Setting up a printer in VMWare Windows instance
Sometimes there are products that run in Windows that don’t have a clone on the Mac, like Microsoft Visio. Working in the virtual machine is the solution but printing is tedious to setup when you’re using a NAT network model. The following instructions show you how to setup a networked printer inside a VMWare instance that uses NAT networking. You can also use it when configuring it in a bridged network configuration. It is more or less the ordinary way for the Windows XP platform.
 I found that the standard printer in the virtual machine wouldn’t work. I tried it in both VMWare 1.x and 2.x but without any luck. It did work ineffectively in VMWare 2.x but it embedded characters in simple documents that shouldn’t be there. Finally, I pursued this course. It has the benefit of working like you’d expect! It lets you print your native Windows documents when you’ve configured the VMWare machine in NAT. The same steps work when you’re using a bridged networking. In a bridged network, you don’t have to share the printer on the Mac OS because it directly accesses it.
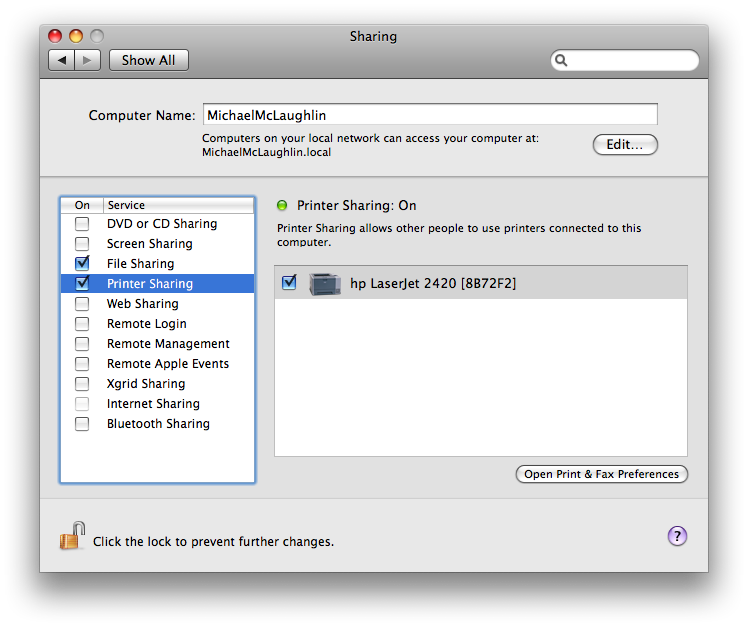
The first step requires that you share you printer setup on the Mac OS. You do that by launching System Preferences, then click on Sharing. In Sharing, you enable print sharing by chosing the network printer …
After you’ve enabled sharing on the Mac OS, you can take the following steps in Windows:
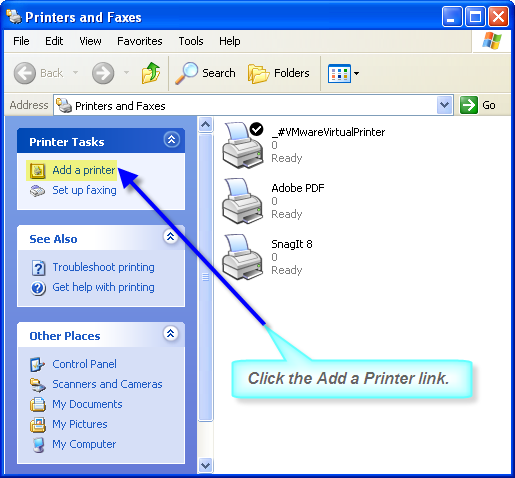
1. Click the Start button, then choose Printers and Faxes. You’ll get the following screen where you should click the link to Add a printer. It will launch the Add Print Wizard.
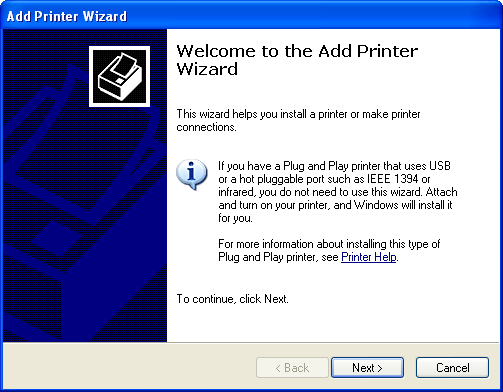
2. You should install the printer drivers if they’re not already installed before launching the Add Print Wizard. You click Next In the first screen.
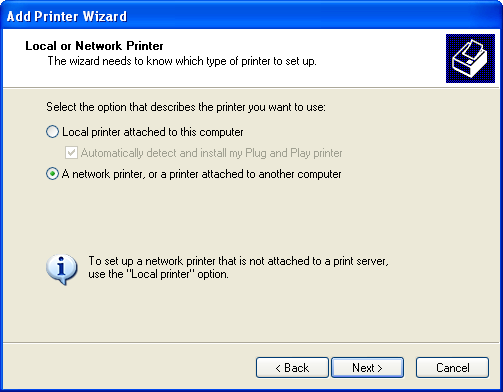
3. The default radio button is for a locally attached printer. Click the network printer radio button before clicking the Next button.
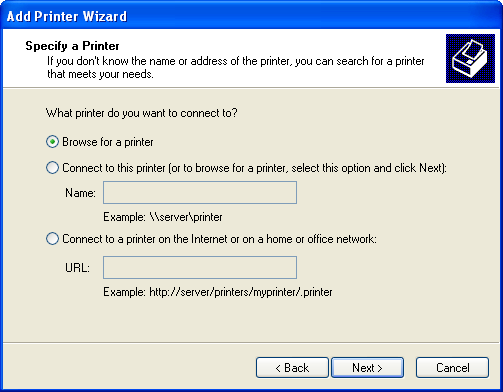
4. Click the Next button because the default browses for a network connected printer.
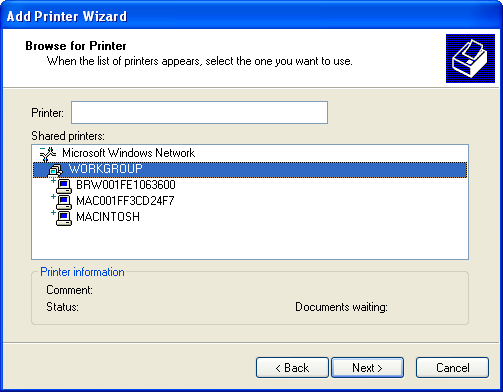
5. You shuold see the Microsoft Windows Network, and the default workgroup. Click on the Workgroup to display the possible machine names. If your machine doesn’t show in the list, it’s most likely because your printer wasn’t known in when Windows XP was released. The solution here is to insert the HP disk when you’ve connected it to the virtual machine, and then you simply follow the prompts, as shown in this newer post.
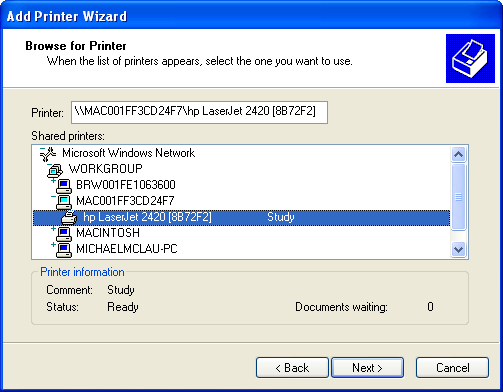
6. Click the appropriate machine that represents the hosting Mac OS (your machine that’s running VMWare). After you click it, you’ll see the target printers that are available through the external Mac OS connectivity and sharing. Click the Next button to proceed.
7. The last activity triggers a warning error. It asks you to confirm that you can trust your Mac. Click the Yes button to proceed (it’s a boring message but click on it if you want to read it).
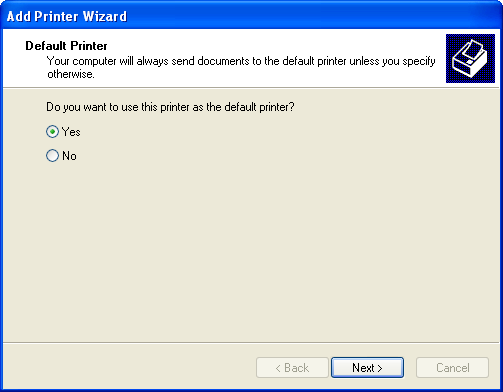
8. Choose the printer as a default printer by clicking the Yes button. You can choose the No button if you’ve got more than one network printer.
There are problems when you forget to install the hardware first, so make sure you get the hardware installed first.
