Archive for the ‘MacBook Pro’ Category
Ubuntu Desktop 22.04
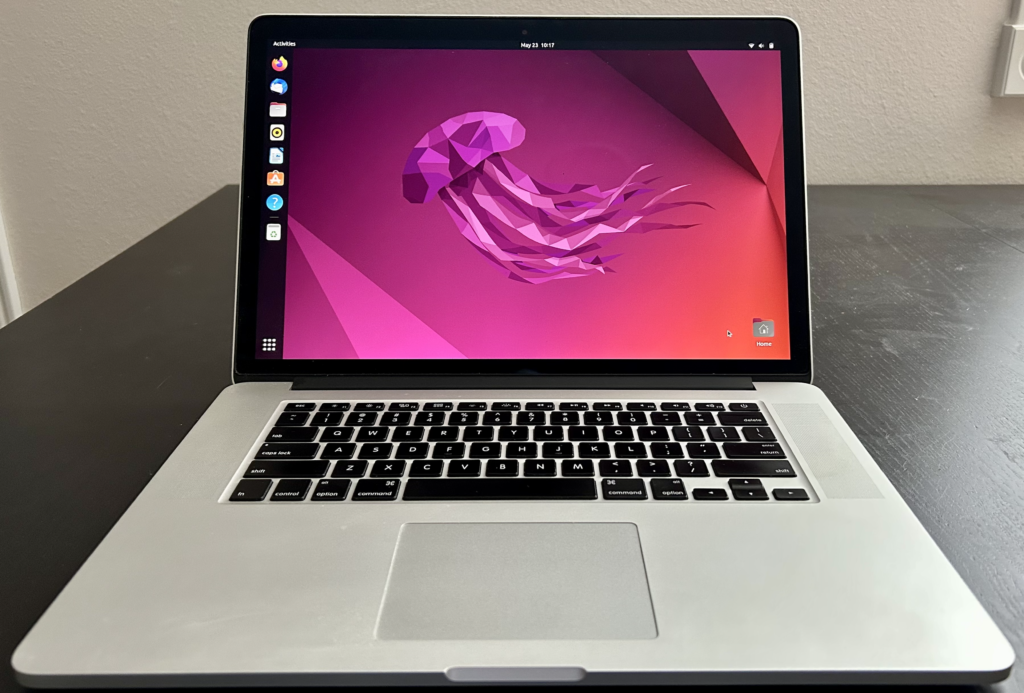
I finally got around to installing Ubuntu Desktop, Version 22.04, on my MacBook Pro 2014 since OS X stopped allowing upgrades on the device in 2021. While I replaced it in 2021 with a new MacBook Pro with an i9 Intel Chip. The Ubuntu documentation gave clear instructions on how to create a bootable USB drive before replacing the Mac OS software..
Unfortunately, networking was not well covered. It left me with two questions:
- How to configure Ubuntu Desktop 22.04 to the network?
You need to use an RJ45 network cable (in this case also an RJ45 to Thunderbolt adapter) and reboot the OS. It will automatically configure your DCHP connection.
- How to configure Wifi for Ubuntu Desktop 22.04?
You need to download and install a library, which is covered below.
After the Ubuntu Desktop installation, I noticed it didn’t provide any opportunity to update the software or configure the network. It also was not connected to the network. I connected the MacBook Pro to a physical Internet cable and rebooted the Ubuntu OS. It recognized the wired network. Then, I upgraded the installed libraries, which is almost always the best choice.
At this point, I noticed that the libraries to enable a WiFi connection were not installed. So, I installed the missing Wifi libraries with this command:
sudo apt-get install dbms bcmwl-kernel-source |
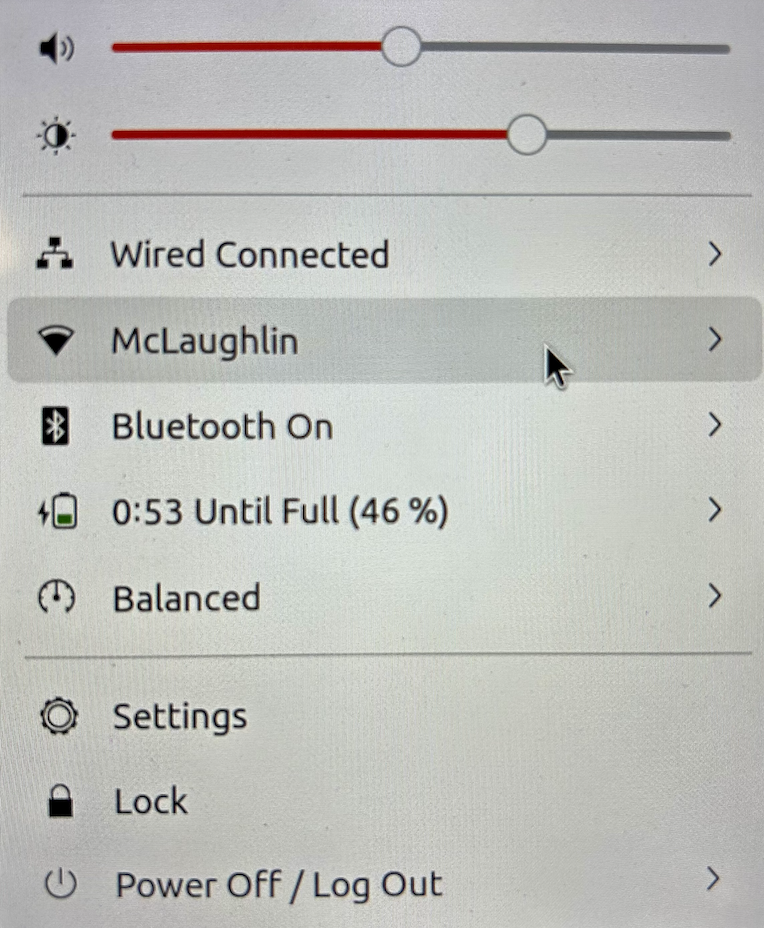
After you’ve installed the bcmwl-kernel-source libraries, navigate to the top right where you’ll find a small network icon. Click on the network icon and you’ll see the following dialog. Click on your designated Wifi, enter the password and you’ll have a Wifi connection.
As always, I hope this note helps those trying to solve a real world problem.
Mac SQL Developer Install
This how you install SQL Developer on Mac OS Yosemite. The first thing you need to do is download and install Java 8, not Java 7 on your Mac OS Yosemite as suggested on some web sites. You can determine whether or not Java is installed by running the following command:
Mac-Pro-3:~ username$ java -version No Java runtime present, requesting install. |
You must accept the Java license to install Java 8 on the Mac OS X operating system:

You have the option of installing the Java SDK or JDK. I’ve opted to install Netbeans 8 with JDK 8u45, as you can tell from the screen capture after you launched the file:

It is a standard Mac OS installation, which is why I didn’t bother showing any dialog messages. After installing the Java JDK or SDK, you should download SQL Developer 4.1 from Oracle’s web site. Below is a screen shot of the Oracle download web page where I’ve accepted the license agreement:

If you attempt to launch the installation and you’ve set your Mac Security to the “Mac App Store and identified developers” setting, you should raise the following exception:

If you reset the Mac Security to an “Anywhere” setting, you can install Oracle SQL Developer on Yosemite. Just make sure you reset it to the “Mac App Store and identified developers” setting after you install SQL Developer.
If you launch SQL Developer with the Security “Anywhere” setting, it displays the following dialog:

After you launch the program, you will see the following progress dialog:

The last step of the installation launches SQL Developer, as shown below:

Click the Connections icon to create an initial connection, like the following:

After connecting to the database, you can write and execute a query as shown in the next screen capture:

As always, I hope that this helps those who require an example to install SQL Server on a Mac OS.
Mac Disk Failure & Recovery
The first time I had a major failure on my Mac Pro, I lost a 1 TB Seagate drive and ten key virtual machines. It taught me to apply the principles from my production life to my private life. Swapping the fault-prone Seagate drives for Hitachi drives, I began the slow process of rebuilding those virtual environments.
 My solution to minimize risk was two fold. First, I put the main 320 GB disk on a time machine backup. Second, I began weekly backups of my virtual machines to two external 2 TB disk drives. After all, I wanted to contain cost.
Paying more attention paid off this week, when I got the flashing drive folder error. It’s the equivalent on the Mac OS X to Microsoft’s Blue Screen of death. This error means the machine can’t find a healthy OS. The problem is that there a number of posts out there, and some aren’t as effective as they appear in solving the problem. More or less, when you see this screen you have two tests before getting a new disk and restoring the image from your time machine.
The first step requires you to reboot the machine that’s stuck looking for an operating system.  You can do that by pushing the power button until a reset occurs while simultaneously holding down the Option and key. You’ll know it works if you don’t see the blinking file folder icon and you see a mouse arrow displayed in the screen. It should occur within 5 to no more than 10 seconds after you reboot.
Insert a valid Mac Operating System (OS) disk into the optical drive. It should launch the installation program within 30 to 60 seconds. Click the first proceed button and on the next screen launch the Disk Utility from the displayed menu. In the Disk Utility, click the First Aid tab. Look at the Total Capacity value in the bottom right of the screen. If it provides a numeric value, there’s a hope for your disk recovery. Click on the First Aid tab to try and recover the disk drive. If it provides a zero numeric value, there’s virtually no hope for your disk recovery.
Since the likelihood of recovering the disk at this point is low, buying a new disk is probably the best step. After you’ve ordered the replacement disk, you can boot your Mac in target mode.  Target mode allows you to use another Mac and it’s operating system to run your disks (on a Mac Pro, there can be up to 4 disks).
Remove the CD copy of the operating system from the optical drive and push the power button to turn off your non-working Mac. Start the remote Mac and connect the two using a FireWire cable. After the new target machine has finished booting its copy of the OS, push the power button on the machine that can’t find the OS and hold down the T key. In the target machine, open the Finder and inspect which disks are found. If the base disk drive is excluded from the list, as it is in the screen capture on the right, your disk has failed.
At this point, you should definitely buy a new disk unless you’re covered by AppleCare. If the latter, log a ticket and let them fix it. It’s even possible they may be able to recover something from your failed disk. Although, it is unlikely your get any data back if the Mac OS X software can’t recognize the disk.
 Your best bet is to recover the image from a time machine restoration. Hopefully, you had an active time machine image not too far before the failure. I did, and it fully recovered everything smoothly. The new disk arrived this morning, and I’m less than 30 minutes from a full recovery. Though that’s unimportant unless I tell you how.
Once you physically install the disk, you reboot the machine that’s stuck looking for an operating system. You push the power button while simultaneously holding down the Option key. Insert a valid Mac Operating System disk into the optical drive. It should launch the installation program within 30 to 60 seconds. Click the first proceed button and on the next screen launch the Disk Utility from the displayed menu. In the Disk Utility, click the Partition tab to partition the new disk. Then, choose to restore from a time machine in the installation program.
Bottom-line: I’m so happy that time machine works so well!!!
NVIDIA Strikes MacBook Pro
The distorted video problems introduced by NVIDIA on MacBook Pro is old news because it affected early 2008 machines. Alas, those intermittent little gray lines at the bottom of my MacBook Pro early 2008 model now transcend my screen 4 out of 5 boot cycles, as shown below:

The screen shot from the MacBook Pro shows the image is fine when emailed to another machine. As Pooh Bear (my daughter’s favorite) would say, “Oh, bother …”
Now I’m urgently moving all files over to other media. That includes conference presentations, code, and several VMs.
While waiting on the USB transfers, I checked out what it might run to fix it and ran into this Apple Support page. It basically says my inaction at the annoyance during my AppleCare period, which just lapsed in July, won’t make it my problem. That’s because I’m within the extended 4 year window from date of purchase.
Living in Eastern Idaho has a number of perks, like the environment and community. It does have some downsides, like a 250 miles drive to the nearest Apple Store.
It looks like I’ll be making a little drive to Salt Lake City next week.
Actually got this fixed at the University’s help desk. Apple sent the exact same logic board that it had previously, and guess what the bars are hemming me in now intermittently. Ouch!
A little more research and it appears that this may be related to the Black Vertical Lines on MacBook Pro 15″ Display and from MacRumor’s archive. It’s odd there’s no recall on the monitor. Maybe that’s because Apple would pay for it, and NVIDIA paid for the other?
As with every purchase in technology, there’s an upside and downside. Clearly, the failure drove me to opt for the less expensive 13″ MacBook Pro upgrade with a 2.8 GHz CPU, 8 GB of memory, and 750 MB harddisk. I’ll probably avoid ever purchasing the leading, and pricier, Apple technology again.
Target Disk Mode
It’s been a terribly busy three weeks, needless to say when I got back to working my Mac Pro video card failed. That was Saturday, and I’m waiting on the replacement card. Thank goodness for AppleCare because the card is still $200.
In the meantime, I was stuck without being able to use Screen Sharing. A friend, Kyle, told me how to use Target Disk Mode to boot my Mac Pro on my MacBook Pro, which let me enable Screen Sharing without trying to sort through the configuration files. This basically lets me use my MacBook Pro as a bridge until I get the new video card.
I figured it would be nice to label how to do it. First, you’ll need a FireWire 800 cable or with older equipment a FireWire 400 cable will work. Connect the two machines, then:
- Boot the disabled machine in Disk Target Mode by holding down the “T” key when turning on the physical machine.
- Boot the target console by holding down the Option key.
- You’ll see two disks, one should be the standard silver disk icon and the other a gold remote disk icon. Use the right arrow key to select the gold remote disk, then click the return key.
Your target machine is now booted off the remote machine. You can now navigate to System Preferences, choose Sharing, and check the Checkbox for Screen Sharing. Now you can shutdown both systems and use screen sharing or continue to work this way. It’s really your preference. I like screen sharing because then I can use the resources from both machines.
This may be old hat to many but I’ve got a hunch it’s news to others. While I knew there was a way to do this, I’d never had to try it until now.
An update 4/27/10, AppleCare got me the replacement video card. I installed it and it worked like a charm.
Black Screen of Death
Holiday Gift from Microsoft
Windows 7 ships. Then, we find it’s really Windows Vista+ (code base 6.1). Now, Microsoft give us a late year present, the Microsoft Black Screen of Death (their original post has been wiped by agreement with Microsoft it appears but only the shadow knows and rumors on the web). What better excuse to rush out and buy a MacBook Pro or use this fix?
Holiday Gift from Apple
Buying a MacBook Pro makes sense if you don’t already have one. Owning one, I’m hesitant to upgrade my MacBook Pro because the battery in the new one requires a service call when the battery wears out. An expensive item because the battery life is generally poor after 1,000 recharge cycles and that number of recharges may or may not occur before your Applecare service contract runs out.
Battery life/replacement is one of the reasons why I’ve stayed on my old MacBook Pro (purchased 16 months ago). The other reason is that I plan on getting by with a MacBook Pro for 4 to 5 years not Apple’s apparent plannned obsolescence of 3 years. While I’m in the gripe mode, the new Apple Cinema Display is attractive but not compatible with older MacBook Pro or MacBook computers. Also, the Altona DVI to Mini Display Port has mixed reviews out there and Apple seems disinterested in helping owners of older machines use the new Cinema screens. There aren’t any other alternatives to the Altona product (at least that I’ve found). I almost feel that somebody at Apple watched the movie Robots too often because it seems my 16 month old MacBook Pro is an outmode and there isn’t an upgrade option (only a new purchase).
