Archive for the ‘Microsoft SQL Server’ Category
Convert to SQL Server?
I’m always amazed at the questions that pop up for me. For example, how do you convert an Oracle script that creates my Video Store model to a Microsoft SQL Server script. It’s not very hard but there’s one big caveat, and that’s the fact that system_user is a reserved word. That means you can’t create the Access Control List (ACL) table with a system_user name. The alternative, would be to convert the system_user table name to database_user. That’s what I’ve done in this example.
It’s also important to note that this example uses Microsoft SQL Server’s sqlcmd in batch mode. Naturally, it presumes that you’ve created a student user with a trivial password of student, and a studentdb schema. Also, that you’ve granted privileges so everything works (if you need help on that check my earlier post on how to setup a studentdb schema).
The following is an example of conditionally dropping and then creating a system_user table in an Oracle schema. It uses a CASCADE CONSTRAINTS clause to eliminate dependencies with foreign key values.
1 2 3 4 5 6 7 8 9 10 11 12 13 14 | -- Conditionally drop the table and sequence. BEGIN FOR i IN (SELECT NULL FROM user_tables WHERE table_name = 'SYSTEM_USER') LOOP EXECUTE IMMEDIATE 'DROP TABLE system_user CASCADE CONSTRAINTS'; END LOOP; FOR i IN (SELECT NULL FROM user_sequences WHERE sequence_name = 'SYSTEM_USER_S1') LOOP EXECUTE IMMEDIATE 'DROP SEQUENCE system_user_s1'; END LOOP; END; / |
1 2 3 4 5 6 7 8 9 10 11 12 13 14 15 16 17 18 19 20 | -- Create SYSTEM_USER table. CREATE TABLE system_user ( system_user_id NUMBER CONSTRAINT system_user_pk PRIMARY KEY , system_user_name VARCHAR2(20) CONSTRAINT system_user_nn1 NOT NULL , system_user_group_id NUMBER CONSTRAINT system_user_nn2 NOT NULL , system_user_type NUMBER CONSTRAINT system_user_nn3 NOT NULL , first_name VARCHAR2(20) , middle_name VARCHAR2(20) , last_name VARCHAR2(20) , created_by NUMBER CONSTRAINT system_user_nn4 NOT NULL , creation_date DATE CONSTRAINT system_user_nn5 NOT NULL , last_updated_by NUMBER CONSTRAINT system_user_nn6 NOT NULL , last_update_date DATE CONSTRAINT system_user_nn7 NOT NULL , CONSTRAINT system_user_fk1 FOREIGN KEY (created_by) REFERENCES system_user (system_user_id) , CONSTRAINT system_user_fk2 FOREIGN KEY (last_updated_by) REFERENCES system_user (system_user_id)); -- Create SYSTEM_USER_S1 sequence with a start value of 1001. CREATE SEQUENCE system_user_s1 START WITH 1001; |
1 2 3 4 5 6 7 8 9 10 11 12 13 14 | -- Conditionally drop the table and sequence. BEGIN FOR i IN (SELECT NULL FROM user_tables WHERE table_name = 'COMMON_LOOKUP') LOOP EXECUTE IMMEDIATE 'DROP TABLE common_lookup CASCADE CONSTRAINTS'; END LOOP; FOR i IN (SELECT NULL FROM user_sequences WHERE sequence_name = 'COMMON_LOOKUP_S1') LOOP EXECUTE IMMEDIATE 'DROP SEQUENCE common_lookup_s1'; END LOOP; END; / |
1 2 3 4 5 6 7 8 9 10 11 12 13 14 15 16 17 18 19 20 21 22 23 24 | -- Create COMMON_LOOKUP table. CREATE TABLE common_lookup ( common_lookup_id NUMBER , common_lookup_context VARCHAR2(30) CONSTRAINT nn_clookup_1 NOT NULL , common_lookup_type VARCHAR2(30) CONSTRAINT nn_clookup_2 NOT NULL , common_lookup_meaning VARCHAR2(30) CONSTRAINT nn_clookup_3 NOT NULL , created_by NUMBER CONSTRAINT nn_clookup_4 NOT NULL , creation_date DATE CONSTRAINT nn_clookup_5 NOT NULL , last_updated_by NUMBER CONSTRAINT nn_clookup_6 NOT NULL , last_update_date DATE CONSTRAINT nn_clookup_7 NOT NULL , CONSTRAINT pk_c_lookup_1 PRIMARY KEY(common_lookup_id) , CONSTRAINT fk_c_lookup_1 FOREIGN KEY(created_by) REFERENCES system_user(system_user_id) , CONSTRAINT fk_c_lookup_2 FOREIGN KEY(last_updated_by) REFERENCES system_user(system_user_id)); -- Create a non-unique index on a single column. CREATE INDEX common_lookup_n1 ON common_lookup(common_lookup_context); -- Create a unique index based on two columns. CREATE UNIQUE INDEX common_lookup_u2 ON common_lookup(common_lookup_context,common_lookup_type); -- Create COMMON_LOOKUP_S1 sequence with a start value of 1001. CREATE SEQUENCE common_lookup_s1 START WITH 1001; |
You can do the same thing for a database_user table in Microsoft SQL Server with the following syntax. Unfortunately, there isn’t a CASCADE CONSTRAINTS clause that we can append in Microsoft SQL Server. The script uses a dynamic SQL statement with a Common Table Expression (CTE) to generate a list of ALTER statements that drop foreign key constraints in the schema.
1 2 3 4 5 6 7 8 9 10 11 12 13 14 15 16 17 18 19 20 21 22 23 24 25 26 27 28 29 30 31 32 33 34 35 36 37 38 39 40 41 42 43 44 45 46 47 48 49 50 51 52 53 54 55 56 57 58 59 60 61 62 63 64 65 | /* Drop all foreign keys. */ USE studentdb; /* Create a session variable to hold a command list. */ SELECT 'Create a session variable.' AS "Statement"; DECLARE @sql NVARCHAR(MAX) = N''; /* Generate the command list to drop foreign key constraints. */ SELECT 'Generate dynamic SQL statements.' AS "Statement"; ;WITH x AS (SELECT N'ALTER TABLE ' + OBJECT_SCHEMA_NAME(parent_object_id) + N'.' + OBJECT_NAME(parent_object_id) + N' ' + N'DROP CONSTRAINT ' + name + N';' AS sqlstmt FROM sys.foreign_keys) SELECT @sql += sqlstmt FROM x; /* Call the dynamically generated statements. */ SELECT 'Execute dynamic SQL statements.' AS "Statement"; EXEC sp_executesql @sql; /* Conditionally drop tables. */ SELECT 'Conditionally drop studentdb.common_lookup table.' AS "Statement"; IF OBJECT_ID('studentdb.database_user','U') IS NOT NULL DROP TABLE studentdb.database_user; /* Create a table with self-referencing foreign key constraints. */ SELECT 'Create studentdb.common_lookup table.' AS "Statement"; CREATE TABLE studentdb.database_user ( database_user_id INT NOT NULL IDENTITY(1,1) CONSTRAINT database_user_pk PRIMARY KEY , database_user_name VARCHAR(20) NOT NULL , database_user_group_id INT NOT NULL , database_user_type INT NOT NULL , first_name VARCHAR(20) , middle_name VARCHAR(20) , last_name VARCHAR(20) , created_by INT NOT NULL , creation_date DATE NOT NULL , last_updated_by INT NOT NULL , last_update_date DATE NOT NULL , CONSTRAINT database_user_fk1 FOREIGN KEY (created_by) REFERENCES studentdb.database_user (database_user_id) , CONSTRAINT database_user_fk2 FOREIGN KEY (created_by) REFERENCES studentdb.database_user (database_user_id)); /* Conditionally drop common_lookup table. */ SELECT 'Conditionally drop studentdb.common_lookup table.' AS "Statement"; IF OBJECT_ID('studentdb.common_lookup','U') IS NOT NULL DROP TABLE studentdb.common_lookup; /* Create a table with external referencing foreign key constraints. */ SELECT 'Create studentdb.common_lookup table.' AS "Statement"; CREATE TABLE studentdb.common_lookup ( common_lookup_id INT NOT NULL IDENTITY(1,1) CONSTRAINT common_lookup_pk PRIMARY KEY , common_lookup_context VARCHAR(30) CONSTRAINT nn_clookup_1 NOT NULL , common_lookup_type VARCHAR(30) CONSTRAINT nn_clookup_2 NOT NULL , common_lookup_meaning VARCHAR(30) CONSTRAINT nn_clookup_3 NOT NULL , created_by INT CONSTRAINT nn_clookup_4 NOT NULL , creation_date DATE CONSTRAINT nn_clookup_5 NOT NULL , last_updated_by INT CONSTRAINT nn_clookup_6 NOT NULL , last_update_date DATE CONSTRAINT nn_clookup_7 NOT NULL , CONSTRAINT common_lookup_fk1 FOREIGN KEY(created_by) REFERENCES studentdb.database_user (database_user_id) , CONSTRAINT common_lookup_fk2 FOREIGN KEY(last_updated_by) REFERENCES studentdb.database_user (database_user_id)); |
You can run it from a file by calling the sqlcmd utility. You’ll need to know several things to run it. First, you need to know your database instance. You can capture that from a query against the data dictionary or catalog. Just run the following from inside the Microsoft SQL Server Management Studio (SSMS):
SELECT @@SERVERNAME; |
In my case, it shows the following, which is the machine’s hostname a backslash and SQLEXPRESS:
MCLAUGHLINSQL\SQLEXPRESS |
The script uses sqltest.sql as a file name, and you can call it from the Windows shell environment like this:
sqlcmd -S MCLAUGHLINSQL\SQLEXPRESS -U student -P student -i C:\Data\MicrosoftSQL\sqltest.sql -o C:\Data\Microsoft\sqltest.out |
As always, I hope this helps.
Setup SQL Server Schema
After you’ve installed Microsoft SQL Server 2012 and created a database schema, you still need to setup or configure the database schema. This is the recommended Microsoft SQL Server Best Practice.That means you must grant permissions to a user to work in the database schema, otherwise you get the following type of error message.
Msg 2760, Level 16, State 1, Line 1 The specified schema name "studentdb" either does not exist or you do not have permission to use it. |
You receive the foregoing error message when trying to create a table in a database schema that hasn’t been assigned a user or role. This typically occurs after you create a new database schema, which has a <default> owner.
For those new to the idea of schemas (or scheme), they were introduced by Microsoft in SQL Server 2005. Here are some rules of thumb on schemas:
- Database schema names are distinct from user names.
- Multiple users may share a schema, which means it can hold objects owned by multiple users.
- Permissions to act inside the schema may be granted to individual users, and you have a varied set of privileges that you can assign to users.
- Ownership of objects in a schema can be transferred using the
ALTER SCHEMAcommand. - Ownership of a schema can be changed by using the
ALTER AUTHORIZATIONcommand. - Database users can be dropped without changing objects in schemas, which is a big difference between Oracle and SQL Server.
The following example occurs when you try to create a table in a studentdb database schema. It doesn’t expose you to the SQL syntax but demonstrates how to manage the changes within the SQL Server Management Studio (SSMS).
By the way, you start the new schema creation process by right clicking on the Databases folder in the SQL Server Management Studio. Then, you give the new database schema a name in the New Database dialog; and click the OK button to complete the process.
The balance of the instructions show you how to create a user account that will map to your new database schema. It assumes you’ve installed it on your local machine and have privileges through local Windows Authentication to the System Administrator (sa) account. You create a student user account, assign the studentdb database schema, log off as the System Administrator, log in as the new user, conditionally drop a table from the studentdb schema, create a table in the studentdb schema, and query the results. It’s also possible to create the user first, database second, and assign the database as the default database for the user account.
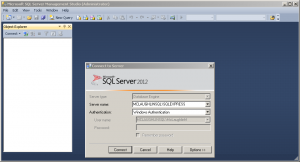
- The first screen asks you to authenticate as the System Administrator using Windows Authentication. Click the Connect button to connect to the SQL Server Management System (SMSS).
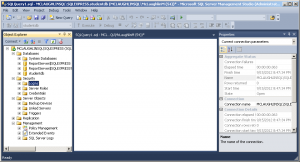
- Click the Security folder and expand the subordinate list of folders. Right click on the Logins folder and click on the New Login option in the context menu. It launches a new dialog where you enter a user account.
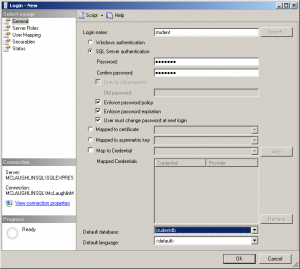
- On the General page of the Login – New dialog, enter a Login name and click the SQL Server authentication radio button. Clicking the radio button enables the Password and Confirm password fields where you enter the same password twice. Click the Default database drop down and choose the studentdb created earlier. Click the Server Roles page to continue.
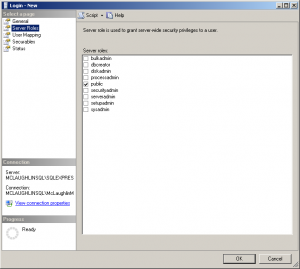
- On the Server Roles page, ensure that only the public server role is checked. Click on the User Mapping page to continue.
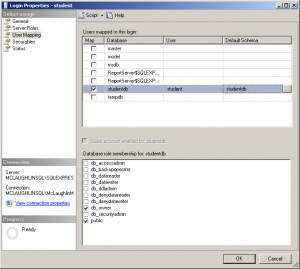
- On the User Mapping page, click the Map check box for the
studentdbdatabase, enterstudentin the User field, and enterstudentdbin the Default Schema field. Click the db_owner and public database role membership forstudentdb. Click on the Securables page to continue.
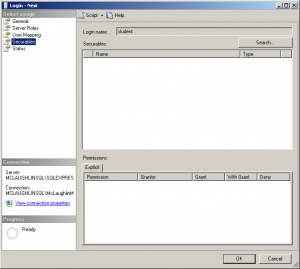
- There are no required changes on the Securables page. Check that screen matches the illustration at the left, and click on the Status page to continue.
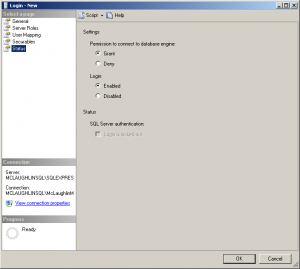
- There are no required changes on the Status page. Check that screen matches the illustration at the left, and click on the OK button to complete creating the user. Then, exit the SQL Server Management Studio as the System Administrator.
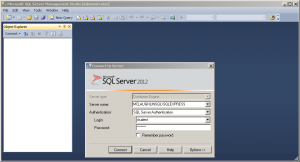
- Launch the SQL Server Management Studio, choose SQL Server Authentication as the authentication method, and enter the
studentLogin (user name) and Password before clicking the Connect button to continue.
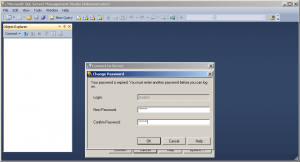
- The first time a user logs in, they must re-enter a valid password. After entering the password twice, click the OK button to continue.
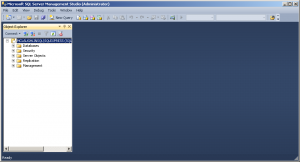
- The initial display shows only the Object Explorer. Click the New Query option in the menu toolbar.
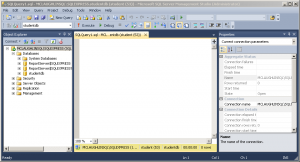
- Click on the Databases folder to expand the list and you will see the
studentdbdatabase schema displayed, as shown in the illustration on the left.
- Enter a conditional drop of a
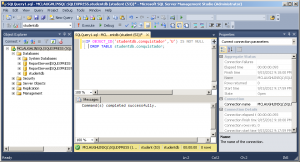
conquistadortable from thestudentdbdatabase schema. Click the Execute button from the toolbar menu to run the statement.
IF OBJECT_ID('studentdb.conquistador','U') IS NOT NULL DROP TABLE studentdb.conquistador; |
- Enter a
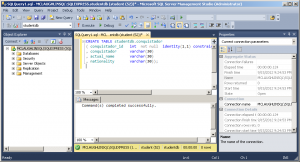
CREATEstatement for aconquistadortable in thestudentdbdatabase schema. Click the Execute button from the toolbar menu to run the statement.
CREATE TABLE studentdb.conquistador ( conquistador_id INT NOT NULL IDENTITY(1,1) CONSTRAINT pk_conquistador PRIMARY KEY , conquistador VARCHAR(30) , actual_name VARCHAR(30) , nationality VARCHAR(30)); |
- Enter an
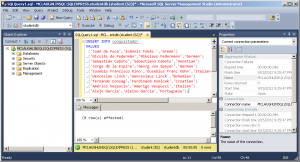
INSERTstatement to theconquistadortable in thestudentdbdatabase schema. Click the Execute button from the toolbar menu to run the statement and see that it inserted 9 rows.
INSERT INTO conquistador VALUES ('Juan de Fuca','Ioánnis Fokás','Greek') ,('Nicolás de Federmán','Nikolaus Federmann','German') ,('Sebastián Caboto','Sebastiano Caboto','Venetian') ,('Jorge de la Espira','Georg von Speyer','German') ,('Eusebio Francisco Kino','Eusebius Franz Kühn','Italian') ,('Wenceslao Linck','Wenceslaus Linck','Bohemian') ,('Fernando Consag','Ferdinand Konšcak','Croatian') ,('Américo Vespucio','Amerigo Vespucci','Italian') ,('Alejo García','Aleixo Garcia','Portuguese'); |
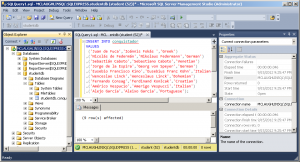
- Click the
studentdbfolder to expand content, and you should see theconquistadortable.
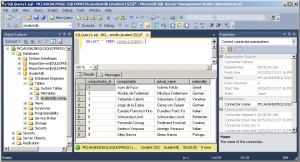
SELECT * FROM conquistador; |
- Click in the SQL Query frame and enter a query against the
conquistadortable. Click the Execute button to run the query and you should see the following output from theconquistadortable.
As always, I hope this helps those trying to sort out how to solve a similar problem.
SQL Server 2012 Install
While testing the MySQL Workbench migration tool, I needed to install Microsoft SQL Server 2012 Express (the free one up to 8 GB of data). These are my notes on installing the product, and you can click on any image to see the full size resolution and details. (The approach using small snapshots on the left was suggested from somebody who uses the blog and felt these would be easier than large but slightly reduced image files.)
For MySQL readers, this was posted as part of a replicateable test case for Alfredo’s MySQL Workbench team. A Windows OS version of Bug 66516.
Installation Steps
For reference, I’ve already installed the pre-requisites of Windows PowerShell 2.0 and Microsoft .NET Framework 3.5. You’ll see that when you get to step #6.
- The first screen gives you the appearance of a wizard format with the list of tasks on the left and the details on the right. Click the New SQL Server stand-alone installation or add features to an existing installation to install a copy of SQL Server 2012 Express with a sample database.
- The Microsoft SQL Server 2012 installation firsts checks the rules for the installation. This screen lasts for about 20-30 seconds before you get the licensing dialog box.
- There’s not much choice with this dialog but you must confirm you’ve read the license terms. If you want to keep Microsoft apprise about your platform leave the button check box enabled. It’s unchecked in my installation. 😉 After you address the check boxes, click the Next button to proceed with the installation.
- This dialog should quickly scan for any product updates, which are minimal if you’ve downloaded the file from Microsoft’s download site. Mine was up to date and skipped downloading and extracting tasks. It does take a small amount of time to install the setup files, and you’re parked on this screen while that happens. Click the Install button to continue with the installation.
- A second rule check runs to make sure anything from the software update is completed. Click the Next button to proceed.
- This page presents the Features that you want installed. It installs everything but a local database by default. If you’re building a stand alone instance you should check the LocalDB check box.
- After you check the LocalDB check box, the Features display shows that all features are selected. Click the Next button to continue.
- This dialog lets you choose whether you install a default or named instance. You also provide the instance unique identifier (ID), and root directory. After making sure that’s completed, click the Next button ton continue.
- This section lets you name and set Microsoft Service names for the database engine, reporting services, full-text filter daemon launche, and browser. My settings enable the database engine and reporting services as automatic, which means they start when the operating systems wakes. Click the Next button to continue with the install.
- This dialog lets you set the authentication mode of Microsoft SQL Server. By default, Microsoft SQL Server uses Windows authentication mode. I recommend you opt for Mixed Mode by clicking the radio button and entering a password twice.
- After entering the SQL Server Administrators’ password in the Server Configuration tab view, click the Data Directories tab to check the data directories.
- On the Data Directories tab verify the installation directories. The 64-bit directory default root directory is:
C:\Program Files\Microsoft SQL Server\
- After inspecting the Data Directories, click the User Instances tab and enable the Users are allowed to run a separate instance of the Database Engine check box.
- Clicking the FILESTREAM tab, you click the Enable FILESTREAM for Transact-SQL access check box. This enables FILESTREAM for Transact-SQL. Click the Next button to proceed.
- This dialog of the wizard lets you configure the reporting services. Click the Install and configure radio button and then the Next button to proceed.
- This dialog lets you set the error reporting. Click the Send Windows and SQL Server Error Reports to Microsoft if you want to advise them of errors. After making your notification decision, click the Next button to proceed.
- The installation program takes several minutes to run, and this is a copy of the progress dialog. After the installation completes, the program automatically advances to the completion dialog.
- When everything succeeds you’ll see a dialog like the one on the left. Click the Close button to complete the installation.
- Click on the Start button, choose All Programs, choose Microsoft SQL Server 2012, and choose the SQL Server Management Studio that launches the SQL Server 2012 login screen.
- This launches the Microsoft SQL Server Management Studio as an Administrator. This base image only displays the Object Explorer view.
- Click the View Query button and it displays the SQL Query and Properties view.
Post Installation Configuration Step
After installing the Microsoft SQL Server 2012 Express Edition, I discovered that the pipe definition was incorrect and had to fix it, which was exactly like the fix for Microsoft SQL Server 2008 that I blogged about 3 years ago here.
If you want to set up databases that hold tables of their own as opposed to deploying everything in the dbo schema, you should read this post on configuring SQL Server 2012. It shows you how to create a database, user, and schema.
You’ll need to configure a Windows Data Name Source (DSN) for SQL Server, when you’re planning to connect Microsoft Excel to SQL Server or migrate data from SQL Server using MySQL Workbench.
