Archive for the ‘Microsoft’ Category
MySQL Windows DSN
Almost a Ripley’s Believe It or Not. An prior data science student told me that his new IT department setup a Windows component that let him connect his Excel Spreadsheets to their production MySQL database without a password. Intrigued, I asked if it was a MySQL Connector/ODBC Data Source Configuration, or DSN (Data Source Name)?
He wasn’t sure, so I asked him to connect to PowerShell and run the following command:
Get-Item -Path Registry::HKEY_LOCAL_MACHINE\SOFTWARE\ODBC\ODBC.INI\MySQL |
It returned something like this (substituting output from one of my test systems):
    Hive: HKEY_LOCAL_MACHINE\SOFTWARE\ODBC\ODBC.INI


Name                           Property
----                           --------
MySQL                          Driver      : C:\Program Files\MySQL\Connector ODBC 8.0\myodbc8w.dll
                               DESCRIPTION : MySQL ODBC Connector
                               SERVER      : localhost
                               UID         : student
                               PWD         : student
                               DATABASE    : studentdb
PORT : 3306 |
The student was stunned and concerned he was compromising his employer’s system security. I suggested he share the information with his IT department so they could provide a different approach for his access to the production database. His IT department immediately agreed. Unfortunately, he’s bummed he can’t simply access the data through Excel.
I told him they were welcome to use the MySQL Connect Dialog PowerShell solution that I wrote. It creates a minimal MySQL DSN and requires a manual password entry through the PowerShell Dialog box. I also suggested that they look into the PowerShell Excel Module.
I also suggested they develop a query only copy of the production database, or shift access to a data warehouse. Needless to say, it wasn’t a large corporation.
As always, I hope this helps others.
Multidimension Arrays
Picking up where I left off on yesterday’s post on PostgreSQL arrays, you can also write multidimensional arrays provided all the nested arrays are equal in size. You can’t use the CARDINALITY function to determine the length of nested arrays, you must use the ARRAY_LENGTH to determine the length of subordinate arrays.
Here’s an example file with a multidimensional array of integers:
DO $$ DECLARE /* Declare an array of integers with a subordinate array of integers. */ list int[][] = array[array[1,2,3,4] ,array[1,2,3,4] ,array[1,2,3,4] ,array[1,2,3,4] ,array[1,2,3,4]]; row varchar(20) = ''; BEGIN /* Loop through the first dimension of integers. */ <<Outer>> FOR i IN 1..ARRAY_LENGTH(list,1) LOOP row = ''; /* Loop through the second dimension of integers. */ <<Inner>> FOR j IN 1..ARRAY_LENGTH(list,2) LOOP IF LENGTH(row) = 0 THEN row = row || list[i][j]; ELSE row = row || ',' || list[i][j]; END IF; END LOOP; /* Exit outer loop. */ RAISE NOTICE 'Row [%][%]', i, row; END LOOP; END; $$; |
It prints:
NOTICE: Row [1][1,2,3,4] NOTICE: Row [2][1,2,3,4] NOTICE: Row [3][1,2,3,4] NOTICE: Row [4][1,2,3,4] NOTICE: Row [5][1,2,3,4] DO |
Multidimensional arrays are unique to PostgreSQL but you can have nested lists of tables or varrays inside an Oracle database. Oracle also supports nested lists that are asynchronous.
As always, I hope this helps those trying sort out the syntax.
Parameter Validation
I was trying to explain how to validate PowerShell script parameters to my students when I found the number and quality of enum data type examples was woefully inadequate. Here’s a series of examples that show you how to validate input parameters against an enum list of values.
The basic concept requires you to validate an element in an enum type. It uses a literal value
1 2 3 4 5 6 7 8 9 10 | # Create a enum type. Add-Type -TypeDefinition @" public enum msgTypes { moe, larry, curly } "@ # Check whether the value is found in the enum type. if ([enum]::isDefined(([msgTypes]), [msgTypes]::moe)) { Write-Host "Success" } |
You test this testEnum1.ps1 script file with this syntax:
powershell testEnum1.ps1 |
It prints:
Success |
The next sample embeds the validation in a local function:
1 2 3 4 5 6 7 8 9 10 11 12 13 14 15 16 | # Create a enum type. Add-Type -TypeDefinition @" public enum msgTypes { moe, larry, curly } "@ # A local function for verbose reporting. function Print-Message ($msg) { # Check whether the value is found in the enum type. if ([enum]::isDefined(([msgTypes]), [msgTypes]::$msg)) { Write-Host "Success" } } # Call the function with a literal value. Print-Message "moe" |
You test this testEnum2.ps1 script file with this syntax:
powershell testEnum2.ps1 |
It also prints:
Success |
The next sample testEnum3.ps1 accepts a parameter and passes it to the validation function:
1 2 3 4 5 6 7 8 9 10 11 12 13 14 15 16 17 18 19 20 21 22 23 24 | # Create a enum type. Add-Type -TypeDefinition @" public enum msgTypes { moe, larry, curly } "@ # A local function for verbose reporting. function Print-Message ($msg) { # Check whether the value is found in the enum type. if ([enum]::isDefined(([msgTypes]), [msgTypes]::$msg)) { Write-Host "Success" } } # Wrap the Parameter call to avoid a type casting warning. try { param ( [Parameter(Mandatory)][hashtable]$args ) } catch {} # Call the function with a literal value. Print-Message "moe" |
You test this testEnum.ps1 script file with this syntax:
powershell testEnum3.ps1 moe |
It also prints:
Success |
However, if you don’t pass a parameter to the testEnum3.ps1, like this
powershell testEnum3.ps1 |
It raises the following error:
Exception calling "IsDefined" with "2" argument(s): "Value cannot be null. Parameter name: value" At C:\Data\cit225\mysql\test\testEnum3.ps1:9 char:7 + if ([enum]::isDefined(([msgTypes]), [msgTypes]::$msg)) { + ~~~~~~~~~~~~~~~~~~~~~~~~~~~~~~~~~~~~~~~~~~~~~~~~~ + CategoryInfo : NotSpecified: (:) [], MethodInvocationException + FullyQualifiedErrorId : ArgumentNullException |
Rewriting the Print-Message function in the script may appear to fix the problem. At least, a missing parameter won’t cause an error when you wrap the call to the isDefined method inside an if-statement.
Here’s how that wrapping attempt would look:
7 8 9 10 11 12 13 14 15 16 | # A local function for verbose reporting. function Print-Message ($msg) { if (!($msg -eq $null)) { if ([enum]::isDefined(([msgTypes]), [msgTypes]::$msg)) { Write-Host "Success" } } else { Write-Host "Failure" } } |
While the prior change to the Print-Message function manages the lack of a parameter, it doesn’t prevent a failure when you pass an incorrect parameter. A new variation of the old error occurs when you pass a parameter that is not a member of the enum type, like
powershell testEnum4.ps1 Shem |
It now prints:
Failure |
So, you need to complete another step. Our woeful tale of parameter validation against a set of possible enum values isn’t quite complete. That’s because any incorrect parameter value raises a null value when isDefined method can’t find a valid value in the enum type. This standard behavior means that the isDefined method returns this error message:
Exception calling "IsDefined" with "2" argument(s): "Value cannot be null. Parameter name: value" At C:\Data\cit225\mysql\test\testEnum4.ps1:10 char:9 + if ([enum]::isDefined(([msgTypes]), [msgTypes]::$msg)) { + ~~~~~~~~~~~~~~~~~~~~~~~~~~~~~~~~~~~~~~~~~~~~~~~~~ + CategoryInfo : NotSpecified: (:) [], MethodInvocationException + FullyQualifiedErrorId : ArgumentNullException |
After all the effort to sort through how PowerShell handles the isDefined method and navigating Microsoft’s limited PowerShell examples, we’ve travelled down a rabbit hole. The problem is that the isDefined method isn’t terribly useful.
You need to use another getValues method, which returns the set of member values from the enum type. This requires you to write a new function. Find-EnumMatch seems an appropriate Pascal-like name for that function because that’s what it will do. Writing the new function also simplifies the Print-Message function.
1 2 3 4 5 6 7 8 9 10 11 12 13 14 15 16 17 18 19 20 21 22 23 24 25 26 27 28 29 30 31 32 33 34 35 36 37 | # Create a enum type for statements, for future use. Add-Type -TypeDefinition @" public enum msgTypes { moe, larry, curly } "@ # A local function to find a valid enum member. function Find-EnumMatch ($typeof, $member) { # Set default return value. $evaluated = $false # Check for a not null match to an enum member. if (!($msg -eq $null)) { foreach ($msgValue in $msgTypes = [enum]::getValues(([enum]::'[' + $typeof + ']'))) { if ($msgValue -eq $member) { $evaluated = $true break } } } # Return whether true or false. return $evaluated } # A local function for verbose reporting. function Print-Message ($msg) { # Check for a not null match to an enum member. if (find-enumMatch $msg) { Write-Host "Success" } else { Write-Host "Failure" } } # Wrap the Parameter call to avoid a type casting warning. try { param ( [Parameter(Mandatory)][hashtable]$args ) } catch {} |
Now, if we test the program with a valid, invalid, or null value parameter it works as expected. It prints “Success” when the parameter is found as a member of the enum type, and prints “Failure” when the parameter is null or not found as a member of the enum type. It also never raises an unhandled exception.
There’s an important explicit casting trick required on line #14 to avoid the following error:
Cannot convert argument "enumType", with value: "[msgTypes]", for "GetValues" to type "System.Type": "Cannot convert the "[msgTypes]" value of type "System.String" to type "System.Type"." At C:\Data\cit225\mysql\test\testEnum7.ps1:14 char:27 + ... ($msgValue in $msgTypes = [enum]::getValues(('[' + $typeof + ']'))) { + ~~~~~~~~~~~~~~~~~~~~~~~~~~~~~~~~~~~~~~~~~~~~~~~~~~~~ + CategoryInfo : NotSpecified: (:) [], MethodException + FullyQualifiedErrorId : MethodArgumentConversionInvalidCastArgument |
While many developers might think that you can write the line without explicitly casting the enum name enclosed by square brackets, you actually have to explicitly cast it.
As always, I hope this helps those looking for an arcane bit of knowledge. While handling parameters is routine, it sure appears the method for doing so in PowerShell with an enum type isn’t quite well documented.
Oracle ODBC DSN
As I move forward with trying to build an easy to use framework for data analysts who use multiple database backends and work on Windows OS, here’s a complete script that lets you run any query stored in a file to return a CSV file. It makes the assumption that you opted to put the user ID and password in the Windows ODBC DSN, and only provides the ODBC DSN name to make the connection to the ODBC library and database.
1 2 3 4 5 6 7 8 9 10 11 12 13 14 15 16 17 18 19 20 21 22 23 24 25 26 27 28 29 30 31 32 33 34 35 36 37 38 39 40 41 42 43 44 45 46 47 48 49 50 51 52 53 54 55 56 57 58 59 60 61 62 63 64 65 66 67 68 69 70 71 72 73 74 75 76 77 78 79 80 81 82 83 84 85 86 87 88 89 90 91 92 93 94 95 96 97 98 99 100 101 102 103 104 105 106 107 108 109 110 111 112 113 114 115 116 117 118 119 120 121 122 123 124 125 126 127 128 129 130 131 132 133 134 135 | # A local function for verbose reporting. function Get-Message ($param, $value = $null) { if (!($value)) { Write-Host "Evaluate swtich [" $param "]" } else { Write-Host "Evaluate parameter [" $param "] and [" $value "]" } } # Read SQLStatement file and minimally parse it. function Get-SQLStatement ($sqlStatement) { # Set localvariable for return string value. $statement = "" # Read a file line-by-line. foreach ($line in Get-Content $sqlStatement) { # Use regular expression to replace multiple whitespace. $line = $line -replace '\s+', ' ' # Add a whitespace to avoid joining keywords from different lines; # and remove trailing semicolons which are unneeded. if (!($line.endswith(";"))) { $statement += $line + " " } else { $statement += $line.trimend(";") } } # Returned minimally parsed statement. return $statement } # Set default type of SQL statement value to a query. $stmt = "select" # Set a variable to hold a SQL statement from a file. $query = "" # Set default values for SQL input and output files. $outFile = "output.csv" $sqlFile = "query.sql" # Set default path to: %USERPROFILE%\AppData\Local\Temp folder, but ir # the tilde (~) in lieu of the %USERPROFILE% environment variable value. $path = "~\AppData\Local\Temp" # Set a verbose switch. $verbose = $false # Wrap the Parameter call to avoid a type casting warning. try { param ( [Parameter(Mandatory)][hashtable]$args ) } catch {} # Check for switches and parameters with arguments. for ($i = 0; $i -lt $args.count; $i += 1) { if (($args[$i].startswith("-")) -and ($args[$i + 1].startswith("-"))) { if ($args[$i] = "-v") { $verbose = $true } # Print to verbose console. if ($verbose) { Get-Message $args[$i] }} elseif ($args[$i].startswith("-")) { # Print to verbose console. if ($verbose) { Get-Message $args[$i] $args[$i + 1] } # Evaluate and take action on parameters and values. if ($args[$i] -eq "-o") { $outfile = $args[$i + 1] } elseif ($args[$i] -eq "-q") { $sqlFile = $args[$i + 1] } elseif ($args[$i] -eq "-p") { $path = $args[$i + 1] } } } # Set a PowerShell Virtual Drive. New-PSDrive -Name folder -PSProvider FileSystem -Description 'Forder Location' ` -Root $path | Out-Null # Remove the file only when it exists. if (Test-Path folder:$outFile) { Remove-Item -Path folder:$outFile } # Read SQL file into minimally parsed string. if (Test-Path folder:$sqlFile) { $query = Get-SQLStatement $sqlFile } # Set a ODBC DSN connection string. $ConnectionString = 'DSN=OracleGeneric' # Set an Oracle Command Object for a query. $Connection = New-Object System.Data.Odbc.OdbcConnection; $Connection.ConnectionString = $ConnectionString # Attempt connection. try { $Connection.Open() # Create a SQL command. $Command = $Connection.CreateCommand(); $Command.CommandText = $query; # Attempt to read SQL command. try { $row = $Command.ExecuteReader(); # Read while records are found. while ($row.Read()) { # Initialize output for each row. $output = "" # Navigate across all columns (only two in this example). for ($column = 0; $column -lt $row.FieldCount; $column += 1) { # Mechanic for comma-delimit between last and first name. if ($output.length -eq 0) { $output += $row[$column] } else { $output += ", " + $row[$column] } } # Write the output from the database to a file. Add-Content -Value $output -Path folder:$outFile } } catch { Write-Error "Message: $($_.Exception.Message)" Write-Error "StackTrace: $($_.Exception.StackTrace)" Write-Error "LoaderExceptions: $($_.Exception.LoaderExceptions)" } finally { # Close the reader. $row.Close() } } catch { Write-Error "Message: $($_.Exception.Message)" Write-Error "StackTrace: $($_.Exception.StackTrace)" Write-Error "LoaderExceptions: $($_.Exception.LoaderExceptions)" } finally { $Connection.Close() } |
You can use a command-line call like this:
powershell ./OracleContact.ps1 -v -o output.csv -q script.sql -p . |
It produces the following verbose output to the console:
Evaluate swtich [ -v ] Evaluate parameter [ -o ] and [ output.csv ] Evaluate parameter [ -q ] and [ script.sql ] Evaluate parameter [ -p ] and [ . ] |
You can suppress printing to the console by eliminating the -v switch from the parameter list.
As always, I hope this helps those looking for a solution to less tedious interactions with the Oracle database.
PowerShell Parameter List
Playing around with passing parameters for a PowerShell project and ran into some interesting quirks. I found that you can pass in a set of values by declaring the parameter list as an array or string[] but the Microsoft documentation suggests using the array data type, which is implicitly cast as a string.
So, this would work provided you want to enter commas between the parameters:
param ( [Parameter(Mandatory)][array]$args ) |
However, you can’t use a -o for example because it’ll raise this error message:
C:\PowerShell\test\Params.ps1 : Parameter cannot be processed because the parameter name 'o' is ambiguous. Possible matches
include: -OutVariable -OutBuffer.
At line:1 char:21
+ ./Params.ps1 -o output.csv
+                     ~~
    + CategoryInfo          : InvalidArgument: (:) [Params.ps1], ParameterBindingException
+ FullyQualifiedErrorId : AmbiguousParameter,Params.ps1 |
The error doesn’t occur because the script but because the -OutVariable and -OutBuffer are parameters of the Powershell executable. You can get rid of the error and use an array without error by using two hyphens (—) back-to-back before your script’s parameters. The two hyphens together are the end-of-parameters operator, which means everything following it will be treated as arguments.
However, the better solution is to use a hashtable, like:
param ( [Parameter(Mandatory)][hashtable]$args ) |
However, as written above it raises the following error:
Cannot convert the "System.Object[]" value of type "System.Object[]" to type "System.Collections.Hashtable". At C:\PowerShell\test\Params.ps1:35 char:1 + param ( + ~~~~~~~ + CategoryInfo : InvalidArgument: (:) [], RuntimeException + FullyQualifiedErrorId : ConvertToFinalInvalidCastException |
There’s a great deal of humor if you recognize that the parameters are actually cast as strings in the hashtable and the error is more of a warning rather than a real error. All you need to do is wrap the param() call in a try-catch block, like:
try { param ( [Parameter(Mandatory)][hashtable]$args ) } catch {} |
Then, you can call the Powershell script like this from the CLI:
powershell params -o outfile.csv -q query.sql |
and, process it in a block like this, naturally qualifying the keys before assigning to local variables:
if ($args.count % 2) { Write-Host "Uneven number of parameters." Exit } else { for ($i = 0; $i -lt $args.count; $i += 2) { if ($args[$i] -eq "-o") { $outFile = $args[$i + 1] } elseif ($args[$i] -eq "-q") { $queryFile = $args[$i + 1] } } } |
Since this is really simply a script file, I prefer the if-not logic or a verbose (wordy) list of options when the parameter list is incorrect. For example, you could rewrite the block above to exclude an error message as follows:
if (!($args.count % 2)) { for ($i = 0; $i -lt $args.count; $i += 2) { if ($args[$i] -eq "-o") { $outFile = $args[$i + 1] } elseif ($args[$i] -eq "-q") { $queryFile = $args[$i + 1] } }} else { exit } |
While I answered the question about pairs, it’s a bad approach. You can find the right way to handle options (or, switches) and parameters to your PowerShell scripts in this later blog post.
As always, I hope blogging tidbits helps others looking for a solution.
PostgreSQL+PowerShell
This post explains and demonstrates how to install, configure, and use the psqlODBC (32-bit) and psqlODBC (64-bit) libraries to connect your Microsoft PowerShell programs to a locally installed PostgreSQL 14 database. It relies on you previously installing and configuring a PostgreSQL 14 database. This post is a step-by-step guide to installing PostgreSQL 14 on Windows 10, and this post shows you how to configure the PostgreSQL 14 database.
If you didn’t follow the instructions to get the psqlODBC libraries in the installation blog post, you will need to get those libraries, as qualified by Microsoft with the PostgreSQL Stack Builder.

You can launch PostgreSQL Stack Builder after the install by clicking on Start -> PostgreSQL -> Stack Builder. Choose to enable Stack Builder to change your system and install the psqlODBC libraries. After you’ve installed the psqlODBC library, use Windows search field to find the ODBC Data Sources dialog and run it as administrator.

There are six steps to setup, test, and save your ODBC Data Source Name (DSN). You can click on the images on the right to launch them in a more readable format or simply read the instructions.
PostgreSQL ODBC Setup Steps

- The Microsoft DSN (Data Source Name) dialog automatically elects the User DSN tab. Click on the System DSN tab.

- The view under the System DSN is exactly like the User DSN tab. Click the Add button to start the workflow.

- The Create New Data Source dialog requires you select the PostgreSQL ODBC Driver(UNICODE) option from the list and click the Finish button to proceed.

- The PostgreSQL Unicode ODBC Driver Setup dialog should complete the prompts as follows below and consistent with the PostgreSQL 14 Configuration blog. If you opt for localhost as the server value because you have a DCHP IP address, make sure you’ve configured your hosts file in the C:\Windows\System32\drivers\etc directory. You should enter the following two lines in the hosts file:
127.0.0.1  localhost
::1        localhost
These are the string values you should enter in the PostgreSQL Unicode ODBC Driver Setup dialog:
Data Source: PostgreSQL35W
Database:    videodb
Server:      localhost
User Name:   student
Description: PostgreSQL
SSL Mode:    disable
Port:        5432
Password:    student
After you complete the entry, click the Test button.

- The Connection Test dialog should return a “Connection successful” message. Click the OK button to continue.

- The ODBC Data Source Administrator dialog should show the PostgreSQL35W System Data Source. Click the OK button to continue.
After you have created the System PostgreSQL ODBC Setup, it’s time to build a PowerShell Cmdlet (or, Commandlet). Some documentation and blog notes incorrectly suggest you need to write a connection string with a UID and password, like:
$ConnectionString = 'DSN=PostgreSQL35W;Uid=student;Pwd=student' |
The UID and password is unnecessary in the connection string. As a rule, the UID and password are only necessary in the ODBC DSN, like:
$ConnectionString = 'DSN=PostgreSQL35W' |
You can create a readcursor.ps1 Cmdlet like the following:
1 2 3 4 5 6 7 8 9 10 11 12 13 14 15 16 17 18 19 20 21 22 23 24 25 26 27 28 29 30 31 32 33 34 35 36 37 | # Define a ODBC DSN connection string. $ConnectionString = 'DSN=PostgreSQL35W' # Define a MySQL Command Object for a non-query. $Connection = New-Object System.Data.Odbc.OdbcConnection; $Connection.ConnectionString = $ConnectionString # Attempt connection. try { $Connection.Open() # Create a SQL command. $Command = $Connection.CreateCommand(); $Command.CommandText = "SELECT current_database();"; # Attempt to read SQL command. try { $Reader = $Command.ExecuteReader(); # Read while records are found. while ($Reader.Read()) { Write-Host "Current Database [" $Reader[0] "]"} } catch { Write-Error "Message: $($_.Exception.Message)" Write-Error "StackTrace: $($_.Exception.StackTrace)" Write-Error "LoaderExceptions: $($_.Exception.LoaderExceptions)" } finally { # Close the reader. $Reader.Close() } } catch { Write-Error "Message: $($_.Exception.Message)" Write-Error "StackTrace: $($_.Exception.StackTrace)" Write-Error "LoaderExceptions: $($_.Exception.LoaderExceptions)" } finally { $Connection.Close() } |
Line 14 assigns a SQL query that returns a single row with one column as the CommandText of a Command object. Line 22 reads the zero position of a row or record set with only one column.
You call the readcursor.ps1 Cmdlet with the following syntax:
powershell .\readcursor.ps1 |
It returns:
Current Database [ videodb ] |
A more realistic way to write a query would return multiple rows with a set of two or more columns. The following program queries a table with multiple rows of two columns, but the program logic can manage any number of columns.
# Define a ODBC DSN connection string. $ConnectionString = 'DSN=PostgreSQL35W' # Define a MySQL Command Object for a non-query. $Connection = New-Object System.Data.Odbc.OdbcConnection; $Connection.ConnectionString = $ConnectionString # Attempt connection. try { $Connection.Open() # Create a SQL command. $Command = $Connection.CreateCommand(); $Command.CommandText = "SELECT last_name, first_name FROM contact ORDER BY 1, 2"; # Attempt to read SQL command. try { $row = $Command.ExecuteReader(); # Read while records are found. while ($row.Read()) { # Initialize output for each row. $output = "" # Navigate across all columns (only two in this example). for ($column = 0; $column -lt $row.FieldCount; $column += 1) { # Mechanic for comma-delimit between last and first name. if ($output.length -eq 0) { $output += $row[$column] } else { $output += ", " + $row[$column] } } # Write the output from the database. Write-Host $output } } catch { Write-Error "Message: $($_.Exception.Message)" Write-Error "StackTrace: $($_.Exception.StackTrace)" Write-Error "LoaderExceptions: $($_.Exception.LoaderExceptions)" } finally { # Close the reader. $row.Close() } } catch { Write-Error "Message: $($_.Exception.Message)" Write-Error "StackTrace: $($_.Exception.StackTrace)" Write-Error "LoaderExceptions: $($_.Exception.LoaderExceptions)" } finally { $Connection.Close() } |
You call the readcontact.ps1 Cmdlet with the following syntax:
powershell .\readcontact.ps1 |
It returns an ordered set of comma-separated values, like
Clinton, Goeffrey Gretelz, Simon Moss, Wendy Royal, Elizabeth Smith, Brian Sweeney, Ian Sweeney, Matthew Sweeney, Meaghan Vizquel, Doreen Vizquel, Oscar Winn, Brian Winn, Randi |
As always, I hope this helps those looking for a complete concrete example of how to make Microsoft Powershell connect and query results from a PostgreSQL database.
Configure PostgreSQL 14
After you install PostgreSQL 14 on Windows, there are a few steps to create a sandbox database. This post shows you those steps, including a couple Windows OS tasks you’ll need to complete. You should note that these instructions are for the PostgreSQL psql Command Line Interface (CLI).
Open a Command Prompt with Administrator privileges. It should give you a command prompt like the following:
Microsoft Windows [Version 10.0.19042.1466] (c) Microsoft Corporation. All rights reserved. C:\Users\username> |
Type psql to launch the PostgreSQL CLI and then the return or enter key:
C:\Users\username>psql |
Most likely, you’ll get the following error message. It means that your System Path environment variable doesn’t include the directory where the psql executable is found, and that’s why the command is not recognized.
'psql' is not recognized as an internal or external command, operable program or batch file. |
You can set it temporarily in your current Windows CLI with the following command:
set PATH=%PATH%;C:\Program Files\PostgreSQL\14\bin; |
For those familiar with Windows CLI navigation in prior releases, the convention is to append a semicolon at the end of the item added to the %PATH% environment variable. If you were to put the semicolon between the %PATH% and new directory path there would be two semicolons together. While it won’t do any harm, it’s best to follow the new convention or style.
CRITICAL NOTE: The rest of the post assumes you have set the correct %PATH% environment variable or added it to your System’s Path environment variable and restarted the Windows CLI after adding it through the GUI tool. The reason you need to restart the Windows CLI is that the %PATH% environment variable is inherited at startup and doesn’t change in an open Windows CLI shell.
Another common mistake some users make, at least those who have used an older version of the psql utility on a Linux distribution (or “distro”), is to type psql without any arguments to become the superuser. This error doesn’t occur in Linux because you most likely connected as the postgres user before trying to connect to the PostgreSQL database. A quick demonstration should illustrate the error and support explaining why it occurs on the Windows OS.
Attempting to connect to the PostgreSQL database as a non-postgres user:
C:\Users\username>psql |
You should get the following error:
psql: error: connection to server at "localhost" (::1), port 5432 failed: fe_sendauth: no password supplied |
This error occurs because you’re not the postgres user, and all other users must designate that they’re connecting to the superuser account. The correct syntax is:
C:\Users\username>psql -U postgres |
Then, you’ll be prompted for the password that you set when you installed PostreSQL database. Enter that password from the installation at the prompt.
Password for user postgres:
psql (14.1)
WARNING: Console code page (437) differs from Windows code page (1252)
         8-bit characters might not work correctly. See psql reference
         page "Notes for Windows users" for details.
Type "help" for help.

postgres=# |
The warning message is telling you that the character set collation differs between your Windows OS and the PostgreSQL database. We’ll discuss this more later but for the sake of almost all your work, it won’t matter. If the warning message bothers you, you can run the chcp command before launching PostgreSQL when you open your Windows CLI:
chcp 1252 |
The chcp command changes your terminal character set to align with the Latin 1 character set, which enables you to use things like non-English accent characters (the umlaut over an o, or ö). After running the You will see this when you connect after running that command:
psql (14.2) Type "help" for help. postgres# |
INFO: The chcp command is used to supplement the international keyboard and character set information, allowing MS-DOS to be used in other countries and with different languages. Before the chcp command can be used, the nlsfunc must be loaded, and the country.sys must be loaded into the OS configuration.
If you are an experienced Windows OS user, you may want to edit your Windows Registry to change this behavior automatically for each Windows CLI session. You can do that by opening the Windows Registry with the regedit command as an Administrator. In regedit, add an Autorun element with a value of chcp 1252 to this part of the registry:
Computer\HKEY_LOCAL_MACHINE\SOFTWARE\Microsoft\Command Processor |
This value automatically sets your Windows CLI to a Latin 1 character set everytime you launch a terminal shell with the cmd.exe utility. You should only do this if you understand it completely.
Now that you’re connected as the superuser, let’s examine the steps to configure your playground or videodb database. There are five steps to configure your database and one step to connect and use the videodb database as the student user
- Create Physical Directory
The directory for the data dictionary changes with PostgreSQL installations. You can find it with the following psql CLI command:
postgres=# show data_directory; |
This will return the following:
data_directory ------------------------------------- C:/Program Files/PostgreSQL/14/data (1 row) |
While it is possible to store your subdirectory in the data dictionary, it will raise a warning message. It’s actually a better practice to install your local databases in another location on your file system.
Open a new Windows OS CLI to create a subdirectory (or in Windows parlance folder) where you will store your videoDB database. Each new Windows OS CLI opens in your home directory. You need to create a physical video_db subdirectory in your home directory.
HINT: The name of the database inside PostgreSQL should map to the tablespace name and differ from the physical directory. Otherwise there is a chance you might get confused and make an error in the future.
In a new command line shell, you can use the following syntax to create videoDB subdirectory:
md video_db |
- Create Tablespace
Returning to the original Windows CLI shell where you are connected as the postgres superuser, you can create a video_db tablespace with the following syntax:
CREATE TABLESPACE video_db OWNER postgres LOCATION 'C:\Users\username\video_db'; |
This will return the following:
CREATE TABLESPACE |
You can query whether you successfully create the video_db tablespace with the following:
SELECT * FROM pg_tablespace; |
It should return the following:
oid | spcname | spcowner | spcacl | spcoptions -------+------------+----------+--------+------------ 1663 | pg_default | 10 | | 1664 | pg_global | 10 | | 16395 | video_db | 10 | | (3 rows) |
- Create a Database
You need to know the PostgreSQL default collation before you create a new database. You can write the following query to determine the default correlation:
postgres=# SELECT datname, datcollate FROM pg_database WHERE datname = 'postgres'; |
It should return something like this:
datname | datcollate -----------+---------------------------- postgres | English_United States.1252 (1 row) |
The datcollate value of the postgres database needs to the same value for the LC_COLLATE and LC_CTYPE parameters when you create a database. You can create a videodb database with the following syntax provided you’ve made appropriate substitutions for the LC_COLLATE and LC_CTYPE values below:
CREATE DATABASE videodb WITH OWNER = postgres ENCODING = 'UTF8' TABLESPACE = video_db LC_COLLATE = 'English_United States.1252' LC_CTYPE = 'English_United States.1252' CONNECTION LIMIT = -1; |
You can verify the creation of the videodb with the following command:
postgres# \l |
It should show you a display like the following:
                                                 List of databases
   Name    |  Owner   | Encoding |          Collate           |           Ctype            |   Access privileges
-----------+----------+----------+----------------------------+----------------------------+-----------------------
 postgres  | postgres | UTF8     | English_United States.1252 | English_United States.1252 |
 template0 | postgres | UTF8     | English_United States.1252 | English_United States.1252 | =c/postgres          +
           |          |          |                            |                            | postgres=CTc/postgres
 template1 | postgres | UTF8     | English_United States.1252 | English_United States.1252 | =c/postgres          +
           |          |          |                            |                            | postgres=CTc/postgres
 videodb   | postgres | UTF8     | English_United States.1252 | English_United States.1252 |
(4 rows) |
Then, you can assign comment to the database with the following syntax:
COMMENT ON DATABASE videodb IS 'Video Store Database'; |
- Create a Role, Grant, and User
In this section you create a dba role, grant privileges on a videodb database to a role, and create a user with the role that you created previously with the following three statements. There are three steps in this sections.
- The first step creates a dba role:
CREATE ROLE dba WITH SUPERUSER;
- The second step grants all privileges on the videodb database to both the postgres superuser and the dba role:
GRANT ALL PRIVILEGES ON DATABASE videodb TO postgres;
GRANT ALL PRIVILEGES ON DATABASE videodb TO dba;
Any work in pgAdmin4 requires a grant on the videodb database to the postgres superuser. The grant enables visibility of the videodb database in the pgAdmin4 console as shown in the following image.

- The third step creates a student user with the dba role:
CREATE USER student
  WITH ROLE dba
       ENCRYPTED PASSWORD 'student';
After this step, you need to disconnect as the postgres superuser with the following command:
QUIT;
- It is possible that you may (and should if this is a new instance you are building) encounter an error when you try to connect as a sandboxed user. The syntax to connect as the student user is:
psql -d videodb -U student -W
All the options, which are preceded with a single dash (–) are case sensitive. The -d option sets the database for the connection. The -U option set user for the connection and the -W option instructs the psql CLI to prompt for the password.
While you shouldn’t encounter the following error during a Windows OS installation,
psql: FATAL: Peer authentication failed for user "student"
You can fix this in PostgreSQL 14 by changing the user access parameters in the pg_hba.conf configuration file. The file is found in the C:\Program Files\PostgreSQL\14\data directory. These are the correct out of the box settings you should see.
# TYPE  DATABASE        USER            ADDRESS                 METHOD

# "local" is for Unix domain socket connections only
local   all             all                                     scram-sha-256
# IPv4 local connections:
host    all             all             127.0.0.1/32            scram-sha-256
# IPv6 local connections:
host    all             all             ::1/128                 scram-sha-256
# Allow replication connections from localhost, by a user with the
# replication privilege.
local   replication     all                                     scram-sha-256
host    replication     all             127.0.0.1/32            scram-sha-256
host    replication     all             ::1/128                 scram-sha-256
If you find something that’s broken, fix it. The values above should ensure you make the changes successfully. You will need to restart the postgres service if you make changes.
If you plan on using the copy command to read external CSV (Comma Separated Value) files, you need to grant as the postgres superuser another privilege to the student user. This grants the pg_read_server_files role to the student user.
GRANT pg_read_server_files TO student;

- Create a Schema
The PostgreSQL database supports multiple schemas inside databases. The default schema for any database is the public schema. You must create separate schemas and refer to them explicitly when accessing them unless you alter the default search path. This section demonstrates how to:
- Create an app schema.
- Create a revision_history table in the app schema.
- Modify the standard search path to include other schemas
The process of creating a schema requires you grant the CREATE ON DATABASE privilege to the user as the postgres user. The initial grant of the create privilege requires the postgres superuser’s privileges. That means you must connect as the postgres user, like:
psql -U postgres -W |
Then, as the postgres superuser, you use the following syntax to grant the create privilege to the student user on the videodb database:
GRANT CREATE ON DATABASE videodb TO student; |
After granting the create privilege, you should exit the postgres superuser’s account, like
QUIT; |
Now, you should connect as the student user to the videodb database (syntax introduced earlier but provided again below).
psql -U postgres -W |
As the student user, create the app schema with the following syntax:
CREATE SCHEMA app; |
Then, you can query the result as follows:
SELECT * FROM pg_catalog.pg_namespace ORDER BY nspname; |
You should see the following:
  oid  |      nspname       | nspowner |               nspacl
-------+--------------------+----------+-------------------------------------
 16399 | app                |    16398 |
 13388 | information_schema |       10 | {postgres=UC/postgres,=U/postgres}
    11 | pg_catalog         |       10 | {postgres=UC/postgres,=U/postgres}
    99 | pg_toast           |       10 |
  2200 | public             |       10 | {postgres=UC/postgres,=UC/postgres}
(5 rows) |
If you create a table without a schema name, it is automatically placed in the public schema. That means any attempt to describe the table with the \d command line option returns without prepending the schema name returns an error, however, this is only true when you are using the default search parameter.
Let’s create a revision_history table in the app schema with a script file. A script file is a set of related SQL commands, like the following example that suppresses notices, drops any pre-existing revision_history table, and create the revision_history table.
-- Set client messages to warning or error, which means any -- notice associated with the if exists clause is suppressed. SET client_min_messages TO warning; -- Conditionally drop an existing revision_history table in -- the app schema. DROP TABLE IF EXISTS revision_history; -- Create a revision_history table. CREATE TABLE app.revision_history ( revision_history_id serial , session_id VARCHAR , table_name VARCHAR , revision_id INTEGER ); |
You can run a script file by using a relative or absolute file name. An absolute file name includes a full path from a Windows logical driver letter, like C:\ or a Linux mount point. A relative file name is simply the file name.
If you want to use a relative file name, you must first navigate to the directory where you have saved the file first. This directory becomes your local drive and allows you call any file in it from the psql command prompt by using only its file name.
You should connect as the student user to the videodb database. The \i command lets you run a file, assuming you put the preceding script file into a revision_history file in your local directory.
\I revision_history.sql |
If you try to describe the revision_history table with the \d command line option, like
\d revision_history |
It will show the following:
Did not find any relation named "revision_history". |
That’s because there is no revision_history table in the public schema and the default search path only includes the public schema.
You can show the search path with the following:
show search_path; |
It should return the following, which is a schema that shares the user’s name and public.
search_path ----------------- "$user", public (1 row) |
You reset the search path as follows:
SET search_path TO app, "$user", public; |
After you set the search_path, an attempt to describe the table will work because it searches for the table in the app and public schema. That means the following command:
\d revision_history |
Shows:
                                                  Table "app.revision_history"
       Column        |       Type        | Collation | Nullable |                            Default
---------------------+-------------------+-----------+----------+---------------------------------------------------------------
 revision_history_id | integer           |           | not null | nextval('revision_history_revision_history_id_seq'::regclass)
 session_id          | character varying |           |          |
 table_name          | character varying |           |          |
revision_id | integer | | | |
- Connect as student to videodb:
As shown in Step #4 above, you can now connect and use to the videodb as the student user with the following syntax:
psql -d videodb -U student -W |
If you did everything correctly, you should see the following after correctly providing the student password for the student user:
Password:
psql (14.1)
WARNING: Console code page (437) differs from Windows code page (1252)
         8-bit characters might not work correctly. See psql reference
         page "Notes for Windows users" for details.
Type "help" for help.

videodb=> |
After connecting to the videodb database, you can query the current database, like
SELECT current_database(); |
It should return the following:
current_database ------------------ videodb (1 row) |
This has shown you how to create a videodb tablespace, a videodb database, a dba role, a student user, an app schema, and connect to your new videodb database as the student user. As always, I hope it lets you get a lot down with little effort and avoiding pages and pages of documentation.
MySQL Connect Dialog
About a month ago, I published how you can connect to MySQL with a small form. One suggestion, or lets promote it to a request, from that post was: “Nice, but how do you create a reusable library for the MySQL Connection Dialog box?”
That was a good question but I couldn’t get back until now to write a new blog post. This reusable MySQL connection dialog lets you remove MySQL connection data from the command-line history. This post also shows you how to create and test a Powershell Module.

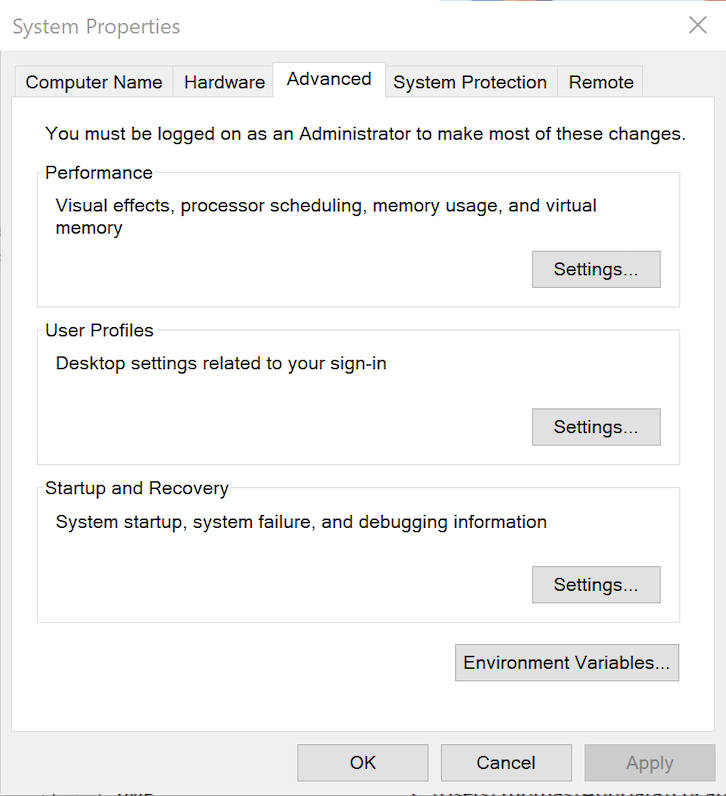
The first step to create a module requires that you set the proper %PSModulePath% environment variable. If you fail to do that, you can put it into a default PowerShell module location but that’s not too effective for testing. You launch the System Properties dialog and click the Environment Variables button:
Then, you edit the PSModulePath environment variable in the bottom list of environment variables and add a new path to the PSModulePath. My development path in this example is:
C:\Data\cit225\mysql\ps\mod |
I named the file the same as the function Get-Credentials.psm1 consistent with the Microsoft instructions for creating a PowerShell module and their instructions for Pascal case name with an approved verb and singular noun.
Below is the code for the Get-Credentials.psm1 file:
function Get-Credentials { # Add libraries for form components. Add-Type -AssemblyName System.Windows.Forms Add-Type -AssemblyName System.Drawing # Define a user credential form. $form = New-Object System.Windows.Forms.Form $form.Text = 'User Credential Form' $form.Size = New-Object System.Drawing.Size(300,240) $form.StartPosition = 'CenterScreen' # Define a button and assign it and its controls to a form. $loginButton = New-Object System.Windows.Forms.Button $loginButton.Location = New-Object System.Drawing.Point(60,160) $loginButton.Size = New-Object System.Drawing.Size(75,23) $loginButton.Text = 'Login' $loginButton.DialogResult = [System.Windows.Forms.DialogResult]::OK $form.AcceptButton = $loginButton $form.Controls.Add($loginButton) # Define a button and assign it and its controls to a form. $cancelButton = New-Object System.Windows.Forms.Button $cancelButton.Location = New-Object System.Drawing.Point(155,160) $cancelButton.Size = New-Object System.Drawing.Size(75,23) $cancelButton.Text = 'Cancel' $cancelButton.DialogResult = [System.Windows.Forms.DialogResult]::Cancel $form.CancelButton = $cancelButton $form.Controls.Add($cancelButton) # Define a label and assign it and its controls to a form. $userLabel = New-Object System.Windows.Forms.Label $userLabel.Location = New-Object System.Drawing.Point(30,15) $userLabel.Size = New-Object System.Drawing.Size(100,20) $userLabel.Text = 'Enter User Name:' $form.Controls.Add($userLabel) # Define a TextBox and assign it and its controls to a form. $userTextBox = New-Object System.Windows.Forms.TextBox $userTextBox.Location = New-Object System.Drawing.Point(140,15) $userTextBox.Size = New-Object System.Drawing.Size(100,20) $form.Controls.Add($userTextBox) # Define a label and assign it and its controls to a form. $pwdLabel = New-Object System.Windows.Forms.Label $pwdLabel.Location = New-Object System.Drawing.Point(30,40) $pwdLabel.Size = New-Object System.Drawing.Size(100,20) $pwdLabel.Text = 'Enter Password:' $form.Controls.Add($pwdLabel) # Define a TextBox and assign it and its controls to a form. $pwdTextBox = New-Object System.Windows.Forms.TextBox $pwdTextBox.Location = New-Object System.Drawing.Point(140,40) $pwdTextBox.Size = New-Object System.Drawing.Size(100,20) $pwdTextBox.PasswordChar = "*" $form.Controls.Add($pwdTextBox) # Define a label and assign it and its controls to a form. $hostLabel = New-Object System.Windows.Forms.Label $hostLabel.Location = New-Object System.Drawing.Point(30,65) $hostLabel.Size = New-Object System.Drawing.Size(100,20) $hostLabel.Text = 'Enter Hostname:' $form.Controls.Add($hostLabel) # Define a TextBox and assign it and its controls to a form. $hostTextBox = New-Object System.Windows.Forms.TextBox $hostTextBox.Location = New-Object System.Drawing.Point(140,65) $hostTextBox.Size = New-Object System.Drawing.Size(100,20) $form.Controls.Add($hostTextBox) # Define a label and assign it and its controls to a form. $portLabel = New-Object System.Windows.Forms.Label $portLabel.Location = New-Object System.Drawing.Point(30,90) $portLabel.Size = New-Object System.Drawing.Size(100,20) $portLabel.Text = 'Enter Port #:' $form.Controls.Add($portLabel) # Define a TextBox and assign it and its controls to a form. $portTextBox = New-Object System.Windows.Forms.TextBox $portTextBox.Location = New-Object System.Drawing.Point(140,90) $portTextBox.Size = New-Object System.Drawing.Size(100,20) $form.Controls.Add($portTextBox) # Define a label and assign it and its controls to a form. $dbLabel = New-Object System.Windows.Forms.Label $dbLabel.Location = New-Object System.Drawing.Point(30,115) $dbLabel.Size = New-Object System.Drawing.Size(100,20) $dbLabel.Text = 'Enter DB Name:' $form.Controls.Add($dbLabel) # Define a TextBox and assign it and its controls to a form. $dbTextBox = New-Object System.Windows.Forms.TextBox $dbTextBox.Location = New-Object System.Drawing.Point(140,115) $dbTextBox.Size = New-Object System.Drawing.Size(100,20) $form.Controls.Add($dbTextBox) $form.Topmost = $true $form.Add_Shown({$userTextBox.Select()}) $result = $form.ShowDialog() if ($result -eq [System.Windows.Forms.DialogResult]::OK) { # Assign inputs to connection variables. $uid = $userTextBox.Text $pwd = $pwdTextBox.Text $server = $hostTextBox.Text $port= $portTextBox.Text $dbName = $dbTextBox.Text # Declare connection string. $credentials = 'server=' + $server + ';port=' + $port + ';uid=' + $uid + ';pwd=' + $pwd + ';database=' + $dbName } else { $credentials = $null } return $credentials } |
You must create a Get-Connection directory in your C:\Data\cit225\mysql\ps\mod directory that you added to the PSModulePath. Then, you must put your module code in the Get-Connection subdirectory as the Get-Connection.psm1 module file.
The test.ps1 script imports the Get-Credentials.psm1 PowerShell module, launches the MySQL Connection Dialog form and returns the connection string. The test.ps1 code is:
# Import your custom module. Import-Module Get-Credentials # Test the Get-Credentials function. if (($credentials = Get-Credentials) -ne $undefinedVariable) { Write-Host($credentials) } |
You can test it from the local any directory with the following command-line:
powershell .\test.ps1 |
It should print something like this to the console:
server=localhost;port=3306;uid=student;pwd=student;database=studentdb |
If you got this far, that’s great! You’re ready to test a connection to the MySQL database. Before you do that, you should create the same avenger table I used in the initial post and insert the same or some additional data. Connect to the any of your test databases and rung the following code to create the avenger table and nine rows of data.
-- Create the avenger table. CREATE TABLE db_connect ( db_connect_id INT UNSIGNED PRIMARY KEY AUTO_INCREMENT , version VARCHAR(10) , user VARCHAR(24) , db_name VARCHAR(10)); -- Seed the avenger table with data. INSERT INTO avenger ( first_name, last_name, avenger ) VALUES ('Anthony', 'Stark', 'Iron Man') ,('Thor', 'Odinson', 'God of Thunder') ,('Steven', 'Rogers', 'Captain America') ,('Bruce', 'Banner', 'Hulk') ,('Clinton', 'Barton', 'Hawkeye') ,('Natasha', 'Romanoff', 'Black Widow') ,('Peter', 'Parker', 'Spiderman') ,('Steven', 'Strange', 'Dr. Strange') ,('Scott', 'Lange', 'Ant-man'); |
Now, let’s promote our use-case test.ps1 script to a testQuery.ps1 script, like:
# Import your custom module. Import-Module Get-Credentials # Test the Get-Credentials function. if (($credentials = Get-Credentials) -ne $undefinedVariable) { # Connect to the libaray MySQL.Data.dll Add-Type -Path 'C:\Program Files (x86)\MySQL\Connector NET 8.0\Assemblies\v4.5.2\MySql.Data.dll' # Create a MySQL Database connection variable that qualifies: # [Driver]@ConnectionString # ============================================================ # You can assign the connection string before using it or # while using it, which is what we do below by assigning # literal values for the following names: # - server=<ip_address> or 127.0.0.1 for localhost # - uid=<user_name> # - pwd=<password> # - port=<port#> or 3306 for default port # - database=<database_name> # ============================================================ $Connection = [MySql.Data.MySqlClient.MySqlConnection]@{ConnectionString=$credentials} $Connection.Open() # Define a MySQL Command Object for a non-query. $sqlCommand = New-Object MySql.Data.MySqlClient.MySqlCommand $sqlDataAdapter = New-Object MySql.Data.MySqlClient.MySqlDataAdapter $sqlDataSet = New-Object System.Data.DataSet # Assign the connection and command text to the MySQL command object. $sqlCommand.Connection = $Connection $sqlCommand.CommandText = 'SELECT CONCAT(first_name," ",last_name) AS full_name ' + ', avenger ' + 'FROM avenger' # Assign the connection and command text to the query method of # the data adapter object. $sqlDataAdapter.SelectCommand=$sqlCommand # Assign the tuples of data to a data set and return the number of rows fetched. $rowsFetched=$sqlDataAdapter.Fill($sqlDataSet, "data") # Print to console the data returned from the query. foreach($row in $sqlDataSet.tables[0]) { write-host "Avenger:" $row.avenger "is" $row.full_name } # Close the MySQL connection. $Connection.Close() } |
It should give you the MySQL Connection Dialog and with the correct credentials print the following to your console:
Avenger: Iron Man is Anthony Stark Avenger: God of Thunder is Thor Odinson Avenger: Captain America is Steven Rogers Avenger: Hulk is Bruce Banner Avenger: Hawkeye is Clinton Barton Avenger: Black Widow is Natasha Romanoff Avenger: Spiderman is Peter Parker Avenger: Dr. Strange is Steven Strange Avenger: Ant-man is Scott Lange |
As always, I hope this helps those looking to exploit technology.
Insert into XML Column
Working through Chapter 7 of the Querying Microsoft SQL Server 2012 book for Microsoft’s Exam 70-461, I found the XML examples incomplete for my students. I decided to put together a post on how to create:
- An XML Schema Collection type.
- A table that uses an XML Schema Collection as a column’s data type.
- An example on how you can transfer the contents of a table into the XML Schema Collection.
This post assumes you understand the basics about XML structures. If you’re unfamiliar with XML, please note that everything within it is case sensitive unlike SQL. You raise exceptions when the case of your XML fails to match the case of your XML Schema Collection definitions. I raised the following exception by using a Marvel element tag in title case when the XML Schema Collection uses a lowercase marvel element tag:
Msg 6913, Level 16, State 1, Line 2 XML Validation: Declaration not found for element 'Marvel'. Location: /*:Marvel[1] |
The basic marvel table is defined in this earlier blog post. To ensure you don’t run into conflicts with previously existing objects, you can delete the marvel table with the following syntax:
1 2 | IF OBJECT_ID('studentdb.marvel_xml','U') IS NOT NULL DROP TABLE marvel_xml; |
There is no predefined function that lets you conditionally drop the XML Schema Collection from the data base. The alternative is to query the Microsoft SQL Server data catalog for the existence of a row before dropping the XML Schema Collection, like this:
1 2 3 4 | IF EXISTS (SELECT * FROM sys.xml_schema_collections WHERE name = 'MarvelXMLTable') DROP XML SCHEMA COLLECTION MarvelXMLTable; ELSE SELECT 'Not found.'; |
You can now create the MarvelXMLTable XML Schema Collection with the following syntax:
1 2 3 4 5 6 7 8 9 10 11 12 13 14 15 16 17 | CREATE XML SCHEMA COLLECTION MarvelXMLTable AS N'<?xml version="1.0" encoding="UTF-16"?> <xsd:schema xmlns:xsd="http://www.w3.org/2001/XMLSchema" xmlns:sqltypes="http://schemas.microsoft.com/sqlserver/2004/sqltypes"> <xsd:import namespace="http://schemas.microsoft.com/sqlserver/2004/sqltypes" schemaLocation="http://schemas.microsoft.com/sqlserver/2004/sqltypes/sqltypes.xsd" /> <xsd:element name="Marvel"> <xsd:complexType> <xsd:sequence> <xsd:element name="marvel_id" type="sqltypes:int" /> <xsd:element name="avenger_name" type="sqltypes:nvarchar" /> <xsd:element name="first_name" type="sqltypes:nvarchar" /> <xsd:element name="last_name" type="sqltypes:nvarchar" /> </xsd:sequence> </xsd:complexType> </xsd:element> </xsd:schema>'; |
After creating the XML Schema Collection, you can confirm whether it works correctly with the following statements. It will fail when you use semicolons on the DECLARE or SET lines, so avoid them as shown below:
1 2 3 4 5 6 7 8 | DECLARE @marvel AS XML(MarvelXMLTable) SET @marvel = '<marvel> <marvel_id>1</marvel_id> <avenger_name>Falcon</avenger_name> <first_name>Sam</first_name> <last_name>Wilson</last_name> </marvel>' SELECT @marvel; |
After creating and verifying the integrity of the XML Schema Collection, you can create a marvel_xml table. The xml_table column of the marvel_xml table uses a strongly-typed XML type, as shown:
1 2 3 | CREATE TABLE marvel_xml ( id INT IDENTITY(1,1) CONSTRAINT marvel_xml_pk PRIMARY KEY , xml_table XML(MarvelXMLTable)); |
You can write an INSERT statement with single element like this:
1 2 3 4 5 6 7 8 9 | INSERT INTO marvel_xml ( xml_table ) VALUES ('<Marvel> <marvel_id>9</marvel_id> <avenger_name>Falcon</avenger_name> <first_name>Sam</first_name> <last_name>Wilson</last_name> </Marvel>'); |
You can insert two elements with an INSERT statement like this:
1 2 3 4 5 6 7 8 9 10 11 12 13 14 15 | INSERT INTO marvel_xml ( xml_table ) VALUES ('<Marvel> <marvel_id>9</marvel_id> <avenger_name>Falcon</avenger_name> <first_name>Sam</first_name> <last_name>Wilson</last_name> </Marvel> <Marvel> <marvel_id>10</marvel_id> <avenger_name>Scarlet Witch</avenger_name> <first_name>Wanda</first_name> <last_name>Witch</last_name> </Marvel>'); |
There’s a lot of typing to insert XML literal values. It a lot easier to transfer relational data from a table to an XML type. Unfortunately, Microsoft didn’t make it very easy. The FOR XML AUTO doesn’t work for two reasons. First, the FOR XML AUTO clause doesn’t render the correct XML structure. Second, the INSERT statement disallows nested SELECT queries that include the FOR XML AUTO clause.
Here’s the way you insert relational data into an XML type column:
1 2 3 4 5 6 7 8 9 10 11 12 13 | DECLARE @xml_elements NVARCHAR(MAX); SET @xml_elements = N''; WITH x AS (SELECT CONCAT(N'<marvel>' ,N'<marvel_id>',marvel_id,N'</marvel_id>' ,N'<avenger_name>',avenger_name,N'</avenger_name>' ,N'<first_name>',first_name,N'</first_name>' ,N'<last_name>',last_name,N'</last_name>' ,N'</marvel>') AS element FROM marvel) SELECT @xml_elements += element FROM x; INSERT INTO marvel_xml (xml_table) VALUES (@xml_elements); |
Line 1 declares an xml_element session variable. Line 2 initializes the xml_element session variable as an empty string. The WITH clause on lines 3 through 10 creates a Common Table Expression (CTE) with the valid XML structure for all rows in the marvel table. The nested SELECT statement on line 11 returns data from the CTE and adds returned row to the session-level string variable. Finally, the INSERT statement on lines 12 and 13 inserts the XML table into the xml_table column.
You can then query the table with the following statement:
SELECT xml_table FROM marvel_xml; |
Click on the return type in the SQL Server Management Studio (SSMS), and the XML structure will expand to show this:
<marvel> <marvel_id>1</marvel_id> <avenger_name>Hulk</avenger_name> <first_name>Bruce</first_name> <last_name>Banner</last_name> </marvel> <marvel> <marvel_id>2</marvel_id> <avenger_name>Iron Man</avenger_name> <first_name>Tony</first_name> <last_name>Stark</last_name> </marvel> <marvel> <marvel_id>3</marvel_id> <avenger_name>Black Widow</avenger_name> <first_name>Natasha</first_name> <last_name>Romanoff</last_name> </marvel> <marvel> <marvel_id>4</marvel_id> <avenger_name>Thor</avenger_name> <first_name>Thor</first_name> <last_name>Odinsson</last_name> </marvel> <marvel> <marvel_id>5</marvel_id> <avenger_name>Captain America</avenger_name> <first_name>Steve</first_name> <last_name>Rogers</last_name> </marvel> <marvel> <marvel_id>6</marvel_id> <avenger_name>Hawkeye</avenger_name> <first_name>Clint</first_name> <last_name>Barton</last_name> </marvel> <marvel> <marvel_id>7</marvel_id> <avenger_name>Winter Soldier</avenger_name> <first_name>Bucky</first_name> <last_name>Barnes</last_name> </marvel> <marvel> <marvel_id>8</marvel_id> <avenger_name>Iron Patriot</avenger_name> <first_name>James</first_name> <last_name>Rhodey</last_name> </marvel> |
As always, I hope this post benefits those who read it.
SQL Server 2012
 Life’s interesting, and as they say, “Things always change.” While there’s a great debate about the future of books and their usefulness in certain formats, there’s also a discussion about whether they should be free, cheap or pricey? This debate is especially interesting in the arena of technology because the life-cycle of books becomes ever shorter as software release cycles narrow.
For example, you can purchase the new Introducing Microsoft SQL Server 2012 printed and bound book (shown in the illustration at the left) at Amazon.com, or you can download it for free from here as a PDF, EPUB, or Mobi file. While I only glanced through it, it looks like a well written and complete book. It’s also free electronically, which begs the questions how the authors and publishers recovered the cost of producing the work.
Is this the future of technical books? After all, technical books exist to smooth the uptake of new software and to humanize the information that is often too verbose (trying to be exhaustive of software uses) or too short (trying to be accessible in the smallest amount of time). It seems there will always be books for these reasons about technology. I would characterize three problems with technology books, and they’re readability, content, and affordability.
- Readability is an interesting trick with a technology book because of how we seems to measure it. Unlike a novel, The Da Vinci Code, technology books seem to be measured on different criteria. The criteria seem to be how well the books expose features, instruct audiences, and provide complete or comprehensive reference; and sometimes, seemingly rarer, they’re read cover-to-cover with an expectation of thematic story telling along with the features, instructions, or reference materials.
- Content should be accurate, concise, and accessible. This is always a challenge as the length of books get larger because the time allotted to the write, shrinks during editing and review cycles. Often the author doesn’t get to review the index or final proof galleys and typos invariable creep in to any book. Typos in code are annoying but incomplete code fragments drive reader’s nuts. Content should include complete programs or modules that enable the reader to test concepts explained in the text.
- Affordability is the largest hurdle because access to information drives success for technicians working with cutting edge technology. Paraphrasing what Alvin Toffler wrote in Powershift: Knowledge, Wealth, and Violence at the Edge of the 21st Century, knowledge or access to knowledge is power, more precisely power that captures wealth.
If vendors, like Microsoft, underwrite books by paying the author and publisher upfront, they remove the risk and vouchsafe financial return associated with producing the book. The likelihood is that the freely distributed copies may no longer yield revenue to the author or publisher, which means the author’s and publisher’s compensation is upfront and limited to a contracted amount. This would operate like the current advance amount, which is only exceeded when the book sells well. This type of arrangement guarantees books at or near production plus supply chain and inventory costs.
If the incentive to write, produce, and maintain (correct problems with) the book are reasonable and the book provides readability, accurate content, and affordability, this may be the future of technical publishing. It certainly begins to lower the barrier to entry cost of their technology. What do you think?
