Archive for the ‘MySQL Workbench’ Category
MySQL Shell Parsing
I’ve been experimenting with the mysqlsh since installing it last week. It’s been interesting. Overall, I’m totally impressed but I did find a problem with how it parses stored procedures.
First thought is always, is it my code? I checked the file by running it as a script file through MySQL Workbench. It ran perfectly in MySQL Workbench but failed repeatedly when run from the mysqlsh utility. Next step, reduce the code to a small test case, retest it, and log a bug if it is replicated. My test case in a test.sql file generates the following errors when run from the mysqlsh utility:
MySQL localhost:33060+ ssl studentdb SQL > source test.sql Query OK, 0 rows affected (0.0003 sec) ERROR: 1064: You have an error in your SQL syntax; check the manual that corresponds to your MySQL server version for the right syntax to use near 'CREATE PROCEDURE test ( pv_input1 CHAR(12) , pv_input2 CHAR(19)) MODIFIES SQL ' at line 2 Query OK, 0 rows affected (0.0002 sec) Query OK, 0 rows affected (0.0003 sec) ERROR: 1305: PROCEDURE studentdb.test does not exist |
The same file generates this series of successful messages when run as a script file from MySQL Workbench:
Preparing... Importing test.sql... Finished executing script Statement CREATE PROCEDURE test pv_input1 One Operation completed successfully |
For those who are curious enough to review the test case, here it is:
-- Reset the delimiter so that a semicolon can be used as a statement and block terminator. DELIMITER $$ SELECT 'CREATE PROCEDURE test' AS "Statement"; CREATE PROCEDURE test ( pv_input1 CHAR(12) , pv_input2 CHAR(19)) MODIFIES SQL DATA BEGIN SELECT CONCAT(pv_input1,', ',pv_input2) AS message; END; $$ -- Reset the standard delimiter to let the semicolon work as an execution command. DELIMITER ; -- Call the test procedure. CALL test('One','Two'); |
The reply in the bug explained the behavior difference between MySQL Workbench and the MySQL Shell (mysqlsh) environments. MySQL Workbench uses the MySQL client, which supports multiple client statements with the CLIENT_MULTI_STATEMENTS option. Recognizing that, the logging entry SELECT statement should move to a position before setting the DELIMITER, like:
-- Set a label for the log file. SELECT 'CREATE PROCEDURE test' AS "Statement"; -- Reset the delimiter so that a semicolon can be used as a statement and block terminator. DELIMITER $$ CREATE PROCEDURE test ( pv_input1 CHAR(12) , pv_input2 CHAR(19)) MODIFIES SQL DATA BEGIN SELECT CONCAT(pv_input1,', ',pv_input2) AS message; END; $$ -- Reset the standard delimiter to let the semicolon work as an execution command. DELIMITER ; -- Call the test procedure. CALL test('One','Two'); |
The new test case only submits one statement at a time. The logging query is submitted by the semicolon, and the test procedure by the double dollar ($$) symbol set.
So, I was correct identifying a parsing behavior difference between MySQL Workbench and MySQL Shell. It appears to be a difference by design but the MySQL Shell documentation fails to explain it can’t manage multiple statements. I hope identifying this saves others time.
It’s also true that the MySQL client software supports TEE and NOTEE to write log files. Unfortunately, MySQL Shell (mysqlsh) doesn’t support the TEE and NOTEE syntax. You can only do minimal logging with the control of standard error (stderr) by using the application and AdminAPI log utilities, which are covered in Chapter 8 of the MySQL Shell 8.0 documentation.
MySQL 8.0 Install
MySQL will be used for our online sections because the VMware instance and Docker configurations where too large to effectively download this term.
MySQL 8.0.21 Installation Steps
After you download the MySQL 8 MSI file, you will perform the following 24 steps to install MySQL on Windows 10. If you want a full developer install you must install Microsoft Excel and Visual Studio first.
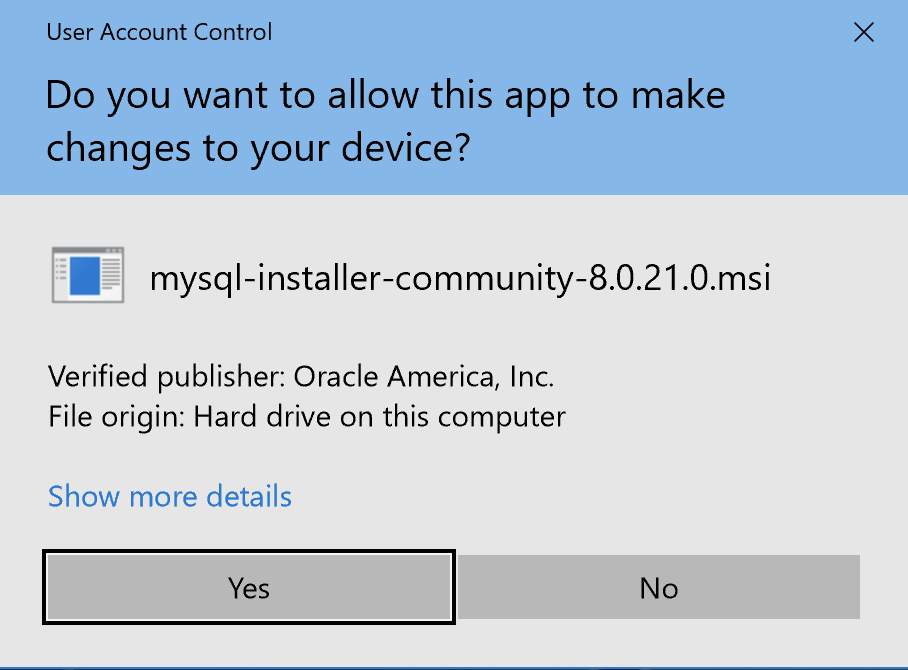
- The first thing you need to do is grant privileges to allow the MySQL Installer application to work in Windows 10. Click the Yes button to authorize the MySQL Installer to run.
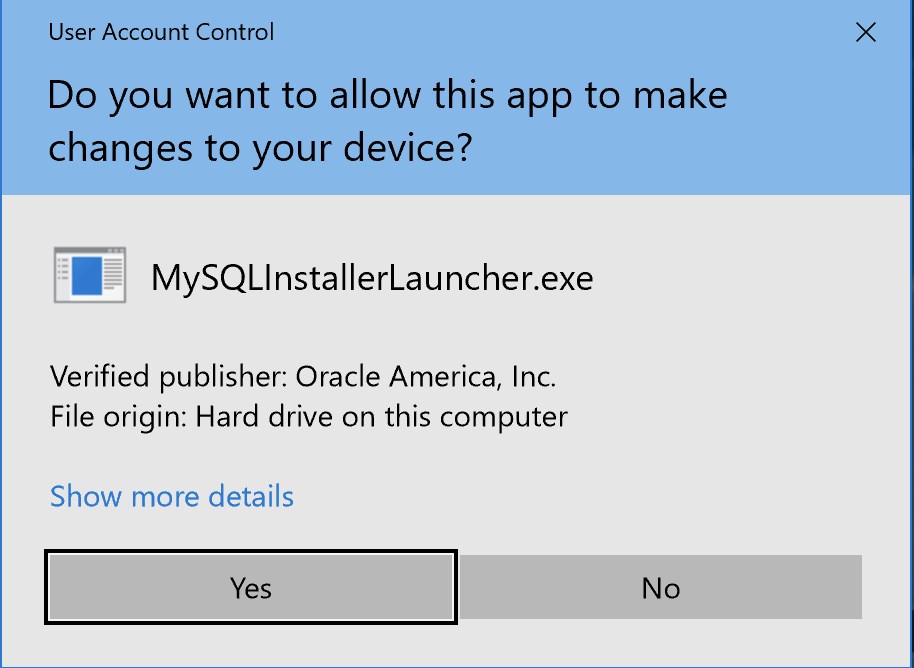
- The next thing you need to do is grant privileges to allow the MySQL Installer Launcher application to work in Windows 10. Click the Yes button to authorize the MySQL Installer to run.

- Now you start the install by choosing a setup type. As a rule, I recommend you install the Developer Default. It is the default selection and preselected for you. Click the Next button to verify that you can install what you’ve selected.
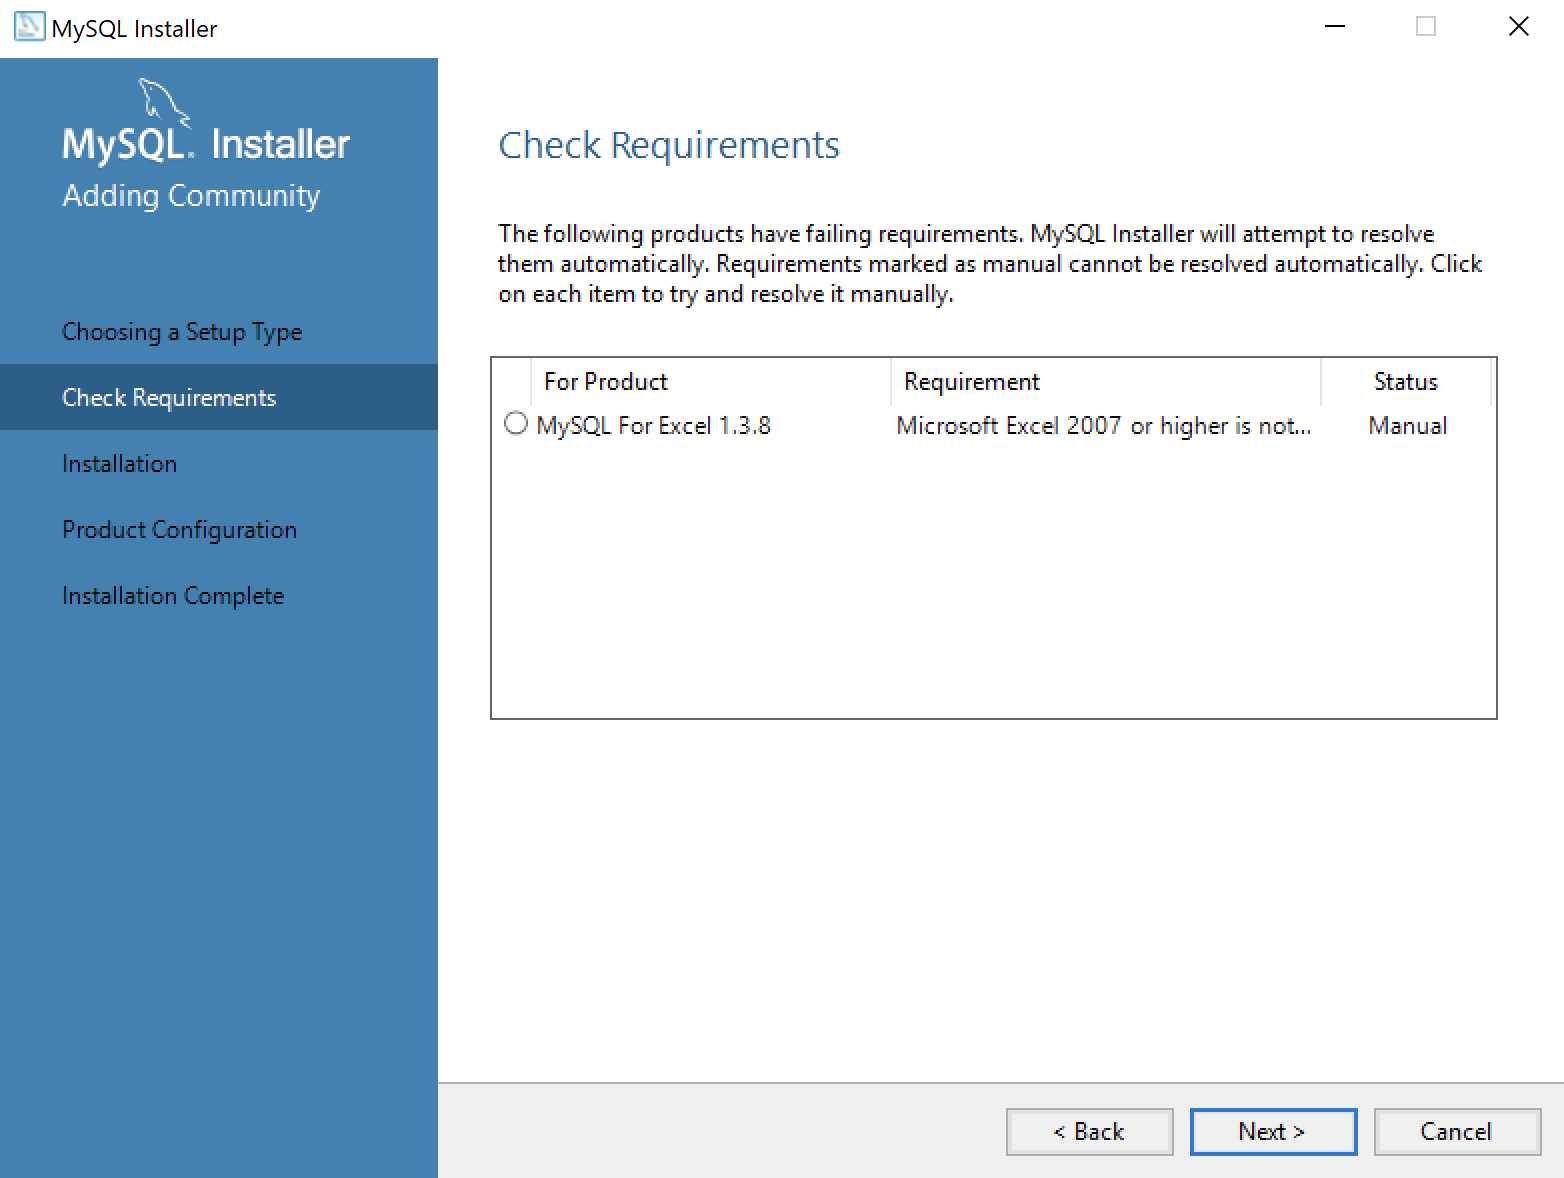
- The next workflow step checks requirements and lists any unmet requirements. The workflow lists the requirements for MySQL for Excel 1.3.8 as unmet because Microsoft Excel is not installed. Click the Next button when there are no unmet requirements in the list. Click the Back button to remove MySQL for Excel 1.3.8 from the setup selection.

- Returning to the setup type workflow, you should select the Custom radio button. Click the Next button to view the list of selected types.
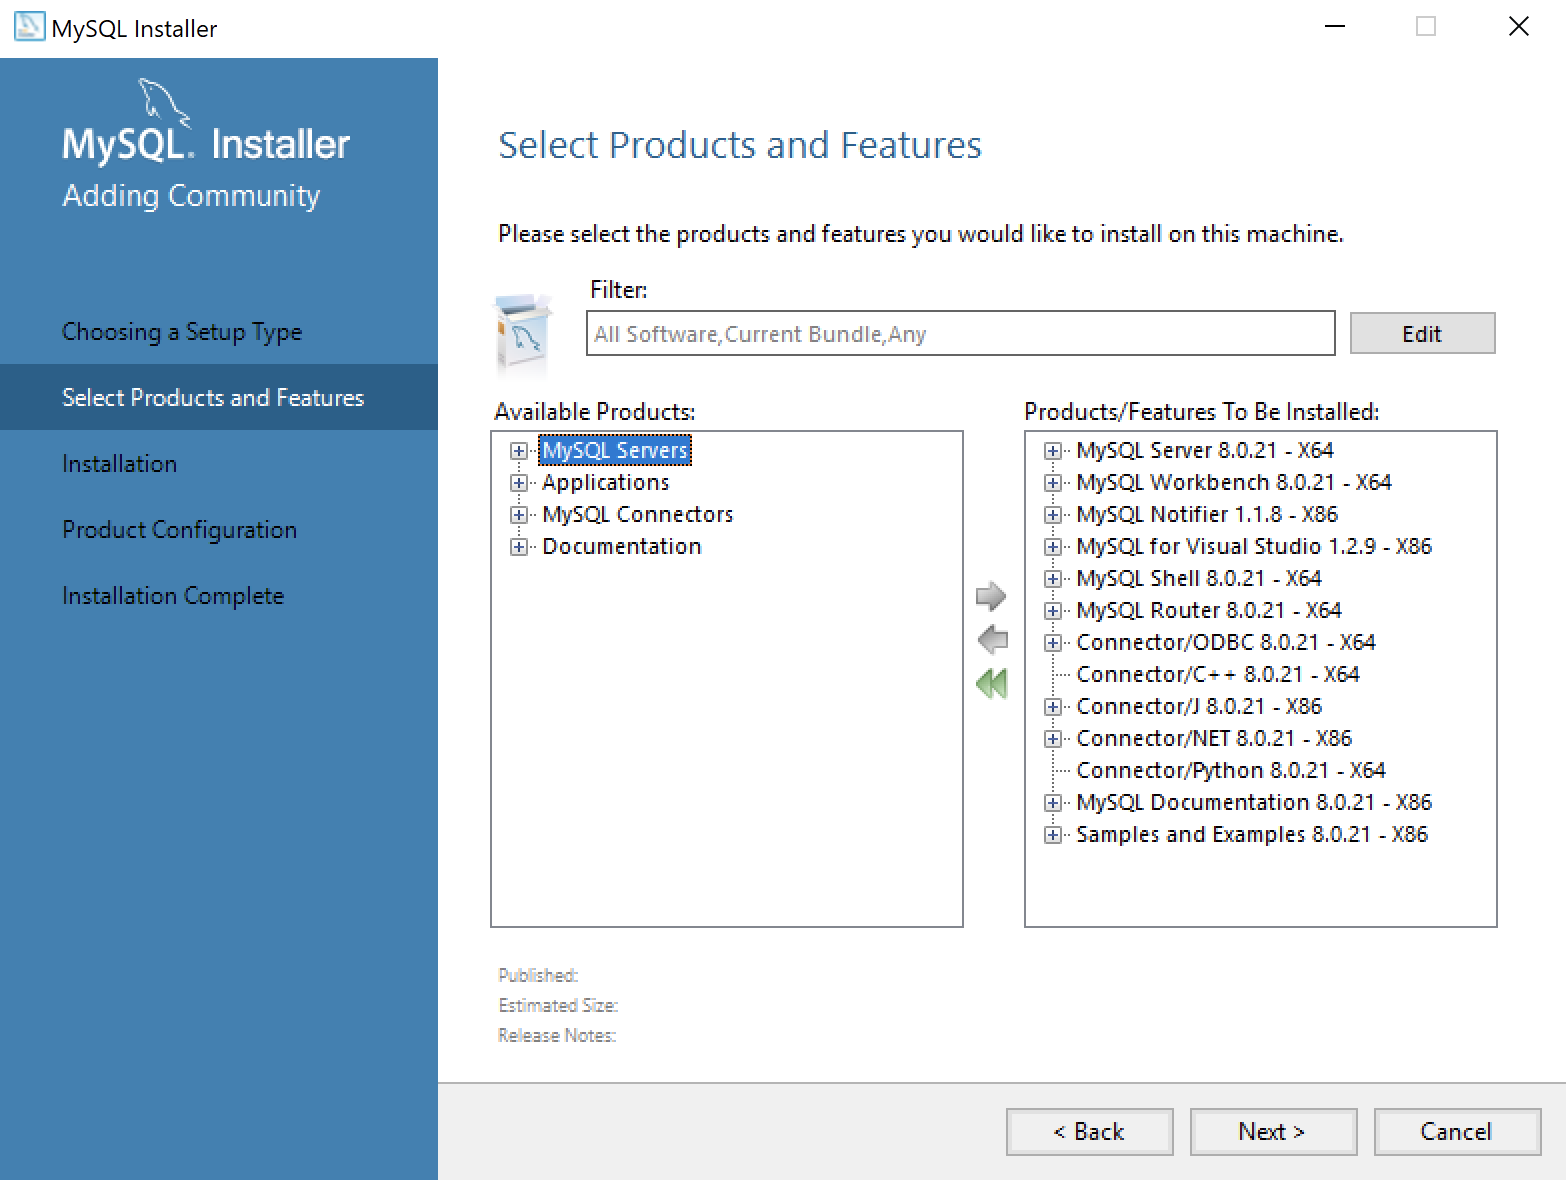
- Use the green arrow pointing to the left to remove MySQL for Excel 1.3.8 from the list. Click the Next button to continue the MySQL Installer to install the selected MySQL libraries.
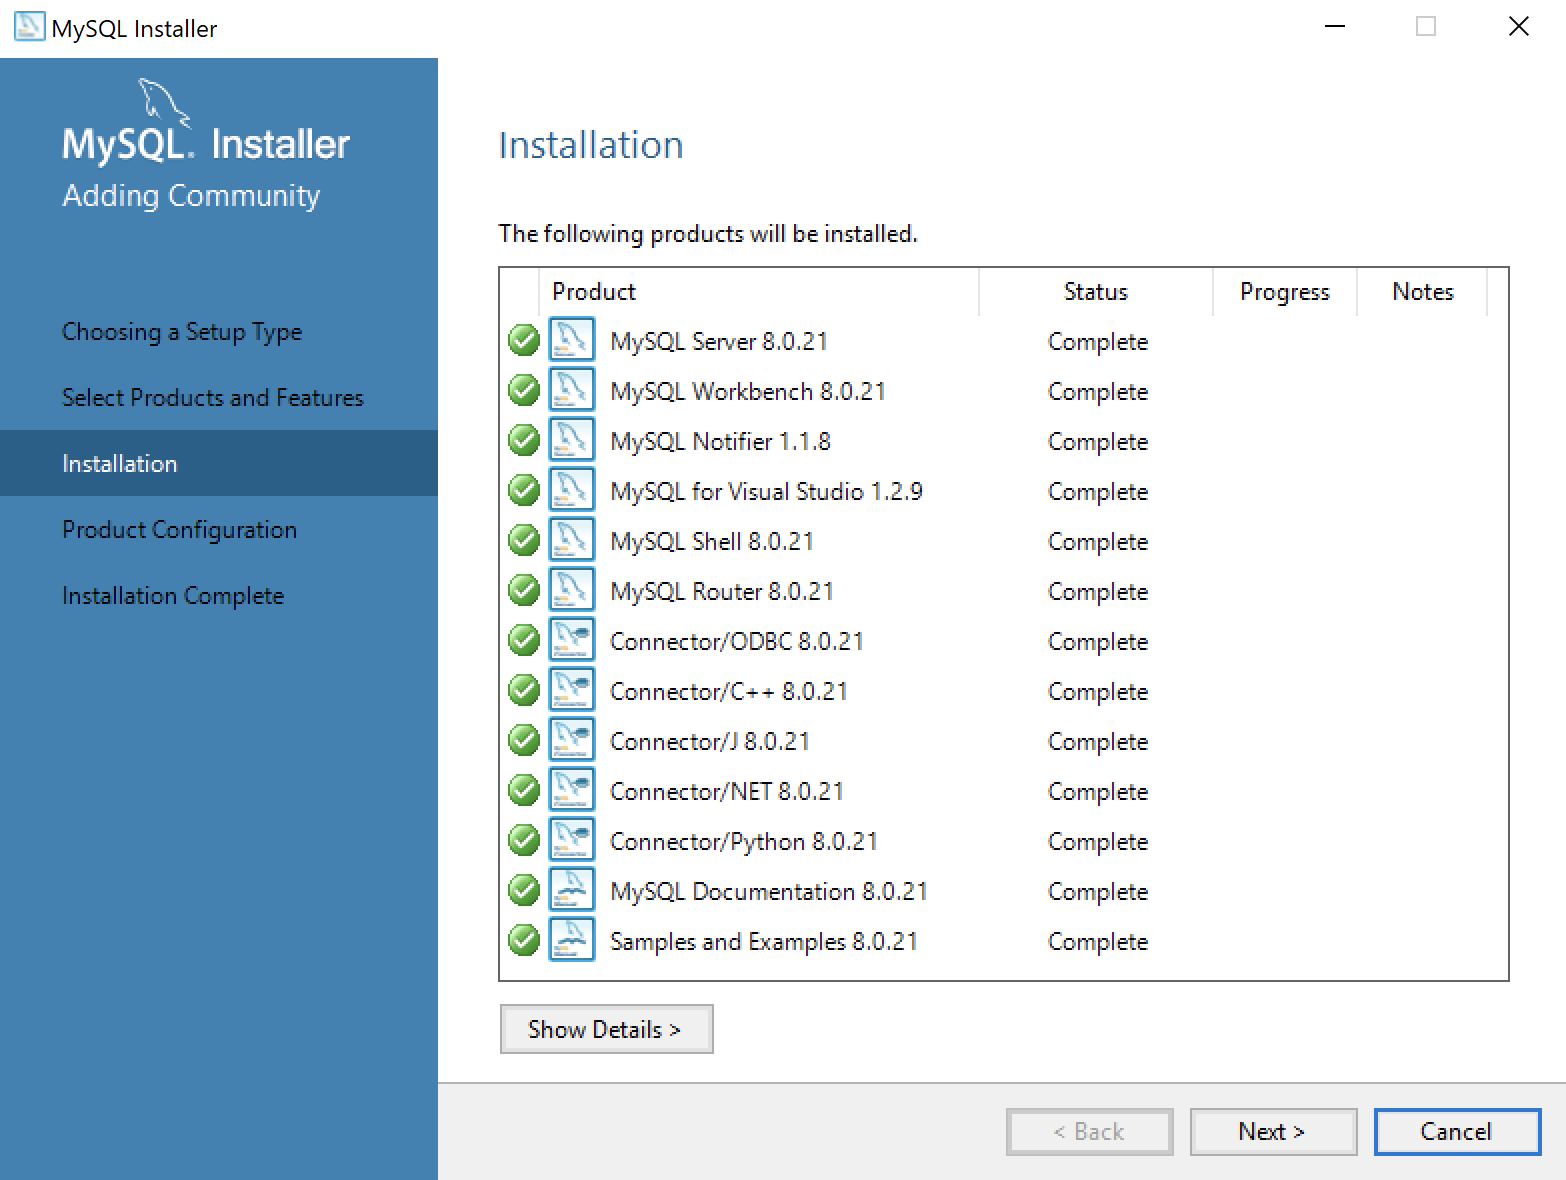
- This dialog will display for several minutes as each of the MySQL Installer modules is. Click the Next button to move forward in the MySQL Installer workflow.
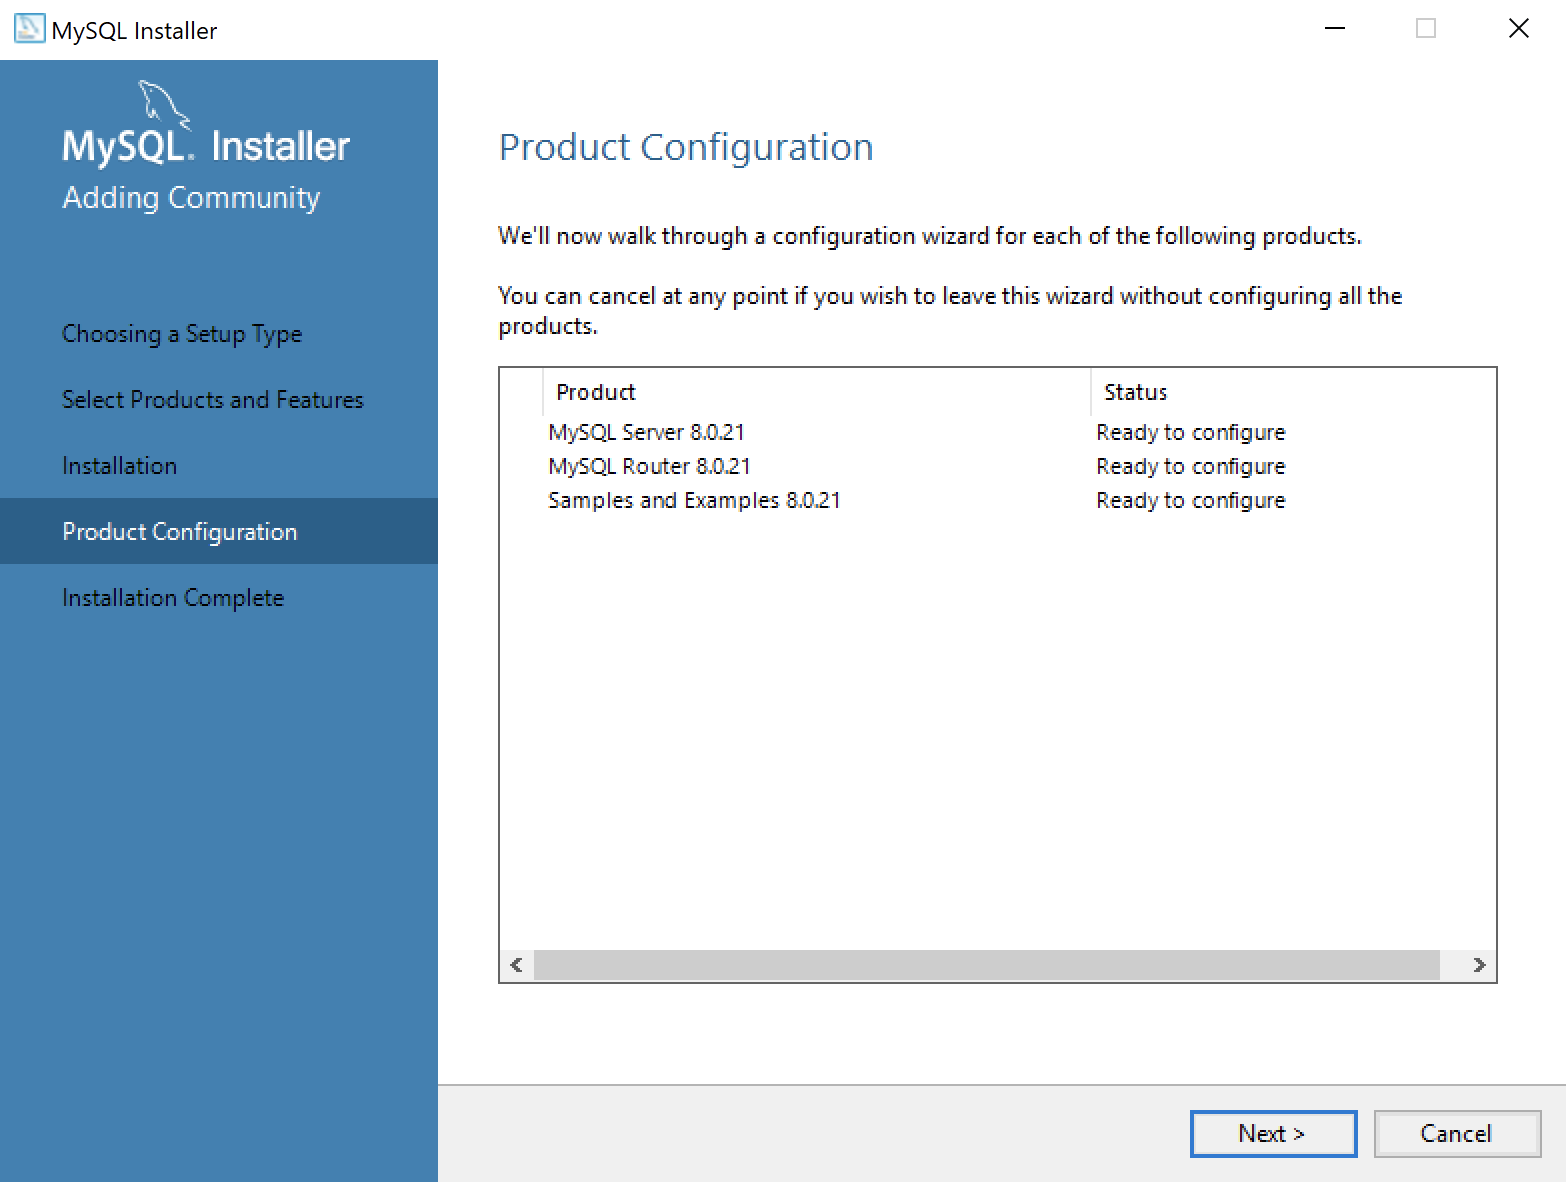
- This dialog qualifies that there are three products to configure. Click the Next button to begin configuration of these products.
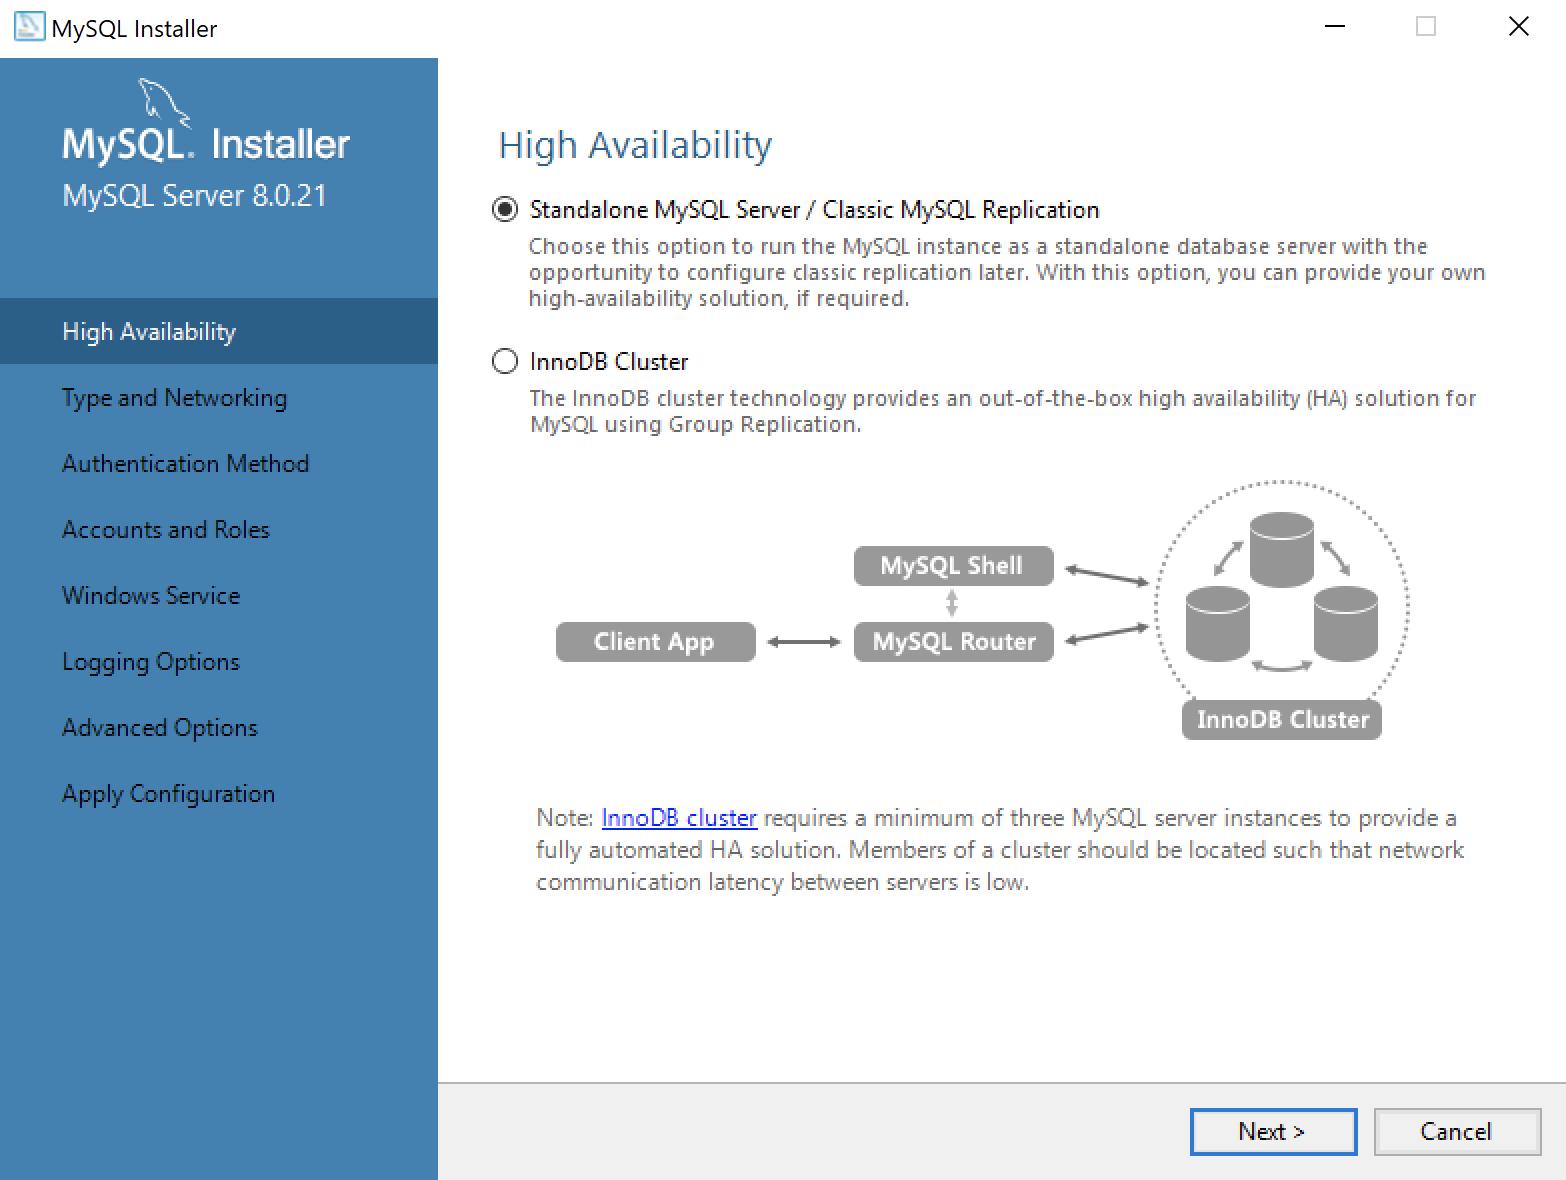
- This dialog lets you choose between a Standalone MySQL Server / Classic MySQL Replication and InnoDB Cluster. You should choose the Standalone MySQL Server for a developer installation on a laptop or desktop. Click the Next button to continue the MySQL Installer configuration.
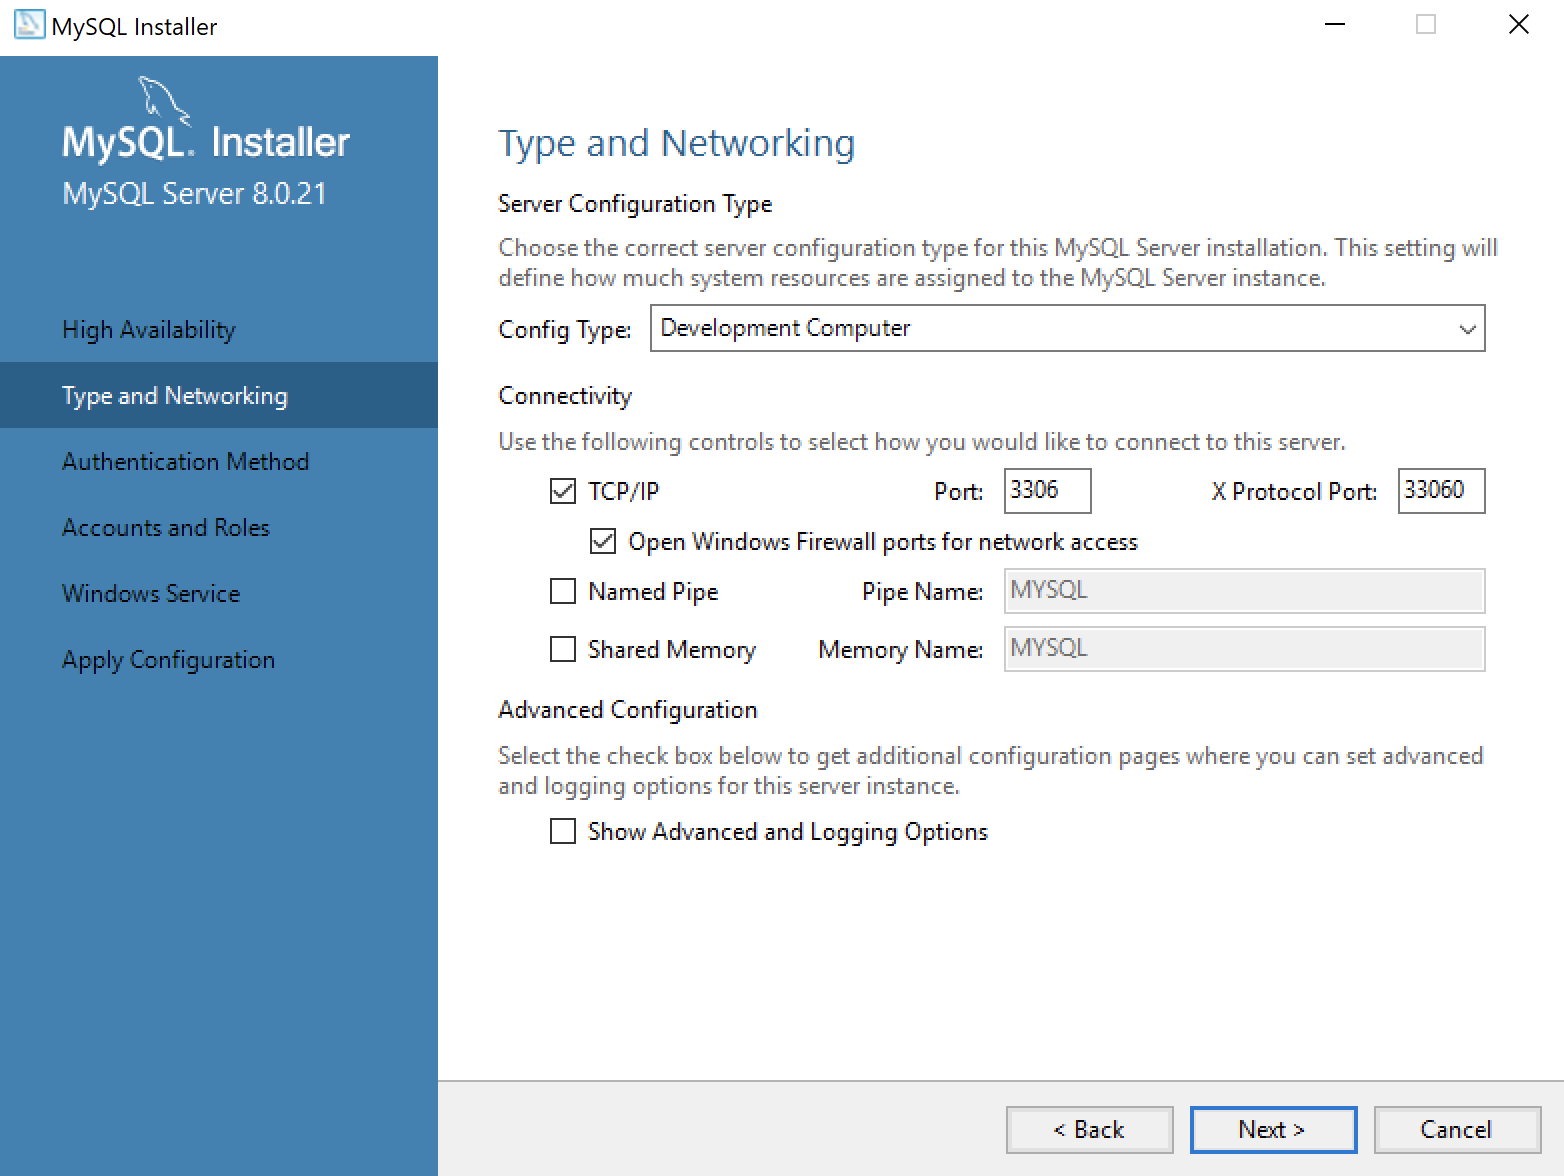
- This dialog lets you choose set the type and networking values. They should be preselected as they are in the screen image. Click the Next button to continue the MySQL Installer configuration.
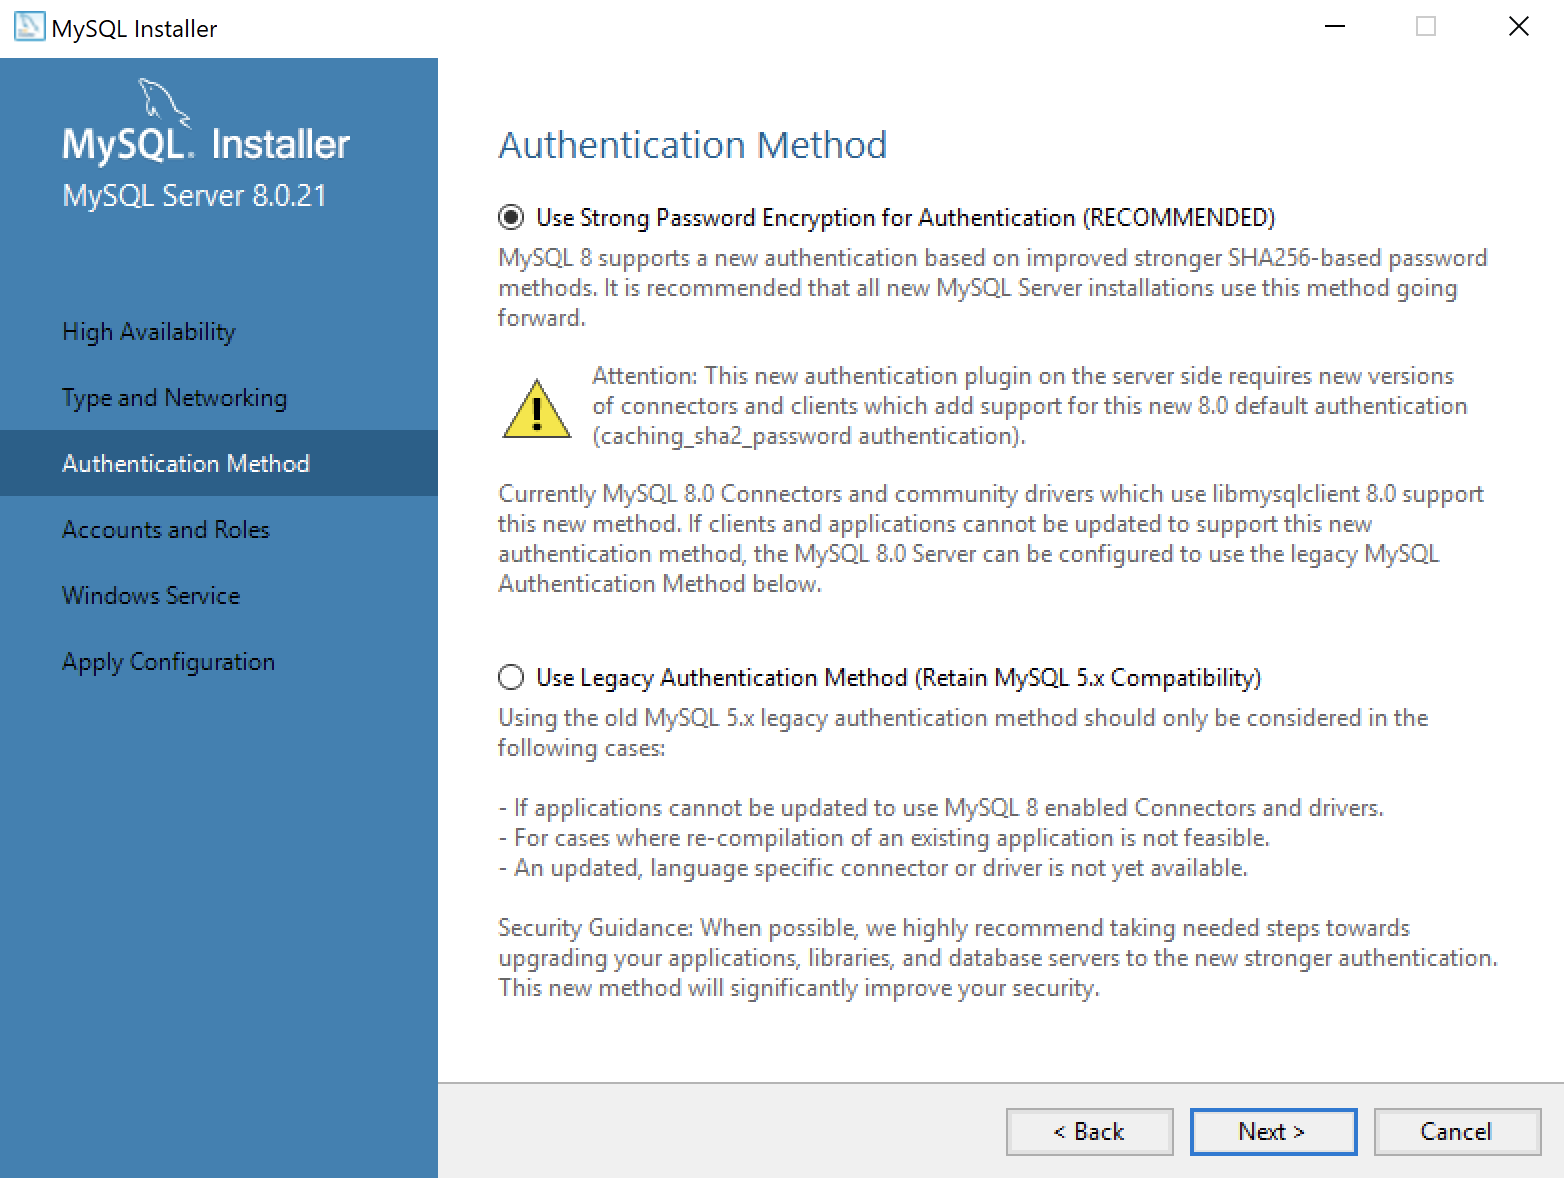
- This dialog lets you choose between SHA256-based and the older MD5 encryption. Click Use Strong Password Encryption for Authentication (RECOMMENDED) radio button. Click the Next button to continue the MySQL Installer configuration.
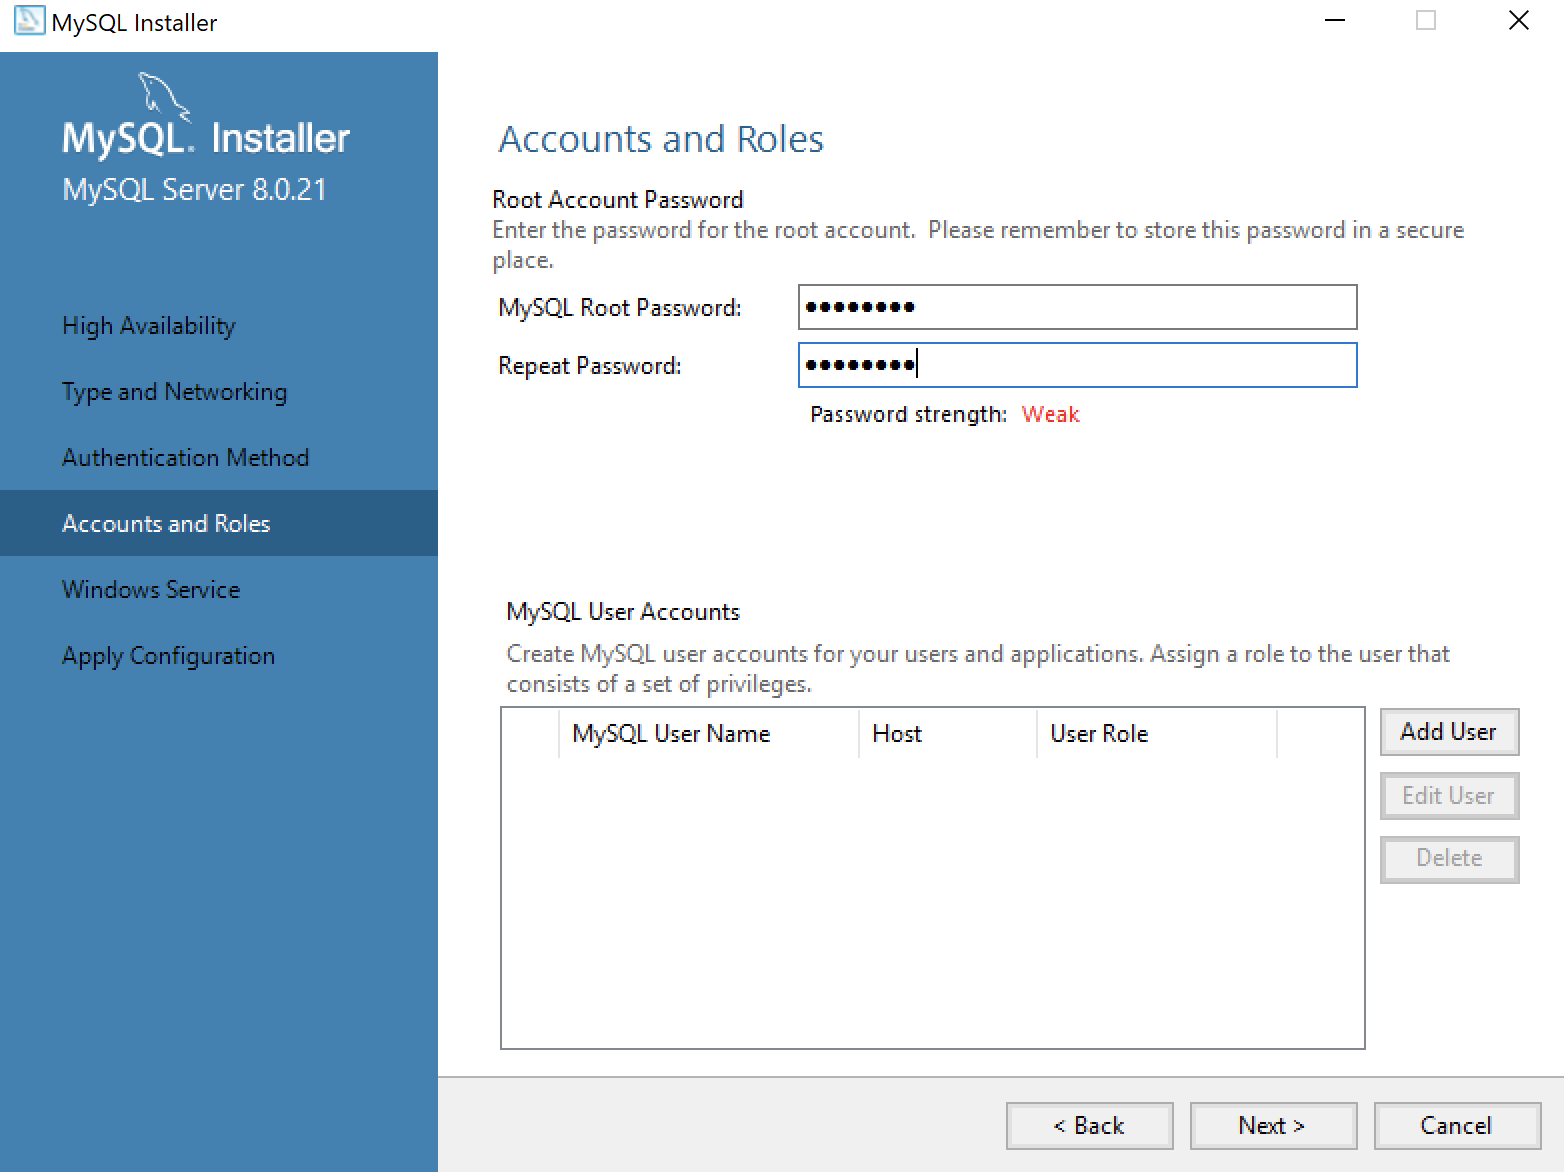
- This dialog lets you enter the MySQL Root Password. Click the Next button to continue the MySQL Installer configuration.
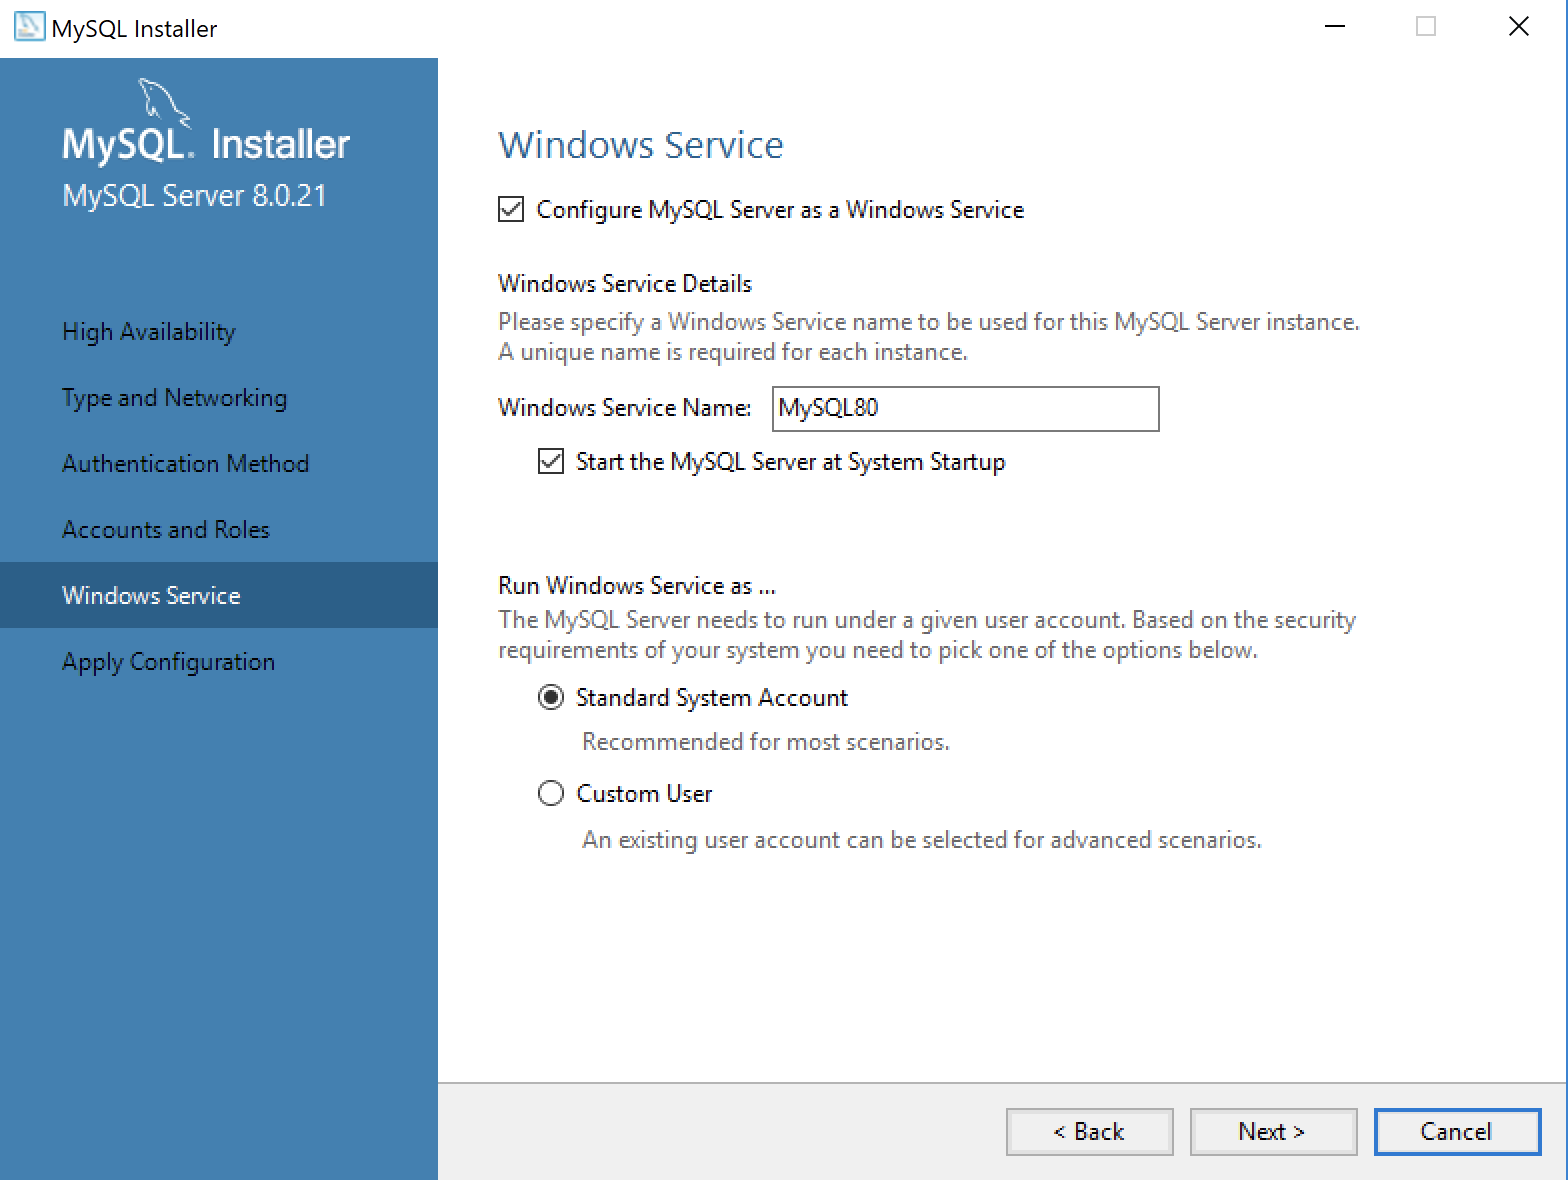
- This dialog lets you enter a Windows Service Name and install a Standard System Account or Custom User account. Click the Next button to continue the MySQL Installer configuration.
- This dialog lets you apply the configuration of the MySQL Server or Custom User product. Click the Next button to continue the MySQL Server configuration.
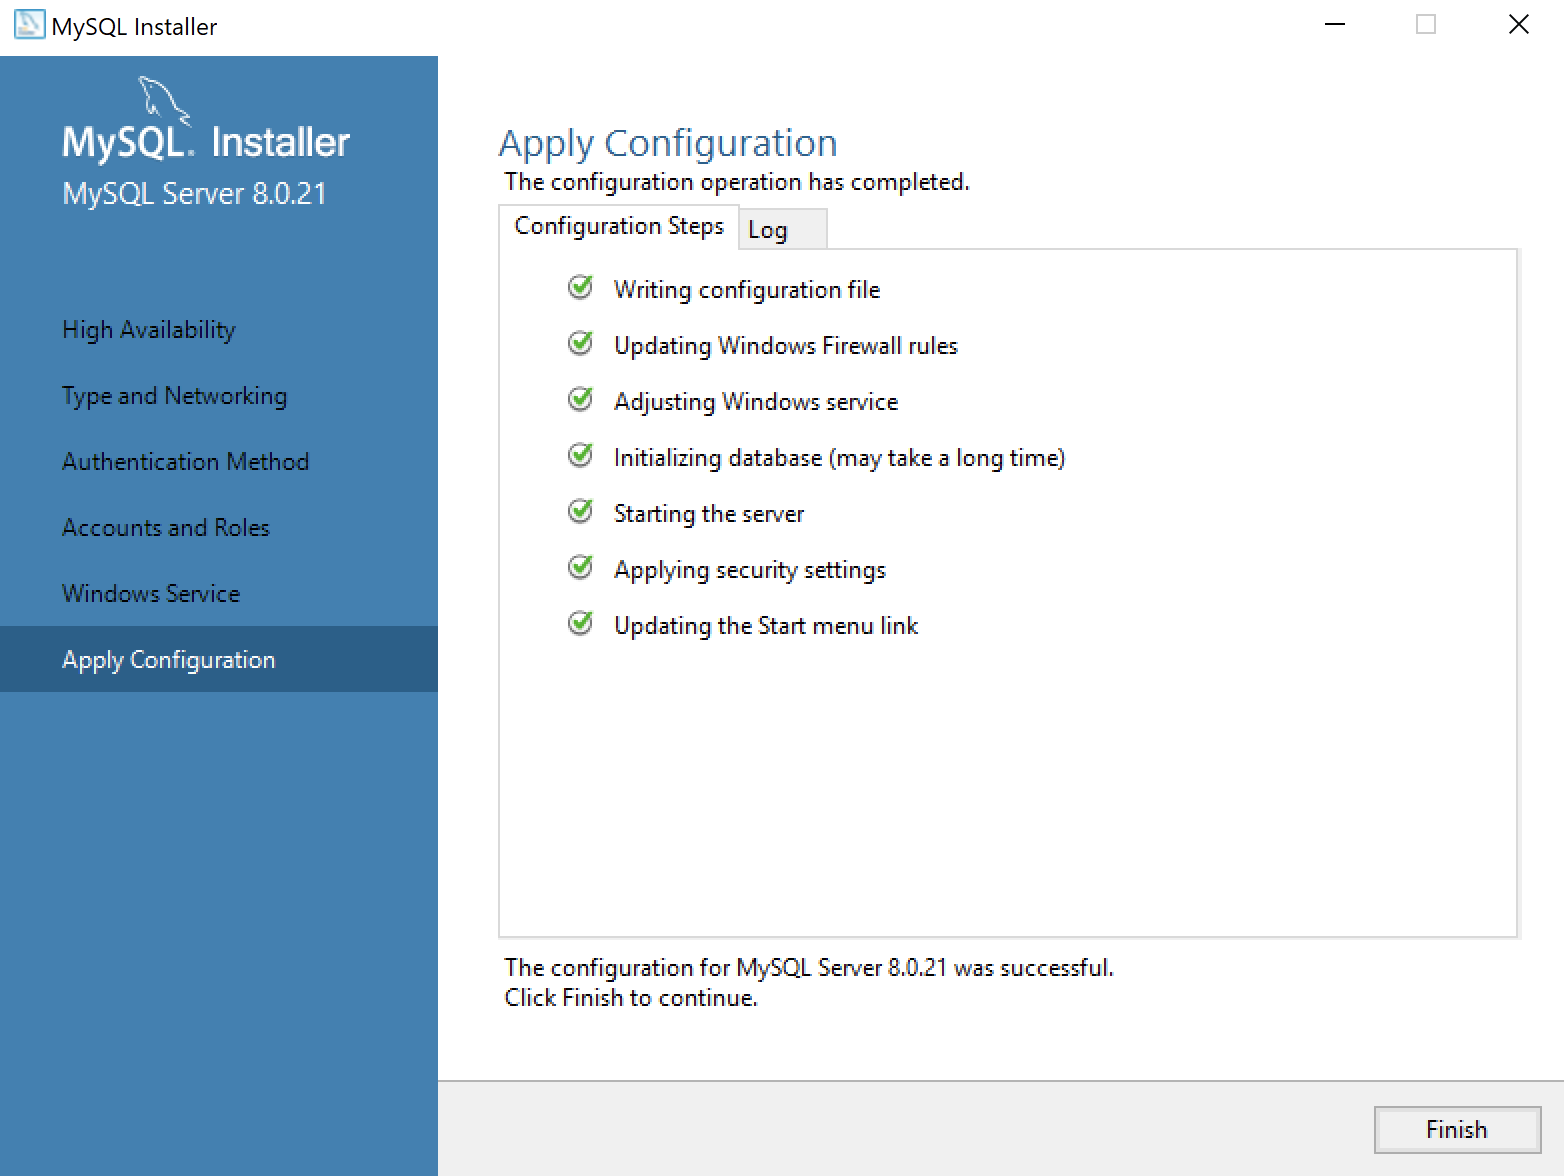
- This dialog lets you watch the progress of the MySQL Server or Custom User configuration. Click the Finish button to complete the MySQL Server configuration.
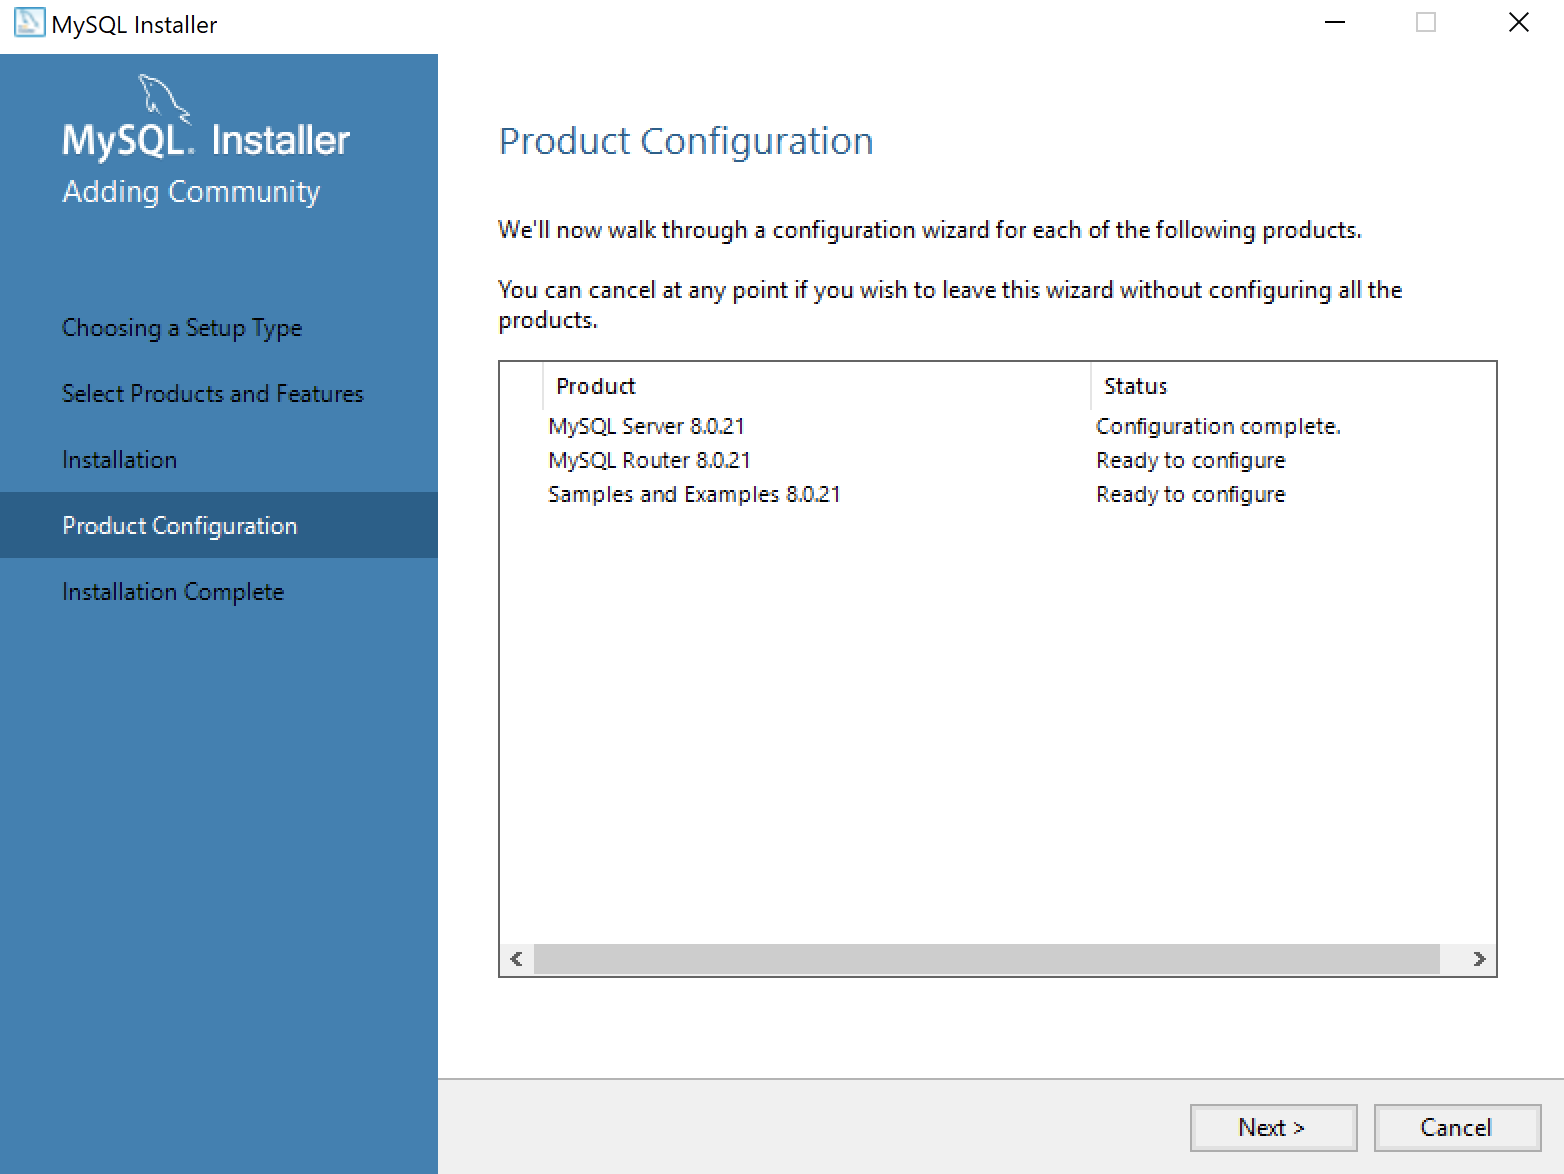
- This dialog lets you choose the next MySQL Router product for configuration. Click the Next button to begin the MySQL Router configuration.
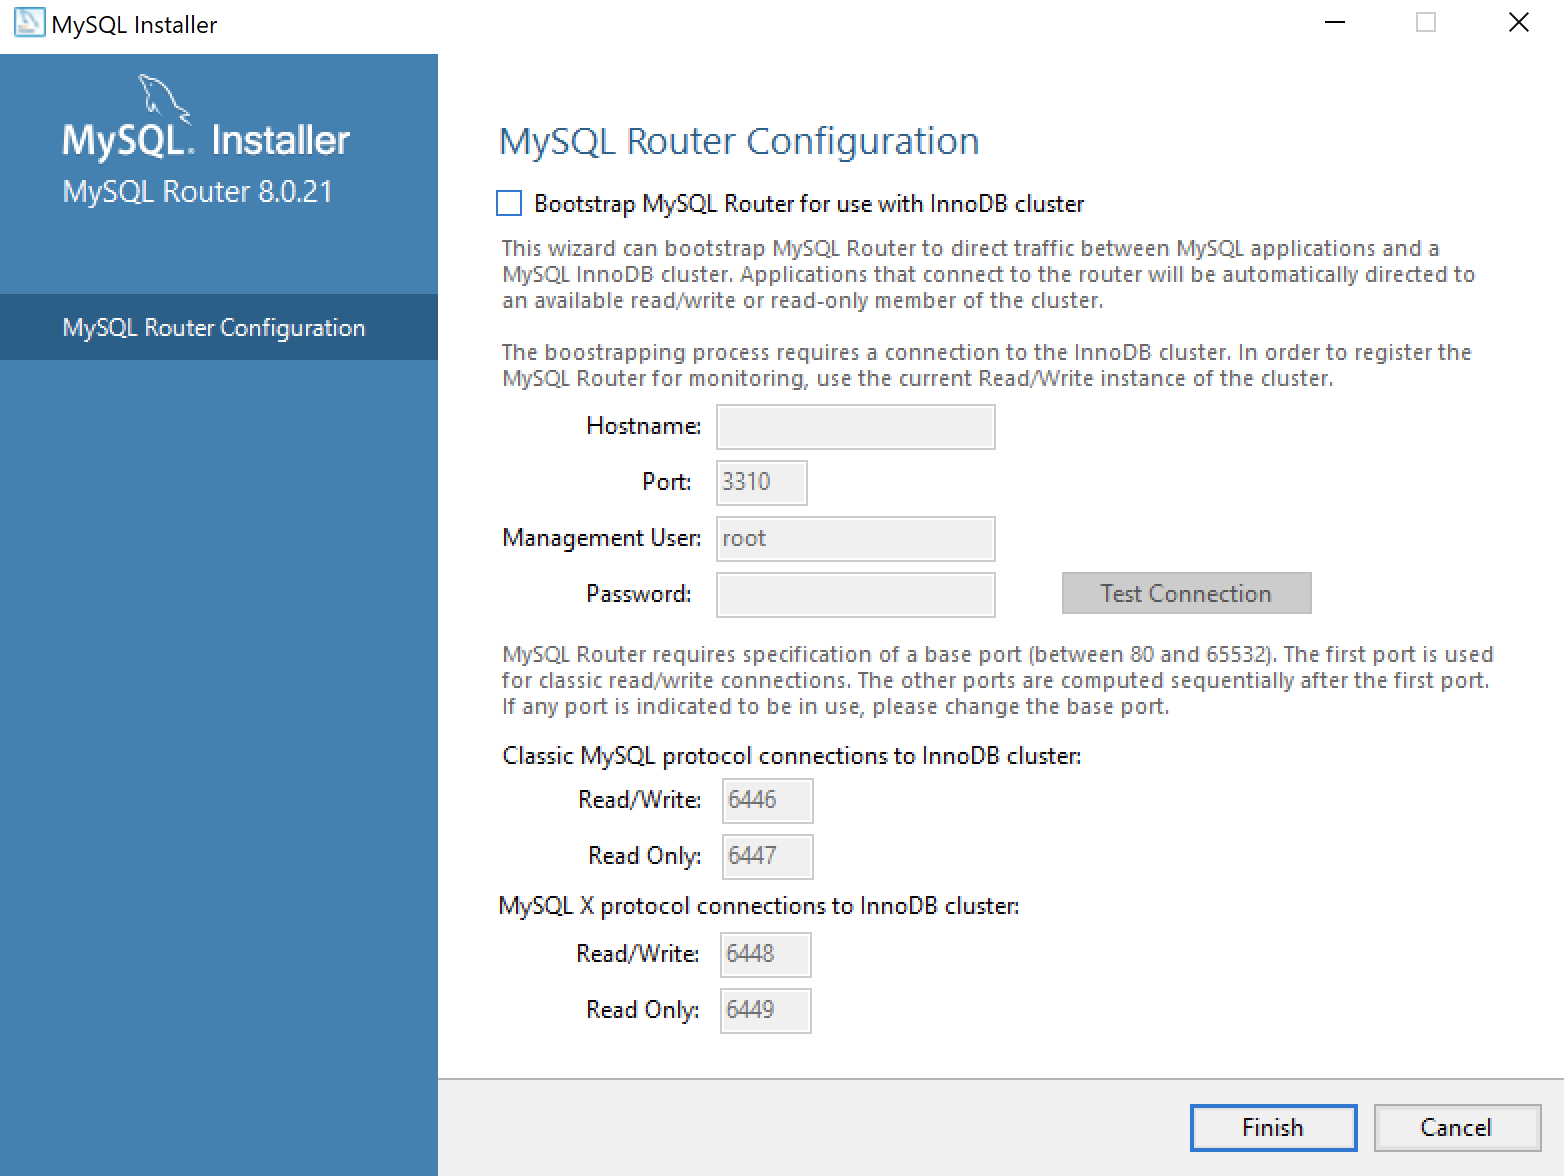
- This dialog allows you to configure the MySQL Router Configuration product. Leave the
HostnameandPasswordfields blank when you do not want to configure the MySQL Router Configuration product. Click the Finish button to complete the MySQL Router workflow.

- This dialog lets you choose the next Samples and Examples product for configuration. Click the Next button to begin the Samples and Examples configuration.

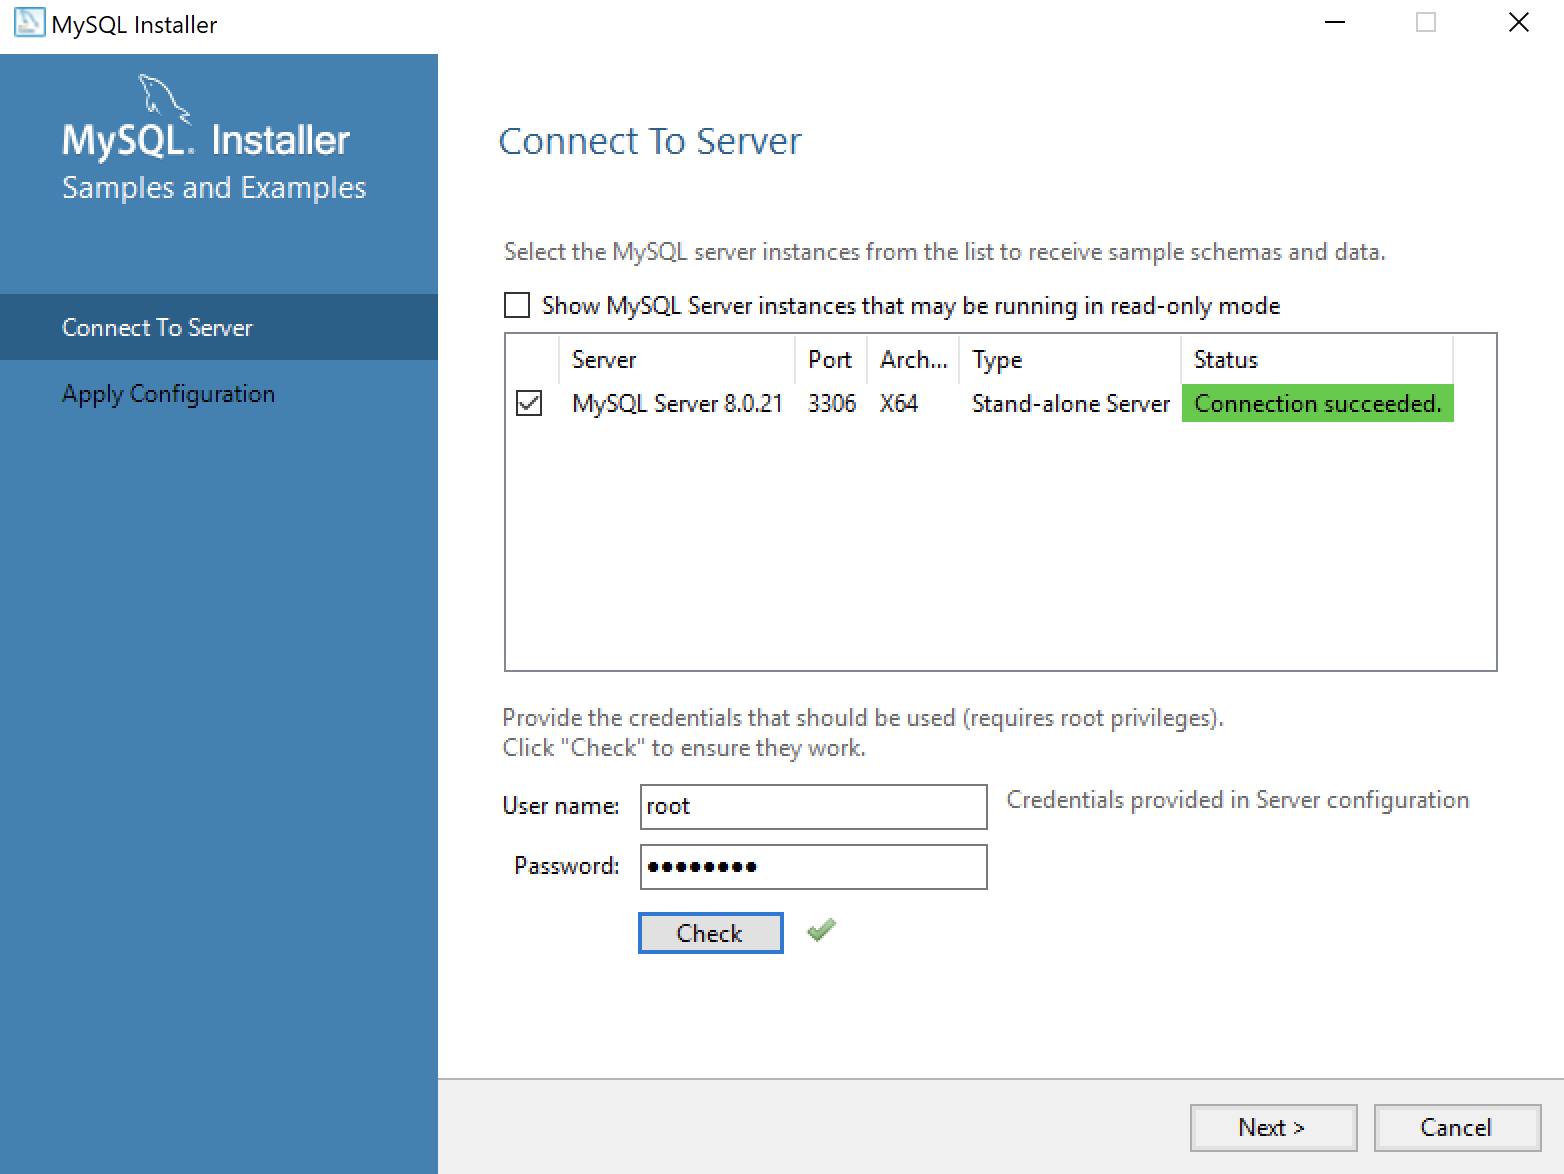
- This dialog lets you create a Windows 10 MySQL Service. You enter the
rootpassword that you entered in Step #12. After you enterrootpassword, click the Check button to verify therootpassword. The Check button enables the Next button when therootaccount’s password is validated. Click the now enabled Next button to create the MySQL Service.
- This dialog lets you create a Windows 10 MySQL Service. Click the now enabled Next button to create the MySQL Service.
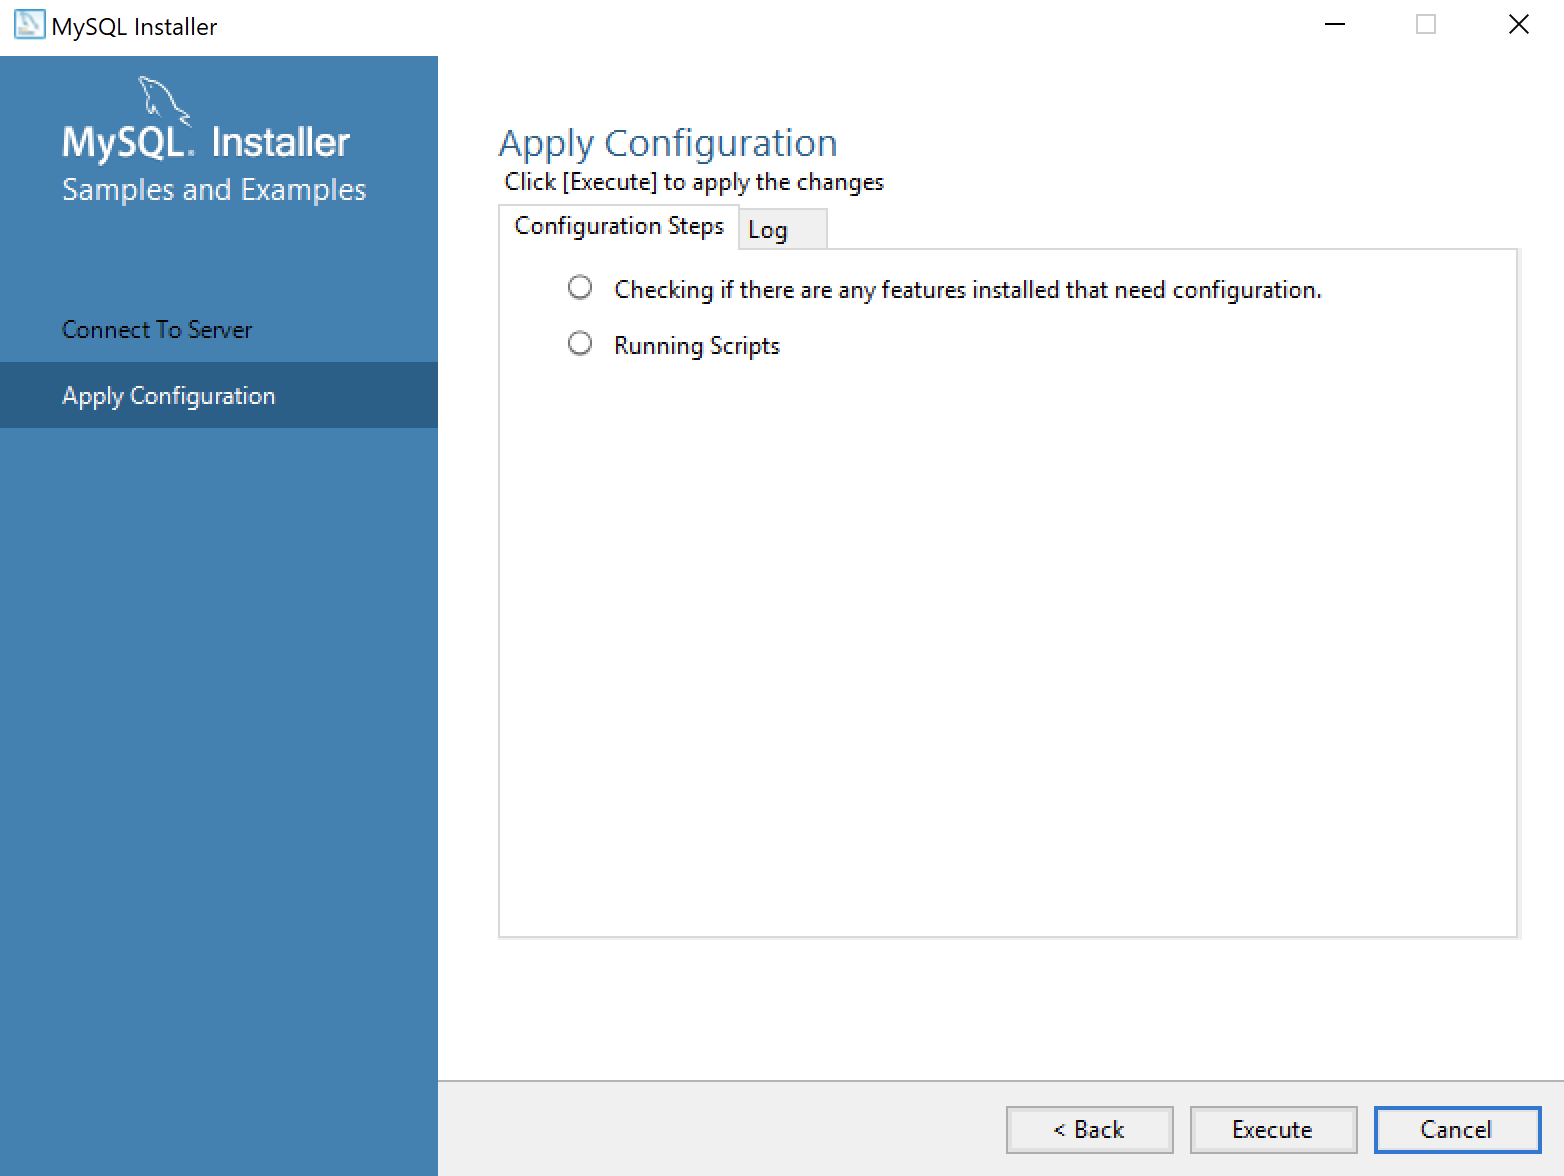
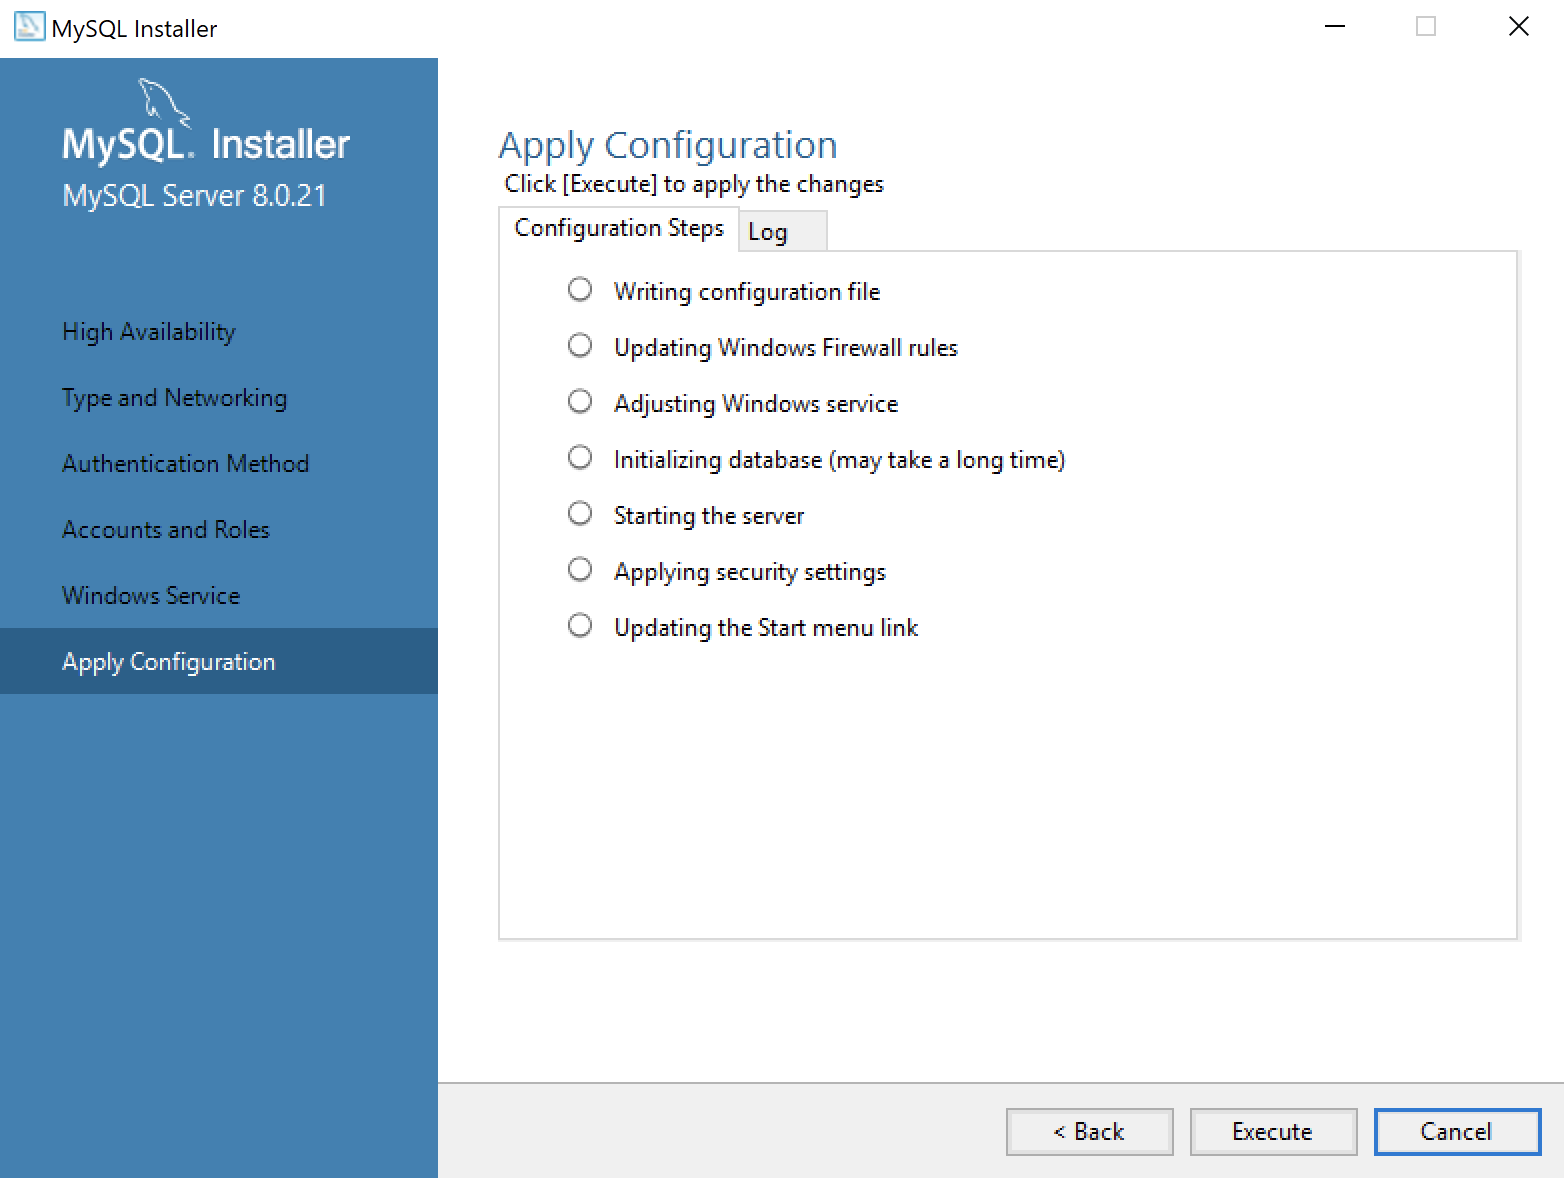
- This dialog applies all the configurations selected. Click the Execute button to proceed with the configuration.
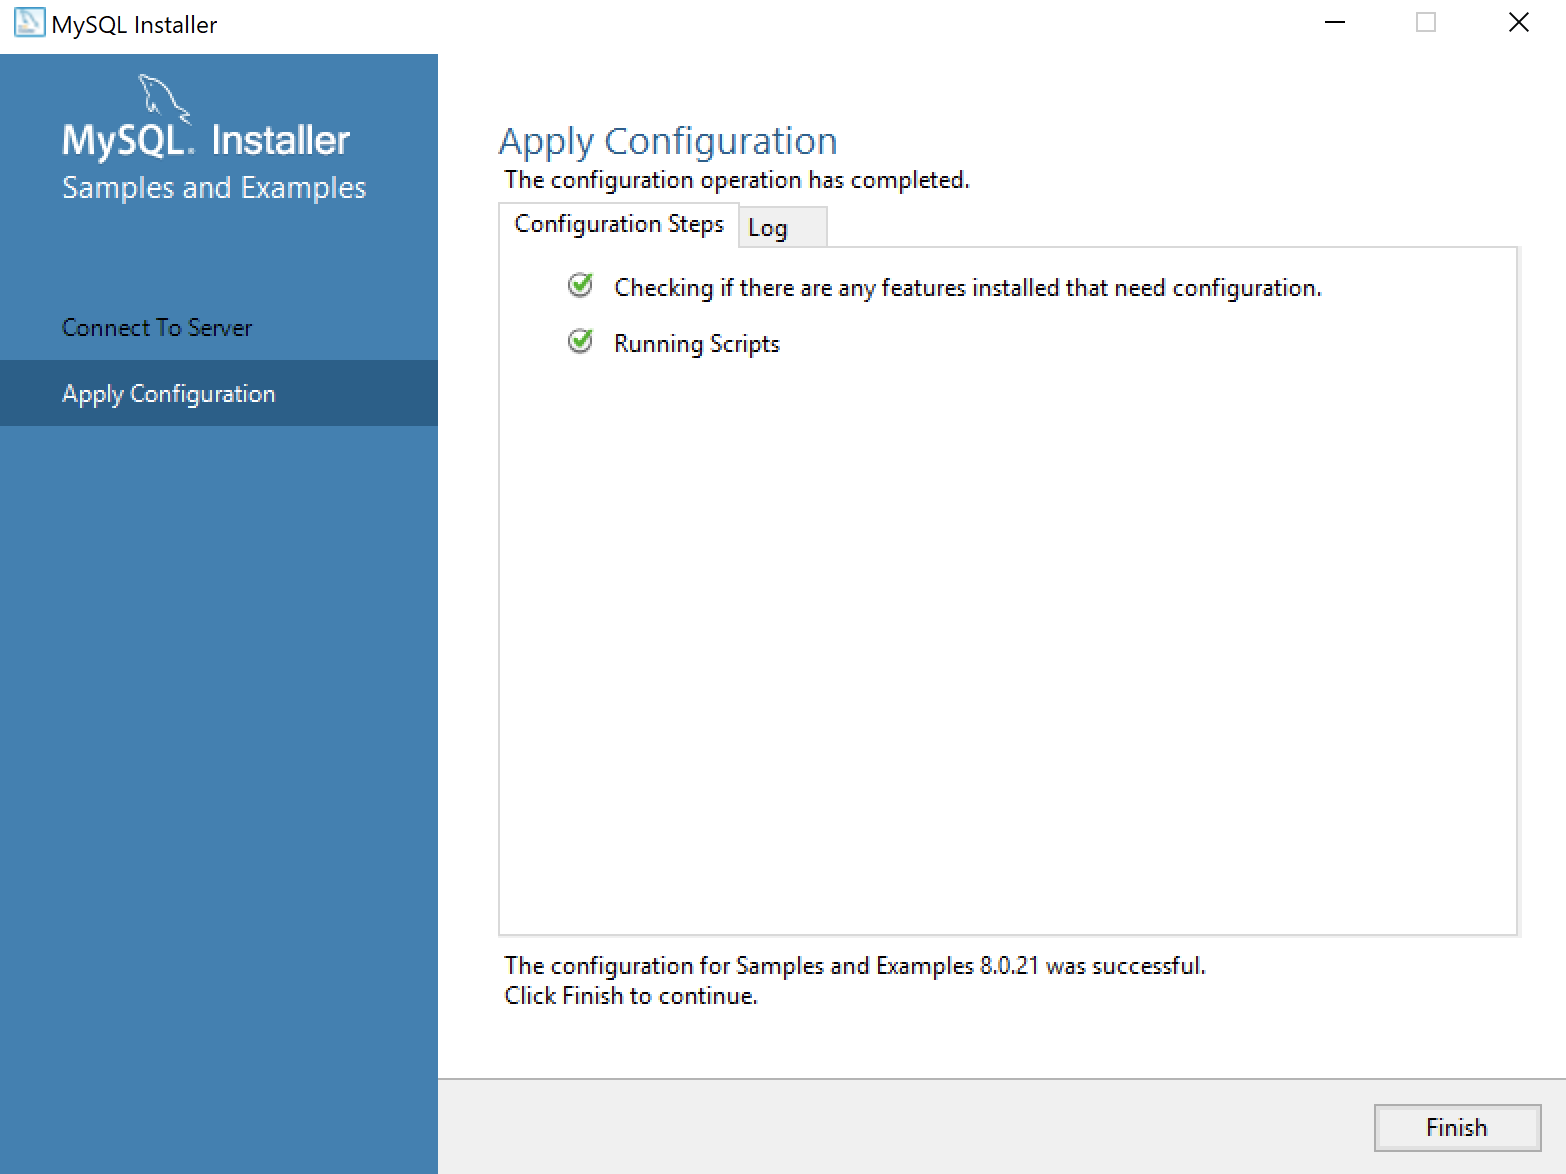
- This dialog lets you watch the progress of the configuration. Click the Finish button to complete the product configurations.

- This dialog the product configurations. You should note that the MySQL Router was not configured or needed. Click the Next button to complete the installation.
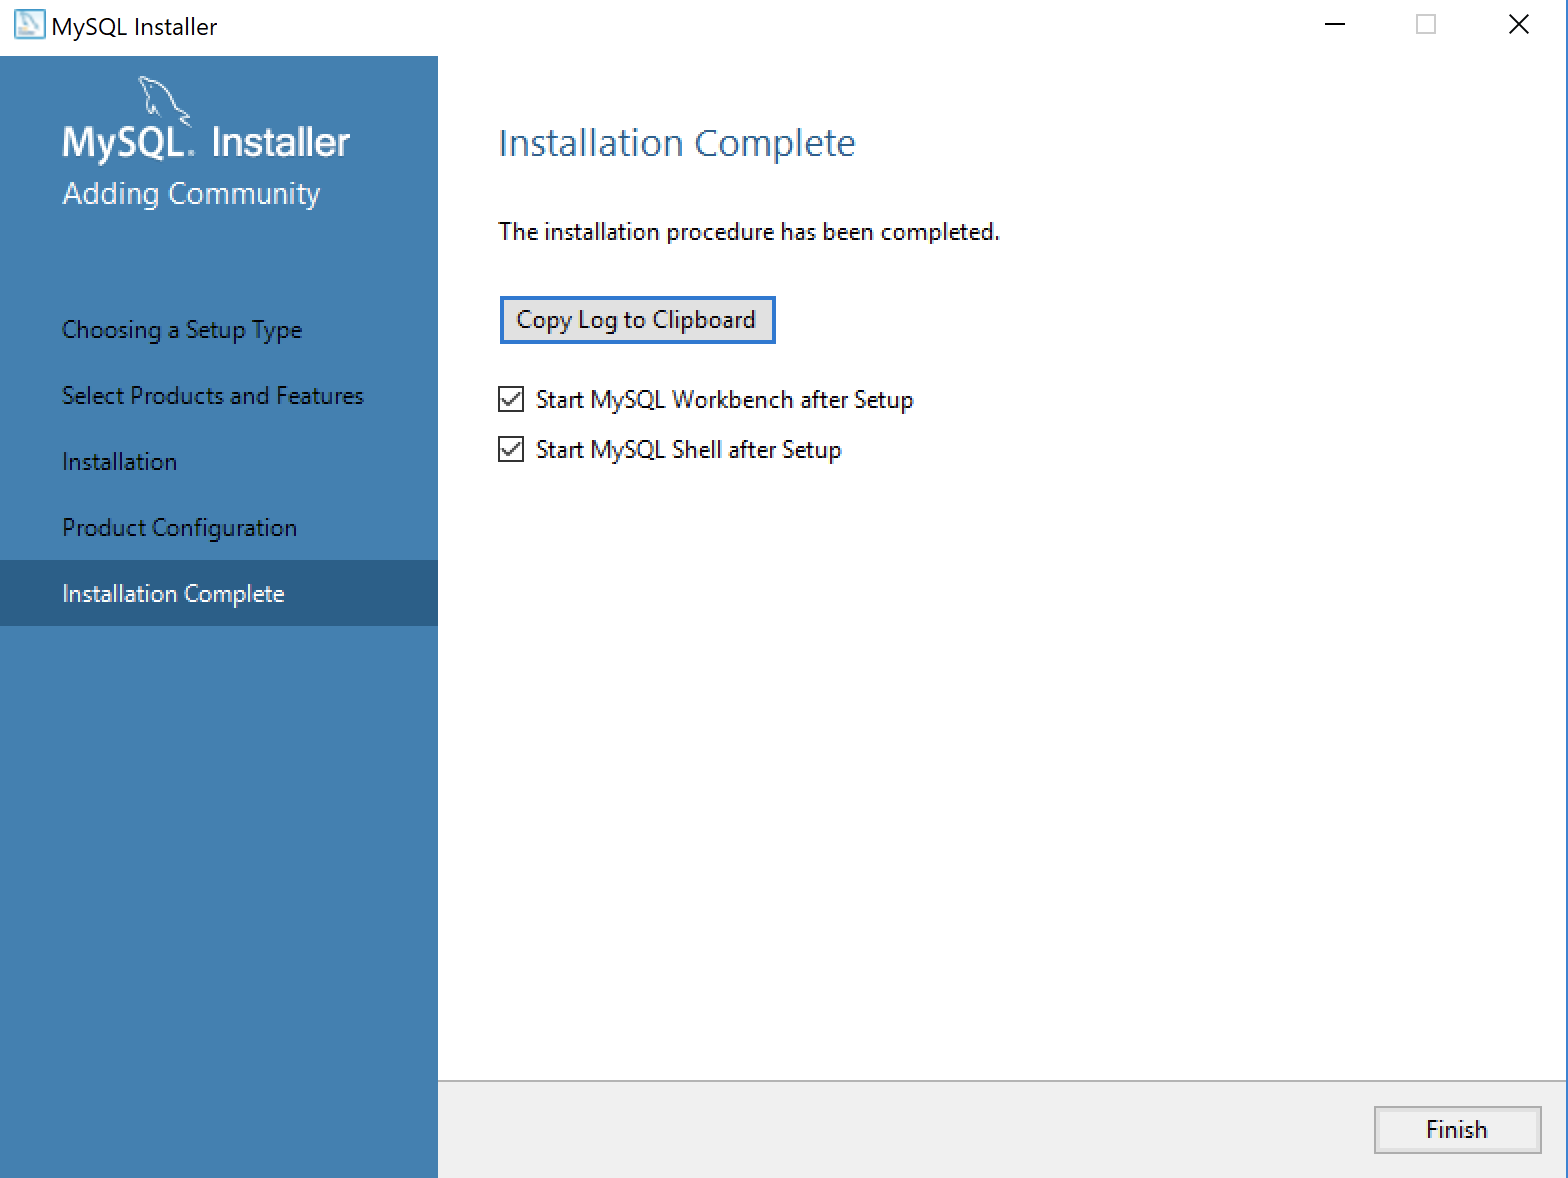
- This dialog completes the workflow and launches MySQL Workbench and Shell. Click the Finish button to complete the installation and configuration processes.
After you install MySQL, the following shows you how to provision a studentdb database. It also shows you how to enable the global file privilege and how to read data from an external comma-separated values (CSV) file.
Bash Arrays & MySQL
Student questions are always interesting! They get me to think and to write. The question this time is: “How do I write a Bash Shell script to process multiple MySQL script files?” This post builds the following model (courtesy of MySQL Workbench) by using a bash shell script and MySQL script files, but there’s a disclaimer on this post. It shows both insecure and secure approaches and you should avoid the insecure ones.

It seems a quick refresher on how to use arrays in bash shell may be helpful. While it’s essential in a Linux environment, it’s seems not everyone masters the bash shell.
Especially, since I checked my Learning the Bash Shell (2nd Edition) and found a typo on how you handle arrays in the bash shell, and it’s a mistake that could hang newbies up (on page 161). Perhaps I should update my copy because I bought it in 1998. 😉 It was good then, and the new edition is probably better. The error is probably corrected in the current Learning the Bash Shell, but if not, the following examples show you how to use arrays in loops.
Naturally, these do presume some knowledge of working with bash shell, like the first line always is the same in any bash shell script. That you open an if-statement with an if and close it with a fi, and that you else-if is elif; and that a semicolon between a for-statement and the do statement is required when they’re on the same line because they’re two statements.
If you’re new to bash shell arrays, click on the link below to expand a brief tutorial. It takes you through three progressive examples of working with bash arrays.
Working with bash Arrays ↓
A basic example of working with an array in bash shell is the following list1.sh script:
1 2 3 4 5 6 7 8 9 10 11 12 13 | #!/usr/bin/bash # Print script name. echo $0 #!/usr/bin/bash # Define an array. declare -a cmd=("one" "two" "three") # Call the array elements. for i in ${cmd[*]}; do echo ${i} done |
Line 8 declares the cmd array by assigning three strings. Line 12 returns the elements of the array to the ${i} variable, which lets you manage them one at a time. You use the chmod command to make the list1.sh executable, like this:
chmod 755 list1.sh |
Then, you can run it like this from the present working directory (pwd):
./list1.sh |
It should print:
one two three |
The list2.sh example changes the cmd array declaration from list1.sh. It declares the cmd array as an empty array, and then it assigns elements by index numbers (using a zero-based index), as shown below:
1 2 3 4 5 6 7 8 9 10 11 12 13 14 | #!/usr/bin/bash # Define an array. declare -a cmd # Assign elements to an array. cmd[0]="one" cmd[1]="two" cmd[2]="three" # Call the array elements. for i in ${cmd[*]}; do echo ${i} done |
Lines 7 through 9 assign values to the elements of the cmd array. You would chmod the file, and run the file as qualified above for the list1.sh script.
The last pre-implementation example requires that you create three demonstration scripts, the one.sh, two.sh, and three.sh scripts. You should put them in the same directory as the list3.sh script.
The demonstration scripts should all have the same code, like this:
1 2 3 4 | #!/usr/bin/bash # Print script name. echo $0 |
Line 4 returns command line parameter $0 or ${0}, which is always the command line program’s file name. The file name may be provided as a relative or absolute file name, and if that’s new to you please check out The Linux Command Line: A Complete Introduction (also downloadable as a PDF for free).
The list3.sh script should contain the following:
1 2 3 4 5 6 7 8 9 10 11 12 13 14 | #!/usr/bin/bash <code> # Define an array. declare -a cmd # Assign elements to an array. cmd[0]="one.sh" cmd[1]="two.sh" cmd[2]="three.sh" # Call the array elements. for i in ${cmd[*]}; do `pwd`/${i} done |
When you run the list3.sh script from the /home/student/Code/bash directory with a local syntax, the script should return the fully qualified file names of the subshell programs. The output should look like this:
/home/student/Code/bash/one.sh /home/student/Code/bash/two.sh /home/student/Code/bash/three.sh |
The list3.sh script provides the present working directory (pwd) and the one.sh, two.sh, and three.sh scripts return only their executable name. For example, if you ran one.sh with the following syntax:
./one.sh |
It returns
./one.sh |
Only one more trick needs to be qualified before our main MySQL examples. That trick is how you pass parameters to a bash shell script. For reference, this is the part that’s insecure because user command histories are available inside the Linux OS.
Here’s a hello_whom.sh script to demonstrates the concept of parameter passing:
1 2 3 4 5 6 7 8 9 10 | #!/usr/bin/bash # This says hello to the argument while managing no argument. if [[ ${#} = 1 ]]; then echo 'The '${0}' program says: "Hello '${1}'!"' elif [[ ${#} > 1 ]]; then echo 'The '${0}' program wants to know if you have more than one name?' else echo 'The '${0}' program wants to know if you have a name?' fi |
If you need more on how parameters are passed and managed, you can check a prior blob post on Handling bash Parameters, or check the bash help pages. The following leverages bash arrays to run scripts and query the MySQL database from the command line.
You will need the three batch SQL files first, so here they are:
Setup SQL Files ↓
The actor.sql file:
1 2 3 4 5 6 7 8 9 10 11 12 13 14 15 16 17 18 | -- Use the sampledb database. USE sampledb; -- Disable foreign key checking. SET foreign_key_checks = 0; -- Drop an actor table. DROP TABLE IF EXISTS actor; -- Create an actor table. CREATE TABLE actor ( actor_id INT UNSIGNED PRIMARY KEY AUTO_INCREMENT , actor_name VARCHAR(30) NOT NULL ); -- Insert two rows. INSERT INTO actor (actor_name) VALUES ('Chris Hemsworth'); INSERT INTO actor (actor_name) VALUES ('Chris Pine'); INSERT INTO actor (actor_name) VALUES ('Chris Pratt'); |
The film.sql file:
1 2 3 4 5 6 7 8 9 10 11 12 13 14 15 16 17 18 19 20 | -- Use the sampledb database. USE sampledb; -- Disable foreign key checking. SET foreign_key_checks = 0; -- Drop a film table. DROP TABLE IF EXISTS film; -- Create a film table. CREATE TABLE film ( film_id INT UNSIGNED PRIMARY KEY AUTO_INCREMENT , film_name VARCHAR(30) NOT NULL ); -- Insert rows. INSERT INTO film (film_name) VALUES ('Thor'); INSERT INTO film (film_name) VALUES ('Thor: The Dark World'); INSERT INTO film (film_name) VALUES ('Star Trek'); INSERT INTO film (film_name) VALUES ('Star Trek into Darkness'); INSERT INTO film (film_name) VALUES ('Guardians of the Galaxy'); |
The movie.sql file:
1 2 3 4 5 6 7 8 9 10 11 12 13 14 15 16 17 18 19 20 21 22 23 24 25 26 27 28 29 30 31 32 33 34 35 36 37 38 39 40 41 42 43 44 45 46 47 48 49 50 51 52 53 54 55 56 57 58 59 60 61 62 63 64 65 66 67 68 69 70 71 72 73 74 75 76 77 78 | -- Use the sampledb database. USE sampledb; -- Disable foreign key checking. SET foreign_key_checks = 0; -- Drop an movie table. DROP TABLE IF EXISTS movie; -- Create an movie table. CREATE TABLE movie ( movie_id int unsigned PRIMARY KEY AUTO_INCREMENT , actor_id int unsigned NOT NULL , film_id int unsigned NOT NULL , CONSTRAINT actor_fk FOREIGN KEY (actor_id) REFERENCES actor (actor_id) , CONSTRAINT film_fk FOREIGN KEY (film_id) REFERENCES film(film_id)); -- Use scalar subqueries to discover surrogate keys by using the faux natural key. INSERT INTO movie ( actor_id , film_id ) VALUES ((SELECT actor_id FROM actor WHERE actor_name = 'Chris Hemsworth') ,(SELECT film_id FROM film WHERE film_name = 'Thor')); -- Use scalar subqueries to discover surrogate keys by using the faux natural key. INSERT INTO movie ( actor_id , film_id ) VALUES ((SELECT actor_id FROM actor WHERE actor_name = 'Chris Hemsworth') ,(SELECT film_id FROM film WHERE film_name = 'Thor: The Dark World')); -- Use scalar subqueries to discover surrogate keys by using the faux natural key. INSERT INTO movie ( actor_id , film_id ) VALUES ((SELECT actor_id FROM actor WHERE actor_name = 'Chris Pine') ,(SELECT film_id FROM film WHERE film_name = 'Star Trek')); -- Use scalar subqueries to discover surrogate keys by using the faux natural key. INSERT INTO movie ( actor_id , film_id ) VALUES ((SELECT actor_id FROM actor WHERE actor_name = 'Chris Pine') ,(SELECT film_id FROM film WHERE film_name = 'Star Trek into Darkness')); -- Use scalar subqueries to discover surrogate keys by using the faux natural key. INSERT INTO movie ( actor_id , film_id ) VALUES ((SELECT actor_id FROM actor WHERE actor_name = 'Chris Pratt') ,(SELECT film_id FROM film WHERE film_name = 'Guardians of the Galaxy')); |
The following list_mysql.sh shell script expects to receive the username, password, database and fully qualified path in that specific order. The script names are entered manually because this should be a unit test script. Naturally, you can extend the script to manage those parameters but as mentioned I see this type of solution as a developer machine only script to simplify unit testing. Anything beyond that is risky!
1 2 3 4 5 6 7 8 9 10 11 12 13 14 15 16 17 18 19 20 21 22 23 24 25 26 27 28 29 30 31 32 33 34 35 36 37 38 39 40 41 42 43 44 45 46 47 48 49 50 51 52 53 54 | #!/usr/bin/bash # Assign user and password username="${1}" password="${2}" database="${3}" directory="${4}" # List the parameter values passed. echo "Username: " ${username} echo "Password: " ${password} echo "Database: " ${database} echo "Directory: " ${directory} echo "" # Define an array. declare -a cmd # Assign elements to an array. cmd[0]="actor.sql" cmd[1]="film.sql" cmd[2]="movie.sql" # Call the array elements. for i in ${cmd[*]}; do mysql -s -u${username} -p${password} -D${database} < ${directory}/${i} > /dev/null 2>/dev/null done # Connect and pipe the query result minus errors and warnings to the while loop. mysql -u${username} -p${password} -D${database} <<<'show tables' 2>/dev/null | # Read through the piped result until it's empty but format the title. while IFS='\n' read list; do if [[ ${list} = "Tables_in_sampledb" ]]; then echo $list echo "----------------------------------------" else echo $list fi done echo "" # Connect and pipe the query result minus errors and warnings to the while loop. mysql -u${username} -p${password} -D${database} <<<'SELECT CONCAT(a.actor_name," in ",f.film_name) AS "Actors in Films" FROM actor a INNER JOIN movie m ON a.actor_id = m.actor_id INNER JOIN film f ON m.film_id = f.film_id' 2>/dev/null | # Read through the piped result until it's empty but format the title. while IFS='\n' read actor_name; do if [[ ${actor_name} = "Actors in Films" ]]; then echo $actor_name echo "----------------------------------------" else echo $actor_name fi done |
The IFS (Internal Field Separator) works with whitespace by default. The IFS on lines 33 and 47 sets the IFS to a line return ('\n'). That’s the trick to display the data, and you can read more about the IFS in this question and answer post.
You can run this script with the following input parameters from the local directory where you deploy it. The a parameters are: (1) username, (2) password, (3) database, and (4) a fully qualified path to the SQL setup files.
./list_mysql.sh student student sampledb "/home/student/Code/bash/mysql" |
With valid input values, the list_mysql.sh bash script generates the following output, which confirms inputs and verifies actions taken by the scripts with queries:
Username: student Password: student Database: sampledb Directory: /home/student/Code/bash/mysql Tables_in_sampledb ---------------------------------------- actor film movie Actors in Films ---------------------------------------- Chris Hemsworth in Thor Chris Hemsworth in Thor: The Dark World Chris Pine in Star Trek Chris Pine in Star Trek into Darkness Chris Pine in Guardians of the Galaxy |
If you forgot to provide the required inputs to the list_mysql.sh bash script, it alternatively returns the following output:
Username: Password: Database: Directory: ./list_mysql.sh: line 25: /actor.sql: No such file or directory ./list_mysql.sh: line 25: /film.sql: No such file or directory ./list_mysql.sh: line 25: /movie.sql: No such file or directory |
The secure way removes the password at a minimum! The refactored program will require you to manually enter the password for all elements of the array (three in this sample), and twice for the two queries. Here’s the refactored code:
1 2 3 4 5 6 7 8 9 10 11 12 13 14 15 16 17 18 19 20 21 22 23 24 25 26 27 28 29 30 31 32 33 34 35 36 37 38 39 40 41 42 43 44 45 46 47 48 49 50 51 52 | #!/usr/bin/bash # Assign user and password username="${1}" database="${2}" directory="${3}" # List the parameter values passed. echo "Username: " ${username} echo "Database: " ${database} echo "Directory: " ${directory} echo "" # Define an array. declare -a cmd # Assign elements to an array. cmd[0]="actor.sql" cmd[1]="film.sql" cmd[2]="movie.sql" # Call the array elements. for i in ${cmd[*]}; do mysql -s -u${username} -p -D${database} < ${directory}/${i} > /dev/null 2>/dev/null done # Connect and pipe the query result minus errors and warnings to the while loop. mysql -u${username} -p -D${database} <<<'show tables' 2>/dev/null | # Read through the piped result until it's empty. while IFS='\n' read list; do if [[ ${list} = "Tables_in_sampledb" ]]; then echo $list echo "----------------------------------------" else echo $list fi done echo "" # Connect and pipe the query result minus errors and warnings to the while loop. mysql -u${username} -p -D${database} <<<'SELECT CONCAT(a.actor_name," in ",f.film_name) AS "Actors in Films" FROM actor a INNER JOIN movie m ON a.actor_id = m.actor_id INNER JOIN film f ON m.film_id = f.film_id' 2>/dev/null | # Read through the piped result until it's empty. while IFS='\n' read actor_name; do if [[ ${actor_name} = "Actors in Films" ]]; then echo $actor_name echo "----------------------------------------" else echo $actor_name fi done |
Please let me know if you think there should be any more scaffolding for newbies in this post. As always, I hope this helps those looking for this type of solution.
MySQL bind-address
While I try to keep things simple, sometimes eliminating options and explanations comes back to haunt me. After posting how to open a Fedora firewall port for a LAMP stack, somebody got trapped by my instructions for installing MySQL on Fedora. They got stuck because they had the following setting in their /etc/my.cnf file:
bind-address=localhost.localdomain |
I’d suggested using that bind-address value for a DHCP VMware Fedora installation in Step #7. I was trying to create an example for an isolated testing instance, which is why I set the bind-address to a localhost.localdomain value. They raised the following error when they tried to connect their base operating system’s version of MySQL Workstation to the Fedora VM:
Failed to Connect to MySQL at 192.168.2.168:3306 with user student |
or, this dialog image:

Before you do the next step, please ensure you’re using the right IP address. You can find that by running this command as an authorized sudoer:
ifconfig | grep inet.*netmask.*broadcast |
In this case, the command returns:
inet 192.168.2.168 netmask 255.255.255.0 broadcast 192.168.2.255 |
I’ve since added instructions to the older post to set the bind-address value in the my.cnf file as follows when they want to support external connections (naturally that means authorizing port 3306):
bind-address=0.0.0.0 |
After you reset the /etc/my.cnf file, you must stop and start, or restart the mysqld service. You can do that as the root user like this:
systemctl restart mysqld |
Then, you can test a student user connection from MySQL Workbench like this:

If the student user is authorized and the password is correct, you’ll see that the connection now works:

As always, I hope this helps those working through similar issues.
Using MySQL Workbench
I’ve been setting up a simplified lab environment to let my students learn use in class. This added content will show them how to do reverse engineering with MySQL Workbench.
It’s a complete Fedora image with MySQL and Oracle Database 11g for the course. The uncompressed image is 14GB and the compressed image is 5.3GB. I chose Fedora because it’s the smallest open source image that supports both environments, and Fedora is the closest to Red Hat and Oracle Unbreakable Linux. I’m inclined to make the instance available generally but haven’t figured out the best way to do that.
Here are the new instructions I’m adding and if you have any input leave it as a comment. 😉
You connect as the student user, which puts you in the /home/student directory. Once connected to the Fedora OS, you open a Terminal session by clicking on Activities in the upper right hand corner, and then you type terminal in the search box. When you’re in the Terminal session, use the following command to verify that the apply_mysql_lab1.sql file is correct:
cat Data/cit225/mysql/lab1/apply_mysql_lab1.sql |
It should display the following commands:
\. /home/student/Data/cit225/mysql/lib/cleanup.sql \. /home/student/Data/cit225/mysql/lib/create_mysql_store_ri.sql \. /home/student/Data/cit225/mysql/lib/seed_mysql_store_ri.sql |
You can run the apply_mysql_lab1.sql to create the tables in the studentdb database, and seed them with data. Assuming you’re in the same /home/student directory, you connect to the studentdb database with the following syntax:
mysql -ustudent -pstudent studentdb |
or, more securely:
mysql -ustudent studentdb -p |
Having connected to the studentdb database, you can run the following command:
\. /home/student/Data/cit225/mysql/lab1/apply_mysql_lab1.sql |
It creates a Video store image and seeds it with some basic data. You can use the show command to see the tables you’ve created, like:
show tables; |
It displays:
+---------------------+ | Tables_in_studentdb | +---------------------+ | address | | common_lookup | | contact | | contacts | | current_rental | | item | | member | | rental | | rental_item | | street_address | | system_user | | telephone | +---------------------+ 12 rows in set (0.00 sec) |
After successfully creating and seeding the studentdb database, you can run MySQL Workbench by launching it from the search field (recommended). Alternatively, you can open it from a terminal session with the following command. Unfortunately, a command-line launch links the terminal and the MySQL Workbench processes and closing the terminal will close the MySQL Workbench.
mysql-workbench |
Here are the instructions for the lab with MySQL Workbench:

- The first displayed page of MySQL Workbench is the home page (click on it or any of the others to see the full size image). Click the ⊕ symbol to the right of the MySQL Workbench title.

- After clicking the the ⊕ symbol, it launches the Startup New Connection dialog. Enter a name for your new connection. I recommend you enter MySQLConnection.

- Click the Test Connection button to see if it works.

- When you click the Test Connection button, MySQL Workbench prompts you for a password. After entering a password and verifying the connection, click the OK button to test the connection.
![]()
- Click the OK button to continue.

- Click the gray highlighted MySQLConnection connection icon below the MySQL Connection title to launch the MySQL Workbench application.
- When you click the gray highlighted MySQLConnection connection icon, MySQL Workbench prompts you for a password. After entering a password and verifying the connection, click the OK button to connect to the MySQL Workbench application.

- The MySQL Workbench launches in the default view.

- Click on the Database menu option and then the Reverse Engineering… option, as shown in the illustration.

- This displays the Set Parameters for Connecting to a DBMS dialog. Click the Stored Connection list of values. Choose the MySQLConnection (if you used my suggestion) or the one you created from the list of values of the Stored Connection element. Click the Next button to continue.
- Enter the password and click the OK button to connect to the MySQL database.

- This is an in-progress display, it runs waiting for the password and until the step of the wizard completes.

- This dialog displays when the MySQL Workbench application connects to the database, retrieves a schema (database) list from the database management system, and checks the common server configuration issues. Click the Next button to move to the next step of the wizard.

- This Select Schemas to Reverse Engineer dialog displays any available schemas. You check the schemas that you want. Click the Next button to move to the next step of the wizard.
- Enter the password and click the OK button to connect to the MySQL database to retrieve objects from the database management system.

- This dialog displays when the MySQL Workbench application retrieves objects from the database. Click the Next button to move to the next step of the wizard.

- This dialog displays when the MySQL Workbench application retrieves objects from the schemata and checks the result. Click the Next button to move to the next step of the wizard.

- This dialog displays the tables, views, and routines to import. Click the Execute button to move to the next step of the wizard.
- This dialog displays the tables, views, and routines to import. Click the Execute button to move to the next step of the wizard.

- This dialog displays shows the reverse engineering objects and puts them in the object image. Click the Next button to move to the next step of the wizard.

- This dialog displays a summary of reverse engineering objects. Click the Close button to move to the next step of the wizard.

- The MySQL Model dialog displays after you complete the reverse engineering process. Click the EER Diagram icon or EER Diagram tab to see visual depiction of the database objects.

- The EER Diagram is equivalent to the EER Diagram tab. The Navigator displays the tables as blue rectangles. You can scroll through the Canvas Panel to work with the display of tables and views.

- The next image shows EER Diagram with the tables moved for display purposes. Sometimes there are too many relationship lines, MySQL Workbench lets you split the lines so they don’t clutter the diagram.

- The next image shows you the Property tab of EER Diagram. You should see that the drawSplit checkbox is checked, which suppresses the bottom-most relationship line from displaying in the EER from display on the Canvas Panel.
You can now save the MySQL Workbench file in the Lab 3 directory.
MySQL Workbench on Fedora
The early release of Fedora 20 disallowed installation of MySQL Workbench but the current version allows it. Almost like Tom Cruise’s Edge of Tomorrow without the drama. All you need to do is follow my earlier instructions for installing MySQL on Fedora 20. I’d check your kernel to know whether it’s supported. You can check that with this command:
<shell> uname -r |
My Fedora is at the following version:
3.14.8-200.fc20.x86_64 |
Then, you can install MySQL Workbench with yum, like this:
<shell> sudo yum install mysql-workbench |
It generates the following log file, and if you have Oracle 11g XE installed you can ignore the mime-type error:
Loaded plugins: langpacks, refresh-packagekit
Resolving Dependencies
--> Running transaction check
---> Package mysql-workbench-community.x86_64 0:6.1.7-1.fc20 will be installed
--> Processing Dependency: libzip.so.2()(64bit) for package: mysql-workbench-community-6.1.7-1.fc20.x86_64
--> Processing Dependency: libvsqlitepp.so.3()(64bit) for package: mysql-workbench-community-6.1.7-1.fc20.x86_64
--> Processing Dependency: libtinyxml.so.0()(64bit) for package: mysql-workbench-community-6.1.7-1.fc20.x86_64
--> Processing Dependency: liblua-5.1.so()(64bit) for package: mysql-workbench-community-6.1.7-1.fc20.x86_64
--> Processing Dependency: libgtkmm-2.4.so.1()(64bit) for package: mysql-workbench-community-6.1.7-1.fc20.x86_64
--> Processing Dependency: libgdkmm-2.4.so.1()(64bit) for package: mysql-workbench-community-6.1.7-1.fc20.x86_64
--> Processing Dependency: libctemplate.so.2()(64bit) for package: mysql-workbench-community-6.1.7-1.fc20.x86_64
--> Running transaction check
---> Package compat-lua-libs.x86_64 0:5.1.5-1.fc20 will be installed
---> Package ctemplate.x86_64 0:2.2-5.fc20 will be installed
---> Package gtkmm24.x86_64 0:2.24.4-2.fc20 will be installed
---> Package libzip.x86_64 0:0.11.2-1.fc20 will be installed
---> Package tinyxml.x86_64 0:2.6.2-4.fc20 will be installed
---> Package vsqlite++.x86_64 0:0.3.13-3.fc20 will be installed
--> Finished Dependency Resolution

Dependencies Resolved

================================================================================
 Package                    Arch    Version        Repository              Size
================================================================================
Installing:
 mysql-workbench-community  x86_64  6.1.7-1.fc20   mysql-tools-community   24 M
Installing for dependencies:
 compat-lua-libs            x86_64  5.1.5-1.fc20   updates                158 k
 ctemplate                  x86_64  2.2-5.fc20     fedora                 174 k
 gtkmm24                    x86_64  2.24.4-2.fc20  fedora                 748 k
 libzip                     x86_64  0.11.2-1.fc20  updates                 59 k
 tinyxml                    x86_64  2.6.2-4.fc20   updates                 49 k
 vsqlite++                  x86_64  0.3.13-3.fc20  updates                 58 k

Transaction Summary
================================================================================
Install  1 Package (+6 Dependent packages)

Total download size: 26 M
Installed size: 119 M
Is this ok [y/d/N]: y
Downloading packages:
(1/7): compat-lua-libs-5.1.5-1.fc20.x86_64.rpm              | 158 kB  00:01
(2/7): ctemplate-2.2-5.fc20.x86_64.rpm                      | 174 kB  00:01
(3/7): tinyxml-2.6.2-4.fc20.x86_64.rpm                      |  49 kB  00:00
(4/7): gtkmm24-2.24.4-2.fc20.x86_64.rpm                     | 748 kB  00:01
(5/7): vsqlite++-0.3.13-3.fc20.x86_64.rpm                   |  58 kB  00:00
(6/7): libzip-0.11.2-1.fc20.x86_64.rpm                      |  59 kB  00:02
(7/7): mysql-workbench-community-6.1.7-1.fc20.x86_64.rpm    |  24 MB  00:08
--------------------------------------------------------------------------------
Total                                              2.9 MB/s |  26 MB  00:08
Running transaction check
Running transaction test
Transaction test succeeded
Running transaction
  Installing : gtkmm24-2.24.4-2.fc20.x86_64                                 1/7
  Installing : libzip-0.11.2-1.fc20.x86_64                                  2/7
  Installing : vsqlite++-0.3.13-3.fc20.x86_64                               3/7
  Installing : ctemplate-2.2-5.fc20.x86_64                                  4/7
  Installing : compat-lua-libs-5.1.5-1.fc20.x86_64                          5/7
  Installing : tinyxml-2.6.2-4.fc20.x86_64                                  6/7
  Installing : mysql-workbench-community-6.1.7-1.fc20.x86_64                7/7
Error in file "/usr/share/applications/oraclexe-startdb.desktop": "Application/database" is an invalid MIME type ("Application" is an unregistered media type)
  Verifying  : tinyxml-2.6.2-4.fc20.x86_64                                  1/7
  Verifying  : compat-lua-libs-5.1.5-1.fc20.x86_64                          2/7
  Verifying  : ctemplate-2.2-5.fc20.x86_64                                  3/7
  Verifying  : vsqlite++-0.3.13-3.fc20.x86_64                               4/7
  Verifying  : mysql-workbench-community-6.1.7-1.fc20.x86_64                5/7
  Verifying  : libzip-0.11.2-1.fc20.x86_64                                  6/7
  Verifying  : gtkmm24-2.24.4-2.fc20.x86_64                                 7/7

Installed:
  mysql-workbench-community.x86_64 0:6.1.7-1.fc20

Dependency Installed:
  compat-lua-libs.x86_64 0:5.1.5-1.fc20     ctemplate.x86_64 0:2.2-5.fc20
  gtkmm24.x86_64 0:2.24.4-2.fc20            libzip.x86_64 0:0.11.2-1.fc20
  tinyxml.x86_64 0:2.6.2-4.fc20             vsqlite++.x86_64 0:0.3.13-3.fc20

Complete! |
After successfully installing MySQL Workbench, you can launch it with the following command:
<shell> mysql-workbench |
It should launch the following MySQL Workbench home page (click on it to see the full size image):
Add User Defined Types
Somebody asked me if there was a cheaper alternative to using the Embarcadero Data Architect (a data modeling tool). I said sure, you can use the MySQL Workbench. My friend laughed and said, it’s to model Oracle databases and they use different data types. I broke the news to him that he can create his own user defined types and use MySQL Workbench to model problems for the Oracle Database 11g.
For example, you can launch the MySQL Workbench, and click on the Model menu option, and in the menu window click on the User Defined Types choice, as shown in the following:

Choosing the User Defined Type option, launches the following form. You can enter customized user defined types in the User Defined Types module:

You enter user defined types by entering a name value and choosing valid MySQL type value before clicking the Add button. When you’ve added your last user defined type, click the OK button instead of the Add button. The next screen shot shows how you can create Oracle Database 11g native data types, specifically the NUMBER and VARCHAR2 data types.

Hopefully, this has shown that you can create User Defined Types let you use MySQL Workbench to create Oracle ERD models. Here’s an example of a table with Oracle’s NUMBER and VARCHAR2 data types:

Yes, MySQL Workbench is a marvelous tool with wide potential for use to solve problems with MySQL and other databases.
Relationship Notations
One of my students asked how to convert MySQL Workbench’s default Crow’s Foot (IE) diagram to one of the other supported formats – Classic, Connect to Columns, UML, and IDEF1X. Crow’s Foot is also known as the Information Engineering Model method (covered in Chapter 3 of my MySQL Workbench: Data Modeling & Development.
It quite simple, you open the Model Overview window, click on the Model menu choice. In the dialog, click on the Relationship Notation menu option. Click on one of the choices in the nested menu, like Column to Columns.

Hope this helps those working with MySQL Workbench.
MySQL Image Architecture
The LinkedIn MySQL DB Development group posed a questions on how to handle images. Naturally, the argument always goes: Should images be deployed in the database or the file system? I believe they should be stored in the database because the cost and time associated is too high with regard to managing files, a file naming schema, and backing up the file system discretely from the database.
Since there’s a significant difference between the backup of transactional data and image data, they should be placed in different databases. The imagedb database is where you would place the images and large text descriptions, as shown in the MySQL Workbench ERD:

The imagedb ERD splits the foreign key references back to the system_user table, which contains the individual user credentials. The system_user table serves as the Access Control List (ACL) for the application.
Until I get a chance to write the code for this model, you can refer to the generic PHP/MySQL solution from several years back (its code source was last tested with PHP 5.3). As always, I hope this helps.
Open a port on Fedora
Since MySQL Workbench 6.0 isn’t available for Fedora, Version 20, I’m having my students install it on their local Windows and Mac OS X operating systems. You can configure the /etc/sysconfig/iptables file to enable port 3306 after installing MySQL on Fedora.
You can open a port by using the firewall-config utility (easy way) or by adding the following line to the /etc/sysconfig/iptables file (Fedora’s instructions on editing iptables [hard way]). The file won’t exist initially, but you can create it by running the following command as the root superuser or sudoer:
shell> service iptables save |
You you can run the following commands as the root superuser, which saves the line in the iptables file:
shell> iptables -A INPUT -m conntrack --ctstate NEW -m tcp -p tcp --dport 3306 -j ACCEPT shell> iptables-save |
After making the change to the /etc/iptables file you can change the firewall by running the following command as the root superuser:
shell> service iptables restart |
Just make sure you don’t inadvertently start both iptables and ip6tables as services. You can check that only one is running by using the following commands:
shell> service iptables status shell> service ip6tables status |
MySQL Workbench Configuration

- The first thing you need to do is click on the
+symbol in the circle to the right of the MySQL Connections text label. It launches the Setup New Connection dialog.

- The second thing you need to do is enter a Connection Name, Hostname, Port, and Username. Then, click the Test Connection button.

- The Test Connection button launches the Connect to MySQL Server dialog. Enter the password for the
studentuser (or whatever user you’re interested in), and then click the OK button.

- When the credentials in the Connect to MySQL Server dialog work, you see the following confirmation dialog message. Click the OK button to continue and you’ll see a new VMWare Fedora Instance connection icon.

- Click the VMWare Fedora Instance connection to start a new connection.
- The VMWare Fedora Instance button launches the Connect to MySQL Server dialog. Like you did when configuring the connection, enter the password for the
studentuser (or whatever user you’re interested in), and then click the OK button. It launches an interactive panel that lets you run, edit, or save the SQL script file.

- Type the following two lines in the Query1 panel (at least if you have a
studentdbdatabase:USE studentdb; SELECT DATABASE();
