Archive for the ‘Oracle Installer’ Category
Protocol adapter error
One of the errors that defeats a lot of new users who install the Oracle Database on the Windows operating system is a two-step event. The first step occurs when you try to connect to the database and it raises the following error:
SQL*Plus: Release 18.0.0.0.0 - Production on Fri Jan 7 21:00:42 2022 Version 18.4.0.0.0 Copyright (c) 1982, 2018, Oracle. All rights reserved. ERROR: ORA-12541: TNS:no listener |
The second step may occur after you get the “no listener” error when you try to start the Oracle listener and it fails to start. The Oracle listener control command is:
lsnrctl start |
When it returns the following error:
LSNRCTL FOR 64-bit Windows: Version 18.0.0.0.0 - Production ON 07-JAN-2022 21:02:20 Copyright (c) 1991, 2018, Oracle. ALL rights reserved. Starting tnslsnr: please wait... Unable TO OpenSCManager: err=5 TNS-12560: TNS:protocol adapter error TNS-00530: Protocol adapter error |
The problem is generally in two configuration files. They are the listener.ora and tnsnames.ora files. This typically occurs when the developer fails to set the localhost in the Windows operating system hosts configuration file. The chain of events that causes these errors can be avoided when the user puts the following two lines:
127.0.0.1 localhost ::1 localhost |
in the following hosts file:
C:\Windows\system32\drivers\etc\hosts |
You can typically avoid these errors when you configure the hosts configuration file correctly before installing the Oracle Database. That’s because the Oracle database installation will use localhost keyword instead of the current, and typically DHCP assigned, IP address.
The loss of connectivity errors typically occur when the IP address changes after the installation. DHCP IP addresses often change as machines disconnect and reconnect to a network.
You can fix a DHCP IP installation of an Oracle database by editing the listener.ora and tnsnames.ora files. You replace the IP addresses with the localhost keyword.
The listener.ora and tnsnames.ora files look like the following for an Oracle Database 21c Express Edition (provided you installed them in a C:\app\username directory:
listener.ora
# listener.ora Network Configuration File: C:\app\username\product\21.0.0\dbhomeXE\NETWORK\ADMIN\listener.ora
# Generated by Oracle configuration tools.

DEFAULT_SERVICE_LISTENER = XE

SID_LIST_LISTENER =
 (SID_LIST =
   (SID_DESC =
     (SID_NAME = CLRExtProc)
     (ORACLE_HOME = C:\app\username\product\21.0.0\dbhomeXE)
     (PROGRAM = extproc)
     (ENVS = "EXTPROC_DLLS=ONLY:C:\app\username\product\21.0.0\dbhomeXE\bin\oraclr21.dll")
   )
 )

LISTENER =
 (DESCRIPTION_LIST =
   (DESCRIPTION =
     (ADDRESS = (PROTOCOL = TCP)(HOST = localhost)(PORT = 1521))
     (ADDRESS = (PROTOCOL = IPC)(KEY = EXTPROC1521))
   )
) |
tnsnames.ora
# tnsnames.ora Network Configuration File: C:\app\mclaughlinm\product\21.0.0\dbhomeXE\NETWORK\ADMIN\tnsnames.ora
# Generated by Oracle configuration tools.

XE =
 (DESCRIPTION =
   (ADDRESS = (PROTOCOL = TCP)(HOST = localhost)(PORT = 1521))
   (CONNECT_DATA =
     (SERVER = DEDICATED)
     (SERVICE_NAME = XE)
   )
 )

LISTENER_XE =
 (ADDRESS = (PROTOCOL = TCP)(HOST = localhost)(PORT = 1521))


ORACLR_CONNECTION_DATA =
 (DESCRIPTION =
   (ADDRESS_LIST =
     (ADDRESS = (PROTOCOL = IPC)(KEY = EXTPROC1521))
   )
   (CONNECT_DATA =
     (SID = CLRExtProc)
     (PRESENTATION = RO)
   )
) |
As always, I hope this helps those looking for a solution to something that can take more time than it should to fix.
Oracle Passwords
It’s funny but Oracle doesn’t want you to enter a trivial password, and about every week I get asked what the standards are for Oracle Database passwords. That’s funny too because it’s in the documentation, the one most experienced and new users never read – Oracle Database Installation Guide (available by platform, the link is for the Windows platform).
Anyway, let me quote the rules:
Oracle recommends that the password you specify:
- Contains at least one lowercase letter.
- Contains at least one uppercase letter.
- Contains at least one digit.
- Is at least 8 characters in length.
- Uses the database character set which can include the underscore (_), dollar ($), and pound sign (#) character.
- If (the password) contains special characters, including beginning the password with a number or symbol, then enclose the password with double-quotation marks.
- Should not be an actual word.
Likewise, you can’t use the old educational passwords:
- The
SYSaccount password cannot bechange_on_install(case-insensitive). - The
SYSTEMaccount password cannot bemanager(case-insensitive). - The
SYSMANaccount password cannot besysman(case-insensitive). - The
DBSNMPaccount password cannot bedbsnmp(case-insensitive). - If you choose to use the same password for all the accounts, then that password cannot be
change_on_install,manager,sysman, ordbsnmp(case-insensitive).
Hope this helps, and by the way reading the documentation never hurts too much! 🙂
SQL Developer batch file?
It’s amazing to me that there is yet another outcome from installing Oracle Database 11g on Windows 7. This one installs without an error but then raises the following error message dialog when you try to launch SQL Developer from the menu. Naturally, it seems to depend on having more than one Java JVM installed when you run the Oracle Universal Installer (OUI) without setting the %JAVA_HOME% environment variable.
Text of error message from image:
Windows is searching for SQLSERVER.BAT. To located the file yourself, click Browse. |
While the installation release notes (E10842-02) that download or ship with the product don’t mention the %JAVA_HOME% or %DEV_TOOLS% environment variables, it appears you should set them before the installation. You can discover this by double clicking on the SQL Developer menu option, and then choose Properties. You should see the following in the dialog.
Windows 7 searches for the sqldeveloper.bat file when the OUI installation fails to configure the SetJavaHome parameter in the sqldeveloper.conf file. OUI does configure the SetJavaHome parameter when OUI resolves the JVM address.
You should put this in the Target field:
C:\app\<user_name>\product\11.2.0\dbhome_1\sqldeveloper\sqldeveloper\bin\sqldeveloperW.exe |
Although, that may be a simplifying assumption of what causes the problem, I didn’t go through all the Oracle Universal Installer (OUI) background tasks to discover the actual code element. Also, I didn’t take the time to retest by setting those parameters. I solved this problem by replacing the sqldeveloper.bat value with a sqldeveloperw.exe value in the menu link, applying the change, and saving it. If you’ve a better solution, please share it.
The configuration file is found here:
C:\> app\<user_name>\product\11.2.0\dbhome_1\sqldeveloper\sqldeveloper\bin\sqldeveloper.conf |
While you can provide a sqldeveloper.bat file, it’s much simpler to simply put the JVM physical address in the sqldeveloper.conf file. That’s what I did to solve the problem and what I think the development team expects.
A valid SetJavaHome value points to a 32-bi JVM, and in my testing environment that is:
SetJavaHome C:\Program Files (x86)\Java\jdk1.6.0_34 |
Another post on this topic can be found here. As always, I hope this saves somebody time working with the Oracle product stack.
What’s ORACLE_UNQNAME?
It started with a three part question: What’s the URL to run the DB Console for Oracle Database 11gR2 on Windows 7, and what’s the ORACLE_UNQNAME and why isn’t it defined by the installation. The first part is easy (shown further below), but the second and third parts were more involved.
The ORACLE_UNQNAME is an operating system environment variable that holds the database’s unique name value. You can find it with the following query as the SYSTEM user (through SQL*Plus):
SELECT name, db_unique_name FROM v$database; |
By the way, it’s not set as a Windows environment variable by default. You would need to do that manually (an example of setting an environment variable is here). The Oracle Universal Installer (OUI) actually used it to configure the already running DB Console service (with a successful installation). Once there, it didn’t need to set it as a system-level environment variable.
You may be wondering what generated the question if there’s already a configured service. You encounter the error when dropping down to the command line. First, you verify that the ports are running with this command:
C:\> netstat -an | findstr /C:1158 TCP 0.0.0.0:1158 0.0.0.0:0 LISTENING |
While this blog discusses the hard way to determine whether the DB Console is running, you can simply open the Windows Services to see whether the DB Console is running. Likewise, if you know the URL, enter it in your browser. Assuming you don’t know how to do either or are just a gluten for the command line, the rest of this post is important.
You can see your Windows services by typing services.msc in the Start->Run Command field. That way you don’t need to navigate the various links that differ between Windows releases.
Many know that you can check the status of the running DB Console with the emctl utility at the command line. It lets you find the URL that you should enter for the DB Console in a browser. This knowledge is where users encounter the problem with %ORACLE_UNQNAME% environment variable ($ORACLE_UNQNAME on Linux or Unix).
For example, running the following command raises an error that instructs you to set the %ORACLE_UNQNAME% environment variable. Although, it leaves many wondering what’s the right value to enter.
C:\> emctl status dbconsole Environment variable ORACLE_UNQNAME not defined. Please set ORACLE_UNQNAME to database unique name. |
If you object to using the Windows services to start and stop the OEM tool, you can do it at the command-line like the status example above. Having set the environment variables, you can start the DB console with this command-line syntax:
C:\> emctl start dbconsole |
Having set the environment variables, you can stop the DB console with this command-line syntax:
C:\> emctl stop dbconsole |
It’s not hard to find this information when you know how. While the error message complains about one environment variable, there are actually two environment values you need to set. They are: %ORACLE_HOSTNAME% and %ORACLE_UNQNAME%.
You can find them by navigating to the %ORACLE_HOME%\oc4j\j2ee\ folder (or directory). The file name of the DB Console file tells you the values for these environment variables because they’re embedded in the file’s name. A snapshot from Windows Explorer shows them both.
You can set these environment variables as shown below in command shell of Windows (Linux or Unix users should use terminal), and then successfully run emctl from the command line.
C:\>set ORACLE_HOSTNAME=localhost C:\>set ORACLE_UNQNAME=orcl C:\>emctl status dbconsole Oracle Enterprise Manager 11g Database Control Release 11.2.0.1.0 Copyright (c) 1996, 2010 Oracle Corporation. All rights reserved. https://localhost:1158/em/console/aboutApplication Oracle Enterprise Manager 11g is running. ------------------------------------------------------------------ Logs are generated in directory C:\app\McLaughlinM\product\11.2.0\dbhome_1/localhost_orcl/sysman/log |
If you’re using Linux or Unix, the export commands differ. You can check this other post for those. They under step 8 in that post.
You then enter the following URL in a browser to use the newly installed DB Console:
https://localhost:1158/em |
The browser will prompt you with a security warning like the following:
Click the Add Exception button and you’ll see the following Windows dialog.
Having granted the exception, you arrive at the following credential web page. Connect as the SYSDBA using the SYS user’s account when you require extraordinary privileges. Doing so, shows a security risk in the console. You should connect as the SYSTEM user with NORMAL access generally, as shown below.
The following home page shows after your credentials are validated.
Hope that helps those trying to sort out running the DB Console and finding the magic %ORACLE_UNQNAME% value. Check this other blog post for instructions to reconfigure OEM.
Verifying a Socket w/Perl
Using a lowercase hostname is typical but I got sloppy on a Windows 7 installation, after all Windows is case insensitive, and I used a mixed case hostname. It raised an interesting error when installing Oracle Database 11g Release 2.
Failed to allocate port(s) in the specified range(s) for the following process(es): JMS
[5540-5559], RMI [5520-5539], Database Control [5500-5519], EM Agent [3938] | [1830-1849]
Refer to the log file at C:\app\McLaughlinM\cfgtoollogs\dbca\orcl\emConfig.log for more details.
You can retry configuring this database with Enterprise Manager later by manually running C:\app\McLaughlinM\product\11.2.0\dbhome_1\bin\emca script.
After verifying the ports were available, it required testing the ability to form a socket. The quickest way to do that was installing ActiveState Perl and test the socket.
Server-side Perl code (server.pl):
1 2 3 4 5 6 7 8 9 10 11 12 13 14 15 16 17 18 19 20 21 | # Import socket library. use IO::Socket; # Create new socket. my $sock = new IO::Socket::INET( LocalAddr => 'mclaughlinmysql', LocalPort => '5500', Proto => 'tcp', Listen => 5500, Reuse => 5500); # Kill the program when socket not created. die "Could not create socket: $!\n" unless $sock; # Set socket to listen for incoming request and loop while waiting. my $new_sock = $sock->accept(); while(<$new_sock>) { print $_; } # Close the socket. close($sock); |
Server-side Perl code (client.pl):
1 2 3 4 5 6 7 8 9 10 11 12 13 14 15 | # Import socket library. use IO::Socket; # Create new socket. my $sock = new IO::Socket::INET( PeerAddr => 'mclaughlinmysql', PeerPort => '5500', Proto => 'tcp'); # Kill the program when socket not created. die "Could not create socket: $!\n" unless $sock; # Send string to socket. print $sock "Hello there!\n"; close($sock); |
These scripts help you check connectivity on a port. Run the server first in one command shell and the client second in another command shell. Then, the server-side program prints the “Hello There!” message sent from the client-side program.
You run the server with the following:
perl server.pl |
and the client with this:
perl client.pl |
Hope they help you verify viability through server ports.
SQL Developer JVM Fix
It’s amazing the moving parts in Oracle Database 11g, and the ones that I don’t use after installation for a while often reach out to teach me something new. That’s what happened when I went to launch SQL Developer on my Windows 7 Professional 64-bit installation.
I got the message Unable to find a Java Virtual Machine, as shown in the image below. It really means unable to find a 32-bit Java 5 or Java 6 (1.6.0_4+) SDK home. Although the installation appeared fine, it pointed the SQL Developer configuration file to an incompatible 64-bit Java 7 SDK.
You fix this error by following these steps:
- Open the
sqldeveloper.conffile and check theSetJavaHomeparameter value. You find thesqldeveloper.conffile in the following directory:
%ORACLE_HOME\sqldeveloper\sqldeveloper\bin |
- Install the 32-bit Java 6 (1.6.0_4+) SDK on the operating system if not installed already. You can check whether it’s installed by looking for it in the Program Files (x86) folder.
- Change the value of the
SetJavaHomeparameter to point to the new 32-bit Java 6 home directory (or folder). The following change to line 18 in thesqldeveloper.conffile should fix it on your installation (provided that’s your version of the JVM).
18 | SetJavaHome C:\Program Files (x86)\Java\jdk1.6.0_34 |
Hope this helps those who run into the same issue.
Oracle 11gR2 on Windows 7
Here are step-by-step instructions for installing Oracle Database 11g Release 2 on Windows 7 (Oracle 12c is here). It’s provided in response to questions posted on my step-by-step instructions for installing Oracle 11gR1 on Windows 7. For reference, I posted the former because it didn’t work without intervention. I hadn’t updated step-by-step instructions because Oracle Database 11g Release 2 has always worked for me when installing on Windows 7.
A number of students and blog readers have mentioned that it didn’t work for them. My guess is that they had configuration issues within the Windows 7 environment. There are some Windows 7 configuration caveats before you perform this installation, and they are:
Windows 7 Configuration Steps
- Make sure you have at least 3 GB of memory on your Windows PC, or that you can allocate 4 GB of memory to your virtual machine (the latter typically requires 8 GB of real memory to avoid extensive disk caching of memory).
- Install Oracle’s SJDK and run time for Java 6 or 7 on Windows 7 (I installed Java 7). Although either work with the database, you need the Java 6 SDK 32-bit version (at least SJDK 1.6.0_4) for Oracle SQL Developer. This means you need to download the 32-bit version even when you’re installing the 64-bit Oracle Database 11g version. The SQL Developer fix is found in this blog post.
- Disable Microsoft’s User Access Controls (UAC). I blogged about a set of Windows 7 gripes, and the second point shows you the screen shots that let you disable UAC on Windows 7.
- Configure your
C:\Windows\System32\drivers\etc\hostsfile. Use lines 1 through 3 when you’re using a DHCP IP address, and lines 1 through 4 when you’re using a static IP address. If you want to set a static IP address, check this old post on how to set a static IP address. Please note that thehostnameneeds to be lowercase.
1 2 3 4 | 127.0.0.1 localhost
::1 localhost
127.0.0.1 mclaughlinmysql mclaughlinmysql.techtinker.com
172.26.126.131 mclaughlinmysql mclaughlinmysql.techtinker.com |
- Create a user account name that doesn’t have a white space, like
McLaughlinMin the screen shots, and assign it Administrator privileges. - The Oracle Enterprise Manager (OEM) uses port ranges above 5,000, which according to Microsoft requires that you set
MaxUserPortkey in the Windows Registry. You can find more details at this Microsoft Support page. Personally, I haven’t found this necessary and after adding it to please somebody without setting it everything ran fine in Windows 7.
Registry key: HKEY_LOCAL_MACHINE\SYSTEM\CurrentControlSet\Services\Tcpip\Parameters
| Value Name | MaxUserPort |
| Value Type | DWORD |
| Value Data | 65534 |
| Value Range | 5000-65534 (decimal) |
| Value Default | 0x1388 (5000 decimal) |
| Description | This parameter controls the maximum port number that is used when a program requests any available user port from the system. Typically, ephemeral (short-lived) ports are allocated between the values of 1024 and 5000 inclusive. After the release of security bulletin MS08-037, the behavior of Windows Server 2003 was changed to more closely match that of Windows Server 2008 and Windows Vista. For more information about Microsoft security bulletin MS08-037 |
Oracle 11g Release 2 Installation Steps
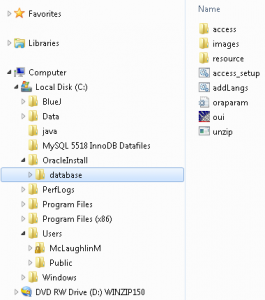
- The Oracle Database 11g Release 2 files are broken down into two zip files on the Oracle site. That means you need to download both files, and then expand them into an installation directory. I called my installation directory
C:\OracleInstall, but you can call it whatever works for you. Here’s a screen shot of the directory after expanding both compressed files (done with WinZip 15).
database directory (or folder). Within the installation folder (C:\OracleInstall\database), you double click on the oui icon to launch (start) the Oracle Universal Installer. It’ll open a command prompt that may dwell on the screen for a few seconds up to maybe fifteen seconds.
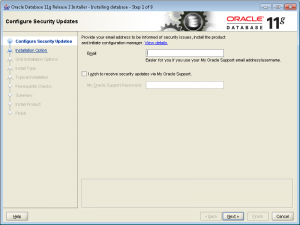
- It’s a good idea to provide an email address for security updates no matter what. You can uncheck the box if you don’t want updates via Oracle Support Services. Click the Next button to continue.
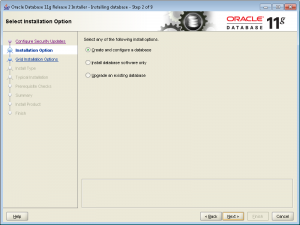
- Most developers want to Create and configure a database. If that’s your desire, leave the default radio button checked. Click the Next button to continue.
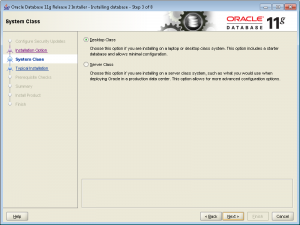
- Most developers install their test instance on a desktop or laptop. If that’s your desire, leave the default Desktop Class radio button checked. Click the Next button to continue.
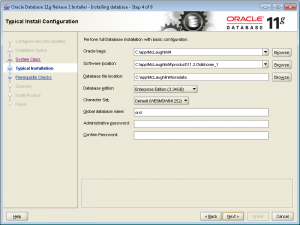
- These are default settings and generally the easiest to use. I’d suggest you change the Character Set drop down to Unicode. Then, enter a password twice. Oracle requires that you use at least one capital letter and one number in a 6 character or more long password. Click the Next button to continue.
- The next screen is a progress bar that checks for prerequisites. You shouldn’t have to do anything here because it automatically advances you to the next dialog screen. This generally takes less than a minute to run but can take two or so. If you’re much beyond 3 minutes there may be a resource problem with your Windows PC or virtual machine.
- This shows you all the selected values for the installation. Unless you want to abort the installation, click the Finish button to proceed.
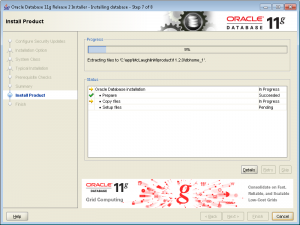
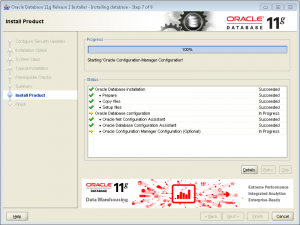
- This screen is the main progress bar, and you’ll be here somewhere between 5 and 10 minutes. The downside is that there are some dialogs that will popup during this phase and you need to authorize them, so it’s a bad time to take a break.
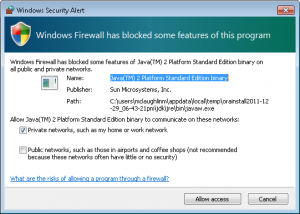
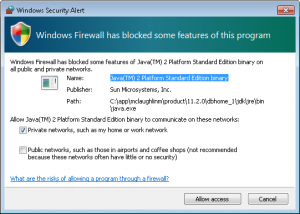
- The first popup screen requires you to authorize the Java runtime to call home. You should click the Allow Access button to proceed.
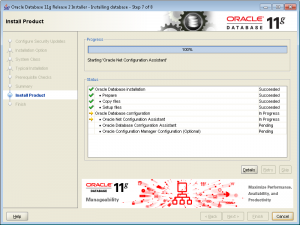
- When the progress bar starts configuring the instance, failures can occur. The first may occur during the network configuration, which typically happens if you didn’t preconfigure the
hostsfile. You don’t need to do anything but watch here unless the installer triggers an error.
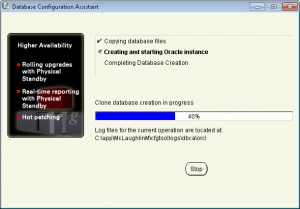
- The following progress bar is launched by the Oracle Database Configuration Assistant. It typically runs without a problem. You don’t need to do anything but watch here unless the installer triggers an error. This takes a few minutes, and unfortunately requires you to stick aroung to again authorize Java.
- The second popup screen requires you to authorize the Java runtime to call home. You should click the Allow Access button to proceed.
- The third and last popup screen asks you to whether you want to open other scheme. Generally, you should click the OK button to proceed.
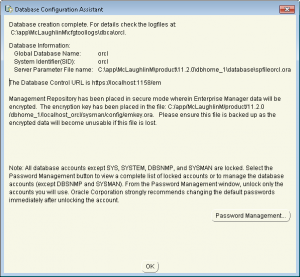
- The next dialog shows you that the network and database instances are configured. It’s also running the OEM (Oracle Enterprise Manager) installation. You can wait here but it won’t be a long wait.
- This is the last dialog and says you’ve installed Oracle Database 11g Release 2 successfully. You can the Close button to complete the installation.
The next step is probably running Oracle Enterprise Manager (OEM). I’ve recently added this post, which arose from a question. It shows you how to run the DB Console.
Also, it’s possible that you could have a problem launching SQL Developer. If so, check how to set the proper JVM for SQL Developer post.
As always, I hope this helps folks.
Excel-Oracle ODBC Driver
Somebody was trying to query Oracle via Microsoft Excel 2007, and didn’t have an Oracle ODBC Data Source that enable them to choose Oracle. I’d referred them to this post on adding MySQL’s ODBC driver to Windows 7 but that didn’t help enough. Posting this screen shot may not have helped either.
It appears I assumed too, like everyone would know that it’s on Windows 7 when Oracle 11g (or another Oracle database) is installed locally. The person who posed the question doesn’t have Oracle installed locally and can’t install it.
For those who don’t have an Oracle instance running locally, you can download the Oracle Data Access Components for Windows from the Oracle web site. It’s in the driver sections, as shown in the screen capture below:
This driver contains the necessary OLE DB and ODBC drivers, as you can see in this screen shot.
Once you’ve downloaded it, you can return to this post where you set up an Excel query against a remote Oracle database. You should take note that Microsoft’s future direction adopts Oracle ODBC, like the approach they’ve chosen with MySQL’s ODBC driver. As always, I hope this helps.
Oracle 11g XE Install
Here’s the Oracle Database 11g Express Edition step-by-step installation. I did the installation on Window 7 64-bit, and did run into a problem with the Windows Registry on a fresh installation (posted earlier on the blog).
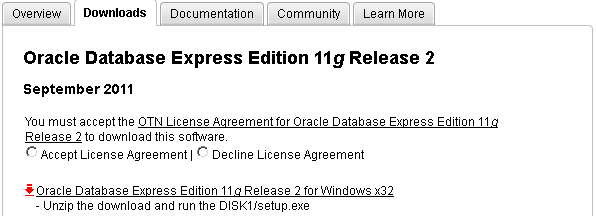
When you download the software from Oracle, you’ll need an account and you’ll need to accept the license agreement.
- You’re prompted to accept the license agreement and can’t proceed without doing it.
- After accepting the license agreement you can download the software.
- Unlike, the Oracle 10g XE MSI file, you’ve downloaded a compressed (
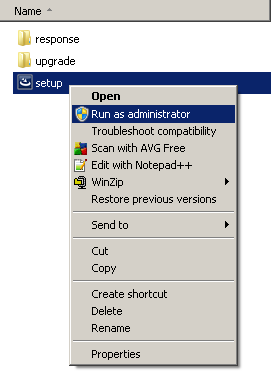
OracleXE112_Win32.zip) file, and you’ll need to explode the zip file and write it to a directory. When you write it to a directory, it looks like the following and you double click on thesetup.msifile.

It’s recommended that you right click on the setup.msi program and run it as the Administrator. If you’ve not disabled Microsoft User Access Controls (UAC), I’d do that first.
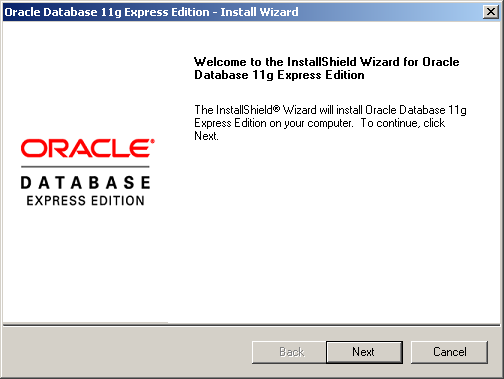
- After launching the
setup.msifile, you see the Install Shield wizard screen while the file loads, like this:
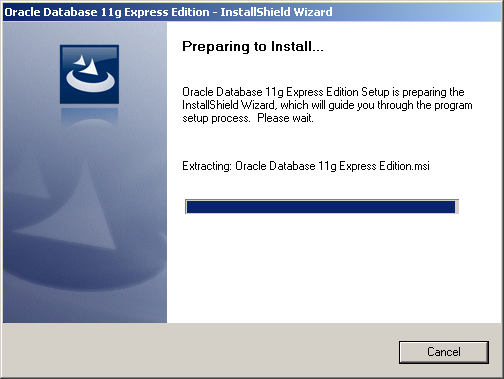
After launching the setup.msi file, and loading the MSI file, you see the first dialog box of the installation. Click the Next button to start the installation.
- The second dialog box is the license for the installation. Click the I accept the terms in the license agreement. radio button and then the Next button.
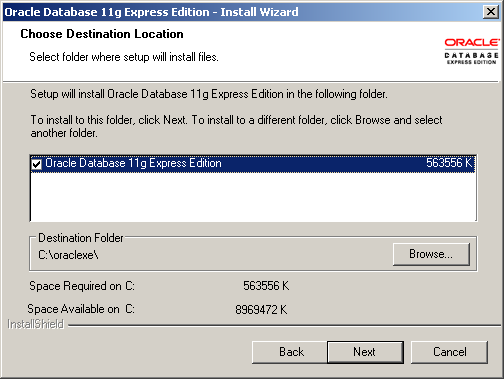
- The third dialog box lets you accept the default location or provide an override location. If you accept the default location, click the Next button to continue.
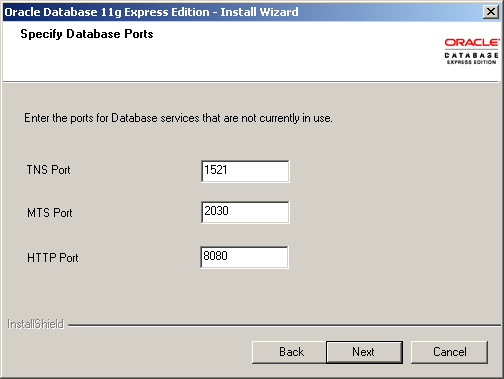
- The fourth dialog box lets you specify the TNS, MTS, and HTTP Ports. The default values are shown in the following screen shot but I’ve change my TNS port to 1621, which you’ll see later. Click the Next button to continue.
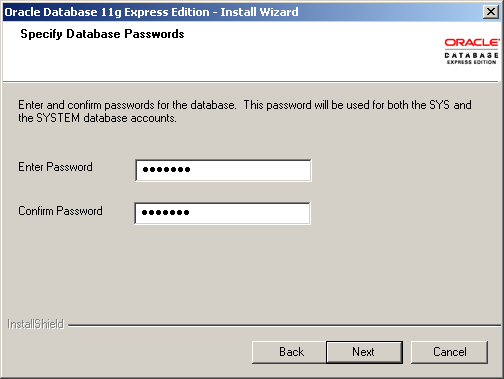
- The fifth dialog box lets you enter the password for the
SYSandSYSTEMusers. You must enter it twice and naturally they must match each other. Click the Next button to continue.
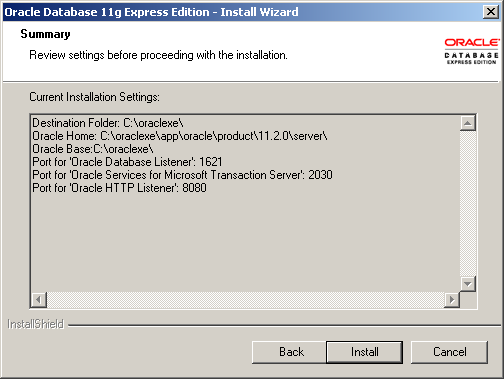
- The sixth dialog box lets you see the configuration options you’ve chosen. Note that this installation is using a TNS port of 1621 rather than the default of 1521. Click the Next button to continue.
- The seventh dialog box lets you see the progress bar, take a break it can run for two or three minutes. Click the Next button to continue.
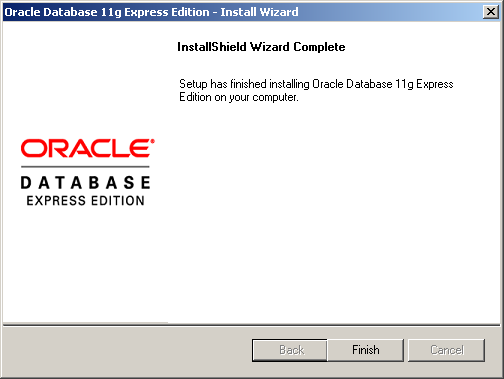
- The last dialog box lets you see that you’ve installed the product. Click the Finish button to complete the installation.
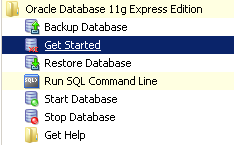
You’ve now installed Oracle Database 11g Express Edition. You can start the command line by typing sqlplus system/password in command shell or the Get Started option in your Program Menus, as shown below.
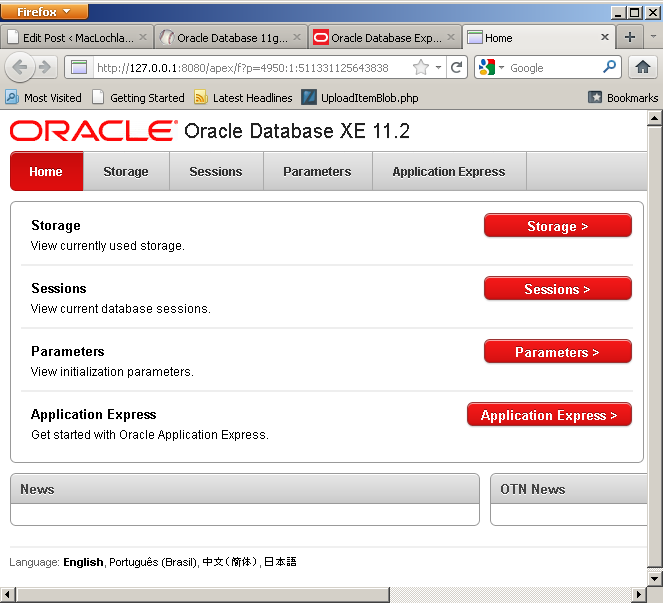
You should see this console when you launch Get Started or manually type http://localhost:8080/apex. There’s more to the web page but I scrunched it to fit into the blog. Alas, space is always at a premium.
Hope this helps folks.
Oracle 11g XE Installer
Finally, I got to install Oracle Database 11g Express Edition (XE) tonight. Unfortunately, I ran into an error during the installation. A quick Google search landed me in the forum, where it gave me the impression it wouldn’t work on Windows 7, 64-bit. However, I’m tenacious with problems like this. Here’s the screenshot for the error:
The text from the image is noted below to help folks find the solution.
The installer is unable to instantiate the file C:\Users\McLAUGH~1\AppData\Local\Temp\{078E83D7-3FCC-4A72-903B-995C7CE44681}\KEY_XE.reg. The file does not appear to exist. |
The physical file isn’t missing, what failed to happen was that the installer didn’t write a Registry Key’s Data value. You can add the missing registry key’s Data value, and then click OK on the Error dialog box to continue the installation. (Replying to Andrea, I’ve provided screen shots on editing the Registry in a comment below.) It will succeed, at least it succeeded for me on Windows 7 64-bit. Rather than use abbreviations like the forum entry, the missing key is found here in the Windows Registry:
- HKEY_CLASSES_ROOT\Installer\Products\266B7A503A089BE4EAD1986A429434C1\SourceList\Media |
A screenshot shows that the Data value of the key wasn’t populated by the MSI (Microsoft Software Installer), the arguments remain for a script to populate:
You need to add the message value from your Error dialog as Data value of the Name entry 1, like this screenshot shows:
Since I believe the only things that should change are your Administrator’s hostname and the key value (type in the one that shows in the your dialog box), here’s the text you’ll need to enter:
C:\Users\hostname\AppData\Local\Temp\{078E83D7-3FCC-4A72-903B-995C7CE44681}\ |
This fix worked for me, and I hope the same holds true for you.


