Archive for the ‘Linux Development’ tag
Ruby+MySQL on Ubuntu
This post goes through installing and configuring Ruby and Ruby on Rails for MySQL. The first step requires updating the Ubuntu OS:
sudo apt-get update |
Interestingly, I found that the man-db service had inadvertently stopped. It raised the following error:
E: dpkg was interrupted, you must manually run 'sudo dpkg --configure -a' to correct the problem. |
You run this command to find the problem with the dpkg utility:
sudo dpkg --configure -a |
It returned:
Setting up man-db (2.10.2-1) ... Updating database of manual pages ... man-db.service is a disabled or a static unit not running, not starting it. |
The following command started the man-db service:
sudo systemctl start man-db.service |
Next, you install the prerequisite packages with this command:
sudo apt-get install -y git-core zlib1g-dev build-essential libssl-dev libreadline-dev libyaml-dev libsqlite3-dev sqlite3 libxml2-dev libxslt1-dev libcurl4-openssl-dev software-properties-common libffi-dev |
Display detailed console log →
Reading package lists... Done Building dependency tree... Done Reading state information... Done Note, selecting 'git' instead of 'git-core' build-essential is already the newest version (12.9ubuntu3). build-essential set to manually installed. libreadline-dev is already the newest version (8.1.2-1). libreadline-dev set to manually installed. git is already the newest version (1:2.34.1-1ubuntu1.10). git set to manually installed. software-properties-common is already the newest version (0.99.22.9). zlib1g-dev is already the newest version (1:1.2.11.dfsg-2ubuntu9.2). zlib1g-dev set to manually installed. The following additional packages will be installed: libssl3 Suggested packages: libcurl4-doc libidn11-dev libkrb5-dev libldap2-dev librtmp-dev libssh2-1-dev sqlite3-doc libssl-doc libyaml-doc The following NEW packages will be installed: libcurl4-openssl-dev libffi-dev libsqlite3-dev libxml2-dev libxslt1-dev libyaml-dev sqlite3 The following packages will be upgraded: libssl-dev libssl3 2 upgraded, 7 newly installed, 0 to remove and 18 not upgraded. Need to get 7,426 kB of archives. After this operation, 12.8 MB of additional disk space will be used. Get:1 http://us.archive.ubuntu.com/ubuntu jammy-updates/main amd64 libssl-dev amd64 3.0.2-0ubuntu1.13 [2,374 kB] Get:2 http://us.archive.ubuntu.com/ubuntu jammy-updates/main amd64 libssl3 amd64 3.0.2-0ubuntu1.13 [1,902 kB] Get:3 http://us.archive.ubuntu.com/ubuntu jammy-updates/main amd64 libcurl4-openssl-dev amd64 7.81.0-1ubuntu1.15 [386 kB] Get:4 http://us.archive.ubuntu.com/ubuntu jammy-updates/main amd64 libsqlite3-dev amd64 3.37.2-2ubuntu0.3 [846 kB] Get:5 http://us.archive.ubuntu.com/ubuntu jammy-updates/main amd64 libxml2-dev amd64 2.9.13+dfsg-1ubuntu0.3 [804 kB] Get:6 http://us.archive.ubuntu.com/ubuntu jammy-updates/main amd64 libxslt1-dev amd64 1.1.34-4ubuntu0.22.04.1 [219 kB] Get:7 http://us.archive.ubuntu.com/ubuntu jammy-updates/main amd64 sqlite3 amd64 3.37.2-2ubuntu0.3 [768 kB] Get:8 http://us.archive.ubuntu.com/ubuntu jammy/main amd64 libffi-dev amd64 3.4.2-4 [63.7 kB] Get:9 http://us.archive.ubuntu.com/ubuntu jammy/main amd64 libyaml-dev amd64 0.2.2-1build2 [62.8 kB] Fetched 7,426 kB in 1s (5,467 kB/s) Preconfiguring packages ... (Reading database ... 246735 files and directories currently installed.) Preparing to unpack .../libssl-dev_3.0.2-0ubuntu1.13_amd64.deb ... Unpacking libssl-dev:amd64 (3.0.2-0ubuntu1.13) over (3.0.2-0ubuntu1.12) ... Preparing to unpack .../libssl3_3.0.2-0ubuntu1.13_amd64.deb ... Unpacking libssl3:amd64 (3.0.2-0ubuntu1.13) over (3.0.2-0ubuntu1.12) ... Setting up libssl3:amd64 (3.0.2-0ubuntu1.13) ... Selecting previously unselected package libcurl4-openssl-dev:amd64. (Reading database ... 246735 files and directories currently installed.) Preparing to unpack .../0-libcurl4-openssl-dev_7.81.0-1ubuntu1.15_amd64.deb ... Unpacking libcurl4-openssl-dev:amd64 (7.81.0-1ubuntu1.15) ... Selecting previously unselected package libsqlite3-dev:amd64. Preparing to unpack .../1-libsqlite3-dev_3.37.2-2ubuntu0.3_amd64.deb ... Unpacking libsqlite3-dev:amd64 (3.37.2-2ubuntu0.3) ... Selecting previously unselected package libxml2-dev:amd64. Preparing to unpack .../2-libxml2-dev_2.9.13+dfsg-1ubuntu0.3_amd64.deb ... Unpacking libxml2-dev:amd64 (2.9.13+dfsg-1ubuntu0.3) ... Selecting previously unselected package libxslt1-dev:amd64. Preparing to unpack .../3-libxslt1-dev_1.1.34-4ubuntu0.22.04.1_amd64.deb ... Unpacking libxslt1-dev:amd64 (1.1.34-4ubuntu0.22.04.1) ... Selecting previously unselected package sqlite3. Preparing to unpack .../4-sqlite3_3.37.2-2ubuntu0.3_amd64.deb ... Unpacking sqlite3 (3.37.2-2ubuntu0.3) ... Selecting previously unselected package libffi-dev:amd64. Preparing to unpack .../5-libffi-dev_3.4.2-4_amd64.deb ... Unpacking libffi-dev:amd64 (3.4.2-4) ... Selecting previously unselected package libyaml-dev:amd64. Preparing to unpack .../6-libyaml-dev_0.2.2-1build2_amd64.deb ... Unpacking libyaml-dev:amd64 (0.2.2-1build2) ... Setting up libyaml-dev:amd64 (0.2.2-1build2) ... Setting up libffi-dev:amd64 (3.4.2-4) ... Setting up libxml2-dev:amd64 (2.9.13+dfsg-1ubuntu0.3) ... Setting up libsqlite3-dev:amd64 (3.37.2-2ubuntu0.3) ... Setting up libcurl4-openssl-dev:amd64 (7.81.0-1ubuntu1.15) ... Setting up libssl-dev:amd64 (3.0.2-0ubuntu1.13) ... Setting up sqlite3 (3.37.2-2ubuntu0.3) ... Setting up libxslt1-dev:amd64 (1.1.34-4ubuntu0.22.04.1) ... Processing triggers for man-db (2.10.2-1) ... Processing triggers for install-info (6.8-4build1) ... Processing triggers for libc-bin (2.35-0ubuntu3.6) ... |
Use the cd command to change to the student home directory. Clone the asdf as the multiple runtime version manager with this command:
git clone https://github.com/excid3/asdf.git ~/.asdf |
The following is the output of the git clone command:
Cloning into '/home/student/.asdf'... remote: Enumerating objects: 8756, done. remote: Counting objects: 100% (829/829), done. remote: Compressing objects: 100% (476/476), done. remote: Total 8756 (delta 428), reused 657 (delta 334), pack-reused 7927 Receiving objects: 100% (8756/8756), 3.10 MiB | 4.29 MiB/s, done. Resolving deltas: 100% (5148/5148), done. |
Next, you fix your .bashrc file by adding the following components:
echo '. "$HOME/.asdf/asdf.sh"' >> ~/.bashrc echo '. "$HOME/.asdf/completions/asdf.bash"' >> ~/.bashrc echo 'legacy_version_file = yes' >> ~/.asdfrc echo 'export EDITOR="code --wait"' >> ~/.bashrc |
Source the modifies shell, which you can do like this:
exec $SHELL |
or, like:
. ${HOME}/.bashrc |
Add the following asdf plug-ins:
asdf plugin add ruby asdf plugin add nodejs |
Install Ruby with the following command:
asdf install ruby 3.3.0 |
Display detailed console log →
Downloading ruby-build...
==> Downloading ruby-3.3.0.tar.gz...
-> curl -q -fL -o ruby-3.3.0.tar.gz https://cache.ruby-lang.org/pub/ruby/3.3/ruby-3.3.0.tar.gz
  % Total    % Received % Xferd  Average Speed   Time    Time     Time  Current
                                 Dload  Upload   Total   Spent    Left  Speed
100 21.0M  100 21.0M    0     0  10.1M      0  0:00:02  0:00:02 --:--:-- 10.1M
==> Installing ruby-3.3.0...
-> ./configure "--prefix=$HOME/.asdf/installs/ruby/3.3.0" --enable-shared --with-ext=openssl,psych,+
-> make -j 2
-> make install
==> Installed ruby-3.3.0 to /home/student/.asdf/installs/ruby/3.3.0
asdf: Warn: You have configured asdf to preserve downloaded files (with always_keep_download=yes or --keep-download). But
asdf: Warn: the current plugin (ruby) does not support that. Downloaded files will not be preserved. |
Install Ruby Global with this syntax:
asdf global ruby 3.3.0 |
Update the Ruby Gems with this command:
gem update --system |
Display detailed console log →
Updating rubygems-update Fetching rubygems-update-3.5.5.gem Successfully installed rubygems-update-3.5.5 Parsing documentation for rubygems-update-3.5.5 Installing ri documentation for rubygems-update-3.5.5 Done installing documentation for rubygems-update after 1 seconds Parsing documentation for rubygems-update-3.5.5 Done installing documentation for rubygems-update after 0 seconds Installing RubyGems 3.5.5 Successfully built RubyGem Name: bundler Version: 2.5.5 File: bundler-2.5.5.gem Bundler 2.5.5 installed RubyGems 3.5.5 installed Regenerating binstubs Regenerating plugins Parsing documentation for rubygems-3.5.5 Installing ri documentation for rubygems-3.5.5 # 3.5.5 / 2024-01-18 ## Enhancements: * Installs bundler 2.5.5 as a default gem. ## Bug fixes: * Fix `require` activation conflicts when requiring default gems under some situations. Pull request [#7379](https://github.com/rubygems/rubygems/pull/7379) by deivid-rodriguez * Use cache_home instead of data_home in default_spec_cache_dir. Pull request [#7331](https://github.com/rubygems/rubygems/pull/7331) by mrkn ## Documentation: * Use squiggly heredocs in `Gem::Specification#description` documentation, so it doesn't add leading whitespace. Pull request [#7373](https://github.com/rubygems/rubygems/pull/7373) by bravehager # 3.5.4 / 2024-01-04 ## Enhancements: * Always avoid "Updating rubygems-update" message. Pull request [#7335](https://github.com/rubygems/rubygems/pull/7335) by deivid-rodriguez * Installs bundler 2.5.4 as a default gem. ## Bug fixes: * Make `gem update --system` respect ruby version constraints. Pull request [#7334](https://github.com/rubygems/rubygems/pull/7334) by deivid-rodriguez ------------------------------------------------------------------------------ RubyGems installed the following executables: /home/student/.asdf/installs/ruby/3.3.0/bin/gem /home/student/.asdf/installs/ruby/3.3.0/bin/bundle /home/student/.asdf/installs/ruby/3.3.0/bin/bundler Ruby Interactive (ri) documentation was installed. ri is kind of like man pages for Ruby libraries. You may access it like this: ri Classname ri Classname.class_method ri Classname#instance_method If you do not wish to install this documentation in the future, use the --no-document flag, or set it as the default in your ~/.gemrc file. See 'gem help env' for details. RubyGems system software updated |
You can confirm your Ruby install with two commands. First, use the which utility to check the Ruby install:
which -a ruby |
It should return:
/home/student/.asdf/shims/ruby |
Then, check the Ruby version:
ruby -v |
It should return:
ruby 3.3.0 (2023-12-25 revision 5124f9ac75) [x86_64-linux] |
Assuming you’ve installed and configured MySQL 8 on Ubuntu, you need this additional library to support the necessary Ruby Gem:
sudo apt-get install -y libmysqlclient-dev |
Now, you can install the current MySQL Ruby Gem:
gem install mysql2 |
You can now write a mysql_connection.rb program to verify a connection to the MySQL 8 database, like:
# Include Ruby Gem libraries. require 'rubygems' require 'mysql2' begin # Create new database connection. db = Mysql2::Client.new( :host => 'localhost' \ , :username => 'student' \ , :password => 'student' \ , :database => 'studentdb') # Create a result set. stmt = db.query('SELECT version() AS version') # Read through the result set hash. stmt.each do | row | puts "#{row['version']}" end # Release the result set resources. stmt.free rescue Mysql2::Error => e # Print the error. puts "ERROR #{e.errno} (#{e.sqlstate}): #{e.error}" puts "Can't connect to the MySQL database specified." # Signal an error. exit 1 ensure # Close the connection when it is open. db.close if db end |
Call the program with this syntax:
ruby mysql_connection.rb |
It should return:
Connected to the MySQL database server. |
You can verify the version with this mysql_version.rb program:
# Include Ruby Gem libraries. require 'rubygems' require 'mysql2' begin # Create new database connection. db = Mysql2::Client.new( :host => 'localhost' \ , :username => 'student' \ , :password => 'student' \ , :database => 'studentdb') # Create a result set. rs = db.query('SELECT version() AS version') # Read through the result set hash. rs.each do | row | puts "#{row['version']}" end # Release the result set resources. rs.free rescue Mysql2::Error => e # Print the error. puts "ERROR #{e.errno} (#{e.sqlstate}): #{e.error}" puts "Can't connect to the MySQL database specified." # Signal an error. exit 1 ensure # Close the connection when it is open. db.close if db end |
On Ubuntu, it should return:
8.0.35-0ubuntu0.22.04.1 |
If you don’t know anything about the mysql2 Ruby Gem, you should read the documentation. It’s very concise and requires a basic understanding of Ruby programming. The two specific pages who may want to check for the next examples are:
- The Mysql2 Statement Class list.
- The Mysql2 Result Class List
The mysql_version.rb version uses the known string literal for columns or column aliases returned by the SQL statement, which becomes the stmt (or statement) in the program. The next program eliminates the need to enumerate with the text-based columns from the query by using the Statement#fields array values by use of a numeric index. The numeric index returns the field names from the Statement#fields class to use in as the name for values in the Result#fields value found in the row variable of the for loop.
# Include Ruby Gem libraries. require 'rubygems' require 'mysql2' # Begin block. begin # Create a new connection resource. db = Mysql2::Client.new( :host => 'localhost' \ , :username => 'student' \ , :password => 'student' \ , :database => 'studentdb') # Create a result set. stmt = db.query("SELECT DISTINCT i.item_title, ra.rating " + \ "FROM item i INNER JOIN rating_agency ra " + \ "ON i.item_rating_id = ra.rating_agency_id " + \ "WHERE ra.rating_agency = 'MPAA'" + \ "ORDER BY 1") # Read through the result set hash. stmt.each do | row | out = "" i = 0 while i < stmt.fields.count() # Check when not last column and use the: # - Hash returned by the result set for the value, and # - String array value returned by the statement object # as the name value of the hash by leveraging its # numeric index. if i < stmt.fields.count() - 1 out += "#{row[stmt.fields[i]]}" out += ", " else out += "#{row[stmt.fields[i]]}" end i += 1 end puts "#{out}" end # Release the result set resources. stmt.free rescue Mysql2::Error => e # Print the error. puts "ERROR #{e.errno} (#{e.sqlstate}): #{e.error}" puts "Can't connect to MySQL database specified." # Signal an error. exit 1 ensure # Close the connection when it is open. db.close if db end |
It returns the select two columns from the query:
A Man for All Seasons, G Around the World in 80 Days, G Beau Geste, PG Brave Heart, R Camelot, G Casino Royale, PG-13 ... Tomorrow Never Dies, PG-13 Tora! Tora! Tora!, G Tron, PG |
The following mysql_query_params.rb Ruby example accepts a single argument to leverage a wild card query in MySQL:
require 'rubygems' require 'mysql2' # Input external arguments. arguments = ARGV # Check for one input parameter and substitute an empty string # when one isn't found. if arguments.length == 1 argument = arguments[0] else argument = "" end # Begin block. begin # Create a new connection resource. db = Mysql2::Client.new( :host => 'localhost' \ , :username => 'student' \ , :password => 'student' \ , :database => 'studentdb') # Create a result set. stmt = db.prepare("SELECT DISTINCT i.item_title, ra.rating " + \ "FROM item i INNER JOIN rating_agency ra " + \ "ON i.item_rating_id = ra.rating_agency_id " + \ "WHERE ra.rating_agency = 'MPAA'" + \ "AND i.item_title LIKE CONCAT(?,'%')" + \ "ORDER BY 1") # Bind the variable into the query. rs = stmt.execute(argument) # Read through the result set hash. rs.each do | row | out = "" i = 0 while i < rs.fields.count() # Check when not last column and use the: # - Hash returned by the result set for the value, and # - String array value returned by the statement object # as the name value of the hash by leveraging its # numeric index. if i < rs.fields.count() - 1 out += "#{row[rs.fields[i]]}" out += ", " else out += "#{row[rs.fields[i]]}" end i += 1 end puts "#{out}" end # Release the result set resources. rs.free rescue Mysql2::Error => e # Print the error. puts "ERROR #{e.errno} (#{e.sqlstate}): #{e.error}" puts "Can't connect to MySQL database specified." # Signal an error. exit 1 ensure # Close the connection when it is open. db.close if db end |
If you call the mysql_query_params.rb program with this syntax:
ruby mysql_aquery_params.rb Harry |
It’ll return the following from the studentdb database:
Harry Potter and the Chamber of Secrets, PG Harry Potter and the Deathly Hallows, Part 1, PG-13 Harry Potter and the Deathly Hallows, Part 2, PG-13 Harry Potter and the Goblet of Fire, PG-13 Harry Potter and the Half Blood Prince, PG Harry Potter and the Order of the Phoenix, PG-13 Harry Potter and the Prisoner of Azkaban, PG Harry Potter and the Sorcerer's Stone, PG |
After that, you should install Rails (check for current version beyond 1/2024). Install Ruby Global with this syntax:
gem install rails -v 7.1.3 |
Check the version installed:
rails -v |
It should return:
Rails 7.1.3 |
Run this command to enable Rails for MySQL 8:
rails new myapp -d mysql |
If you want to configure a username and password for MySQL, edit the config/database.yml file.
As always, I hope this helps somebody looking for step-by-step guide.
Ubuntu Next.js Install
You begin by setting up Node with its version manager. You can do this in a Terminal shell with the following command:
curl -o- https://raw.githubusercontent.com/nvm-sh/nvm/v0.39.1/install.sh | bash |
After running that command, you should reboot your system. Then, open a new Terminal session and start NVM with this command in your home directory:
nvm install --lts |
Display detailed console log →
Installing latest LTS version. Downloading and installing node v20.11.0... Downloading https://nodejs.org/dist/v20.11.0/node-v20.11.0-linux-x64.tar.xz... ######################################################################### 100.0% Computing checksum with sha256sum Checksums matched! Now using node v20.11.0 (npm v10.2.4) Creating default alias: default -> lts/* (-> v20.11.0) |
After installing Node, create a new Next.js application to test if everything is working. Create a blog-app application with the following command in the Ubuntu bash shell session:
npx create-next-app@latest blog-app |
It produces a small console log and asks you complete interactive responses as shown:
Need to install the following packages:
create-next-app@14.0.4
Ok to proceed? (y) y
✔ Would you like to use TypeScript? … No / Yes
✔ Would you like to use ESLint? … No / Yes
✔ Would you like to use Tailwind CSS? … No / Yes
✔ Would you like to use `src/` directory? … No / Yes
✔ Would you like to use App Router? (recommended) … No / Yes
✔ Would you like to customize the default import alias (@/*)? … No / Yes
Creating a new Next.js app in /home/student/blog-app.
Display detailed console log →
Using npm. Initializing project with template: app-tw Installing dependencies: - react - react-dom - next Installing devDependencies: - typescript - @types/node - @types/react - @types/react-dom - autoprefixer - postcss - tailwindcss - eslint - eslint-config-next added 362 packages, and audited 363 packages in 25s 128 packages are looking for funding run `npm fund` for details found 0 vulnerabilities Success! Created blog-app at /home/student/blog-app npm notice npm notice New minor version of npm available! 10.2.4 -> 10.3.0 npm notice Changelog: https://github.com/npm/cli/releases/tag/v10.3.0 npm notice Run npm install -g npm@10.3.0 to update! npm notice |
Now, you can launch the application from the command-line interface (CLI):
npm run dev & |
Display detailed console log →
> blog-app@0.1.0 dev > next dev ▲ Next.js 14.0.4 - Local: http://localhost:3000 Attention: Next.js now collects completely anonymous telemetry regarding usage. This information is used to shape Next.js' roadmap and prioritize features. You can learn more, including how to opt-out if you'd not like to participate in this anonymous program, by visiting the following URL: https://nextjs.org/telemetry ✓ Ready in 1937ms ○ Compiling / ... ✓ Compiled / in 14.9s (500 modules) ✓ Compiled in 597ms (235 modules) ○ Compiling /favicon.ico ... ✓ Compiled /favicon.ico in 2.1s (505 modules) |
You can view the running application by using the following URL in a local browser:
http://localhost:3000 |
It should render the following web application:
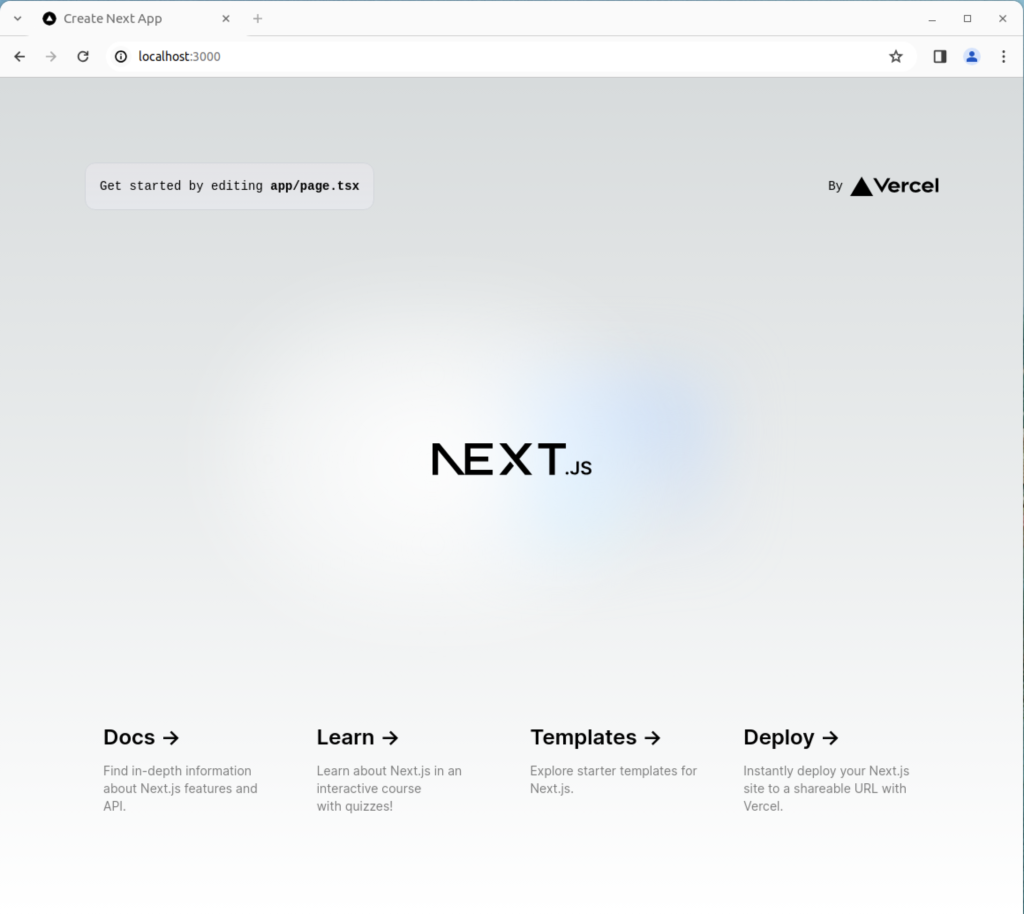
As always, I hope this helps those curious about new things and who need a set of instructions.
Oracle 23c Free SQL*Plus
It’s always frustrated me when using the sqlplus command-line interface (CLI) that you can’t just “up arrow” to through the history. At least, that’s the default case unless you wrap the sqlplus executable.
I like to do my development work as close to the database as possible. The delay from SQL Developer to the database or VSCode to the database is just too long. Therefore, I like the native sqlplus to be as efficient as possible. This post shows you how to install the rlwarp utility to wrap sqlplus and create a sandboxed student user for a local development account inside the Oracle 23c Free container. You should note that the Docker or Podman Container is using Oracle Unbreakable Linux 8 as it’s native OS.
You can connect to your Docker version of Oracle Database 23c Free with the following command:
docker exec -it -u root oracle23c bash |
You can’t just use dnf to install rlwrap and get it to magically install all the dependencies. That would be too easy, eh?
Attempting to do so will lock your base OS and eventually force you to kill with prejudice the hung dnf process (at least it forced me to do so). You need to determine the rlwrap dependencies and then install them first. In that process, I noticed that the which utility program wasn’t installed in the container.
Naturally, I installed the which utility first with this command:
dnf install -y which |
Display detailed console log →
Last metadata expiration check: 0:26:00 ago on Thu Dec 21 05:18:09 2023. Dependencies resolved. ================================================================================ Package Architecture Version Repository Size ================================================================================ Installing: which x86_64 2.21-20.el8 ol8_baseos_latest 50 k Transaction Summary ================================================================================ Install 1 Package Total download size: 50 k Installed size: 81 k Downloading Packages: which-2.21-20.el8.x86_64.rpm 80 kB/s | 50 kB 00:00 -------------------------------------------------------------------------------- Total 80 kB/s | 50 kB 00:00 Running transaction check Transaction check succeeded. Running transaction test Transaction test succeeded. Running transaction Preparing : 1/1 Installing : which-2.21-20.el8.x86_64 1/1 Running scriptlet: which-2.21-20.el8.x86_64 1/1 Verifying : which-2.21-20.el8.x86_64 1/1 Installed: which-2.21-20.el8.x86_64 Complete! |
The rlwrap dependencies are: glibc, ncurses, perl, readline, python, and git. Only the perl, python, and git are missing from the list of formal dependencies but there’s another dependency the epel-release package.
If you want to verify whether a package is installed, you can use the rpm command like this:
rpm -qa | grep package_name |
I installed the perl programming environment (a big install) with this command:
dnf install -y perl |
Display detailed console log →
Last metadata expiration check: 0:28:29 ago on Thu Dec 21 05:18:09 2023.
Dependencies resolved.
================================================================================
Package Arch Version Repository Size
================================================================================
Installing:
perl x86_64 4:5.26.3-422.el8 ol8_appstream 73 k
Installing dependencies:
dwz x86_64 0.12-10.el8 ol8_appstream 109 k
efi-srpm-macros noarch 3-3.0.1.el8 ol8_appstream 22 k
file x86_64 5.33-24.el8 ol8_baseos_latest 77 k
ghc-srpm-macros noarch 1.4.2-7.el8 ol8_appstream 9.3 k
glibc-gconv-extra x86_64 2.28-225.0.3.el8 ol8_baseos_latest 1.5 M
go-srpm-macros noarch 2-17.el8 ol8_appstream 13 k
groff-base x86_64 1.22.3-18.el8 ol8_baseos_latest 1.0 M
ocaml-srpm-macros noarch 5-4.el8 ol8_appstream 9.3 k
openblas-srpm-macros noarch 2-2.el8 ol8_appstream 7.9 k
perl-Algorithm-Diff noarch 1.1903-9.el8 ol8_baseos_latest 52 k
perl-Archive-Tar noarch 2.30-1.el8 ol8_baseos_latest 79 k
perl-Archive-Zip noarch 1.60-3.el8 ol8_appstream 108 k
perl-Attribute-Handlers noarch 0.99-422.el8 ol8_appstream 89 k
perl-B-Debug noarch 1.26-2.el8 ol8_appstream 26 k
perl-CPAN noarch 2.18-397.el8 ol8_appstream 554 k
perl-CPAN-Meta noarch 2.150010-396.el8 ol8_appstream 191 k
perl-CPAN-Meta-Requirements noarch 2.140-396.el8 ol8_appstream 37 k
perl-CPAN-Meta-YAML noarch 0.018-397.el8 ol8_appstream 34 k
perl-Carp noarch 1.42-396.el8 ol8_baseos_latest 30 k
perl-Compress-Bzip2 x86_64 2.26-6.el8 ol8_appstream 72 k
perl-Compress-Raw-Bzip2 x86_64 2.081-1.el8 ol8_baseos_latest 40 k
perl-Compress-Raw-Zlib x86_64 2.081-1.el8 ol8_baseos_latest 68 k
perl-Config-Perl-V noarch 0.30-1.el8 ol8_appstream 22 k
perl-DB_File x86_64 1.842-1.el8 ol8_appstream 83 k
perl-Data-Dumper x86_64 2.167-399.el8 ol8_baseos_latest 58 k
perl-Data-OptList noarch 0.110-6.el8 ol8_appstream 31 k
perl-Data-Section noarch 0.200007-3.el8 ol8_appstream 30 k
perl-Devel-PPPort x86_64 3.36-5.el8 ol8_appstream 118 k
perl-Devel-Peek x86_64 1.26-422.el8 ol8_appstream 94 k
perl-Devel-SelfStubber noarch 1.06-422.el8 ol8_appstream 76 k
perl-Devel-Size x86_64 0.81-2.el8 ol8_appstream 34 k
perl-Digest noarch 1.17-395.el8 ol8_baseos_latest 27 k
perl-Digest-MD5 x86_64 2.55-396.el8 ol8_baseos_latest 37 k
perl-Digest-SHA x86_64 1:6.02-1.el8 ol8_appstream 66 k
perl-Encode x86_64 4:2.97-3.el8 ol8_baseos_latest 1.5 M
perl-Encode-devel x86_64 4:2.97-3.el8 ol8_appstream 39 k
perl-Env noarch 1.04-395.el8 ol8_appstream 21 k
perl-Errno x86_64 1.28-422.el8 ol8_baseos_latest 76 k
perl-Exporter noarch 5.72-396.el8 ol8_baseos_latest 34 k
perl-ExtUtils-CBuilder noarch 1:0.280230-2.el8 ol8_appstream 48 k
perl-ExtUtils-Command noarch 1:7.34-1.el8 ol8_appstream 19 k
perl-ExtUtils-Embed noarch 1.34-422.el8 ol8_appstream 79 k
perl-ExtUtils-Install noarch 2.14-4.el8 ol8_appstream 46 k
perl-ExtUtils-MM-Utils noarch 1:7.34-1.el8 ol8_appstream 16 k
perl-ExtUtils-MakeMaker noarch 1:7.34-1.el8 ol8_appstream 300 k
perl-ExtUtils-Manifest noarch 1.70-395.el8 ol8_appstream 36 k
perl-ExtUtils-Miniperl noarch 1.06-422.el8 ol8_appstream 77 k
perl-ExtUtils-ParseXS noarch 1:3.35-2.el8 ol8_appstream 83 k
perl-File-Fetch noarch 0.56-2.el8 ol8_appstream 33 k
perl-File-HomeDir noarch 1.002-4.el8 ol8_appstream 61 k
perl-File-Path noarch 2.15-2.el8 ol8_baseos_latest 38 k
perl-File-Temp noarch 0.230.600-1.el8 ol8_baseos_latest 63 k
perl-File-Which noarch 1.22-2.el8 ol8_appstream 23 k
perl-Filter x86_64 2:1.58-2.el8 ol8_appstream 82 k
perl-Filter-Simple noarch 0.94-2.el8 ol8_appstream 29 k
perl-Getopt-Long noarch 1:2.50-4.el8 ol8_baseos_latest 63 k
perl-HTTP-Tiny noarch 0.074-2.el8 ol8_baseos_latest 57 k
perl-IO x86_64 1.38-422.el8 ol8_baseos_latest 142 k
perl-IO-Compress noarch 2.081-1.el8 ol8_baseos_latest 258 k
perl-IO-Socket-IP noarch 0.39-5.el8 ol8_baseos_latest 47 k
perl-IO-Socket-SSL noarch 2.066-4.module+el8.6.0+20623+f0897f98
ol8_appstream 298 k
perl-IO-Zlib noarch 1:1.10-422.el8 ol8_baseos_latest 81 k
perl-IPC-Cmd noarch 2:1.02-1.el8 ol8_appstream 43 k
perl-IPC-SysV x86_64 2.07-397.el8 ol8_appstream 43 k
perl-IPC-System-Simple noarch 1.25-17.el8 ol8_appstream 43 k
perl-JSON-PP noarch 1:2.97.001-3.el8 ol8_appstream 68 k
perl-Locale-Codes noarch 3.57-1.el8 ol8_appstream 310 k
perl-Locale-Maketext noarch 1.28-396.el8 ol8_appstream 99 k
perl-Locale-Maketext-Simple noarch 1:0.21-422.el8 ol8_appstream 79 k
perl-MIME-Base64 x86_64 3.15-396.el8 ol8_baseos_latest 31 k
perl-MRO-Compat noarch 0.13-4.el8 ol8_appstream 24 k
perl-Math-BigInt noarch 1:1.9998.11-7.el8 ol8_baseos_latest 196 k
perl-Math-BigInt-FastCalc x86_64 0.500.600-6.el8 ol8_appstream 27 k
perl-Math-BigRat noarch 0.2614-1.el8 ol8_appstream 40 k
perl-Math-Complex noarch 1.59-422.el8 ol8_baseos_latest 109 k
perl-Memoize noarch 1.03-422.el8 ol8_appstream 119 k
perl-Module-Build noarch 2:0.42.24-5.el8 ol8_appstream 273 k
perl-Module-CoreList noarch 1:5.20181130-1.el8 ol8_appstream 87 k
perl-Module-CoreList-tools noarch 1:5.20181130-1.el8 ol8_appstream 22 k
perl-Module-Load noarch 1:0.32-395.el8 ol8_appstream 19 k
perl-Module-Load-Conditional noarch 0.68-395.el8 ol8_appstream 24 k
perl-Module-Loaded noarch 1:0.08-422.el8 ol8_appstream 75 k
perl-Module-Metadata noarch 1.000033-395.el8 ol8_appstream 44 k
perl-Mozilla-CA noarch 20160104-7.0.1.module+el8.3.0+21136+b437fca9
ol8_appstream 15 k
perl-Net-Ping noarch 2.55-422.el8 ol8_appstream 102 k
perl-Net-SSLeay x86_64 1.88-2.module+el8.6.0+20623+f0897f98
ol8_appstream 379 k
perl-Package-Generator noarch 1.106-11.el8 ol8_appstream 27 k
perl-Params-Check noarch 1:0.38-395.el8 ol8_appstream 24 k
perl-Params-Util x86_64 1.07-22.el8 ol8_appstream 44 k
perl-PathTools x86_64 3.74-1.el8 ol8_baseos_latest 90 k
perl-Perl-OSType noarch 1.010-396.el8 ol8_appstream 29 k
perl-PerlIO-via-QuotedPrint noarch 0.08-395.el8 ol8_appstream 13 k
perl-Pod-Checker noarch 4:1.73-395.el8 ol8_appstream 33 k
perl-Pod-Escapes noarch 1:1.07-395.el8 ol8_baseos_latest 20 k
perl-Pod-Html noarch 1.22.02-422.el8 ol8_appstream 88 k
perl-Pod-Parser noarch 1.63-396.el8 ol8_appstream 108 k
perl-Pod-Perldoc noarch 3.28-396.el8 ol8_baseos_latest 88 k
perl-Pod-Simple noarch 1:3.35-395.el8 ol8_baseos_latest 213 k
perl-Pod-Usage noarch 4:1.69-395.el8 ol8_baseos_latest 34 k
perl-Scalar-List-Utils x86_64 3:1.49-2.el8 ol8_baseos_latest 68 k
perl-SelfLoader noarch 1.23-422.el8 ol8_appstream 83 k
perl-Socket x86_64 4:2.027-3.el8 ol8_baseos_latest 59 k
perl-Software-License noarch 0.103013-2.el8 ol8_appstream 137 k
perl-Storable x86_64 1:3.11-3.el8 ol8_baseos_latest 98 k
perl-Sub-Exporter noarch 0.987-15.el8 ol8_appstream 73 k
perl-Sub-Install noarch 0.928-14.el8 ol8_appstream 27 k
perl-Sys-Syslog x86_64 0.35-397.el8 ol8_appstream 50 k
perl-Term-ANSIColor noarch 4.06-396.el8 ol8_baseos_latest 46 k
perl-Term-Cap noarch 1.17-395.el8 ol8_baseos_latest 23 k
perl-Test noarch 1.30-422.el8 ol8_appstream 90 k
perl-Test-Harness noarch 1:3.42-1.el8 ol8_appstream 279 k
perl-Test-Simple noarch 1:1.302135-1.el8 ol8_appstream 516 k
perl-Text-Balanced noarch 2.03-395.el8 ol8_appstream 58 k
perl-Text-Diff noarch 1.45-2.el8 ol8_baseos_latest 45 k
perl-Text-Glob noarch 0.11-4.el8 ol8_appstream 17 k
perl-Text-ParseWords noarch 3.30-395.el8 ol8_baseos_latest 18 k
perl-Text-Tabs+Wrap noarch 2013.0523-395.el8 ol8_baseos_latest 24 k
perl-Text-Template noarch 1.51-1.el8 ol8_appstream 64 k
perl-Thread-Queue noarch 3.13-1.el8 ol8_appstream 24 k
perl-Time-HiRes x86_64 4:1.9758-2.el8 ol8_appstream 61 k
perl-Time-Local noarch 1:1.280-1.el8 ol8_baseos_latest 33 k
perl-Time-Piece x86_64 1.31-422.el8 ol8_appstream 98 k
perl-URI noarch 1.73-3.el8 ol8_baseos_latest 116 k
perl-Unicode-Collate x86_64 1.25-2.el8 ol8_appstream 686 k
perl-Unicode-Normalize x86_64 1.25-396.el8 ol8_baseos_latest 82 k
perl-autodie noarch 2.29-396.el8 ol8_appstream 98 k
perl-bignum noarch 0.49-2.el8 ol8_appstream 43 k
perl-constant noarch 1.33-396.el8 ol8_baseos_latest 25 k
perl-devel x86_64 4:5.26.3-422.el8 ol8_appstream 600 k
perl-encoding x86_64 4:2.22-3.el8 ol8_appstream 68 k
perl-experimental noarch 0.019-2.el8 ol8_appstream 24 k
perl-inc-latest noarch 2:0.500-9.el8 ol8_appstream 25 k
perl-interpreter x86_64 4:5.26.3-422.el8 ol8_baseos_latest 6.3 M
perl-libnet noarch 3.11-3.el8 ol8_baseos_latest 121 k
perl-libnetcfg noarch 4:5.26.3-422.el8 ol8_appstream 78 k
perl-libs x86_64 4:5.26.3-422.el8 ol8_baseos_latest 1.6 M
perl-local-lib noarch 2.000024-2.el8 ol8_appstream 74 k
perl-macros x86_64 4:5.26.3-422.el8 ol8_baseos_latest 72 k
perl-open noarch 1.11-422.el8 ol8_appstream 78 k
perl-parent noarch 1:0.237-1.el8 ol8_baseos_latest 20 k
perl-perlfaq noarch 5.20180605-1.el8 ol8_appstream 386 k
perl-podlators noarch 4.11-1.el8 ol8_baseos_latest 118 k
perl-srpm-macros noarch 1-25.el8 ol8_appstream 11 k
perl-threads x86_64 1:2.21-2.el8 ol8_baseos_latest 61 k
perl-threads-shared x86_64 1.58-2.el8 ol8_baseos_latest 48 k
perl-utils noarch 5.26.3-422.el8 ol8_appstream 129 k
perl-version x86_64 6:0.99.24-1.el8 ol8_appstream 67 k
python-rpm-macros noarch 3-45.el8 ol8_appstream 16 k
python-srpm-macros noarch 3-45.el8 ol8_appstream 16 k
python3-pyparsing noarch 2.1.10-7.el8 ol8_baseos_latest 142 k
python3-rpm-macros noarch 3-45.el8 ol8_appstream 15 k
qt5-srpm-macros noarch 5.15.3-1.el8 ol8_appstream 11 k
redhat-rpm-config noarch 131-1.0.1.el8 ol8_appstream 91 k
rust-srpm-macros noarch 5-2.el8 ol8_appstream 9.2 k
systemtap-sdt-devel x86_64 4.9-3.0.1.el8 ol8_appstream 88 k
zip x86_64 3.0-23.el8 ol8_baseos_latest 270 k
Installing weak dependencies:
perl-Encode-Locale noarch 1.05-10.module+el8.3.0+7692+542c56f9
ol8_appstream 22 k
perl-TermReadKey x86_64 2.37-7.el8 ol8_appstream 40 k
Enabling module streams:
perl 5.26
perl-IO-Socket-SSL 2.066
perl-libwww-perl 6.34
Transaction Summary
================================================================================
Install 159 Packages
Total download size: 25 M
Installed size: 73 M
Downloading Packages:
(1/159): file-5.33-24.el8.x86_64.rpm 163 kB/s | 77 kB 00:00
(2/159): perl-Algorithm-Diff-1.1903-9.el8.noarc 531 kB/s | 52 kB 00:00
(3/159): groff-base-1.22.3-18.el8.x86_64.rpm 1.5 MB/s | 1.0 MB 00:00
(4/159): perl-Archive-Tar-2.30-1.el8.noarch.rpm 642 kB/s | 79 kB 00:00
(5/159): perl-Carp-1.42-396.el8.noarch.rpm 449 kB/s | 30 kB 00:00
(6/159): perl-Compress-Raw-Bzip2-2.081-1.el8.x8 452 kB/s | 40 kB 00:00
(7/159): perl-Compress-Raw-Zlib-2.081-1.el8.x86 968 kB/s | 68 kB 00:00
(8/159): perl-Data-Dumper-2.167-399.el8.x86_64. 734 kB/s | 58 kB 00:00
(9/159): perl-Digest-1.17-395.el8.noarch.rpm 391 kB/s | 27 kB 00:00
(10/159): perl-Digest-MD5-2.55-396.el8.x86_64.r 481 kB/s | 37 kB 00:00
(11/159): perl-Errno-1.28-422.el8.x86_64.rpm 811 kB/s | 76 kB 00:00
(12/159): perl-Encode-2.97-3.el8.x86_64.rpm 9.4 MB/s | 1.5 MB 00:00
(13/159): perl-File-Path-2.15-2.el8.noarch.rpm 627 kB/s | 38 kB 00:00
(14/159): perl-Exporter-5.72-396.el8.noarch.rpm 466 kB/s | 34 kB 00:00
(15/159): perl-Getopt-Long-2.50-4.el8.noarch.rp 867 kB/s | 63 kB 00:00
(16/159): perl-File-Temp-0.230.600-1.el8.noarch 648 kB/s | 63 kB 00:00
(17/159): perl-HTTP-Tiny-0.074-2.el8.noarch.rpm 847 kB/s | 57 kB 00:00
(18/159): perl-IO-Compress-2.081-1.el8.noarch.r 3.5 MB/s | 258 kB 00:00
(19/159): perl-IO-1.38-422.el8.x86_64.rpm 1.2 MB/s | 142 kB 00:00
(20/159): perl-IO-Socket-IP-0.39-5.el8.noarch.r 614 kB/s | 47 kB 00:00
(21/159): perl-IO-Zlib-1.10-422.el8.noarch.rpm 881 kB/s | 81 kB 00:00
(22/159): perl-MIME-Base64-3.15-396.el8.x86_64. 425 kB/s | 31 kB 00:00
(23/159): perl-Math-BigInt-1.9998.11-7.el8.noar 1.5 MB/s | 196 kB 00:00
(24/159): perl-Math-Complex-1.59-422.el8.noarch 1.5 MB/s | 109 kB 00:00
(25/159): perl-Pod-Escapes-1.07-395.el8.noarch. 300 kB/s | 20 kB 00:00
(26/159): perl-PathTools-3.74-1.el8.x86_64.rpm 1.2 MB/s | 90 kB 00:00
(27/159): perl-Pod-Perldoc-3.28-396.el8.noarch. 1.2 MB/s | 88 kB 00:00
(28/159): perl-Pod-Simple-3.35-395.el8.noarch.r 2.2 MB/s | 213 kB 00:00
(29/159): perl-Pod-Usage-1.69-395.el8.noarch.rp 499 kB/s | 34 kB 00:00
(30/159): perl-Scalar-List-Utils-1.49-2.el8.x86 947 kB/s | 68 kB 00:00
(31/159): perl-Socket-2.027-3.el8.x86_64.rpm 864 kB/s | 59 kB 00:00
(32/159): perl-Storable-3.11-3.el8.x86_64.rpm 1.2 MB/s | 98 kB 00:00
(33/159): perl-Term-ANSIColor-4.06-396.el8.noar 677 kB/s | 46 kB 00:00
(34/159): perl-Term-Cap-1.17-395.el8.noarch.rpm 321 kB/s | 23 kB 00:00
(35/159): perl-Text-Diff-1.45-2.el8.noarch.rpm 596 kB/s | 45 kB 00:00
(36/159): perl-Text-ParseWords-3.30-395.el8.noa 257 kB/s | 18 kB 00:00
(37/159): perl-Text-Tabs+Wrap-2013.0523-395.el8 351 kB/s | 24 kB 00:00
(38/159): perl-Time-Local-1.280-1.el8.noarch.rp 440 kB/s | 33 kB 00:00
(39/159): perl-URI-1.73-3.el8.noarch.rpm 1.6 MB/s | 116 kB 00:00
(40/159): perl-Unicode-Normalize-1.25-396.el8.x 1.1 MB/s | 82 kB 00:00
(41/159): perl-constant-1.33-396.el8.noarch.rpm 395 kB/s | 25 kB 00:00
(42/159): perl-libnet-3.11-3.el8.noarch.rpm 1.8 MB/s | 121 kB 00:00
(43/159): perl-libs-5.26.3-422.el8.x86_64.rpm 13 MB/s | 1.6 MB 00:00
(44/159): perl-macros-5.26.3-422.el8.x86_64.rpm 1.1 MB/s | 72 kB 00:00
(45/159): perl-parent-0.237-1.el8.noarch.rpm 279 kB/s | 20 kB 00:00
(46/159): perl-podlators-4.11-1.el8.noarch.rpm 1.3 MB/s | 118 kB 00:00
(47/159): perl-interpreter-5.26.3-422.el8.x86_6 14 MB/s | 6.3 MB 00:00
(48/159): glibc-gconv-extra-2.28-225.0.3.el8.x8 601 kB/s | 1.5 MB 00:02
(49/159): perl-threads-2.21-2.el8.x86_64.rpm 876 kB/s | 61 kB 00:00
(50/159): perl-threads-shared-1.58-2.el8.x86_64 657 kB/s | 48 kB 00:00
(51/159): python3-pyparsing-2.1.10-7.el8.noarch 2.0 MB/s | 142 kB 00:00
(52/159): zip-3.0-23.el8.x86_64.rpm 3.7 MB/s | 270 kB 00:00
(53/159): dwz-0.12-10.el8.x86_64.rpm 1.6 MB/s | 109 kB 00:00
(54/159): efi-srpm-macros-3-3.0.1.el8.noarch.rp 350 kB/s | 22 kB 00:00
(55/159): ghc-srpm-macros-1.4.2-7.el8.noarch.rp 125 kB/s | 9.3 kB 00:00
(56/159): go-srpm-macros-2-17.el8.noarch.rpm 198 kB/s | 13 kB 00:00
(57/159): ocaml-srpm-macros-5-4.el8.noarch.rpm 154 kB/s | 9.3 kB 00:00
(58/159): openblas-srpm-macros-2-2.el8.noarch.r 116 kB/s | 7.9 kB 00:00
(59/159): perl-5.26.3-422.el8.x86_64.rpm 921 kB/s | 73 kB 00:00
(60/159): perl-Archive-Zip-1.60-3.el8.noarch.rp 1.4 MB/s | 108 kB 00:00
(61/159): perl-Attribute-Handlers-0.99-422.el8. 1.2 MB/s | 89 kB 00:00
(62/159): perl-B-Debug-1.26-2.el8.noarch.rpm 356 kB/s | 26 kB 00:00
(63/159): perl-CPAN-2.18-397.el8.noarch.rpm 5.3 MB/s | 554 kB 00:00
(64/159): perl-CPAN-Meta-2.150010-396.el8.noarc 2.3 MB/s | 191 kB 00:00
(65/159): perl-CPAN-Meta-Requirements-2.140-396 512 kB/s | 37 kB 00:00
(66/159): perl-CPAN-Meta-YAML-0.018-397.el8.noa 508 kB/s | 34 kB 00:00
(67/159): perl-Compress-Bzip2-2.26-6.el8.x86_64 990 kB/s | 72 kB 00:00
(68/159): perl-Config-Perl-V-0.30-1.el8.noarch. 337 kB/s | 22 kB 00:00
(69/159): perl-DB_File-1.842-1.el8.x86_64.rpm 1.2 MB/s | 83 kB 00:00
(70/159): perl-Data-OptList-0.110-6.el8.noarch. 457 kB/s | 31 kB 00:00
(71/159): perl-Data-Section-0.200007-3.el8.noar 423 kB/s | 30 kB 00:00
(72/159): perl-Devel-PPPort-3.36-5.el8.x86_64.r 1.6 MB/s | 118 kB 00:00
(73/159): perl-Devel-Peek-1.26-422.el8.x86_64.r 960 kB/s | 94 kB 00:00
(74/159): perl-Devel-SelfStubber-1.06-422.el8.n 831 kB/s | 76 kB 00:00
(75/159): perl-Devel-Size-0.81-2.el8.x86_64.rpm 510 kB/s | 34 kB 00:00
(76/159): perl-Digest-SHA-6.02-1.el8.x86_64.rpm 859 kB/s | 66 kB 00:00
(77/159): perl-Encode-Locale-1.05-10.module+el8 285 kB/s | 22 kB 00:00
(78/159): perl-Encode-devel-2.97-3.el8.x86_64.r 510 kB/s | 39 kB 00:00
(79/159): perl-Env-1.04-395.el8.noarch.rpm 321 kB/s | 21 kB 00:00
(80/159): perl-ExtUtils-CBuilder-0.280230-2.el8 730 kB/s | 48 kB 00:00
(81/159): perl-ExtUtils-Command-7.34-1.el8.noar 248 kB/s | 19 kB 00:00
(82/159): perl-ExtUtils-Embed-1.34-422.el8.noar 1.1 MB/s | 79 kB 00:00
(83/159): perl-ExtUtils-Install-2.14-4.el8.noar 661 kB/s | 46 kB 00:00
(84/159): perl-ExtUtils-MM-Utils-7.34-1.el8.noa 243 kB/s | 16 kB 00:00
(85/159): perl-ExtUtils-MakeMaker-7.34-1.el8.no 4.0 MB/s | 300 kB 00:00
(86/159): perl-ExtUtils-Manifest-1.70-395.el8.n 500 kB/s | 36 kB 00:00
(87/159): perl-ExtUtils-Miniperl-1.06-422.el8.n 1.1 MB/s | 77 kB 00:00
(88/159): perl-File-HomeDir-1.002-4.el8.noarch. 980 kB/s | 61 kB 00:00
(89/159): perl-File-Fetch-0.56-2.el8.noarch.rpm 483 kB/s | 33 kB 00:00
(90/159): perl-ExtUtils-ParseXS-3.35-2.el8.noar 1.1 MB/s | 83 kB 00:00
(91/159): perl-Filter-Simple-0.94-2.el8.noarch. 417 kB/s | 29 kB 00:00
(92/159): perl-File-Which-1.22-2.el8.noarch.rpm 312 kB/s | 23 kB 00:00
(93/159): perl-Filter-1.58-2.el8.x86_64.rpm 1.1 MB/s | 82 kB 00:00
(94/159): perl-IO-Socket-SSL-2.066-4.module+el8 3.6 MB/s | 298 kB 00:00
(95/159): perl-IPC-Cmd-1.02-1.el8.noarch.rpm 545 kB/s | 43 kB 00:00
(96/159): perl-IPC-SysV-2.07-397.el8.x86_64.rpm 544 kB/s | 43 kB 00:00
(97/159): perl-IPC-System-Simple-1.25-17.el8.no 535 kB/s | 43 kB 00:00
(98/159): perl-JSON-PP-2.97.001-3.el8.noarch.rp 853 kB/s | 68 kB 00:00
(99/159): perl-Locale-Codes-3.57-1.el8.noarch.r 3.7 MB/s | 310 kB 00:00
(100/159): perl-MRO-Compat-0.13-4.el8.noarch.rp 399 kB/s | 24 kB 00:00
(101/159): perl-Locale-Maketext-1.28-396.el8.no 1.4 MB/s | 99 kB 00:00
(102/159): perl-Locale-Maketext-Simple-0.21-422 1.1 MB/s | 79 kB 00:00
(103/159): perl-Math-BigInt-FastCalc-0.500.600- 371 kB/s | 27 kB 00:00
(104/159): perl-Math-BigRat-0.2614-1.el8.noarch 560 kB/s | 40 kB 00:00
(105/159): perl-Memoize-1.03-422.el8.noarch.rpm 1.6 MB/s | 119 kB 00:00
(106/159): perl-Module-Build-0.42.24-5.el8.noar 3.4 MB/s | 273 kB 00:00
(107/159): perl-Module-CoreList-tools-5.2018113 297 kB/s | 22 kB 00:00
(108/159): perl-Module-CoreList-5.20181130-1.el 1.1 MB/s | 87 kB 00:00
(109/159): perl-Module-Load-0.32-395.el8.noarch 242 kB/s | 19 kB 00:00
(110/159): perl-Module-Load-Conditional-0.68-39 316 kB/s | 24 kB 00:00
(111/159): perl-Module-Loaded-0.08-422.el8.noar 972 kB/s | 75 kB 00:00
(112/159): perl-Module-Metadata-1.000033-395.el 664 kB/s | 44 kB 00:00
(113/159): perl-Mozilla-CA-20160104-7.0.1.modul 229 kB/s | 15 kB 00:00
(114/159): perl-Net-Ping-2.55-422.el8.noarch.rp 1.5 MB/s | 102 kB 00:00
(115/159): perl-Package-Generator-1.106-11.el8. 386 kB/s | 27 kB 00:00
(116/159): perl-Params-Check-0.38-395.el8.noarc 333 kB/s | 24 kB 00:00
(117/159): perl-Net-SSLeay-1.88-2.module+el8.6. 4.4 MB/s | 379 kB 00:00
(118/159): perl-Perl-OSType-1.010-396.el8.noarc 459 kB/s | 29 kB 00:00
(119/159): perl-Params-Util-1.07-22.el8.x86_64. 656 kB/s | 44 kB 00:00
(120/159): perl-PerlIO-via-QuotedPrint-0.08-395 206 kB/s | 13 kB 00:00
(121/159): perl-Pod-Checker-1.73-395.el8.noarch 449 kB/s | 33 kB 00:00
(122/159): perl-Pod-Parser-1.63-396.el8.noarch. 1.6 MB/s | 108 kB 00:00
(123/159): perl-Pod-Html-1.22.02-422.el8.noarch 1.1 MB/s | 88 kB 00:00
(124/159): perl-SelfLoader-1.23-422.el8.noarch. 1.1 MB/s | 83 kB 00:00
(125/159): perl-Software-License-0.103013-2.el8 1.8 MB/s | 137 kB 00:00
(126/159): perl-Sub-Exporter-0.987-15.el8.noarc 1.0 MB/s | 73 kB 00:00
(127/159): perl-Sub-Install-0.928-14.el8.noarch 383 kB/s | 27 kB 00:00
(128/159): perl-Sys-Syslog-0.35-397.el8.x86_64. 734 kB/s | 50 kB 00:00
(129/159): perl-TermReadKey-2.37-7.el8.x86_64.r 536 kB/s | 40 kB 00:00
(130/159): perl-Test-1.30-422.el8.noarch.rpm 1.2 MB/s | 90 kB 00:00
(131/159): perl-Test-Harness-3.42-1.el8.noarch. 3.4 MB/s | 279 kB 00:00
(132/159): perl-Test-Simple-1.302135-1.el8.noar 5.2 MB/s | 516 kB 00:00
(133/159): perl-Text-Glob-0.11-4.el8.noarch.rpm 272 kB/s | 17 kB 00:00
(134/159): perl-Text-Balanced-2.03-395.el8.noar 807 kB/s | 58 kB 00:00
(135/159): perl-Text-Template-1.51-1.el8.noarch 841 kB/s | 64 kB 00:00
(136/159): perl-Time-HiRes-1.9758-2.el8.x86_64. 855 kB/s | 61 kB 00:00
(137/159): perl-Thread-Queue-3.13-1.el8.noarch. 319 kB/s | 24 kB 00:00
(138/159): perl-Time-Piece-1.31-422.el8.x86_64. 1.3 MB/s | 98 kB 00:00
(139/159): perl-autodie-2.29-396.el8.noarch.rpm 1.3 MB/s | 98 kB 00:00
(140/159): perl-Unicode-Collate-1.25-2.el8.x86_ 7.2 MB/s | 686 kB 00:00
(141/159): perl-bignum-0.49-2.el8.noarch.rpm 620 kB/s | 43 kB 00:00
(142/159): perl-encoding-2.22-3.el8.x86_64.rpm 934 kB/s | 68 kB 00:00
(143/159): perl-devel-5.26.3-422.el8.x86_64.rpm 6.5 MB/s | 600 kB 00:00
(144/159): perl-experimental-0.019-2.el8.noarch 327 kB/s | 24 kB 00:00
(145/159): perl-inc-latest-0.500-9.el8.noarch.r 331 kB/s | 25 kB 00:00
(146/159): perl-libnetcfg-5.26.3-422.el8.noarch 1.0 MB/s | 78 kB 00:00
(147/159): perl-local-lib-2.000024-2.el8.noarch 1.1 MB/s | 74 kB 00:00
(148/159): perl-srpm-macros-1-25.el8.noarch.rpm 157 kB/s | 11 kB 00:00
(149/159): perl-open-1.11-422.el8.noarch.rpm 1.0 MB/s | 78 kB 00:00
(150/159): perl-perlfaq-5.20180605-1.el8.noarch 4.7 MB/s | 386 kB 00:00
(151/159): perl-version-0.99.24-1.el8.x86_64.rp 1.0 MB/s | 67 kB 00:00
(152/159): perl-utils-5.26.3-422.el8.noarch.rpm 1.7 MB/s | 129 kB 00:00
(153/159): python-rpm-macros-3-45.el8.noarch.rp 219 kB/s | 16 kB 00:00
(154/159): python3-rpm-macros-3-45.el8.noarch.r 243 kB/s | 15 kB 00:00
(155/159): python-srpm-macros-3-45.el8.noarch.r 239 kB/s | 16 kB 00:00
(156/159): qt5-srpm-macros-5.15.3-1.el8.noarch. 132 kB/s | 11 kB 00:00
(157/159): rust-srpm-macros-5-2.el8.noarch.rpm 128 kB/s | 9.2 kB 00:00
(158/159): redhat-rpm-config-131-1.0.1.el8.noar 1.2 MB/s | 91 kB 00:00
(159/159): systemtap-sdt-devel-4.9-3.0.1.el8.x8 1.2 MB/s | 88 kB 00:00
--------------------------------------------------------------------------------
Total 4.6 MB/s | 25 MB 00:05
Running transaction check
Transaction check succeeded.
Running transaction test
Transaction test succeeded.
Running transaction
Preparing : 1/1
Installing : python-srpm-macros-3-45.el8.noarch 1/159
Installing : python-rpm-macros-3-45.el8.noarch 2/159
Installing : python3-rpm-macros-3-45.el8.noarch 3/159
Installing : rust-srpm-macros-5-2.el8.noarch 4/159
Installing : qt5-srpm-macros-5.15.3-1.el8.noarch 5/159
Installing : perl-srpm-macros-1-25.el8.noarch 6/159
Installing : openblas-srpm-macros-2-2.el8.noarch 7/159
Installing : ocaml-srpm-macros-5-4.el8.noarch 8/159
Installing : go-srpm-macros-2-17.el8.noarch 9/159
Installing : ghc-srpm-macros-1.4.2-7.el8.noarch 10/159
Installing : efi-srpm-macros-3-3.0.1.el8.noarch 11/159
Installing : dwz-0.12-10.el8.x86_64 12/159
Installing : zip-3.0-23.el8.x86_64 13/159
Installing : python3-pyparsing-2.1.10-7.el8.noarch 14/159
Installing : systemtap-sdt-devel-4.9-3.0.1.el8.x86_64 15/159
Installing : groff-base-1.22.3-18.el8.x86_64 16/159
Installing : perl-Digest-1.17-395.el8.noarch 17/159
Installing : perl-Digest-MD5-2.55-396.el8.x86_64 18/159
Installing : perl-Data-Dumper-2.167-399.el8.x86_64 19/159
Installing : perl-libnet-3.11-3.el8.noarch 20/159
Installing : perl-URI-1.73-3.el8.noarch 21/159
Installing : perl-Pod-Escapes-1:1.07-395.el8.noarch 22/159
Installing : perl-IO-Socket-IP-0.39-5.el8.noarch 23/159
Installing : perl-Time-Local-1:1.280-1.el8.noarch 24/159
Installing : perl-Mozilla-CA-20160104-7.0.1.module+el8.3.0+21 25/159
Installing : perl-IO-Socket-SSL-2.066-4.module+el8.6.0+20623+ 26/159
Installing : perl-Net-SSLeay-1.88-2.module+el8.6.0+20623+f089 27/159
Installing : perl-Term-ANSIColor-4.06-396.el8.noarch 28/159
Installing : perl-Term-Cap-1.17-395.el8.noarch 29/159
Installing : perl-File-Temp-0.230.600-1.el8.noarch 30/159
Installing : perl-HTTP-Tiny-0.074-2.el8.noarch 31/159
Installing : perl-Pod-Simple-1:3.35-395.el8.noarch 32/159
Installing : perl-podlators-4.11-1.el8.noarch 33/159
Installing : perl-Pod-Perldoc-3.28-396.el8.noarch 34/159
Installing : perl-Text-ParseWords-3.30-395.el8.noarch 35/159
Installing : perl-Pod-Usage-4:1.69-395.el8.noarch 36/159
Installing : perl-MIME-Base64-3.15-396.el8.x86_64 37/159
Installing : perl-Storable-1:3.11-3.el8.x86_64 38/159
Installing : perl-Getopt-Long-1:2.50-4.el8.noarch 39/159
Installing : perl-Errno-1.28-422.el8.x86_64 40/159
Installing : perl-Socket-4:2.027-3.el8.x86_64 41/159
Installing : perl-Encode-4:2.97-3.el8.x86_64 42/159
Installing : perl-Carp-1.42-396.el8.noarch 43/159
Installing : perl-Exporter-5.72-396.el8.noarch 44/159
Installing : perl-libs-4:5.26.3-422.el8.x86_64 45/159
Installing : perl-Scalar-List-Utils-3:1.49-2.el8.x86_64 46/159
Installing : perl-parent-1:0.237-1.el8.noarch 47/159
Installing : perl-macros-4:5.26.3-422.el8.x86_64 48/159
Installing : perl-Text-Tabs+Wrap-2013.0523-395.el8.noarch 49/159
Installing : perl-Unicode-Normalize-1.25-396.el8.x86_64 50/159
Installing : perl-File-Path-2.15-2.el8.noarch 51/159
Installing : perl-IO-1.38-422.el8.x86_64 52/159
Installing : perl-PathTools-3.74-1.el8.x86_64 53/159
Installing : perl-constant-1.33-396.el8.noarch 54/159
Installing : perl-threads-1:2.21-2.el8.x86_64 55/159
Installing : perl-threads-shared-1.58-2.el8.x86_64 56/159
Installing : perl-interpreter-4:5.26.3-422.el8.x86_64 57/159
Installing : perl-version-6:0.99.24-1.el8.x86_64 58/159
Installing : perl-Time-HiRes-4:1.9758-2.el8.x86_64 59/159
Installing : perl-CPAN-Meta-Requirements-2.140-396.el8.noarch 60/159
Installing : perl-ExtUtils-Manifest-1.70-395.el8.noarch 61/159
Installing : perl-ExtUtils-ParseXS-1:3.35-2.el8.noarch 62/159
Installing : perl-Test-Harness-1:3.42-1.el8.noarch 63/159
Installing : perl-Module-CoreList-1:5.20181130-1.el8.noarch 64/159
Installing : perl-Module-Metadata-1.000033-395.el8.noarch 65/159
Installing : perl-Compress-Raw-Zlib-2.081-1.el8.x86_64 66/159
Installing : perl-Filter-2:1.58-2.el8.x86_64 67/159
Installing : perl-SelfLoader-1.23-422.el8.noarch 68/159
Installing : perl-Module-Load-1:0.32-395.el8.noarch 69/159
Installing : perl-Perl-OSType-1.010-396.el8.noarch 70/159
Installing : perl-Text-Balanced-2.03-395.el8.noarch 71/159
Installing : perl-encoding-4:2.22-3.el8.x86_64 72/159
Installing : perl-Net-Ping-2.55-422.el8.noarch 73/159
Installing : perl-Compress-Raw-Bzip2-2.081-1.el8.x86_64 74/159
Installing : perl-IO-Compress-2.081-1.el8.noarch 75/159
Installing : perl-IO-Zlib-1:1.10-422.el8.noarch 76/159
Installing : perl-Math-Complex-1.59-422.el8.noarch 77/159
Installing : perl-Math-BigInt-1:1.9998.11-7.el8.noarch 78/159
Installing : perl-JSON-PP-1:2.97.001-3.el8.noarch 79/159
Installing : perl-Math-BigRat-0.2614-1.el8.noarch 80/159
Installing : perl-CPAN-Meta-YAML-0.018-397.el8.noarch 81/159
Installing : perl-CPAN-Meta-2.150010-396.el8.noarch 82/159
Installing : perl-Digest-SHA-1:6.02-1.el8.x86_64 83/159
Installing : perl-ExtUtils-Command-1:7.34-1.el8.noarch 84/159
Installing : perl-Locale-Maketext-1.28-396.el8.noarch 85/159
Installing : perl-Locale-Maketext-Simple-1:0.21-422.el8.noarc 86/159
Installing : perl-Params-Check-1:0.38-395.el8.noarch 87/159
Installing : perl-Module-Load-Conditional-0.68-395.el8.noarch 88/159
Installing : perl-Params-Util-1.07-22.el8.x86_64 89/159
Installing : perl-Pod-Html-1.22.02-422.el8.noarch 90/159
Installing : perl-Sub-Install-0.928-14.el8.noarch 91/159
Installing : perl-Data-OptList-0.110-6.el8.noarch 92/159
Installing : perl-bignum-0.49-2.el8.noarch 93/159
Installing : perl-Math-BigInt-FastCalc-0.500.600-6.el8.x86_64 94/159
Installing : perl-open-1.11-422.el8.noarch 95/159
Installing : perl-Filter-Simple-0.94-2.el8.noarch 96/159
Installing : perl-Devel-SelfStubber-1.06-422.el8.noarch 97/159
Installing : perl-Archive-Zip-1.60-3.el8.noarch 98/159
Installing : perl-Module-CoreList-tools-1:5.20181130-1.el8.no 99/159
Installing : perl-experimental-0.019-2.el8.noarch 100/159
Installing : perl-Algorithm-Diff-1.1903-9.el8.noarch 101/159
Installing : perl-Text-Diff-1.45-2.el8.noarch 102/159
Installing : perl-Archive-Tar-2.30-1.el8.noarch 103/159
Installing : perl-Attribute-Handlers-0.99-422.el8.noarch 104/159
Installing : perl-B-Debug-1.26-2.el8.noarch 105/159
Installing : perl-Compress-Bzip2-2.26-6.el8.x86_64 106/159
Installing : perl-Config-Perl-V-0.30-1.el8.noarch 107/159
Installing : perl-DB_File-1.842-1.el8.x86_64 108/159
Installing : perl-Devel-PPPort-3.36-5.el8.x86_64 109/159
Installing : perl-Devel-Size-0.81-2.el8.x86_64 110/159
Installing : perl-Encode-Locale-1.05-10.module+el8.3.0+7692+5 111/159
Installing : perl-Env-1.04-395.el8.noarch 112/159
Installing : perl-ExtUtils-MM-Utils-1:7.34-1.el8.noarch 113/159
Installing : perl-IPC-Cmd-2:1.02-1.el8.noarch 114/159
Installing : perl-File-Fetch-0.56-2.el8.noarch 115/159
Installing : perl-IPC-SysV-2.07-397.el8.x86_64 116/159
Installing : perl-IPC-System-Simple-1.25-17.el8.noarch 117/159
Installing : perl-autodie-2.29-396.el8.noarch 118/159
Installing : perl-Locale-Codes-3.57-1.el8.noarch 119/159
Installing : perl-Memoize-1.03-422.el8.noarch 120/159
Installing : perl-Module-Loaded-1:0.08-422.el8.noarch 121/159
Installing : perl-Package-Generator-1.106-11.el8.noarch 122/159
Installing : perl-Sub-Exporter-0.987-15.el8.noarch 123/159
Installing : perl-Pod-Checker-4:1.73-395.el8.noarch 124/159
Installing : perl-Pod-Parser-1.63-396.el8.noarch 125/159
Installing : perl-Sys-Syslog-0.35-397.el8.x86_64 126/159
Installing : perl-TermReadKey-2.37-7.el8.x86_64 127/159
Installing : perl-Test-1.30-422.el8.noarch 128/159
Installing : perl-Test-Simple-1:1.302135-1.el8.noarch 129/159
Installing : perl-Text-Glob-0.11-4.el8.noarch 130/159
Installing : perl-Text-Template-1.51-1.el8.noarch 131/159
Installing : perl-Time-Piece-1.31-422.el8.x86_64 132/159
Installing : perl-Unicode-Collate-1.25-2.el8.x86_64 133/159
Installing : perl-local-lib-2.000024-2.el8.noarch 134/159
Installing : perl-utils-5.26.3-422.el8.noarch 135/159
Installing : perl-Thread-Queue-3.13-1.el8.noarch 136/159
Installing : perl-File-Which-1.22-2.el8.noarch 137/159
Installing : perl-File-HomeDir-1.002-4.el8.noarch 138/159
Installing : perl-Devel-Peek-1.26-422.el8.x86_64 139/159
Installing : perl-MRO-Compat-0.13-4.el8.noarch 140/159
Installing : perl-Data-Section-0.200007-3.el8.noarch 141/159
Installing : perl-Software-License-0.103013-2.el8.noarch 142/159
Installing : perl-PerlIO-via-QuotedPrint-0.08-395.el8.noarch 143/159
Installing : perl-perlfaq-5.20180605-1.el8.noarch 144/159
Installing : glibc-gconv-extra-2.28-225.0.3.el8.x86_64 145/159
Running scriptlet: glibc-gconv-extra-2.28-225.0.3.el8.x86_64 145/159
Installing : file-5.33-24.el8.x86_64 146/159
Installing : redhat-rpm-config-131-1.0.1.el8.noarch 147/159
Installing : perl-ExtUtils-Install-2.14-4.el8.noarch 148/159
Installing : perl-devel-4:5.26.3-422.el8.x86_64 149/159
Installing : perl-ExtUtils-MakeMaker-1:7.34-1.el8.noarch 150/159
Installing : perl-ExtUtils-CBuilder-1:0.280230-2.el8.noarch 151/159
Installing : perl-ExtUtils-Embed-1.34-422.el8.noarch 152/159
Installing : perl-ExtUtils-Miniperl-1.06-422.el8.noarch 153/159
Installing : perl-libnetcfg-4:5.26.3-422.el8.noarch 154/159
Installing : perl-Encode-devel-4:2.97-3.el8.x86_64 155/159
Installing : perl-inc-latest-2:0.500-9.el8.noarch 156/159
Installing : perl-Module-Build-2:0.42.24-5.el8.noarch 157/159
Installing : perl-CPAN-2.18-397.el8.noarch 158/159
Installing : perl-4:5.26.3-422.el8.x86_64 159/159
Running scriptlet: perl-4:5.26.3-422.el8.x86_64 159/159
Verifying : file-5.33-24.el8.x86_64 1/159
Verifying : glibc-gconv-extra-2.28-225.0.3.el8.x86_64 2/159
Verifying : groff-base-1.22.3-18.el8.x86_64 3/159
Verifying : perl-Algorithm-Diff-1.1903-9.el8.noarch 4/159
Verifying : perl-Archive-Tar-2.30-1.el8.noarch 5/159
Verifying : perl-Carp-1.42-396.el8.noarch 6/159
Verifying : perl-Compress-Raw-Bzip2-2.081-1.el8.x86_64 7/159
Verifying : perl-Compress-Raw-Zlib-2.081-1.el8.x86_64 8/159
Verifying : perl-Data-Dumper-2.167-399.el8.x86_64 9/159
Verifying : perl-Digest-1.17-395.el8.noarch 10/159
Verifying : perl-Digest-MD5-2.55-396.el8.x86_64 11/159
Verifying : perl-Encode-4:2.97-3.el8.x86_64 12/159
Verifying : perl-Errno-1.28-422.el8.x86_64 13/159
Verifying : perl-Exporter-5.72-396.el8.noarch 14/159
Verifying : perl-File-Path-2.15-2.el8.noarch 15/159
Verifying : perl-File-Temp-0.230.600-1.el8.noarch 16/159
Verifying : perl-Getopt-Long-1:2.50-4.el8.noarch 17/159
Verifying : perl-HTTP-Tiny-0.074-2.el8.noarch 18/159
Verifying : perl-IO-1.38-422.el8.x86_64 19/159
Verifying : perl-IO-Compress-2.081-1.el8.noarch 20/159
Verifying : perl-IO-Socket-IP-0.39-5.el8.noarch 21/159
Verifying : perl-IO-Zlib-1:1.10-422.el8.noarch 22/159
Verifying : perl-MIME-Base64-3.15-396.el8.x86_64 23/159
Verifying : perl-Math-BigInt-1:1.9998.11-7.el8.noarch 24/159
Verifying : perl-Math-Complex-1.59-422.el8.noarch 25/159
Verifying : perl-PathTools-3.74-1.el8.x86_64 26/159
Verifying : perl-Pod-Escapes-1:1.07-395.el8.noarch 27/159
Verifying : perl-Pod-Perldoc-3.28-396.el8.noarch 28/159
Verifying : perl-Pod-Simple-1:3.35-395.el8.noarch 29/159
Verifying : perl-Pod-Usage-4:1.69-395.el8.noarch 30/159
Verifying : perl-Scalar-List-Utils-3:1.49-2.el8.x86_64 31/159
Verifying : perl-Socket-4:2.027-3.el8.x86_64 32/159
Verifying : perl-Storable-1:3.11-3.el8.x86_64 33/159
Verifying : perl-Term-ANSIColor-4.06-396.el8.noarch 34/159
Verifying : perl-Term-Cap-1.17-395.el8.noarch 35/159
Verifying : perl-Text-Diff-1.45-2.el8.noarch 36/159
Verifying : perl-Text-ParseWords-3.30-395.el8.noarch 37/159
Verifying : perl-Text-Tabs+Wrap-2013.0523-395.el8.noarch 38/159
Verifying : perl-Time-Local-1:1.280-1.el8.noarch 39/159
Verifying : perl-URI-1.73-3.el8.noarch 40/159
Verifying : perl-Unicode-Normalize-1.25-396.el8.x86_64 41/159
Verifying : perl-constant-1.33-396.el8.noarch 42/159
Verifying : perl-interpreter-4:5.26.3-422.el8.x86_64 43/159
Verifying : perl-libnet-3.11-3.el8.noarch 44/159
Verifying : perl-libs-4:5.26.3-422.el8.x86_64 45/159
Verifying : perl-macros-4:5.26.3-422.el8.x86_64 46/159
Verifying : perl-parent-1:0.237-1.el8.noarch 47/159
Verifying : perl-podlators-4.11-1.el8.noarch 48/159
Verifying : perl-threads-1:2.21-2.el8.x86_64 49/159
Verifying : perl-threads-shared-1.58-2.el8.x86_64 50/159
Verifying : python3-pyparsing-2.1.10-7.el8.noarch 51/159
Verifying : zip-3.0-23.el8.x86_64 52/159
Verifying : dwz-0.12-10.el8.x86_64 53/159
Verifying : efi-srpm-macros-3-3.0.1.el8.noarch 54/159
Verifying : ghc-srpm-macros-1.4.2-7.el8.noarch 55/159
Verifying : go-srpm-macros-2-17.el8.noarch 56/159
Verifying : ocaml-srpm-macros-5-4.el8.noarch 57/159
Verifying : openblas-srpm-macros-2-2.el8.noarch 58/159
Verifying : perl-4:5.26.3-422.el8.x86_64 59/159
Verifying : perl-Archive-Zip-1.60-3.el8.noarch 60/159
Verifying : perl-Attribute-Handlers-0.99-422.el8.noarch 61/159
Verifying : perl-B-Debug-1.26-2.el8.noarch 62/159
Verifying : perl-CPAN-2.18-397.el8.noarch 63/159
Verifying : perl-CPAN-Meta-2.150010-396.el8.noarch 64/159
Verifying : perl-CPAN-Meta-Requirements-2.140-396.el8.noarch 65/159
Verifying : perl-CPAN-Meta-YAML-0.018-397.el8.noarch 66/159
Verifying : perl-Compress-Bzip2-2.26-6.el8.x86_64 67/159
Verifying : perl-Config-Perl-V-0.30-1.el8.noarch 68/159
Verifying : perl-DB_File-1.842-1.el8.x86_64 69/159
Verifying : perl-Data-OptList-0.110-6.el8.noarch 70/159
Verifying : perl-Data-Section-0.200007-3.el8.noarch 71/159
Verifying : perl-Devel-PPPort-3.36-5.el8.x86_64 72/159
Verifying : perl-Devel-Peek-1.26-422.el8.x86_64 73/159
Verifying : perl-Devel-SelfStubber-1.06-422.el8.noarch 74/159
Verifying : perl-Devel-Size-0.81-2.el8.x86_64 75/159
Verifying : perl-Digest-SHA-1:6.02-1.el8.x86_64 76/159
Verifying : perl-Encode-Locale-1.05-10.module+el8.3.0+7692+5 77/159
Verifying : perl-Encode-devel-4:2.97-3.el8.x86_64 78/159
Verifying : perl-Env-1.04-395.el8.noarch 79/159
Verifying : perl-ExtUtils-CBuilder-1:0.280230-2.el8.noarch 80/159
Verifying : perl-ExtUtils-Command-1:7.34-1.el8.noarch 81/159
Verifying : perl-ExtUtils-Embed-1.34-422.el8.noarch 82/159
Verifying : perl-ExtUtils-Install-2.14-4.el8.noarch 83/159
Verifying : perl-ExtUtils-MM-Utils-1:7.34-1.el8.noarch 84/159
Verifying : perl-ExtUtils-MakeMaker-1:7.34-1.el8.noarch 85/159
Verifying : perl-ExtUtils-Manifest-1.70-395.el8.noarch 86/159
Verifying : perl-ExtUtils-Miniperl-1.06-422.el8.noarch 87/159
Verifying : perl-ExtUtils-ParseXS-1:3.35-2.el8.noarch 88/159
Verifying : perl-File-Fetch-0.56-2.el8.noarch 89/159
Verifying : perl-File-HomeDir-1.002-4.el8.noarch 90/159
Verifying : perl-File-Which-1.22-2.el8.noarch 91/159
Verifying : perl-Filter-2:1.58-2.el8.x86_64 92/159
Verifying : perl-Filter-Simple-0.94-2.el8.noarch 93/159
Verifying : perl-IO-Socket-SSL-2.066-4.module+el8.6.0+20623+ 94/159
Verifying : perl-IPC-Cmd-2:1.02-1.el8.noarch 95/159
Verifying : perl-IPC-SysV-2.07-397.el8.x86_64 96/159
Verifying : perl-IPC-System-Simple-1.25-17.el8.noarch 97/159
Verifying : perl-JSON-PP-1:2.97.001-3.el8.noarch 98/159
Verifying : perl-Locale-Codes-3.57-1.el8.noarch 99/159
Verifying : perl-Locale-Maketext-1.28-396.el8.noarch 100/159
Verifying : perl-Locale-Maketext-Simple-1:0.21-422.el8.noarc 101/159
Verifying : perl-MRO-Compat-0.13-4.el8.noarch 102/159
Verifying : perl-Math-BigInt-FastCalc-0.500.600-6.el8.x86_64 103/159
Verifying : perl-Math-BigRat-0.2614-1.el8.noarch 104/159
Verifying : perl-Memoize-1.03-422.el8.noarch 105/159
Verifying : perl-Module-Build-2:0.42.24-5.el8.noarch 106/159
Verifying : perl-Module-CoreList-1:5.20181130-1.el8.noarch 107/159
Verifying : perl-Module-CoreList-tools-1:5.20181130-1.el8.no 108/159
Verifying : perl-Module-Load-1:0.32-395.el8.noarch 109/159
Verifying : perl-Module-Load-Conditional-0.68-395.el8.noarch 110/159
Verifying : perl-Module-Loaded-1:0.08-422.el8.noarch 111/159
Verifying : perl-Module-Metadata-1.000033-395.el8.noarch 112/159
Verifying : perl-Mozilla-CA-20160104-7.0.1.module+el8.3.0+21 113/159
Verifying : perl-Net-Ping-2.55-422.el8.noarch 114/159
Verifying : perl-Net-SSLeay-1.88-2.module+el8.6.0+20623+f089 115/159
Verifying : perl-Package-Generator-1.106-11.el8.noarch 116/159
Verifying : perl-Params-Check-1:0.38-395.el8.noarch 117/159
Verifying : perl-Params-Util-1.07-22.el8.x86_64 118/159
Verifying : perl-Perl-OSType-1.010-396.el8.noarch 119/159
Verifying : perl-PerlIO-via-QuotedPrint-0.08-395.el8.noarch 120/159
Verifying : perl-Pod-Checker-4:1.73-395.el8.noarch 121/159
Verifying : perl-Pod-Html-1.22.02-422.el8.noarch 122/159
Verifying : perl-Pod-Parser-1.63-396.el8.noarch 123/159
Verifying : perl-SelfLoader-1.23-422.el8.noarch 124/159
Verifying : perl-Software-License-0.103013-2.el8.noarch 125/159
Verifying : perl-Sub-Exporter-0.987-15.el8.noarch 126/159
Verifying : perl-Sub-Install-0.928-14.el8.noarch 127/159
Verifying : perl-Sys-Syslog-0.35-397.el8.x86_64 128/159
Verifying : perl-TermReadKey-2.37-7.el8.x86_64 129/159
Verifying : perl-Test-1.30-422.el8.noarch 130/159
Verifying : perl-Test-Harness-1:3.42-1.el8.noarch 131/159
Verifying : perl-Test-Simple-1:1.302135-1.el8.noarch 132/159
Verifying : perl-Text-Balanced-2.03-395.el8.noarch 133/159
Verifying : perl-Text-Glob-0.11-4.el8.noarch 134/159
Verifying : perl-Text-Template-1.51-1.el8.noarch 135/159
Verifying : perl-Thread-Queue-3.13-1.el8.noarch 136/159
Verifying : perl-Time-HiRes-4:1.9758-2.el8.x86_64 137/159
Verifying : perl-Time-Piece-1.31-422.el8.x86_64 138/159
Verifying : perl-Unicode-Collate-1.25-2.el8.x86_64 139/159
Verifying : perl-autodie-2.29-396.el8.noarch 140/159
Verifying : perl-bignum-0.49-2.el8.noarch 141/159
Verifying : perl-devel-4:5.26.3-422.el8.x86_64 142/159
Verifying : perl-encoding-4:2.22-3.el8.x86_64 143/159
Verifying : perl-experimental-0.019-2.el8.noarch 144/159
Verifying : perl-inc-latest-2:0.500-9.el8.noarch 145/159
Verifying : perl-libnetcfg-4:5.26.3-422.el8.noarch 146/159
Verifying : perl-local-lib-2.000024-2.el8.noarch 147/159
Verifying : perl-open-1.11-422.el8.noarch 148/159
Verifying : perl-perlfaq-5.20180605-1.el8.noarch 149/159
Verifying : perl-srpm-macros-1-25.el8.noarch 150/159
Verifying : perl-utils-5.26.3-422.el8.noarch 151/159
Verifying : perl-version-6:0.99.24-1.el8.x86_64 152/159
Verifying : python-rpm-macros-3-45.el8.noarch 153/159
Verifying : python-srpm-macros-3-45.el8.noarch 154/159
Verifying : python3-rpm-macros-3-45.el8.noarch 155/159
Verifying : qt5-srpm-macros-5.15.3-1.el8.noarch 156/159
Verifying : redhat-rpm-config-131-1.0.1.el8.noarch 157/159
Verifying : rust-srpm-macros-5-2.el8.noarch 158/159
Verifying : systemtap-sdt-devel-4.9-3.0.1.el8.x86_64 159/159
Installed:
dwz-0.12-10.el8.x86_64
efi-srpm-macros-3-3.0.1.el8.noarch
file-5.33-24.el8.x86_64
ghc-srpm-macros-1.4.2-7.el8.noarch
glibc-gconv-extra-2.28-225.0.3.el8.x86_64
go-srpm-macros-2-17.el8.noarch
groff-base-1.22.3-18.el8.x86_64
ocaml-srpm-macros-5-4.el8.noarch
openblas-srpm-macros-2-2.el8.noarch
perl-4:5.26.3-422.el8.x86_64
perl-Algorithm-Diff-1.1903-9.el8.noarch
perl-Archive-Tar-2.30-1.el8.noarch
perl-Archive-Zip-1.60-3.el8.noarch
perl-Attribute-Handlers-0.99-422.el8.noarch
perl-B-Debug-1.26-2.el8.noarch
perl-CPAN-2.18-397.el8.noarch
perl-CPAN-Meta-2.150010-396.el8.noarch
perl-CPAN-Meta-Requirements-2.140-396.el8.noarch
perl-CPAN-Meta-YAML-0.018-397.el8.noarch
perl-Carp-1.42-396.el8.noarch
perl-Compress-Bzip2-2.26-6.el8.x86_64
perl-Compress-Raw-Bzip2-2.081-1.el8.x86_64
perl-Compress-Raw-Zlib-2.081-1.el8.x86_64
perl-Config-Perl-V-0.30-1.el8.noarch
perl-DB_File-1.842-1.el8.x86_64
perl-Data-Dumper-2.167-399.el8.x86_64
perl-Data-OptList-0.110-6.el8.noarch
perl-Data-Section-0.200007-3.el8.noarch
perl-Devel-PPPort-3.36-5.el8.x86_64
perl-Devel-Peek-1.26-422.el8.x86_64
perl-Devel-SelfStubber-1.06-422.el8.noarch
perl-Devel-Size-0.81-2.el8.x86_64
perl-Digest-1.17-395.el8.noarch
perl-Digest-MD5-2.55-396.el8.x86_64
perl-Digest-SHA-1:6.02-1.el8.x86_64
perl-Encode-4:2.97-3.el8.x86_64
perl-Encode-Locale-1.05-10.module+el8.3.0+7692+542c56f9.noarch
perl-Encode-devel-4:2.97-3.el8.x86_64
perl-Env-1.04-395.el8.noarch
perl-Errno-1.28-422.el8.x86_64
perl-Exporter-5.72-396.el8.noarch
perl-ExtUtils-CBuilder-1:0.280230-2.el8.noarch
perl-ExtUtils-Command-1:7.34-1.el8.noarch
perl-ExtUtils-Embed-1.34-422.el8.noarch
perl-ExtUtils-Install-2.14-4.el8.noarch
perl-ExtUtils-MM-Utils-1:7.34-1.el8.noarch
perl-ExtUtils-MakeMaker-1:7.34-1.el8.noarch
perl-ExtUtils-Manifest-1.70-395.el8.noarch
perl-ExtUtils-Miniperl-1.06-422.el8.noarch
perl-ExtUtils-ParseXS-1:3.35-2.el8.noarch
perl-File-Fetch-0.56-2.el8.noarch
perl-File-HomeDir-1.002-4.el8.noarch
perl-File-Path-2.15-2.el8.noarch
perl-File-Temp-0.230.600-1.el8.noarch
perl-File-Which-1.22-2.el8.noarch
perl-Filter-2:1.58-2.el8.x86_64
perl-Filter-Simple-0.94-2.el8.noarch
perl-Getopt-Long-1:2.50-4.el8.noarch
perl-HTTP-Tiny-0.074-2.el8.noarch
perl-IO-1.38-422.el8.x86_64
perl-IO-Compress-2.081-1.el8.noarch
perl-IO-Socket-IP-0.39-5.el8.noarch
perl-IO-Socket-SSL-2.066-4.module+el8.6.0+20623+f0897f98.noarch
perl-IO-Zlib-1:1.10-422.el8.noarch
perl-IPC-Cmd-2:1.02-1.el8.noarch
perl-IPC-SysV-2.07-397.el8.x86_64
perl-IPC-System-Simple-1.25-17.el8.noarch
perl-JSON-PP-1:2.97.001-3.el8.noarch
perl-Locale-Codes-3.57-1.el8.noarch
perl-Locale-Maketext-1.28-396.el8.noarch
perl-Locale-Maketext-Simple-1:0.21-422.el8.noarch
perl-MIME-Base64-3.15-396.el8.x86_64
perl-MRO-Compat-0.13-4.el8.noarch
perl-Math-BigInt-1:1.9998.11-7.el8.noarch
perl-Math-BigInt-FastCalc-0.500.600-6.el8.x86_64
perl-Math-BigRat-0.2614-1.el8.noarch
perl-Math-Complex-1.59-422.el8.noarch
perl-Memoize-1.03-422.el8.noarch
perl-Module-Build-2:0.42.24-5.el8.noarch
perl-Module-CoreList-1:5.20181130-1.el8.noarch
perl-Module-CoreList-tools-1:5.20181130-1.el8.noarch
perl-Module-Load-1:0.32-395.el8.noarch
perl-Module-Load-Conditional-0.68-395.el8.noarch
perl-Module-Loaded-1:0.08-422.el8.noarch
perl-Module-Metadata-1.000033-395.el8.noarch
perl-Mozilla-CA-20160104-7.0.1.module+el8.3.0+21136+b437fca9.noarch
perl-Net-Ping-2.55-422.el8.noarch
perl-Net-SSLeay-1.88-2.module+el8.6.0+20623+f0897f98.x86_64
perl-Package-Generator-1.106-11.el8.noarch
perl-Params-Check-1:0.38-395.el8.noarch
perl-Params-Util-1.07-22.el8.x86_64
perl-PathTools-3.74-1.el8.x86_64
perl-Perl-OSType-1.010-396.el8.noarch
perl-PerlIO-via-QuotedPrint-0.08-395.el8.noarch
perl-Pod-Checker-4:1.73-395.el8.noarch
perl-Pod-Escapes-1:1.07-395.el8.noarch
perl-Pod-Html-1.22.02-422.el8.noarch
perl-Pod-Parser-1.63-396.el8.noarch
perl-Pod-Perldoc-3.28-396.el8.noarch
perl-Pod-Simple-1:3.35-395.el8.noarch
perl-Pod-Usage-4:1.69-395.el8.noarch
perl-Scalar-List-Utils-3:1.49-2.el8.x86_64
perl-SelfLoader-1.23-422.el8.noarch
perl-Socket-4:2.027-3.el8.x86_64
perl-Software-License-0.103013-2.el8.noarch
perl-Storable-1:3.11-3.el8.x86_64
perl-Sub-Exporter-0.987-15.el8.noarch
perl-Sub-Install-0.928-14.el8.noarch
perl-Sys-Syslog-0.35-397.el8.x86_64
perl-Term-ANSIColor-4.06-396.el8.noarch
perl-Term-Cap-1.17-395.el8.noarch
perl-TermReadKey-2.37-7.el8.x86_64
perl-Test-1.30-422.el8.noarch
perl-Test-Harness-1:3.42-1.el8.noarch
perl-Test-Simple-1:1.302135-1.el8.noarch
perl-Text-Balanced-2.03-395.el8.noarch
perl-Text-Diff-1.45-2.el8.noarch
perl-Text-Glob-0.11-4.el8.noarch
perl-Text-ParseWords-3.30-395.el8.noarch
perl-Text-Tabs+Wrap-2013.0523-395.el8.noarch
perl-Text-Template-1.51-1.el8.noarch
perl-Thread-Queue-3.13-1.el8.noarch
perl-Time-HiRes-4:1.9758-2.el8.x86_64
perl-Time-Local-1:1.280-1.el8.noarch
perl-Time-Piece-1.31-422.el8.x86_64
perl-URI-1.73-3.el8.noarch
perl-Unicode-Collate-1.25-2.el8.x86_64
perl-Unicode-Normalize-1.25-396.el8.x86_64
perl-autodie-2.29-396.el8.noarch
perl-bignum-0.49-2.el8.noarch
perl-constant-1.33-396.el8.noarch
perl-devel-4:5.26.3-422.el8.x86_64
perl-encoding-4:2.22-3.el8.x86_64
perl-experimental-0.019-2.el8.noarch
perl-inc-latest-2:0.500-9.el8.noarch
perl-interpreter-4:5.26.3-422.el8.x86_64
perl-libnet-3.11-3.el8.noarch
perl-libnetcfg-4:5.26.3-422.el8.noarch
perl-libs-4:5.26.3-422.el8.x86_64
perl-local-lib-2.000024-2.el8.noarch
perl-macros-4:5.26.3-422.el8.x86_64
perl-open-1.11-422.el8.noarch
perl-parent-1:0.237-1.el8.noarch
perl-perlfaq-5.20180605-1.el8.noarch
perl-podlators-4.11-1.el8.noarch
perl-srpm-macros-1-25.el8.noarch
perl-threads-1:2.21-2.el8.x86_64
perl-threads-shared-1.58-2.el8.x86_64
perl-utils-5.26.3-422.el8.noarch
perl-version-6:0.99.24-1.el8.x86_64
python-rpm-macros-3-45.el8.noarch
python-srpm-macros-3-45.el8.noarch
python3-pyparsing-2.1.10-7.el8.noarch
python3-rpm-macros-3-45.el8.noarch
qt5-srpm-macros-5.15.3-1.el8.noarch
redhat-rpm-config-131-1.0.1.el8.noarch
rust-srpm-macros-5-2.el8.noarch
systemtap-sdt-devel-4.9-3.0.1.el8.x86_64
zip-3.0-23.el8.x86_64
Complete! |
I installed the python3 with this command:
dnf install -y python3 |
Display detailed console log →
Last metadata expiration check: 0:31:49 ago on Thu Dec 21 05:18:09 2023.
Dependencies resolved.
================================================================================
 Package             Arch   Version                     Repository         Size
================================================================================
Installing:
 python36            x86_64 3.6.8-38.module+el8.9.0+90104+968a3e84
                                                        ol8_appstream      18 k
Installing dependencies:
 platform-python-pip noarch 9.0.3-23.el8                ol8_baseos_latest 1.6 M
 python3-pip         noarch 9.0.3-23.el8                ol8_appstream      20 k
 python3-setuptools  noarch 39.2.0-7.el8                ol8_baseos_latest 163 k
Enabling module streams:
 python36                   3.6

Transaction Summary
================================================================================
Install  4 Packages

Total download size: 1.8 M
Installed size: 7.0 M
Downloading Packages:
(1/4): python3-pip-9.0.3-23.el8.noarch.rpm       61 kB/s |  20 kB     00:00
(2/4): python36-3.6.8-38.module+el8.9.0+90104+9 229 kB/s |  18 kB     00:00
(3/4): python3-setuptools-39.2.0-7.el8.noarch.r 335 kB/s | 163 kB     00:00
(4/4): platform-python-pip-9.0.3-23.el8.noarch. 1.9 MB/s | 1.6 MB     00:00
--------------------------------------------------------------------------------
Total                                           2.2 MB/s | 1.8 MB     00:00
Running transaction check
Transaction check succeeded.
Running transaction test
Transaction test succeeded.
Running transaction
  Preparing        :                                                        1/1
  Installing       : python3-setuptools-39.2.0-7.el8.noarch                 1/4
  Installing       : platform-python-pip-9.0.3-23.el8.noarch                2/4
  Installing       : python36-3.6.8-38.module+el8.9.0+90104+968a3e84.x86_   3/4
  Running scriptlet: python36-3.6.8-38.module+el8.9.0+90104+968a3e84.x86_   3/4
  Installing       : python3-pip-9.0.3-23.el8.noarch                        4/4
  Running scriptlet: python3-pip-9.0.3-23.el8.noarch                        4/4
  Verifying        : platform-python-pip-9.0.3-23.el8.noarch                1/4
  Verifying        : python3-setuptools-39.2.0-7.el8.noarch                 2/4
  Verifying        : python3-pip-9.0.3-23.el8.noarch                        3/4
  Verifying        : python36-3.6.8-38.module+el8.9.0+90104+968a3e84.x86_   4/4

Installed:
  platform-python-pip-9.0.3-23.el8.noarch
  python3-pip-9.0.3-23.el8.noarch
  python3-setuptools-39.2.0-7.el8.noarch
  python36-3.6.8-38.module+el8.9.0+90104+968a3e84.x86_64

Complete! |
I installed the git module with this command:
dnf install -y git |
Display detailed console log →
Last metadata expiration check: 0:33:00 ago on Thu Dec 21 05:18:09 2023. Dependencies resolved. ================================================================================ Package Arch Version Repository Size ================================================================================ Installing: git x86_64 2.39.3-1.el8_8 ol8_appstream 104 k Installing dependencies: emacs-filesystem noarch 1:26.1-11.el8 ol8_baseos_latest 70 k git-core x86_64 2.39.3-1.el8_8 ol8_appstream 11 M git-core-doc noarch 2.39.3-1.el8_8 ol8_appstream 3.0 M less x86_64 530-1.el8 ol8_baseos_latest 164 k perl-Error noarch 1:0.17025-2.el8 ol8_appstream 46 k perl-Git noarch 2.39.3-1.el8_8 ol8_appstream 79 k Transaction Summary ================================================================================ Install 7 Packages Total download size: 14 M Installed size: 45 M Downloading Packages: (1/7): git-2.39.3-1.el8_8.x86_64.rpm 233 kB/s | 104 kB 00:00 (2/7): emacs-filesystem-26.1-11.el8.noarch.rpm 155 kB/s | 70 kB 00:00 (3/7): less-530-1.el8.x86_64.rpm 309 kB/s | 164 kB 00:00 (4/7): perl-Error-0.17025-2.el8.noarch.rpm 519 kB/s | 46 kB 00:00 (5/7): perl-Git-2.39.3-1.el8_8.noarch.rpm 722 kB/s | 79 kB 00:00 (6/7): git-core-doc-2.39.3-1.el8_8.noarch.rpm 5.1 MB/s | 3.0 MB 00:00 (7/7): git-core-2.39.3-1.el8_8.x86_64.rpm 12 MB/s | 11 MB 00:00 -------------------------------------------------------------------------------- Total 11 MB/s | 14 MB 00:01 Running transaction check Transaction check succeeded. Running transaction test Transaction test succeeded. Running transaction Preparing : 1/1 Installing : perl-Error-1:0.17025-2.el8.noarch 1/7 Installing : less-530-1.el8.x86_64 2/7 Installing : git-core-2.39.3-1.el8_8.x86_64 3/7 Installing : git-core-doc-2.39.3-1.el8_8.noarch 4/7 Installing : emacs-filesystem-1:26.1-11.el8.noarch 5/7 Installing : perl-Git-2.39.3-1.el8_8.noarch 6/7 Installing : git-2.39.3-1.el8_8.x86_64 7/7 Running scriptlet: git-2.39.3-1.el8_8.x86_64 7/7 Verifying : emacs-filesystem-1:26.1-11.el8.noarch 1/7 Verifying : less-530-1.el8.x86_64 2/7 Verifying : git-2.39.3-1.el8_8.x86_64 3/7 Verifying : git-core-2.39.3-1.el8_8.x86_64 4/7 Verifying : git-core-doc-2.39.3-1.el8_8.noarch 5/7 Verifying : perl-Error-1:0.17025-2.el8.noarch 6/7 Verifying : perl-Git-2.39.3-1.el8_8.noarch 7/7 Installed: emacs-filesystem-1:26.1-11.el8.noarch git-2.39.3-1.el8_8.x86_64 git-core-2.39.3-1.el8_8.x86_64 git-core-doc-2.39.3-1.el8_8.noarch less-530-1.el8.x86_64 perl-Error-1:0.17025-2.el8.noarch perl-Git-2.39.3-1.el8_8.noarch Complete! |
I installed the epel-release container with this command:
dnf install -y epel-release |
Display detailed console log →
Last metadata expiration check: 0:40:34 ago on Thu Dec 21 05:18:09 2023. Dependencies resolved. ================================================================================ Package Arch Version Repository Size ================================================================================ Installing: oracle-epel-release-el8 x86_64 1.0-5.el8 ol8_baseos_latest 15 k Transaction Summary ================================================================================ Install 1 Package Total download size: 15 k Installed size: 18 k Downloading Packages: oracle-epel-release-el8-1.0-5.el8.x86_64.rpm 49 kB/s | 15 kB 00:00 -------------------------------------------------------------------------------- Total 49 kB/s | 15 kB 00:00 Running transaction check Transaction check succeeded. Running transaction test Transaction test succeeded. Running transaction Preparing : 1/1 Installing : oracle-epel-release-el8-1.0-5.el8.x86_64 1/1 Verifying : oracle-epel-release-el8-1.0-5.el8.x86_64 1/1 Installed: oracle-epel-release-el8-1.0-5.el8.x86_64 Complete! |
After installing all of these, you’re now ready to install the core rlwrap utility program. Like the other installations, you use:
dnf install -y rlwrap |
Display detailed console log →
Oracle Linux 8 EPEL Packages for Development (x 15 MB/s | 58 MB 00:03 Oracle Linux 8 EPEL Modular Packages for Develo 404 kB/s | 322 kB 00:00 Dependencies resolved. ================================================================================ Package Arch Version Repository Size ================================================================================ Installing: rlwrap x86_64 0.46.1-1.el8 ol8_developer_EPEL 140 k Installing dependencies: perl-File-Slurp noarch 9999.19-19.el8 ol8_appstream 47 k Transaction Summary ================================================================================ Install 2 Packages Total download size: 186 k Installed size: 426 k Downloading Packages: (1/2): perl-File-Slurp-9999.19-19.el8.noarch.rp 94 kB/s | 47 kB 00:00 (2/2): rlwrap-0.46.1-1.el8.x86_64.rpm 242 kB/s | 140 kB 00:00 -------------------------------------------------------------------------------- Total 321 kB/s | 186 kB 00:00 Running transaction check Transaction check succeeded. Running transaction test Transaction test succeeded. Running transaction Preparing : 1/1 Installing : perl-File-Slurp-9999.19-19.el8.noarch 1/2 Installing : rlwrap-0.46.1-1.el8.x86_64 2/2 Running scriptlet: rlwrap-0.46.1-1.el8.x86_64 2/2 Verifying : rlwrap-0.46.1-1.el8.x86_64 1/2 Verifying : perl-File-Slurp-9999.19-19.el8.noarch 2/2 Installed: perl-File-Slurp-9999.19-19.el8.noarch rlwrap-0.46.1-1.el8.x86_64 Complete! |
At this point, you need to create a sandboxed user account for the Docker instance because as a developer using the root user for simple tasks is a bad idea. While you could do this with a Docker command, the Oracle 23c Free edition raised a lock on the /etc/group file when I tried it. Naturally, that’s not a problem because you can connect as the root user with this syntax:
docker exec -it -u root oracle23c bash |
As the root user, create a student account as a developer account in the Oracle 23c Free container:
useradd -u 501 -g dba -G users -d /home/student -s /bin/bash/ -c "Student" -n student |
You’ll be unable to leverage the tnsnames.ora file unless you alter the prior command to replace dba with oinstall or add the following command:
usermod -a -G oinstall student |
Exit the Oracle 23c Free container as the root user and reconnect as the student user with this syntax:
docker exec -it --user student oracle23c bash |
While you’re connected as the root user, you should create an upload directory as a subdirectory of the $ORACLE_BASE directory. The $ORACLE_BASE directory in the Oracle Database 23c Free Docker image is the /opt/oracle directory.
You should use the following syntax to create the upload directory and change its permission to that of the Oracle Database 23c Free installation (for a future blog post on developing external table deployment on the Docker image):
mkdir /opt/oracle chown -R oracle:install /opt/oracle/upload |
You also can add the following student function to the Ubuntu student user’s .bashrc file. It means all you need to type to connect to the Oracle Database 23c Free Docker instance is “student“. I like shortcuts like this one, which let you leverage one-line Python commands.
student () { # Discover the fully qualified program name. path=`which docker 2>/dev/null` file='' # Parse the program name from the path. if [ -n ${path} ]; then file=${path##/*/} fi # Wrap when there is a file and it is rewrap. if [ -n ${file} ] && [[ ${file} = "docker" ]]; then python -c "import subprocess; subprocess.run(['docker exec -it --user student oracle23c bash'], shell=True)" else echo "Docker is unavailable: Install the docker package." fi } |
Open a Ubuntu Terminal shell and type a student function name to connect to the Docker Oracle Database 23c Free instance where you can now test things like external tables with the SQL*Plus command line without installing it on the Ubuntu local operating system.
student@student-virtual-machine:~$ student [student@d28375f0c43f ~]$ sqlplus c##student/student@free SQL*Plus: Release 23.0.0.0.0 - Production on Wed Jan 3 02:14:22 2024 Version 23.3.0.23.09 Copyright (c) 1982, 2023, Oracle. All rights reserved. Last Successful login time: Wed Jan 03 2024 01:56:44 +00:00 Connected to: Oracle Database 23c Free Release 23.0.0.0.0 - Develop, Learn, and Run for Free Version 23.3.0.23.09 SQL> |
Then, I added this sqlplus function to the /home/student/.bashrc file, which is owned by the student user. However, I also added the instruction to change to the student user’s home directory because the Oracle 23c Free container will connect you to the /home/oracle directory by default. I also added the default long list (ll) alias to the .bashrc file.
sqlplus () { # Discover the fully qualified program name. path=`which rlwrap 2>/dev/null` file='' # Parse the program name from the path. if [ -n ${path} ]; then file=${path##/*/} fi; # Wrap when there is a file and it is rewrap. if [ -n ${file} ] && [[ ${file} = "rlwrap" ]]; then rlwrap sqlplus "${@}" else echo "Command-line history unavailable: Install the rlwrap package." $ORACLE_HOME/bin/sqlplus "${@}" fi } # Change to the user's home directory. cd ${HOME} # Create a long list alias: alias ll='ls -l --color=auto' |
After you’ve configured your student user, you can configure the oracle user account to work like a regular server. Exit the Docker Oracle Database 23c Free as the student user, then connect as the root user with this command:
docker exec -it -u root oracle23c bash |
As the root user you can become the oracle user with the following command:
su - oracle |
Now, add the following .bashrc shell in the /home/oracle directory:
# The oracle user's .bashrc # Source global definitions if [ -f /etc/bashrc ]; then . /etc/bashrc fi # User specific environment if ! [[ "$PATH" =~ "$HOME/.local/bin:$HOME/bin:" ]] then PATH="$HOME/.local/bin:$HOME/bin:$PATH" fi export PATH # Uncomment the following line if you don't like systemctl's auto-paging feature: # export SYSTEMD_PAGER= # User specific aliases and functions export ORACLE_SID=FREE export ORACLE_BASE=/opt/oracle export ORACLE_HOME=/opt/oracle/product/23c/dbhomeFree export PATH=$PATH:/$ORACLE_HOME/bin # Change to the user's home directory. cd ${HOME} # Create a long list alias: alias ll='ls -l --color=auto' sqlplus () { # Discover the fully qualified program name. path=`which rlwrap 2>/dev/null` file='' # Parse the program name from the path. if [ -n ${path} ]; then file=${path##/*/} fi; # Wrap when there is a file and it is rewrap. if [ -n ${file} ] && [[ ${file} = "rlwrap" ]]; then rlwrap sqlplus "${@}" else echo "Command-line history unavailable: Install the rlwrap package." $ORACLE_HOME/bin/sqlplus "${@}" fi } |
You need to manually source the .bashrc for the oracle user because it’s not an externally available user. Use this syntax to connect as the internal user:
sqlplus / as sysdba |
It’ll display:
SQL*Plus: RELEASE 23.0.0.0.0 - Production ON Wed Jan 3 07:08:11 2024 Version 23.3.0.23.09 Copyright (c) 1982, 2023, Oracle. ALL rights reserved. Connected TO: Oracle DATABASE 23c Free RELEASE 23.0.0.0.0 - Develop, Learn, AND Run FOR Free Version 23.3.0.23.09 SQL> |
After all this, I can now click the “up arrow” to edit any of the sqlplus command history. If you like to work inside sqlplus natively, this should help you.
AlmaLinux Installation
These are the instructions for installing AlmaLinux 9 on MacOS Intel with VMware. It’s broken into three parts: Configuration, Installation, and Setup.
You should download the current or desired older version of AlmaLinux from the website. It’s a good idea to install it in a source directory or folder.
You need to launch VMware, click the File menu option and then the New menu option before you can configure, install, and setup AlmaLinux. It will show you the following dialog.
Use the Finder to drag the AlmaLinux-9-latest-x86_64-dvd.iso file on to the Install from disc or image to begin the configuration process.
Configuration

- The first thing you need to do is configure the VMware container. You click on the wrench icon in the menu bar that lets you edit the hardware settings for this virtual machine. This opens the general settings dialog.
- The General System Settings dialog lets you will configure the isolation properties for “drag and drop” and “copy and paste”, and define the network adapter.
![]()
- Click on the Isolation menu option from the General System Settings dialog, and enable “Drag adn Drop” and “Copy and Paste” checkboxes. Then, return to the General System Settings dialog/li>
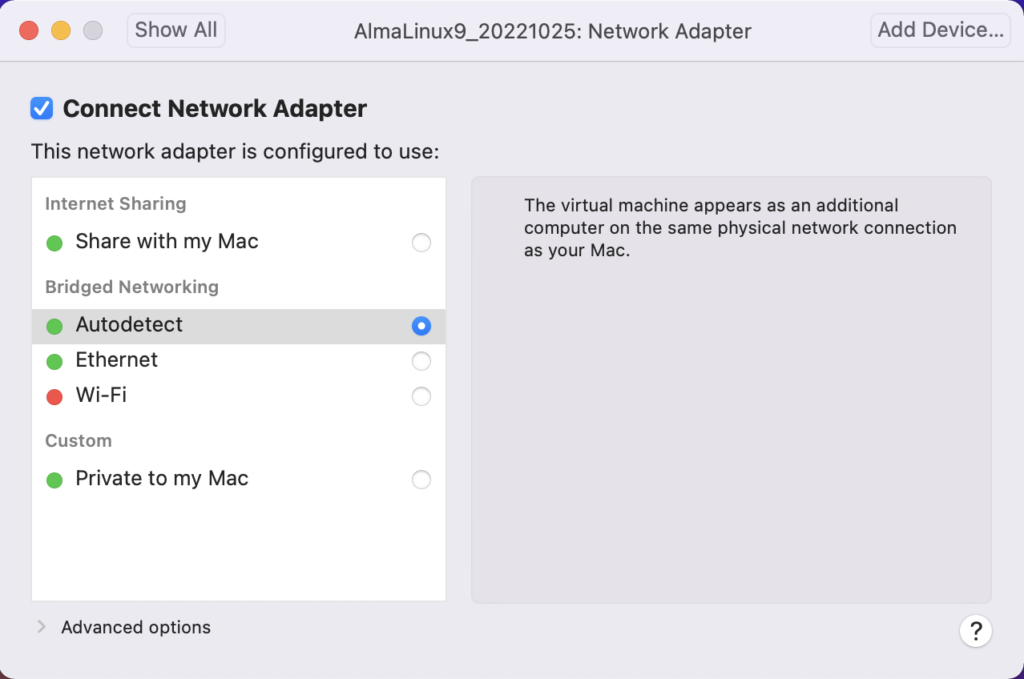
- Click on the Network Adapter menu option from the General System Settings dialog, and click the “Autodetect” checkbox. Then, return to the General System Settings dialog.
Installation
- The first the install asks you to do is type an I for install or T for test. Generally, you can skip the test if this is a copied file rather than DVD.
- Click the Tab key to configure the target installation or Enter key to skip the automatic boot delay.

- Choose the installation language and click the Continue button.
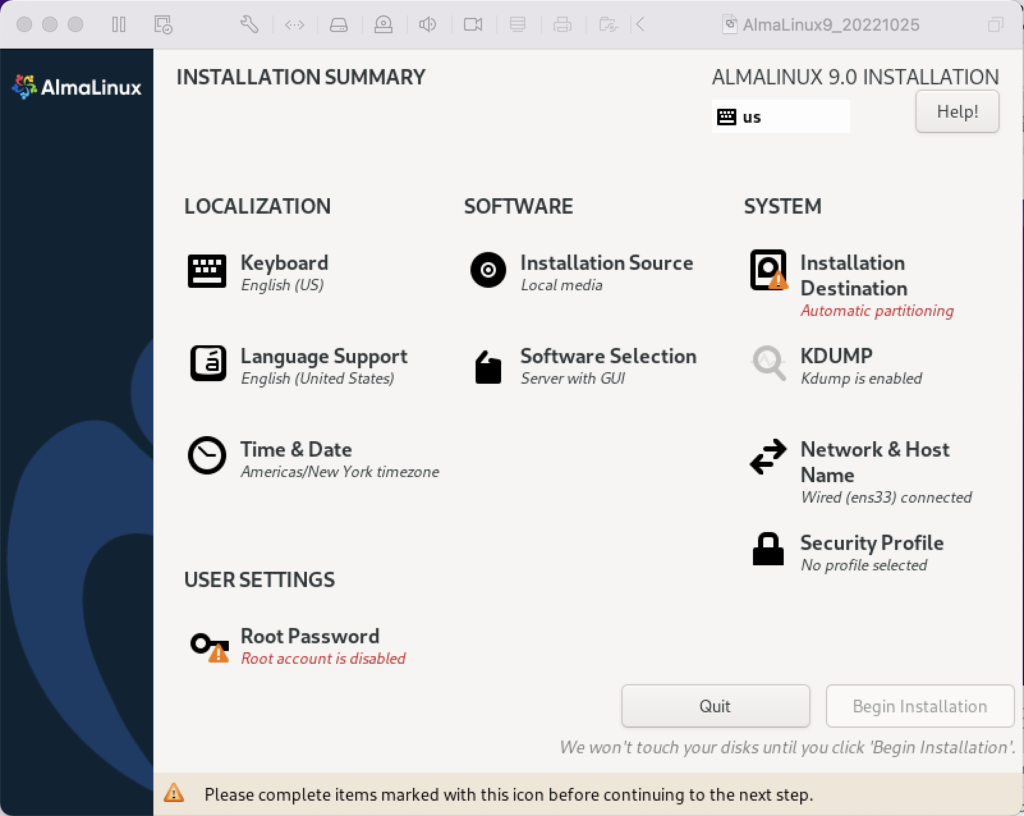
- The Installation Summary dialog lets you fix anything with a warning message orange triangle. Fix the Root Password first by clicking on the text.
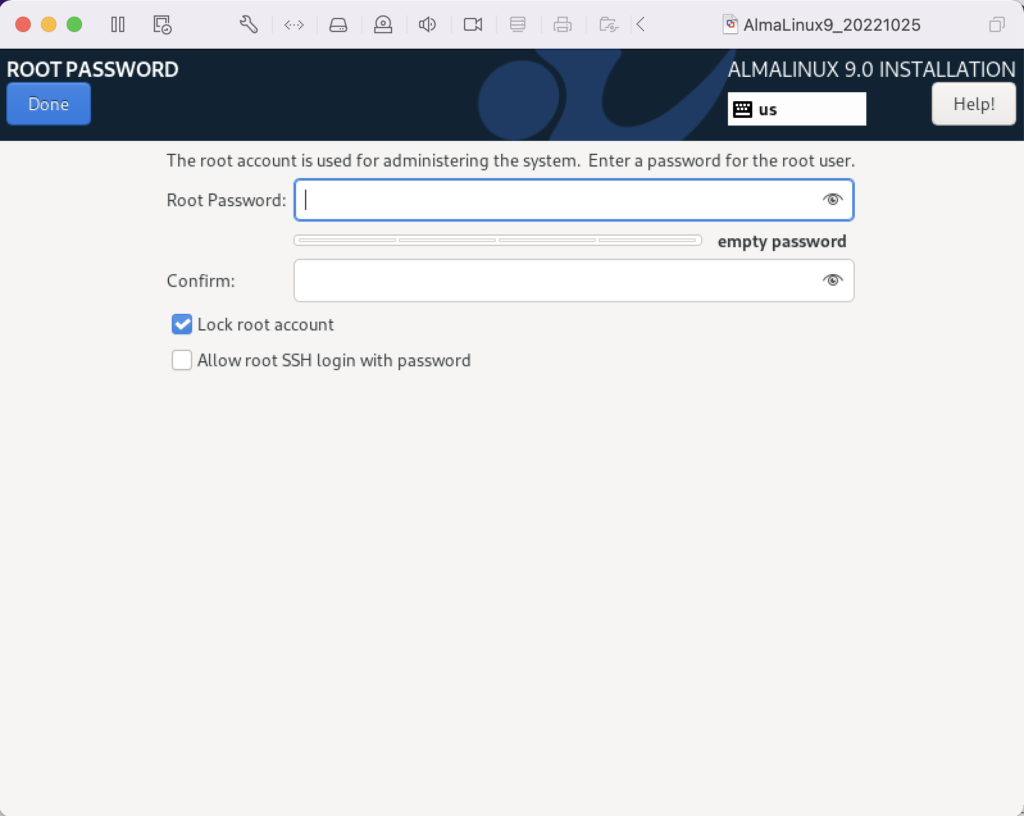
- Enter the Root Password twice, click the Lock root account checkbox to unselect it, and click the Allow root SSH login with password checkbox to enable it.

- Click the Done button to complete setting the root password.

- After fixing the root password, click on the Installation Destination item to change the default partition.
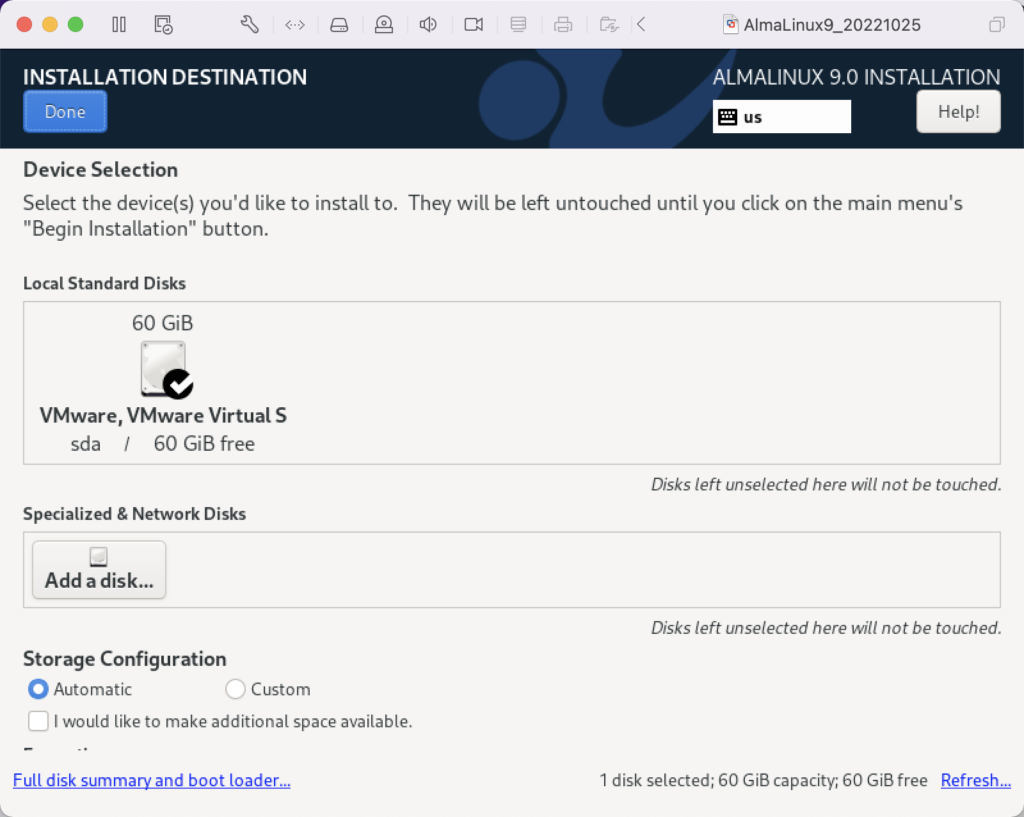
- Click the Done button to accept the initial size of the VM partition.
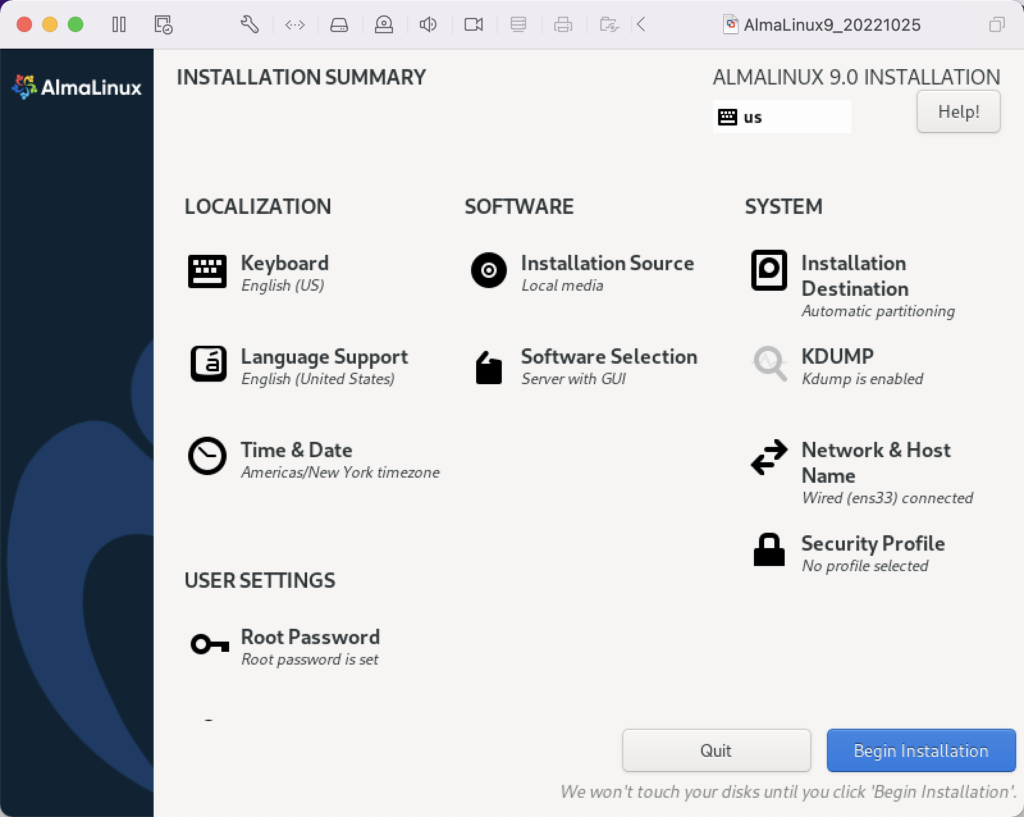
- Click the Software Selection element to add software components to the default installation.
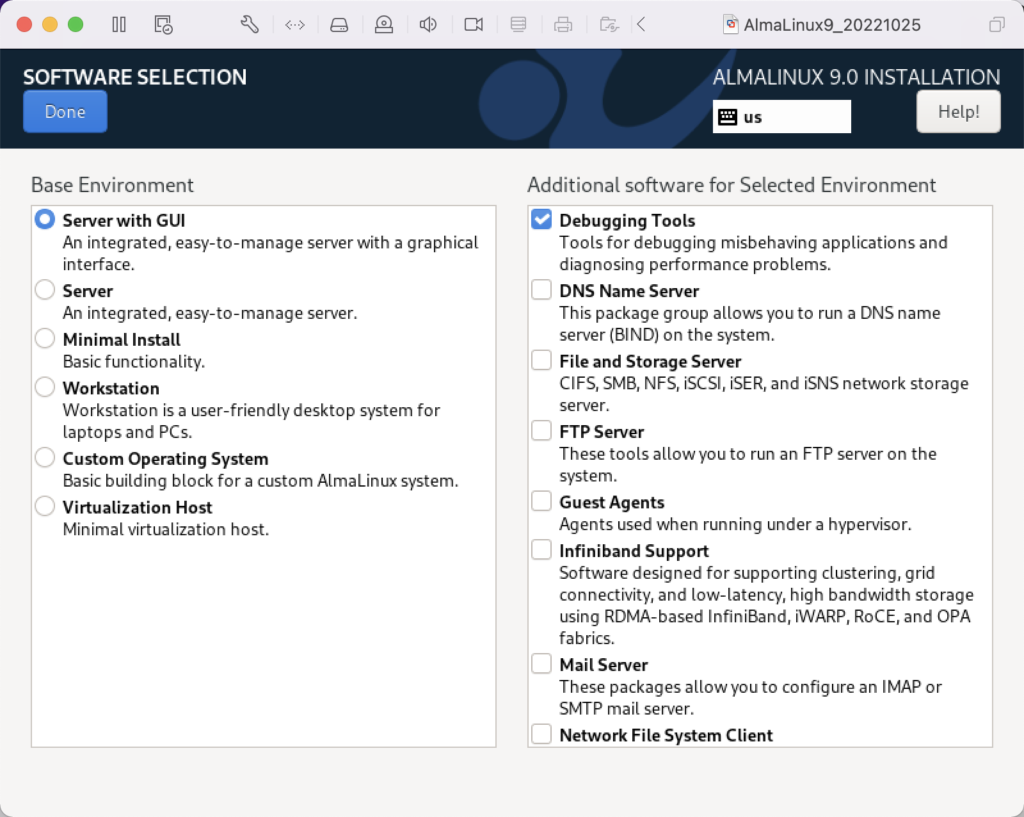
- Click the checkboxes for the following additional software:
- Debugging Tools
- Performance Tools
- Remote Desktop Clients
- Remote Management for Linux
- Legacy UNIX Compatibility
- Console Internet Tools
- Development Tools
- .NET Development
- Graphical Administration Tools
- System Tools
Click the Done button to accept the added software elements.
- Click the Begin Installation button to begin the installation of AlmaLinux.
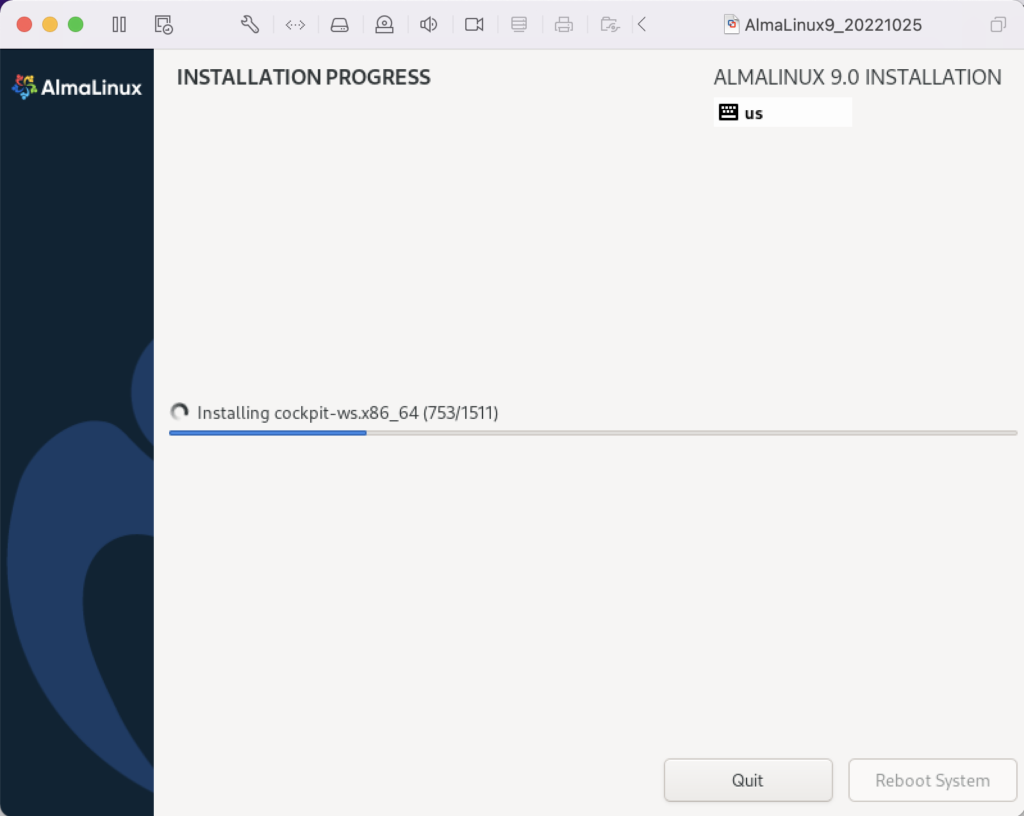
- The Installing Progress dialog will show a progress bar for several minutes.
- The Installing Progress dialog eventually completes, and you click the Reboot System button to complete the installation.
Setup
- The Welcome to AlmaLinux page begins the set up of the operating systems.
- Click the Slide to disable location services.
- After clicking the Slide location services are disabled.

- The Online Account dialog lets you connect your email, online calendar, contacts, documents, and photos. You click the Skip button to avoid setting up any of the online accounts.

- The About You dialog lets you enter user account with sudoer privileges.
- The About You dialog enters a title case user’s name and a lowercase user’s name.
- The Password dialog lets you enter a case sensitive password.
- The Password dialog displays the entry of the passwords as dots.
- The Setup Complete dialog leaves you to click the Start Using AlmaLinux button to complete the setup.

- The blank image page displays until you click on it.
- The Welcome to AlmaLinux dialog invites you to take a tour or decline it. Click the No Thanks button to decline the tour.
- After declining the tour, it displays the core AlmaLinux screen.
- Rebooting the system is necessary to complete the installation. Click on the circle icon on the right to begin the process to restart or shutdown the operating system. Click on the Power Off / Log Out dropdown to continue.
- Click the Restart… menu option to restart the operating system.

- Click the Restart… menu option to confirm the restart of the operating system.
- Click the Student icon to get prompted for a password.
- Enter the Student password to connect to the AlmaLinux operating system.

- This displays the standard working interface for the AlmaLinux operating system.
Fedora for macOS ARM64
I’m always updating VMs, and I was gratified to notice that there’s a Fedora arm64 ISO. If you’re interested in it, you can download the Live Workstation from here or the Fedora Server from here.
Unfortunately, I only have macOS running on i7 and i9 Intel Processors. It would be great to hear back how it goes for somebody one of the new Apple M1 chip.
I typically install the workstation version because it meets my needs to run MySQL and other native Linux development tools. However, the server version is also available. Fedora is a wonderful option, as a small footprint for testing things on my MacBookPro.
JavaScript Streams?
A quick followup to my post on how to write a server-side shell component in JavaScript. Naturally, it’s based on a question posed to me about the original article. It asked, “Why didn’t I use JavaScript’s streams instead of synchronized files?”
Moreover, the question asks why I wrote logic (lines 69 thru 105) that wrote to local files rather than a stream. While they didn’t provide an example, here’s a rewritten solution that uses a stream.
69 70 71 72 73 74 75 76 77 78 79 80 81 82 83 84 85 86 87 88 89 90 91 92 | else { // Returns RowDataPacket from query. for(let element in result) { data += result[element].item_title + ', ' + result[element].release_date = '\n' } // Write file when data string is not empty. if (data.length > 0) { buffer = Buffer.alloc(data.length, data) // Check for data from database query and write file. if (path.length > 0) { let writeStream = fs.createWriteStream(path) writeStream.write(buffer) writeStream.on(buffer) } // Set standard out (stdout) and exit program. console.log(data) process.exit(0) } else { console.error('Query returned no rows.') } } |
The Node.js stream replacement code has a significant problem when the target file can’t be read and written to by a Node.js application. This could be an ownership- or permission-driven problem coupled with the lazy file opening behavior of a stream in JavaScript. The lazy open is a hidden behavior of the createWriteStream() method, which actually calls the fs.open() method. It may raise the following type of error:
events.js:174
     throw er; // Unhandled 'error' event
     ^

Error: EACCES: permission denied, open 'output.csv'
Emitted 'error' event at:
   at lazyFs.open (internal/fs/streams.js:277:12)
at FSReqWrap.args [as oncomplete] (fs.js:140:20) |
You can prevent this type of unhandled exception by putting this type of block right after you verify the target file name in the script. It ensures that your program raises a handled exception before your code tries to access a target file as a stream.
69 70 71 72 73 74 75 76 | // Verify access to the file. try { fs.accessSync(path, (fs.constants.R_OK && fs.constants.W_OK)) access = true } catch { console.error("Error accessing [%s] file.", path) } |
Naturally, you also need to define the access variable at the top of your script. The preceding block lets you set the access variable to true on line 72 when you have permissions to the file used by the stream. It also lets you replace line 76 (from the prior example code) with the following statement that effectively blocks any attempt to use a stream that will fail because of the lazy file opening process:
76 | if (access && (path.length > 0)) { |
Adding the extra block does lengthen the program, and change line numbers. I hope I’ve adjusted in a way that makes sense by referencing the old numbers for the change of the decision making if-statement.
As always, I hope this helps those looking for a related solution.
Node.js Fedora Install
I want to add the MEAN (MongoDB, Express.js, Angular.js, and Node.js) stack to my backend server development course. This post documents the installation and configuration of components on Fedora 30.
The first step requires installing the Node package. The Node package also contains the Node package manager (npm). You install the Node packages as the root user or as a sudoer user with the following command.
yum install -y npm |
It should produce the following installation log:
Last metadata expiration check: 1:10:42 ago on Wed 08 Jul 2020 06:57:52 PM MDT. Dependencies resolved. ================================================================================================================================ Package Architecture Version Repository Size ================================================================================================================================ Installing: npm x86_64 1:6.13.4-1.10.19.0.1.fc30 updates 3.8 M Installing dependencies: nodejs x86_64 1:10.19.0-1.fc30 updates 88 k nodejs-libs x86_64 1:10.19.0-1.fc30 updates 9.1 M Installing weak dependencies: nodejs-full-i18n x86_64 1:10.19.0-1.fc30 updates 7.3 M Transaction Summary ================================================================================================================================ Install 4 Packages Total download size: 20 M Installed size: 91 M Downloading Packages: (1/4): nodejs-10.19.0-1.fc30.x86_64.rpm 173 kB/s | 88 kB 00:00 (2/4): nodejs-full-i18n-10.19.0-1.fc30.x86_64.rpm 2.8 MB/s | 7.3 MB 00:02 (3/4): nodejs-libs-10.19.0-1.fc30.x86_64.rpm 2.7 MB/s | 9.1 MB 00:03 (4/4): npm-6.13.4-1.10.19.0.1.fc30.x86_64.rpm 1.3 MB/s | 3.8 MB 00:02 -------------------------------------------------------------------------------------------------------------------------------- Total 4.9 MB/s | 20 MB 00:04 Running transaction check Transaction check succeeded. Running transaction test Transaction test succeeded. Running transaction Running scriptlet: npm-1:6.13.4-1.10.19.0.1.fc30.x86_64 1/1 Preparing : 1/1 Installing : nodejs-libs-1:10.19.0-1.fc30.x86_64 1/4 Installing : nodejs-full-i18n-1:10.19.0-1.fc30.x86_64 2/4 Installing : npm-1:6.13.4-1.10.19.0.1.fc30.x86_64 3/4 Installing : nodejs-1:10.19.0-1.fc30.x86_64 4/4 Running scriptlet: nodejs-1:10.19.0-1.fc30.x86_64 4/4 Verifying : nodejs-1:10.19.0-1.fc30.x86_64 1/4 Verifying : nodejs-full-i18n-1:10.19.0-1.fc30.x86_64 2/4 Verifying : nodejs-libs-1:10.19.0-1.fc30.x86_64 3/4 Verifying : npm-1:6.13.4-1.10.19.0.1.fc30.x86_64 4/4 Installed: nodejs-1:10.19.0-1.fc30.x86_64 nodejs-full-i18n-1:10.19.0-1.fc30.x86_64 nodejs-libs-1:10.19.0-1.fc30.x86_64 npm-1:6.13.4-1.10.19.0.1.fc30.x86_64 Complete! |
After installing the Node package, you should use the Node package manager (npm) to install the Node Monitor nodemon. nodemon is a popular utility that automatically lets you restart Node programs when you make changes to the source code.
While npm is installed as part of the Node package, you must use npm to install the Node Monitor. The following command installs the nodemon globally on your Fedora system. The -g flag lets you install it globally, which is important when you manage package.json files.
npm install -g nodemon |
You install nodemon globally but most of your web app or project files will be installed locally. Node is a different paradigm than building an Apache or IIS web application because Node provides a framework for you to build a web server.
Here’s a quick Hello World! example that I borrowed a JavaScript helloworld.js file from an excellent Web Development with Node & Express: Leveraging the JavaScript Stack by Ethan Brown. For those who haven’t worked with JavaScript in years, semicolons are optional now.
/* Construct a web server. */ const http = require('http') const port = process.env.PORT || 3000 const server = http.createServer((req, res) => { res.writeHead(200, { 'Content-Type': 'text/plain' }) res.end('Hello world!') }) server.listen(port, () => console.log(`server started on port ${port}); ` + 'press Ctrl-C to terminate...')) |
I put this in /var/www/html/node directory, which is owned by the superuser, root. You need to start the server before accessing it from a browser. You can start the program with the following syntax as a privileged user:
node /var/www/html/node/helloworld.js |
Then, you can use the localhost to access it with the following URL:
http://localhost:3000 |
It will display the following:

Next, you need to use the Node Package Manager (npm) to install the Express.js packages. You do that with the following syntax:
npm install -g express express-generator |
It should produce a console out put like the following:
npm WARN deprecated mkdirp@0.5.1: Legacy versions of mkdirp are no longer supported. Please update to mkdirp 1.x. (Note that the API surface has changed to use Promises in 1.x.) /usr/local/bin/express -> /usr/local/lib/node_modules/express-generator/bin/express-cli.js + express@4.17.1 + express-generator@4.16.1 added 60 packages from 42 contributors in 4.798s |
After you install all the packages, you can inspect them with the following command. The packages are found in the /usr/local/lib/node_modules/express directory. The listing is generated from the package.json file on Fedora and Ubuntu Linux.
npm list -g |
It should display something like this:
/usr/local/lib ├─┬ express@4.17.1 │ ├─┬ accepts@1.3.7 │ │ ├─┬ mime-types@2.1.27 │ │ │ └── mime-db@1.44.0 │ │ └── negotiator@0.6.2 │ ├── array-flatten@1.1.1 │ ├─┬ body-parser@1.19.0 │ │ ├── bytes@3.1.0 │ │ ├── content-type@1.0.4 deduped │ │ ├── debug@2.6.9 deduped │ │ ├── depd@1.1.2 deduped │ │ ├─┬ http-errors@1.7.2 │ │ │ ├── depd@1.1.2 deduped │ │ │ ├── inherits@2.0.3 │ │ │ ├── setprototypeof@1.1.1 deduped │ │ │ ├── statuses@1.5.0 deduped │ │ │ └── toidentifier@1.0.0 │ │ ├─┬ iconv-lite@0.4.24 │ │ │ └── safer-buffer@2.1.2 │ │ ├── on-finished@2.3.0 deduped │ │ ├── qs@6.7.0 deduped │ │ ├─┬ raw-body@2.4.0 │ │ │ ├── bytes@3.1.0 deduped │ │ │ ├── http-errors@1.7.2 deduped │ │ │ ├── iconv-lite@0.4.24 deduped │ │ │ └── unpipe@1.0.0 deduped │ │ └── type-is@1.6.18 deduped │ ├─┬ content-disposition@0.5.3 │ │ └── safe-buffer@5.1.2 deduped │ ├── content-type@1.0.4 │ ├── cookie@0.4.0 │ ├── cookie-signature@1.0.6 │ ├─┬ debug@2.6.9 │ │ └── ms@2.0.0 │ ├── depd@1.1.2 │ ├── encodeurl@1.0.2 │ ├── escape-html@1.0.3 │ ├── etag@1.8.1 │ ├─┬ finalhandler@1.1.2 │ │ ├── debug@2.6.9 deduped │ │ ├── encodeurl@1.0.2 deduped │ │ ├── escape-html@1.0.3 deduped │ │ ├── on-finished@2.3.0 deduped │ │ ├── parseurl@1.3.3 deduped │ │ ├── statuses@1.5.0 deduped │ │ └── unpipe@1.0.0 │ ├── fresh@0.5.2 │ ├── merge-descriptors@1.0.1 │ ├── methods@1.1.2 │ ├─┬ on-finished@2.3.0 │ │ └── ee-first@1.1.1 │ ├── parseurl@1.3.3 │ ├── path-to-regexp@0.1.7 │ ├─┬ proxy-addr@2.0.6 │ │ ├── forwarded@0.1.2 │ │ └── ipaddr.js@1.9.1 │ ├── qs@6.7.0 │ ├── range-parser@1.2.1 │ ├── safe-buffer@5.1.2 │ ├─┬ send@0.17.1 │ │ ├── debug@2.6.9 deduped │ │ ├── depd@1.1.2 deduped │ │ ├── destroy@1.0.4 │ │ ├── encodeurl@1.0.2 deduped │ │ ├── escape-html@1.0.3 deduped │ │ ├── etag@1.8.1 deduped │ │ ├── fresh@0.5.2 deduped │ │ ├── http-errors@1.7.2 deduped │ │ ├── mime@1.6.0 │ │ ├── ms@2.1.1 │ │ ├── on-finished@2.3.0 deduped │ │ ├── range-parser@1.2.1 deduped │ │ └── statuses@1.5.0 deduped │ ├─┬ serve-static@1.14.1 │ │ ├── encodeurl@1.0.2 deduped │ │ ├── escape-html@1.0.3 deduped │ │ ├── parseurl@1.3.3 deduped │ │ └── send@0.17.1 deduped │ ├── setprototypeof@1.1.1 │ ├── statuses@1.5.0 │ ├─┬ type-is@1.6.18 │ │ ├── media-typer@0.3.0 │ │ └── mime-types@2.1.27 deduped │ ├── utils-merge@1.0.1 │ └── vary@1.1.2 └─┬ express-generator@4.16.1 ├── commander@2.15.1 ├── ejs@2.6.1 ├─┬ minimatch@3.0.4 │ └─┬ brace-expansion@1.1.11 │ ├── balanced-match@1.0.0 │ └── concat-map@0.0.1 ├─┬ mkdirp@0.5.1 │ └── minimist@0.0.8 └── sorted-object@2.0.1 |
You can also create a secure node site (HTTPS) with the following additional steps. They include creating a self-signed secure public and private key. This creates the public key:
openssl genrsa -out key.pem |
The openssl command will generate a private key key.pem file. It generates something like the following text message to console:
Generating RSA private key, 2048 bit long modulus (2 primes) ...........+++++ .............................................+++++ e is 65537 (0x010001) |
Next, you need to generate a self-signed certificate. You do this in two steps.
- Create a Distinguished Name (
DN) file. Thecsr.pemfile is theDNfile. You need it to create a self-signed certificate:openssl req -new -key key.pem -out csr.pem
It will prompt you for values, like the following:
You are about to be asked to enter information that will be incorporated
into your certificate request.
What you are about to enter is what is called a Distinguished Name or a DN.
There are quite a few fields but you can leave some blank
For some fields there will be a default value,
If you enter '.', the field will be left blank.
-----
Country Name (2 letter code) [XX]:
State or Province Name (full name) []:MiddleEarth
Locality Name (eg, city) [Default City]:Rivendell
Organization Name (eg, company) [Default Company Ltd]:Fellowship
Organizational Unit Name (eg, section) []:Self
Common Name (eg, your name or your server's hostname) []:Localhost
Email Address []:bilbo@loth.org

Please enter the following 'extra' attributes
to be sent with your certificate request
A challenge password []:friend
An optional company name []:Bilbo
- Use the DN file to create your secure certificate. The following
opensslcommand creates the certificate file by using your private keykey.pemandDNcsr.pemfiles.openssl x509 -req -days 9999 -in csr.pem -signkey key.pem -out cert.pem
It should generate a Secure certificate cert.pem file and return something like the following to the console.
Signature ok
subject=C = XX, ST = MiddleEarth, L = Rivendell, O = Fellowship, OU = Self, CN = Localhost, emailAddress = bilbo@loth.org
Getting Private key
You can put these private key (key.pem) and certificate (cert.pem) files in an ssl subdirectory of the directory where you put the JavaScript program. The following creates a secure server page with the following code.
/* Construct a secure web server. */ const https = require('https') const fs = require('fs') const port = process.env.PORT || 3000 const options = { key: fs.readFileSync('ssl/key.pem'), cert: fs.readFileSync('ssl/cert.pem') } const server = https.createServer((options, res) => { res.writeHead(200, { 'Content-Type': 'text/plain' }) res.end('Hello world!') }) server.listen(port, () => console.log(`server started on port ${port}); ` + 'press Ctrl-C to terminate...')) |
If you try launch your browser using the localhost instead of a DNS or file resolved network name on the designated port, it will raise the following security error:
This site can't be reached https's server IP address could not be found. DNS_PROBE_FINISHED_NXDOMAIN |
An alternate approach to writing a secure server includes using Express.js library. The syntax changes somewhat and you include two new libraries, as shown below:
/* Construct a secure web server. */ const https = require('https') const express = require('express') const fs = require('fs') const app = express() const port = process.env.PORT || 3001 const options = { key: fs.readFileSync('ssl/key.pem'), cert: fs.readFileSync('ssl/cert.pem') } https.createServer(options, app).listen(port, () => { console.log(`Express started in ${app.get('env')} mode ` + `on port + ${port}.`) }) |
This will fail with the following error message if you’re running it with a global installation unless you set the $NODE_PATH environment variable correctly. Without setting the variable you may get the following error message:
internal/modules/cjs/loader.js:638 throw err; ^ Error: Cannot find module 'express' at Function.Module._resolveFilename (internal/modules/cjs/loader.js:636:15) at Function.Module._load (internal/modules/cjs/loader.js:562:25) at Module.require (internal/modules/cjs/loader.js:692:17) at require (internal/modules/cjs/helpers.js:25:18) at Object.<anonymous> (/var/www/html/node/helloworldsecure.js:3:17) at Module._compile (internal/modules/cjs/loader.js:778:30) at Object.Module._extensions..js (internal/modules/cjs/loader.js:789:10) at Module.load (internal/modules/cjs/loader.js:653:32) at tryModuleLoad (internal/modules/cjs/loader.js:593:12) at Function.Module._load (internal/modules/cjs/loader.js:585:3) |
Sometimes they’ll advise you to do an individual user installation of Express.js to get past this error but that’s not necessary. You just need to set the $NODE_PATH environment variable as follows:
export NODE_PATH=/usr/local/lib/node_modules |
This will enable the JavaScript to work without error and without a specific user installation. Assuming you name either of these programs as helloworldsecure.js, you run them with the following command:
node helloworldsecure.js |
You can terminate the program with a Ctrl+c or if use the kill -15 pid command if you started it as a background process. You can find the process ID (pid) with the jobs command.
As always, I hope this is helpful to those starting out with this cool technology stack.
Fix VMware Networking
Occasionally, my students loose their network connection when copying their virtual machines. This article shows you how to rebuild your Internet connection.
The first step requires you to identify the port number on your host operating system, which is typically Windows OS or Mac OS X. You can find that by running the following search from a Mac OS X Terminal session or Windows OS Command session.
If you’re on the Mac OS X, you launch a Terminal session and then use the sudo command to open a shell as the root super user, like this:
sudo sh |
As the root super user on Mac OS X , you run the netstat command like this:
sh-3.2# netstat -a | grep 1.ntp | grep -v grep udp4 0 0 192.168.147.1.ntp *.* |
VMware uses the same subdomain with one difference for the gateway, it uses node 2:
192.168.147.2 |
The alternate syntax to find Vmware’s subdomain requires you to use an Administrator account on Windows, like this:
C:\> netstat -a | findstr /C:.ntp |
After you determine the subdomain, you need to ensure VMware is configured correctly. You navigate to the menu and choose Virtual Machine and then Settings from the dropdown menu. The software shows you the following:

Then, click on the Network Adapter under the Removable Devices, and you see the following screen:

You need to make sure that you’re using Internet Sharing, or Share with my Mac. If you’re not using it select it now.
Launch the hosted Linux OS and open a Terminal seesion. Inside the Terminal, you should find the machine’s address as the root address with the ifconfig utility. The technique follows:
[student@localhost ~]$ sudo sh [sudo] password for student: sh-4.2# ifconfig eno16777736: flags=4163<UP,BROADCAST,RUNNING,MULTICAST> mtu 1500 ether 00:0c:29:70:77:64 txqueuelen 1000 (Ethernet) RX packets 34 bytes 4190 (4.0 KiB) RX errors 0 dropped 0 overruns 0 frame 0 TX packets 0 bytes 0 (0.0 B) TX errors 0 dropped 0 overruns 0 carrier 0 collisions 0 lo: flags=73<UP,LOOPBACK,RUNNING> mtu 65536 inet 127.0.0.1 netmask 255.0.0.0 inet6 ::1 prefixlen 128 scopeid 0x10<host> loop txqueuelen 0 (Local Loopback) RX packets 0 bytes 0 (0.0 B) RX errors 0 dropped 0 overruns 0 frame 0 TX packets 0 bytes 0 (0.0 B) TX errors 0 dropped 0 overruns 0 carrier 0 collisions 0 |
Next, you need to edit some files, they assume the VMware Network Gateway is 192.168.147.2 and the machine’s address is “00:0c:29:70:77:64“. The first file you need to edit is the /etc/resolv.conf file, and it should look like this:
domain localdomain search localdomain nameserver 192.168.147.2 |
The second file you need to edit is the /etc/sysconfig/network file. It should look like this:
# Created by anaconda NETWORKING=yes HOSTNAME=localhost.localdomain GATEWAY=192.168.147.2 |
The third file you need to edit is the /etc/sysconfig/network-scripts/ifcfg-eth0 file. It should look like this:
DEVICE=eth0 HWADDR=00:0c:29:70:77:64 ONBOOT=yes NM_CONTROLLED=yes BOOTPROTO=dhcp TYPE=Ethernet DNS1=192.168.147.2 USERCTL=no PEERDNS=yes IPV6INIT=no |
The last step requires that you reboot the machine or run the /etc/rc.d/init.d/network to restart the network. I hope this helps those trying to restore their VMware hosted operating systems network connection.
Add Gedit Plugins
Fedora comes with vim and gedit installed but the gedit installation is bare bones. You can update gedit to include supplemental Plug-ins with the following yum command as the root user:
yum install -y gedit-plugins |
It generates the following log file:
Loaded plugins: langpacks, refresh-packagekit mysql-connectors-community | 2.5 kB 00:00 mysql-tools-community | 2.5 kB 00:00 mysql56-community | 2.5 kB 00:00 pgdg93 | 3.6 kB 00:00 updates/20/x86_64/metalink | 14 kB 00:00 updates | 4.9 kB 00:00 (1/2): pgdg93/20/x86_64/primary_db | 86 kB 00:00 (2/2): updates/20/x86_64/primary_db | 11 MB 00:03 (1/2): updates/20/x86_64/pkgtags | 1.5 MB 00:00 (2/2): updates/20/x86_64/updateinfo | 2.0 MB 00:01 Resolving Dependencies --> Running transaction check ---> Package gedit-plugins.x86_64 0:3.10.1-1.fc20 will be installed --> Processing Dependency: libgit2-glib for package: gedit-plugins-3.10.1-1.fc20.x86_64 --> Running transaction check ---> Package libgit2-glib.x86_64 0:0.0.6-2.fc20 will be installed --> Processing Dependency: libgit2.so.0()(64bit) for package: libgit2-glib-0.0.6-2.fc20.x86_64 --> Running transaction check ---> Package libgit2.x86_64 0:0.19.0-2.fc20 will be installed --> Processing Dependency: libxdiff.so.1()(64bit) for package: libgit2-0.19.0-2.fc20.x86_64 --> Processing Dependency: libhttp_parser.so.2()(64bit) for package: libgit2-0.19.0-2.fc20.x86_64 --> Running transaction check ---> Package http-parser.x86_64 0:2.0-5.20121128gitcd01361.fc20 will be installed ---> Package libxdiff.x86_64 0:1.0-3.fc20 will be installed --> Finished Dependency Resolution Dependencies Resolved ================================================================================ Package Arch Version Repository Size ================================================================================ Installing: gedit-plugins x86_64 3.10.1-1.fc20 updates 830 k Installing for dependencies: http-parser x86_64 2.0-5.20121128gitcd01361.fc20 fedora 23 k libgit2 x86_64 0.19.0-2.fc20 fedora 281 k libgit2-glib x86_64 0.0.6-2.fc20 fedora 82 k libxdiff x86_64 1.0-3.fc20 fedora 33 k Transaction Summary ================================================================================ Install 1 Package (+4 Dependent packages) Total download size: 1.2 M Installed size: 5.2 M Downloading packages: (1/5): http-parser-2.0-5.20121128gitcd01361.fc20.x86_64.rpm | 23 kB 00:00 (2/5): libgit2-0.19.0-2.fc20.x86_64.rpm | 281 kB 00:00 (3/5): libgit2-glib-0.0.6-2.fc20.x86_64.rpm | 82 kB 00:00 (4/5): libxdiff-1.0-3.fc20.x86_64.rpm | 33 kB 00:00 (5/5): gedit-plugins-3.10.1-1.fc20.x86_64.rpm | 830 kB 00:01 -------------------------------------------------------------------------------- Total 899 kB/s | 1.2 MB 00:01 Running transaction check Running transaction test Transaction test succeeded Running transaction (shutdown inhibited) Installing : libxdiff-1.0-3.fc20.x86_64 1/5 Installing : http-parser-2.0-5.20121128gitcd01361.fc20.x86_64 2/5 Installing : libgit2-0.19.0-2.fc20.x86_64 3/5 Installing : libgit2-glib-0.0.6-2.fc20.x86_64 4/5 Installing : gedit-plugins-3.10.1-1.fc20.x86_64 5/5 Verifying : libgit2-0.19.0-2.fc20.x86_64 1/5 Verifying : libgit2-glib-0.0.6-2.fc20.x86_64 2/5 Verifying : gedit-plugins-3.10.1-1.fc20.x86_64 3/5 Verifying : http-parser-2.0-5.20121128gitcd01361.fc20.x86_64 4/5 Verifying : libxdiff-1.0-3.fc20.x86_64 5/5 Installed: gedit-plugins.x86_64 0:3.10.1-1.fc20 Dependency Installed: http-parser.x86_64 0:2.0-5.20121128gitcd01361.fc20 libgit2.x86_64 0:0.19.0-2.fc20 libgit2-glib.x86_64 0:0.0.6-2.fc20 libxdiff.x86_64 0:1.0-3.fc20 Complete! |
When you launch the gedit utility, you click on the
Gedit Plug-in Installation

- After you install the Gedit Plug-ins, you can configure the plug-ins by launching Gedit and then click on the
geditmenu option. Then, click on the Preferences menu option to enable the new plugins, like the Embedded Terminal plug-in.

- You have four tab options when working with the Preferences menu. The first tab is the View tab, as shown to the left.

- The second tab is the Editor tab, as shown to the left.

- The third tab is the Font & Colors tab, as shown to the left.

- The fourth tab is the Plugins tab, as shown to the left. Scroll down the list and check the Embedded Terminal and Python Console plug-ins’ checkbox. The Embedded Terminal lets you edit a file and have command line access to a Terminal session from the
geditmenu; and the Python Console session from thegeditmenu.

- Click on the View menu, and then choose the Bottom Panel menu option.

- After enabling the Bottom Panel in the Gedit menu, you can edit a file and click on the Terminal by simply clicking on the subpanel. You can see the split image on the left. There’s also a set of bottom tabs that lets you switch from a Linux Terminal session to the Python console.
As always, I hope this helps those working with gedit on the Fedora operating system.
C Shared Libraries
I wrote a shared C library example to demonstrate external procedures in the Oracle Database 11g PL/SQL Programming book. I also reused the same example to demonstrate Oracle’s external procedures in the Oracle Database 12c PL/SQL Advanced Programming Techniques book last year. The example uses a C Shared Library but a PL/SQL wrapper and PL/SQL test case.
One of my students asked me to simplify the unit test case example by writing the complete unit test in the C Progamming Language. The student request seemed like a good idea, and while poking around on the web it appears there’s a strong case for a set of simple shared C library examples. This blog post isn’t meant to replace the C Programming web site and C Programming Tutorial web site, which I recommend as a great reference point.
Like most things, the best place to start is with basics of C programming because some readers may be very new to C programming. I’ll start with basic standalone programs and how to use the gcc compiler before showing you how to use shared C libraries.
The most basic program is a hello.c program that serves as a “Hello World!” program:
1 2 3 4 5 | #include <stdio.h> int main() { printf("Hello World!\n"); return(0); } |
Assuming you put the C source files in a src subdirectory and the executable files in a bin subdirectory. You compile the program with the gcc program from the parent directory of the src and bin subdirectories, as follows:
gcc -o bin/hello src/hello.c |
Then, you execute the hello executable program from the parent directory as follows:
bin/hello |
It prints:
Hello World! |
You can modify the basic Hello World! program to accept a single input word, like this hello_whom.c program:
1 2 3 4 5 6 7 8 9 10 11 12 | #include <stdio.h> /* The executable main method. */ int main() { // Declare a character array to hold an input value. char whom[30]; /* Print a question and read a string input. */ printf("Who are you? "); scanf("%s", whom); printf("Hello %s!\n", whom); return(0); } |
You can compile the hello_whom.c program as follows:
gcc -o bin/hello_whom src/hello_whom.c |
Then, you execute the hello_whom executable program from the parent directory as follows:
bin/hello_whom
Who are you? Stuart |
It prints:
Hello Stuart! |
Alternatively, you can modify the hello_whom.c program to accept a stream of text, like the following hello_string.c program:
1 2 3 4 5 6 7 8 9 10 11 12 | #include <stdio.h> /* The executable main method. */ int main() { // Declare a character array to hold an input name. char phrase[4000]; /* Print a question and read a string input. */ printf("Hello? "); scanf("%[^\n]%*c", phrase); printf("Hello %s!\n", phrase); return(0); } |
The [] is the scan set character. The [^\n] on line 10 defines the input as not a newline with a white space, and the %*c reads the newline character from the input buffer. After you compile the program you can call it like this:
bin/hello_string
Hello? there, it reads like a C++ stream |
It would print:
Hello there, it reads like a C++ stream! |
These example, like the previous examples, assume the source files are in a src subdirectory and the executable files are in the bin subdirectory. All compilation commands are run from the parent directory of the src and bin subdirectories.
The first example puts everything into a single writingstr.c file. It defines a writestr() function prototype before the main() function and the writestr() function after the main() function.
The code follows below:
1 2 3 4 5 6 7 8 9 10 11 12 13 14 15 16 17 18 19 20 21 22 | #include <stdio.h> /* Declare two integer variables. */ char path[255], message[4000]; /* Define a prototype for the writestr() function. */ void writestr(char *path, char *message); /* The executable main method. */ int main() { printf("Enter file name and message: "); scanf("%s %[^\n]%*c", &path, &message); printf("File name: %s\n", path); printf("File content: %s\n", message); writestr(path, message); return(0); } void writestr(char *path, char *message) { FILE *file_name; file_name = fopen(path,"w"); fprintf(file_name,"%s\n",message); fclose(file_name); } |
You can compile the writingstr.c function with the following syntax:
gcc -o bin/writingstr src/writingstr.c |
You can run the writingstr executable file with the following syntax:
bin/writingstr Enter file name and message: /home/student/Code/c/test.txt A string for a file. File name: /home/student/Code/c/test.txt File content: A string for a file. |
You’ll find a test.txt file written to the /home/student/Code/C directory. The file contains only the single sentence fragment entered above.
Now, let’s create a writestr.h header file, a writestr.c shared object file, and a main.c testing file. You should note a pattern between the self-contained code and the approach for using shared libraries. The prototype of the writestr() function becomes the definition of the writestr.h file, and the implementation of the writestr() function becomes the writestr.so shared library.
The main.c file contains the only the main() function from the writingstr.c file. The main() function uses the standard scanf() function to read a fully qualified file name (also known as a path) as a string and then a text stream for the content of the file.
You define the writestr.h header file as:
1 2 3 4 5 6 | #ifndef writestr_h__ #define writestr_h__ extern void writestr(char *path, char *message); #endif |
You define the writestr.c shared library, which differs from the example in the book. The difference is the #include statement of the writestr.h header file. The source code follows:
1 2 3 4 5 6 7 8 | #include <stdio.h> #include "writestr.h" void writestr(char *path, char *message) { FILE *file_name; file_name = fopen(path,"w"); fprintf(file_name,"%s\n",message); fclose(file_name); } |
You define the main.c testing program as:
1 2 3 4 5 6 7 8 9 10 11 12 | #include <stdio.h> #include "writestr.h" /* Declare two integer variables. */ char path[255], message[4000]; /* The executable main method. */ int main() { printf("Enter file name and message: "); scanf("%s %[^\n]%*c", &path, &message); writestr(path, message); return(0); } |
Before you begin the process to compile these, you should create an environment file that sets the $LD_LIBRARY_PATH environment variable or add it to your .bashrc file. You should point the $LD_LIBRARY_PATH variable to the directory where you’ve put your shared libraries.
# Set the LD_LIBRARY_PATH environment variable. export LD_LIBRARY_PATH=/home/student/Code/c/trylib/libfile |
With programs defined, you need to first compile the writestr.c shared library first. You use the following syntax from the parent directory of the src and bin subdirectories.
gcc -shared -fPIC -o bin/writestr.so src/writestr.c |
If you haven’t set the $LD_LIBRARY_PATH, you may raise an exception. There’s also an alternative to setting the $LD_LIBRARY_PATH before you call the gcc executable. You can use the -L option set the $LD_LIBRARY_PATH for a given all to the gcc executable, like:
gcc -L /home/student/Code/c/trylib/libfile -shared -fPIC -o bin/writestr.so src/writestr.c |
Then, you compile the main.c program. You must put the writestr.so shared library before you designate the main target object and main.c source files, like this:
gcc bin/writestr.so -o bin/main src/main.c |
Now, you can perform a C-only unit test case by calling the main executable. However, you must have set the $LD_LIBRARY_PATH environment variable at runtime too. You see the following reply to the “Enter file name and message” question when you run the main program unit:
bin/main Enter file name and message: /home/student/Code/c/trylib/libfile/test.txt A long native string is the second input to this C program. |
You can now see that the a new test.txt file has been written to the target directory, and that it contains the following string:
A long native string is the second input to this C program. |
As always, I hope this helps those you want to write shared libraries in the C programming language.
