Archive for the ‘MySQL DBA Techniques’ tag
MySQL on Ubuntu
Working with my students to create an Ubuntu virtual environment for Python development with the MySQL database. After completing the general provisioning covered in this older post, I’d recommend you create a python symbolic link before installing the MySQL-Python driver.
sudo ln -s /usr/bin/python3 /usr/bin/python |
You install the Python development driver with the following:
sudo apt-get -y install python3-mysql.connector |
Create a python_connect.py file to test your Python deployment’s ability to connect to the MySQL database:
#!/usr/bin/python # Import the library. import mysql.connector from mysql.connector import errorcode try: # Open connection. cnx = mysql.connector.connect(user='student', password='student', host='localhost', database='sakila') # Print the value. print("Database connection resolved.") # Handle exception and close connection. except mysql.connector.Error as e: if e.errno == errorcode.ER_ACCESS_DENIED_ERROR: print("Something is wrong with your user name or password") elif e.errno == errorcode.ER_BAD_DB_ERROR: print("Database does not exist") else: print(e) # Close the connection when the try block completes. else: cnx.close() |
You should change the file permissions of the python_connect.py to read-write-execute as owner, and read-execute as group and other with the following command:
chmod 755 python_connect.py |
Then, you can test your python_connect.py program from the local directory with the following command:
./python_connect.py |
You see the following output if it works:
Database connection resolved. |
As alway, I hope those looking for a code complete solutionk
MySQL Workbench Fits
My students wanted an illustration of where MySQL Workbench fits within the MySQL database. So, I overlaid it in this drawing from my old book on comparative SQL syntax for Oracle and MySQL. Anybody else have a cool alternative illustration?
The idea is the lightening bolt transmits an interactive call and reading a script file submits a call paradigm.

More or less MySQL processes a static query in the panel, like the following Python program process the dynamic query (on lines 71-78) with parameters sent when calling the Python script.
1 2 3 4 5 6 7 8 9 10 11 12 13 14 15 16 17 18 19 20 21 22 23 24 25 26 27 28 29 30 31 32 33 34 35 36 37 38 39 40 41 42 43 44 45 46 47 48 49 50 51 52 53 54 55 56 57 58 59 60 61 62 63 64 65 66 67 68 69 70 71 72 73 74 75 76 77 78 79 80 81 82 83 84 85 86 87 88 89 90 91 92 93 94 95 96 97 98 99 100 101 102 103 104 | #!/usr/bin/python # ------------------------------------------------------------ # Name: mysql-query2.py # Date: 20 Aug 2019 # ------------------------------------------------------------ # Purpose: # ------- # The program shows you how to provide agruments, convert # from a list to individual variables of the date type. # # You can call the program: # # ./mysql-query3.py 2001-01-01 2003-12-31 # # ------------------------------------------------------------ # Import the library. import sys import mysql.connector from datetime import datetime from datetime import date from mysql.connector import errorcode # Capture argument list. fullCmdArguments = sys.argv # Assignable variables. start_date = "" end_date = "" # Assign argument list to variable. argumentList = fullCmdArguments[1:] # Check and process argument list. # ============================================================ # If there are less than two arguments provide default values. # Else enumerate and convert strings to dates. # ============================================================ if (len(argumentList) < 2): # Set a default start date. if (isinstance(start_date,str)): start_date = date(1980, 1, 1) # Set the default end date. if (isinstance(end_date,str)): end_date = datetime.date(datetime.today()) else: # Enumerate through the argument list where beginDate precedes endDate as strings. try: for i, s in enumerate(argumentList): if (i == 0): start_date = datetime.date(datetime.fromisoformat(s)) elif (i == 1): end_date = datetime.date(datetime.fromisoformat(s)) except ValueError: print("One of the first two arguments is not a valid date (YYYY-MM-DD).") # Attempt the query. # ============================================================ # Use a try-catch block to manage the connection. # ============================================================ try: # Open connection. cnx = mysql.connector.connect(user='student', password='student', host='127.0.0.1', database='studentdb') # Create cursor. cursor = cnx.cursor() # Set the query statement. query = ("SELECT CASE " " WHEN item_subtitle IS NULL THEN CONCAT('''',item_title,'''') " " ELSE CONCAT('''',item_title,': ',item_subtitle,'''') " " END AS title, " "release_date " "FROM item " "WHERE release_date BETWEEN %s AND %s " "ORDER BY item_title") # Execute cursor. cursor.execute(query, (start_date, end_date)) # Display the rows returned by the query. for (title, release_date) in cursor: print("{}, {:%d-%b-%Y}".format(title, release_date)) # Close cursor. cursor.close() # ------------------------------------------------------------ # Handle exception and close connection. except mysql.connector.Error as e: if e.errno == errorcode.ER_ACCESS_DENIED_ERROR: print("Something is wrong with your user name or password") elif e.errno == errorcode.ER_BAD_DB_ERROR: print("Database does not exist") else: print("Error code:", e.errno) # error number print("SQLSTATE value:", e.sqlstate) # SQLSTATE value print("Error message:", e.msg) # error message # Close the connection when the try block completes. else: cnx.close() |
You could call this type of script from the Linux CLI (Command-Line Interface), like this:
./mysql-query3.py '2003-01-01' '2003-12-31' 2>/dev/null |
As always, I hope this helps those looking to understand things.
MySQL Posts Summary
Here’s a quick catalog for my students of PowerShell, JavaScript, and Python examples connecting to MySQL:
- MySQL Powershell Connection with .Net Library Example
- MySQL Powershell Connection with ODBC DSN Example
- MySQL Powershell with CSV File Write Example
- MySQL Powershell with Dialog for Dynamic Connection Inputs
- MySQL Node.js Introduction without Bind Variables
- MySQL Express.js Introcution with Bind Variables – Inclusive of Alternate Syntax
- MySQL Node.js Server-side Scripting Example – Inclusive of Regular Expressions and Parameter Validation
- MySQL Node.js Server-side Clarification of JavaScript Streams
- MySQL Python Connector – Working Example with Python 2 & 3
- MySQL Python with CTE Examples
- MySQL How to use Python to Read a CSV and Write it to a Table
- MySQL How to use Python to cleanup JSON Presentation
As always, I hope this helps those looking for a code sample.
AlmaLinux Libraries
I discovered a dependency for MySQL Workbench on AlmaLinux 8 installation. I neglected to fully cover it when I documented the installation in a VM of AlmaLinux 9. I go back later and update that entry but for now you need the following dependencies:
proj-6.3.2-4.el8.x86_64.rpm proj-datumgrid-1.8-6.3.2.4.el8.noarch.rpm proj-devel-6.3.2-4.el8.x86_64.rpm |
Install like this:
sudo dnf install -y *.rpm |
Log file:
Last metadata expiration check: 3:01:53 ago on Fri 10 Feb 2023 03:37:49 AM UTC. Dependencies resolved. ========================================================================================== Package Architecture Version Repository Size ========================================================================================== Installing: proj x86_64 6.3.2-4.el8 @commandline 2.0 M proj-datumgrid noarch 1.8-6.3.2.4.el8 @commandline 5.4 M proj-devel x86_64 6.3.2-4.el8 @commandline 89 k Transaction Summary ========================================================================================== Install 3 Packages Total size: 7.5 M Installed size: 17 M Downloading Packages: Running transaction check Transaction check succeeded. Running transaction test Transaction test succeeded. Running transaction Preparing : 1/1 Installing : proj-datumgrid-1.8-6.3.2.4.el8.noarch 1/3 Installing : proj-6.3.2-4.el8.x86_64 2/3 Installing : proj-devel-6.3.2-4.el8.x86_64 3/3 Running scriptlet: proj-devel-6.3.2-4.el8.x86_64 3/3 Verifying : proj-6.3.2-4.el8.x86_64 1/3 Verifying : proj-datumgrid-1.8-6.3.2.4.el8.noarch 2/3 Verifying : proj-devel-6.3.2-4.el8.x86_64 3/3 Installed: proj-6.3.2-4.el8.x86_64 proj-datumgrid-1.8-6.3.2.4.el8.noarch proj-devel-6.3.2-4.el8.x86_64 Complete! |
A quick update while installing AlmaLinux for AWS.
AlmaLinux LAMP

After installing and configuring MySQL 8.0.30, I installed the Apache Web Server, PHP and the MySQLi packages. Here are the step-by-step instructions after installing and configuring the MySQL Server and provisioning a student user and the sakila and studentdb databases (blog for those steps). After installing the major components, I completed the HTTPS configuration steps for Apache 2.
The installation steps are:
- Install the Apache packages as the sudoer user with this command:
sudo dnf install -y httpd
- Enable Apache as the sudoer user with this command:
chkconfig httpd on
This returns the following completion message:
Note: Forwarding request to 'systemctl enable httpd.service'.
Created symlink /etc/systemd/system/multi-user.target.wants/httpd.service → /usr/lib/systemd/system/httpd.service.
A quick Linux syntax note in the event you want to confirm the link or link target later. You can use the following syntax as a sudoer user to find the link:
ls `find /etc -type l | grep httpd.service 2>/dev/null`
and the following syntax as a sudoer user to find the link’s target:
readlink `find /etc -type l | grep httpd.service 2>/dev/null`
- You still need to start the Apache service unless you reboot the operating system as the sudoer user with this command:
apachectl start - At this point, you need to check the firewall settings because Apache can’t even read localhost at this point. If you’re new to these firewall commands, you should consider reviewing Korbin Brown’s tutorial. As the sudoer user check the Apache available services with this command:
firewall-cmd --zone=public --list-services
It should return:
cockpit dhcpv6-client sshAdd the following services and ports with these commands:
firewall-cmd --zone=public --add-port 80/tcp --permanent
firewall-cmd --zone=public --add-port 443/tcp --permanent
firewall-cmd --zone=public --add-port 8080/tcp --permanent
firewall-cmd --zone=public --add-service=http --permanent
firewall-cmd --zone=public --add-service=https --permanent
Check the open ports with the following command:
firewall-cmd --zone=public --list-ports
It should return:
80/tcp 443/tcp 8080/tcp
Check the open services with the following command:
firewall-cmd --zone=public --list-services
It should return:
cockpit dhcpv6-client http https ssh - Create the hello.htm file in the /var/www/html directory as the root user:
Restart the Apache service as the sudoer user:
apache restart
<html>
<body>
Hello World!
</body>
</html>
Then, you can launch the Firefox browser and type the following:
localhost/hello.htmIt should print “Hello World!” in the browser.
- Install the php package as the sudoer user with the following command:
sudo dnf install -y php
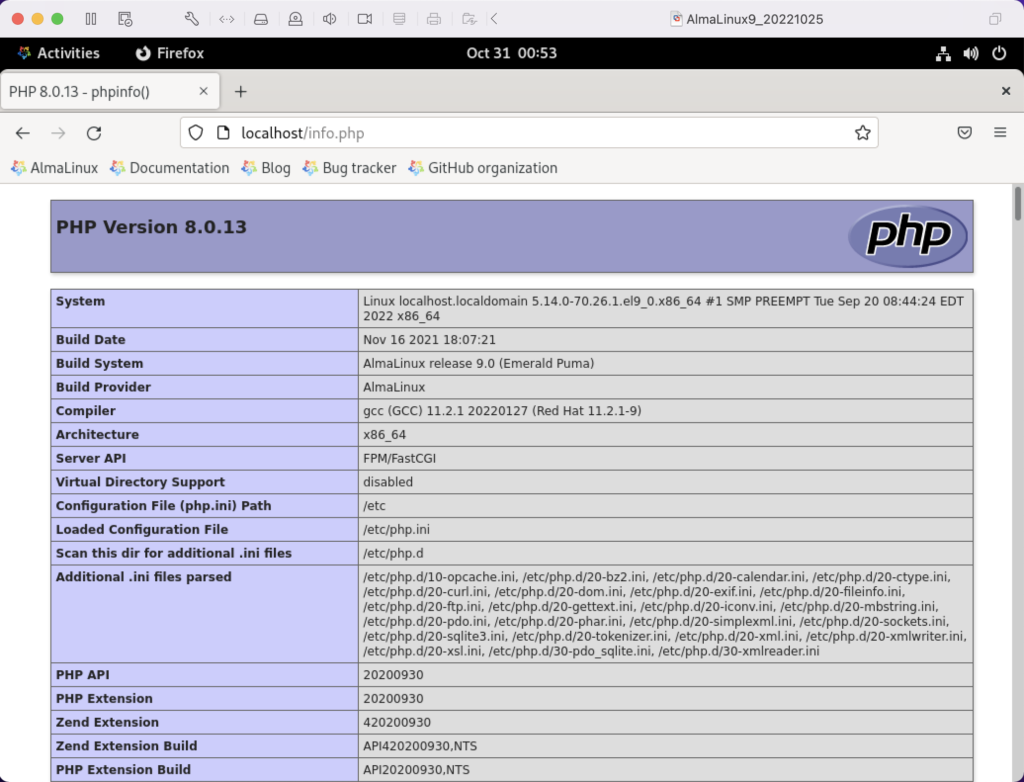
Create the info.php file in the /var/www/html directory as the root user:
<?php
  phpinfo();
?>
apache restart
Then, you can launch the Firefox browser and type the following:
localhost/info.php
It should return the following in the browser.
- Install the php_mysqli package as the sudoer user with the following command:
dnf install -y php-mysqli
Create the mysqli_check.php file in the /var/www/html directory as the root user:
<html>
<header>
<title>Static Query Object Sample</title>
</header>
<body>
<?php
  if (!function_exists('mysqli_init') && !extension_loaded('mysqli')) {
    print 'mysqli not installed.'; }
  else {
    print 'mysqli installed.'; }
  if (!function_exists('pdo_init') && !extension_loaded('pdo')) {
    print '<p>pdo not installed.</p>'; }
  else {
    print '<p>pdo installed.</p>'; }
?>
</script>
</body>
</html>
apache restart
Then, you can launch the Firefox browser and type the following:
localhost/mysqli_check.php
It should print the following in the browser.
mysqli installed.

pdo installed.
- Check if the mod_ssl module is installed. You can use the following command::
rpm -qa | grep mod_ssl
Assuming it’s not installed, you install it like this:
dnf install -y mod_ssl
Recheck after installing mod_ssl with the following command::
rpm -qa | grep mod_ssl
It should print:
mod_ssl-2.4.51-7.el9_0.x86_64
- AlmaLinux and Apache require you to resolve the ServerName values and the public and private keys. Run this command on AlmaLinux to begin verifying and configuring the ServerName values and the public and private keys:
httpd -M | grep ssl
Assuming a new installation consistent with were MySQL and Apache were just configured, you should get the following message:
AH00558: httpd: Could not reliably determine the server's fully qualified domain name, using localhost.localdomain. Set the 'ServerName' directive globally to suppress this message
 ssl_module (shared)
Recheck the failure for more detail with this command:
sudo systemctl status httpd.service -l --no-pager
It should print:
● httpd.service - The Apache HTTP Server Loaded: loaded (/usr/lib/systemd/system/httpd.service; enabled; vendor preset: disabled) Drop-In: /usr/lib/systemd/system/httpd.service.d └─php-fpm.conf Active: active (running) since Sun 2022-11-13 22:39:07 EST; 1h 37min ago Docs: man:httpd.service(8) Main PID: 1351 (httpd) Status: "Total requests: 0; Idle/Busy workers 100/0;Requests/sec: 0; Bytes served/sec: 0 B/sec" Tasks: 213 (limit: 23280) Memory: 43.1M CPU: 2.733s CGroup: /system.slice/httpd.service ├─1351 /usr/sbin/httpd -DFOREGROUND ├─1443 /usr/sbin/httpd -DFOREGROUND ├─1452 /usr/sbin/httpd -DFOREGROUND ├─1456 /usr/sbin/httpd -DFOREGROUND └─1459 /usr/sbin/httpd -DFOREGROUND Nov 13 22:39:06 localhost.localdomain systemd[1]: Starting The Apache HTTP Server... Nov 13 22:39:07 localhost.localdomain httpd[1351]: AH00558: httpd: Could not reliably determine the server's fully qualified domain name, using localhost.localdomain. Set the 'ServerName' directive globally to suppress this message Nov 13 22:39:07 localhost.localdomain systemd[1]: Started The Apache HTTP Server. Nov 13 22:39:07 localhost.localdomain httpd[1351]: Server configured, listening on: port 80It takes the next set of steps to fix the ServerName values.
- Generically, on Linux you need to find the files to modify. You can use the following command from within the /etc directory to find the configuration files in the /etc directory that include ServerName in them. Their values will be proceeded by a # symbol because they’re comments by default.
find /etc -type f | xargs grep -i ServerName
It should return the following:
./httpd/conf.d/ssl.conf:#ServerName www.example.com:443
./httpd/conf/httpd.conf:# ServerName gives the name and port that the server uses to identify itself.
./httpd/conf/httpd.conf:#ServerName www.example.com:80
./dnsmasq.conf:# tftp_servername (the third option to dhcp-boot) and in that
- Add the following line to the ssl.conf file as the root user:
ServerName localhost:443 - Add the following line to the httpd.conf file as the root user:
ServerName localhost:443 - After adding the two values, restart Apache with the following command:
sudo apachectl restart
- Rerun the systemctl command to get the status of the httpd service with this command:
sudo systemctl status httpd.service -l --no-pager
It should print:
● httpd.service - The Apache HTTP Server
     Loaded: loaded (/usr/lib/systemd/system/httpd.service; enabled; vendor preset: disabled)
    Drop-In: /usr/lib/systemd/system/httpd.service.d
             └─php-fpm.conf
     Active: active (running) since Mon 2022-11-14 00:37:03 EST; 3min 23s ago
       Docs: man:httpd.service(8)
   Main PID: 53596 (httpd)
     Status: "Total requests: 0; Idle/Busy workers 100/0;Requests/sec: 0; Bytes served/sec:   0 B/sec"
      Tasks: 213 (limit: 23280)
     Memory: 34.0M
        CPU: 183ms
     CGroup: /system.slice/httpd.service
             ├─53596 /usr/sbin/httpd -DFOREGROUND
             ├─53597 /usr/sbin/httpd -DFOREGROUND
             ├─53598 /usr/sbin/httpd -DFOREGROUND
             ├─53599 /usr/sbin/httpd -DFOREGROUND
             └─53600 /usr/sbin/httpd -DFOREGROUND

Nov 14 00:37:03 localhost.localdomain systemd[1]: Starting The Apache HTTP Server...
Nov 14 00:37:03 localhost.localdomain systemd[1]: Started The Apache HTTP Server.
Nov 14 00:37:03 localhost.localdomain httpd[53596]: Server configured, listening on: port 443, port 80
- Generically, on Linux you need to find the files to modify. You can use the following command from within the /etc directory to find the configuration files in the /etc directory that include ServerName in them. Their values will be proceeded by a # symbol because they’re comments by default.
- Your next step requires setting up an SSL Certificate. Consistent with the design to build a standalone test system that uses a DHCP assigned IP address to resolve a localhost server name, you require the following two tasks to create an openssl self-signed certificate.
- On the new instance, you create a private subdirectory with this command:
sudo mkdir /etc/ssl/private
- Then, you can build a self-signed certificate with this command:
sudo openssl req -x509 -nodes -days 365 -newkey rsa:2048 -keyout /etc/ssl/private/apache-selfsigned.key -out /etc/ssl/certs/apache-selfsigned.crt
The openssl command will prompt you for these values to create a private key:
You are about to be asked to enter information that will be incorporated
into your certificate request.
What you are about to enter is what is called a Distinguished Name or a DN.
There are quite a few fields but you can leave some blank
For some fields there will be a default value,
If you enter '.', the field will be left blank.
-----
Country Name (2 letter code) [XX]:
State or Province Name (full name) []:
Locality Name (eg, city) [Default City]:
Organization Name (eg, company) [Default Company Ltd]:
Organizational Unit Name (eg, section) []:
Common Name (eg, your name or your server's hostname) []:
Email Address []:
- On the new instance, you create a private subdirectory with this command:
- Your last step requires three tasks to configure Apache to use SSL.
- You need to create the following sites-available directory with the following command as the root user:
mkdir /etc/httpd/sites-available
- Add the following localhost.conf/etc/httpd/sites-available directory:
<VirtualHost *:443>
   ServerName localhost
   DocumentRoot /var/www/html

   SSLEngine on
   SSLCertificateFile /etc/ssl/certs/localhost.crt
   SSLCertificateKeyFile /etc/ssl/private/apache-selfsigned.key
</VirtualHost>
- Restart Apache with the following command:
sudo apachectl restart
- You need to create the following sites-available directory with the following command as the root user:
- After configuring everything, let’s test our self-signed HTTPS skunkworks. Launch the default Firefox browser and enter the following URL, which uses the mysql_check.php file from step #7:
https://localhost/mysqli_check.php
It will raise a warning message about a potential security risk, which is caused by our self-signed certificate. Click the Advanced… button and will see the option to Accept the Risk and Continue. If you want to use the self-signed and contained AlmaLinux LAMP stack for developer testing, accept the risk.

Having assumed the risk, the confirmation of the configuration will be displayed as follows:

As always, I hope this helps those looking to install MySQL, PHP, on AlmaLinux.
AlmaLinux MySQL+Python
After installing and configuring MySQL 8.0.30, I installed the Python connector. During that process on AlmaLinux, there were several changes since I last installed the Python’s mysql module. Here are the step-by-step instructions after installing and configuring MySQL Server (blog for those steps).
Using the MySQL Connector/Python X DevAPI Reference, you must install the pip utility before you install the library. You install the pip library as a sudoer user with the following command:
sudo yum install -y pip |
Then, using the pip utility as a sudoer user install the mysql-connector-python module with the following command:
sudo pip install mysql-connector-python |
Please note that this type of library installation can cause problems when you maintain multiple testing environments. If you plan to maintain multiple testing environments, please install this library in a virtual environment.
You create a bare-bones Python connection test program, like connect.py below:
# Import the library. import mysql.connector from mysql.connector import errorcode try: # Open connection. cnx = mysql.connector.connect(user='student', password='student', host='127.0.0.1', database='studentdb') # Print the value. print("Database connection resolved.") # Handle exception and close connection. except mysql.connector.Error as e: if e.errno == errorcode.ER_ACCESS_DENIED_ERROR: print("Something is wrong with your user name or password") elif e.errno == errorcode.ER_BAD_DB_ERROR: print("Database does not exist") else: print(e) # Close the connection when the try block completes. else: cnx.close() |
You test the connect.py program with this command:
python connect.py |
It’ll return the following provided you provisioned the student user and studentdb database:
Database connection resolved. |
If you’d like to run it without calling the python executable, you can add the following as the first line:
#/usr/bin/python |
and, change the default file permissions from
-rw-rw-r--. 1 student student 717 Oct 30 13:57 connect.py |
with the chmod command to
-rwxr-xr-x. 1 student student 717 Oct 30 13:57 connect.py |
These instructions should set you up to develop Python code against your AlmaLinux MySQL studentdb database. You use this syntax, assuming a default $PATH environment variable that excludes the present working directory.
./connect.py |
As always, I hope this helps those trying to get a complete solution.
MySQL Query from JSON
One of my students asked how you could get JSON data out in tabular format. I said they should look at Øystein Grøvlen’s JSON_TABLE – Best of Both Worlds blog post from 2018. Unfortunately, the student wanted another example with the Video Store model that we use in class.
For clarity, all path definitions start with a $ followed by other selectors:
- A period followed by a name, such as $.website
- [N] where N is the position in a zero-indexed array
- The .[*] wildcard evaluates all members of an object
- The [*] wildcard evaluates all members of an array
- The prefix and suffix wildcard, **, evaluates to all paths that begin with the named prefix and end with the named suffix
So, here’s a quick supplement to what’s already there. It assumes you created an example table based on my prior blog post that looks like this:
+----+-------------------------------------------------------------------------------------------------------------------------------------------------------------------------------------------------+
| id | struct                                                                                                                                                                                          |
+----+-------------------------------------------------------------------------------------------------------------------------------------------------------------------------------------------------+
|  1 | {"contact": [{"last_name": "Winn", "first_name": "Randi"}, {"last_name": "Winn", "first_name": "Brian"}], "account_number": "US00001"}                                                          |
|  2 | {"contact": [{"last_name": "Vizquel", "first_name": "Oscar"}, {"last_name": "Vizquel", "first_name": "Doreen"}], "account_number": "US00002"}                                                   |
|  3 | {"contact": [{"last_name": "Sweeney", "first_name": "Meaghan"}, {"last_name": "Sweeney", "first_name": "Matthew"}, {"last_name": "Sweeney", "first_name": "Ian"}], "account_number": "US00003"} |
|  4 | {"contact": [{"last_name": "Clinton", "first_name": "Goeffrey"}], "account_number": "US00004"}                                                                                                  |
|  5 | {"contact": [{"last_name": "Moss", "first_name": "Wendy"}], "account_number": "US00005"}                                                                                                        |
|  6 | {"contact": [{"last_name": "Gretelz", "first_name": "Simon"}], "account_number": "US00006"}                                                                                                     |
|  7 | {"contact": [{"last_name": "Royal", "first_name": "Elizabeth"}], "account_number": "US00007"}                                                                                                   |
|  8 | {"contact": [{"last_name": "Smith", "first_name": "Brian"}], "account_number": "US00008"}                                                                                                       |
|  9 | {"contact": [{"last_name": "Potter", "first_name": "Harry"}, {"last_name": "Potter", "first_name": "Ginny"}, {"last_name": "Potter", "first_name": "Lily"}], "account_number": "US00011"}       |
+----+-------------------------------------------------------------------------------------------------------------------------------------------------------------------------------------------------+
9 rows in set (0.01 sec) |
You can query the account_number key value like this:
SELECT id , JSON_EXTRACT(struct, "$.account_number") AS account_no FROM example; |
It returns:
+----+------------+ | id | account_no | +----+------------+ | 1 | "US00001" | | 2 | "US00002" | | 3 | "US00003" | | 4 | "US00004" | | 5 | "US00005" | | 6 | "US00006" | | 7 | "US00007" | | 8 | "US00008" | | 9 | "US00011" | +----+------------+ 9 rows in set (0.00 sec) |
You use the JSON_TABLE function to get the embedded array elements of first and last name, like:
SELECT id , contact.* FROM example CROSS JOIN JSON_TABLE( struct ,"$.contact[*]" COLUMNS( lname JSON PATH "$.last_name" , fname JSON PATH "$.first_name")) AS contact; |
It returns:
+----+-----------+-------------+ | id | lname | fname | +----+-----------+-------------+ | 1 | "Winn" | "Randi" | | 1 | "Winn" | "Brian" | | 2 | "Vizquel" | "Oscar" | | 2 | "Vizquel" | "Doreen" | | 3 | "Sweeney" | "Meaghan" | | 3 | "Sweeney" | "Matthew" | | 3 | "Sweeney" | "Ian" | | 4 | "Clinton" | "Goeffrey" | | 5 | "Moss" | "Wendy" | | 6 | "Gretelz" | "Simon" | | 7 | "Royal" | "Elizabeth" | | 8 | "Smith" | "Brian" | | 9 | "Potter" | "Harry" | | 9 | "Potter" | "Ginny" | | 9 | "Potter" | "Lily" | +----+-----------+-------------+ 15 rows in set (0.00 sec) |
You can combine both approaches, as shown below.
SELECT id , JSON_EXTRACT(struct, "$.account_number") AS account_no , contact.* FROM example CROSS JOIN JSON_TABLE( struct ,"$.contact[*]" COLUMNS( lname JSON PATH "$.last_name" , fname JSON PATH "$.first_name")) AS contact; |
It returns:
+----+------------+-----------+-------------+ | id | account_no | lname | fname | +----+------------+-----------+-------------+ | 1 | "US00001" | "Winn" | "Randi" | | 1 | "US00001" | "Winn" | "Brian" | | 2 | "US00002" | "Vizquel" | "Oscar" | | 2 | "US00002" | "Vizquel" | "Doreen" | | 3 | "US00003" | "Sweeney" | "Meaghan" | | 3 | "US00003" | "Sweeney" | "Matthew" | | 3 | "US00003" | "Sweeney" | "Ian" | | 4 | "US00004" | "Clinton" | "Goeffrey" | | 5 | "US00005" | "Moss" | "Wendy" | | 6 | "US00006" | "Gretelz" | "Simon" | | 7 | "US00007" | "Royal" | "Elizabeth" | | 8 | "US00008" | "Smith" | "Brian" | | 9 | "US00011" | "Potter" | "Harry" | | 9 | "US00011" | "Potter" | "Ginny" | | 9 | "US00011" | "Potter" | "Lily" | +----+------------+-----------+-------------+ 15 rows in set (0.00 sec) |
Lastly, if you want to get rid of the enclosing double quotes you can do the following:
WITH raw AS (SELECT id , JSON_EXTRACT(struct, "$.account_number") AS account_no , contact.* FROM example CROSS JOIN JSON_TABLE( struct ,"$.contact[*]" COLUMNS( lname JSON PATH "$.last_name" , fname JSON PATH "$.first_name")) AS contact) SELECT id , REGEXP_REPLACE(account_no,'"','') AS account_no , REGEXP_REPLACE(lname,'"','') AS lname , REGEXP_REPLACE(fname,'"','') AS fname FROM raw; |
It’s also possible to use the JSON_UNQUOTE function to cleanup the double quotes. I hope this helps those extracting JSON data into tabular result sets.
MySQL Backslashes
Yesterday, I wrote a blog post that showed you how to write a query returning a JSON structure for a 1:many relationship. The relationship was between the member and contact table. It returns one account_number from the member table and a list of first_name and last_name columns from the contact table in a JSON structure.
One of my students asked why I choose to strip the backslashes with Python, and my reply was the SQL was already complex for most blog readers. The student asked but how would you do it in SQL. OK, that’s a fair question for two reasons. First, you don’t need to do in your local programs because it’ll run faster on the server. Second, if you strip the backslashes you can insert it into a standard JSON column. This blog post will show you how to do both.
You would use three REGEXP_REPLACE function calls, like:
SELECT REGEXP_REPLACE( REGEXP_REPLACE( REGEXP_REPLACE( JSON_OBJECT( 'account_number', account_number ,'contact', CONCAT('[' , GROUP_CONCAT( JSON_OBJECT('first_name',first_name ,'last_name',last_name ) SEPARATOR ',') ,']') ) ,'\\\\','') ,'"\\\[','\\\[') ,'\\\]"','\\\]') AS json_result FROM member m INNER JOIN contact c ON m.member_id = c.member_id GROUP BY m.account_number; |
It returns the following:
+-----------------------------------------------------------------------------------------------------------------------------------------------------------------------------------------------+
| {"contact": [{"last_name": "Winn", "first_name": "Randi"},{"last_name": "Winn", "first_name": "Brian"}], "account_number": "US00001"}                                                         |
| {"contact": [{"last_name": "Vizquel", "first_name": "Oscar"},{"last_name": "Vizquel", "first_name": "Doreen"}], "account_number": "US00002"}                                                  |
| {"contact": [{"last_name": "Sweeney", "first_name": "Meaghan"},{"last_name": "Sweeney", "first_name": "Matthew"},{"last_name": "Sweeney", "first_name": "Ian"}], "account_number": "US00003"} |
| {"contact": [{"last_name": "Clinton", "first_name": "Goeffrey"}], "account_number": "US00004"}                                                                                                |
| {"contact": [{"last_name": "Moss", "first_name": "Wendy"}], "account_number": "US00005"}                                                                                                      |
| {"contact": [{"last_name": "Gretelz", "first_name": "Simon"}], "account_number": "US00006"}                                                                                                   |
| {"contact": [{"last_name": "Royal", "first_name": "Elizabeth"}], "account_number": "US00007"}                                                                                                 |
| {"contact": [{"last_name": "Smith", "first_name": "Brian"}], "account_number": "US00008"}                                                                                                     |
| {"contact": [{"last_name": "Potter", "first_name": "Harry"},{"last_name": "Potter", "first_name": "Ginny"},{"last_name": "Potter", "first_name": "Lily"}], "account_number": "US00011"}       |
+-----------------------------------------------------------------------------------------------------------------------------------------------------------------------------------------------+
9 rows in set (0.00 sec) |
Let’s create a table with a JSON structure with the following script:
/* Drop table if it exists. */ DROP TABLE IF EXISTS example; /* Create a example table. */ CREATE TABLE example ( id int unsigned auto_increment , struct json , PRIMARY KEY (id)); |
Now, we can embed the query inside an INSERT statement:
INSERT INTO example ( struct ) (SELECT REGEXP_REPLACE( REGEXP_REPLACE( REGEXP_REPLACE( JSON_OBJECT( 'account_number', account_number ,'contact', CONCAT('[' , GROUP_CONCAT( JSON_OBJECT('first_name',first_name ,'last_name',last_name ) SEPARATOR ',') ,']') ) ,'\\\\','') ,'"\\\[','\\\[') ,'\\\]"','\\\]') AS json_result FROM member m INNER JOIN contact c ON m.member_id = c.member_id GROUP BY m.account_number); |
A query of the example table, like:
SELECT * FROM example; |
Returns:
+----+-------------------------------------------------------------------------------------------------------------------------------------------------------------------------------------------------+
| id | struct                                                                                                                                                                                          |
+----+-------------------------------------------------------------------------------------------------------------------------------------------------------------------------------------------------+
|  1 | {"contact": [{"last_name": "Winn", "first_name": "Randi"}, {"last_name": "Winn", "first_name": "Brian"}], "account_number": "US00001"}                                                          |
|  2 | {"contact": [{"last_name": "Vizquel", "first_name": "Oscar"}, {"last_name": "Vizquel", "first_name": "Doreen"}], "account_number": "US00002"}                                                   |
|  3 | {"contact": [{"last_name": "Sweeney", "first_name": "Meaghan"}, {"last_name": "Sweeney", "first_name": "Matthew"}, {"last_name": "Sweeney", "first_name": "Ian"}], "account_number": "US00003"} |
|  4 | {"contact": [{"last_name": "Clinton", "first_name": "Goeffrey"}], "account_number": "US00004"}                                                                                                  |
|  5 | {"contact": [{"last_name": "Moss", "first_name": "Wendy"}], "account_number": "US00005"}                                                                                                        |
|  6 | {"contact": [{"last_name": "Gretelz", "first_name": "Simon"}], "account_number": "US00006"}                                                                                                     |
|  7 | {"contact": [{"last_name": "Royal", "first_name": "Elizabeth"}], "account_number": "US00007"}                                                                                                   |
|  8 | {"contact": [{"last_name": "Smith", "first_name": "Brian"}], "account_number": "US00008"}                                                                                                       |
|  9 | {"contact": [{"last_name": "Potter", "first_name": "Harry"}, {"last_name": "Potter", "first_name": "Ginny"}, {"last_name": "Potter", "first_name": "Lily"}], "account_number": "US00011"}       |
+----+-------------------------------------------------------------------------------------------------------------------------------------------------------------------------------------------------+
9 rows in set (0.00 sec) |
I hope this answers the question about whether you can use SQL remove the backslashes from the original result set and how you can insert the JSON result set into a JSON data type.
MySQL JSON Tricks
Are they really tricks or simply basic techniques combined to create a solution. Before writing these mechanics for using native MySQL to create a compound JSON object, let me point out that the easiest way to get one is to use the MySQL Node.js library, as shown recently in my “Is SQL Programming” blog post.
Moving data from a relational model output to a JSON structure isn’t as simple as a delimited list of columns in a SQL query. Let’s look at it in stages based on the MySQL Server 12.18.2 Functions that create JSON values.
Here’s how you return single row as a JSON object, which is quite straightforward:
SELECT JSON_OBJECT('first_name',c.first_name,'last_name',c.last_name) AS json_result FROM contact c WHERE first_name = 'Harry' AND last_name = 'Potter'; |
It returns:
+------------------------------------------------+
| json_result                                         |
+------------------------------------------------+
| {"last_name": "Potter", "first_name": "Harry"} |
+------------------------------------------------+
1 row in set (0.00 sec) |
With a GROUP_CONCAT function, let’s capture a JSON array of all three Potter family members:
SELECT CONCAT('[' , GROUP_CONCAT( JSON_OBJECT('first_name',first_name ,'last_name',last_name ) SEPARATOR ',') ,']') AS json_result FROM contact c WHERE c.last_name = 'Potter'; |
It returns an array of JSON objects:
+-----------------------------------------------------------------------------------------------------------------------------------------------+
| [{"last_name": "Potter", "first_name": "Harry"},{"last_name": "Potter", "first_name": "Ginny"},{"last_name": "Potter", "first_name": "Lily"}] |
+-----------------------------------------------------------------------------------------------------------------------------------------------+
1 row in set (0.01 sec) |
Next, let’s put a 1:many relationship between the member and contact table into a JSON structure with a single account number and an array of contact. It requires a second call to the JSON_OBJECT function and the addition of a GROUP BY clause in the query.
SELECT JSON_OBJECT( 'account_number', account_number ,'contact', CONCAT('[' , GROUP_CONCAT( JSON_OBJECT('first_name',first_name ,'last_name',last_name ) SEPARATOR ',') ,']') ) AS json_result FROM member m INNER JOIN contact c ON m.member_id = c.member_id WHERE c.last_name = 'Potter' GROUP BY m.account_number; |
It returns the following string with an annoying set of backslashes. It also inverts the column order, which appears unavoidable but it shouldn’t matter because the order of name-value pairs in JSON is immaterial.
+-------------------------------------------------------------------------------------------------------------------------------------------------------------------------------------------------------------------+
| {"contact": "[{\"last_name\": \"Potter\", \"first_name\": \"Harry\"},{\"last_name\": \"Potter\", \"first_name\": \"Ginny\"},{\"last_name\": \"Potter\", \"first_name\": \"Lily\"}]", "account_number": "US00011"} |
+-------------------------------------------------------------------------------------------------------------------------------------------------------------------------------------------------------------------+
1 row in set (0.00 sec) |
The following quick little Python code cleans up the JSON string by removing the backslashes and extraneous quotes around the array of contacts.
# Import the library. import mysql.connector from mysql.connector import errorcode try: # Open connection. cnx = mysql.connector.connect(user='student', password='student', host='127.0.0.1', database='studentdb') # Create cursor. cursor = cnx.cursor() # Set the query statement. query = ("SELECT JSON_OBJECT( " "'account_number', m.account_number " ",'contact', CONCAT('[' " " , GROUP_CONCAT( " " JSON_OBJECT('first_name', c.first_name " " ,'last_name', c.last_name ) SEPARATOR ',') " " ,']')) AS json_result " "FROM contact c INNER JOIN member m " "ON c.member_id = m.member_id " "WHERE c.last_name = %s " "GROUP BY account_number") # Execute cursor. cursor.execute(query,["Potter"]) # Display the column returned by the query stripped of backslashes and # extraneous quotes. for (row) in cursor: for column in range(len(row)): print(row[column].replace("\\","").replace("\"[","[").replace("]\"","]")) # Close cursor. cursor.close() # ------------------------------------------------------------ # Handle exception and close connection. except mysql.connector.Error as e: if e.errno == errorcode.ER_ACCESS_DENIED_ERROR: print("Something is wrong with your user name or password") elif e.errno == errorcode.ER_BAD_DB_ERROR: print("Database does not exist") else: print("Error code:", e.errno) # error number print("SQLSTATE value:", e.sqlstate) # SQLSTATE value print("Error message:", e.msg) # error message # Close the connection when the try block completes. else: cnx.close() |
It returns:
{"contact": [{"last_name": "Potter", "first_name": "Harry"},{"last_name": "Potter", "first_name": "Ginny"},{"last_name": "Potter", "first_name": "Lily"}], "account_number": "US00011"} |
I hope this helps exhibit less well known MySQL syntax.
Setting SQL_MODE
In MySQL, the @@sql_mode parameter should generally use ONLY_FULL_GROUP_BY. If it doesn’t include it and you don’t have the ability to change the database parameters, you can use a MySQL PSM (Persistent Stored Module), like:
Create the set_full_group_by procedure:
1 2 3 4 5 6 7 8 9 10 11 12 13 14 15 16 17 18 19 20 21 22 23 24 25 26 27 | -- Drop procedure conditionally on whether it exists already. DROP PROCEDURE IF EXISTS set_full_group_by; -- Reset delimter to allow semicolons to terminate statements. DELIMITER $$ -- Create a procedure to verify and set connection parameter. CREATE PROCEDURE set_full_group_by() LANGUAGE SQL NOT DETERMINISTIC SQL SECURITY DEFINER COMMENT 'Set connection parameter when not set.' BEGIN /* Check whether full group by is set in the connection and if unset, set it in the scope of the connection. */ IF NOT EXISTS (SELECT NULL WHERE REGEXP_LIKE(@@SQL_MODE,'ONLY_FULL_GROUP_BY')) THEN SET SQL_MODE=(SELECT CONCAT(@@sql_mode,',ONLY_FULL_GROUP_BY')); END IF; END; $$ -- Reset the default delimiter. DELIMITER ; |
Run the following SQL command before you attempt the exercises in the same session scope:
CALL set_full_group_by(); |
As always, I hope this helps those looking for a solution. Naturally, you can simply use the SET command on line #21 above.
