Archive for the ‘MySQL Developer’ tag
Updating SQL_MODE
This is an update for MySQL 8 Stored PSM to add the ONLY_FULL_GROUP_BY mode to the global SQL_MODE variable when it’s not set during a session. Here’s the code:
/* Drop procedure conditionally on whether it exists already. */ DROP PROCEDURE IF EXISTS set_full_group_by; /* Reset delimter to allow semicolons to terminate statements. */ DELIMITER $$ /* Create a procedure to verify and set connection parameter. */ CREATE PROCEDURE set_full_group_by() LANGUAGE SQL NOT DETERMINISTIC SQL SECURITY DEFINER COMMENT 'Set connection parameter when not set.' BEGIN /* Check whether full group by is set in the connection and if unset, set it in the scope of the connection. */ IF EXISTS (SELECT TRUE WHERE NOT REGEXP_LIKE(@@SESSION.SQL_MODE,'ONLY_FULL_GROUP_BY')) THEN SET @@GLOBAL.SQL_MODE := CONCAT(@@SESSION.sql_mode,',ONLY_FULL_GROUP_BY'); END IF; END; $$ /* Reset the default delimiter. */ DELIMITER ; |
You can call the set_full_group_by procedure with the CALL command:
CALL set_full_group_by(); |
You can see the SQL_MODE variable with the following query:
SELECT @@GLOBAL.SQL_MODE; |
It’ll return:
+---------------------------------------------------------------+ | @@GLOBAL.SQL_MODE | +---------------------------------------------------------------+ | ONLY_FULL_GROUP_BY,STRICT_TRANS_TABLES,NO_ENGINE_SUBSTITUTION | +---------------------------------------------------------------+ 1 row in set (0.00 sec) |
As always, I hope this helps those looking to solve this type of problem.
GROUP BY Quirk
It’s always interesting to see how others teach SQL courses. It can be revealing as to whether they understand SQL or only understand a dialect of SQL. In this case, one of my old students was taking a graduate course in SQL and the teacher was using MySQL. The teacher made an issue of using ANSI SQL:1999 or SQL3 and asked the following question, which I suspect is a quiz bank question from a textbook:
“How would you get all students’ names and for each student the number of courses that the
student has registered for?”
They referenced the MySQL 5.7 documentation for the GROUP BY and SQL:1999 as if MySQL implemented the ANSI SQL:1999 specification defined the standard. I didn’t know whether to laugh or cry because they were referring to MySQL 5.7 when we’re all using MySQL 8 and anybody who’s worked in more than MySQL knows that the behavior for a GROUP BY in MySQL can work without listing the necessary non-aggregated columns in the SELECT-list.
For example, their working solution, which is from the instructor and the author of their MySQL textbook the correct perspective of ANSI:1999 behavior. It doesn’t matter that their solution is actually based on ANSI:1992 not ANSI:1999 because it will only succeed because of a quirk of MySQL:
SELECT a.studentname , COUNT(b.courseid) FROM students a INNER JOIN registeredcourses b ON a.studentid = b.studentid GROUP BY a.studentid; |
While it works in MySQL, it doesn’t work because it conforms to an ANSI standard. It works in MySQL, notwithstanding that standard because it violates the standard.
In Oracle, PostgreSQL, and SQL Server, it raises an exception. For example, Oracle raises the following exception:
SELECT   a.studentname
         *
ERROR at line 1:
ORA-00979: not a GROUP BY expression |
The correct way to write the GROUP BY is:
SELECT a.studentname , COUNT(b.courseid) FROM students a INNER JOIN registeredcourses b ON a.studentid = b.studentid INNER JOIN courses c ON b.courseid = c.courseid GROUP BY a.studentname; |
Then, it would return:
Student Name Course IDs ------------------------------ ---------- Montgomery Scott 1 Leonard McCoy 2 James Tiberus Kirk 3 |
For reference, here’s a complete test case for MySQL:
/* Drop table conditionally. */ DROP TABLE IF EXISTS students; /* Create table. */ CREATE TABLE students ( studentID int unsigned primary key auto_increment , studentName varchar(30)); /* Drop table conditionally. */ DROP TABLE IF EXISTS courses; /* Create table. */ CREATE TABLE courses ( courseid int unsigned primary key auto_increment , coursename varchar(40)); /* Drop table conditionally. */ DROP TABLE IF EXISTS registeredcourses; /* Create table. */ CREATE TABLE registeredcourses ( courseid int unsigned , studentid int unsigned ); /* Insert into students. */ INSERT INTO students ( studentName ) VALUES ('James Tiberus Kirk') ,('Leonard McCoy') ,('Montgomery Scott'); /* Insert into courses. */ INSERT INTO courses ( coursename ) VALUES ('English Literature') ,('Physics') ,('English Composition') ,('Botany') ,('Mechanical Engineering'); /* Insert into registeredcourses. */ INSERT INTO registeredcourses ( studentid , courseid ) VALUES (1,1) ,(1,3) ,(1,4) ,(2,2) ,(2,5) ,(3,4); /* Check global sql_mode to ensure only_full_group_by is set. */ SELECT @@GLOBAL.SQL_MODE; /* Query with a column not found in the SELECT-list. */ SELECT a.studentname , COUNT(b.courseid) FROM students a INNER JOIN registeredcourses b ON a.studentid = b.studentid GROUP BY a.studentid; /* Query consistent with ANSI SQL:1992 */ SELECT a.studentname , COUNT(b.courseid) FROM students a INNER JOIN registeredcourses b ON a.studentid = b.studentid INNER JOIN courses c ON b.courseid = c.courseid GROUP BY a.studentname; |
and, another complete test case for Oracle:
/* Drop tabhe unconditionallly. */ DROP TABLE students; /* Create table. */ CREATE TABLE students ( studentID NUMBER PRIMARY KEY , studentName VARCHAR(30)); /* Drop table unconditionally. */ DROP TABLE courses; /* Create table. */ CREATE TABLE courses ( courseid NUMBER PRIMARY KEY , coursename VARCHAR(40)); /* Drop table unconditionally. */ DROP TABLE registeredcourses; /* Create table. */ CREATE TABLE registeredcourses ( courseid NUMBER , studentid NUMBER ); /* Insert values in student. */ INSERT INTO students ( studentid, studentName ) VALUES (1,'James Tiberus Kirk'); INSERT INTO students ( studentid, studentName ) VALUES (2,'Leonard McCoy'); INSERT INTO students ( studentid, studentName ) VALUES (3,'Montgomery Scott'); /* Insert values in courses. */ INSERT INTO courses ( courseid, coursename ) VALUES (1,'English Literature'); INSERT INTO courses ( courseid, coursename ) VALUES (2,'Physics'); INSERT INTO courses ( courseid, coursename ) VALUES (3,'English Composition'); INSERT INTO courses ( courseid, coursename ) VALUES (4,'Botany'); INSERT INTO courses ( courseid, coursename ) VALUES (5,'Mechanical Engineering'); /* Insert values into registeredcourses. */ INSERT INTO registeredcourses ( studentid, courseid ) VALUES (1,1); INSERT INTO registeredcourses ( studentid, courseid ) VALUES (1,3); INSERT INTO registeredcourses ( studentid, courseid ) VALUES (1,4); INSERT INTO registeredcourses ( studentid, courseid ) VALUES (2,2); INSERT INTO registeredcourses ( studentid, courseid ) VALUES (2,5); INSERT INTO registeredcourses ( studentid, courseid ) VALUES (3,4); /* Non-ANSI SQL GROUP BY statement. */ SELECT a.studentname , COUNT(b.courseid) FROM students a INNER JOIN registeredcourses b ON a.studentid = b.studentid GROUP BY a.studentid; /* ANSI SQL GROUP BY statement. */ SELECT a.studentname AS "Student Name" , COUNT(b.courseid) AS "Course IDs" FROM students a INNER JOIN registeredcourses b ON a.studentid = b.studentid INNER JOIN courses c ON b.courseid = c.courseid GROUP BY a.studentname; |
I hope this helps those learning the correct way to write SQL.
MySQL PNG Files
LAMP (Linux, Apache, MySQL, Perl/PHP/Python) Architecture is very flexible. All the components can be positioned on the same server or different servers. The servers are divided into two types. The types are known as the Application or database tiers. Generally, the application tier holds the Apache Server, any Apache Modules, and local copies of Server Side Includes (SSI) programs.
In many development environments, you also deploy the client to the same machine. This means a single machine runs the database server, the application server, and the browser. The lab for this section assumes these configurations.
Before you test an installation, you should make sure that you’ve started the database and Apache server. In an Oracle LAMP configuration (known as an OLAP – Oracle, Linux, Apache, Perl/PHP/Python), you must start both the Oracle Listener and database. MySQL starts the listener when you start the database. You must also start the Apache Server. The Apache Server also starts an Apache Listener, which listens for incoming HTTP/HTTPS requests. It listens on Port 80 unless you override that setting in the httpd.conf file.

The URI reaches the server and is redirected to an Apache Module based on configuration information found in the httpd.conf file. Spawned or child processes of the Apache Module then read programs into memory from the file system and run them. If you’ve uploaded a file the locally stored program can move it from a secure cache location to another local area for processing. The started programs can run independently or include other files as libraries, and they can communicate to the database server.
Working though PHP test cases against the MySQL database for my AlmaLinux installation and configuration, I discovered that the php-gd library weren’t installed by default. I had to add it to get my PHP programs to upload and display PNG files.
The log file for applying the php-gd packages:
Display detailed console log →
Last metadata expiration check: 3:59:15 ago on Wed 28 Dec 2022 08:17:58 PM EST. Dependencies resolved. ================================================================================ Package Architecture Version Repository Size ================================================================================ Installing: php-gd x86_64 8.0.20-3.el9 appstream 43 k Transaction Summary ================================================================================ Install 1 Package Total download size: 43 k Installed size: 110 k Downloading Packages: php-gd-8.0.20-3.el9.x86_64.rpm 196 kB/s | 43 kB 00:00 -------------------------------------------------------------------------------- Total 39 kB/s | 43 kB 00:01 Running transaction check Transaction check succeeded. Running transaction test Transaction test succeeded. Running transaction Preparing : 1/1 Installing : php-gd-8.0.20-3.el9.x86_64 1/1 Running scriptlet: php-gd-8.0.20-3.el9.x86_64 1/1 Verifying : php-gd-8.0.20-3.el9.x86_64 1/1 Installed: php-gd-8.0.20-3.el9.x86_64 Complete! |
The balance of this page demonstrates how to upload, store, and manage Text (Character Large Data Streams) and BLOBs (Binary Large Objects). It provides MySQL equivalent instructions to those for manaing LOBs in an Oracle database. As covered in Chapter 8 in my Oracle Database 11g PL/SQL Programming book.
Before you begin these steps, you should have already installed Zend Server Community Edition. If you haven’t done so, please click here for instructions.
Create directories or folders, and position code →
This section provides you with instructions on how to position the code components in Windows, at least for the newbie. If you’re on Linux, you probably know how to do most if not all of this already. Likewise, if you already know how to put things in the right place, please choose your own locations.
- Create a
LOB(Large Object) directory for the PHP files inside thehtdocsdirectory.
![]()
- You can down the MySQL PHP Upload LOB Web Code zip file and unzip it into the directory you just created. It can co-exist with the Oracle equivalent if you’ve done that already.
Load a TEXT (like an Oracle CLOB) column to the MySQL database →
This is a copy of the three files required to load a large string to a MySQL database into a mediumtext data type. The code is in clear text because somebody asked for it. They’re nervous about zip files. Click the title above to expand all the code text.
MySQLCredentials.inc
1 2 3 4 5 6 7 | <?php // Connection variables. define('HOSTNAME',"localhost"); define('USERNAME',"student"); define('PASSWORD',"student"); define('DATABASE',"sampledb"); ?> |
UploadItemDescMySQLForm.htm
1 2 3 4 5 6 7 8 9 10 11 12 13 14 15 16 17 18 19 20 21 22 23 24 25 26 27 28 29 30 31 32 33 34 35 36 37 38 | <html>
<head>
<title>
UploadItemDescMySQLForm.htm
</title>
</head>
<body>
<form id="uploadForm"
action="UploadItemDescMySQL.php"
enctype="multipart/form-data"
method="post">
<table border=0 cellpadding=0 cellspacing=0>
<tr>
<td width=125>Item Number</td>
<td>
<input id="id" name="id" type="text">
</td>
</tr>
<tr>
<td width=125>Item Title</td>
<td>
<input id="title" name="title" type="text">
</td>
</tr>
<tr>
<td width=125>Select File</td>
<td>
<input id="uploadfilename" name="userfile" type="file">
</td>
</tr>
<tr>
<td width=125>Click Button to</td>
<td><input type="submit" value="Upload File"></td>
</tr>
</table>
</form>
</body>
</html> |
UploadItemDescMySQL.php
1 2 3 4 5 6 7 8 9 10 11 12 13 14 15 16 17 18 19 20 21 22 23 24 25 26 27 28 29 30 31 32 33 34 35 36 37 38 39 40 41 42 43 44 45 46 47 48 49 50 51 52 53 54 55 56 57 58 59 60 61 62 63 64 65 66 67 68 69 70 71 72 73 74 75 76 77 78 79 80 81 82 83 84 85 86 87 88 89 90 91 92 93 94 95 96 97 98 99 100 101 102 103 104 105 106 107 108 109 110 111 112 113 114 115 116 117 118 119 120 121 122 123 124 125 126 127 128 129 | <?php // Set database credentials. include_once("MySQLCredentials.inc"); // Displayed moved file in web page. $item_desc = process_uploaded_file(); // Return successful attempt to connect to the database. if (!$c = @mysqli_connect(HOSTNAME,USERNAME,PASSWORD,DATABASE)) { // Print user message. print "Sorry! The connection to the database failed. Please try again later."; // Assign the mysqli_error() and format double and single quotes. print mysqli_error(); // Kill the resource. die(); } else { // Declare input variables. $id = (isset($_POST['id'])) ? (int) $_POST['id'] : $id = 21; $title = (isset($_POST['title'])) ? $_POST['title'] : $title = "Harry #1"; // Initialize a statement in the scope of the connection. $stmt = mysqli_stmt_init($c); // Declare a PL/SQL execution command. $sql = "Update item set item_desc = ? where item_id = ?"; // Prepate statement and link it to a connection. if (mysqli_stmt_prepare($stmt,$sql)) { mysqli_stmt_bind_param($stmt,"si",$item_desc,$id); // Execute it and print success or failure message. if (mysqli_stmt_execute($stmt)) { query_insert($id,$title); } else { print "You're target row doesn't exist."; } } // Disconnect from database. mysqli_close($c); } // Query results afret an insert. function query_insert($id,$title) { // Return successful attempt to connect to the database. if (!$c = @mysqli_connect(HOSTNAME,USERNAME,PASSWORD,DATABASE)) { // Print user message. print "Sorry! The connection to the database failed. Please try again later."; // Assign the OCI error and format double and single quotes. print mysqli_error(); // Kill the resource. die(); } else { // Initialize a statement in the scope of the connection. $stmt = mysqli_stmt_init($c); // Declare a SQL SELECT statement returning a CLOB. $sql = "SELECT item_desc FROM item WHERE item_id = ?"; // Prepare statement. if (mysqli_stmt_prepare($stmt,$sql)) { mysqli_stmt_bind_param($stmt,"i",$id); // Execute it and print success or failure message. if (mysqli_stmt_execute($stmt)) { // Bind result to local variable. mysqli_stmt_bind_result($stmt, $desc); // Read result. mysqli_stmt_fetch($stmt); // Format HTML table to display biography. $out = '<table border="1" cellpadding="3" cellspacing="0">'; $out .= '<tr>'; $out .= '<td align="center" class="e">'.$title.'</td>'; $out .= '</tr>'; $out .= '<tr>'; $out .= '<td class="v">'.$desc.'</td>'; $out .= '</tr>'; $out .= '</table>'; // Print the HTML table. print $out; } } // Disconnect from database. mysqli_close($c); } } // Manage file upload and return file as string. function process_uploaded_file() { // Declare a variable for file contents. $contents = ""; // Define the upload file name for Windows or Linux. if (preg_match(".Win32.",$_SERVER["SERVER_SOFTWARE"])) $upload_file = "C:\\temp\\".$_FILES['userfile']['name']; else $upload_file = "/tmp/".$_FILES['userfile']['name']; // Check for and move uploaded file. if (is_uploaded_file($_FILES['userfile']['tmp_name'])) move_uploaded_file($_FILES['userfile']['tmp_name'],$upload_file); // Open a file handle and suppress an error for a missing file. if ($fp = @fopen($upload_file,"r")) { // Read until the end-of-file marker. while (!feof($fp)) $contents .= fgetc($fp); // Close an open file handle. fclose($fp); } // Return file content as string. return $contents; } ?> |
Load a BLOB column to the MySQL database →
This is a copy of the four files required to load a large image to a MySQL database into a MEDIUMBLOB data type. The fourth file reads the binary image and translates it into an HTML header and image that can be read through a call to the src attribute of an img tag. You can find the call to the forth file in the UploadItemBlobMySQL.php.
The code is in clear text because somebody asked for it. They’re nervous about zip files. Click the title above to expand all the code text.
MySQLCredentials.inc
1 2 3 4 5 6 7 | <?php // Connection variables. define('HOSTNAME',"localhost"); define('USERNAME',"student"); define('PASSWORD',"student"); define('DATABASE',"sampledb"); ?> |
UploadItemBlobMySQLForm.htm
1 2 3 4 5 6 7 8 9 10 11 12 13 14 15 16 17 18 19 20 21 22 23 24 25 26 27 28 29 30 31 32 33 34 35 36 37 38 | <html>
<head>
<title>
UploadItemBlobMySQLForm.htm
</title>
</head>
<body>
<form id="uploadForm"
action="UploadItemBlobMySQL.php"
enctype="multipart/form-data"
method="post">
<table border=0 cellpadding=0 cellspacing=0>
<tr>
<td width=125>Item Number</td>
<td>
<input id="id" name="id" type="text">
</td>
</tr>
<tr>
<td width=125>Item Title</td>
<td>
<input id="title" name="title" type="text">
</td>
</tr>
<tr>
<td width=125>Select File</td>
<td>
<input id="uploadfilename" name="userfile" type="file">
</td>
</tr>
<tr>
<td width=125>Click Button to</td>
<td><input type="submit" value="Upload File"></td>
</tr>
</table>
</form>
</body>
</html> |
UploadItemBlobMySQL.php
1 2 3 4 5 6 7 8 9 10 11 12 13 14 15 16 17 18 19 20 21 22 23 24 25 26 27 28 29 30 31 32 33 34 35 36 37 38 39 40 41 42 43 44 45 46 47 48 49 50 51 52 53 54 55 56 57 58 59 60 61 62 63 64 65 66 67 68 69 70 71 72 73 74 75 76 77 78 79 80 81 82 83 84 85 86 87 88 89 90 91 92 93 94 95 96 97 98 99 100 101 102 103 104 105 106 107 108 109 110 111 112 113 114 115 116 117 118 119 120 121 122 123 124 125 126 127 128 129 130 131 132 133 134 135 136 137 138 139 140 141 142 143 144 145 146 147 | <?php // Set database credentials. include_once("MySQLCredentials.inc"); // Displayed moved file in web page. $item_blob = process_uploaded_file(); // Return successful attempt to connect to the database. if (!$c = @mysqli_connect(HOSTNAME,USERNAME,PASSWORD,DATABASE)) { // Print user message. print "Sorry! The connection to the database failed. Please try again later."; // Assign the mysqli_error() error and format double and single quotes. print mysqli_error(); // Kill the resource. die(); } else { // Declare input variables. $id = (isset($_POST['id'])) ? (int) $_POST['id'] : 1021; $title = (isset($_POST['title'])) ? $_POST['title'] : "Harry #1"; // Initialize a statement in the scope of the connection. $stmt = mysqli_stmt_init($c); // Declare a PL/SQL execution command. $sql = "UPDATE item SET item_blob = ? WHERE item_id = ?"; // Prepare statement and link it to a connection. if (mysqli_stmt_prepare($stmt,$sql)) { mysqli_stmt_bind_param($stmt,"bi",$item_blob,$id); $start = 0; $chunk = 8192; while ($start < strlen($item_blob)) { mysqli_stmt_send_long_data($stmt,0,substr($item_blob,$start,$chunk)); $start += $chunk; } // Execute the PL/SQL statement. if (mysqli_stmt_execute($stmt)) { query_insert($id,$title); } else { print "Your target row doesn't exist."; } } else { print "mysqli_stmt_prepare() failed."; } // Disconnect from database. mysqli_close($c); } // Query results afret an insert. function query_insert($id,$title) { // Return successful attempt to connect to the database. if (!$c = @mysqli_connect(HOSTNAME,USERNAME,PASSWORD,DATABASE)) { // Print user message. print "Sorry! The connection to the database failed. Please try again later."; // Assign the OCI error and format double and single quotes. print mysqli_error(); // Kill the resource. die(); } else { // Initialize a statement in the scope of the connection. $stmt = mysqli_stmt_init($c); // Declare a SQL SELECT statement returning a CLOB. $sql = "SELECT item_desc FROM item WHERE item_id = ?"; // Prepare statement and link it to a connection. if (mysqli_stmt_prepare($stmt,$sql)) { mysqli_stmt_bind_param($stmt,"i",$id); // Execute the PL/SQL statement. if (mysqli_stmt_execute($stmt)) { // Bind result to local variable. mysqli_stmt_bind_result($stmt, $data); // Read result. mysqli_stmt_fetch($stmt); // Format HTML table to display BLOB photo and CLOB description. $out = '<table border="1" cellpadding="5" cellspacing="0">'; $out .= '<tr>'; $out .= '<td align="center" class="e">'.$title.'</td>'; $out .= '</tr>'; $out .= '<tr><td class="v">'; $out .= '<div>'; $out .= '<div style="margin-right:5px;float:left">'; $out .= '<img src="ConvertMySQLBlobToImage.php?id='.$id.'">'; $out .= '</div>'; $out .= '<div style="position=relative;">'.$data.'</div>'; $out .= '</div>'; $out .= '</td></tr>'; $out .= '</table>'; // Print the HTML table. print $out; } else { print "You're target row doesn't exist."; } } // Disconnect from database. mysqli_close($c); } } // Manage file upload and return file as string. function process_uploaded_file() { // Declare a variable for file contents. $contents = ""; // Define the upload file name for Windows or Linux. if (preg_match(".Win32.",$_SERVER["SERVER_SOFTWARE"])) $upload_file = "C:\\TEMP\\".$_FILES['userfile']['name']; else $upload_file = "/tmp/".$_FILES['userfile']['name']; // Check for and move uploaded file. if (is_uploaded_file($_FILES['userfile']['tmp_name'])) move_uploaded_file($_FILES['userfile']['tmp_name'],$upload_file); // Open a file handle and suppress an error for a missing file. if ($fp = @fopen($upload_file,"r")) { // Read until the end-of-file marker. while (!feof($fp)) $contents .= fgetc($fp); // Close an open file handle. fclose($fp); } // Return file content as string. return $contents; } ?> |
ConvertMySQLBlobToImage.php
1 2 3 4 5 6 7 8 9 10 11 12 13 14 15 16 17 18 19 20 21 22 23 24 25 26 27 28 29 30 31 32 33 34 35 36 37 38 39 40 41 42 43 44 45 46 47 48 49 50 51 | <?php // Database credentials must be set manually because an include_once() function // call puts something ahead of the header, which causes a failure when rendering // an image. // Return successful attempt to connect to the database. if (!$c = @mysqli_connect("localhost","student","student","sampledb")) { // Print user message. print "Sorry! The connection to the database failed. Please try again later."; // Assign the OCI error and format double and single quotes. print mysqli_error(); // Kill the resource. die(); } else { // Declare input variables. $id = (isset($_GET['id'])) ? (int) $_GET['id'] : 1023; // Initialize a statement in the scope of the connection. $stmt = mysqli_stmt_init($c); // Declare a SQL SELECT statement returning a MediumBLOB. $sql = "SELECT item_blob FROM item WHERE item_id = ?"; // Prepare statement and link it to a connection. if (mysqli_stmt_prepare($stmt,$sql)) { mysqli_stmt_bind_param($stmt,"i",$id); // Execute the PL/SQL statement. if (mysqli_stmt_execute($stmt)) { // Bind result to local variable. mysqli_stmt_bind_result($stmt, $image); // Read result. mysqli_stmt_fetch($stmt); } } // Disconnect from database. mysqli_close($c); // Print the header first. header('Content-type: image/x-png'); imagepng(imagecreatefromstring($image)); } ?> |
- Create a
tempdirectory for the upload target location, as qualified in the PHP code. The PHP code works regardless of whether you’re on Windows or Linux, but it does depend on the creation of this directory.
![]()
- Create a directory or folder for the large file source directories. This directory is probably on your test machine (laptop) but it mimics a client laptop and would work if your server was on a different machine.
![]()
- Inside the Upload directory, you should create the following two directories:

- You should download the CLOB Text File zip file and unzip it into the
textfiles directory; then download the BLOB Image File zip file and unzip it into the imagefiles directory.Assuming you’ve downloaded the zip files and extracted them into the correct locations, this section is done.
Prepare the MySQL database →
This section provides you with instructions on how to ensure everything will work once the PHP programs call the database. Even if you have one of my sample Video Store databases, you should verify and add appropriate columns. This post assumes you’ve downloaded the one of my basic Video Store models
- Navigate to the directory that you created for SQL scripts, which should be
/home/student/Data/mysql. In that directory at the command prompt, connect as thestudentuser, which should be student. You connect to the MySQL database, with the following syntax as student (if you need more help, check this blog post on configuring MySQL).
mysql -ustudent -pstudent |
Once connected to the database, you run the files to create the database, like:
mysql> source /Data/mysql/create_mysql_store.sql mysql> source /Data/mysql/seed_mysql_store.sql |
- Navigate to the directory that you created for SQL scripts, which should be
/home/student/Data/mysql. In that directory at the command prompt, connect as thestudentuser, or whichever account you’re using. You should confirm that you have aitem_desccolumn ofTEXTdata type, and anitem_blobcolumn ofMEDIUMBLOBtype in theitemtable. If you don’t have those columns, you can add them with the following statement:
ALTER TABLE item ADD (item_desc TEXT, item_blob MEDIUMBLOB); |
After ensuring that you have those two columns, you’ve completed this section.
Test the Configuration →
This section shows you how to test all that you’ve done. It works provided you created the directories and extracted the zip file contents to their respective directories. The virtual URL actually maps to the /var/www/html/lob directory.
- Enter the
http://localhost/lob/UploadItemDescMySQLForm.htmURL, and complete the form by choosing a validitem_idcolumn value and text file from your/home/student/Upload/TextFilesdirectory. Then, click the Upload File button (you can see a larger version of the image by clicking on it).

- This page displays after you successfully upload the text file to the database.

- Enter the
http://localhost/lob/UploadItemBlobFormMySQL.htmURL, and complete the form by choosing a validitem_idcolumn value and image file from your/home/student/Upload/ImageFilesdirectory. Then, click the Upload File button (you can see a larger version of the image by clicking on it).

- This page displays after you successfully upload the image file to the database.

Troubleshooting the Configuration →
This section shows you how to check why something isn’t working.
- The first thing to check are the credentials. They’re in the
MySQLCredentials.incfile. They’re posted with alocalhostmachine name,studentusername,studentpassword, andsampledbdatabase.
- Not to be funny, but the second thing to check are credentials. Specifically, you need to check the credentials in the
ConvertBlobToImage.phpfile. They’re individually entered in the connect string of this file because otherwise they put something in front of the header, which is disallowed to render the image.
- Check to see if the text or image file made it to the
/var/www/html/lob/tempdirectory. If they made it that far but no further, check to see if you have valid procedures in thestudentschema.
- Check whether the
TEXTandMEDIUMBLOBare loaded into the database. You use theLENGTHfunction, like this:
SELECT i.item_id , length(i.item_desc) , length(i.item_blob) FROM item i WHERE i.item_desc IS NOT NULL OR i.item_blob IS NOT NULL; |
- Check if the
item_idvalue is found in the list of values.
- If you’re stumped, add a comment and explain what’s up.
If you find any problems, please let me know. I’ll be happy to fix them.
AlmaLinux Install & Configuration

This is a collection of blog posts for installing and configuring AlmaLinux with the Oracle, PostgreSQL, MySQL databases and several programming languages. Sample programs show how to connect PHP and Python to the MySQL database.
- Installing AlmaLinux operating system
- Installing and configuring MySQL
- Installing Python-MySQL connector and provide sample programs
- Configuring Flask for Python on AlmaLinux with a complete software router instruction set.
- Installing Rust programming language and writing a sample program
- Installing and configuring LAMP stack with PHP and MySQL and a self-signed security key
- MySQL PNG Images in LAMP with PHP Programming
- Demonstration of how to write Perl that connects to MySQL
- Installing and configuring MySQL Workbench
- Installing and configuring PostgreSQL and pgAdmin4
- Identifying the required libnsl2-devel packages for SQL*Plus
- Writing and deploying a sqlplus function to use a read line wrapper
- Installing and configuring Visual Studio Code Editor
- Installing and configuring Java with connectivity to MySQL
- Installing and configuring Oracle SQL Developer
I used Oracle Database 11g XE in this instance to keep the footprint as small as possible. It required a few tricks and discovering the missing library that caused folks grief eleven years ago. I build another with a current Oracle Database XE after the new year.
If you see something that I missed or you’d like me to add, let me know. As time allows, I’ll try to do that. Naturally, the post will get updates as things are added later.
AlmaLinux+Java+MySQL
AlmaLinux generally has Java installed. You can check whether java is installed with this command:
which -a java |
It should return:
/usr/bin/java |
Then, you can check the Java version with this command:
java -version |
For AlmaLinux 9, it should return:
openjdk version "11.0.17" 2022-10-18 LTS OpenJDK Runtime Environment (Red_Hat-11.0.17.0.8-2.el9_0) (build 11.0.17+8-LTS) OpenJDK 64-Bit Server VM (Red_Hat-11.0.17.0.8-2.el9_0) (build 11.0.17+8-LTS, mixed mode, sharing) |
Next, you check whether javac is installed. You can use the which command to determine whether it is installed. Generally, its not installed and you use this command to
sudo dnf search jdk | egrep -- '-17' |
It should return:
Last metadata expiration check: 0:11:17 ago on Mon 19 Dec 2022 11:32:48 PM EST. java-17-openjdk.x86_64 : OpenJDK 17 Runtime Environment java-17-openjdk-demo.x86_64 : OpenJDK 17 Demos java-17-openjdk-devel.x86_64 : OpenJDK 17 Development Environment java-17-openjdk-headless.x86_64 : OpenJDK 17 Headless Runtime Environment java-17-openjdk-javadoc.x86_64 : OpenJDK 17 API documentation java-17-openjdk-javadoc-zip.x86_64 : OpenJDK 17 API documentation compressed in a single archive java-17-openjdk-jmods.x86_64 : JMods for OpenJDK 17 java-17-openjdk-src.x86_64 : OpenJDK 17 Source Bundle java-17-openjdk-static-libs.x86_64 : OpenJDK 17 libraries for static linking |
Now, you can install the Java JDK with the following dnf command:
sudo dnf install java-17-openjdk java-17-openjdk-devel |
The log file for this is:
Display detailed console log →
Last metadata expiration check: 0:28:26 ago on Mon 19 Dec 2022 11:32:48 PM EST. Dependencies resolved. ================================================================================ Package Arch Version Repository Size ================================================================================ Installing: java-17-openjdk x86_64 1:17.0.5.0.8-2.el9_0 appstream 237 k java-17-openjdk-devel x86_64 1:17.0.5.0.8-2.el9_0 appstream 4.7 M Installing dependencies: java-17-openjdk-headless x86_64 1:17.0.5.0.8-2.el9_0 appstream 40 M ttmkfdir x86_64 3.0.9-65.el9 appstream 52 k xorg-x11-fonts-Type1 noarch 7.5-33.el9 appstream 499 k Transaction Summary ================================================================================ Install 5 Packages Total download size: 45 M Installed size: 199 M Is this ok [y/N]: y Downloading Packages: (1/5): java-17-openjdk-17.0.5.0.8-2.el9_0.x86_6 342 kB/s | 237 kB 00:00 (2/5): ttmkfdir-3.0.9-65.el9.x86_64.rpm 520 kB/s | 52 kB 00:00 (3/5): xorg-x11-fonts-Type1-7.5-33.el9.noarch.r 849 kB/s | 499 kB 00:00 (4/5): java-17-openjdk-devel-17.0.5.0.8-2.el9_0 1.7 MB/s | 4.7 MB 00:02 (5/5): java-17-openjdk-headless-17.0.5.0.8-2.el 6.1 MB/s | 40 MB 00:06 -------------------------------------------------------------------------------- Total 6.3 MB/s | 45 MB 00:07 Running transaction check Transaction check succeeded. Running transaction test Transaction test succeeded. Running transaction Regex version mismatch, expected: 10.40 2022-04-14 actual: 10.37 2021-05-26 Regex version mismatch, expected: 10.40 2022-04-14 actual: 10.37 2021-05-26 Running scriptlet: java-17-openjdk-headless-1:17.0.5.0.8-2.el9_0.x86_64 1/1 Preparing : 1/1 Installing : java-17-openjdk-headless-1:17.0.5.0.8-2.el9_0.x86_64 1/5 Running scriptlet: java-17-openjdk-headless-1:17.0.5.0.8-2.el9_0.x86_64 1/5 Installing : ttmkfdir-3.0.9-65.el9.x86_64 2/5 Installing : xorg-x11-fonts-Type1-7.5-33.el9.noarch 3/5 Running scriptlet: xorg-x11-fonts-Type1-7.5-33.el9.noarch 3/5 Installing : java-17-openjdk-1:17.0.5.0.8-2.el9_0.x86_64 4/5 Running scriptlet: java-17-openjdk-1:17.0.5.0.8-2.el9_0.x86_64 4/5 Installing : java-17-openjdk-devel-1:17.0.5.0.8-2.el9_0.x86_64 5/5 Running scriptlet: java-17-openjdk-devel-1:17.0.5.0.8-2.el9_0.x86_64 5/5 Running scriptlet: java-17-openjdk-headless-1:17.0.5.0.8-2.el9_0.x86_64 5/5 Running scriptlet: java-17-openjdk-1:17.0.5.0.8-2.el9_0.x86_64 5/5 Running scriptlet: java-17-openjdk-devel-1:17.0.5.0.8-2.el9_0.x86_64 5/5 Verifying : java-17-openjdk-1:17.0.5.0.8-2.el9_0.x86_64 1/5 Verifying : java-17-openjdk-devel-1:17.0.5.0.8-2.el9_0.x86_64 2/5 Verifying : java-17-openjdk-headless-1:17.0.5.0.8-2.el9_0.x86_64 3/5 Verifying : ttmkfdir-3.0.9-65.el9.x86_64 4/5 Verifying : xorg-x11-fonts-Type1-7.5-33.el9.noarch 5/5 Installed: java-17-openjdk-1:17.0.5.0.8-2.el9_0.x86_64 java-17-openjdk-devel-1:17.0.5.0.8-2.el9_0.x86_64 java-17-openjdk-headless-1:17.0.5.0.8-2.el9_0.x86_64 ttmkfdir-3.0.9-65.el9.x86_64 xorg-x11-fonts-Type1-7.5-33.el9.noarch Complete! |
After installing javac, you can verify it with the which command, and check the version with the javac utility.
which -a javac |
It should return:
/usr/bin/javac |
Then, you can check the Java version with this command:
java -version |
For AlmaLinux 9, it should return:
javac 17.0.5 |
Now, you need to download and install the jdk with the dnf utility. You download the jdk package with the wget utility.
wget https://download.oracle.com/java/17/latest/jdk-17_linux-x64_bin.rpm |
It will generate the following console output:
--2022-12-20 00:12:34-- https://download.oracle.com/java/17/latest/jdk-17_linux-x64_bin.rpm Resolving download.oracle.com (download.oracle.com)... 23.192.208.88 Connecting to download.oracle.com (download.oracle.com)|23.192.208.88|:443... connected. HTTP request sent, awaiting response... 200 OK Length: 163101336 (156M) [application/x-redhat-package-manager] Saving to: ‘jdk-17_linux-x64_bin.rpm’ jdk-17_linux-x64_bi 100%[===================>] 155.54M 11.1MB/s in 17s 2022-12-20 00:12:51 (9.01 MB/s) - ‘jdk-17_linux-x64_bin.rpm’ saved [163101336/163101336] |
You install the jdk package with the dnf utility.
sudo rpm -Uvh jdk-17_linux-x64_bin.rpm |
The log file for this is:
Display detailed console log →
warning: jdk-17_linux-x64_bin.rpm: Header V3 RSA/SHA256 Signature, key ID ec551f03: NOKEY Verifying... ################################# [100%] Regex version mismatch, expected: 10.40 2022-04-14 actual: 10.37 2021-05-26 Regex version mismatch, expected: 10.40 2022-04-14 actual: 10.37 2021-05-26 Preparing... ################################# [100%] Updating / installing... 1:jdk-17-2000:17.0.5-ga ################################# [100%] |
After installing everything, you need to set the default Java. You can discover the available Java versions with the following command:
sudo alternatives --config java |
It should return a list and the ability to select one by using the “Selection” number. I recommend you chose #2.
There are 3 programs which provide 'java'. Selection Command ----------------------------------------------- 1 java-11-openjdk.x86_64 (/usr/lib/jvm/java-11-openjdk-11.0.17.0.8-2.el9_0.x86_64/bin/java) 2 java-17-openjdk.x86_64 (/usr/lib/jvm/java-17-openjdk-17.0.5.0.8-2.el9_0.x86_64/bin/java) *+ 3 /usr/java/jdk-17.0.5/bin/java Enter to keep the current selection[+], or type selection number: 2 |
Then, you can check the Java version with this command:
java -version |
Now, it should return:
openjdk version "17.0.5" 2022-10-18 LTS OpenJDK Runtime Environment (Red_Hat-17.0.5.0.8-2.el9_0) (build 17.0.5+8-LTS) OpenJDK 64-Bit Server VM (Red_Hat-17.0.5.0.8-2.el9_0) (build 17.0.5+8-LTS, mixed mode, sharing) |
You should define the $JAVA_HOME environment variable in the /etc/profile file. Sometimes, it is also appropriate to include it in your .bashrc file.
export set JAVA_HOME="/usr/lib/jvm/java-17-openjdk-17.0.5.0.8-2.el9_0.x86_64/bin" |
You should also add it to your $PATH variable in your .bashrc file, like:
export set PATH=$PATH:$JAVA_HOME |
Now, let’s write the basic “Hello World” program in Java:
// Define the Java program. public class HelloWorld { public static void main(String[] args) { System.out.println("Hello World!"); } } |
Compile it with:
javac HelloWorld.java |
Run it with the java command:
java HelloWorld |
It prints:
Hello World! |
Let’s download the MySQL/J Connector from the MySQL website, where we con select the operating system and its version, as shown in the image.
![]()
After you download the mysql-connector-j RPM package, you can install it with the following dnf command:
sudo dnf install -y mysql-connector-j-8.0.31-1.el9.noarch.rpm |
The log file for this is:
Display detailed console log →
Last metadata expiration check: 2:02:56 ago on Mon 19 Dec 2022 11:32:48 PM EST. Dependencies resolved. ================================================================================ Package Arch Version Repository Size ================================================================================ Installing: mysql-connector-j noarch 1:8.0.31-1.el9 @commandline 2.3 M Transaction Summary ================================================================================ Install 1 Package Total size: 2.3 M Installed size: 2.7 M Downloading Packages: Running transaction check Transaction check succeeded. Running transaction test Transaction test succeeded. Running transaction Regex version mismatch, expected: 10.40 2022-04-14 actual: 10.37 2021-05-26 Regex version mismatch, expected: 10.40 2022-04-14 actual: 10.37 2021-05-26 Preparing : 1/1 Installing : mysql-connector-j-1:8.0.31-1.el9.noarch 1/1 Verifying : mysql-connector-j-1:8.0.31-1.el9.noarch 1/1 Installed: mysql-connector-j-1:8.0.31-1.el9.noarch Complete! |
You should add the $CLASSPATH to your .bashrc file. Add the following line to your .bashrc file and resource your .bashrc file to test the JDBC driver.
export set CLASSPATH="/usr/share/java/mysql-connector-j.jar:." |
Let’s write a slightly larger Java program that tests connectivity to the MySQL database, like:
// Import classes. import java.sql.*; /* You can't include the following on Linux without raising an exception. */ // import com.mysql.jdbc.Driver; public class MySQLConnector { public MySQLConnector() { /* Declare variables that require explicit assignments because they're addressed in the finally block. */ Connection conn = null; Statement stmt = null; ResultSet rset = null; /* Declare other variables. */ String url; String username = "student"; String password = "student"; String database = "studentdb"; String hostname = "localhost"; String port = "3306"; String sql; /* Attempt a connection. */ try { // Set URL. url = "jdbc:mysql://" + hostname + ":" + port + "/" + database; // Create instance of MySQLDriver. Class.forName ("com.mysql.cj.jdbc.Driver").newInstance(); conn = DriverManager.getConnection (url, username, password); // Query the version of the database. sql = "SELECT version()"; stmt = conn.createStatement(); rset = stmt.executeQuery(sql); System.out.println ("Database connection established"); // Read row returns for one column. while (rset.next()) { System.out.println("MySQLDriver Version [" + rset.getString(1) + "]"); } } catch (SQLException e) { System.err.println ("Cannot connect to database server:"); System.out.println(e.getMessage()); } catch (ClassNotFoundException e) { System.err.println ("Cannot find MySQL driver class:"); System.out.println(e.getMessage()); } catch (InstantiationException e) { System.err.println ("Cannot instantiate class:"); System.out.println(e.getMessage()); } catch (IllegalAccessException e) { System.err.println ("Illegal access exception:"); System.out.println(e.getMessage()); } finally { if (conn != null) { try { rset.close(); stmt.close(); conn.close(); System.out.println ("Database connection terminated"); } catch (Exception e) { /* ignore close errors */ } } } } /* Unit test. */ public static void main(String args[]) { new MySQLDriver(); } } |
Just a note, there’s a deprecated behavior introduced in MySQL 8.0.24, which produces the following error message when compiled looking for deprecation:
javac -Xlint:deprecation MySQLDriver.java |
It produces the following error message, which I hope to sort and update later in the week:
MySQLDriver.java:30: warning: [deprecation] newInstance() in Class has been deprecated
      Class.forName ("com.mysql.cj.jdbc.Driver").newInstance();
                                                ^
  where T is a type-variable:
    T extends Object declared in class Class
1 warning |
The code does compile because the deprecation is only a warning. When you run the program, like:
java MySQLDriver |
It returns, confirming a connection to the MySQL database:
Database connection established MySQLDriver Version [8.0.30] Database connection terminated |
As always, I hope this helps those trying to sort out new behaviors.
AlmaLinux MySQL Workbench
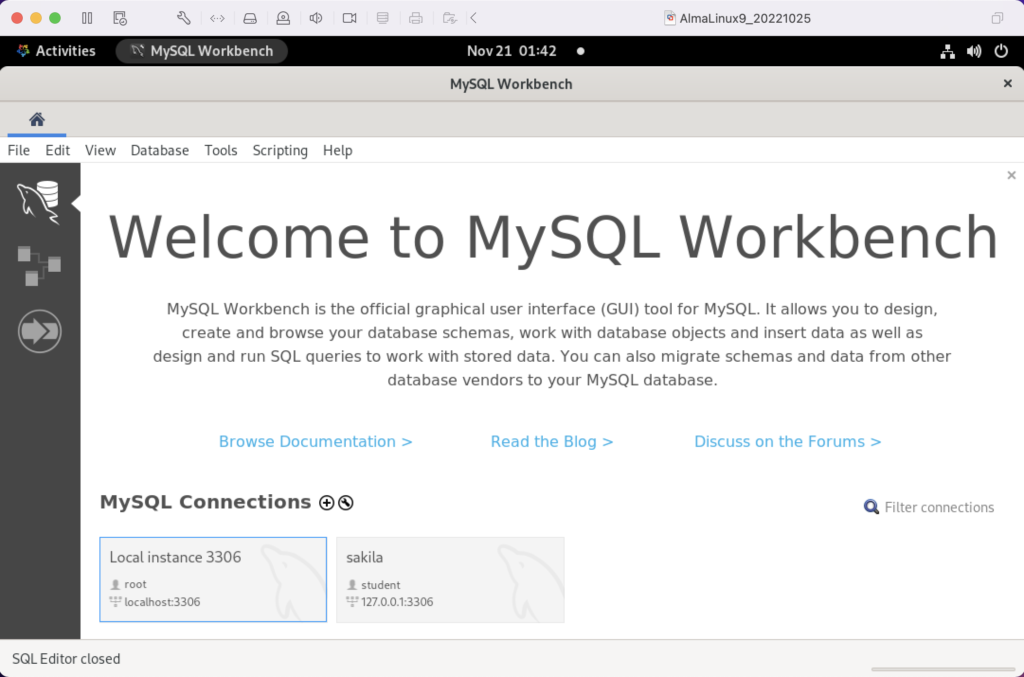
AlmaLinux doesn’t natively support MySQL Workbench but these notes will help you install it. The great news is that MySQL Workbench works perfectly once you’ve installed all the dependent libraries. It’ll look like the following:
Disclaimer of sorts:
AlmaLinux is an open-source, community-driven project that intends to fill the gap left by the demise of the CentOS stable release. AlmaLinux is a 1:1 binary compatible fork of RHEL® 9 and it is built by the AlmaLinux OS Foundation as a standalone, completely free OS. The AlmaLinux OS Foundation will support future RHEL® releases by updating AlmaLinux. Ongoing development efforts are governed by the members of the community.
You can download MySQL Workbench from the following website:
https://dev.mysql.com/downloads/workbench |
When you open this page, select the Red Hat Enterprise Linux 9 / Oracle Linux 9 (x86, 64-bit), RPM Package from the dropdown menu. Then, click the Download button. You may be prompted for your credentials or to create new credentials, but you can skip that by clicking on the No thanks, just start my download link.
When the download completes, open a terminal session as the student user. Navigate to the Downloads directory with the following command:
cd $HOME/Downloads |
List the files in the $HOME/Downloads directory and you should see:
mysql-workbench-community-8.0.31-1.el9.x86_64.rpm |
As the sudoer user or root, run the following command (naturally, exclude sudo if you’re the root user):
sudo dnf install -y mysql-workbench-community-8.0.31-1.el9.x86_64.rpm |
It will most likely fail with an error message like this:
Last metadata expiration check: 2:50:04 ago on Thu 17 Nov 2022 09:33:15 AM EST. Error: Problem: conflicting requests - nothing provides gtkmm30-devel needed by mysql-workbench-community-8.0.31-1.el9.src - nothing provides libzip-devel needed by mysql-workbench-community-8.0.31-1.el9.src - nothing provides proj-devel needed by mysql-workbench-community-8.0.31-1.el9.src - nothing provides swig >= 3.0 needed by mysql-workbench-community-8.0.31-1.el9.src (try to add '--skip-broken' to skip uninstallable packages or '--nobest' to use not only best candidate packages) |
AlmaLinux doesn’t install these prerequisite packages. You’ll need to resolve these dependencies by installing them in the right order and groups before you can run the MySQL Workbench packages.
You can discover missing packages at the pkgs.org website. You need to resolve all four prerequisites before installing MySQL Workbench.
- Let’s start with the gtkmm30-devel package, which has eight separate dependencies. Assuming you’re still in your $HOME/Downloads directory, you can run the following command to get the gtkmm30-devel for AlmaLinux 9:
wget https://repo.almalinux.org/almalinux/9/CRB/x86_64/os/Packages/gtkmm30-devel-3.24.5-1.el9.x86_64.rpm
It downloads the following package:
gtkmm30-devel-3.24.5-1.el9.x86_64.rpm
If you attempt to run it, the gtkmm30-devel package raises the following errors:
sudo dnf install -y gtkmm30-devel-3.24.5-1.el9.x86_64.rpm
Last metadata expiration check: 0:41:13 ago on Thu 17 Nov 2022 02:39:59 PM EST.
Error:
 Problem: conflicting requests
  - nothing provides pkgconfig(atkmm-1.6) >= 2.24.2 needed by gtkmm30-devel-3.24.5-1.el9.x86_64
  - nothing provides pkgconfig(cairomm-1.0) >= 1.12.0 needed by gtkmm30-devel-3.24.5-1.el9.x86_64
  - nothing provides pkgconfig(giomm-2.4) >= 2.54.0 needed by gtkmm30-devel-3.24.5-1.el9.x86_64
  - nothing provides pkgconfig(pangomm-1.4) >= 1.12.0 needed by gtkmm30-devel-3.24.5-1.el9.x86_64
(try to add '--skip-broken' to skip uninstallable packages or '--nobest' to use not only best candidate packages)
While you only get four errors, there are more packages required. You need to use the wget utility to download these packages. I would recommend you create a temporary gtkmm30 subdirectory inside your $HOME/Downloads directory and change to that directory before downloading these files.
wget https://repo.almalinux.org/almalinux/9/CRB/x86_64/os/Packages/atkmm-devel-2.28.2-2.el9.x86_64.rpm
wget https://repo.almalinux.org/almalinux/9/CRB/x86_64/os/Packages/cairomm-devel-1.14.2-10.el9.x86_64.rpm
wget https://repo.almalinux.org/almalinux/9/AppStream/x86_64/os/Packages/gdk-pixbuf2-devel-2.42.6-2.el9.x86_64.rpm
wget https://repo.almalinux.org/almalinux/9/CRB/x86_64/os/Packages/glibmm24-devel-2.66.1-1.el9.x86_64.rpm
wget https://repo.almalinux.org/almalinux/9/AppStream/x86_64/os/Packages/gtk3-devel-3.24.31-2.el9.x86_64.rpm
wget https://repo.almalinux.org/almalinux/9/CRB/x86_64/os/Packages/pangomm-devel-2.46.1-1.el9.x86_64.rpm
wget https://repo.almalinux.org/almalinux/9/CRB/x86_64/os/Packages/libsigc++20-devel-2.10.7-2.el9.x86_64.rpm
You need to run these as a set of prerequisites, so from your gtkmm30 subdirectory use the following dnf command as the sudoer user:
sudo dnf install -y *.rpm
The log file for this is:
Display detailed console log →
Last metadata expiration check: 0:09:20 ago on Sun 20 Nov 2022 12:52:28 AM EST. Dependencies resolved. ================================================================================ Package Arch Version Repository Size ================================================================================ Installing: atkmm-devel x86_64 2.28.2-2.el9 @commandline 45 k cairomm-devel x86_64 1.14.2-10.el9 @commandline 62 k gdk-pixbuf2-devel x86_64 2.42.6-2.el9 @commandline 64 k glibmm24-devel x86_64 2.66.1-1.el9 @commandline 497 k gtk3-devel x86_64 3.24.31-2.el9 @commandline 4.1 M libsigc++20-devel x86_64 2.10.7-2.el9 @commandline 67 k pangomm-devel x86_64 2.46.1-1.el9 @commandline 65 k Upgrading: dbus-common noarch 1:1.12.20-6.el9 baseos 14 k dbus-daemon x86_64 1:1.12.20-6.el9 appstream 196 k dbus-libs x86_64 1:1.12.20-6.el9 baseos 151 k dbus-tools x86_64 1:1.12.20-6.el9 baseos 50 k fontconfig x86_64 2.14.0-1.el9 appstream 274 k freetype x86_64 2.10.4-9.el9 baseos 387 k fribidi x86_64 1.0.10-6.el9.2 appstream 84 k harfbuzz x86_64 2.7.4-8.el9 baseos 624 k harfbuzz-icu x86_64 2.7.4-8.el9 appstream 14 k libblkid x86_64 2.37.4-9.el9 baseos 107 k libfdisk x86_64 2.37.4-9.el9 baseos 154 k libmount x86_64 2.37.4-9.el9 baseos 133 k libselinux x86_64 3.4-3.el9 baseos 85 k libselinux-utils x86_64 3.4-3.el9 baseos 158 k libsepol x86_64 3.4-1.1.el9 baseos 315 k libsmartcols x86_64 2.37.4-9.el9 baseos 63 k libtiff x86_64 4.4.0-2.el9 appstream 195 k libuuid x86_64 2.37.4-9.el9 baseos 27 k libxml2 x86_64 2.9.13-2.el9 baseos 746 k pcre2 x86_64 10.40-2.el9 baseos 236 k pcre2-syntax noarch 10.40-2.el9 baseos 143 k pcre2-utf16 x86_64 10.40-2.el9 appstream 216 k pcre2-utf32 x86_64 10.40-2.el9 appstream 205 k python3-libselinux x86_64 3.4-3.el9 appstream 185 k python3-libxml2 x86_64 2.9.13-2.el9 baseos 226 k util-linux x86_64 2.37.4-9.el9 baseos 2.2 M util-linux-core x86_64 2.37.4-9.el9 baseos 434 k util-linux-user x86_64 2.37.4-9.el9 baseos 30 k Installing dependencies: at-spi2-atk-devel x86_64 2.38.0-4.el9 appstream 9.5 k at-spi2-core-devel x86_64 2.40.3-1.el9 appstream 134 k atk-devel x86_64 2.36.0-5.el9 appstream 172 k brotli x86_64 1.0.9-6.el9 appstream 313 k brotli-devel x86_64 1.0.9-6.el9 appstream 31 k bzip2-devel x86_64 1.0.8-8.el9 appstream 213 k cairo-devel x86_64 1.17.4-7.el9 appstream 190 k cairo-gobject-devel x86_64 1.17.4-7.el9 appstream 10 k dbus-devel x86_64 1:1.12.20-6.el9 appstream 33 k fontconfig-devel x86_64 2.14.0-1.el9 appstream 128 k freetype-devel x86_64 2.10.4-9.el9 appstream 1.1 M fribidi-devel x86_64 1.0.10-6.el9.2 appstream 25 k glib2-devel x86_64 2.68.4-5.el9 appstream 475 k graphite2-devel x86_64 1.3.14-9.el9 appstream 21 k harfbuzz-devel x86_64 2.7.4-8.el9 appstream 305 k libX11-devel x86_64 1.7.0-7.el9 appstream 940 k libXau-devel x86_64 1.0.9-8.el9 appstream 13 k libXcomposite-devel x86_64 0.4.5-7.el9 appstream 15 k libXcursor-devel x86_64 1.2.0-7.el9 appstream 21 k libXdamage-devel x86_64 1.1.5-7.el9 appstream 9.3 k libXext-devel x86_64 1.3.4-8.el9 appstream 72 k libXfixes-devel x86_64 5.0.3-16.el9 appstream 12 k libXft-devel x86_64 2.3.3-8.el9 appstream 18 k libXi-devel x86_64 1.7.10-8.el9 appstream 99 k libXinerama-devel x86_64 1.1.4-10.el9 appstream 13 k libXrandr-devel x86_64 1.5.2-8.el9 appstream 19 k libXrender-devel x86_64 0.9.10-16.el9 appstream 16 k libXtst-devel x86_64 1.2.3-16.el9 appstream 15 k libblkid-devel x86_64 2.37.4-9.el9 appstream 17 k libdatrie-devel x86_64 0.2.13-4.el9 appstream 132 k libepoxy-devel x86_64 1.5.5-4.el9 appstream 133 k libffi-devel x86_64 3.4.2-7.el9 appstream 29 k libglvnd-core-devel x86_64 1:1.3.4-1.el9 appstream 17 k libglvnd-devel x86_64 1:1.3.4-1.el9 appstream 155 k libicu-devel x86_64 67.1-9.el9 appstream 830 k libmount-devel x86_64 2.37.4-9.el9 appstream 18 k libpng-devel x86_64 2:1.6.37-12.el9 appstream 290 k libselinux-devel x86_64 3.4-3.el9 appstream 113 k libsepol-devel x86_64 3.4-1.1.el9 appstream 40 k libthai-devel x86_64 0.1.28-8.el9 appstream 117 k libtiff-devel x86_64 4.4.0-2.el9 appstream 513 k libxcb-devel x86_64 1.13.1-9.el9 appstream 1.0 M libxkbcommon-devel x86_64 1.0.3-4.el9 appstream 61 k libxml2-devel x86_64 2.9.13-2.el9 appstream 828 k pango-devel x86_64 1.48.7-2.el9 appstream 141 k pcre-cpp x86_64 8.44-3.el9.3 appstream 26 k pcre-devel x86_64 8.44-3.el9.3 appstream 470 k pcre-utf16 x86_64 8.44-3.el9.3 appstream 184 k pcre-utf32 x86_64 8.44-3.el9.3 appstream 174 k pcre2-devel x86_64 10.40-2.el9 appstream 474 k perl-Filter x86_64 2:1.60-4.el9 appstream 81 k perl-encoding x86_64 4:3.00-462.el9 appstream 62 k perl-open noarch 1.12-479.el9 appstream 25 k pixman-devel x86_64 0.40.0-5.el9 appstream 17 k sysprof-capture-devel x86_64 3.40.1-3.el9 appstream 59 k wayland-devel x86_64 1.19.0-4.el9 appstream 132 k xorg-x11-proto-devel noarch 2021.4-2.el9 appstream 262 k Transaction Summary ================================================================================ Install 64 Packages Upgrade 28 Packages Total size: 23 M Total download size: 18 M Downloading Packages: (1/85): at-spi2-atk-devel-2.38.0-4.el9.x86_64.r 38 kB/s | 9.5 kB 00:00 (2/85): atk-devel-2.36.0-5.el9.x86_64.rpm 334 kB/s | 172 kB 00:00 (3/85): brotli-devel-1.0.9-6.el9.x86_64.rpm 354 kB/s | 31 kB 00:00 (4/85): at-spi2-core-devel-2.40.3-1.el9.x86_64. 167 kB/s | 134 kB 00:00 (5/85): cairo-devel-1.17.4-7.el9.x86_64.rpm 1.9 MB/s | 190 kB 00:00 (6/85): cairo-gobject-devel-1.17.4-7.el9.x86_64 179 kB/s | 10 kB 00:00 (7/85): brotli-1.0.9-6.el9.x86_64.rpm 413 kB/s | 313 kB 00:00 (8/85): dbus-devel-1.12.20-6.el9.x86_64.rpm 549 kB/s | 33 kB 00:00 (9/85): bzip2-devel-1.0.8-8.el9.x86_64.rpm 505 kB/s | 213 kB 00:00 (10/85): fribidi-devel-1.0.10-6.el9.2.x86_64.rp 492 kB/s | 25 kB 00:00 (11/85): fontconfig-devel-2.14.0-1.el9.x86_64.r 891 kB/s | 128 kB 00:00 (12/85): graphite2-devel-1.3.14-9.el9.x86_64.rp 316 kB/s | 21 kB 00:00 (13/85): glib2-devel-2.68.4-5.el9.x86_64.rpm 1.1 MB/s | 475 kB 00:00 (14/85): harfbuzz-devel-2.7.4-8.el9.x86_64.rpm 850 kB/s | 305 kB 00:00 (15/85): freetype-devel-2.10.4-9.el9.x86_64.rpm 1.7 MB/s | 1.1 MB 00:00 (16/85): libXau-devel-1.0.9-8.el9.x86_64.rpm 170 kB/s | 13 kB 00:00 (17/85): libXcomposite-devel-0.4.5-7.el9.x86_64 273 kB/s | 15 kB 00:00 (18/85): libXcursor-devel-1.2.0-7.el9.x86_64.rp 344 kB/s | 21 kB 00:00 (19/85): libXdamage-devel-1.1.5-7.el9.x86_64.rp 133 kB/s | 9.3 kB 00:00 (20/85): libXfixes-devel-5.0.3-16.el9.x86_64.rp 256 kB/s | 12 kB 00:00 (21/85): libXext-devel-1.3.4-8.el9.x86_64.rpm 768 kB/s | 72 kB 00:00 (22/85): libXft-devel-2.3.3-8.el9.x86_64.rpm 324 kB/s | 18 kB 00:00 (23/85): libXinerama-devel-1.1.4-10.el9.x86_64. 205 kB/s | 13 kB 00:00 (24/85): libXi-devel-1.7.10-8.el9.x86_64.rpm 913 kB/s | 99 kB 00:00 (25/85): libXrender-devel-0.9.10-16.el9.x86_64. 295 kB/s | 16 kB 00:00 (26/85): libXrandr-devel-1.5.2-8.el9.x86_64.rpm 289 kB/s | 19 kB 00:00 (27/85): libXtst-devel-1.2.3-16.el9.x86_64.rpm 261 kB/s | 15 kB 00:00 (28/85): libblkid-devel-2.37.4-9.el9.x86_64.rpm 284 kB/s | 17 kB 00:00 (29/85): libX11-devel-1.7.0-7.el9.x86_64.rpm 1.4 MB/s | 940 kB 00:00 (30/85): libepoxy-devel-1.5.5-4.el9.x86_64.rpm 1.2 MB/s | 133 kB 00:00 (31/85): libdatrie-devel-0.2.13-4.el9.x86_64.rp 876 kB/s | 132 kB 00:00 (32/85): libffi-devel-3.4.2-7.el9.x86_64.rpm 426 kB/s | 29 kB 00:00 (33/85): libglvnd-core-devel-1.3.4-1.el9.x86_64 233 kB/s | 17 kB 00:00 (34/85): libmount-devel-2.37.4-9.el9.x86_64.rpm 280 kB/s | 18 kB 00:00 (35/85): libglvnd-devel-1.3.4-1.el9.x86_64.rpm 976 kB/s | 155 kB 00:00 (36/85): libpng-devel-1.6.37-12.el9.x86_64.rpm 1.9 MB/s | 290 kB 00:00 (37/85): libselinux-devel-3.4-3.el9.x86_64.rpm 801 kB/s | 113 kB 00:00 (38/85): libsepol-devel-3.4-1.1.el9.x86_64.rpm 636 kB/s | 40 kB 00:00 (39/85): libthai-devel-0.1.28-8.el9.x86_64.rpm 630 kB/s | 117 kB 00:00 (40/85): libicu-devel-67.1-9.el9.x86_64.rpm 1.3 MB/s | 830 kB 00:00 (41/85): libtiff-devel-4.4.0-2.el9.x86_64.rpm 1.6 MB/s | 513 kB 00:00 (42/85): libxkbcommon-devel-1.0.3-4.el9.x86_64. 710 kB/s | 61 kB 00:00 (43/85): pango-devel-1.48.7-2.el9.x86_64.rpm 914 kB/s | 141 kB 00:00 (44/85): pcre-cpp-8.44-3.el9.3.x86_64.rpm 425 kB/s | 26 kB 00:00 (45/85): pcre-devel-8.44-3.el9.3.x86_64.rpm 1.8 MB/s | 470 kB 00:00 (46/85): pcre-utf16-8.44-3.el9.3.x86_64.rpm 1.5 MB/s | 184 kB 00:00 (47/85): libxml2-devel-2.9.13-2.el9.x86_64.rpm 1.2 MB/s | 828 kB 00:00 (48/85): libxcb-devel-1.13.1-9.el9.x86_64.rpm 1.2 MB/s | 1.0 MB 00:00 (49/85): pcre-utf32-8.44-3.el9.3.x86_64.rpm 1.4 MB/s | 174 kB 00:00 (50/85): perl-Filter-1.60-4.el9.x86_64.rpm 704 kB/s | 81 kB 00:00 (51/85): perl-encoding-3.00-462.el9.x86_64.rpm 916 kB/s | 62 kB 00:00 (52/85): perl-open-1.12-479.el9.noarch.rpm 476 kB/s | 25 kB 00:00 (53/85): pixman-devel-0.40.0-5.el9.x86_64.rpm 272 kB/s | 17 kB 00:00 (54/85): sysprof-capture-devel-3.40.1-3.el9.x86 797 kB/s | 59 kB 00:00 (55/85): pcre2-devel-10.40-2.el9.x86_64.rpm 1.3 MB/s | 474 kB 00:00 (56/85): wayland-devel-1.19.0-4.el9.x86_64.rpm 1.0 MB/s | 132 kB 00:00 (57/85): xorg-x11-proto-devel-2021.4-2.el9.noar 1.3 MB/s | 262 kB 00:00 (58/85): dbus-daemon-1.12.20-6.el9.x86_64.rpm 1.3 MB/s | 196 kB 00:00 (59/85): fontconfig-2.14.0-1.el9.x86_64.rpm 1.7 MB/s | 274 kB 00:00 (60/85): harfbuzz-icu-2.7.4-8.el9.x86_64.rpm 217 kB/s | 14 kB 00:00 (61/85): fribidi-1.0.10-6.el9.2.x86_64.rpm 700 kB/s | 84 kB 00:00 (62/85): libtiff-4.4.0-2.el9.x86_64.rpm 1.5 MB/s | 195 kB 00:00 (63/85): pcre2-utf32-10.40-2.el9.x86_64.rpm 1.2 MB/s | 205 kB 00:00 (64/85): python3-libselinux-3.4-3.el9.x86_64.rp 1.5 MB/s | 185 kB 00:00 (65/85): pcre2-utf16-10.40-2.el9.x86_64.rpm 995 kB/s | 216 kB 00:00 (66/85): dbus-common-1.12.20-6.el9.noarch.rpm 203 kB/s | 14 kB 00:00 (67/85): dbus-tools-1.12.20-6.el9.x86_64.rpm 856 kB/s | 50 kB 00:00 (68/85): dbus-libs-1.12.20-6.el9.x86_64.rpm 1.3 MB/s | 151 kB 00:00 (69/85): libblkid-2.37.4-9.el9.x86_64.rpm 1.6 MB/s | 107 kB 00:00 (70/85): libfdisk-2.37.4-9.el9.x86_64.rpm 1.6 MB/s | 154 kB 00:00 (71/85): freetype-2.10.4-9.el9.x86_64.rpm 1.5 MB/s | 387 kB 00:00 (72/85): libmount-2.37.4-9.el9.x86_64.rpm 1.3 MB/s | 133 kB 00:00 (73/85): libselinux-3.4-3.el9.x86_64.rpm 820 kB/s | 85 kB 00:00 (74/85): harfbuzz-2.7.4-8.el9.x86_64.rpm 1.4 MB/s | 624 kB 00:00 (75/85): libselinux-utils-3.4-3.el9.x86_64.rpm 1.4 MB/s | 158 kB 00:00 (76/85): libuuid-2.37.4-9.el9.x86_64.rpm 448 kB/s | 27 kB 00:00 (77/85): libsmartcols-2.37.4-9.el9.x86_64.rpm 793 kB/s | 63 kB 00:00 (78/85): libsepol-3.4-1.1.el9.x86_64.rpm 1.6 MB/s | 315 kB 00:00 (79/85): pcre2-syntax-10.40-2.el9.noarch.rpm 1.2 MB/s | 143 kB 00:00 (80/85): pcre2-10.40-2.el9.x86_64.rpm 1.6 MB/s | 236 kB 00:00 (81/85): python3-libxml2-2.9.13-2.el9.x86_64.rp 1.4 MB/s | 226 kB 00:00 (82/85): libxml2-2.9.13-2.el9.x86_64.rpm 1.5 MB/s | 746 kB 00:00 (83/85): util-linux-user-2.37.4-9.el9.x86_64.rp 618 kB/s | 30 kB 00:00 (84/85): util-linux-core-2.37.4-9.el9.x86_64.rp 1.1 MB/s | 434 kB 00:00 (85/85): util-linux-2.37.4-9.el9.x86_64.rpm 1.9 MB/s | 2.2 MB 00:01 -------------------------------------------------------------------------------- Total 2.4 MB/s | 18 MB 00:07 Running transaction check Transaction check succeeded. Running transaction test Transaction test succeeded. Running transaction Preparing : 1/1 Installing : xorg-x11-proto-devel-2021.4-2.el9.noarch 1/120 Upgrading : libuuid-2.37.4-9.el9.x86_64 2/120 Upgrading : libblkid-2.37.4-9.el9.x86_64 3/120 Running scriptlet: libblkid-2.37.4-9.el9.x86_64 3/120 Upgrading : harfbuzz-2.7.4-8.el9.x86_64 4/120 Upgrading : freetype-2.10.4-9.el9.x86_64 5/120 Upgrading : libxml2-2.9.13-2.el9.x86_64 6/120 Upgrading : pcre2-syntax-10.40-2.el9.noarch 7/120 Upgrading : pcre2-10.40-2.el9.x86_64 8/120 Upgrading : libsepol-3.4-1.1.el9.x86_64 9/120 Upgrading : libselinux-3.4-3.el9.x86_64 10/120 Running scriptlet: libselinux-3.4-3.el9.x86_64 10/120 Upgrading : libmount-2.37.4-9.el9.x86_64 11/120 Upgrading : dbus-libs-1:1.12.20-6.el9.x86_64 12/120 Installing : libpng-devel-2:1.6.37-12.el9.x86_64 13/120 Installing : dbus-devel-1:1.12.20-6.el9.x86_64 14/120 Installing : libxml2-devel-2.9.13-2.el9.x86_64 15/120 Upgrading : libsmartcols-2.37.4-9.el9.x86_64 16/120 Installing : libsigc++20-devel-2.10.7-2.el9.x86_64 17/120 Installing : libffi-devel-3.4.2-7.el9.x86_64 18/120 Installing : wayland-devel-1.19.0-4.el9.x86_64 19/120 Upgrading : util-linux-core-2.37.4-9.el9.x86_64 20/120 Running scriptlet: util-linux-core-2.37.4-9.el9.x86_64 20/120 Installing : libxkbcommon-devel-1.0.3-4.el9.x86_64 21/120 Upgrading : dbus-tools-1:1.12.20-6.el9.x86_64 22/120 Installing : libsepol-devel-3.4-1.1.el9.x86_64 23/120 Upgrading : pcre2-utf16-10.40-2.el9.x86_64 24/120 Upgrading : pcre2-utf32-10.40-2.el9.x86_64 25/120 Installing : pcre2-devel-10.40-2.el9.x86_64 26/120 Installing : libselinux-devel-3.4-3.el9.x86_64 27/120 Upgrading : fontconfig-2.14.0-1.el9.x86_64 28/120 Running scriptlet: fontconfig-2.14.0-1.el9.x86_64 28/120 Upgrading : harfbuzz-icu-2.7.4-8.el9.x86_64 29/120 Installing : libblkid-devel-2.37.4-9.el9.x86_64 30/120 Installing : libmount-devel-2.37.4-9.el9.x86_64 31/120 Upgrading : libfdisk-2.37.4-9.el9.x86_64 32/120 Upgrading : util-linux-2.37.4-9.el9.x86_64 33/120 Installing : libXau-devel-1.0.9-8.el9.x86_64 34/120 Installing : libxcb-devel-1.13.1-9.el9.x86_64 35/120 Installing : libX11-devel-1.7.0-7.el9.x86_64 36/120 Installing : libXext-devel-1.3.4-8.el9.x86_64 37/120 Installing : libXfixes-devel-5.0.3-16.el9.x86_64 38/120 Installing : libXrender-devel-0.9.10-16.el9.x86_64 39/120 Installing : libXi-devel-1.7.10-8.el9.x86_64 40/120 Installing : libXtst-devel-1.2.3-16.el9.x86_64 41/120 Installing : libXcursor-devel-1.2.0-7.el9.x86_64 42/120 Installing : libXrandr-devel-1.5.2-8.el9.x86_64 43/120 Installing : libXcomposite-devel-0.4.5-7.el9.x86_64 44/120 Installing : libXdamage-devel-1.1.5-7.el9.x86_64 45/120 Installing : libXinerama-devel-1.1.4-10.el9.x86_64 46/120 Upgrading : dbus-common-1:1.12.20-6.el9.noarch 47/120 Running scriptlet: dbus-common-1:1.12.20-6.el9.noarch 47/120 Upgrading : libtiff-4.4.0-2.el9.x86_64 48/120 Installing : libtiff-devel-4.4.0-2.el9.x86_64 49/120 Upgrading : fribidi-1.0.10-6.el9.2.x86_64 50/120 Installing : fribidi-devel-1.0.10-6.el9.2.x86_64 51/120 Installing : sysprof-capture-devel-3.40.1-3.el9.x86_64 52/120 Installing : pixman-devel-0.40.0-5.el9.x86_64 53/120 Installing : perl-Filter-2:1.60-4.el9.x86_64 54/120 Installing : perl-encoding-4:3.00-462.el9.x86_64 55/120 Installing : perl-open-1.12-479.el9.noarch 56/120 Installing : pcre-utf32-8.44-3.el9.3.x86_64 57/120 Installing : pcre-utf16-8.44-3.el9.3.x86_64 58/120 Installing : pcre-cpp-8.44-3.el9.3.x86_64 59/120 Installing : pcre-devel-8.44-3.el9.3.x86_64 60/120 Installing : glib2-devel-2.68.4-5.el9.x86_64 61/120 Installing : atk-devel-2.36.0-5.el9.x86_64 62/120 Installing : glibmm24-devel-2.66.1-1.el9.x86_64 63/120 Installing : at-spi2-core-devel-2.40.3-1.el9.x86_64 64/120 Installing : at-spi2-atk-devel-2.38.0-4.el9.x86_64 65/120 Installing : gdk-pixbuf2-devel-2.42.6-2.el9.x86_64 66/120 Installing : libicu-devel-67.1-9.el9.x86_64 67/120 Installing : libglvnd-core-devel-1:1.3.4-1.el9.x86_64 68/120 Installing : libglvnd-devel-1:1.3.4-1.el9.x86_64 69/120 Installing : libepoxy-devel-1.5.5-4.el9.x86_64 70/120 Installing : libdatrie-devel-0.2.13-4.el9.x86_64 71/120 Installing : libthai-devel-0.1.28-8.el9.x86_64 72/120 Installing : graphite2-devel-1.3.14-9.el9.x86_64 73/120 Installing : bzip2-devel-1.0.8-8.el9.x86_64 74/120 Installing : brotli-1.0.9-6.el9.x86_64 75/120 Installing : brotli-devel-1.0.9-6.el9.x86_64 76/120 Installing : harfbuzz-devel-2.7.4-8.el9.x86_64 77/120 Installing : freetype-devel-2.10.4-9.el9.x86_64 78/120 Installing : fontconfig-devel-2.14.0-1.el9.x86_64 79/120 Installing : cairo-devel-1.17.4-7.el9.x86_64 80/120 Installing : cairo-gobject-devel-1.17.4-7.el9.x86_64 81/120 Installing : cairomm-devel-1.14.2-10.el9.x86_64 82/120 Installing : libXft-devel-2.3.3-8.el9.x86_64 83/120 Installing : pango-devel-1.48.7-2.el9.x86_64 84/120 Installing : gtk3-devel-3.24.31-2.el9.x86_64 85/120 Installing : pangomm-devel-2.46.1-1.el9.x86_64 86/120 Installing : atkmm-devel-2.28.2-2.el9.x86_64 87/120 Running scriptlet: dbus-daemon-1:1.12.20-6.el9.x86_64 88/120 Upgrading : dbus-daemon-1:1.12.20-6.el9.x86_64 88/120 Running scriptlet: dbus-daemon-1:1.12.20-6.el9.x86_64 88/120 Upgrading : util-linux-user-2.37.4-9.el9.x86_64 89/120 Upgrading : python3-libselinux-3.4-3.el9.x86_64 90/120 Upgrading : libselinux-utils-3.4-3.el9.x86_64 91/120 Upgrading : python3-libxml2-2.9.13-2.el9.x86_64 92/120 Cleanup : python3-libxml2-2.9.13-1.el9_0.1.x86_64 93/120 Running scriptlet: dbus-daemon-1:1.12.20-5.el9.x86_64 94/120 Cleanup : dbus-daemon-1:1.12.20-5.el9.x86_64 94/120 Running scriptlet: dbus-daemon-1:1.12.20-5.el9.x86_64 94/120 Cleanup : libselinux-utils-3.3-2.el9.x86_64 95/120 Cleanup : fontconfig-2.13.94-2.el9.x86_64 96/120 Running scriptlet: fontconfig-2.13.94-2.el9.x86_64 96/120 Cleanup : dbus-tools-1:1.12.20-5.el9.x86_64 97/120 Cleanup : python3-libselinux-3.3-2.el9.x86_64 98/120 Cleanup : util-linux-user-2.37.4-3.el9.x86_64 99/120 Cleanup : util-linux-2.37.4-3.el9.x86_64 100/120 Cleanup : util-linux-core-2.37.4-3.el9.x86_64 101/120 Cleanup : libmount-2.37.4-3.el9.x86_64 102/120 Cleanup : libfdisk-2.37.4-3.el9.x86_64 103/120 Cleanup : libselinux-3.3-2.el9.x86_64 104/120 Cleanup : harfbuzz-icu-2.7.4-5.el9.x86_64 105/120 Cleanup : pcre2-10.37-5.el9_0.x86_64 106/120 Cleanup : libblkid-2.37.4-3.el9.x86_64 107/120 Cleanup : freetype-2.10.4-6.el9.x86_64 108/120 Cleanup : pcre2-utf32-10.37-5.el9_0.x86_64 109/120 Cleanup : pcre2-utf16-10.37-5.el9_0.x86_64 110/120 Cleanup : pcre2-syntax-10.37-5.el9_0.noarch 111/120 Running scriptlet: dbus-common-1:1.12.20-5.el9.noarch 112/120 Cleanup : dbus-common-1:1.12.20-5.el9.noarch 112/120 Running scriptlet: dbus-common-1:1.12.20-5.el9.noarch 112/120 Cleanup : harfbuzz-2.7.4-5.el9.x86_64 113/120 Cleanup : libuuid-2.37.4-3.el9.x86_64 114/120 Cleanup : libsepol-3.3-2.el9.x86_64 115/120 Cleanup : libsmartcols-2.37.4-3.el9.x86_64 116/120 Cleanup : dbus-libs-1:1.12.20-5.el9.x86_64 117/120 Cleanup : libxml2-2.9.13-1.el9_0.1.x86_64 118/120 Cleanup : libtiff-4.2.0-3.el9.x86_64 119/120 Cleanup : fribidi-1.0.10-6.el9.x86_64 120/120 Running scriptlet: fontconfig-2.14.0-1.el9.x86_64 120/120 Running scriptlet: fribidi-1.0.10-6.el9.x86_64 120/120 Regex version mismatch, expected: 10.40 2022-04-14 actual: 10.37 2021-05-26 Regex version mismatch, expected: 10.40 2022-04-14 actual: 10.37 2021-05-26 Regex version mismatch, expected: 10.40 2022-04-14 actual: 10.37 2021-05-26 Regex version mismatch, expected: 10.40 2022-04-14 actual: 10.37 2021-05-26 Verifying : at-spi2-atk-devel-2.38.0-4.el9.x86_64 1/120 Verifying : at-spi2-core-devel-2.40.3-1.el9.x86_64 2/120 Verifying : atk-devel-2.36.0-5.el9.x86_64 3/120 Verifying : brotli-1.0.9-6.el9.x86_64 4/120 Verifying : brotli-devel-1.0.9-6.el9.x86_64 5/120 Verifying : bzip2-devel-1.0.8-8.el9.x86_64 6/120 Verifying : cairo-devel-1.17.4-7.el9.x86_64 7/120 Verifying : cairo-gobject-devel-1.17.4-7.el9.x86_64 8/120 Verifying : dbus-devel-1:1.12.20-6.el9.x86_64 9/120 Verifying : fontconfig-devel-2.14.0-1.el9.x86_64 10/120 Verifying : freetype-devel-2.10.4-9.el9.x86_64 11/120 Verifying : fribidi-devel-1.0.10-6.el9.2.x86_64 12/120 Verifying : glib2-devel-2.68.4-5.el9.x86_64 13/120 Verifying : graphite2-devel-1.3.14-9.el9.x86_64 14/120 Verifying : harfbuzz-devel-2.7.4-8.el9.x86_64 15/120 Verifying : libX11-devel-1.7.0-7.el9.x86_64 16/120 Verifying : libXau-devel-1.0.9-8.el9.x86_64 17/120 Verifying : libXcomposite-devel-0.4.5-7.el9.x86_64 18/120 Verifying : libXcursor-devel-1.2.0-7.el9.x86_64 19/120 Verifying : libXdamage-devel-1.1.5-7.el9.x86_64 20/120 Verifying : libXext-devel-1.3.4-8.el9.x86_64 21/120 Verifying : libXfixes-devel-5.0.3-16.el9.x86_64 22/120 Verifying : libXft-devel-2.3.3-8.el9.x86_64 23/120 Verifying : libXi-devel-1.7.10-8.el9.x86_64 24/120 Verifying : libXinerama-devel-1.1.4-10.el9.x86_64 25/120 Verifying : libXrandr-devel-1.5.2-8.el9.x86_64 26/120 Verifying : libXrender-devel-0.9.10-16.el9.x86_64 27/120 Verifying : libXtst-devel-1.2.3-16.el9.x86_64 28/120 Verifying : libblkid-devel-2.37.4-9.el9.x86_64 29/120 Verifying : libdatrie-devel-0.2.13-4.el9.x86_64 30/120 Verifying : libepoxy-devel-1.5.5-4.el9.x86_64 31/120 Verifying : libffi-devel-3.4.2-7.el9.x86_64 32/120 Verifying : libglvnd-core-devel-1:1.3.4-1.el9.x86_64 33/120 Verifying : libglvnd-devel-1:1.3.4-1.el9.x86_64 34/120 Verifying : libicu-devel-67.1-9.el9.x86_64 35/120 Verifying : libmount-devel-2.37.4-9.el9.x86_64 36/120 Verifying : libpng-devel-2:1.6.37-12.el9.x86_64 37/120 Verifying : libselinux-devel-3.4-3.el9.x86_64 38/120 Verifying : libsepol-devel-3.4-1.1.el9.x86_64 39/120 Verifying : libthai-devel-0.1.28-8.el9.x86_64 40/120 Verifying : libtiff-devel-4.4.0-2.el9.x86_64 41/120 Verifying : libxcb-devel-1.13.1-9.el9.x86_64 42/120 Verifying : libxkbcommon-devel-1.0.3-4.el9.x86_64 43/120 Verifying : libxml2-devel-2.9.13-2.el9.x86_64 44/120 Verifying : pango-devel-1.48.7-2.el9.x86_64 45/120 Verifying : pcre-cpp-8.44-3.el9.3.x86_64 46/120 Verifying : pcre-devel-8.44-3.el9.3.x86_64 47/120 Verifying : pcre-utf16-8.44-3.el9.3.x86_64 48/120 Verifying : pcre-utf32-8.44-3.el9.3.x86_64 49/120 Verifying : pcre2-devel-10.40-2.el9.x86_64 50/120 Verifying : perl-Filter-2:1.60-4.el9.x86_64 51/120 Verifying : perl-encoding-4:3.00-462.el9.x86_64 52/120 Verifying : perl-open-1.12-479.el9.noarch 53/120 Verifying : pixman-devel-0.40.0-5.el9.x86_64 54/120 Verifying : sysprof-capture-devel-3.40.1-3.el9.x86_64 55/120 Verifying : wayland-devel-1.19.0-4.el9.x86_64 56/120 Verifying : xorg-x11-proto-devel-2021.4-2.el9.noarch 57/120 Verifying : atkmm-devel-2.28.2-2.el9.x86_64 58/120 Verifying : cairomm-devel-1.14.2-10.el9.x86_64 59/120 Verifying : gdk-pixbuf2-devel-2.42.6-2.el9.x86_64 60/120 Verifying : glibmm24-devel-2.66.1-1.el9.x86_64 61/120 Verifying : gtk3-devel-3.24.31-2.el9.x86_64 62/120 Verifying : libsigc++20-devel-2.10.7-2.el9.x86_64 63/120 Verifying : pangomm-devel-2.46.1-1.el9.x86_64 64/120 Verifying : dbus-daemon-1:1.12.20-6.el9.x86_64 65/120 Verifying : dbus-daemon-1:1.12.20-5.el9.x86_64 66/120 Verifying : fontconfig-2.14.0-1.el9.x86_64 67/120 Verifying : fontconfig-2.13.94-2.el9.x86_64 68/120 Verifying : fribidi-1.0.10-6.el9.2.x86_64 69/120 Verifying : fribidi-1.0.10-6.el9.x86_64 70/120 Verifying : harfbuzz-icu-2.7.4-8.el9.x86_64 71/120 Verifying : harfbuzz-icu-2.7.4-5.el9.x86_64 72/120 Verifying : libtiff-4.4.0-2.el9.x86_64 73/120 Verifying : libtiff-4.2.0-3.el9.x86_64 74/120 Verifying : pcre2-utf16-10.40-2.el9.x86_64 75/120 Verifying : pcre2-utf16-10.37-5.el9_0.x86_64 76/120 Verifying : pcre2-utf32-10.40-2.el9.x86_64 77/120 Verifying : pcre2-utf32-10.37-5.el9_0.x86_64 78/120 Verifying : python3-libselinux-3.4-3.el9.x86_64 79/120 Verifying : python3-libselinux-3.3-2.el9.x86_64 80/120 Verifying : dbus-common-1:1.12.20-6.el9.noarch 81/120 Verifying : dbus-common-1:1.12.20-5.el9.noarch 82/120 Verifying : dbus-libs-1:1.12.20-6.el9.x86_64 83/120 Verifying : dbus-libs-1:1.12.20-5.el9.x86_64 84/120 Verifying : dbus-tools-1:1.12.20-6.el9.x86_64 85/120 Verifying : dbus-tools-1:1.12.20-5.el9.x86_64 86/120 Verifying : freetype-2.10.4-9.el9.x86_64 87/120 Verifying : freetype-2.10.4-6.el9.x86_64 88/120 Verifying : harfbuzz-2.7.4-8.el9.x86_64 89/120 Verifying : harfbuzz-2.7.4-5.el9.x86_64 90/120 Verifying : libblkid-2.37.4-9.el9.x86_64 91/120 Verifying : libblkid-2.37.4-3.el9.x86_64 92/120 Verifying : libfdisk-2.37.4-9.el9.x86_64 93/120 Verifying : libfdisk-2.37.4-3.el9.x86_64 94/120 Verifying : libmount-2.37.4-9.el9.x86_64 95/120 Verifying : libmount-2.37.4-3.el9.x86_64 96/120 Verifying : libselinux-3.4-3.el9.x86_64 97/120 Verifying : libselinux-3.3-2.el9.x86_64 98/120 Verifying : libselinux-utils-3.4-3.el9.x86_64 99/120 Verifying : libselinux-utils-3.3-2.el9.x86_64 100/120 Verifying : libsepol-3.4-1.1.el9.x86_64 101/120 Verifying : libsepol-3.3-2.el9.x86_64 102/120 Verifying : libsmartcols-2.37.4-9.el9.x86_64 103/120 Verifying : libsmartcols-2.37.4-3.el9.x86_64 104/120 Verifying : libuuid-2.37.4-9.el9.x86_64 105/120 Verifying : libuuid-2.37.4-3.el9.x86_64 106/120 Verifying : libxml2-2.9.13-2.el9.x86_64 107/120 Verifying : libxml2-2.9.13-1.el9_0.1.x86_64 108/120 Verifying : pcre2-10.40-2.el9.x86_64 109/120 Verifying : pcre2-10.37-5.el9_0.x86_64 110/120 Verifying : pcre2-syntax-10.40-2.el9.noarch 111/120 Verifying : pcre2-syntax-10.37-5.el9_0.noarch 112/120 Verifying : python3-libxml2-2.9.13-2.el9.x86_64 113/120 Verifying : python3-libxml2-2.9.13-1.el9_0.1.x86_64 114/120 Verifying : util-linux-2.37.4-9.el9.x86_64 115/120 Verifying : util-linux-2.37.4-3.el9.x86_64 116/120 Verifying : util-linux-core-2.37.4-9.el9.x86_64 117/120 Verifying : util-linux-core-2.37.4-3.el9.x86_64 118/120 Verifying : util-linux-user-2.37.4-9.el9.x86_64 119/120 Verifying : util-linux-user-2.37.4-3.el9.x86_64 120/120 Upgraded: dbus-common-1:1.12.20-6.el9.noarch dbus-daemon-1:1.12.20-6.el9.x86_64 dbus-libs-1:1.12.20-6.el9.x86_64 dbus-tools-1:1.12.20-6.el9.x86_64 fontconfig-2.14.0-1.el9.x86_64 freetype-2.10.4-9.el9.x86_64 fribidi-1.0.10-6.el9.2.x86_64 harfbuzz-2.7.4-8.el9.x86_64 harfbuzz-icu-2.7.4-8.el9.x86_64 libblkid-2.37.4-9.el9.x86_64 libfdisk-2.37.4-9.el9.x86_64 libmount-2.37.4-9.el9.x86_64 libselinux-3.4-3.el9.x86_64 libselinux-utils-3.4-3.el9.x86_64 libsepol-3.4-1.1.el9.x86_64 libsmartcols-2.37.4-9.el9.x86_64 libtiff-4.4.0-2.el9.x86_64 libuuid-2.37.4-9.el9.x86_64 libxml2-2.9.13-2.el9.x86_64 pcre2-10.40-2.el9.x86_64 pcre2-syntax-10.40-2.el9.noarch pcre2-utf16-10.40-2.el9.x86_64 pcre2-utf32-10.40-2.el9.x86_64 python3-libselinux-3.4-3.el9.x86_64 python3-libxml2-2.9.13-2.el9.x86_64 util-linux-2.37.4-9.el9.x86_64 util-linux-core-2.37.4-9.el9.x86_64 util-linux-user-2.37.4-9.el9.x86_64 Installed: at-spi2-atk-devel-2.38.0-4.el9.x86_64 at-spi2-core-devel-2.40.3-1.el9.x86_64 atk-devel-2.36.0-5.el9.x86_64 atkmm-devel-2.28.2-2.el9.x86_64 brotli-1.0.9-6.el9.x86_64 brotli-devel-1.0.9-6.el9.x86_64 bzip2-devel-1.0.8-8.el9.x86_64 cairo-devel-1.17.4-7.el9.x86_64 cairo-gobject-devel-1.17.4-7.el9.x86_64 cairomm-devel-1.14.2-10.el9.x86_64 dbus-devel-1:1.12.20-6.el9.x86_64 fontconfig-devel-2.14.0-1.el9.x86_64 freetype-devel-2.10.4-9.el9.x86_64 fribidi-devel-1.0.10-6.el9.2.x86_64 gdk-pixbuf2-devel-2.42.6-2.el9.x86_64 glib2-devel-2.68.4-5.el9.x86_64 glibmm24-devel-2.66.1-1.el9.x86_64 graphite2-devel-1.3.14-9.el9.x86_64 gtk3-devel-3.24.31-2.el9.x86_64 harfbuzz-devel-2.7.4-8.el9.x86_64 libX11-devel-1.7.0-7.el9.x86_64 libXau-devel-1.0.9-8.el9.x86_64 libXcomposite-devel-0.4.5-7.el9.x86_64 libXcursor-devel-1.2.0-7.el9.x86_64 libXdamage-devel-1.1.5-7.el9.x86_64 libXext-devel-1.3.4-8.el9.x86_64 libXfixes-devel-5.0.3-16.el9.x86_64 libXft-devel-2.3.3-8.el9.x86_64 libXi-devel-1.7.10-8.el9.x86_64 libXinerama-devel-1.1.4-10.el9.x86_64 libXrandr-devel-1.5.2-8.el9.x86_64 libXrender-devel-0.9.10-16.el9.x86_64 libXtst-devel-1.2.3-16.el9.x86_64 libblkid-devel-2.37.4-9.el9.x86_64 libdatrie-devel-0.2.13-4.el9.x86_64 libepoxy-devel-1.5.5-4.el9.x86_64 libffi-devel-3.4.2-7.el9.x86_64 libglvnd-core-devel-1:1.3.4-1.el9.x86_64 libglvnd-devel-1:1.3.4-1.el9.x86_64 libicu-devel-67.1-9.el9.x86_64 libmount-devel-2.37.4-9.el9.x86_64 libpng-devel-2:1.6.37-12.el9.x86_64 libselinux-devel-3.4-3.el9.x86_64 libsepol-devel-3.4-1.1.el9.x86_64 libsigc++20-devel-2.10.7-2.el9.x86_64 libthai-devel-0.1.28-8.el9.x86_64 libtiff-devel-4.4.0-2.el9.x86_64 libxcb-devel-1.13.1-9.el9.x86_64 libxkbcommon-devel-1.0.3-4.el9.x86_64 libxml2-devel-2.9.13-2.el9.x86_64 pango-devel-1.48.7-2.el9.x86_64 pangomm-devel-2.46.1-1.el9.x86_64 pcre-cpp-8.44-3.el9.3.x86_64 pcre-devel-8.44-3.el9.3.x86_64 pcre-utf16-8.44-3.el9.3.x86_64 pcre-utf32-8.44-3.el9.3.x86_64 pcre2-devel-10.40-2.el9.x86_64 perl-Filter-2:1.60-4.el9.x86_64 perl-encoding-4:3.00-462.el9.x86_64 perl-open-1.12-479.el9.noarch pixman-devel-0.40.0-5.el9.x86_64 sysprof-capture-devel-3.40.1-3.el9.x86_64 wayland-devel-1.19.0-4.el9.x86_64 xorg-x11-proto-devel-2021.4-2.el9.noarch Complete!
Now return to your $HOME/Downloads directory and run the following command. You’ll notice that it installs and upgrades many more packages than you might expect.
sudo dnf install -y gtkmm30-devel-3.24.5-1.el9.x86_64.rpm
The log file for this is:
Display detailed console log →
Last metadata expiration check: 1:22:32 ago on Sun 20 Nov 2022 12:52:28 AM EST.
Dependencies resolved.
================================================================================
 Package             Architecture Version              Repository          Size
================================================================================
Installing:
 gtkmm30-devel       x86_64       3.24.5-1.el9         @commandline       605 k

Transaction Summary
================================================================================
Install  1 Package

Total size: 605 k
Installed size: 4.7 M
Downloading Packages:
Running transaction check
Transaction check succeeded.
Running transaction test
Transaction test succeeded.
Running transaction
Regex version mismatch, expected: 10.40 2022-04-14 actual: 10.37 2021-05-26
Regex version mismatch, expected: 10.40 2022-04-14 actual: 10.37 2021-05-26
  Preparing        :                                                        1/1
  Installing       : gtkmm30-devel-3.24.5-1.el9.x86_64                      1/1
  Running scriptlet: gtkmm30-devel-3.24.5-1.el9.x86_64                      1/1
  Verifying        : gtkmm30-devel-3.24.5-1.el9.x86_64                      1/1

Installed:
  gtkmm30-devel-3.24.5-1.el9.x86_64

Complete!
All that done and you’ve only got the first of four dependencies resovled.
- Next, start with the libzip-devel package, which has a couple dependencies. Assuming you’re still in your $HOME/Downloads directory, you can run the following command to get the libzip-devel and its prerequisite packages for AlmaLinux 9:
wget https://repo.almalinux.org/almalinux/9/CRB/x86_64/os/Packages/libzip-devel-1.7.3-7.el9.x86_64.rpm
wget https://repo.almalinux.org/almalinux/9/AppStream/x86_64/os/Packages/cmake-filesystem-3.20.2-7.el9.x86_64.rpm
wget https://repo.almalinux.org/almalinux/9/AppStream/x86_64/os/Packages/libzip-1.7.3-7.el9.x86_64.rpm
You can run the prerequisites with the following command:
sudo dnf install -y cmake*.rpm libzip-1.7.3*.rpm
Now, you can run the libzip-devel package with this syntax:
sudo dnf install -y libzip-devel*.rpm
Having resolved the two dependencies, you can install the compression development kit. This completes the second step.
-
Next, you need to apply the proj_devel package for AlmaLinux 9:
wget https://download-ib01.fedoraproject.org/pub/epel/9/Everything/x86_64/Packages/p/proj-devel-8.2.0-1.el9.x86_64.rpm
Now, you can run the proj-devel package with this syntax:
sudo dnf install -y proj-devel-8.2.0-1.el9.x86_64.rpm
-
Next, you need to apply the swig packages for AlmaLinux 9:
wget https://repo.almalinux.org/almalinux/9/CRB/x86_64/os/Packages/swig-4.0.2-8.el9.x86_64.rpm
wget https://repo.almalinux.org/almalinux/9/CRB/x86_64/os/Packages/swig-doc-4.0.2-8.el9.noarch.rpm
wget https://repo.almalinux.org/almalinux/9/CRB/x86_64/os/Packages/swig-gdb-4.0.2-8.el9.x86_64.rpm
sudo dnf install -y swig*.rpm
-
Next, you need to apply the mysql-community-workbench packages for AlmaLinux 9. The download instructions where provided above. You apply the packages with the following command.
sudo dnf install -y mysql-workbench-community-8.0.31-1.el9.x86_64.rpm
Display detailed console log →
Last metadata expiration check: 1:06:04 ago on Sun 20 Nov 2022 03:28:30 PM EST.
Dependencies resolved.
================================================================================
 Package                      Arch      Version           Repository       Size
================================================================================
Installing:
 mysql-workbench-community    x86_64    8.0.31-1.el9      @commandline     39 M
Upgrading:
 proj                         x86_64    8.2.0-1.el9       epel            2.5 M

Transaction Summary
================================================================================
Install  1 Package
Upgrade  1 Package

Total size: 41 M
Total download size: 2.5 M
Downloading Packages:
proj-8.2.0-1.el9.x86_64.rpm                     388 kB/s | 2.5 MB     00:06
--------------------------------------------------------------------------------
Total                                           354 kB/s | 2.5 MB     00:07
Extra Packages for Enterprise Linux 9 - x86_64  1.6 MB/s | 1.6 kB     00:00
Importing GPG key 0x3228467C:
 Userid     : "Fedora (epel9) <epel@fedoraproject.org>"
 Fingerprint: FF8A D134 4597 106E CE81 3B91 8A38 72BF 3228 467C
 From       : /etc/pki/rpm-gpg/RPM-GPG-KEY-EPEL-9
Key imported successfully
Running transaction check
Transaction check succeeded.
Running transaction test
Transaction test succeeded.
Running transaction
Regex version mismatch, expected: 10.40 2022-04-14 actual: 10.37 2021-05-26
Regex version mismatch, expected: 10.40 2022-04-14 actual: 10.37 2021-05-26
  Preparing        :                                                        1/1
  Upgrading        : proj-8.2.0-1.el9.x86_64                                1/3
  Installing       : mysql-workbench-community-8.0.31-1.el9.x86_64          2/3
  Running scriptlet: mysql-workbench-community-8.0.31-1.el9.x86_64          2/3
  Cleanup          : proj-4.8.0-4.el7.x86_64                                3/3
  Running scriptlet: proj-4.8.0-4.el7.x86_64                                3/3
  Verifying        : mysql-workbench-community-8.0.31-1.el9.x86_64          1/3
  Verifying        : proj-8.2.0-1.el9.x86_64                                2/3
  Verifying        : proj-4.8.0-4.el7.x86_64                                3/3

Upgraded:
  proj-8.2.0-1.el9.x86_64
Installed:
  mysql-workbench-community-8.0.31-1.el9.x86_64

Complete!
After applying the dependent and mysql-community-workbench packages, you can launch MySQL Workbench by clicking the Activities symbol in the upper left hand corner. That displays the nine-dots for Show Applications icon. Click the Show Applications icon and choose the MySQL Workbench icon to launch MySQL Workbench.
You’ll be prompted with the following dialog. Just click Don’t show this message again checkbox and the OK button to launch MySQL Workbench.
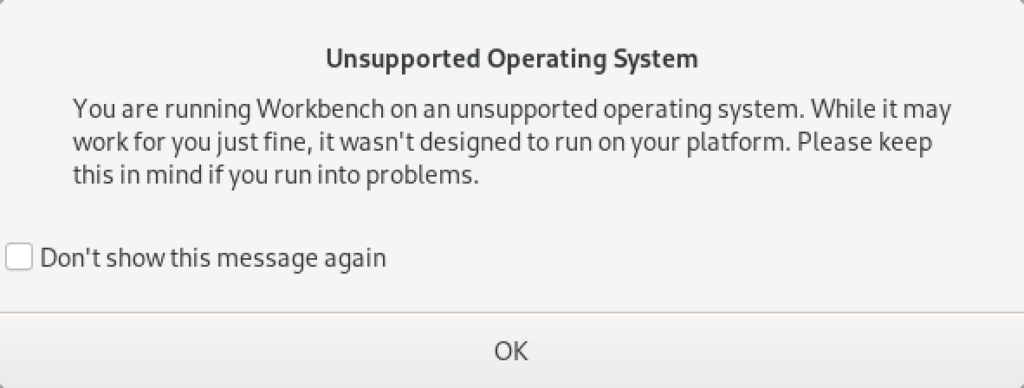
As always, I hope this helps those looking to solve a real problem.
AlmaLinux MySQL+Perl
A quick primer on Perl programs connecting to the MySQL database. It’s another set of coding examples for the AlmaLinux instance that I’m building for students. This one demonstrates basic Perl programs, connecting to MySQL, returning data sets by reference and position, dynamic queries, and input parameters to dynamic queries.
- Naturally, a hello.pl is a great place to start:
#!/usr/bin/perl

# Hello World program.
print "Hello World!\n";
After setting the permissions to -rwxr-xr-x. with this command:
chmod 755 hello.pl
You call it like this from the Command-Line Interface (CLI):
./hello.pl
It prints:
Hello World! - Next, a connect.pl program lets us test the Perl::DBI connection to the MySQL database.
#!/usr/bin/perl

# Import libraries.
use strict;
use warnings;
use v5.10;     # for say() function
use DBI;

# Print with say() function message.
say "Perl MySQL Connect Attempt.";

# MySQL data source name should have a valid database as the
# third argument; this uses the sakila demo database.
my $dsn = "DBI:mysql:sakila";

# Local variables to build the connection string.
my $username = "student";
my $password = "student";

# Set arguments for MySQL database error management.
my %attr = ( PrintError=>0,  # turn off error reporting via warn()
             RaiseError=>1);   # turn on error reporting via die()

# Create connction with a data source name, user name and password.
my $dbh  = DBI->connect($dsn,$username,$password, \%attr);

# Print with say() function valid connection message.
say "Connected to the MySQL database.";
After setting the permissions to -rwxr-xr-x. you call it with this CLI command:
./connect.pl
It prints:
Perl MySQL Connect Attempt.
Connected to the MySQL database.
- After connecting to the database lets query a couple columns by reference notation in a static.pl program. This one just returns the result of the MySQL version() and database() functions.
#!/usr/bin/perl

# Import libraries.
use strict;
use warnings;
use v5.10;     # for say() function
use DBI;

# Print with say() function message.
say "Perl MySQL Connect Attempt.";

# MySQL data source name must have a valid database as the
# third argument; this uses the sakila demo database.
my $dsn = "DBI:mysql:sakila";

# Local variables to build the connection string.
my $username = "student";
my $password = "student";

# Set arguments for MySQL database error management.
my %attr = ( PrintError=>0,  # turn off error reporting via warn()
             RaiseError=>1); # turn on error reporting via die()

# Create connction with a data source name, user name and password.
my $dbh  = DBI->connect($dsn,$username,$password, \%attr);

# Creaet a static SQL statement or query.
my $sth = $dbh->prepare("SELECT version() AS version \
	                 ,      database() AS db_name");

# Execute the static statement.
$sth->execute() or die "Execution failed: $dbh->errstr()";

# Read data and print by reference.
print "----------------------------------------\n";
while (my $ref = $sth->fetchrow_hashref()) {
  print "MySQL Version:  $ref->{'version'}\nMySQL Database: $ref->{'db_name'}\n";
}
print "----------------------------------------\n";

# Close the statement.
$sth->finish;

# Disconnect from database connection.
$dbh->disconnect();

# Print with say() function valid connection message.
say "Connected to the MySQL database.";
After setting the permissions to -rwxr-xr-x. you call it with this CLI command:
./static.pl
It prints:
Perl MySQL Connect Attempt.
----------------------------------------
MySQL Version:  8.0.30
MySQL Database: sakila
----------------------------------------
Connected to the MySQL database.
- After connecting to the database and securing variables by reference notation, lets return the value as an array of rows in a columns.pl program. This one just returns data from the film table of the sakila database. It is a static query because all the values are contained inside the SQL statement.
#!/usr/bin/perl

# Import libraries.
use strict;
use warnings;
use v5.10;     # for say() function
use DBI;

# Print with say() function message.
say "Perl MySQL Connect Attempt.";

# MySQL data source name must have a valid database as the
# third argument; this uses the sakila demo database.
my $dsn = "DBI:mysql:sakila";

# Local variables to build the connection string.
my $username = "student";
my $password = "student";

# Set arguments for MySQL database error management.
my %attr = ( PrintError=>0,  # turn off error reporting via warn()
             RaiseError=>1); # turn on error reporting via die()

# Create connction with a data source name, user name and password.
my $dbh  = DBI->connect($dsn,$username,$password, \%attr);

# Creaet a static SQL statement or query.
my $sth = $dbh->prepare("SELECT title         \
	                 ,      release_year  \
			 ,      rating        \
			 FROM   film          \
			 WHERE  title LIKE 'roc%'");

# Execute the static statement.
$sth->execute() or die "Execution failed: $dbh->errstr()";

# Read data and print by comma-delimited row position.
print "----------------------------------------\n";
while (my @row = $sth->fetchrow_array()) {
  print join(", ", @row), "\n";
}
print "----------------------------------------\n";

# Close the statement.
$sth->finish;

# Disconnect from database connection.
$dbh->disconnect();

# Print with say() function valid connection message.
say "Connected to the MySQL database.";
After setting the permissions to -rwxr-xr-x. you call it with this CLI command:
./columns.pl
It prints:
Perl MySQL Connect Attempt.
----------------------------------------
ROCK INSTINCT, 2006, G
ROCKETEER MOTHER, 2006, PG-13
ROCKY WAR, 2006, PG-13
----------------------------------------
Connected to the MySQL database.
- After connecting to the database and securing variables by reference notation, lets return the value as an array of rows in a dynamic.pl program. This one just returns data from the film table of the sakila database. It is a dynamic query because a string passed to the execute method and that value is bound to a ? placeholder in the SQL statement.
#!/usr/bin/perl

# Import libraries.
use strict;
use warnings;
use v5.10;     # for say() function
use DBI;

# Print with say() function message.
say "Perl MySQL Connect Attempt.";

# MySQL data source name must have a valid database as the
# third argument; this uses the sakila demo database.
my $dsn = "DBI:mysql:sakila";

# Local variables to build the connection string.
my $username = "student";
my $password = "student";

# Set arguments for MySQL database error management.
my %attr = ( PrintError=>0,  # turn off error reporting via warn()
             RaiseError=>1); # turn on error reporting via die()

# Create connction with a data source name, user name and password.
my $dbh  = DBI->connect($dsn,$username,$password, \%attr);

# Creaet a static SQL statement or query.
my $sth = $dbh->prepare("SELECT title         \
	                 ,      release_year  \
			 ,      rating        \
			 FROM   film          \
			 WHERE  title LIKE CONCAT(?,'%')");

# Execute the dynamic statement by providing an input parameter.
$sth->execute('roc') or die "Execution failed: $dbh->errstr()";

# Read data and print by comma-delimited row position.
print "----------------------------------------\n";
while (my @row = $sth->fetchrow_array()) {
  print join(", ", @row), "\n";
}
print "----------------------------------------\n";

# Close the statement.
$sth->finish;

# Disconnect from database connection.
$dbh->disconnect();

# Print with say() function valid connection message.
say "Connected to the MySQL database.";
After setting the permissions to -rwxr-xr-x. you call it with this CLI command:
./dynamic.pl
It prints:
Perl MySQL Connect Attempt.
----------------------------------------
ROCK INSTINCT, 2006, G
ROCKETEER MOTHER, 2006, PG-13
ROCKY WAR, 2006, PG-13
----------------------------------------
Connected to the MySQL database.
- After connecting to the database and securing variables by reference notation, lets return the value as an array of rows in a input.pl program. This one just returns data from the film table of the sakila database. It is a dynamic query because an input parameter is passed to a local variable and the local variable is bound to a ? placeholder in the SQL statement.
#!/usr/bin/perl

# Import libraries.
use strict;
use warnings;
use v5.10;     # for say() function
use DBI;

# Get the index value of the maximum argument in the
# argument.
my $argc = $#ARGV;

# Accept first argument value as parameter.
my $param = $ARGV[$argc];

# Verify variable value assigned.
if (not defined $param) {
  die "Need parameter value.\n";
}

# Print with say() function message.
say "Perl MySQL Connect Attempt.";

# MySQL data source name must have a valid database as the
# third argument; this uses the sakila demo database.
my $dsn = "DBI:mysql:sakila";

# Local variables to build the connection string.
my $username = "student";
my $password = "student";

# Set arguments for MySQL database error management.
my %attr = ( PrintError=>0,  # turn off error reporting via warn()
             RaiseError=>1); # turn on error reporting via die()

# Create connction with a data source name, user name and password.
my $dbh  = DBI->connect($dsn,$username,$password, \%attr);

# Creaet a static SQL statement or query.
my $sth = $dbh->prepare("SELECT title         \
	                 ,      release_year  \
			 ,      rating        \
			 FROM   film          \
			 WHERE  title LIKE CONCAT(?,'%')");

# Execute the static statement.
$sth->execute($param) or die "Execution failed: $dbh->errstr()";

# Read data and print by comma-delimited row position.
print "----------------------------------------\n";
while (my @row = $sth->fetchrow_array()) {
  print join(", ", @row), "\n";
}
print "----------------------------------------\n";

# Close the statement.
$sth->finish;

# Disconnect from database connection.
$dbh->disconnect();

# Print with say() function valid connection message.
say "Connected to the MySQL database.";
After setting the permissions to -rwxr-xr-x. you call it with this CLI command:
./input.pl ta
It prints:
Perl MySQL Connect Attempt.
----------------------------------------
TADPOLE PARK, 2006, PG
TALENTED HOMICIDE, 2006, PG
TARZAN VIDEOTAPE, 2006, PG-13
TAXI KICK, 2006, PG-13
----------------------------------------
Connected to the MySQL database.
I think these examples cover most of the basic elements of writing Perl against the MySQL database. If I missed something you think would be useful, please advise. As always, I hope this helps those working with the MySQL and Perl products.
AlmaLinux LAMP
After installing and configuring MySQL 8.0.30, I installed the Apache Web Server, PHP and the MySQLi packages. Here are the step-by-step instructions after installing and configuring the MySQL Server and provisioning a student user and the sakila and studentdb databases (blog for those steps). After installing the major components, I completed the HTTPS configuration steps for Apache 2.
The installation steps are:
- Install the Apache packages as the sudoer user with this command:
sudo dnf install -y httpd
- Enable Apache as the sudoer user with this command:
chkconfig httpd on
This returns the following completion message:
Note: Forwarding request to 'systemctl enable httpd.service'.
Created symlink /etc/systemd/system/multi-user.target.wants/httpd.service → /usr/lib/systemd/system/httpd.service.
A quick Linux syntax note in the event you want to confirm the link or link target later. You can use the following syntax as a sudoer user to find the link:
ls `find /etc -type l | grep httpd.service 2>/dev/null`
and the following syntax as a sudoer user to find the link’s target:
readlink `find /etc -type l | grep httpd.service 2>/dev/null`
- You still need to start the Apache service unless you reboot the operating system as the sudoer user with this command:
apachectl start - At this point, you need to check the firewall settings because Apache can’t even read localhost at this point. If you’re new to these firewall commands, you should consider reviewing Korbin Brown’s tutorial. As the sudoer user check the Apache available services with this command:
firewall-cmd --zone=public --list-services
It should return:
cockpit dhcpv6-client sshAdd the following services and ports with these commands:
firewall-cmd --zone=public --add-port 80/tcp --permanent
firewall-cmd --zone=public --add-port 443/tcp --permanent
firewall-cmd --zone=public --add-port 8080/tcp --permanent
firewall-cmd --zone=public --add-service=http --permanent
firewall-cmd --zone=public --add-service=https --permanent
Check the open ports with the following command:
firewall-cmd --zone=public --list-ports
It should return:
80/tcp 443/tcp 8080/tcp
Check the open services with the following command:
firewall-cmd --zone=public --list-services
It should return:
cockpit dhcpv6-client http https ssh - Create the hello.htm file in the /var/www/html directory as the root user:
Restart the Apache service as the sudoer user:
apache restart
<html>
<body>
Hello World!
</body>
</html>
Then, you can launch the Firefox browser and type the following:
localhost/hello.htmIt should print “Hello World!” in the browser.
- Install the php package as the sudoer user with the following command:
sudo dnf install -y php
Create the info.php file in the /var/www/html directory as the root user:
<?php
  phpinfo();
?>
apache restart
Then, you can launch the Firefox browser and type the following:
localhost/info.php
It should return the following in the browser.
- Install the php_mysqli package as the sudoer user with the following command:
dnf install -y php-mysqli
Create the mysqli_check.php file in the /var/www/html directory as the root user:
<html>
<header>
<title>Static Query Object Sample</title>
</header>
<body>
<?php
  if (!function_exists('mysqli_init') && !extension_loaded('mysqli')) {
    print 'mysqli not installed.'; }
  else {
    print 'mysqli installed.'; }
  if (!function_exists('pdo_init') && !extension_loaded('pdo')) {
    print '<p>pdo not installed.</p>'; }
  else {
    print '<p>pdo installed.</p>'; }
?>
</script>
</body>
</html>
apache restart
Then, you can launch the Firefox browser and type the following:
localhost/mysqli_check.php
It should print the following in the browser.
mysqli installed.

pdo installed.
- Check if the mod_ssl module is installed. You can use the following command::
rpm -qa | grep mod_ssl
Assuming it’s not installed, you install it like this:
dnf install -y mod_ssl
Recheck after installing mod_ssl with the following command::
rpm -qa | grep mod_ssl
It should print:
mod_ssl-2.4.51-7.el9_0.x86_64
- AlmaLinux and Apache require you to resolve the ServerName values and the public and private keys. Run this command on AlmaLinux to begin verifying and configuring the ServerName values and the public and private keys:
httpd -M | grep ssl
Assuming a new installation consistent with were MySQL and Apache were just configured, you should get the following message:
AH00558: httpd: Could not reliably determine the server's fully qualified domain name, using localhost.localdomain. Set the 'ServerName' directive globally to suppress this message
 ssl_module (shared)
Recheck the failure for more detail with this command:
sudo systemctl status httpd.service -l --no-pager
It should print:
● httpd.service - The Apache HTTP Server Loaded: loaded (/usr/lib/systemd/system/httpd.service; enabled; vendor preset: disabled) Drop-In: /usr/lib/systemd/system/httpd.service.d └─php-fpm.conf Active: active (running) since Sun 2022-11-13 22:39:07 EST; 1h 37min ago Docs: man:httpd.service(8) Main PID: 1351 (httpd) Status: "Total requests: 0; Idle/Busy workers 100/0;Requests/sec: 0; Bytes served/sec: 0 B/sec" Tasks: 213 (limit: 23280) Memory: 43.1M CPU: 2.733s CGroup: /system.slice/httpd.service ├─1351 /usr/sbin/httpd -DFOREGROUND ├─1443 /usr/sbin/httpd -DFOREGROUND ├─1452 /usr/sbin/httpd -DFOREGROUND ├─1456 /usr/sbin/httpd -DFOREGROUND └─1459 /usr/sbin/httpd -DFOREGROUND Nov 13 22:39:06 localhost.localdomain systemd[1]: Starting The Apache HTTP Server... Nov 13 22:39:07 localhost.localdomain httpd[1351]: AH00558: httpd: Could not reliably determine the server's fully qualified domain name, using localhost.localdomain. Set the 'ServerName' directive globally to suppress this message Nov 13 22:39:07 localhost.localdomain systemd[1]: Started The Apache HTTP Server. Nov 13 22:39:07 localhost.localdomain httpd[1351]: Server configured, listening on: port 80It takes the next set of steps to fix the ServerName values.
- Generically, on Linux you need to find the files to modify. You can use the following command from within the /etc directory to find the configuration files in the /etc directory that include ServerName in them. Their values will be proceeded by a # symbol because they’re comments by default.
find /etc -type f | xargs grep -i ServerName
It should return the following:
./httpd/conf.d/ssl.conf:#ServerName www.example.com:443
./httpd/conf/httpd.conf:# ServerName gives the name and port that the server uses to identify itself.
./httpd/conf/httpd.conf:#ServerName www.example.com:80
./dnsmasq.conf:# tftp_servername (the third option to dhcp-boot) and in that
- Add the following line to the ssl.conf file as the root user:
ServerName localhost:443 - Add the following line to the httpd.conf file as the root user:
ServerName localhost:443 - After adding the two values, restart Apache with the following command:
sudo apachectl restart
- Rerun the systemctl command to get the status of the httpd service with this command:
sudo systemctl status httpd.service -l --no-pager
It should print:
● httpd.service - The Apache HTTP Server
     Loaded: loaded (/usr/lib/systemd/system/httpd.service; enabled; vendor preset: disabled)
    Drop-In: /usr/lib/systemd/system/httpd.service.d
             └─php-fpm.conf
     Active: active (running) since Mon 2022-11-14 00:37:03 EST; 3min 23s ago
       Docs: man:httpd.service(8)
   Main PID: 53596 (httpd)
     Status: "Total requests: 0; Idle/Busy workers 100/0;Requests/sec: 0; Bytes served/sec:   0 B/sec"
      Tasks: 213 (limit: 23280)
     Memory: 34.0M
        CPU: 183ms
     CGroup: /system.slice/httpd.service
             ├─53596 /usr/sbin/httpd -DFOREGROUND
             ├─53597 /usr/sbin/httpd -DFOREGROUND
             ├─53598 /usr/sbin/httpd -DFOREGROUND
             ├─53599 /usr/sbin/httpd -DFOREGROUND
             └─53600 /usr/sbin/httpd -DFOREGROUND

Nov 14 00:37:03 localhost.localdomain systemd[1]: Starting The Apache HTTP Server...
Nov 14 00:37:03 localhost.localdomain systemd[1]: Started The Apache HTTP Server.
Nov 14 00:37:03 localhost.localdomain httpd[53596]: Server configured, listening on: port 443, port 80
- Generically, on Linux you need to find the files to modify. You can use the following command from within the /etc directory to find the configuration files in the /etc directory that include ServerName in them. Their values will be proceeded by a # symbol because they’re comments by default.
- Your next step requires setting up an SSL Certificate. Consistent with the design to build a standalone test system that uses a DHCP assigned IP address to resolve a localhost server name, you require the following two tasks to create an openssl self-signed certificate.
- On the new instance, you create a private subdirectory with this command:
sudo mkdir /etc/ssl/private
- Then, you can build a self-signed certificate with this command:
sudo openssl req -x509 -nodes -days 365 -newkey rsa:2048 -keyout /etc/ssl/private/apache-selfsigned.key -out /etc/ssl/certs/apache-selfsigned.crt
The openssl command will prompt you for these values to create a private key:
You are about to be asked to enter information that will be incorporated
into your certificate request.
What you are about to enter is what is called a Distinguished Name or a DN.
There are quite a few fields but you can leave some blank
For some fields there will be a default value,
If you enter '.', the field will be left blank.
-----
Country Name (2 letter code) [XX]:
State or Province Name (full name) []:
Locality Name (eg, city) [Default City]:
Organization Name (eg, company) [Default Company Ltd]:
Organizational Unit Name (eg, section) []:
Common Name (eg, your name or your server's hostname) []:
Email Address []:
- On the new instance, you create a private subdirectory with this command:
- Your last step requires three tasks to configure Apache to use SSL.
- You need to create the following sites-available directory with the following command as the root user:
mkdir /etc/httpd/sites-available
- Add the following localhost.conf/etc/httpd/sites-available directory:
<VirtualHost *:443>
   ServerName localhost
   DocumentRoot /var/www/html

   SSLEngine on
   SSLCertificateFile /etc/ssl/certs/localhost.crt
   SSLCertificateKeyFile /etc/ssl/private/apache-selfsigned.key
</VirtualHost>
- Restart Apache with the following command:
sudo apachectl restart
- You need to create the following sites-available directory with the following command as the root user:
- After configuring everything, let’s test our self-signed HTTPS skunkworks. Launch the default Firefox browser and enter the following URL, which uses the mysql_check.php file from step #7:
https://localhost/mysqli_check.php
It will raise a warning message about a potential security risk, which is caused by our self-signed certificate. Click the Advanced… button and will see the option to Accept the Risk and Continue. If you want to use the self-signed and contained AlmaLinux LAMP stack for developer testing, accept the risk.

Having assumed the risk, the confirmation of the configuration will be displayed as follows:

As always, I hope this helps those looking to install MySQL, PHP, on AlmaLinux.
AlmaLinux MySQL+Python
After installing and configuring MySQL 8.0.30, I installed the Python connector. During that process on AlmaLinux, there were several changes since I last installed the Python’s mysql module. Here are the step-by-step instructions after installing and configuring MySQL Server (blog for those steps).
Using the MySQL Connector/Python X DevAPI Reference, you must install the pip utility before you install the library. You install the pip library as a sudoer user with the following command:
sudo yum install -y pip |
Then, using the pip utility as a sudoer user install the mysql-connector-python module with the following command:
sudo pip install mysql-connector-python |
Please note that this type of library installation can cause problems when you maintain multiple testing environments. If you plan to maintain multiple testing environments, please install this library in a virtual environment.
You create a bare-bones Python connection test program, like connect.py below:
# Import the library. import mysql.connector from mysql.connector import errorcode try: # Open connection. cnx = mysql.connector.connect(user='student', password='student', host='127.0.0.1', database='studentdb') # Print the value. print("Database connection resolved.") # Handle exception and close connection. except mysql.connector.Error as e: if e.errno == errorcode.ER_ACCESS_DENIED_ERROR: print("Something is wrong with your user name or password") elif e.errno == errorcode.ER_BAD_DB_ERROR: print("Database does not exist") else: print(e) # Close the connection when the try block completes. else: cnx.close() |
You test the connect.py program with this command:
python connect.py |
It’ll return the following provided you provisioned the student user and studentdb database:
Database connection resolved. |
If you’d like to run it without calling the python executable, you can add the following as the first line:
#/usr/bin/python |
and, change the default file permissions from
-rw-rw-r--. 1 student student 717 Oct 30 13:57 connect.py |
with the chmod command to
-rwxr-xr-x. 1 student student 717 Oct 30 13:57 connect.py |
These instructions should set you up to develop Python code against your AlmaLinux MySQL studentdb database. You use this syntax, assuming a default $PATH environment variable that excludes the present working directory.
./connect.py |
As always, I hope this helps those trying to get a complete solution.
MySQL on AlmaLinux
After installing AlmaLinux in a VMware VM on my MacBook Pro (Intel Chip), and updating the packages with the following command:
sudo dnf upgrade --refresh -y |
MySQL was first on my installation and configuration list. Here are the commands to install and configure it on AlmaLinux.
Install the MySQL Server packages and dependents:
sudo dnf install mysql mysql-server -y |
Install the MySQL service utilities with the initscripts package, using the following command:
sudo yum install -y initscripts |
Start the MySQL daemon with the following command:
sudo service mysqld start |
Connect and verify the root user can connect to the database. At this point, you’ve not set the root user’s password and should use the following syntax:
mysql -uroot |
It should connect and display:
Welcome to the MySQL monitor. Commands end with ; or \g. Your MySQL connection id is 10 Server version: 8.0.30 Source distribution Copyright (c) 2000, 2022, Oracle and/or its affiliates. Oracle is a registered trademark of Oracle Corporation and/or its affiliates. Other names may be trademarks of their respective owners. Type 'help;' or '\h' for help. Type '\c' to clear the current input statement. mysql> |
Exit MySQL and run the following command:
mysql_secure_installation |
It’ll run you through the following prompts, which you may change to suit your installation. My choices are a trivial student database isolated inside a VM.
Securing the MySQL server deployment. Connecting to MySQL using a blank password. VALIDATE PASSWORD COMPONENT can be used to test passwords and improve security. It checks the strength of password and allows the users to set only those passwords which are secure enough. Would you like to setup VALIDATE PASSWORD component? Press y|Y for Yes, any other key for No: n Please set the password for root here. New password: Re-enter new password: By default, a MySQL installation has an anonymous user, allowing anyone to log into MySQL without having to have a user account created for them. This is intended only for testing, and to make the installation go a bit smoother. You should remove them before moving into a production environment. Remove anonymous users? (Press y|Y for Yes, any other key for No) : y Success. Normally, root should only be allowed to connect from 'localhost'. This ensures that someone cannot guess at the root password from the network. Disallow root login remotely? (Press y|Y for Yes, any other key for No) : y Success. By default, MySQL comes with a database named 'test' that anyone can access. This is also intended only for testing, and should be removed before moving into a production environment. Remove test database and access to it? (Press y|Y for Yes, any other key for No) : y - Dropping test database... Success. - Removing privileges on test database... Success. Reloading the privilege tables will ensure that all changes made so far will take effect immediately. Reload privilege tables now? (Press y|Y for Yes, any other key for No) : y Success. All done! |
The next step requires setting up the sample sakila and studentdb database. The syntax has changed from prior releases. Here are the new three steps:
- Grant the root user the privilege to grant to others, which root does not have by default. You use the following syntax as the MySQL root user:
mysql> GRANT ALL ON *.* TO 'root'@'localhost';
- Download the sakila database, which you can download from this site. Click on the sakila database’s TGZ download.

When you download the sakila zip file it creates a sakila-db folder in the /home/student/Downloads directory. Copy the sakila-db folder into the /home/student/Data/sakila directory. Then, change to the /home/student/Data/sakila/sakila-db directory, connect to mysql as the root user, and run the following command:
mysql> SOURCE /home/student/Data/sakila/sakila-db/sakila-schema.sql
mysql> SOURCE /home/student/Data/sakila/sakila-db/sakila-data.sql
- Create the studentdb database with the following command as the MySQL root user:
mysql> CREATE DATABASE studentdb; - Create the user with a clear English password and grant the user student full privileges on the sakila and studentdb databases:
mysql> CREATE USER 'student'@'localhost' IDENTIFIED WITH mysql_native_password BY 'student';
mysql> GRANT ALL ON studentdb.* TO 'student'@'localhost';
mysql> GRANT ALL ON sakila.* TO 'student'@'localhost';
You can now connect to a sandboxed sakila database with the student user’s credentials, like:
mysql -ustudent -p -Dsakila |
or, you can now connect to a sandboxed studentdb database with the student user’s credentials, like:
mysql -ustudent -p -Dstudentdb |
As always, I hope code and step complete instructions help others get things done more quickly.
