Archive for the ‘oracle installation’ tag
Oracle 12c on Windows 7
Here are step-by-step instructions for installing Oracle Database 12c Release 1 on Windows 7. This is more or less to install a Desktop version of Oracle 12c. I posted other versions for Oracle Database 11gR1 and 11gR2. While some report that they installation doesn’t work for them, its typically because they didn’t configured their Windows 7 environment.
Here are some Windows 7 configuration caveats before you perform this installation, and they are:
Windows 7 Configuration Steps
- Make sure you have at least 3 GB of memory on your Windows PC, or that you can allocate 4 GB of memory to your virtual machine for Windows.
- Install Oracle’s JDK 7 for 64-bit OS with NetBeans and 32-bit OS when running on a 64-bit machine. The installer is smart enough to only install NetBeans once. The JDK 7 32-bit installation supports SQL Developer.
- Disable Microsoft’s User Access Controls (UAC). I blogged about a set of Windows 7 gripes, and the second point shows you the screen shots that let you disable UAC on Windows 7.
- Configure your
C:\Windows\System32\drivers\etc\hostsfile. Use lines 1 through 3 when you’re using a DHCP IP address, and lines 1 through 4 when you’re using a static IP address. If you want to set a static IP address, check this old post on how to set a static IP address. Please note that thehostnameneeds to be lowercase.
1 2 3 | 127.0.0.1 localhost
::1 localhost
127.0.0.1 oracle12c oracle12c.techtinker.com |
Line 4, only use for a static IP address, would look like this on the 192.168.* subdomain:
4 | 192.168.0.5 oracle12c oracle12c.techtinker.com |
- Create a user account name that doesn’t have a white space, like
McLaughlinMin the screen shots, and assign it Administrator privileges. During the install, you’ll be prompted to create a non-administrator account to start Oracle.
Oracle Database 12c Release 1 Installation Steps
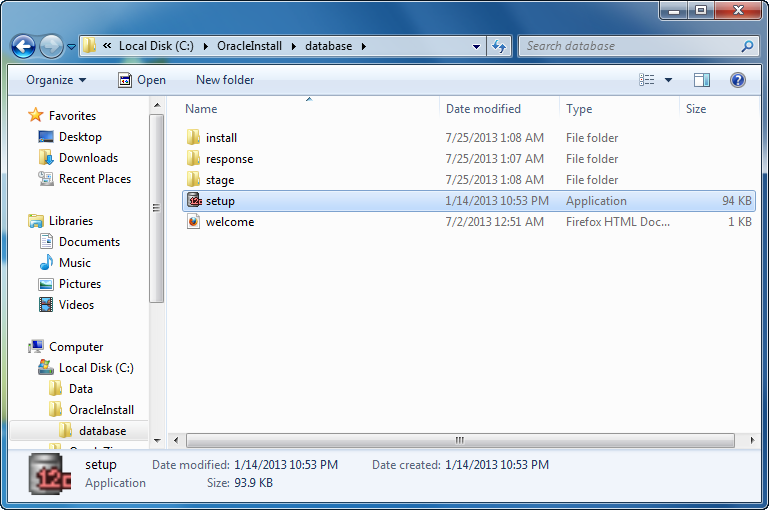
- The first thing you need to do is unzip the two zip files into a common directory. I’ve chosen to create an OracleInstall folder. Oracle creates a database folder inside it. Within the database folder, click the Setup file to launch the Oracle Installer.
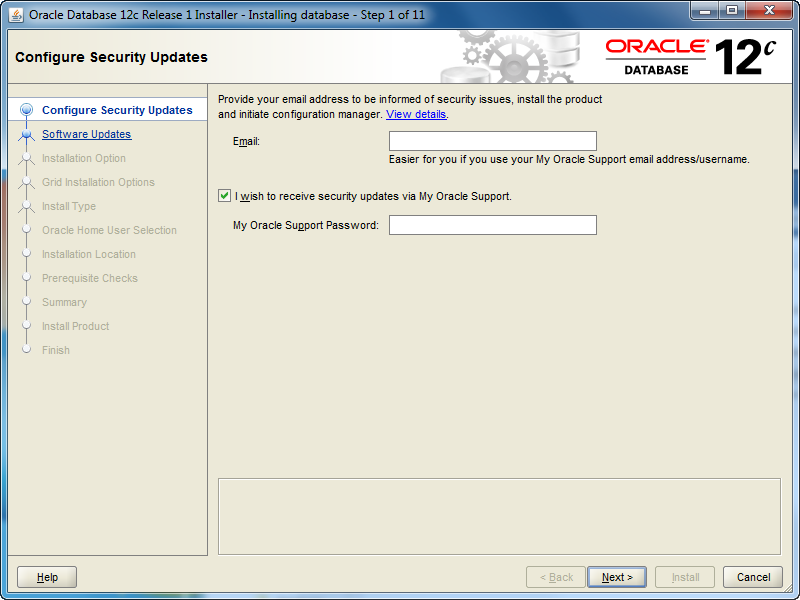
- After launching the Oracle Installer, the Configure Security Updates screen is your first stop. You may provide your email (attached to your Oracle Support Contract) and Oracle Support password, or uncheck the box and you can simply install a Desktop test environment. Click the Next button to proceed.
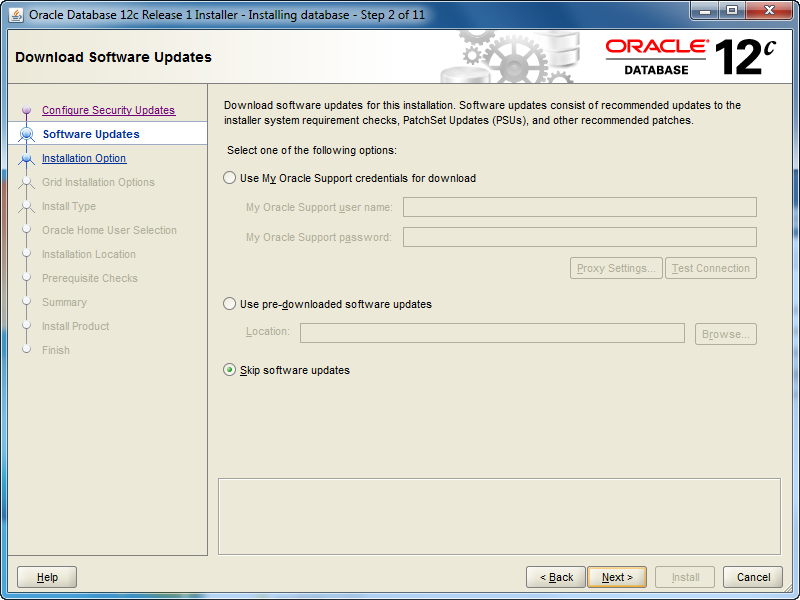
- The Software Updates is the next screen. If you want to check for updates, click and enter your Oracle Support credentials. If you want to install the base release, click the Skip software updates radio button. After making a choice about what you want to do with updates, click the Next button to proceed with the install.
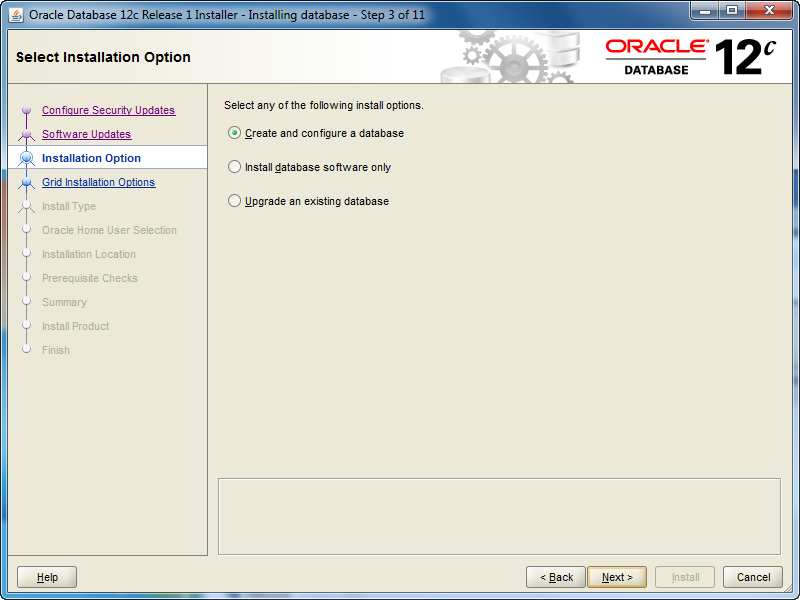
- The Installation Option screen lets you chose whether you want to Create and configure a database (sample database), Intall database software only, or Upgrade an existing database. Check the appropriate radio button and then click the Next button to proceed with the install.
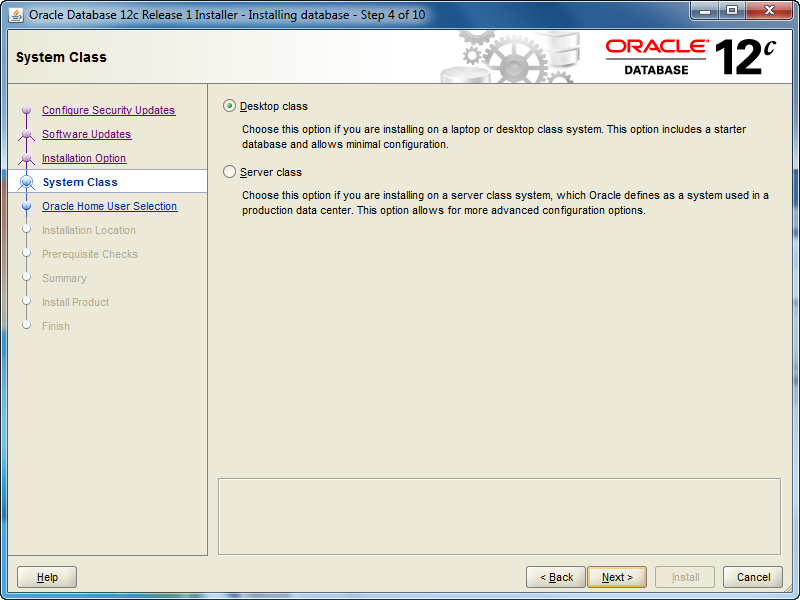
- The System Class screen lets you chose whether you want to install a Desktop class (ideal for develoers to play around in) or a Server class. Check the appropriate radio button and then click the Next button to proceed with the install.
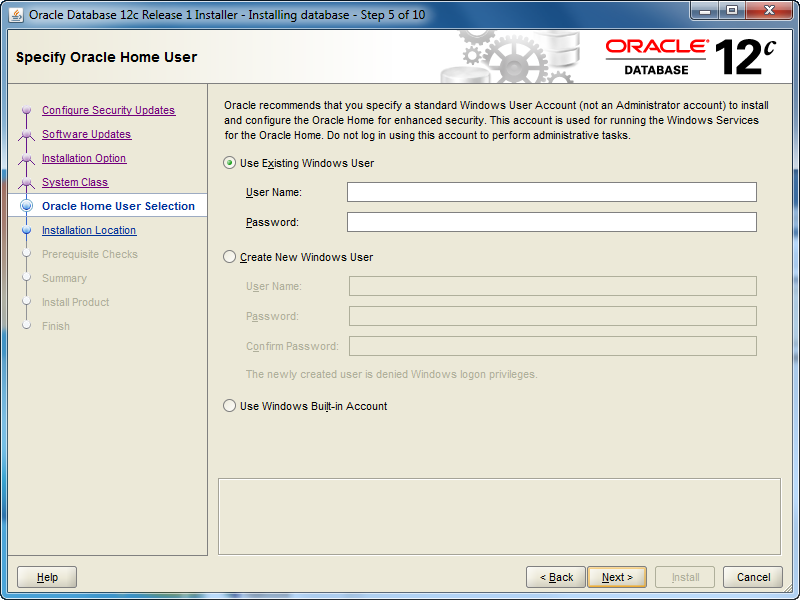
- The Oracle Home User Selection screen lets you chose whether you want to Use Existing Windows User (that’s fine if you created one previously), Create New Windows User (what I’ll do next), or Use Windows Built-in Account. Check the appropriate radio button and then click the Next button to proceed with the install.
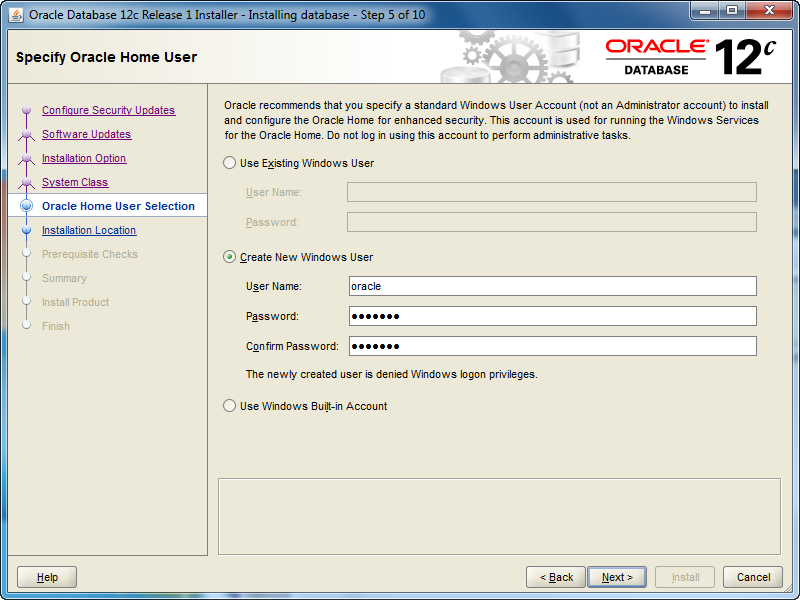
- The Oracle Home User Selection screen lets you Create New Windows User, and that’s what I’ve done with the
oracleuser (it could be whatever you like). Click the Next button to proceed with the install.
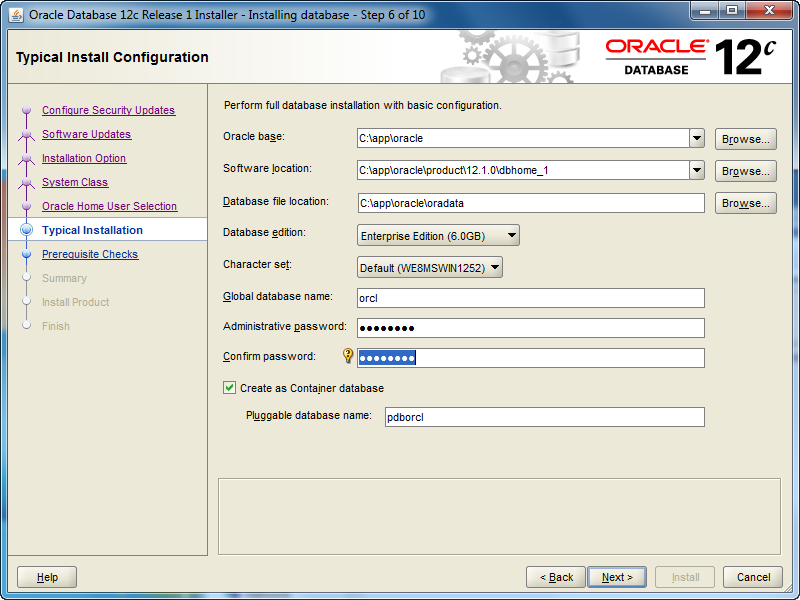
- The Typical Install Configuration screen lets you customize your installation. I’ve only opted to provide an Oracle compliant password while accepting the defaults. Click the Next button to proceed with the install.
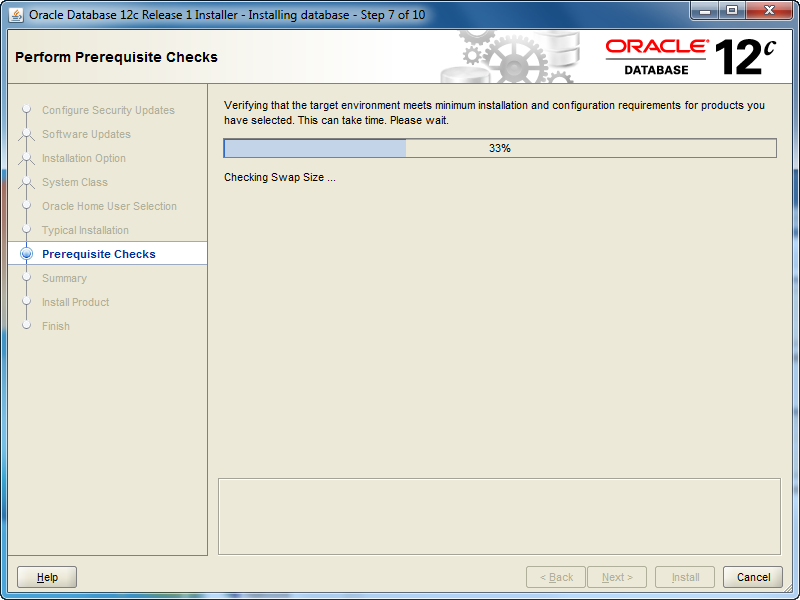
- The Perform Prerequisite Checks screen initially displays a task bar. You need some patience, it’ll show you the next screen if everything is fine.
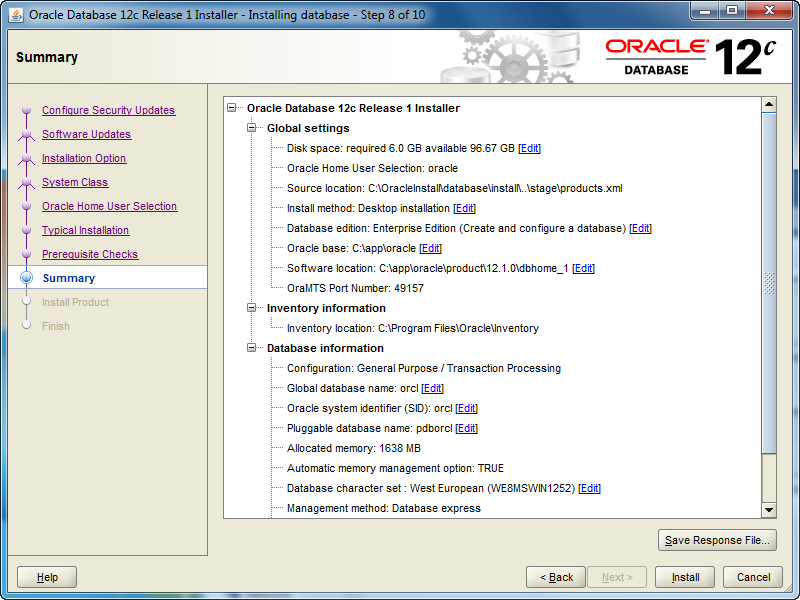
- The Summary screen tells you what you’re going to install. Read it over, save a copy for later, and when everything is right then click the Next button to install.
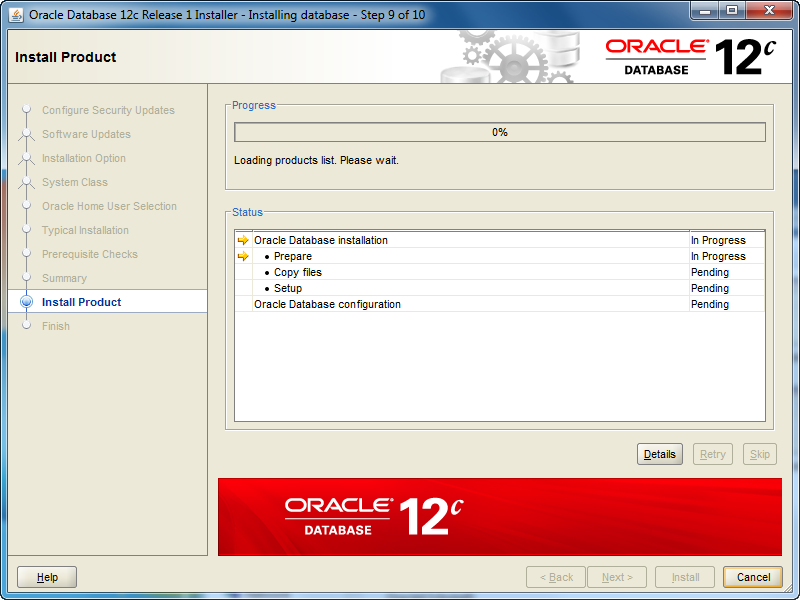
- The Install Product screen tells you what you’re installing and it can take some time. Don’t walk away too quickly because you’re most likely going to have to allow access for the installation to complete successfully.
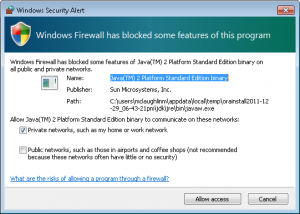
- You should see two Windows Security Alerts with the installation. Click the Allow access button to continue successfully.
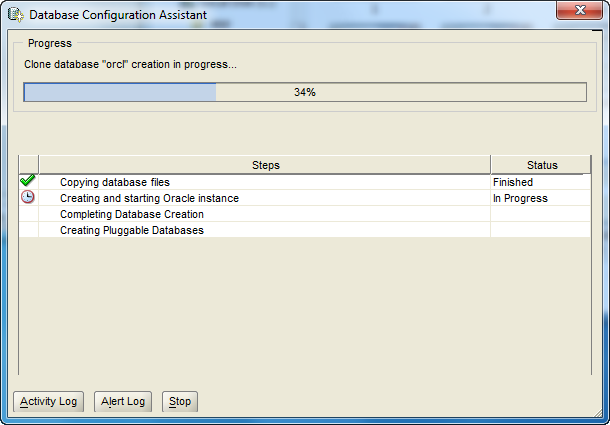
- The Database Configuration Assistant screen tells you that you’ve been successful to this point. Although, this is where several errors can occur when you failed to correctly configure Windows 7 before installation. This takes some time to run, here’s where you can take a break.
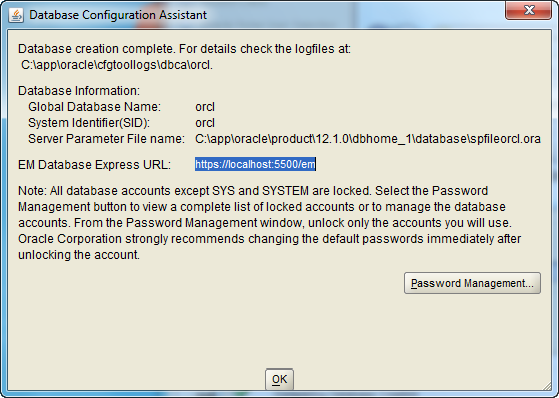
- The second Database Configuration Assistant screen lets you configure passwords for the database accounts. I’m skipping that by accepting the defaults and clicking the OK button to proceed.
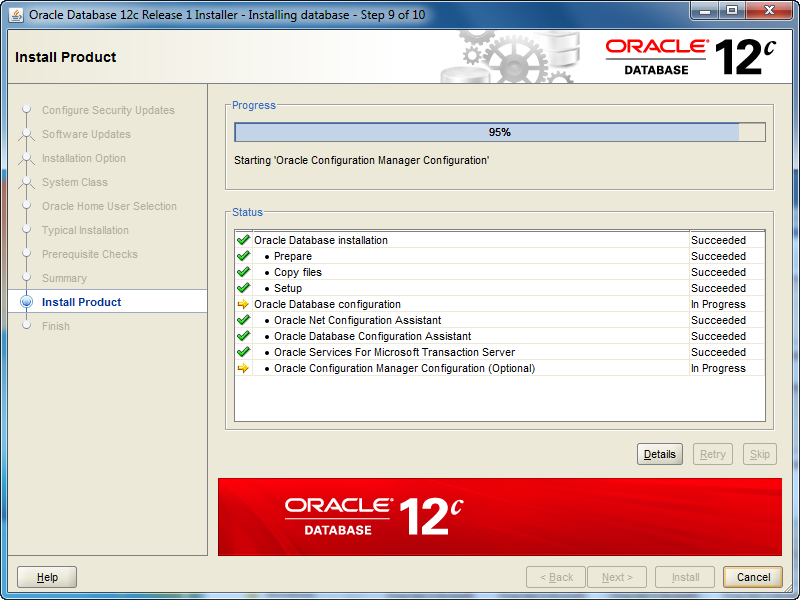
- The Install Product screen reappears while most of the database cloning operation has finished. At this point, it starts configuring the Oracle Enterprise Manager (OEM). It can take a couple minutes to complete. Simply monitor it.

- The Finish screen appears after everything has worked. Click the Close button to finish the install.
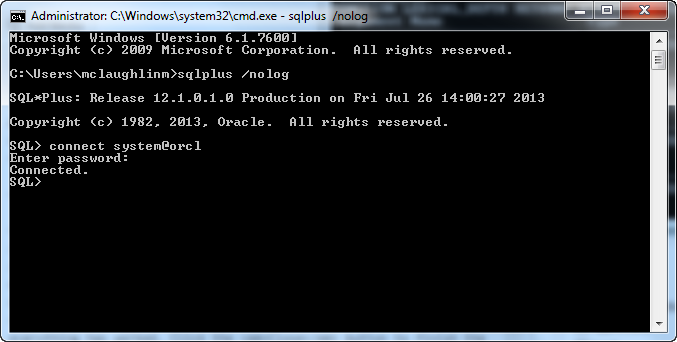
- Now, you can open a Windows command shell and call the
sqlplusexecutable with a/nologoption (denies login credentials form OS history files). Then, you can connect using the TNSorclalias, which verifies your networkinglistener.oraandtnsnames.orafiles are setup correctly. You should see the following in the command shell when the installation was successful.
C:\Users\mclaughlinm>sqlplus /nolog SQL*Plus: Release 12.1.0.1.0 Production on Fri Jul 26 02:00:19 2013 Copyright (c) 1982, 2013, Oracle. All rights reserved. Connected to: Oracle Database 12c Enterprise Edition Release 12.1.0.1.0 - 64bit Production With the Partitioning, OLAP, Advanced Analytics and Real Application Testing options SQL> connect system@orcl Enter password: Connected. |
Oracle 12c changes the dynamics on users. You now have two types of databases. One is a Container Database (CDB) and the other is a Pluggable Database (PDB). While Oracle’s default container users, like SYS, SYSTEM, and so forth, remain unchanged, you create new CDB users with a C##<user_name> preface. PDB users are a different matter, and they can retain the same format used previously for user-defined users. You set PDB users as the ADMIN user for a pluggable database when you provision it.
Subsequent to this post, I’ve posted how you can provision an Oracle 12c Pluggable Database (PDB), and you can find it in this post. AS always, I hope that this helps those trying to find a quick shortcut on reading the instructions. 😉
Oracle 11gR2 on Windows 7
Here are step-by-step instructions for installing Oracle Database 11g Release 2 on Windows 7 (Oracle 12c is here). It’s provided in response to questions posted on my step-by-step instructions for installing Oracle 11gR1 on Windows 7. For reference, I posted the former because it didn’t work without intervention. I hadn’t updated step-by-step instructions because Oracle Database 11g Release 2 has always worked for me when installing on Windows 7.
A number of students and blog readers have mentioned that it didn’t work for them. My guess is that they had configuration issues within the Windows 7 environment. There are some Windows 7 configuration caveats before you perform this installation, and they are:
Windows 7 Configuration Steps
- Make sure you have at least 3 GB of memory on your Windows PC, or that you can allocate 4 GB of memory to your virtual machine (the latter typically requires 8 GB of real memory to avoid extensive disk caching of memory).
- Install Oracle’s SJDK and run time for Java 6 or 7 on Windows 7 (I installed Java 7). Although either work with the database, you need the Java 6 SDK 32-bit version (at least SJDK 1.6.0_4) for Oracle SQL Developer. This means you need to download the 32-bit version even when you’re installing the 64-bit Oracle Database 11g version. The SQL Developer fix is found in this blog post.
- Disable Microsoft’s User Access Controls (UAC). I blogged about a set of Windows 7 gripes, and the second point shows you the screen shots that let you disable UAC on Windows 7.
- Configure your
C:\Windows\System32\drivers\etc\hostsfile. Use lines 1 through 3 when you’re using a DHCP IP address, and lines 1 through 4 when you’re using a static IP address. If you want to set a static IP address, check this old post on how to set a static IP address. Please note that thehostnameneeds to be lowercase.
1 2 3 4 | 127.0.0.1 localhost
::1 localhost
127.0.0.1 mclaughlinmysql mclaughlinmysql.techtinker.com
172.26.126.131 mclaughlinmysql mclaughlinmysql.techtinker.com |
- Create a user account name that doesn’t have a white space, like
McLaughlinMin the screen shots, and assign it Administrator privileges. - The Oracle Enterprise Manager (OEM) uses port ranges above 5,000, which according to Microsoft requires that you set
MaxUserPortkey in the Windows Registry. You can find more details at this Microsoft Support page. Personally, I haven’t found this necessary and after adding it to please somebody without setting it everything ran fine in Windows 7.
Registry key: HKEY_LOCAL_MACHINE\SYSTEM\CurrentControlSet\Services\Tcpip\Parameters
| Value Name | MaxUserPort |
| Value Type | DWORD |
| Value Data | 65534 |
| Value Range | 5000-65534 (decimal) |
| Value Default | 0x1388 (5000 decimal) |
| Description | This parameter controls the maximum port number that is used when a program requests any available user port from the system. Typically, ephemeral (short-lived) ports are allocated between the values of 1024 and 5000 inclusive. After the release of security bulletin MS08-037, the behavior of Windows Server 2003 was changed to more closely match that of Windows Server 2008 and Windows Vista. For more information about Microsoft security bulletin MS08-037 |
Oracle 11g Release 2 Installation Steps
- The Oracle Database 11g Release 2 files are broken down into two zip files on the Oracle site. That means you need to download both files, and then expand them into an installation directory. I called my installation directory
C:\OracleInstall, but you can call it whatever works for you. Here’s a screen shot of the directory after expanding both compressed files (done with WinZip 15).
database directory (or folder). Within the installation folder (C:\OracleInstall\database), you double click on the oui icon to launch (start) the Oracle Universal Installer. It’ll open a command prompt that may dwell on the screen for a few seconds up to maybe fifteen seconds.

- It’s a good idea to provide an email address for security updates no matter what. You can uncheck the box if you don’t want updates via Oracle Support Services. Click the Next button to continue.

- Most developers want to Create and configure a database. If that’s your desire, leave the default radio button checked. Click the Next button to continue.

- Most developers install their test instance on a desktop or laptop. If that’s your desire, leave the default Desktop Class radio button checked. Click the Next button to continue.

- These are default settings and generally the easiest to use. I’d suggest you change the Character Set drop down to Unicode. Then, enter a password twice. Oracle requires that you use at least one capital letter and one number in a 6 character or more long password. Click the Next button to continue.

- The next screen is a progress bar that checks for prerequisites. You shouldn’t have to do anything here because it automatically advances you to the next dialog screen. This generally takes less than a minute to run but can take two or so. If you’re much beyond 3 minutes there may be a resource problem with your Windows PC or virtual machine.

- This shows you all the selected values for the installation. Unless you want to abort the installation, click the Finish button to proceed.

- This screen is the main progress bar, and you’ll be here somewhere between 5 and 10 minutes. The downside is that there are some dialogs that will popup during this phase and you need to authorize them, so it’s a bad time to take a break.

- The first popup screen requires you to authorize the Java runtime to call home. You should click the Allow Access button to proceed.

- When the progress bar starts configuring the instance, failures can occur. The first may occur during the network configuration, which typically happens if you didn’t preconfigure the
hostsfile. You don’t need to do anything but watch here unless the installer triggers an error.

- The following progress bar is launched by the Oracle Database Configuration Assistant. It typically runs without a problem. You don’t need to do anything but watch here unless the installer triggers an error. This takes a few minutes, and unfortunately requires you to stick aroung to again authorize Java.

- The second popup screen requires you to authorize the Java runtime to call home. You should click the Allow Access button to proceed.

- The third and last popup screen asks you to whether you want to open other scheme. Generally, you should click the OK button to proceed.

- The next dialog shows you that the network and database instances are configured. It’s also running the OEM (Oracle Enterprise Manager) installation. You can wait here but it won’t be a long wait.

- This is the last dialog and says you’ve installed Oracle Database 11g Release 2 successfully. You can the Close button to complete the installation.
The next step is probably running Oracle Enterprise Manager (OEM). I’ve recently added this post, which arose from a question. It shows you how to run the DB Console.
Also, it’s possible that you could have a problem launching SQL Developer. If so, check how to set the proper JVM for SQL Developer post.
As always, I hope this helps folks.
Oracle 11g on Windows 7
I finally got around to installing Oracle 11g on Windows 7 Professional Edition, 64-bit (click here for Oracle 11g Release 2 on Windows 7). The only catch was that the Oracle 11g (11.1.0.7) installer validates only against Windows 5.0, 5.1, 5.2 or 6.0. Windows 7 is actually Windows Code Base 6.1, as seen in this screen shot after successful installation:

With that knowledge, first you should download the software from Oracle’s web site. You should unzip the contents into another directory. I used a C:\Stage directory. Inside that you’ll find the database directory, and it should look like this:

- Click on the
setupicon to launch the installer. You should then see the following screen shot. Enter a password for theSYSandSYSTEMusers (if you’re coming to Oracle from a MySQL background they’re like therootuser in MySQL). When you’ve entered a matching password in both fields, the Install button becomes active. Click the Install button to proceed.

- In this screen, you’re prompted for your Email and MetaLink Password. If this is a test database (a throw away instance without any real data), you can uncheck the box for automatic security updates. You should enter a password even for test databases. Click the Next button to proceed.

- You’ll only see this failure if you’re installing Oracle 11g (11.1.0.7) on a Windows 7 operating system, which is actually version 6.1 according to their code control numbering. You simply check the Checking operating system requirements … and Checking service pack requirements … to override the prerequisite checks. Another error that you may encounter is related to networking. It is a warning and occurs when you’re operating system uses DHCP to get its IP address. You really should configure the operating system with a static IP address. You can set a static IP address in Windows 7 with these instructions.


- At this point, you’ll get a Windows System Alert asking you to unblock the installer’s
javaw.exeprogram. You must grant the access or forget about installing Oracle 11g. Click the Allow access button to proceed.

- The dialog tells you what will be installed. Click the Install button to proceed.

- This is the installation progress dialog. It’s running while the Oracle Installer lays down the operating system files for the database management system. It takes about 8 to 9 minutes, so stretch your legs if you want to take a break. When it’s 100% complete, click the Next button to continue.

- After the installation, you’ll see the first of the Configuration Assistants, which is the Oracle Net Configuration Assistant (unfortunately, I didn’t capture that screen shot but I provided a temporary substitute until I re-install it). Provided everything happens successfully, it’ll move to the next step without your intervention.

java.exe proceed with the installation.

- This one is exactly where it belongs. It means you have approximately a 5 to 6 minute break while a sample database instance is cloned for you. The cloning process copies a sample compressed database from the installation staging area to your local operating system.


- The last Configuration Assistant is the Oracle Configuration Manager Configuration. It’s a short process, it configures the cloned sample database against your installation names and passwords. When it completes it enables the Next button. Click the Next button to complete the installation.

- You’ve finally reached almost the end of the installation. Click the Exit button on this dialog to proceed to the “are you sure” dialog box.


You’ve successfully installed Oracle 11g on Windows 7.
