Find Type Dependents
Somebody thought it was nice to show how to drop object type dependents in Oracle Database 11g, but they thought I should show how you discover dependent object types first. More or less, they were concerned how they discover type dependents when they raise the following error:
DROP TYPE item_object * ERROR at line 1: ORA-02303: cannot DROP OR REPLACE a TYPE WITH TYPE OR TABLE dependents |
They had a great point, so here I’m providing and object table function (object table functions are covered in Chapter 8 of Oracle Database 12c PL/SQL Programming book) that displays an object dependency tree.
Unlike table functions in Microsoft SQL Server or PostgreSQL, Oracle requires that you create the object type before you can return a result set table from a parameter-driven function. Here’s the object type for this object table function:
1 2 3 4 5 6 7 8 9 10 11 | -- Create an object type that mimics a record structure. CREATE OR REPLACE TYPE type_tree IS object ( level_id NUMBER , type_name VARCHAR2(30) , object VARCHAR2(10) , parent_type VARCHAR2(30)); / -- Create a UDT Collection. CREATE OR REPLACE TYPE type_tree_table IS TABLE OF type_tree; / |
Now, you can create the object table function that returns an object type dependent tree. This function uses branching recursion because you need to walk the dependency tree. The cursor against the three types of metadata in the database catalog lets us walk the tree. Each object type, and their dependents may have:
- A dependent object type
- A dependent collection, which uses the object type as a base object type.
- A dependent schema function, which uses the object type as a parameter data type or return data type.
- A dependent schema procedure, which uses the object type as a parameter data type.
- A dependent package, which contains a function or procedure using the object type as a parameter data type, or a function using the object type as a return data type.
Here’s the type_dependent function that walks the tree and displays the hierarchical results:
1 2 3 4 5 6 7 8 9 10 11 12 13 14 15 16 17 18 19 20 21 22 23 24 25 26 27 28 29 30 31 32 33 34 35 36 37 38 39 40 41 42 43 44 45 46 47 48 49 50 51 52 53 54 55 56 57 58 59 60 61 62 63 64 65 66 67 68 69 70 71 72 73 74 75 76 77 78 79 80 81 82 83 84 85 86 87 88 89 90 91 92 93 94 95 96 97 98 99 100 101 102 103 104 105 106 107 108 109 110 111 112 113 114 115 116 117 118 119 120 121 122 123 124 125 126 127 | CREATE OR REPLACE FUNCTION type_dependents ( pv_base_object_type VARCHAR2 , pv_level_id NUMBER DEFAULT 1 , pv_collection TYPE_TREE_TABLE DEFAULT NULL ) RETURN TYPE_TREE_TABLE IS /* Declare a return data type. */ lv_level_id NUMBER; /* Declare item type. */ lv_type_name VARCHAR2(30); lv_object_type VARCHAR2(30); lv_parent_type VARCHAR2(30); /* Declare a collection variable. */ lv_collection TYPE_TREE_TABLE := type_tree_table(); lv_incoming TYPE_TREE_TABLE := type_tree_table(); /* The first part of the cursor finds the dependent type names of complex object types, and the second part of the cursor finds the dependent collection types. Effectively the set operator finds two distinct branches because you may use any base type as an element of a complex object or of a collection. */ CURSOR base_type ( cv_level_id NUMBER , cv_base_type VARCHAR2 ) IS SELECT (cv_level_id) AS level_id , LPAD(' ', 2*(cv_level_id - 1)) || ut.type_name AS type_name , ut.typecode AS object_type , NULL AS parent_type FROM user_types ut WHERE ut.type_name = cv_base_type; CURSOR dependent_type ( cv_level_id NUMBER , cv_base_type VARCHAR2 ) IS SELECT cv_level_id AS level_id , LPAD(' ', 2*(cv_level_id - 1)) || uta.type_name AS type_name , ut.typecode AS object_type , ut.type_name AS parent_type FROM user_type_attrs uta INNER JOIN user_types ut ON uta.attr_type_name = ut.type_name WHERE ut.type_name = cv_base_type UNION ALL SELECT cv_level_id AS level_id , LPAD(' ', 2*(cv_level_id - 1)) || uct.type_name AS type_name , CASE WHEN uct.coll_type = 'TABLE' THEN uct.coll_type ELSE 'VARRAY' END AS object_type , ut.type_name AS parent_type FROM user_types ut INNER JOIN user_coll_types uct ON ut.type_name = uct.elem_type_name WHERE uct.elem_type_name = cv_base_type UNION ALL SELECT cv_level_id AS level_id , CASE WHEN package_name IS NULL THEN LPAD(' ', 2*(cv_level_id - 1)) || ua.object_name ELSE LPAD(' ', 2*(cv_level_id - 1)) || ua.package_name END AS type_name , CASE WHEN package_name IS NULL THEN uo.object_type ELSE 'PACKAGE' END AS object_type , ua.type_name AS parent_type FROM user_arguments ua LEFT JOIN user_objects uo ON ua.package_name = uo.object_name OR ua.object_name = uo.object_name WHERE type_name = cv_base_type ORDER BY object_type; BEGIN /* Set the call level indicator. */ lv_level_id := pv_level_id; /* Check if the collection holds values, which should occur in recursive calls. */ IF pv_collection IS NOT NULL THEN lv_collection := pv_collection; ELSE /* Open the base type and record level 1. */ OPEN base_type (lv_level_id, pv_base_object_type); FETCH base_type INTO lv_level_id , lv_type_name , lv_object_type , lv_parent_type; CLOSE base_type; /* Extend the collection. */ lv_collection.EXTEND; lv_collection(lv_collection.COUNT) := type_tree( lv_level_id , lv_type_name , lv_object_type , lv_parent_type ); /* Increment the type dependency level. */ lv_level_id := lv_level_id + 1; END IF; /* Loop through and return records. */ FOR i IN dependent_type(lv_level_id, pv_base_object_type) LOOP /* Extend the collection. */ lv_collection.EXTEND; lv_collection(lv_collection.COUNT) := type_tree( i.level_id , i.type_name , i.object_type , i.parent_type ); /* Recursively call down to dependent types. */ IF i.type_name <> i.parent_type THEN lv_collection := type_dependents(TRIM(i.type_name), (lv_level_id + 1), lv_collection); END IF; END LOOP; /* Return 0 for false. */ RETURN lv_collection; END; / |
You would query the function with the TABLE function, like this:
COLUMN level_id FORMAT 99999 HEADING "Level|ID #" COLUMN type_name FORMAT A30 HEADING "Type Name" COLUMN object FORMAT A10 HEADING "Object Type" COLUMN parent_type FORMAT A30 HEADING "Parent Type" SELECT * FROM TABLE(type_dependents('ITEM_OBJECT',1)); |
It displays the following results based on the sample types created by the original blog post:
 Level
  ID # Type Name                      Object Typ Parent Type
------ ------------------------------ ---------- ------------------------
     1 ITEM_OBJECT                    OBJECT
     2   GET_ITEM_OBJECT              FUNCTION   ITEM_OBJECT
     2   IDENTIFIED_OBJECT            OBJECT     ITEM_OBJECT
     2   ITEM_PACKAGE                 PACKAGE    ITEM_OBJECT
     2   ITEM_TABLE                   TABLE      ITEM_OBJECT
     3     ITEM_ASYNC_TABLE           COLLECTION ITEM_TABLE
     4       ITEM_LIST                TABLE      ITEM_ASYNC_TABLE
     2   ITEM_VARRAY                  VARRAY     ITEM_OBJECT
     3     ITEM_ASYNC_VARRAY          COLLECTION ITEM_VARRAY
     4       ITEM_ARRAY               VARRAY     ITEM_ASYNC_VARRAY

10 rows selected. |
I hope this helps those working with Oracle Database 10g (de-supported), 11g, or 12c. As a note, you don’t need to drop type dependents in Oracle 12c because it supports type evolution. I cover type evolution in Appendix B of Oracle Database 12c PL/SQL Programming. As always, I hope this helps those trying to determine type dependents in an Oracle database.
PostgreSQL Install-Windows
A number of folks have asked me to create a post of a PostgreSQL installation on Windows. So, here is my step-by-step PostgreSQL 9.3 installation, and you can go further and learn how to setup your own PostgreSQL database schema.
Download PostgreSQL Database
You can start the download of PostgreSQL from this site. It leads you to the EnterpriseDB site, where you can download the prepackaged software.
Install PostgreSQL 9.3 on Windows
These steps walk you through installing PostgreSQL and the the pgJDBC v9.3, psqlODBC (32 bit), and psqlODBC (64 bit) packages.
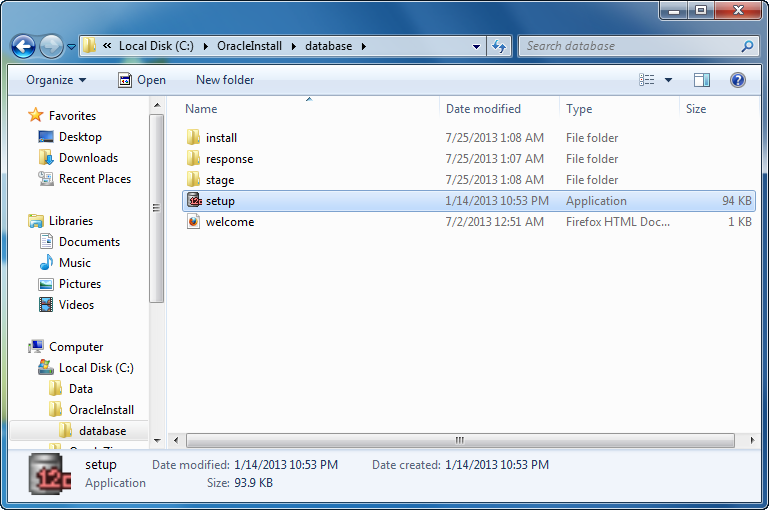
- The first thing you need to do is launch the PostgreSQL file from download folder.

- After launching the downloaded file, you see an Open File – Security Warning dialog message. Click the Run button to run the PostgreSQL executable file.

- The first dialog screen is the Setup – PostgreSQL dialog, which welcomes you and prompts you to start the installtion of PostgreSQL. Click the Next button to continue.

- The Installation Directory dialog sets the location for the PostgreSQL server. Click the Next button to continue.

- The Data Directory dialog sets the location for the PostgreSQL server’s data repository. Click the Next button to continue.

- The first Setup dialog sets the database’s superuser password. Click the Next button to continue.

- The second Setup dialog sets the database’s listener port, which is Port
5432by default. Click the Next button to continue.

- The third Setup dialog sets the database’s default Locale. Click the Next button to continue.

- The Ready to Install dialog lets you start the installation. Click the Next button to continue.

- The Installing dialog lets you montor the unpacking of programs for the installation. You need not click any buttons to continue.

- The Completing the PostgreSQL Setup Wizard dialog advises you that you’ve completed the setup. Checking the Stack Builder check box lets you download and install additional tools, drivers, and applications. Click the Next button to continue.

- This is Welcome dialog to the Stack Builder. Click the Next button to continue.

- This is dialog lets you select applications that you would like to install. Click the plus symbol for the Database Drivers option to continue.

- In the modified dialog, click the pgJDBC v9.3, psqlODBC (32 bit), and psqlODBC (64 bit) check boxes. Then, click the Next button to continue.

- This dialog tells you the pgJDBC v9.3, psqlODBC (32 bit), and psqlODBC (64 bit) installed packages. Click the Next button to continue.

- This dialog lays a downloading progress bar while loading the additional packages. You don’t need to do anything to continue.

- This dialog lays a downloading progress bar while loading the additional packages. Click the Next button to continue.

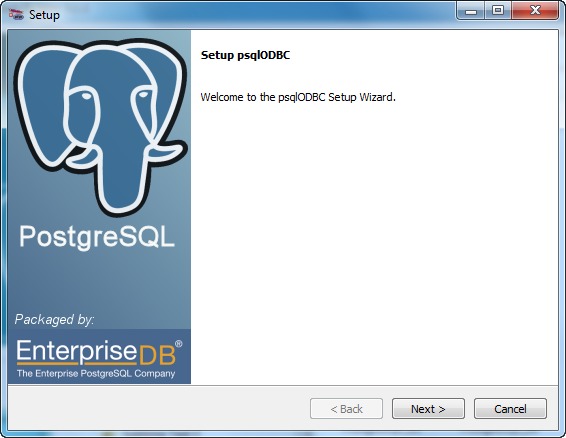
- The Setup pgJDBC dialog welcomes you to the setup wizard. Click the Next button to continue.

- The Installation Directory dialog lets you set the pgJDBC installation directory. Click the Next button to continue.

- The Ready to Install dialog lets you install the pgJDBC package. Click the Next button to install it.

- The Setup dialog confirms you’ve installed the add-on packages. Click the Finish button to complete the installation.
Configure psqlODBC on Windows
These steps walk you through configuring the psqlODBC packages.
- The Setup dialog helps you configure the psqlODBC package. Click the Next button to install it.

- The Installation Directory dialog lets you set the psqlODBC installation directory. Click the Next button to continue.

- The Ready to Install dialog lets you install the psqlODBC package. Click the Next button to install it.
- The Ready to Install dialog lets you install the psqlODBC package. Click the Next button to install it.

- The Installing psqlODBC dialog displays a dialog while installing the psqlODBC package(s). You need not click anything, the dialog dismisses itself when complete.

- The Installing psqlODBC dialog displays a dialog while installing the psqlODBC package(s). You need not click anything, the dialog dismisses itself when complete.

- The Stack Builder dialog displays a message that everything is installed. Click the Finish button when complete.
Connect to the Default PostgreSQL database
You have two options for connecting to the PostgreSQL database. One uses the GUI pgAdmin III console and the other uses the command line.
Connect through pgAdmin III to the PostgreSQL Database

- In Windows, navigate to through the Start to the pgAdmin III menu option.

- After launching pgAdmin III, you’ll see the pgAdmin II console, displayed at left.
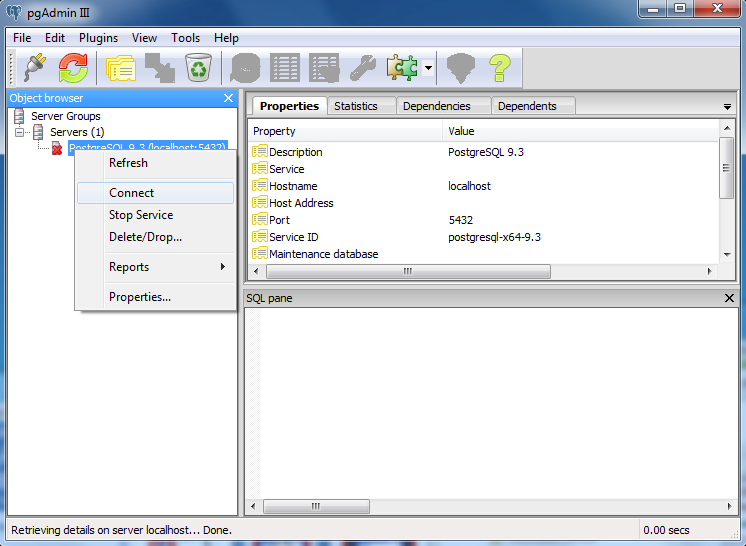
- Right click on the PostgreSQL 9.3 (localhost:5432) item in the Object browser and click the Connect menu choice from the floating menu.

- Enter the password you chose when installing the PostgreSQL Server, and click the OK button.
Connect through the Command-line to the PostgreSQL Database
These steps show you how to connect through the PostgreSQL Command Line Interface (CLI) – psql. psql is like Oracle’s sqlplus, MySQL’s mysql, and Microsoft SQL Server’s sqlcmd CLI interfaces. By default, the PostgreSQL binary directory is not in your default %PATH% environment variable, so you need to add it. I recommend an environment file because in a test situation you may not want to use it all the time.
Create the following directory for the environment file:
C:\Data\PostgreSQL\env |
You can create an environment file with any text editor or do it at the command line, like this:
COPY CON postgresqlenv.bat SET PATH=%PATH%;C:\Program Files\PostgreSQL\9.3\bin;. ^Z |
Then, you can source the environment file like this:
C:\> postgresql.bat |
Now, you can connect to the default database provided you understand that PostgreSQL Stack Builder set some values that differ from the defaults if you installed it manually. Specifically, they set the default value of the database to postgres and default value of the user to postgres.
That means you can connect with the following, provided you remember the password you used during installation:
C:\> psql -d postgres -U postgres |
You should see the following when you connect:
C:\> psql -d postgres -U postgres Password for user postgres: psql (9.3.3) WARNING: Console code page (437) differs from Windows code page (1252) 8-bit characters might not work correctly. See psql reference page "Notes for Windows users" for details. Type "help" for help. |
You can now submit interactive SQL statements or run batch files, like:
postgres=# SELECT 'Hello World!'; |
It displays:
?COLUMN? -------------- Hello World! (1 ROW) |
Adding a column alias to the string literal gives a more readable formatted output:
postgres=# SELECT 'Hello World!' AS "String Literal"; |
It displays:
String Literal ---------------- Hello World! (1 ROW) |
PostgreSQL’s CLI Help
You have the ability to do a lot with the PostgreSQL psql CLI. The general command to discover help is help, and it displays the following:
postgres=# help You are USING psql, the command-line interface TO PostgreSQL. TYPE: \copyright FOR distribution terms \h FOR help WITH SQL commands \? FOR help WITH psql commands \g OR terminate WITH semicolon TO EXECUTE query \q TO quit |
You quit PostgreSQL with a \q command:
postgres=# \q |
You can find more help with the \HELP or the \? commands:
\HELP |
It displays the following:
Available help: ABORT CLUSTER DEALLOCATE END ALTER AGGREGATE COMMENT DECLARE EXECUTE ALTER COLLATION COMMIT DELETE EXPLAIN ALTER CONVERSION COMMIT PREPARED DISCARD FETCH ALTER DATABASE COPY DO GRANT ALTER DEFAULT PRIVILEGES CREATE AGGREGATE DROP AGGREGATE INSERT ALTER DOMAIN CREATE CAST DROP CAST LISTEN ALTER EVENT TRIGGER CREATE COLLATION DROP COLLATION LOAD ALTER EXTENSION CREATE CONVERSION DROP CONVERSION LOCK ALTER FOREIGN DATA WRAPPER CREATE DATABASE DROP DATABASE MOVE ALTER FOREIGN TABLE CREATE DOMAIN DROP DOMAIN NOTIFY ALTER FUNCTION CREATE EVENT TRIGGER DROP EVENT TRIGGER PREPARE ALTER GROUP CREATE EXTENSION DROP EXTENSION PREPARE TRANSACTION ALTER INDEX CREATE FOREIGN DATA WRAPPER DROP FOREIGN DATA WRAPPER REASSIGN OWNED ALTER LANGUAGE CREATE FOREIGN TABLE DROP FOREIGN TABLE REFRESH MATERIALIZED VIEW ALTER LARGE OBJECT CREATE FUNCTION DROP FUNCTION REINDEX ALTER MATERIALIZED VIEW CREATE GROUP DROP GROUP RELEASE SAVEPOINT ALTER OPERATOR CREATE INDEX DROP INDEX RESET ALTER OPERATOR CLASS CREATE LANGUAGE DROP LANGUAGE REVOKE ALTER OPERATOR FAMILY CREATE MATERIALIZED VIEW DROP MATERIALIZED VIEW ROLLBACK ALTER ROLE CREATE OPERATOR DROP OPERATOR ROLLBACK PREPARED ALTER RULE CREATE OPERATOR CLASS DROP OPERATOR CLASS ROLLBACK TO SAVEPOINT ALTER OPERATOR CREATE INDEX DROP INDEX RESET ALTER OPERATOR CLASS CREATE LANGUAGE DROP LANGUAGE REVOKE ALTER OPERATOR FAMILY CREATE MATERIALIZED VIEW DROP MATERIALIZED VIEW ROLLBACK ALTER ROLE CREATE OPERATOR DROP OPERATOR ROLLBACK PREPARED ALTER RULE CREATE OPERATOR CLASS DROP OPERATOR CLASS ROLLBACK TO SAVEPOINT ALTER SCHEMA CREATE OPERATOR FAMILY DROP OPERATOR FAMILY SAVEPOINT ALTER SEQUENCE CREATE ROLE DROP OWNED SECURITY LABEL ALTER SERVER CREATE RULE DROP ROLE SELECT ALTER TABLE CREATE SCHEMA DROP RULE SELECT INTO ALTER TABLESPACE CREATE SEQUENCE DROP SCHEMA SET ALTER TEXT SEARCH CONFIGURATION CREATE SERVER DROP SEQUENCE SET CONSTRAINTS ALTER TEXT SEARCH DICTIONARY CREATE TABLE DROP SERVER SET ROLE ALTER TEXT SEARCH PARSER CREATE TABLE AS DROP TABLE SET SESSION AUTHORIZATION ALTER TEXT SEARCH TEMPLATE CREATE TABLESPACE DROP TABLESPACE SET TRANSACTION ALTER TRIGGER CREATE TEXT SEARCH CONFIGURATION DROP TEXT SEARCH CONFIGURATION SHOW ALTER TYPE CREATE TEXT SEARCH DICTIONARY DROP TEXT SEARCH DICTIONARY START TRANSACTION ALTER USER CREATE TEXT SEARCH PARSER DROP TEXT SEARCH PARSER TABLE ALTER USER MAPPING CREATE TEXT SEARCH TEMPLATE DROP TEXT SEARCH TEMPLATE TRUNCATE ALTER VIEW CREATE TRIGGER DROP TRIGGER UNLISTEN ANALYZE CREATE TYPE DROP TYPE UPDATE BEGIN CREATE USER DROP USER VACUUM CHECKPOINT CREATE USER MAPPING DROP USER MAPPING VALUES CLOSE CREATE VIEW DROP VIEW WITH |
You can find more help with the \HELP or the \? commands:
\? |
It displays the following:
General
  \copyright             show PostgreSQL usage and distribution terms
  \g [FILE] or ;         execute query (and send results to file or |pipe)
  \gset [PREFIX]         execute query and store results in psql variables
  \h [NAME]              help on syntax of SQL commands, * for all commands
  \q                     quit psql
  \watch [SEC]           execute query every SEC seconds

Query Buffer
  \e [FILE] [LINE]       edit the query buffer (or file) with external editor
  \ef [FUNCNAME [LINE]]  edit function definition with external editor
  \p                     show the contents of the query buffer
  \r                     reset (clear) the query buffer
  \s [FILE]              display history or save it to file
  \w FILE                write query buffer to file

Input/Output
  \copy ...              perform SQL COPY with data stream to the client host
  \echo [STRING]         write string to standard output
  \i FILE                execute commands from file
  \ir FILE               as \i, but relative to location of current script
  \o [FILE]              send all query results to file or |pipe
  \qecho [STRING]        write string to query output stream (see \o)

Informational
  (options: S = show system objects, + = additional detail)
  \d[S+]                 list tables, views, and sequences
  \d[S+]  NAME           describe table, view, sequence, or index
  \da[S]  [PATTERN]      list aggregates
  \db[+]  [PATTERN]      list tablespaces
  \dc[S+] [PATTERN]      list conversions
  \dC[+]  [PATTERN]      list casts
  \dd[S]  [PATTERN]      show object descriptions not displayed elsewhere
  \ddp    [PATTERN]      list default privileges
  \dD[S+] [PATTERN]      list domains
  \det[+] [PATTERN]      list foreign tables
  \des[+] [PATTERN]      list foreign servers
  \deu[+] [PATTERN]      list user mappings
  \dew[+] [PATTERN]      list foreign-data wrappers
  \df[antw][S+] [PATRN]  list [only agg/normal/trigger/window] functions
  \dF[+]  [PATTERN]      list text search configurations
  \dFd[+] [PATTERN]      list text search dictionaries
  \dFp[+] [PATTERN]      list text search parsers
  \dFt[+] [PATTERN]      list text search templates
  \dg[+]  [PATTERN]      list roles
  \di[S+] [PATTERN]      list indexes
  \dl                    list large objects, same as \lo_list
  \dL[S+] [PATTERN]      list procedural languages
  \dm[S+] [PATTERN]      list materialized views
  \dn[S+] [PATTERN]      list schemas
  \do[S]  [PATTERN]      list operators
  \dO[S+] [PATTERN]      list collations
  \dp     [PATTERN]      list table, view, and sequence access privileges
  \drds [PATRN1 [PATRN2]] list per-database role settings
  \ds[S+] [PATTERN]      list sequences
  \dt[S+] [PATTERN]      list tables
  \dT[S+] [PATTERN]      list data types
  \du[+]  [PATTERN]      list roles
  \dv[S+] [PATTERN]      list views
  \dE[S+] [PATTERN]      list foreign tables
  \dx[+]  [PATTERN]      list extensions
  \dy     [PATTERN]      list event triggers
  \l[+]   [PATTERN]      list databases
  \sf[+] FUNCNAME        show a function's definition
  \z      [PATTERN]      same as \dp

Formatting
  \a                     toggle between unaligned and aligned output mode
  \C [STRING]            set table title, or unset if none
  \f [STRING]            show or set field separator for unaligned query output
  \H                     toggle HTML output mode (currently off)
  \pset NAME [VALUE]     set table output option
                         (NAME := {format|border|expanded|fieldsep|fieldsep_zero|footer|null|
                         numericlocale|recordsep|recordsep_zero|tuples_only|title|tableattr|pager})
  \t [on|off]            show only rows (currently off)
  \T [STRING]            set HTML <table> tag attributes, or unset if none
  \x [on|off|auto]       toggle expanded output (currently off)

Connection
  \c[onnect] {[DBNAME|- USER|- HOST|- PORT|-] | conninfo}
                         connect to new database (currently "studentdb")
  \encoding [ENCODING]   show or set client encoding
  \password [USERNAME]   securely change the password for a user
  \conninfo              display information about current connection

Operating System
  \cd [DIR]              change the current working directory
  \setenv NAME [VALUE]   set or unset environment variable
  \timing [on|off]       toggle timing of commands (currently off)
  \! [COMMAND]           execute command in shell or start interactive shell

Variables
  \prompt [TEXT] NAME    prompt user to set internal variable
  \set [NAME [VALUE]]    set internal variable, or list all if no parameters
  \unset NAME            unset (delete) internal variable

Large Objects
  \lo_export LOBOID FILE
  \lo_import FILE [COMMENT]
  \lo_list
\lo_unlink LOBOID large object operations |
Have fun exploring PostgreSQL. You can click here to learn how to setup your own tablespace, database, and user. As always, I hope this helps those looking to discover how to install and use PostgreSQL.
Add User Defined Types
Somebody asked me if there was a cheaper alternative to using the Embarcadero Data Architect (a data modeling tool). I said sure, you can use the MySQL Workbench. My friend laughed and said, it’s to model Oracle databases and they use different data types. I broke the news to him that he can create his own user defined types and use MySQL Workbench to model problems for the Oracle Database 11g.
For example, you can launch the MySQL Workbench, and click on the Model menu option, and in the menu window click on the User Defined Types choice, as shown in the following:

Choosing the User Defined Type option, launches the following form. You can enter customized user defined types in the User Defined Types module:

You enter user defined types by entering a name value and choosing valid MySQL type value before clicking the Add button. When you’ve added your last user defined type, click the OK button instead of the Add button. The next screen shot shows how you can create Oracle Database 11g native data types, specifically the NUMBER and VARCHAR2 data types.

Hopefully, this has shown that you can create User Defined Types let you use MySQL Workbench to create Oracle ERD models. Here’s an example of a table with Oracle’s NUMBER and VARCHAR2 data types:

Yes, MySQL Workbench is a marvelous tool with wide potential for use to solve problems with MySQL and other databases.
Relationship Notations
One of my students asked how to convert MySQL Workbench’s default Crow’s Foot (IE) diagram to one of the other supported formats – Classic, Connect to Columns, UML, and IDEF1X. Crow’s Foot is also known as the Information Engineering Model method (covered in Chapter 3 of my MySQL Workbench: Data Modeling & Development.
It quite simple, you open the Model Overview window, click on the Model menu choice. In the dialog, click on the Relationship Notation menu option. Click on one of the choices in the nested menu, like Column to Columns.

Hope this helps those working with MySQL Workbench.
MySQL Image Architecture
The LinkedIn MySQL DB Development group posed a questions on how to handle images. Naturally, the argument always goes: Should images be deployed in the database or the file system? I believe they should be stored in the database because the cost and time associated is too high with regard to managing files, a file naming schema, and backing up the file system discretely from the database.
Since there’s a significant difference between the backup of transactional data and image data, they should be placed in different databases. The imagedb database is where you would place the images and large text descriptions, as shown in the MySQL Workbench ERD:

The imagedb ERD splits the foreign key references back to the system_user table, which contains the individual user credentials. The system_user table serves as the Access Control List (ACL) for the application.
Until I get a chance to write the code for this model, you can refer to the generic PHP/MySQL solution from several years back (its code source was last tested with PHP 5.3). As always, I hope this helps.
Drop Types Recursively
As covered in my new Oracle Database 12c PL/SQL Programming book (publisher’s satisfied), you can evolve object types. That means you can change a base object type and the change cascades through dependents. Somebody asked how to remove an object type chain without appending the FORCE clause.
It’s quite easy if you understand writing a recursive function in PL/SQL, as done here:
1 2 3 4 5 6 7 8 9 10 11 12 13 14 15 16 17 18 19 20 21 22 23 24 25 26 27 28 29 30 31 32 33 34 35 36 37 38 39 40 41 42 43 44 45 46 47 48 49 50 51 52 53 54 55 56 57 58 59 60 61 62 63 64 65 66 67 68 69 70 71 72 73 74 75 76 77 78 79 80 81 82 83 84 85 86 87 88 89 90 91 92 93 94 95 96 97 98 99 100 101 102 103 104 105 106 107 | -- Create a recursive function. CREATE OR REPLACE FUNCTION drop_dependents (pv_base_object_type VARCHAR2) RETURN NUMBER IS /* Declare a return data type. */ lv_retval NUMBER := 0; /* Declare item type. */ lv_type_name VARCHAR2(30); lv_object_name VARCHAR2(30); /* The first part of the cursor finds the dependent type names of complex object types, and the second part of the cursor finds the dependent collection types. Effectively the set operator finds two distinct branches because you may use any base type as an element of a complex object or of a collection. */ CURSOR base_type (cv_base_type VARCHAR2) IS SELECT uta.type_name , NULL AS object_name FROM user_type_attrs uta INNER JOIN user_types ut ON uta.attr_type_name = ut.type_name WHERE ut.type_name = cv_base_type UNION ALL SELECT uct.type_name , NULL AS object_name FROM user_types ut INNER JOIN user_coll_types uct ON ut.type_name = uct.elem_type_name WHERE uct.elem_type_name = cv_base_type UNION ALL SELECT CASE WHEN package_name IS NULL THEN uo.object_type ELSE 'PACKAGE' END AS type_name , CASE WHEN package_name IS NULL THEN ua.object_name ELSE ua.package_name END AS object_name FROM user_arguments ua LEFT JOIN user_objects uo ON ua.package_name = uo.object_name OR ua.object_name = uo.object_name WHERE type_name = cv_base_type; BEGIN /* Open a parameterized cursor. */ OPEN base_type(pv_base_object_type); /* Loop through return records. */ LOOP /* Fetch records. */ FETCH base_type INTO lv_type_name , lv_object_name; /* Drop type without dependents, or drop leaf node dependent. */ IF base_type%NOTFOUND THEN /* Drop functions when they include an object type or object type dependent as a formal parameter type or return type. Drop procedures when they include an object type or object type dependent. Drop procedures when any function or procedure uses an object type or object type dependent. */ IF lv_type_name IN ('FUNCTION','PACKAGE','PROCEDURE') THEN /* Drop the base type when no dependents are found. */ EXECUTE IMMEDIATE 'DROP '||lv_type_name||' '||lv_object_name; ELSE /* Drop the base type when no dependents are found. */ EXECUTE IMMEDIATE 'DROP TYPE '||pv_base_object_type; END IF; /* Set exit state to one or true. */ lv_retval := 1; /* Exit the loop. */ EXIT; ELSE /* A type must exclude function, package, and procedure; and the object name must be null before you recurse to another level. */ IF lv_type_name NOT IN ('FUNCTION','PACKAGE','PROCEDURE') AND lv_object_name IS NOT NULL THEN /* Drop base type when no dependents are found. */ lv_retval := drop_dependents(lv_type_name); END IF; END IF; END LOOP; /* Close open cursor. */ CLOSE base_type; /* Return 0 for false. */ RETURN lv_retval; END; / |
Somebody asked me to provide a test case of a hierarchy of object types to support the drop_dependents function. So, here’s the test case code:
1 2 3 4 5 6 7 8 9 10 11 12 13 14 15 16 17 18 19 20 21 22 23 24 25 26 27 28 29 30 31 32 33 34 35 36 37 38 39 40 41 42 43 44 45 46 47 48 49 50 51 52 53 54 55 56 57 58 59 60 61 62 63 64 65 66 67 68 69 70 71 72 73 74 75 76 | -- Create object type. CREATE OR REPLACE TYPE item_object IS OBJECT ( item_name VARCHAR2(30) , item_subname VARCHAR2(30)); / -- Create object type. CREATE OR REPLACE TYPE identified_object IS OBJECT ( identified_id NUMBER , identified_object item_object); / -- Create object collection. CREATE OR REPLACE TYPE item_table IS TABLE OF item_object; / -- Create object collection. CREATE OR REPLACE TYPE item_varray IS VARRAY(5) OF item_object; / -- Create object type. CREATE OR REPLACE TYPE item_async_table IS OBJECT ( item_name VARCHAR2(30) , item_collection item_table); / -- Create object type. CREATE OR REPLACE TYPE item_async_varray IS OBJECT ( item_name VARCHAR2(30) , item_collection item_varray); / -- Create object collection. CREATE OR REPLACE TYPE item_list IS TABLE OF item_async_table; / -- Create object collection. CREATE OR REPLACE TYPE item_array IS VARRAY(10) OF item_async_varray; / -- Create package specification. CREATE OR REPLACE PACKAGE item_package AS /* A published function of the package. */ FUNCTION initialize_object ( id NUMBER , name NUMBER ) RETURN ITEM_OBJECT; END item_package; / -- Create a schema function. CREATE OR REPLACE FUNCTION get_item_object ( pv_id NUMBER , pv_name NUMBER ) RETURN ITEM_OBJECT IS /* Declare a local variable. */ lv_item_object ITEM_OBJECT; BEGIN /* Initialize the object type. */ lv_item_object := item_object(pv_id, pv_name); /* Return the dat type. */ RETURN lv_item_object; END; / |
If you call the function with the base type, it’ll drop the most dependent object type first, and the base object type last. The rest are dropped in their order of dependency. You can call a drop_dependents function with a base type, like ITEM_OBJECT, by using the following syntax:
1 2 3 4 5 6 7 | SET SERVEROUTPUT ON SIZE UNLIMITED BEGIN IF drop_dependents('ITEM_OBJECT') = 1 THEN dbms_output.put_line('Objects dropped.'); END IF; END; / |
Hope this helps those looking to drop a chain of object types in an Oracle database.
Signal from a procedure
As I review with my students, a stored function works like a standalone program, while a stored procedure runs in the scope of another program unit. For example, you can compare the result of a function as an expression in an IF statement, like:
IF add_numbers(1,3) > 3 THEN ... ELSE ... END IF; |
You can’t call procedures inside an IF statement, but you can call the procedure and use a single OUT-mode (pass-by-reference) parameter from the procedure in a subsequent IF statement. You can implement a a wait procedure like that with the following example.
The example first creates two tables, the road_runner and coyote tables:
-- Drop road_runner table if exists. DROP TABLE IF EXISTS road_runner; -- Create roadrunner table. CREATE TABLE road_runner ( road_runner_id int unsigned auto_increment primary key , road_runner_text varchar(20) , CONSTRAINT road_runner_nk UNIQUE (road_runner_text)); -- Drop coyote table if exists. DROP TABLE IF EXISTS coyote; -- Create coyote table. CREATE TABLE coyote ( coyote_id int unsigned auto_increment primary key , coyote_text varchar(20) , road_runner_id int unsigned , CONSTRAINT coyote_nk UNIQUE (coyote_text)); |
The following creates a procedure that:
- Writes data to two tables when the values are unique, returning a value of zero when it works.
- Writes data to neither table when the values to either table are non-unique, returning a value of one when it fails.
The procedure uses a 0 as a false value and a 1 as a true value. The use of a 0 and 1 for truth is a consistent approach for languages where they don’t support a Boolean data type.
-- Change the delimiter to a "$$" DELIMITER $$ -- Drop the paired procedure. DROP PROCEDURE IF EXISTS two_table$$ -- Create the paired procedure. CREATE PROCEDURE two_table (IN pv_road_runner_text varchar(20) ,IN pv_coyote_text varchar(20) , OUT pv_confirm_it int) BEGIN /* Declare a variable to hold a sequence value for an auto incrementing value. */ DECLARE lv_road_runner_id int unsigned; /* Declare a condition variable for attempting to write a non-unique record to a table. */ DECLARE duplicate CONDITION FOR 1062; /* Declare an event handler for a duplicate condition variable, rollback transaction, and set 1 as a false condition. */ DECLARE EXIT HANDLER FOR duplicate BEGIN ROLLBACK to all_or_none; SET pv_confirm_it = 1; END; /* Start the transaction. */ START TRANSACTION; /* Set the save point for a multiple table transaction. */ SAVEPOINT all_or_none; /* Insert into road runner table. */ INSERT INTO road_runner (road_runner_text) VALUES (pv_road_runner_text); /* Capture the auto incrementing sequence value as a local variable. */ SET lv_road_runner_id := last_insert_id(); /* Insert into the coyote table. */ INSERT INTO coyote (coyote_text ,road_runner_id) VALUES (pv_coyote_text ,lv_road_runner_id); /* Commit the record. */ COMMIT; /* Set the control variable to a true value. */ SET pv_confirm_it := 0; END; $$ DELIMITER ; |
You can test the pass-by-reference procedure with the following code:
-- Set a control variable with a null value. SET @sv_control := null; -- Query the results from a join between the road_runner and coyote tables. SELECT * FROM road_runner r INNER JOIN coyote c ON r.road_runner_id = c.road_runner_id; -- Call the two_table procedure with unique results. CALL two_table('Road Runner 1','Coyote 1',@sv_control); -- Query the control variable result from the second call to the -- two_table procedure. SELECT @sv_control AS "1st Insert"; -- Reset the value for a second test. SET @sv_control := 0; -- Call teh two_table procedure with unique results. CALL two_table('Road Runner 2','Coyote 1',@sv_control); -- Query the results from a join between the road_runner and coyote tables. SELECT * FROM road_runner r INNER JOIN coyote c ON r.road_runner_id = c.road_runner_id; -- Query the control variable result from the second call to the -- two_table procedure. SELECT @sv_control AS "2nd Insert"; |
I hope this helps anybody trying to implement a pass-by-reference procedure with a control variable. You can find other examples in Chapter 14 of Oracle Database 11g and MySQL 5.6 Developer Handbook (pp. 446-449 and 450-451).
Cleanup a MySQL Schema
My students required way to remove all their tables, views, and constraints from a MySQL database (or the alias schema). Since they’re using referential or foreign key constraints, I also wrote one procedure to drop all foreign key constraints from a database. There’s also another to drop views. The final stored procedure calls the procedure that drops foreign keys, then calls the procedure to drop views before dropping all the tables.
Here’s the dropForeignKeys stored procedure, but if you want to capture ALTER statements that add these back later please check my follow-up Capture MySQL Foreign Keys post.
1 2 3 4 5 6 7 8 9 10 11 12 13 14 15 16 17 18 19 20 21 22 23 24 25 26 27 28 29 30 31 32 33 34 35 36 37 38 39 40 41 42 43 44 45 46 47 48 49 50 51 52 53 54 55 56 57 58 59 60 61 62 63 64 65 66 67 68 69 | -- Provide a log file debugging statement. SELECT 'DROP PROCEDURE IF EXISTS dropForeignKeys'; -- Conditionally drop the procedure. DROP PROCEDURE IF EXISTS dropForeignKeys; -- Provide a log file debugging statement. SELECT 'CREATE PROCEDURE dropForeignKeys'; -- Change delimiter to create procedure. DELIMITER $$ -- Create procedure. CREATE PROCEDURE dropForeignKeys ( pv_database VARCHAR(64) , pv_referenced_table VARCHAR(64)) BEGIN /* Declare local statement variables. */ DECLARE lv_stmt VARCHAR(1024); /* Declare local cursor variables. */ DECLARE lv_table_name VARCHAR(64); DECLARE lv_constraint_name VARCHAR(64); /* Declare control variable for handler. */ DECLARE fetched INT DEFAULT 0; /* Declare local cursor. */ DECLARE foreign_key_cursor CURSOR FOR SELECT rc.table_name , rc.constraint_name FROM information_schema.referential_constraints rc WHERE constraint_schema = IFNULL(pv_database,database()) AND referenced_table_name = pv_referenced_table ORDER BY rc.table_name , rc.constraint_name; /* Declare a not found record handler to close a cursor loop. */ DECLARE CONTINUE HANDLER FOR NOT FOUND SET fetched = 1; /* Open a local cursor. */ OPEN foreign_key_cursor; cursor_foreign_key: LOOP FETCH foreign_key_cursor INTO lv_table_name , lv_constraint_name; /* Place the catch handler for no more rows found immediately after the fetch operation. */ IF fetched = 1 THEN LEAVE cursor_foreign_key; END IF; /* Set a SQL statement by using concatenation. */ SET @SQL := CONCAT('ALTER TABLE',' ',lv_table_name,' ','DROP FOREIGN KEY',' ',lv_constraint_name); /* Prepare, run, and deallocate statement. */ PREPARE lv_stmt FROM @SQL; EXECUTE lv_stmt; DEALLOCATE PREPARE lv_stmt; END LOOP cursor_foreign_key; CLOSE foreign_key_cursor; END; $$ -- Reset delimiter to run SQL statements. DELIMITER ; |
Here’s the dropViews stored procedure:
1 2 3 4 5 6 7 8 9 10 11 12 13 14 15 16 17 18 19 20 21 22 23 24 25 26 27 28 29 30 31 32 33 34 35 36 37 38 39 40 41 42 43 44 45 46 47 48 49 50 51 52 53 54 55 56 57 58 59 60 61 62 63 | -- Provide a log file debugging statement. SELECT 'DROP PROCEDURE IF EXISTS dropViews'; -- Conditionally drop the procedure. DROP PROCEDURE IF EXISTS dropViews; -- Provide a log file debugging statement. SELECT 'CREATE PROCEDURE dropViews'; -- Change delimiter to create procedure. DELIMITER $$ -- Create procedure. CREATE PROCEDURE dropViews ( pv_database VARCHAR(64)) BEGIN /* Declare local statement variables. */ DECLARE lv_stmt VARCHAR(1024); /* Declare local cursor variables. */ DECLARE lv_view_name VARCHAR(64); /* Declare control variable for handler. */ DECLARE fetched INT DEFAULT 0; /* Declare local cursor. */ DECLARE view_cursor CURSOR FOR SELECT v.table_name FROM information_schema.views v WHERE table_schema = IFNULL(pv_database, database()) ORDER BY v.table_name; /* Declare a not found record handler to close a cursor loop. */ DECLARE CONTINUE HANDLER FOR NOT FOUND SET fetched = 1; /* Open a local cursor. */ OPEN view_cursor; cursor_view: LOOP FETCH view_cursor INTO lv_view_name; /* Place the catch handler for no more rows found immediately after the fetch operation. */ IF fetched = 1 THEN LEAVE cursor_view; END IF; /* Set a SQL statement by using concatenation. */ SET @SQL := CONCAT('DROP VIEW',' ',lv_view_name); /* Prepare, run, and deallocate statement. */ PREPARE lv_stmt FROM @SQL; EXECUTE lv_stmt; DEALLOCATE PREPARE lv_stmt; END LOOP cursor_view; CLOSE view_cursor; END; $$ -- Reset delimiter to run SQL statements. DELIMITER ; |
Here’s the dropTables stored procedure:
1 2 3 4 5 6 7 8 9 10 11 12 13 14 15 16 17 18 19 20 21 22 23 24 25 26 27 28 29 30 31 32 33 34 35 36 37 38 39 40 41 42 43 44 45 46 47 48 49 50 51 52 53 54 55 56 | CREATE PROCEDURE dropTables ( pv_database VARCHAR(64)) BEGIN /* Declare local statement variables. */ DECLARE lv_stmt VARCHAR(1024); /* Declare local cursor variables. */ DECLARE lv_table_name VARCHAR(64); /* Declare control variable for handler. */ DECLARE fetched INT DEFAULT 0; /* Declare local cursor. */ DECLARE table_cursor CURSOR FOR SELECT t.table_name FROM information_schema.tables t WHERE table_schema = IFNULL(pv_database, database()) ORDER BY t.table_name; /* Declare a not found record handler to close a cursor loop. */ DECLARE CONTINUE HANDLER FOR NOT FOUND SET fetched = 1; /* Drop the views. */ CALL dropViews(null); /* Open a local cursor. */ OPEN table_cursor; cursor_table: LOOP FETCH table_cursor INTO lv_table_name; /* Place the catch handler for no more rows found immediately after the fetch operation. */ IF fetched = 1 THEN LEAVE cursor_table; END IF; /* Drop the tables. */ CALL dropForeignKeys(null,lv_table_name); /* Set a SQL statement by using concatenation. */ SET @SQL := CONCAT('DROP TABLE',' ',lv_table_name); /* Prepare, run, and deallocate statement. */ PREPARE lv_stmt FROM @SQL; EXECUTE lv_stmt; DEALLOCATE PREPARE lv_stmt; END LOOP cursor_table; CLOSE table_cursor; END; $$ -- Reset delimiter to run SQL statements. DELIMITER ; |
You put these in a rerunnable script, run it, and then call the dropTables stored procedure. You can pass a database (or schema) name or a null value. When you pass a null value, it uses the current database, like:
CALL dropTables(null); |
As always, I hope this helps others.
Mac Mini to the rescue
In teaching, I had a problem because my students have different base operating systems, like Windows 7, Windows 8, Linux, and Mac OS X. I needed a teaching and lecture platform that would let me teach it all (not to mention support their environments). That meant it had to virtualize any of the following with a portable device:
- Windows 7 or 8 hosting natively an Oracle Database 11g XE, 11g, or 12c and MySQL Database 5.6
- Windows 7 or 8 hosting a Fedora or Oracle Unbreakable Linux VM (3 or 4 GB) with Oracle Database 11g XE, 11g, or 12c and MySQL Database 5.6
- Mac OS X hosting a Fedora or Oracle Unbreakable Linux VM (3 or 4 GB) with Oracle Database 11g XE, 11g, or 12c and MySQL Database 5.6
- Ubuntu hosting a Fedora or Oracle Unbreakable Linux VM (3 or 4 GB) with Oracle Database 11g XE, 11g, or 12c and MySQL Database 5.6
I never considered a manufacturer other than Apple for a laptop since they adopted the Intel chip. Too many of the others sell non-hyperthreaded laptop machines that they market as i5 or i7 64-bit OS machines when they’re not. Some of those vendors disable the hyperthreading facility while others provide motherboards that can’t support hyperthreading. The ones I dislike the most provide a BIOS setting that gives the impression you can enable hyperthreading when you can’t. All Apple devices, MacBook, MacBook Pro, Mac Mini, and Mac Pro do fully support a 64-bit OS and their virtualization.
A MacBook Pro came to mind but the disk space requirements were 1 TB, and that’s too pricey. I went with the Mac Mini because with 16 GB of memory and a 1 TB drive it was only $1,200. Add a wireless keyboard and mighty mouse, and an HDMI and mini-DVI connections, and I had my solution. Naturally, my desktop is a one generation old Mac Pro with 64 GB of memory and 12 TB of disk space, which supports all the virtual machines used for testing. Note to Apple marketing staff: The prior version of the Mac Pro let you pay reasonable (3rd party) prices for the additional memory and disk drives.
The Mac Mini means I can travel anywhere and plug into the console and demo tools and techniques from a myriad set of platforms without the hassle of moving on and off to frequently VM images. It’s a great solution with only one downside, HDMI to DVI sometimes creates purple toned screens. It’s unfortunate because some venues have monitors that don’t support HDMI).
Oracle 12c PL/SQL Published
 After writing nine books, it’s always great when the author copies arrive. That’s when I know the process is complete. Friday, my twelve copies of the Oracle Database 12c PL/SQL Programming
 book arrived in two boxes of six each. The book is also available online at Amazon.com.
The book qualifies all the Oracle 12c new SQL and PL/SQL features. I added review sections and mastery questions to each chapter, and expanded examples and techniques. To conserve space and avoid reprinting duplicate code blocks, I adopted line numbers for the code segments so I could provide the technique variations by line numbers for alternate solutions.
You have complete examples on how to white list functions, procedures, packages, and object types with the new ACCESSIBLE BY clause. Likewise, you’ll learn how to use your PL/SQL variables inside embedded queries.
The improved collection coverage shows you how to write PL/SQL functions that let you use unnested UPDATE statements to add, change, and remove elements from Attribute Data Types (ADTs), and the expanded SQL Primer shows you how to update nested User-Defined Types (UDTs) without having to write PL/SQL. The book also shows you how to export object tables or columns into relational tables for ETL processes.
 The Oracle Database Primer grew to include more database administration, multiversion concurrency control, SQL tuning, and SQL tracing. The SQL Primer now contains expanded coverage on data types, Data Definition Language (DDL), Data Manipulation Language (DML), Transaction Control Language (TCL), SQL queries, joins, and unnesting queries. The SQL Built-in Functions appendix was expanded to enable me to remove side discussions about SQL elements from the PL/SQL chapters. John Harper wrote some wonderful examples of DBMS_COMPARISON, DBMS_CRYPTO, and DBMS_FGA to supplement the PL/SQL Built-in Packages and Types appendix. The Regular Expression Primer was rewritten to make it easier to read and use.
I’ve created an Errata for the Oracle Database 12c PL/SQL Programming. If you buy a copy and find an error, please post a comment in the errata.
