MySQL on Windows 7
This shows you how to setup MySQL Connector/ODBC driver, add a new data source in Windows 7, and a new data import source in Excel 2007. As with other “how-to” posts, it includes screen shots to clear up any ambiguity.
Back in November 2008, I posted how you could query Oracle from Excel 2007. A few folks have asked for more instructions around the data source, and how to connect to a MySQL database. Unfortunately, it took me quite some time to get back to it. It was interesting to note when I attended the ACM Computation Biology Conference last August that so many folks are using MySQL as department data repositories. It was no surprise to find a need to connect Microsoft Excel to MySQL. After all, it is the de facto tool of many data analysts.
Install the MySQL Connector/ODBC Driver
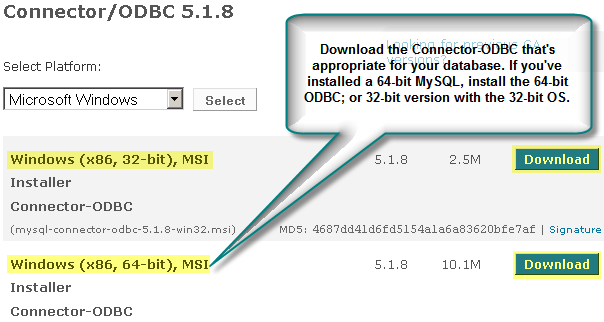
- Downloading the MySQL Connector/ODBC is the first step. You need to choose the 32-bit or 64-bit version based on which version of the operating system and MySQL database installed. These instructions use the 64-bit version.
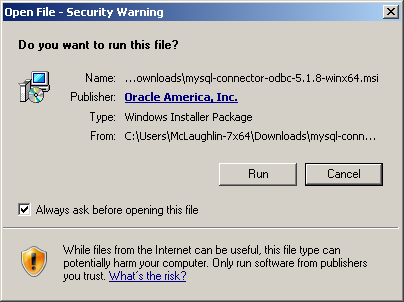
- The first message with be a security warning when you attempt to launch the MSI file. Click the Run button to start the installation.
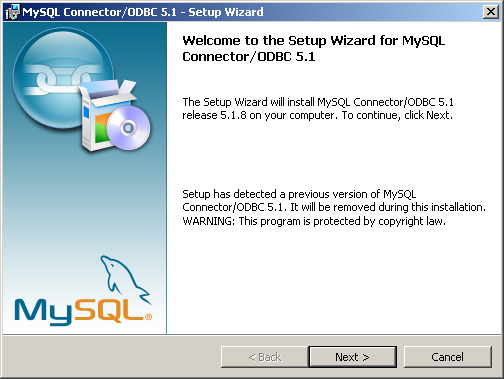
- This is the first dialog of the MySQL Connector/ODBC driver. Click the Next button to continue.
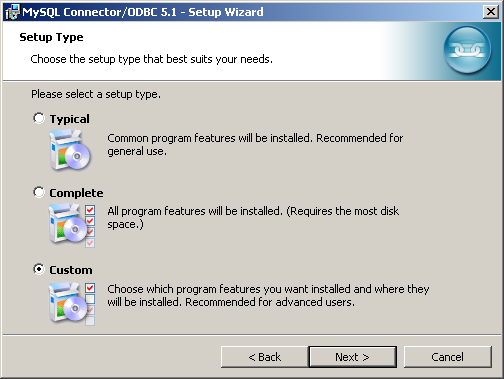
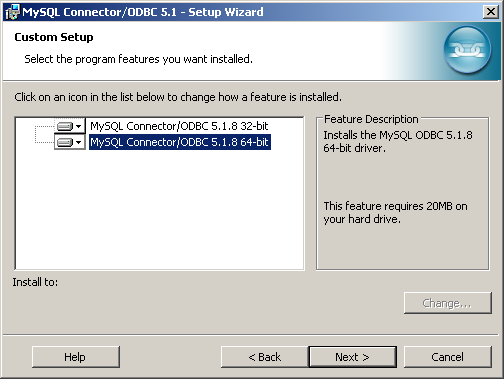
- You can probably choose Typical, Complete, or Custom but I chose Custom. After picking a setup type, click the Next button to continue.
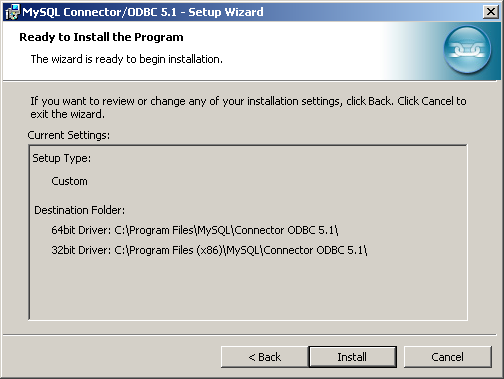
- You can see what you’re installing in this dialog. Click the Next button to continue.
- This dialog shows you were the libraries will be installed. Click the Next button to continue.
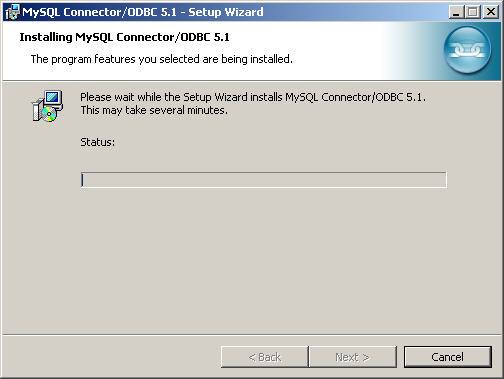
- This dialog is a progress bar, it should run to completion in a half minute or less. Wait until you’re prompted to take action.
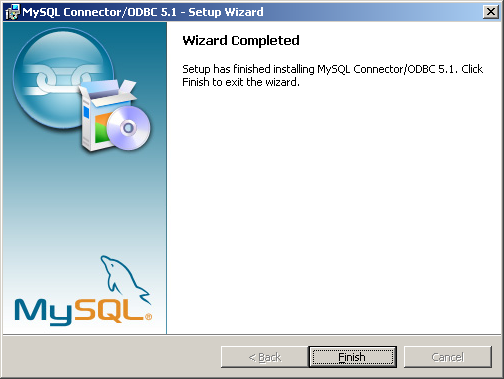
- This is the last setup wizard dialog, you should click the Finish button to apply the change.
Install the MySQL Connector/ODBC Driver
- You need to create a data source in the operating system. You should open the Control Panel and click on the Administrative Tools menu item to begin the installation of a new data source.
- Click the Data Sources (ODBC) menu item to start the process.
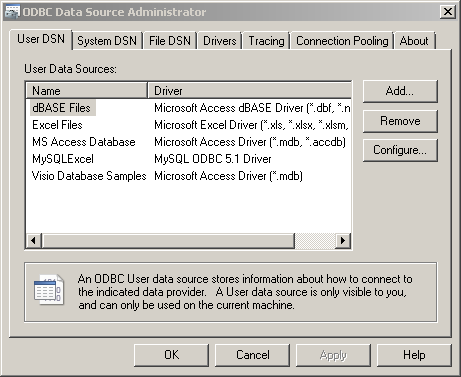
- This is where you add a new User Data Source. Click the Add button on the right of the dialog box.
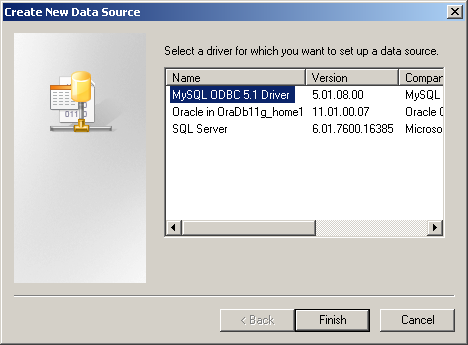
- The Create New Data Source dialog box should show the MySQL ODBC 5.1 Driver that you installed earlier. Click on it in the selection box, and then click the Finish button.
- The MySQL Connector/ODBC Data Source Configuration dialog prompts you for a Data Source Name (DSN), a description, a TCP/IP Server, a port number, a user, a password, and a database. I’ve entered a
studentuser with a trivialstudentpassword, and astudentdbdatabase. Before finishing with this dialog, you should click the Test to ensure you can connect to the database.
- The test should be successful and display the following message. Click the OK button to dismiss the affirmation of the test.
- After the test, you return to the first screen where you should see that you’ve added a MySQLExcel Data Source Name. Click the OK button to dismiss the affirmation of the test.
Setup Data Import
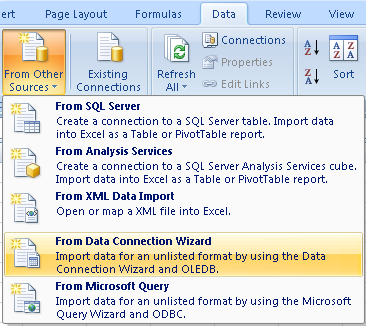
- After launching Microsoft Excel, click on the Data Ribbon. Click the From Other Sources button. In the drop down menu, click on the From Data Connection Wizard item, which launches the Data Connection Wizard.
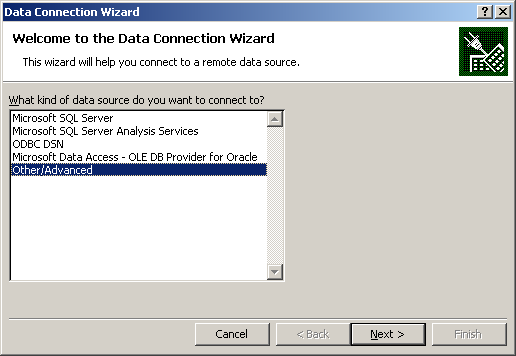
- Choose the Other/Advanced item from the list of data sources. Click the Next button to continue.
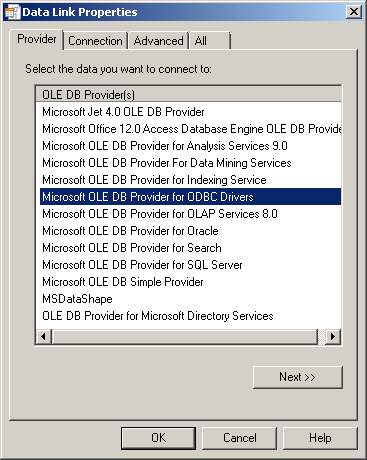
- Choose the Microsoft OLE DB Provider for ODBC Drivers item from the list of OLE DB Provider(s). Click the Next button to continue.
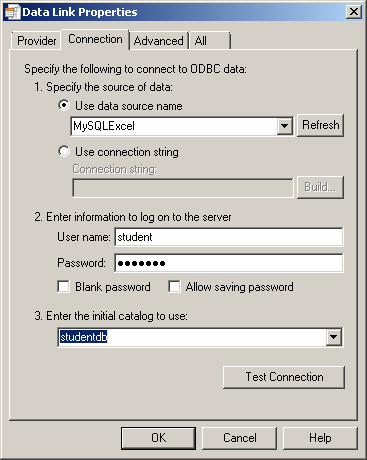
- Choose the Connection tab in the Data Link Properties dialog. Under item #1, choose the Data Source Name (DSN) from the drop down box (set in a previous statement). Under item #2, enter the
studentuser name andstudentpassword. Under item #3, enter the MySQLstudentdbdatabase. Click the OK button to continue.
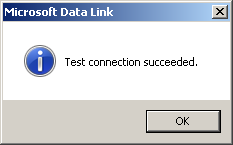
- Click the Test Connection in the prior dialog to verify that you can connect. You should see the following message if the connection works. You can click the OK button to dismiss the Data Link Connection dialog. Then, click the OK button on the Data Link Properties dialog.
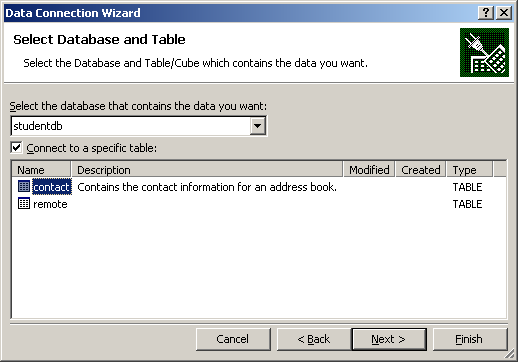
- This dialog lets you select a database and table. Select the
studentdbdatabase from the drop down menu. Then, pick thecontacttable.
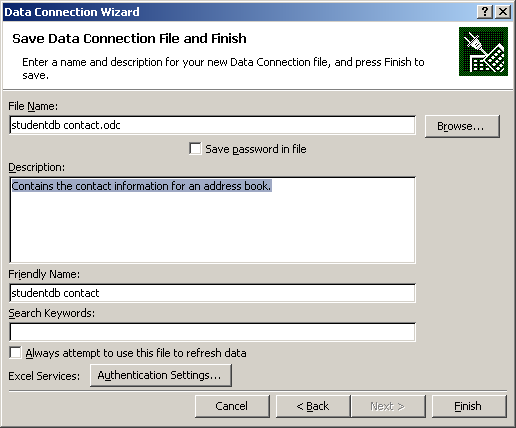
- The last dialog lets you save the connection. Click the Finish button to save the connection.
- The Data Import Wizard is complete with the last step. Now, you must import the data into the existing worksheet or a new worksheet.
You should now have the rows from the table inserted into the spreadsheet, like this:
As always, I hope this helps those trying to sort through how this works. Naturally, a Visual Basic for Applications (VBA) solution is a better alternative once you’ve set up the data source.





[…] moved the post to a page of it’s own […]
Query from MySQL in Excel
15 Feb 11 at 10:43 pm
[…] Oracle ODBC Data Source […]
ODBC required for Excel
13 Nov 11 at 12:59 am
[…] Reference: -> https://blog.mclaughlinsoftware.commicrosoft-excel/accessing-to-mysql/ […]
SQL Drill – Excel Add-In for building and running SQL queries | Windows Admin Notes
16 Mar 12 at 3:52 pm
I tried this and it didn’t work — what I got is “Test connection failed because of an error in initializing provider. [Microsoft][ODBC Driver Manager] The specified DSN contains an architecture mismatch between the Driver and the Application”. I am using Excel 2007 and under “Data Source name”, my DSN that I defined in the Control Panel –> ODBC Data Sources didn’t show up — I had to type it in.
T Bee
24 Oct 12 at 1:11 pm
Can you answer these questions:
Is the operating system 32-bit or 64-bit?
Is the MySQL Server 32-bit or 64-bit?
Is the MySQL Connector 32-bit or 64-bit?
maclochlainn
24 Oct 12 at 7:48 pm
Working perfectly for me.. thanx
Rajneesh
6 Nov 13 at 1:39 am
I came here after struggling to get a connection from 32-bit Excel (Excel 2007) to MySql using Windows 7 (64-bit). It seems that for this you need both the 32-bit and 64-bit ODBC drivers. And version 5.1.8 is the only (or most recent) version where the installer contains both.
So, thanks for pointing me the right way!
Ross Kavanagh
28 Nov 13 at 2:04 pm