Archive for January, 2024
VSCode & $PYTHONPATH
About 4 years ago, I demonstrated how to develop Python functions with a relative src directory in this old blog post. I thought it might be possible to do with VSCode. Doing a bit of research, it appeared all that was required was adding the PythonPath to VSCode’s Python settings in:
/home/student/.vscode/extensions/ms-python.python-2023.22.0/pythonFiles/.vscode/settings.json |
It contained:
{"files.exclude":{"**/__pycache__/**":true,"**/**/*.pyc":true},"python.formatting.provider":"black"} |
I added a configuration for the PYTHONPATH, as shown:
{"files.exclude":{"**/__pycache__/**":true,"**/**/*.pyc":true},"python.formatting.provider":"black","python.pythonPath": "/home/student/Lib"} |
As you can tell from the embedded VSCode Terminal output below, the PYTHONPATH is not found. You can manually enter it and retest your code successfully. There is no way to use a relative PYTHONPATH like the one you can use from an shell environment file.
This is the hello_whom5.py code:
#!/usr/bin/python # Import the basic sys library. import sys from input import parse_input # Assign command-line argument list to variable. whom = parse_input(sys.argv) # Check if string isn't empty and use dynamic input. if len(whom) > 0: # Print dynamic hello salutation. print("Hello " + whom + "!\n") else: # Print default saluation. print("Hello World!") |
This is the input.py library module:
# Parse a list and return a whitespace delimited string. def parse_input(input_list): # Assign command-line argument list to variable. cmd_list = input_list[1:] # Declare return variable. result = "" # Check whether or not their are parameters beyond the file name. if isinstance(input_list,list) and len(input_list) != 0: # Loop through the command-line argument list and print it. for element in cmd_list: if len(result) == 0: result = element else: result = result + " " + element # Return result variable as string. return result |
This is the Terminal output from VSCode:
student@student-virtual-machine:~$ /bin/python /home/student/Code/python/hello_whom5.py Traceback (most recent call last): File "/home/student/Code/python/hello_whom5.py", line 5, in <module> from input import parse_input ModuleNotFoundError: No module named 'input' student@student-virtual-machine:~$ export set PYTHONPATH=/home/student/Lib student@student-virtual-machine:~$ /bin/python /home/student/Code/python/hello_whom5.py Hello World! student@student-virtual-machine:~$ /bin/python /home/student/Code/python/hello_whom5.py Katniss Everdeen Hello Katniss Everdeen! student@student-virtual-machine:~$ |
The VSCode image for the test follows below:

As always, I hope this helps somebody working the same issue. However, if somebody has a better solution, please let me know.
Ubuntu Next.js Install
You begin by setting up Node with its version manager. You can do this in a Terminal shell with the following command:
curl -o- https://raw.githubusercontent.com/nvm-sh/nvm/v0.39.1/install.sh | bash |
After running that command, you should reboot your system. Then, open a new Terminal session and start NVM with this command in your home directory:
nvm install --lts |
Display detailed console log →
Installing latest LTS version. Downloading and installing node v20.11.0... Downloading https://nodejs.org/dist/v20.11.0/node-v20.11.0-linux-x64.tar.xz... ######################################################################### 100.0% Computing checksum with sha256sum Checksums matched! Now using node v20.11.0 (npm v10.2.4) Creating default alias: default -> lts/* (-> v20.11.0) |
After installing Node, create a new Next.js application to test if everything is working. Create a blog-app application with the following command in the Ubuntu bash shell session:
npx create-next-app@latest blog-app |
It produces a small console log and asks you complete interactive responses as shown:
Need to install the following packages:
create-next-app@14.0.4
Ok to proceed? (y) y
✔ Would you like to use TypeScript? … No / Yes
✔ Would you like to use ESLint? … No / Yes
✔ Would you like to use Tailwind CSS? … No / Yes
✔ Would you like to use `src/` directory? … No / Yes
✔ Would you like to use App Router? (recommended) … No / Yes
✔ Would you like to customize the default import alias (@/*)? … No / Yes
Creating a new Next.js app in /home/student/blog-app.
Display detailed console log →
Using npm. Initializing project with template: app-tw Installing dependencies: - react - react-dom - next Installing devDependencies: - typescript - @types/node - @types/react - @types/react-dom - autoprefixer - postcss - tailwindcss - eslint - eslint-config-next added 362 packages, and audited 363 packages in 25s 128 packages are looking for funding run `npm fund` for details found 0 vulnerabilities Success! Created blog-app at /home/student/blog-app npm notice npm notice New minor version of npm available! 10.2.4 -> 10.3.0 npm notice Changelog: https://github.com/npm/cli/releases/tag/v10.3.0 npm notice Run npm install -g npm@10.3.0 to update! npm notice |
Now, you can launch the application from the command-line interface (CLI):
npm run dev & |
Display detailed console log →
> blog-app@0.1.0 dev > next dev ▲ Next.js 14.0.4 - Local: http://localhost:3000 Attention: Next.js now collects completely anonymous telemetry regarding usage. This information is used to shape Next.js' roadmap and prioritize features. You can learn more, including how to opt-out if you'd not like to participate in this anonymous program, by visiting the following URL: https://nextjs.org/telemetry ✓ Ready in 1937ms ○ Compiling / ... ✓ Compiled / in 14.9s (500 modules) ✓ Compiled in 597ms (235 modules) ○ Compiling /favicon.ico ... ✓ Compiled /favicon.ico in 2.1s (505 modules) |
You can view the running application by using the following URL in a local browser:
http://localhost:3000 |
It should render the following web application:
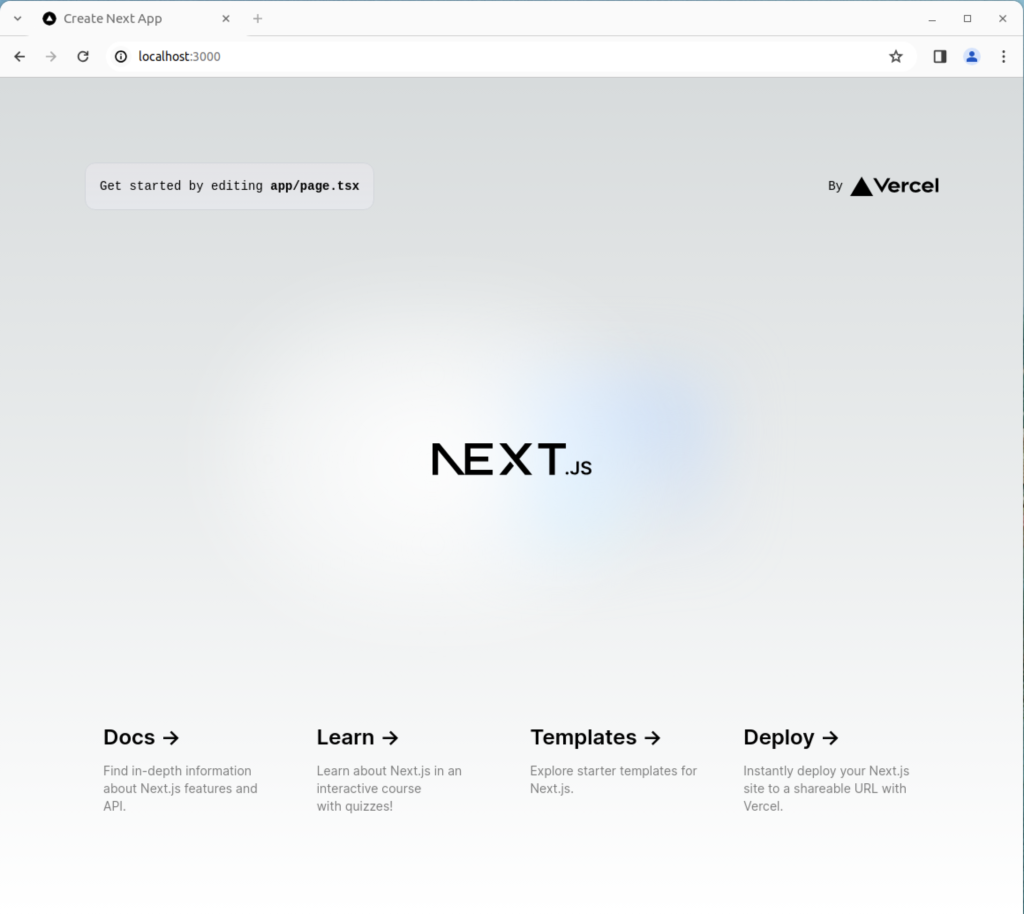
As always, I hope this helps those curious about new things and who need a set of instructions.
Ubuntu, R, RScript & RStudio
Installed R, Rscript, and RStudio on my student Ubuntu instance. You use the following command to install R a
sudo apt install -y r-base-core |
Then, you can check the version with the following command:
R --version |
It should return:
R version 4.1.2 (2021-11-01) -- "Bird Hippie" Copyright (C) 2021 The R Foundation for Statistical Computing Platform: x86_64-pc-linux-gnu (64-bit) R is free software and comes with ABSOLUTELY NO WARRANTY. You are welcome to redistribute it under the terms of the GNU General Public License versions 2 or 3. For more information about these matters see https://www.gnu.org/licenses/. |
You also can run the interactive R environment by simply typing “R” at the command-line interface (CLI). It will display the following after entering the environment, quitting the environment, and discarding the workspace:
R version 4.1.2 (2021-11-01) -- "Bird Hippie" Copyright (C) 2021 The R Foundation for Statistical Computing Platform: x86_64-pc-linux-gnu (64-bit) R is free software and comes with ABSOLUTELY NO WARRANTY. You are welcome to redistribute it under certain conditions. Type 'license()' or 'licence()' for distribution details. Natural language support but running in an English locale R is a collaborative project with many contributors. Type 'contributors()' for more information and 'citation()' on how to cite R or R packages in publications. Type 'demo()' for some demos, 'help()' for on-line help, or 'help.start()' for an HTML browser interface to help. Type 'q()' to quit R. > q() Save workspace image? [y/n/c]: n |
You can write and run a hello.r script file as follows in a Linux environment:
#!/usr/bin/Rscript

# Print a string.
print("Hello World!") |
It prints what you would expect:
[1] "Hello World!" |
The RStudio comes in two versions. One is Free and the other costs money. These are not hosted in the Ubuntu repository, and you must download them manually to apply them. You can go to RStudio web site or run the following command to download RStudio Free edition:
wget https://download1.rstudio.org/electron/jammy/amd64/rstudio-2023.12.0-369-amd64.deb |
After downloading the package, you can’t quite install RStudio until you install two likely uninstalled dependencies, which are:
libclang-dev libclang-14-dev libclang1-14 libclang-common-14-dev lib32gcc-s1 lib32stdc++6 libc6-i386 libobjc4 libobjc-11-dev libssl-dev |
Therefore, the prestep is:
sudo apt install -y libssl-dev libclang-dev libclang-14-dev libobjc-11-dev libclang1-14 libclang-common-14-dev lib32gcc-s1 lib32stdc++6 libc6-i386 libobjc4 |
Display detailed console log →
Reading package lists... Done Building dependency tree... Done Reading state information... Done Suggested packages: libssl-doc The following NEW packages will be installed: lib32gcc-s1 lib32stdc++6 libc6-i386 libclang-14-dev libclang-common-14-dev libclang-dev libclang1-14 libobjc-11-dev libobjc4 libssl-dev 0 upgraded, 10 newly installed, 0 to remove and 14 not upgraded. 1 not fully installed or removed. Need to get 44.2 MB of archives. After this operation, 382 MB of additional disk space will be used. Get:1 http://us.archive.ubuntu.com/ubuntu jammy-updates/main amd64 libssl-dev amd64 3.0.2-0ubuntu1.12 [2,373 kB] Get:2 http://us.archive.ubuntu.com/ubuntu jammy-updates/universe amd64 libobjc4 amd64 12.3.0-1ubuntu1~22.04 [48.6 kB] Get:3 http://us.archive.ubuntu.com/ubuntu jammy-updates/universe amd64 libobjc-11-dev amd64 11.4.0-1ubuntu1~22.04 [196 kB] Get:4 http://us.archive.ubuntu.com/ubuntu jammy-updates/universe amd64 libclang1-14 amd64 1:14.0.0-1ubuntu1.1 [6,792 kB] Get:5 http://us.archive.ubuntu.com/ubuntu jammy-updates/main amd64 libc6-i386 amd64 2.35-0ubuntu3.5 [2,837 kB] Get:6 http://us.archive.ubuntu.com/ubuntu jammy-updates/main amd64 lib32gcc-s1 amd64 12.3.0-1ubuntu1~22.04 [63.9 kB] Get:7 http://us.archive.ubuntu.com/ubuntu jammy-updates/main amd64 lib32stdc++6 amd64 12.3.0-1ubuntu1~22.04 [740 kB] Get:8 http://us.archive.ubuntu.com/ubuntu jammy-updates/universe amd64 libclang-common-14-dev amd64 1:14.0.0-1ubuntu1.1 [5,975 kB] Get:9 http://us.archive.ubuntu.com/ubuntu jammy-updates/universe amd64 libclang-14-dev amd64 1:14.0.0-1ubuntu1.1 [25.2 MB] Get:10 http://us.archive.ubuntu.com/ubuntu jammy/universe amd64 libclang-dev amd64 1:14.0-55~exp2 [3,138 B] Fetched 44.2 MB in 3s (17.1 MB/s) Selecting previously unselected package libssl-dev:amd64. (Reading database ... 242640 files and directories currently installed.) Preparing to unpack .../0-libssl-dev_3.0.2-0ubuntu1.12_amd64.deb ... Unpacking libssl-dev:amd64 (3.0.2-0ubuntu1.12) ... Selecting previously unselected package libobjc4:amd64. Preparing to unpack .../1-libobjc4_12.3.0-1ubuntu1~22.04_amd64.deb ... Unpacking libobjc4:amd64 (12.3.0-1ubuntu1~22.04) ... Selecting previously unselected package libobjc-11-dev:amd64. Preparing to unpack .../2-libobjc-11-dev_11.4.0-1ubuntu1~22.04_amd64.deb ... Unpacking libobjc-11-dev:amd64 (11.4.0-1ubuntu1~22.04) ... Selecting previously unselected package libclang1-14. Preparing to unpack .../3-libclang1-14_1%3a14.0.0-1ubuntu1.1_amd64.deb ... Unpacking libclang1-14 (1:14.0.0-1ubuntu1.1) ... Selecting previously unselected package libc6-i386. Preparing to unpack .../4-libc6-i386_2.35-0ubuntu3.5_amd64.deb ... Unpacking libc6-i386 (2.35-0ubuntu3.5) ... Selecting previously unselected package lib32gcc-s1. Preparing to unpack .../5-lib32gcc-s1_12.3.0-1ubuntu1~22.04_amd64.deb ... Unpacking lib32gcc-s1 (12.3.0-1ubuntu1~22.04) ... Selecting previously unselected package lib32stdc++6. Preparing to unpack .../6-lib32stdc++6_12.3.0-1ubuntu1~22.04_amd64.deb ... Unpacking lib32stdc++6 (12.3.0-1ubuntu1~22.04) ... Selecting previously unselected package libclang-common-14-dev. Preparing to unpack .../7-libclang-common-14-dev_1%3a14.0.0-1ubuntu1.1_amd64.deb ... Unpacking libclang-common-14-dev (1:14.0.0-1ubuntu1.1) ... Selecting previously unselected package libclang-14-dev. Preparing to unpack .../8-libclang-14-dev_1%3a14.0.0-1ubuntu1.1_amd64.deb ... Unpacking libclang-14-dev (1:14.0.0-1ubuntu1.1) ... Selecting previously unselected package libclang-dev. Preparing to unpack .../9-libclang-dev_1%3a14.0-55~exp2_amd64.deb ... Unpacking libclang-dev (1:14.0-55~exp2) ... Setting up libclang1-14 (1:14.0.0-1ubuntu1.1) ... Setting up libobjc4:amd64 (12.3.0-1ubuntu1~22.04) ... Setting up libssl-dev:amd64 (3.0.2-0ubuntu1.12) ... Setting up libc6-i386 (2.35-0ubuntu3.5) ... Setting up libobjc-11-dev:amd64 (11.4.0-1ubuntu1~22.04) ... Setting up lib32gcc-s1 (12.3.0-1ubuntu1~22.04) ... Setting up lib32stdc++6 (12.3.0-1ubuntu1~22.04) ... Setting up libclang-common-14-dev (1:14.0.0-1ubuntu1.1) ... Setting up libclang-14-dev (1:14.0.0-1ubuntu1.1) ... Setting up libclang-dev (1:14.0-55~exp2) ... Setting up rstudio (2023.12.0+369) ... Processing triggers for libc-bin (2.35-0ubuntu3.5) ... |
Then, you can install RStudio with this command from the directory where you downloaded it:
sudo dpkg -i rstudio-2023.12.0-369-amd64.deb |
Display detailed console log →
Selecting previously unselected package rstudio. (Reading database ... 239285 files and directories currently installed.) Preparing to unpack rstudio-2023.12.0-369-amd64.deb ... Unpacking rstudio (2023.12.0+369) ... Setting up rstudio (2023.12.0+369) ... Processing triggers for mailcap (3.70+nmu1ubuntu1) ... Processing triggers for gnome-menus (3.36.0-1ubuntu3) ... Processing triggers for desktop-file-utils (0.26-1ubuntu3) ... Processing triggers for hicolor-icon-theme (0.17-2) ... Processing triggers for shared-mime-info (2.1-2) ... |
After a successful installation, you can launch RStudio with the following command:
rstudio |
You will get the following console:
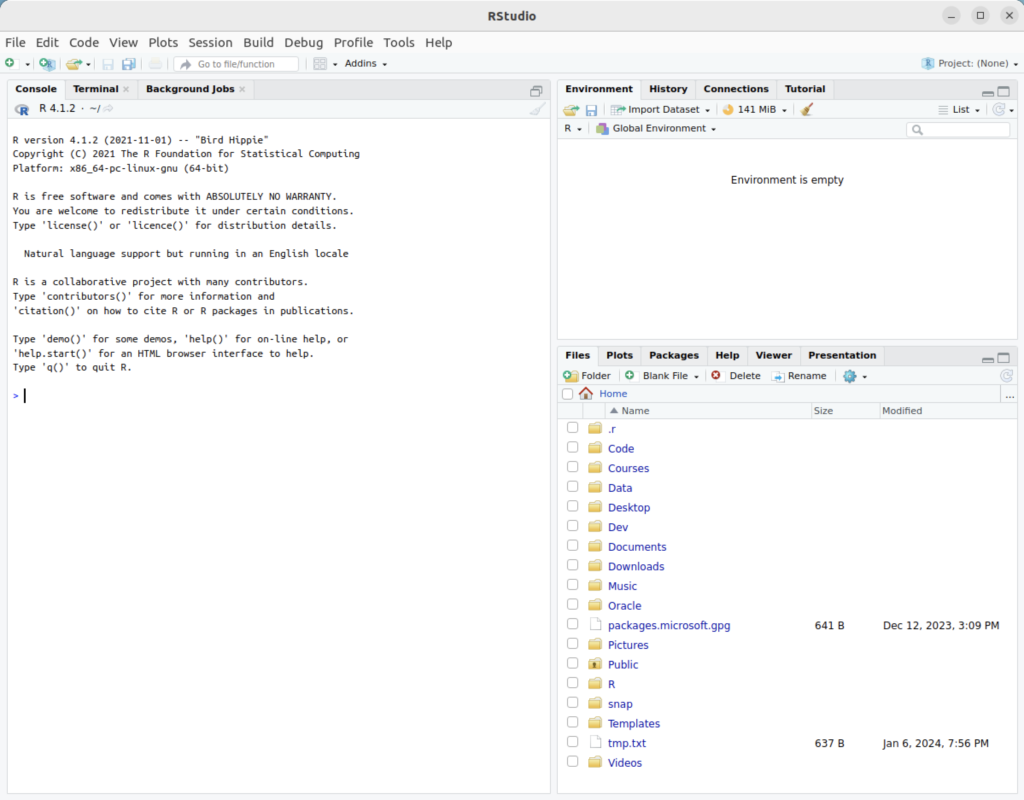
As always, I hope this helps those trying to do something that should be simple but isn’t quite simple.
Ubuntu, Perl & MySQL
Configuring Perl to work with MySQL is straight forward. While Perl is installed generally, you may need to install the libdbd-mysql-perl library.
You install it as a sudoer user with this syntax:
sudo apt install -y libdbd-mysql-perl |
Display detailed console log →
Reading package lists... Done Building dependency tree... Done Reading state information... Done The following additional packages will be installed: libmysqlclient21 The following NEW packages will be installed: libdbd-mysql-perl libmysqlclient21 0 upgraded, 2 newly installed, 0 to remove and 12 not upgraded. Need to get 1,389 kB of archives. After this operation, 7,143 kB of additional disk space will be used. Get:1 http://us.archive.ubuntu.com/ubuntu jammy-updates/main amd64 libmysqlclient21 amd64 8.0.35-0ubuntu0.22.04.1 [1,301 kB] Get:2 http://us.archive.ubuntu.com/ubuntu jammy-updates/universe amd64 libdbd-mysql-perl amd64 4.050-5ubuntu0.22.04.1 [87.6 kB] Fetched 1,389 kB in 1s (1,213 kB/s) Selecting previously unselected package libmysqlclient21:amd64. (Reading database ... 235085 files and directories currently installed.) Preparing to unpack .../libmysqlclient21_8.0.35-0ubuntu0.22.04.1_amd64.deb ... Unpacking libmysqlclient21:amd64 (8.0.35-0ubuntu0.22.04.1) ... Selecting previously unselected package libdbd-mysql-perl:amd64. Preparing to unpack .../libdbd-mysql-perl_4.050-5ubuntu0.22.04.1_amd64.deb ... Unpacking libdbd-mysql-perl:amd64 (4.050-5ubuntu0.22.04.1) ... Setting up libmysqlclient21:amd64 (8.0.35-0ubuntu0.22.04.1) ... Setting up libdbd-mysql-perl:amd64 (4.050-5ubuntu0.22.04.1) ... Processing triggers for man-db (2.10.2-1) ... Processing triggers for libc-bin (2.35-0ubuntu3.5) ... |
You can find the Perl version with the following version.pl program:
1 2 3 4 | #!/usr/bin/perl -w # Print the version. print "Perl ".$]."\n"; |
The first line lets you call the program without prefacing the program name with perl. The first line invokes a subshell of perl by default. You just need to ensure the file has read and execute privileges to run by using the
chmod 755 version.pl |
You call it with this:
./version.pl |
It prints:
Perl 5.034000 |
The following static_query.pl Perl program uses the Perl DBI library to query and return a data set based on a static query.
1 2 3 4 5 6 7 8 9 10 11 12 13 14 15 16 17 18 19 20 21 22 23 24 25 26 27 28 29 30 31 32 33 34 35 36 37 | #!/usr/bin/perl -w # Use the DBI library. use DBI; use strict; use warnings; # Create a connection. my $dbh = DBI->connect("DBI:mysql:database=studentdb;host=localhost:3306" ,"student","student",{'RaiseError' => 1}); # Create SQL statement. my $sql = "SELECT i.item_title , ra.rating , cl.common_lookup_meaning FROM item i INNER JOIN common_lookup cl ON i.item_type = cl.common_lookup_id INNER JOIN rating_agency ra ON i.item_rating_id = ra.rating_agency_id WHERE i.item_title LIKE 'Harry%' AND cl.common_lookup_type = 'BLU-RAY'"; # Prepare SQL statement. my $sth = $dbh->prepare($sql); # Execute statement and read result set. $sth->execute() or die $DBI::errstr; # Read through returned rows, assign elements explicitly to match SELECT-list. while (my @row = $sth->fetchrow_array()) { my $item_title = $row[0]; my $rating = $row[1]; my $lookup_meaning = $row[2]; print "$item_title, $rating, $lookup_meaning\n"; } # Close resources. $sth->finish(); |
It returns the following rows from the sample database:
Harry Potter and the Sorcerer's Stone, PG, Blu-ray Harry Potter and the Chamber of Secrets, PG, Blu-ray Harry Potter and the Prisoner of Azkaban, PG, Blu-ray Harry Potter and the Goblet of Fire, PG-13, Blu-ray |
The following dynamic_query.pl Perl program uses the Perl DBI library to prepare a query, bind a local variable into the query, and return a data set based on a dynamic query.
1 2 3 4 5 6 7 8 9 10 11 12 13 14 15 16 17 18 19 20 21 22 23 24 25 26 27 28 29 30 31 32 33 34 35 36 37 38 39 40 41 42 43 | #!/usr/bin/perl -w # Use the DBI library. use DBI; use strict; use warnings; # Mimic a function parameter by using a local variable. my $item_title_in = 'Star'; # Create a connection. my $dbh = DBI->connect("DBI:mysql:database=studentdb;host=localhost:3306" ,"student","student",{'RaiseError' => 1}); # Create SQL statement. my $sql = "SELECT i.item_title , ra.rating , cl.common_lookup_meaning FROM item i INNER JOIN common_lookup cl ON i.item_type = cl.common_lookup_id INNER JOIN rating_agency ra ON i.item_rating_id = ra.rating_agency_id WHERE i.item_title LIKE CONCAT(?,'%') AND cl.common_lookup_type = 'BLU-RAY'"; # Prepare SQL statement. my $sth = $dbh->prepare($sql); # Bind a variable to first parameter in the query string. $sth->bind_param(1, $item_title_in); # Execute statement and read result set. $sth->execute() or die $DBI::errstr; # Read through returned rows, assign elements explicitly to match SELECT-list. while (my @row = $sth->fetchrow_array()) { my $item_title = $row[0]; my $rating = $row[1]; my $lookup_meaning = $row[2]; print "$item_title, $rating, $lookup_meaning\n"; } # Close resources. $sth->finish(); |
It returns the following rows from the sample database:
Star Wars II, PG, Blu-ray |
You can replace lines 34 through 40 with the following to read any number of columns into a comma-delimited row return:
34 35 36 37 38 39 40 41 42 43 44 45 46 47 48 | # Read through returned rows, assign elements explicitly to match SELECT-list. while (my @row = $sth->fetchrow_array()) { # Read through a dynamic column list for column separated display. my $result = ''; foreach(@row) { if (length($result) == 0) { $result = $_; } else { $result .= ", " . $_; } } # Print comma-separted values by row. print $result . "\n" } |
It returns the following rows from the sample database:
Star Wars II, PG, Blu-ray |
As always, I hope this helps the reader solve a problem.
Oracle 23c Free Ext Files
This is an example of how you would upload data from a flat file, or Comma Separated Value (CSV) file inside Docker Oracle Database 23c Free. It’s important to note that in the file upload you are transferring information that doesn’t have surrogate key values by leveraing joins inside a MERGE statement.
Step #1 : Create a virtual directory
You can create a virtual directory without a physical directory but it won’t work when you try to access it. Therefore, you should create the physical directory first. Assuming you’ve created the Docker Oracle Database 23c Free instance, you should put the code in subdirectories of the /opt/oracle file directory.
- Connect as the root user with the following Docker command:
docker exec -it --user root oracle23c bash
Issue the following commands as the oracle user inside the Docker container to create the necessary physical directories. You may need to refer to my earlier blog post if you haven’t setup the oracle user inside the Docker instance. While this blog post will only use the /opt/oracle/upload/text and /opt/oracle/upload/log directories, a subsequent post will demonstrate the preprocessing module for the external tables.
mkdir /opt/oracle/upload
mkdir /opt/oracle/upload/text
mkdir /opt/oracle/upload/log
mkdir /opt/oracle/upload/preproc
- Connect to the Oracle Database 23c Free inside the container as the system user to create a c##studentrole, and do the following three things:
- Grant privileges to the c##studentrole, and grant the c##studentrole to the c##student user.
-- Create the role.
CREATE ROLE c##studentrole;

-- Grant privileges to the role.
GRANT CREATE CLUSTER, CREATE INDEXTYPE, CREATE PROCEDURE,
CREATE SEQUENCE, CREATE SESSION, CREATE TABLE, CREATE TRIGGER,
CREATE TYPE, CREATE VIEW TO c##studentrole;

-- Grant privileges to the user.
GRANT c##studentrole TO c##student;
- As the system user, create the necessary virtual directories that map to the physical directories inside the Docker container:
CREATE DIRECTORY upload AS '/opt/oracle/upload/text';
CREATE DIRECTORY preproc AS '/opt/oracle/upload/preproc';
CREATE DIRECTORY LOG AS '/opt/oracle/upload/log';
- As the system user, grant the necessary privileges on the virtual directories to the c##studentrole role:
GRANT read ON DIRECTORY upload TO c##studentrole;
GRANT read, WRITE ON DIRECTORY LOG TO c##studentrole;
GRANT read, EXECUTE ON DIRECTORY preproc TO c##studentrole;
- Grant privileges to the c##studentrole, and grant the c##studentrole to the c##student user.
Step #2 : Position your CSV file in the physical directory
After creating the virtual directory, copy the following contents into a file named kingdom_import.csv in the /opt/oracle/upload/texgt directory or folder. If you attempt to do this in Windows, you need to disable Windows UAC before performing this step.
Place the following in the kingdom_import.csv file. The trailing commas aren’t too meaningful in Oracle but they’re very helpful if you use the file in MySQL. A key element in creating this files requires that you avoid trailing line returns at the bottom of the file because they’re inserted as null values. There should be no lines after the last row of data.
'Narnia',77600,'Peter the Magnificent','20-MAR-1272','19-JUN-1292','The Lion, The Witch and The Wardrobe', 'Narnia',77600,'Edmund the Just','20-MAR-1272','19-JUN-1292','The Lion, The Witch and The Wardrobe', 'Narnia',77600,'Susan the Gentle','20-MAR-1272','19-JUN-1292','The Lion, The Witch and The Wardrobe', 'Narnia',77600,'Lucy the Valiant','20-MAR-1272','19-JUN-1292','The Lion, The Witch and The Wardrobe', 'Narnia',42100,'Peter the Magnificent','12-APR-1531','31-MAY-1328','Prince Caspian', 'Narnia',42100,'Edmund the Just','12-APR-1531','31-MAY-1328','Prince Caspian', 'Narnia',42100,'Susan the Gentle','12-APR-1531','31-MAY-1328','Prince Caspian', 'Narnia',42100,'Lucy the Valiant','12-APR-1531','31-MAY-1328','Prince Caspian', 'Camelot',15200,'King Arthur','10-MAR-0631','12-DEC-0686','The Once and Future King', 'Camelot',15200,'Sir Lionel','10-MAR-0631','12-DEC-0686','The Once and Future King', 'Camelot',15200,'Sir Bors','10-MAR-0631','12-DEC-0635','The Once and Future King', 'Camelot',15200,'Sir Bors','10-MAR-0640','12-DEC-0686','The Once and Future King', 'Camelot',15200,'Sir Galahad','10-MAR-0631','12-DEC-0686','The Once and Future King', 'Camelot',15200,'Sir Gawain','10-MAR-0631','12-DEC-0686','The Once and Future King', 'Camelot',15200,'Sir Tristram','10-MAR-0631','12-DEC-0686','The Once and Future King', 'Camelot',15200,'Sir Percival','10-MAR-0631','12-DEC-0686','The Once and Future King', 'Camelot',15200,'Sir Lancelot','30-SEP-0670','12-DEC-0686','The Once and Future King', |
Step #3 : Reconnect as the student user
Disconnect and connect as the c##student user, or reconnect as the c##student user. The reconnect syntax that protects your password is:
CONNECT c##student@free |
Step #4 : Run the script that creates tables and sequences
Copy the following into a create_kingdom_upload.sql file within a directory of your choice. I use varchar as the data type because it’s an alias for varchar2 and highlights appropriately with the GeSHi formatting. Then, run it as the student account.
1 2 3 4 5 6 7 8 9 10 11 12 13 14 15 16 17 18 19 20 21 22 23 24 25 26 27 28 29 30 31 32 33 34 35 36 37 38 39 40 41 42 43 44 45 46 47 48 49 50 51 52 | -- Conditionally drop tables. DROP TABLE IF EXISTS kingdom; DROP TABLE IF EXISTS knight; DROP TABLE IF EXISTS kingdom_knight_import; -- Conditionally drop sequences. DROP SEQUENCE IF EXISTS kingdom_s1; DROP SEQUENCE IF EXISTS knight_s1; -- Create normalized kingdom table. CREATE TABLE kingdom ( kingdom_id NUMBER , kingdom_name VARCHAR(20) , population NUMBER , book VARCHAR(40)); -- Create a sequence for the kingdom table. CREATE SEQUENCE kingdom_s1; -- Create normalized knight table. CREATE TABLE knight ( knight_id NUMBER , knight_name VARCHAR(22) , kingdom_allegiance_id NUMBER , allegiance_start_date DATE , allegiance_end_date DATE , book VARCHAR(40)); -- Create a sequence for the knight table. CREATE SEQUENCE knight_s1; -- Create external import table. CREATE TABLE kingdom_knight_import ( kingdom_name VARCHAR(20) , population NUMBER , knight_name VARCHAR(22) , allegiance_start_date DATE , allegiance_end_date DATE , book VARCHAR(40)) ORGANIZATION EXTERNAL ( TYPE oracle_loader DEFAULT DIRECTORY upload ACCESS PARAMETERS ( RECORDS DELIMITED BY NEWLINE CHARACTERSET US7ASCII BADFILE 'LOG':'kingdom_import.bad' DISCARDFILE 'LOG':'kingdom_import.dis' LOGFILE 'LOG':'kingdom_import.log' FIELDS TERMINATED BY ',' OPTIONALLY ENCLOSED BY "'" MISSING FIELD VALUES ARE NULL ) LOCATION ('kingdom_import.csv')) REJECT LIMIT UNLIMITED; |
Step #5 : Test your access to the external table
There a number of things that could go wrong with setting up an external table, such as file permissions. Before moving on to the balance of the steps, you should test what you’ve done. Run the following query from the student account to check whether or not you can access the kingdom_import.csv file.
1 2 3 4 5 6 7 8 9 10 11 12 | SET PAGESIZE 999 COL kingdom_name FORMAT A7 HEADING "Kingdom|Name" COL folks FORMAT 99999 HEADING "Folks" COL knight_name FORMAT A21 HEADING "Knight Name" COL dates FORMAT A11 HEADING "Start Date" COL source_book FORMAT A38 HEADING "Book" SELECT kingdom_name , knight_name , TO_CHAR(allegiance_start_date,'DD-MON-YYYY') || TO_CHAR(allegiance_end_date,'DD-MON-YYYY') AS dates , book FROM kingdom_knight_import; |
Step #6 : Create the upload procedure
Copy the following into a create_upload_procedure.sql file within a virtual directory of your choice. As noted above in the external table definition writes only occur in the log virtual directory. This is important because there are articles out there on the Internet that could misdirect you when you get the following error message on the upload virtual directory.
ORA-06564: Object UPLOAD does not exist or is not accessible to the user. |
By the way, you’ll only see that error if you fail to:
- Designate the procedure as AUTH_ID CURRENT, and
- Enabled SERVEROUTPUT inside the SQL*Plus command-line interface (CLI) session or inside the glogin.sql file for the Oracle Database 23c Free Docker instance.
Then, run it as the student account.
1 2 3 4 5 6 7 8 9 10 11 12 13 14 15 16 17 18 19 20 21 22 23 24 25 26 27 28 29 30 31 32 33 34 35 36 37 38 39 40 41 42 43 44 45 46 47 48 49 50 51 52 53 54 55 56 57 58 59 60 61 62 63 64 65 66 67 68 | -- Create a procedure to wrap the transaction. CREATE OR REPLACE PROCEDURE upload_kingdom AUTHID CURRENT_USER IS BEGIN -- Set save point for an all or nothing transaction. SAVEPOINT starting_point; -- Insert or update the table, which makes this rerunnable when the file hasn't been updated. MERGE INTO kingdom target USING (SELECT DISTINCT k.kingdom_id , kki.kingdom_name , kki.population , kki.book FROM kingdom_knight_import kki LEFT JOIN kingdom k ON kki.kingdom_name = k.kingdom_name AND kki.population = k.population AND kki.book = k.book) SOURCE ON (target.kingdom_id = SOURCE.kingdom_id) WHEN MATCHED THEN UPDATE SET kingdom_name = SOURCE.kingdom_name WHEN NOT MATCHED THEN INSERT VALUES ( kingdom_s1.nextval , SOURCE.kingdom_name , SOURCE.population , SOURCE.book); -- Insert or update the table, which makes this rerunnable when the file hasn't been updated. MERGE INTO knight target USING (SELECT kn.knight_id , kki.knight_name , k.kingdom_id , kki.allegiance_start_date AS start_date , kki.allegiance_end_date AS end_date , kki.book FROM kingdom_knight_import kki INNER JOIN kingdom k ON kki.kingdom_name = k.kingdom_name AND kki.population = k.population LEFT JOIN knight kn ON k.kingdom_id = kn.kingdom_allegiance_id AND kki.knight_name = kn.knight_name AND kki.allegiance_start_date = kn.allegiance_start_date AND kki.allegiance_end_date = kn.allegiance_end_date AND kki.book = kn.book) SOURCE ON (target.kingdom_allegiance_id = SOURCE.kingdom_id) WHEN MATCHED THEN UPDATE SET allegiance_start_date = SOURCE.start_date , allegiance_end_date = SOURCE.end_date , book = SOURCE.book WHEN NOT MATCHED THEN INSERT VALUES ( knight_s1.nextval , SOURCE.knight_name , SOURCE.kingdom_id , SOURCE.start_date , SOURCE.end_date , SOURCE.book); -- Save the changes. COMMIT; EXCEPTION WHEN OTHERS THEN dbms_output.put_line(SQLERRM); ROLLBACK TO starting_point; RETURN; END; / |
Step #7 : Run the upload procedure
You can run the file by calling the script above. The procedure ensures that records are inserted or updated into their respective tables.
EXECUTE upload_kingdom; |
Step #8 : Test the results of the upload procedure
You can test whether or not it worked by running the following queries.
1 2 3 4 5 6 7 8 9 10 11 12 13 14 15 16 17 18 19 20 21 22 23 24 | -- Format Oracle output. COLUMN kingdom_id FORMAT 999 HEADING "Kingdom|ID #" COLUMN kingdom_name FORMAT A14 HEADING "Kingdom|Name" COLUMN population FORMAT 999,999 HEADING "Population" COLUMN book FORMAT A40 HEADING "Source Book" -- Check the kingdom table. SELECT * FROM kingdom; -- Format Oracle output. SET PAGESIZE 999 COLUMN knight_id FORMAT 999 HEADING "Knight|ID #" COLUMN knight_name FORMAT A23 HEADING "Knight|Name" COLUMN kingdom_allegiance_id FORMAT 999 HEADING "Kingdom|ID #" COLUMN allegiance_start_date FORMAT A11 HEADING "Allegiance|Start Date" COLUMN allegiance_end_date FORMAT A11 HEADING "Allegiance|End Date" -- Check the knight table. SELECT knight_id , knight_name , kingdom_allegiance_id , TO_CHAR(allegiance_start_date,'DD-MON-YYYY') AS allegiance_start_date , TO_CHAR(allegiance_end_date,'DD-MON-YYYY') AS allegiance_end_date FROM knight; |
It should display the following information:
Kingdom Kingdom
   ID # Name	       Population Source Book
------- -------------- ---------- ----------------------------------------
      1 Narnia		   42,100 Prince Caspian
      2 Narnia		   77,600 The Lion, The Witch and The Wardrobe
      3 Camelot 	   15,200 The Once and Future King


Knight Knight		       Kingdom Allegiance  Allegiance
  ID # Name			  ID # Start Date  End Date
------ ----------------------- ------- ----------- -----------
     1 Peter the Magnificent	     2 20-MAR-1272 19-JUN-1292
     2 Edmund the Just		     2 20-MAR-1272 19-JUN-1292
     3 Susan the Gentle 	     2 20-MAR-1272 19-JUN-1292
     4 Lucy the Valiant 	     2 20-MAR-1272 19-JUN-1292
     5 Peter the Magnificent	     1 12-APR-1531 31-MAY-1328
     6 Edmund the Just		     1 12-APR-1531 31-MAY-1328
     7 Susan the Gentle 	     1 12-APR-1531 31-MAY-1328
     8 Lucy the Valiant 	     1 12-APR-1531 31-MAY-1328
     9 King Arthur		     3 10-MAR-0631 12-DEC-0686
    10 Sir Lionel		     3 10-MAR-0631 12-DEC-0686
    11 Sir Bors 		     3 10-MAR-0631 12-DEC-0635
    12 Sir Bors 		     3 10-MAR-0640 12-DEC-0686
    13 Sir Galahad		     3 10-MAR-0631 12-DEC-0686
    14 Sir Gawain		     3 10-MAR-0631 12-DEC-0686
    15 Sir Tristram		     3 10-MAR-0631 12-DEC-0686
    16 Sir Percival		     3 10-MAR-0631 12-DEC-0686
17 Sir Lancelot 3 30-SEP-0670 12-DEC-0686 |
You can rerun the procedure to check that it doesn’t alter any information, then you could add a new knight to test the insertion portion.
Native sqlplus editing
I have to remind myself from time to time that Ubuntu is a Desktop or Workstation and by default can go missing key server software, like ssh. This became evident when I wanted to check whether I could run sqlplus from my Mac OS terminal through my Ubuntu VM and internally embedded Oracle Database 23c Free docker instance.
If like me you forgot to add it, you can add the ssh service with the following commands to your Ubuntu VM:
sudo apt update sudo apt install -y openssh-server sudo systemctl start ssh.service |
Then, you can test the installation with an ssh call to localhost, like:
ssh localhost |
You should see the following, where you need to enter the sudoer’s password to continue. Your localhost target causes an authenticity check, like:
The authenticity of host 'localhost (127.0.0.1)' can't be established. ED25519 key fingerprint is SHA256:js8knEf/lOE1rSss3u8lP4Ii634Y0CkUz+oJM5dt3w4. This key is not known by any other names Are you sure you want to continue connecting (yes/no/[fingerprint])? |
Enter yes to continue:
Are you sure you want to continue connecting (yes/no/[fingerprint])? yes |
It will now add localhost to the list of known hosts provide standard messages, as shown below.
Warning: Permanently added 'localhost' (ED25519) to the list of known hosts. student@localhost's password: Welcome to Ubuntu 22.04.3 LTS (GNU/Linux 6.2.0-39-generic x86_64) * Documentation: https://help.ubuntu.com * Management: https://landscape.canonical.com * Support: https://ubuntu.com/advantage Expanded Security Maintenance for Applications is not enabled. 9 updates can be applied immediately. 5 of these updates are standard security updates. To see these additional updates run: apt list --upgradable Enable ESM Apps to receive additional future security updates. See https://ubuntu.com/esm or run: sudo pro status The programs included with the Ubuntu system are free software; the exact distribution terms for each program are described in the individual files in /usr/share/doc/*/copyright. Ubuntu comes with ABSOLUTELY NO WARRANTY, to the extent permitted by applicable law. |
Having verified the installation and functionality of ssh in the Ubuntu VM. Then, I launched a Terminal session on my MacBookPro base operating system. Using the Ubuntu instance ssh and a customized Bash function, I discovered its IP address.
The following is the get_ip() user-defined function in the Ubuntu instance’s student user’s customized .bashrc file:
# Return the local instance's IP address. get_ip () { echo `hostname -I | cut -f1 -d' '` } |
In this instance, it returned:
192.168.195.155 |
With the IP address, I secured shelled into my Ubuntu sudoer student user like this:
ssh student@192.168.195.155 |
It’ll prompt you for the remote server’s student password, like:
student@192.168.195.155's password: |
After entering the correct password, I got the standard reply of a valid connection:
Welcome to Ubuntu 22.04.3 LTS (GNU/Linux 6.2.0-39-generic x86_64) * Documentation: https://help.ubuntu.com * Management: https://landscape.canonical.com * Support: https://ubuntu.com/advantage Expanded Security Maintenance for Applications is not enabled. 9 updates can be applied immediately. 5 of these updates are standard security updates. To see these additional updates run: apt list --upgradable Enable ESM Apps to receive additional future security updates. See https://ubuntu.com/esm or run: sudo pro status Last login: Fri Jan 5 18:13:21 2024 from 127.0.0.1 |
Next, I connected to the Ubuntu Docker Oracle Database 23c Free instance with this syntax:
docker exec -it --user student oracle23c bash |
At the prompt for the Docker instance of Oracle Database 23c Free, you can type sqlplus to work directly against the Oracle Database 23c Free instance with a pluggable c##student database user.
sqlplus c##student/student SQL*Plus: Release 23.0.0.0.0 - Production on Sat Jan 6 01:38:06 2024 Version 23.3.0.23.09 Copyright (c) 1982, 2023, Oracle. All rights reserved. Last Successful login time: Sat Dec 23 2023 04:30:00 +00:00 Connected to: Oracle Database 23c Free Release 23.0.0.0.0 - Develop, Learn, and Run for Free Version 23.3.0.23.09 |
Now, I can interactively edit my files with vi in the Docker Oracle Database 23c Free directory. The following demonstrates using the sandboxed student() function from my earlier Oracle 23c Free SQL*Plus blog post and connects as a sandboxed student user in the Docker Oracle 23c Free container. The image uses a different Mac OS and different Ubuntu VM from the earlier entries in this blog post from the earlier examples.
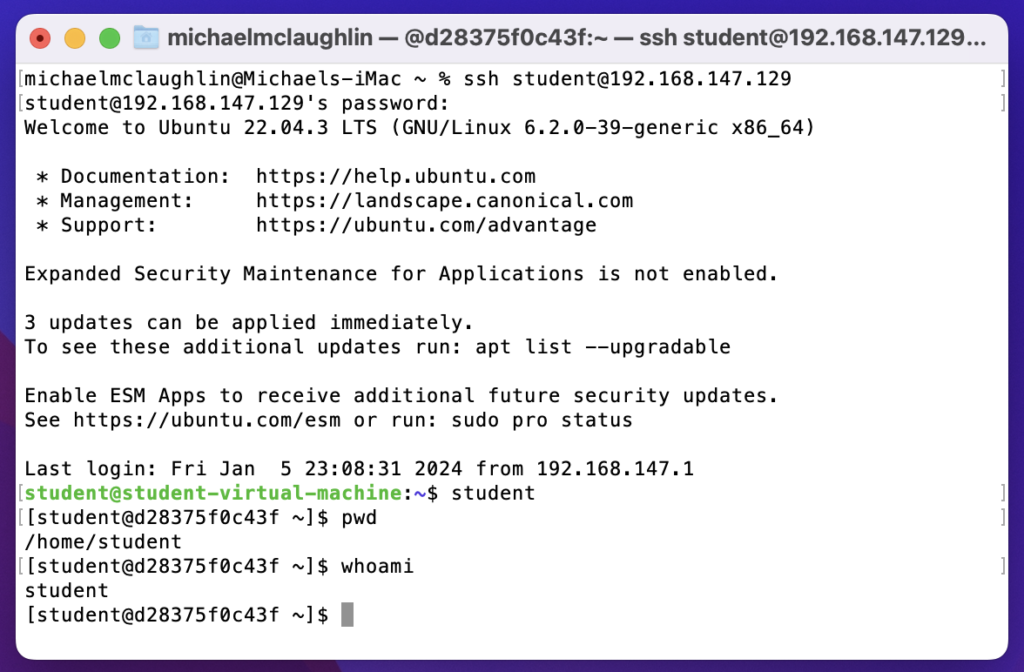
You can edit and test the files in the Docker Oracle 23c Free instance through the command-line interface (CLI). You can further automate the ssh connection by making the Ubuntu instance’s IP address a static address instead of a DCHP-assigned address; and then you can put it in the Mac OS’s /etc/hosts file which lets you resolve it by name (through file versus DNS resolution).
As always, I hope this helps those looking for a solution.
