Archive for the ‘sql’ tag
External Table Access
I left to chance where students would attempt to place their external files in a Linux or Unix implementation. As frequently occurs, they choose a location in their student user’s home directory. Any attempt to read an external table based on a file in this type of directory fails because it’s not accessible by the Oracle user because the directory within the student user’s account isn’t reachable. You can’t simply chown a directory and the files in a directory.
The failure returns the following result:
SELECT COUNT(*) FROM transaction_upload * ERROR AT line 1: ORA-29913: error IN executing ODCIEXTTABLEOPEN callout ORA-29400: data cartridge error error opening FILE /home/student/upload/transaction_upload.LOG |
The reason isn’t readily visible to all, but a virtual directory must reference a physical directory owned by the oracle user and dba group. That also means the oracle user must own all directories from the logical mount point to the physical directory name.
Assuming you’re working in an Oracle Database 11g XE instance, you can create a valid upload directory by navigating to this directory:
/u01/app/oracle |
Then, issue this command as the root user to create a new upload directory:
mkdir upload |
Now you have the following directory:
/u01/app/oracle/upload |
Assuming you’ve created the upload directory as the root user, the root user should issue the following two commands from the /u01/app/oracle directory:
chown -R oracle:dba upload chmod -R 755 upload |
Having made that change you should now be able to query the external file source, like a *.csv (comma-separated values) file. Hope this helps those trying to use external tables, which I subsequently wrote about for Toad World – External Tables.
SQL Insert from Query
Sometimes my students find new errors that I’ve never seen. One student did that this week by including an ORDER BY clause in a subquery that feeds an INSERT statement. It raises an ORA-00907 exception, like:
ORA-00907: missing right parenthesis |
You can’t include a subquery with an ORDER BY clause because it generates an error. The reason is simple. A subquery can’t perform a sort operation inside a subquery. Here’s a quick demonstration:
DROP TABLE destination; CREATE TABLE destination ( destination_id NUMBER , destination_name VARCHAR2(20)); INSERT INTO destination ( SELECT 1,'Sample1' FROM dual UNION ALL SELECT 2,'Sample2' FROM dual ORDER BY 1 DESC ); |
If you remove the ORDER BY clause, the statement works without a problem. For example, here’s the working version:
INSERT INTO destination ( SELECT 1,'Sample1' FROM dual UNION ALL SELECT 2,'Sample2' FROM dual ); |
Alternatively, you can include an ORDER BY clause when you remove the parentheses from around the subquery. This is an example:
INSERT INTO destination SELECT 1,'Sample1' FROM dual UNION ALL SELECT 2,'Sample2' FROM dual ORDER BY 1 DESC; |
I hope this helps anybody who runs into the problem.
Using UTL_FILE Package
Sometimes I’m surprised. Today, the surprise came when somebody pointed to a potential error in another author’s book. The person who asked the question had to send me a screen shot before I believed it.
The author’s code encounters the following error because the code was designed to loop through a multiple line file, and the code called the UTL_FILE.FOPEN procedure with three instead of four parameters. While it works with only three parameters when the strings are less than or equal to 1,024 (thanks Gary), it throws read errors when a string exceeds the default. You use the fourth parameter when your string exceeds the default length of 1,024.
DECLARE * ERROR AT line 1: ORA-29284: FILE read error ORA-06512: AT "SYS.UTL_FILE", line 106 ORA-06512: AT "SYS.UTL_FILE", line 746 ORA-06512: AT line 26 |
As mentioned, you fix the problem by using the fourth parameter like the call on lines 15 through 18 below:
1 2 3 4 5 6 7 8 9 10 11 12 13 14 15 16 17 18 19 20 21 22 23 24 25 26 27 28 29 30 31 32 33 34 35 36 37 38 39 40 41 42 43 | DECLARE /* Declare local input variables. */ lv_location VARCHAR2(60) := 'C:\Data\Direct'; lv_file_name VARCHAR2(40) := 'TextFile.txt'; /* Declare a file reference pointer and buffer. */ lv_file UTL_FILE.FILE_TYPE; -- File reference lv_line VARCHAR2(32767); -- Reading buffer BEGIN /* Check for open file and close when open. */ IF UTL_FILE.is_open(lv_file) THEN UTL_FILE.fclose(lv_file); END IF; /* Open the file for read-only of 32,767 lines of text. The fourth parameter is required when you want to use the GET_LINE procedure to read a file line-by-line. */ lv_file := UTL_FILE.fopen( location => lv_location , filename => lv_file_name , open_mode => 'R' , max_linesize => 32767); /* Read all lines of a text file. */ LOOP /* Read a line of text, when the eof marker is found the get_line procedure raises a NO_DATA_FOUND error, which is why there's no explicit loop. */ UTL_FILE.get_line( file => lv_file , buffer => lv_line ); /* Print the line of text or a line return because UTL_FILE doesn't read line returns. */ DBMS_OUTPUT.put_line(NVL(lv_line,CHR(10))); END LOOP; EXCEPTION WHEN NO_DATA_FOUND THEN UTL_FILE.fclose(lv_file); END; / |
While the foregoing is traditional and uses a physical directory path from the local server’s operating system, you can use a virtual directory from Oracle Database 10g forward. This physical directory is also defined in the utl_file_dir parameter of the database server. A virtual directory hides the physical directory from the application software, which simplifies physical file maintenance when you need to move the files.
3 | lv_location VARCHAR2(60) := 'DirectVirtualDirectory'; |
The preceding example works, and I’ll put one out converting the external to CLOB later in the week.
OUT Parameter Trick
Raja asked a question but unfortunately, I was buried in the final aspects of the write of the new Oracle Database 12c PL/SQL Programming book. He wanted to know how to pass an object type as an OUT-only mode parameter from a procedure.
That’s a great question, and it’s actually simple once you understand the difference between Oracle object types and other data types. Oracle object types must always be initiated before you use them, which means you must initialize any OUT-only mode parameters at the top of your execution section, like this:
1 2 3 4 5 6 7 8 9 10 11 12 | CREATE OR REPLACE PROCEDURE reset_troll ( pv_troll OUT TROLL_OBJECT ) IS /* Troll default name. */ lv_troll_name VARCHAR2(20) := 'Bert'; BEGIN /* Initialize the incoming parameter by allocating memory to it. */ pv_troll := troll_object(); /* Set the name to something other than the 'Tom' default value. */ pv_troll.set_troll(lv_troll_name); END reset_troll; / |
Line 7 shows you the trick, initialize the incoming parameter because there isn’t an incoming parameter for an OUT-only mode parameter. The calling parameter to an OUT-only mode parameter is only a reference where PL/SQL will copy the internal object reference. While the calling parameter has been initialized, the reference to the call parameter’s object is where the internal object will be copied. The local program must first ensure a new memory location for a new instance of the object type before it can act on or return an object instance to the external reference. More or less, the internal object is copied to the calling object instance’s memory location when the procedure completes its execution.
Here’s the source code for the troll_object object type and body:
1 2 3 4 5 6 7 8 9 10 11 12 13 14 15 16 17 18 19 20 21 22 23 24 25 26 27 28 29 30 31 32 33 34 35 36 37 38 39 40 41 42 43 44 | CREATE OR REPLACE TYPE troll_object IS OBJECT ( troll VARCHAR2(20) , CONSTRUCTOR FUNCTION troll_object RETURN SELF AS RESULT , CONSTRUCTOR FUNCTION troll_object ( troll VARCHAR2 ) RETURN SELF AS RESULT , MEMBER FUNCTION get_troll RETURN VARCHAR2 , MEMBER PROCEDURE set_troll (troll VARCHAR2) , MEMBER FUNCTION to_string RETURN VARCHAR2) INSTANTIABLE NOT FINAL; / CREATE OR REPLACE TYPE BODY troll_object IS /* Default no-argument constructor. */ CONSTRUCTOR FUNCTION troll_object RETURN SELF AS RESULT IS troll TROLL_OBJECT := troll_object('Tom'); BEGIN SELF := troll; RETURN; END troll_object; /* Single argument constructor. */ CONSTRUCTOR FUNCTION troll_object (troll VARCHAR2) RETURN SELF AS RESULT IS BEGIN SELF.troll := troll; RETURN; END troll_object; /* A getter function. */ MEMBER FUNCTION get_troll RETURN VARCHAR2 IS BEGIN RETURN SELF.troll; END get_troll; /* A setter procedure. */ MEMBER PROCEDURE set_troll (troll VARCHAR2) IS BEGIN SELF.troll := troll; END set_troll; /* A function that returns the formatted object type's contents. */ MEMBER FUNCTION to_string RETURN VARCHAR2 IS BEGIN RETURN 'Hello '||SELF.troll; END to_string; END; / |
You can test the reset_troll procedure with the following anonymous block:
1 2 3 4 5 6 7 8 9 10 11 12 13 14 15 16 | /* Enable printing from a PL/SQL block. */ SET SERVEROUTPUT ON SIZE UNLIMITED /* Anonymous testing block. */ DECLARE lv_troll TROLL_OBJECT := troll_object('Bill'); BEGIN dbms_output.put_line('--------------------'); /* Prints 'Hello William' */ dbms_output.put_line(lv_troll.to_string()); dbms_output.put_line('--------------------'); reset_troll(lv_troll); /* Prints 'Hello Bert' */ dbms_output.put_line(lv_troll.to_string()); dbms_output.put_line('--------------------'); END; / |
If you remark out line 7 from the reset_troll procedure, you’d raise the following exception by the call on line 10 because the local object hasn’t been instantiated (given life). It means there’s no memory location allocated for the instantiated (instance of an object type).
-------------------- Hello Bill -------------------- DECLARE * ERROR at line 1: ORA-30625: method dispatch ON NULL SELF argument IS disallowed ORA-06512: at "VIDEO.RESET_TROLL", line 10 ORA-06512: at line 8 |
Hope this helps those trying to solve the same problem.
MySQL Synonym?
Somebody asked how to create a SYNONYM in MySQL, which is interesting because MySQL doesn’t support synonyms. I thought the prior entry explained how to do it, but here’s a new post. However, you can create a view in one database that relies on a table in another database.
The following SQL statements create two databases and grant appropriate privileges to the student as the root superuser:
/* Create two databases. */ CREATE DATABASE seussdb; CREATE DATABASE appdb; /* Grant privileges to a student user. */ GRANT ALL ON seussdb.* TO student; GRANT ALL ON appdb.* TO student; |
Log out from the root superuser and reconnect as the student user. Then, the following code connects to the seuss database and create a hat table; and inserts two rows into the hat table:
/* Use the appdb database. */ USE seussdb; /* Create a hat table. */ CREATE TABLE hat ( hat_id INT UNSIGNED PRIMARY KEY AUTO_INCREMENT , hat_text VARCHAR(20)); /* Insert two rows into the hat table. */ INSERT INTO hat (hat_text) VALUES ('Thing 1'); INSERT INTO hat (hat_text) VALUES ('Thing 2'); |
The following code connects to the application database and creates a hat view; and then the code inserts one additional row into the hat table:
/* Connect to the application database. */ USE appdb; /* Create a hat view. */ CREATE VIEW hat AS SELECT * FROM seussdb.hat; /* Query the contents of the view, or seuss.hat table. */ SELECT * FROM hat; /* Insert a new row into the hat table. */ INSERT INTO hat (hat_text) VALUES ('Thing 3'); /* Query the contents of the view, after insert to the view. */ SELECT * FROM hat; |
The results will be the following:
+--------+----------+ | hat_id | hat_text | +--------+----------+ | 1 | Thing 1 | | 2 | Thing 2 | | 3 | Thing 3 | +--------+----------+ |
I hope this answers the question on how to mimic the Oracle database’s synonyms. The appdb.hat view acts as a synonym to the seuss.hat table.
Provision Oracle 12c PDB
Somebody wants help provisioning a pluggable database (PDB). While it’s a new concept in the Oracle 12c database, I can sympathize with their plight. It wasn’t clear to me when first working with it, and I couldn’t seem to find a quick tutorial on the web. While it’s in the new Oracle 12c PL/SQL Programming Book, that won’t be out until January 2014.
If you’re new to Oracle 12c, which is most of us, then it’s important to understand that PDB is a private data context. Most of it’s data catalog is private and separate from the overall database. Only a small portion of the database catalog is stored in the container database catalog, and new CDB_ administrative views are added to the database. A PDB is a great solution when you’re leveraging the Editioning feature of Oracle 11g database.
You should note the guarantee from page #9 of Oracle’s Oracle Multitenant:
From the point of view of the client connecting via Oracle Net, the PDB is the database. A PDB is fully compatible with a non-CDB. We shall refer to this from now on as the PDB/non-CDB compatibility guarantee. In other words, the installation scheme for an application backend that ran without error against a non-CDB will run, with no change, and without error, in a PDB and will produce the same result.
Here are the steps that work on both Windows, Linux, or Windows:
- The following SQL command lets you create a pluggable database (PDB) with a
videouser assigned to it:
1 2 3 4 5 6 7 | CREATE PLUGGABLE DATABASE videodb ADMIN USER videoadm IDENTIFIED BY Video1 ROLES = (dba) DEFAULT TABLESPACE videots DATAFILE 'C:\APP\ORACLE\ORADATA\ORCL\VIDEO01.DBF' SIZE 500M ONLINE FILE_NAME_CONVERT = ('C:\APP\ORACLE\ORADATA\ORCL\PDBSEED\', 'C:\APP\ORACLE\ORADATA\ORCL\VIDEOPDB\'); |
Don’t try to create the DEFAULT TABLESPACE before you provision the database. If you do, you’ll get the following exception:
CREATE PLUGGABLE DATABASE videodb * ERROR at line 1: ORA-00604: error occurred at recursive SQL level 1 ORA-01537: cannot add file 'C:\APP\ORACLE\ORADATA\ORCL\VIDEO01.DBF' - file already part of database |
- You need to stop the Oracle listener and modify the
listener.orafile. Lines 9 through 12 configure aVIDEODBOracle SID. After you make the changes, start the Oracle listener.
1 2 3 4 5 6 7 8 9 10 11 12 13 14 15 16 17 18 19 20 21 | SID_LIST_LISTENER = (SID_LIST = (SID_DESC = (SID_NAME = CLRExtProc) (ORACLE_HOME = C:\app\oracle\product\12.1.0\dbhome_1) (PROGRAM = extproc) (ENVS = "EXTPROC_DLLS=ONLY:C:\app\oracle\product\12.1.0\dbhome_1\bin\oraclr12.dll") ) (SID_DESC = (SID_NAME = VIDEODB) (ORACLE_HOME = C:\app\oracle\product\12.1.0\dbhome_1) ) ) LISTENER = (DESCRIPTION_LIST = (DESCRIPTION = (ADDRESS = (PROTOCOL = IPC)(KEY = EXTPROC1521)) (ADDRESS = (PROTOCOL = TCP)(HOST = localhost)(PORT = 1521)) ) ) |
- You also need to add a
VIDEOTNS alias to thetnsnames.orafile for theVIDEODBpluggable database (PDB).
1 2 3 4 5 6 7 8 9 10 11 12 13 14 15 16 17 18 19 20 21 22 23 24 25 26 27 28 | ORACLR_CONNECTION_DATA = (DESCRIPTION = (ADDRESS_LIST = (ADDRESS = (PROTOCOL = IPC)(KEY = EXTPROC1521)) ) (CONNECT_DATA = (SID = CLRExtProc) (PRESENTATION = RO) ) ) ORCL = (DESCRIPTION = (ADDRESS = (PROTOCOL = TCP)(HOST = localhost)(PORT = 1521)) (CONNECT_DATA = (SERVER = DEDICATED) (SERVICE_NAME = orcl) ) ) VIDEO = (DESCRIPTION = (ADDRESS = (PROTOCOL = TCP)(HOST = localhost)(PORT = 1521)) (CONNECT_DATA = (SERVER = DEDICATED) (SERVICE_NAME = videodb) ) ) |
- You connect as the
SYSDBAfor theVIDEOpluggable database with the following syntax (not presently an example in the SQL*Plus Guide). After connecting as theSYSDBAfor theVIDEODB, you’ll be prompted for a password. The required password is theVideo1password that you used when you set up theVIDEODBdatabase.
sqlplus sys@VIDEO AS sysdba |
- After authenticating as the
SYSDBA, you need to start theVIDEODBpluggable database, like:
SQL> startup Pluggable DATABASE opened. |
You can also start the pluggable database from the generic SYSDBA account. You only need to change the CONTAINER context to pluggable database. You can find the status of pluggable databases with the following query:
SQL> COLUMN RESTRICTED FORMAT A10 SQL> SELECT v.name 2 , v.open_mode 3 , NVL(v.restricted, 'n/a') AS restricted 4 , d.status 5 FROM v$PDBs v INNER JOIN dba_pdbs d USING(guid) 6 ORDER BY v.create_scn; |
The generic sample database returns this after restarting the database:
NAME OPEN_MODE RESTRICTED STATUS ------------------------------ ---------- ---------- -------- PDB$SEED READ ONLY NO NORMAL PDBORCL MOUNTED n/a NORMAL |
The following changes the CONTAINER context, opens the pdborcl PDB, and creates a traditional Oracle 11g and backward standard user/schema account in the pluggable database.
SQL> ALTER SESSION SET container=pdborcl; SQL> ALTER PLUGGABLE DATABASE pdborcl OPEN; SQL> CREATE USER johnny IDENTIFIED BY johnny; |
Re-query the status of the pluggable databases, and you’ll see:
NAME OPEN_MODE RESTRICTED STATUS ------------------------------ ---------- ---------- -------- PDB$SEED READ ONLY NO NORMAL PDBORCL READ WRITE NO NORMAL |
If you have more than one pluggable database, you can use the following to open them all as the CDB’s SYSDBA:
SQL> ALTER PLUGGABLE DATABASE ALL OPEN; |
- As Oracle said during the Oracle 11gR2 release, the DBA role no longer grants
UNLIMITED TABLESPACE. That means you need to grant it as theSYSDBAfor the PDB, like:
GRANT UNLIMITED TABLESPACE TO videoadm; |
- After you’ve done all the prior steps, you can connect with the following as the Administrative
VIDEOuser:
sqlplus videoadm@VIDEO/Video1 |
Although making such a connection is a poor choice, it would be better to make a secure connection like the one below. The problem with the former is that it exposes information at the OS command line that would be visible to other users. Connecting to the Oracle SQL*Plus with the /NOLOG option prevents disclosure of that information.
C:\Users\mclaughlinm>sqlplus /nolog SQL*Plus: Release 12.1.0.1.0 Production ON Tue Aug 13 01:28:30 2013 Copyright (c) 1982, 2013, Oracle. ALL rights reserved. SQL> CONNECT videoadm@VIDEO/Video1 Connected. SQL> SHOW USER USER IS "VIDEOADM" |
- Once you’re connected as the
SYSDBArole, you can create standard (pre-Oracle 12c) user/schemas with the old syntax. Below, we create a student account:
SQL> CREATE USER student IDENTIFIED BY student; SQL> GRANT CREATE cluster, CREATE indextype, CREATE operator 2 , CREATE PROCEDURE, CREATE SEQUENCE, CREATE SESSION 3 , CREATE TABLE, CREATE TRIGGER, CREATE TYPE 4 , CREATE VIEW, UNLIMITED TABLESPACE TO student; |
Naturally, you can also add a USER from the CDB’s SYSDBA role when in the proper CONTAINER context.
This has shown you how to provision a pluggable database (PDB). As a side note, you should know that you can only create user-defined common users (at the CDB-level) with a c## prefix.
An addendum: DBMS_COMPARE isn’t provisioned automatically, and you need to manually apply it in your ADMIN user for the PDB. I’ve blogged about it here.
DBMS_COMPARISON Missing?
The dbms_comparison package isn’t deployed when you provision a pluggable databases (PDBs) in Oracle 12c. It appears to be a simple omission. At least, it let me manually compiled the dbms_comparison package with this syntax:
@?/rdbms/admin/dbmscmp.sql @?/rdbms/admin/prvtcmp.plb |
However, when I ran the code against the PDB it failed. The same code worked against a container database (CDB). It struck me as odd. The error stack wasn’t too useful, as you can see below:
1 2 3 4 5 6 7 8 9 10 | BEGIN * ERROR at line 1: ORA-06564: object "SYS"."COMPARE_NAME" does NOT exist ORA-06512: at "SYS.DBMS_LOGREP_UTIL", line 569 ORA-06512: at "SYS.DBMS_LOGREP_UTIL", line 602 ORA-06512: at "SYS.DBMS_CMP_INT", line 394 ORA-01403: no DATA found ORA-06512: at "SYS.DBMS_COMPARISON", line 764 ORA-06512: at line 2 |
My test was using two copies of a table with differences between column values. Both were deployed in the same CDB or PDB. That meant it was either a missing table or a problem with my database link. Here’s the statement that caused the failure:
7 8 9 10 11 12 | dbms_comparison.create_comparison(comparison_name => 'COMPARE_NAME' , schema_name => 'video' , object_name => 'MEMBER#1' , dblink_name => 'loopbackpdb' , remote_schema_name => 'video' , remote_object_name => 'MEMBER#2'); |
Unfortunately, there wasn’t any notable difference between the two database links. Playing around with it, I discovered the problem. While you don’t have to enclose your case sensitive password in double quotes for a CDB database link, you do need to enclose the password with double quotes in a PDB database link.
This database link fixed the problem:
1 2 3 | CREATE DATABASE LINK loopbackpdb CONNECT TO video IDENTIFIED BY "Video1" USING 'video'; |
The delimiting double quotes on line 2 fixed the problem. Hopefully, this helps somebody who runs into it too. Any way, according to this June 2013 Oracle White Paper it would appear as a bug because it’s an inconsistent behavior between a CDB and PDB.
Oracle 12c on Windows 7
Here are step-by-step instructions for installing Oracle Database 12c Release 1 on Windows 7. This is more or less to install a Desktop version of Oracle 12c. I posted other versions for Oracle Database 11gR1 and 11gR2. While some report that they installation doesn’t work for them, its typically because they didn’t configured their Windows 7 environment.
Here are some Windows 7 configuration caveats before you perform this installation, and they are:
Windows 7 Configuration Steps
- Make sure you have at least 3 GB of memory on your Windows PC, or that you can allocate 4 GB of memory to your virtual machine for Windows.
- Install Oracle’s JDK 7 for 64-bit OS with NetBeans and 32-bit OS when running on a 64-bit machine. The installer is smart enough to only install NetBeans once. The JDK 7 32-bit installation supports SQL Developer.
- Disable Microsoft’s User Access Controls (UAC). I blogged about a set of Windows 7 gripes, and the second point shows you the screen shots that let you disable UAC on Windows 7.
- Configure your
C:\Windows\System32\drivers\etc\hostsfile. Use lines 1 through 3 when you’re using a DHCP IP address, and lines 1 through 4 when you’re using a static IP address. If you want to set a static IP address, check this old post on how to set a static IP address. Please note that thehostnameneeds to be lowercase.
1 2 3 | 127.0.0.1 localhost
::1 localhost
127.0.0.1 oracle12c oracle12c.techtinker.com |
Line 4, only use for a static IP address, would look like this on the 192.168.* subdomain:
4 | 192.168.0.5 oracle12c oracle12c.techtinker.com |
- Create a user account name that doesn’t have a white space, like
McLaughlinMin the screen shots, and assign it Administrator privileges. During the install, you’ll be prompted to create a non-administrator account to start Oracle.
Oracle Database 12c Release 1 Installation Steps
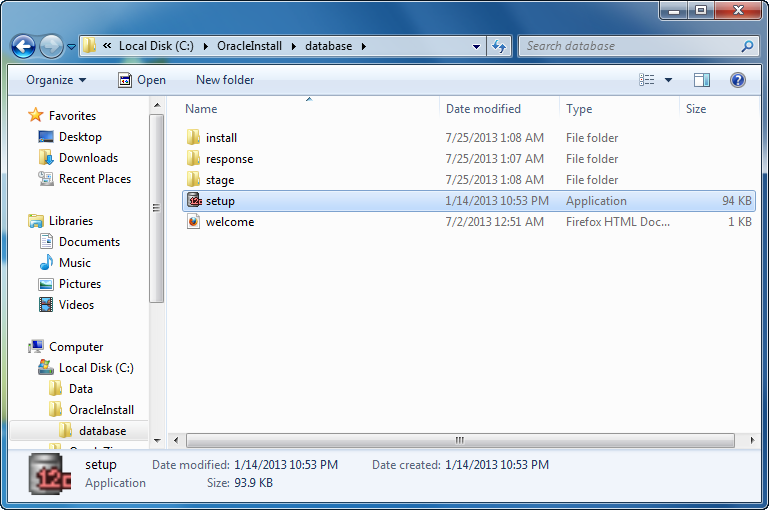
- The first thing you need to do is unzip the two zip files into a common directory. I’ve chosen to create an OracleInstall folder. Oracle creates a database folder inside it. Within the database folder, click the Setup file to launch the Oracle Installer.
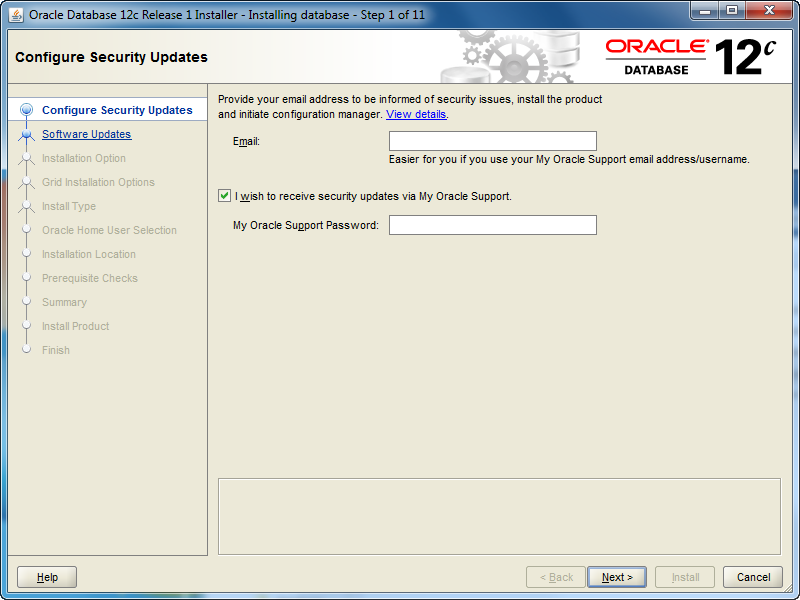
- After launching the Oracle Installer, the Configure Security Updates screen is your first stop. You may provide your email (attached to your Oracle Support Contract) and Oracle Support password, or uncheck the box and you can simply install a Desktop test environment. Click the Next button to proceed.
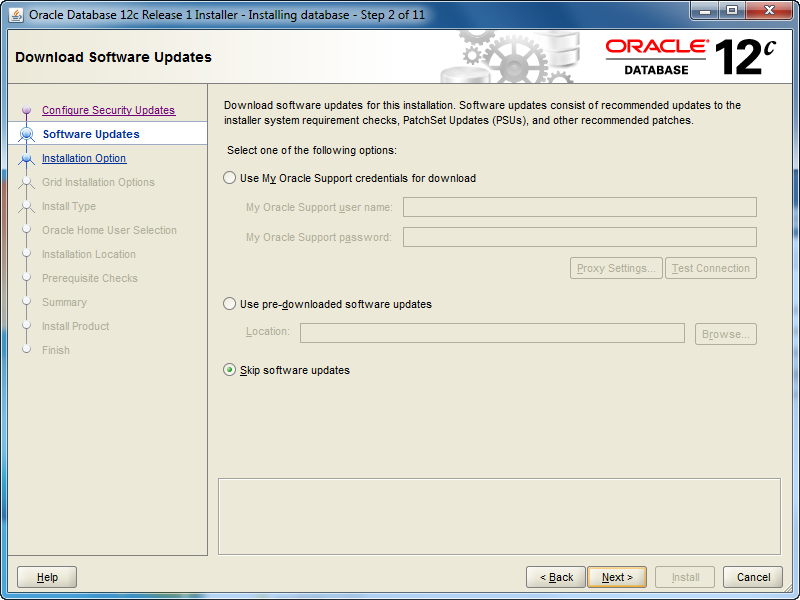
- The Software Updates is the next screen. If you want to check for updates, click and enter your Oracle Support credentials. If you want to install the base release, click the Skip software updates radio button. After making a choice about what you want to do with updates, click the Next button to proceed with the install.
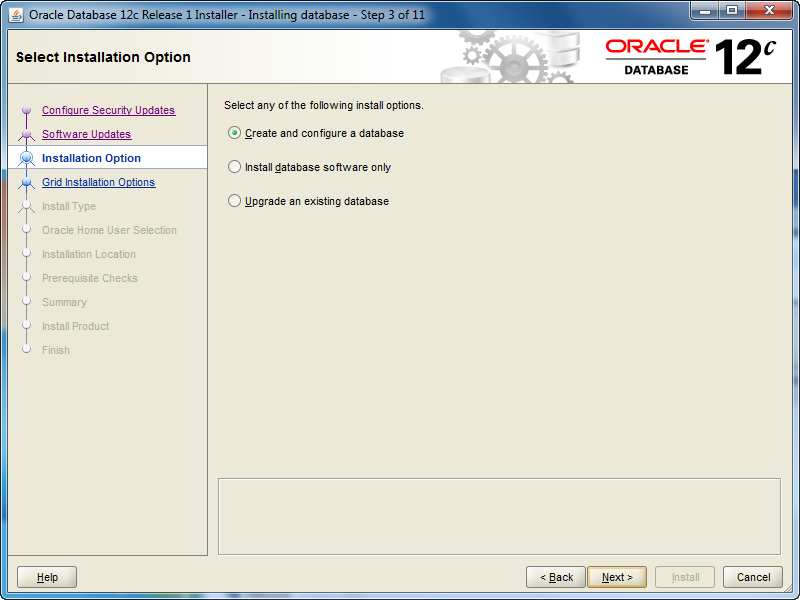
- The Installation Option screen lets you chose whether you want to Create and configure a database (sample database), Intall database software only, or Upgrade an existing database. Check the appropriate radio button and then click the Next button to proceed with the install.
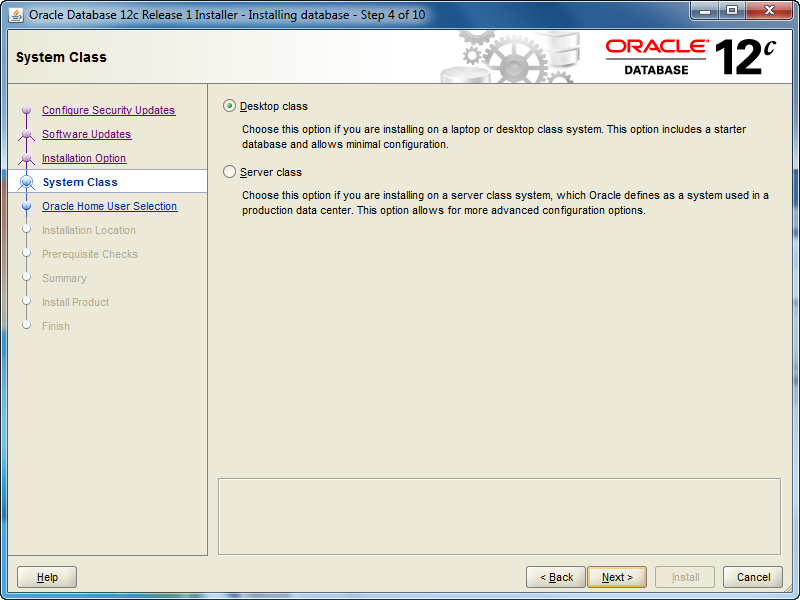
- The System Class screen lets you chose whether you want to install a Desktop class (ideal for develoers to play around in) or a Server class. Check the appropriate radio button and then click the Next button to proceed with the install.
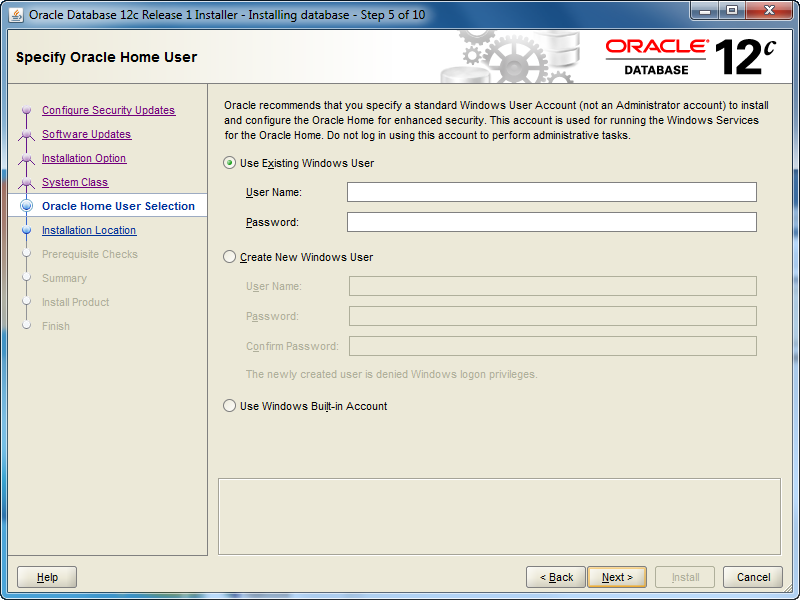
- The Oracle Home User Selection screen lets you chose whether you want to Use Existing Windows User (that’s fine if you created one previously), Create New Windows User (what I’ll do next), or Use Windows Built-in Account. Check the appropriate radio button and then click the Next button to proceed with the install.
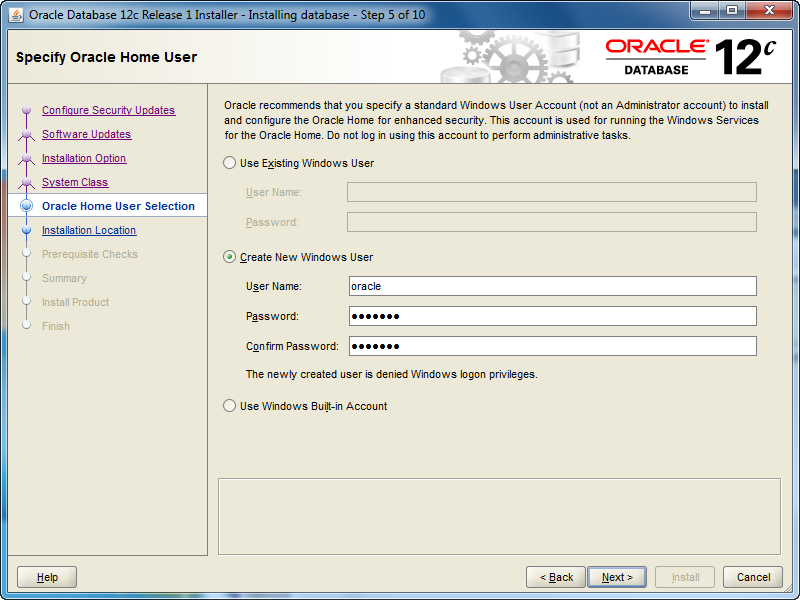
- The Oracle Home User Selection screen lets you Create New Windows User, and that’s what I’ve done with the
oracleuser (it could be whatever you like). Click the Next button to proceed with the install.
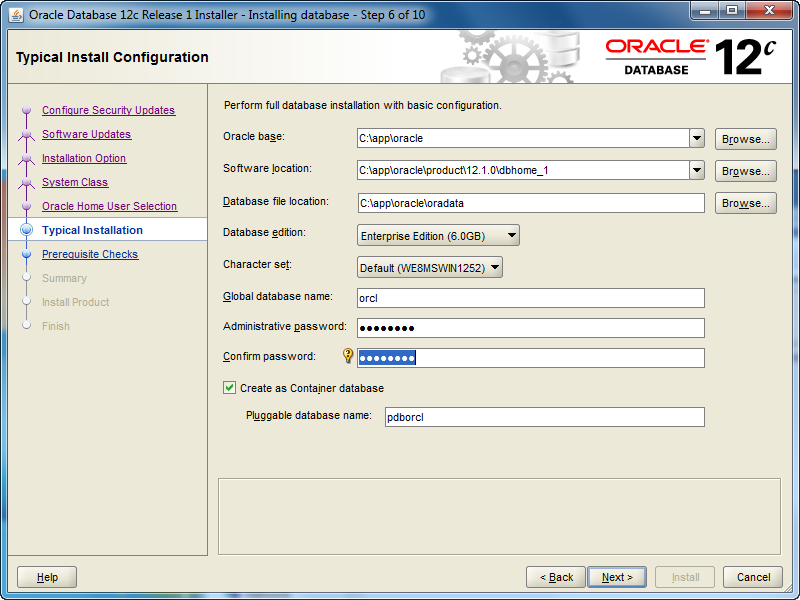
- The Typical Install Configuration screen lets you customize your installation. I’ve only opted to provide an Oracle compliant password while accepting the defaults. Click the Next button to proceed with the install.
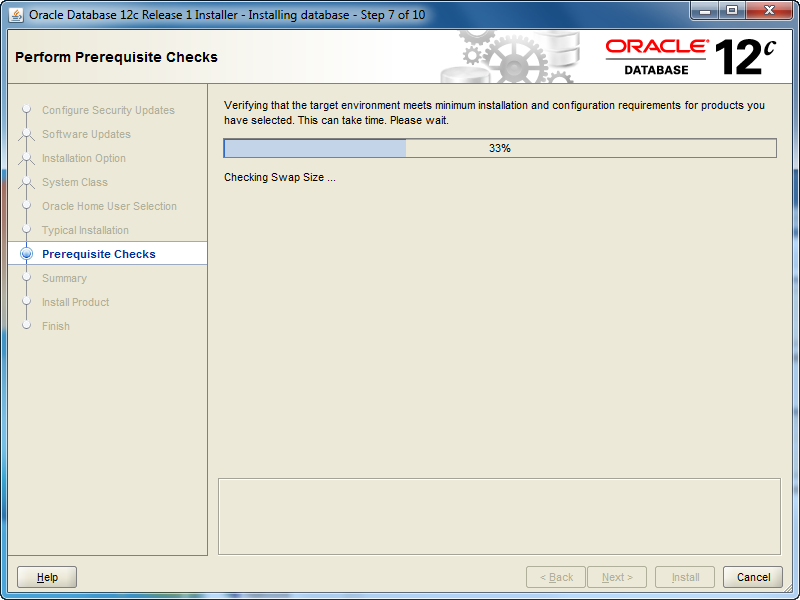
- The Perform Prerequisite Checks screen initially displays a task bar. You need some patience, it’ll show you the next screen if everything is fine.
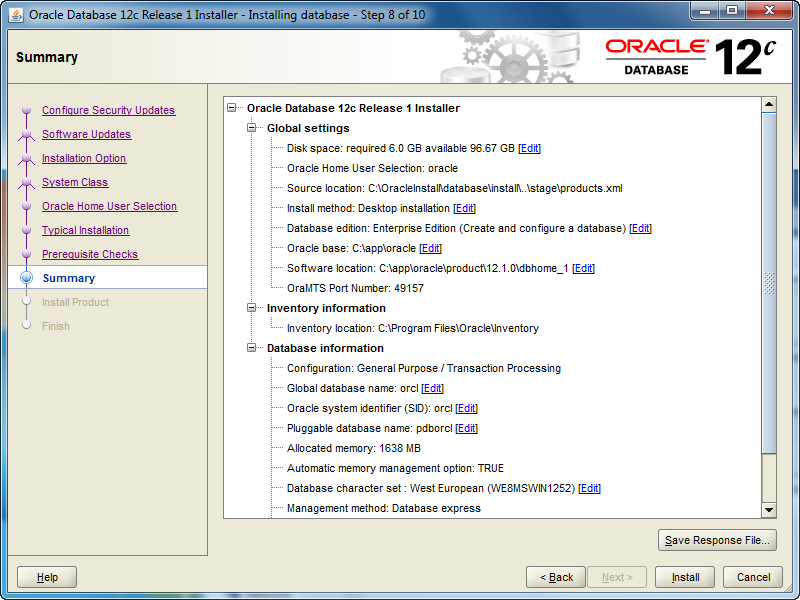
- The Summary screen tells you what you’re going to install. Read it over, save a copy for later, and when everything is right then click the Next button to install.
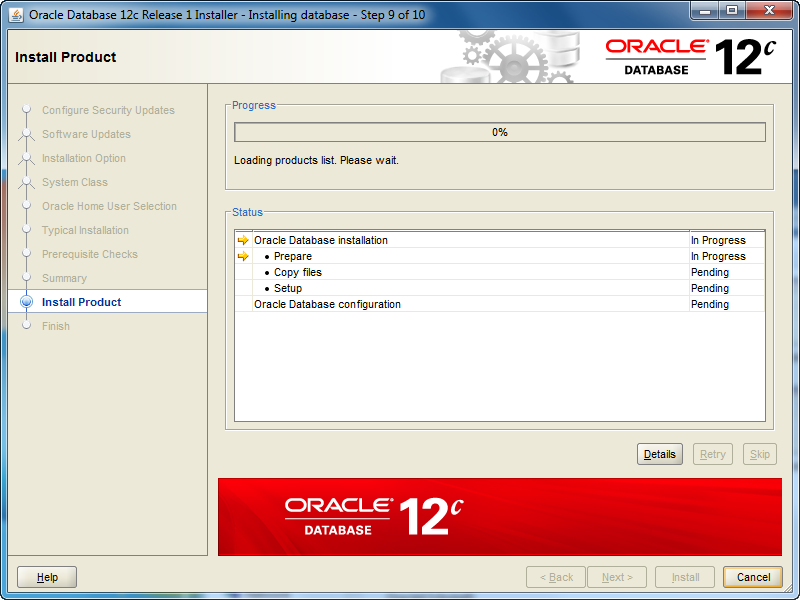
- The Install Product screen tells you what you’re installing and it can take some time. Don’t walk away too quickly because you’re most likely going to have to allow access for the installation to complete successfully.
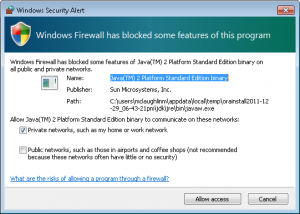
- You should see two Windows Security Alerts with the installation. Click the Allow access button to continue successfully.
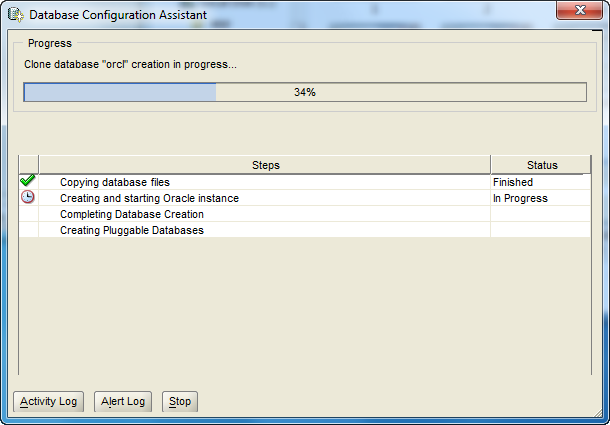
- The Database Configuration Assistant screen tells you that you’ve been successful to this point. Although, this is where several errors can occur when you failed to correctly configure Windows 7 before installation. This takes some time to run, here’s where you can take a break.
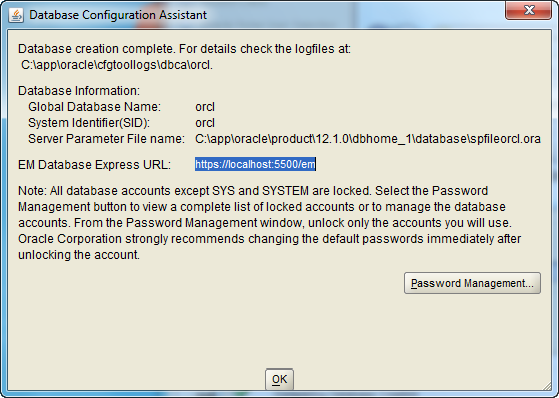
- The second Database Configuration Assistant screen lets you configure passwords for the database accounts. I’m skipping that by accepting the defaults and clicking the OK button to proceed.
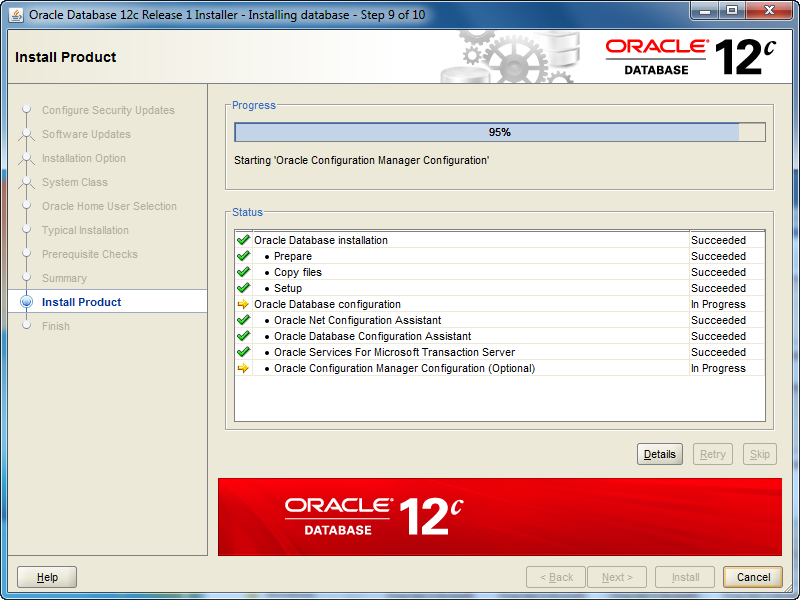
- The Install Product screen reappears while most of the database cloning operation has finished. At this point, it starts configuring the Oracle Enterprise Manager (OEM). It can take a couple minutes to complete. Simply monitor it.

- The Finish screen appears after everything has worked. Click the Close button to finish the install.
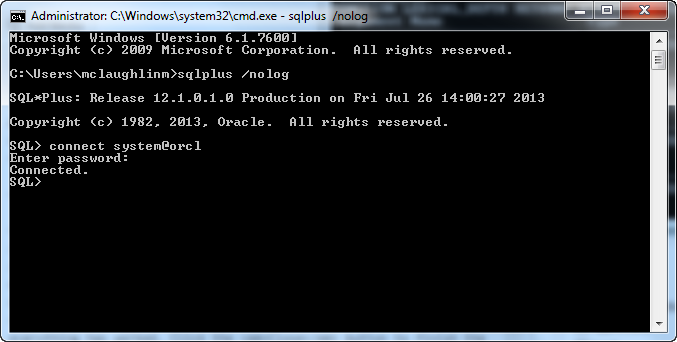
- Now, you can open a Windows command shell and call the
sqlplusexecutable with a/nologoption (denies login credentials form OS history files). Then, you can connect using the TNSorclalias, which verifies your networkinglistener.oraandtnsnames.orafiles are setup correctly. You should see the following in the command shell when the installation was successful.
C:\Users\mclaughlinm>sqlplus /nolog SQL*Plus: Release 12.1.0.1.0 Production on Fri Jul 26 02:00:19 2013 Copyright (c) 1982, 2013, Oracle. All rights reserved. Connected to: Oracle Database 12c Enterprise Edition Release 12.1.0.1.0 - 64bit Production With the Partitioning, OLAP, Advanced Analytics and Real Application Testing options SQL> connect system@orcl Enter password: Connected. |
Oracle 12c changes the dynamics on users. You now have two types of databases. One is a Container Database (CDB) and the other is a Pluggable Database (PDB). While Oracle’s default container users, like SYS, SYSTEM, and so forth, remain unchanged, you create new CDB users with a C##<user_name> preface. PDB users are a different matter, and they can retain the same format used previously for user-defined users. You set PDB users as the ADMIN user for a pluggable database when you provision it.
Subsequent to this post, I’ve posted how you can provision an Oracle 12c Pluggable Database (PDB), and you can find it in this post. AS always, I hope that this helps those trying to find a quick shortcut on reading the instructions. 😉
MySQL Auto Increment
Somebody ran into a problem after reading about the MySQL CREATE statement and the AUTO_INCREMENT option. They couldn’t get a CREATE statement to work with an AUTO_INCREMENT value other than the default of 1. The problem was they were using this incorrect syntax:
CREATE TABLE elvira ( elvira_id int unsigned PRIMARY KEY AUTO_INCREMENT=1001 , movie_title varchar(60)) ENGINE=InnoDB CHARSET=utf8; |
It raises this error:
ERROR 1064 (42000): You have an error in your SQL syntax; check the manual that corresponds to your MySQL server version for the right syntax to use near '=1001 , movie_title varchar(60)) ENGINE=InnoDB CHARSET=utf8' at line 2 |
They concluded that MySQL requires you to assign a default value of 1 as the initial automatic numbering value; then you use the ALTER statement to change the initial sequence value. That assumption is incorrect. The problem was with their assignment of an overriding AUTO_INCREMENT value inside the parenthetical list of columns. That assignment needs to occur after the list of columns and constraints, like
CREATE TABLE elvira ( elvira_id int unsigned PRIMARY KEY AUTO_INCREMENT , movie_title varchar(60)) ENGINE=InnoDB AUTO_INCREMENT=1001 CHARSET=utf8; |
It’s not an unlikely mistake since there’s no clear example on either of the referenced web pages (at the time of writing). It would be nice if they were added but I’m of the opinion some of the reference manual pages are too sparse.
After creating the table, you have the generic fix that seems to appear most often as an answer to setting or re-setting the auto numbering sequence of a MySQL table:
ALTER TABLE elvira AUTO_INCREMENT=1001; |
Why would you set the auto numbering sequence to something other than 1? Some designers consider it a best practice to increment from a set point like 101 or 1,001 for your Application Programming Interface (API) and they leave a readily identifiable sequence number set for pre- or post-seeded data in tables. The region of preallocated numbers are typically only used in a few of the tables, in any application, but consistently managing sequences across all tables does sometimes simplifies data diagnostics.
Hope this helps somebody looking for a syntax fix. By the way, you can find it on Page 162 of the Oracle Database 11g & MySQL 5.6 Developer Handbook.
Reset sequence START WITH
Two things contributed to this post. One was a student question about the difference between the MAX_VALUE of a sequence and the actual sequence value. The other was a comment on an earlier post addressing an NDS approach to resetting sequences.
The student wanted to understand why there were gaps in the sequence, since they created it with the default values, like this:
CREATE SEQUENCE sequence_name; |
A default sequence in an Oracle database sets the cache value to 20, which means you get gaps every time a new set is allocated. This Ask Tom question and answer holds that information.
The blog comment was on an NDS statement post. I wasn’t quite sure what the comment wanted because there really wasn’t a question or a complete code example. Having demonstrated how to dynamically drop and recreate a new sequence without a gap in a comment reply, I thought that was adequate.
Having pointed the student to the Ask Tom column and my answer, he wanted to know how to create a stored procedure to reset sequences dynamically. It took me a couple weeks to get back to this but here’s the procedure. The tricky element of the procedure is the “no binding values allowed” restriction placed on NDS statements that process DDL statements.
The procedure uses two local procedures and two local functinons. The local find_sequence finds a sequence name in the schema, and find_next_sequence function returns the next value. The local create_sequence and drop_sequence procedures respectively isolate the logic for dynamic drops and creates of the sequence.
Warning: The restriction with this design assumes that the table name and sequence name are linked by using the table name and an _ID suffix.
-- Declare an autonomous procedure to drop sequences. CREATE OR REPLACE PROCEDURE reset_sequence ( pv_table_name VARCHAR2 , pv_sequence_name VARCHAR2 , pv_cache_value NUMBER DEFAULT 0 ) IS -- Declares stubs to remove forward reference limits. PROCEDURE create_sequence ( pv_sequence_name VARCHAR2, pv_cache_value NUMBER ); PROCEDURE drop_sequence ( pv_sequence_name VARCHAR2 ); FUNCTION find_sequence ( pv_sequence_name VARCHAR2 ) RETURN VARCHAR2; FUNCTION find_next_sequence ( pv_table_name VARCHAR2 ) RETURN VARCHAR2; -- Drops sequence. PROCEDURE drop_sequence ( pv_sequence_name VARCHAR2 ) IS -- Declare local variable(s). lv_statement VARCHAR2(200); lv_sequence_name VARCHAR2(30); BEGIN /* Conditionally drop any sequence using a local function to find a valid sequence name before attempting to drop it. */ IF find_sequence(DBMS_ASSERT.SIMPLE_SQL_NAME(pv_sequence_name)) > 0 THEN /* Dynamically drop sequence, which requires concatenating the sanitized sequence name because you can't bind values on a DDL statement. */ lv_statement := 'DROP sequence '||DBMS_ASSERT.SIMPLE_SQL_NAME(pv_sequence_name); -- Execute statement immediately. EXECUTE IMMEDIATE lv_statement; END IF; END drop_sequence; -- Drops sequence. PROCEDURE create_sequence ( pv_sequence_name VARCHAR2 , pv_cache_value NUMBER ) IS -- Declare local variable(s). lv_statement VARCHAR2(200); lv_next_sequence NUMBER; BEGIN -- Assign the next sequence value if one exists. lv_next_sequence := find_next_sequence(pv_table_name); -- Check whether a cache value has been provided. IF pv_cache_value > 0 THEN /* Dynamically create a sequence statement with a new start value that is one greater than the highest value in the table that uses the sequence. */ lv_statement := 'CREATE SEQUENCE '||DBMS_ASSERT.SIMPLE_SQL_NAME(pv_sequence_name)||CHR(10) || 'MINVALUE 1 NOMAXVALUE INCREMENT BY 1'||CHR(10) || 'START WITH '||lv_next_sequence||' CACHE '||pv_cache_value||' NOORDER NOCYCLE'; ELSE /* Dynamically create a sequence statement with a new start value that is one greater than the highest value in the table that uses the sequence. */ lv_statement := 'CREATE SEQUENCE '||DBMS_ASSERT.SIMPLE_SQL_NAME(pv_sequence_name)||CHR(10) || ' MINVALUE 1 NOMAXVALUE'||CHR(10) || 'INCREMENT BY 1 START WITH '||lv_next_sequence||' NOCACHE NOORDER NOCYCLE'; END IF; -- Execute create sequence statement. EXECUTE IMMEDIATE lv_statement; END create_sequence; -- Finds whether a sequence exists. FUNCTION find_sequence ( pv_sequence_name VARCHAR2 ) RETURN VARCHAR2 IS -- Declare local return variable(s). lv_statement VARCHAR2(200); lv_sequence_name VARCHAR2(30); lv_return_value NUMBER := 0; -- Declare local system reference cursor. lv_cursor SYS_REFCURSOR; BEGIN -- Dynamically find sequence. lv_statement := 'SELECT sequence_name'||CHR(10) || 'FROM user_sequences'||CHR(10) || 'WHERE sequence_name = :seq_name'; OPEN lv_cursor FOR lv_statement USING DBMS_ASSERT.SIMPLE_SQL_NAME(pv_sequence_name); FETCH lv_cursor INTO lv_sequence_name; CLOSE lv_cursor; -- Convert valid sequence name to positive integer, which represents truth. lv_return_value := LENGTH(lv_sequence_name); -- Return value. RETURN lv_return_value; EXCEPTION -- Reached when DBMS_ASSERT check fails. WHEN OTHERS THEN RETURN lv_return_value; END find_sequence; -- Finds the next sequence value. FUNCTION find_next_sequence ( pv_table_name VARCHAR2 ) RETURN VARCHAR2 IS -- Declare local return variable(s). lv_statement VARCHAR2(200); lv_sequence_value NUMBER; lv_return_value NUMBER := 1; -- Declare local system reference cursor. lv_cursor SYS_REFCURSOR; BEGIN -- Dynamically find sequence. lv_statement := 'SELECT MAX('||DBMS_ASSERT.SIMPLE_SQL_NAME(pv_table_name)||'_ID) + 1'||CHR(10) || 'FROM '||DBMS_ASSERT.SIMPLE_SQL_NAME(pv_table_name); OPEN lv_cursor FOR lv_statement; FETCH lv_cursor INTO lv_sequence_value; CLOSE lv_cursor; -- Assign the return value from the NDS statement to a local return variable. lv_return_value := lv_sequence_value; -- Return value. RETURN lv_return_value; EXCEPTION -- Reached when DBMS_ASSERT check fails. WHEN OTHERS THEN RETURN lv_return_value; END find_next_sequence; -- Set precompiler instruction to run in a discrete process. PRAGMA AUTONOMOUS_TRANSACTION; BEGIN -- Conditionally drop sequence. drop_sequence(DBMS_ASSERT.SIMPLE_SQL_NAME(pv_sequence_name)); -- Create sequence. create_sequence(DBMS_ASSERT.SIMPLE_SQL_NAME(pv_sequence_name), pv_cache_value); END; / |
You can test this procedure with the following script, which includes COMMIT statements. Those are requires because the stand alone procedure runs independently of the current session as an autonomous procedure.
-- Conditionally drop existing tables and sequences. BEGIN FOR i IN (SELECT object_name, object_type FROM user_objects WHERE object_name IN ('SAMPLE','SAMPLE_S')) LOOP IF i.object_type = 'TABLE' THEN EXECUTE IMMEDIATE 'DROP TABLE '||i.object_name||' CASCADE CONSTRAINTS'; dbms_output.put_line(i.object_name); ELSIF i.object_type = 'SEQUENCE' THEN EXECUTE IMMEDIATE 'DROP SEQUENCE '||i.object_name; dbms_output.put_line(i.object_name); END IF; END LOOP; END; / -- Create test table. CREATE TABLE sample (sample_id NUMBER); -- Create test table. CREATE SEQUENCE sample_s; -- Insert a seeding row. INSERT INTO sample VALUES (10); -- Commit the values because the procedure is autonomous. COMMIT; -- Reset the sequence value. EXECUTE reset_sequence('SAMPLE','SAMPLE_S'); -- Insert the next sequence value. INSERT INTO sample VALUES (sample_s.nextval); -- Commit the values because the procedure is autonomous. COMMIT; -- Query the result to ensure the numbers are sequential. SELECT * FROM sample; EXECUTE reset_sequence('SAMPLE','SAMPLE_S',500); -- Insert the next sequence value. INSERT INTO sample VALUES (sample_s.nextval); -- Query the result to ensure the numbers are sequential. SELECT * FROM sample; |
Hope this helps anybody interested in automating the process of resetting a START WITH value of an Oracle sequence.
