Archive for the ‘Linux Development’ tag
Netbeans 8 – Fedora
Some of my students want to use the Fedora image that I built for my database classes in my Java software development life cycle course. As a result, they wanted a Java development environment installed. I examined JDeveloper 11g (11.1.1.7.0) and 12c (12.1.3) but resolved on the more generic Netbeans 8 (8.0.2) IDE.
JDK 7 with Netbeans 8 Download
You can download the generic Netbeans 8 IDE or the JDK 8 with Netbeans for the Linux installation. After you download the executable program, you should follow these instructions to install the Netbeans 8 IDE on Fedora.
As the student user, you can download the file to your ~student/Downloads directory and then run these two commands:
chmod +x ./jdk-7u80-nb-8_0_2-linux-x64.sh sudo ./jdk-7u80-nb-8_0_2-linux-x64.sh |
It produces the following output log:
Configuring the installer... Searching for JVM on the system... Preparing bundled JVM ... Extracting installation data... Running the installer wizard... |
Then, it launches the installer. These screens show you how to install and create your first Java project.
JDK 7 with Netbeans 8 Installation

- The first installation dialog welcomes you to the JDK 7 Update and NetBeans 8 Installer. Click the Next button to proceed.

- The second installation dialog asks you to accept the terms in the license agreement. Click the Next button to proceed.

- The third installation dialog asks you to install Netbeans 8. Click the Browse button if you would like to install it in a different area. Click the Next button to proceed.

- The fourth installation dialog asks you to install another Java JDK 7 that supports the current release of Netbeans 8. Click the Browse button if you would like to install it in a different area. Click the Next button to proceed.

- The fifth installation dialog shows you the progress bar for installing Java JDK 7 that supports the current release of Netbeans 8. You may not need to click the Next button to proceed because it should progress to the Netbeans progress dialog. Click the Next button to proceed when it doesn’t do it automatically.
- The sixth installation dialog shows you the progress bar for installing Netbeans 8. Click the Next button to proceed when it doesn’t do it automatically.

- The next screen is the final screen of the Java SE Development Kit and NetBeans IDE Installer. Click the Finish button to complete the installation.
After the installation, you need to check if the netbeans program can be found by users. It shouldn’t be found at this point because it isn’t in the default $PATH environment variable.
Configuring the student user
You can set the $PATH variable dynamically like this:
export PATH=$PATH:/usr/local/netbeans-8.0.2/bin |
The netbeans program location was set in Step #4 of the Netbeans installation. After setting the $PATH environment variable, you can run netbeans with this syntax:
./netbeans & |
However, the better approach is to put the following lines in your .bashrc file. This change ensures that you can access the netbeans program anytime you launch a Terminal session.
# Add netbeans to the user's PATH variable. export PATH=$PATH:/usr/local/netbeans-8.0.2/bin |
After you have configured the student user’s .bashrc file, you can now use Netbeans to create a Java project.
Create a new Netbeans project

- The next screen is the Netbeans 8 Start Page. This is where you can create your first Java development project.

- You click the File menu and then the New Project menu option to open a new project.

- It launches the New Project dialog at Step #1 – Choose Project, where you choose Java from your Categories list and Java Application from the Projects list. You click the Next button to continue.

- It launches the New Project dialog at Step #2 – Name and Location, where you enter a Project Name. The example uses
MySQLJavaas the project name. You click the Next button to continue.

- It launches the
MySQLJava.javatab in the Netbeans 8 application. This is where you can enter your code.
You should download JDK 8 with Netbeans 8. When you install JDK 8 with Netbeans 8 into an environment with a preinstalled JDK 7 (old as it is) with Netbeans 8, the installer only adds the JDK 8.
The following segments of the post show you how to download and install JDK 8 with Netbeans 8, and how to configure Netbeans to work with the JDK 7 and JDK 8 as interchangeable libraries.
JDK 8 with Netbeans 8 Download
You can now download the JDK 8 with Netbeans for the Linux installation. After you download the executable program, you should follow these instructions to install it on Fedora.
As the student user, you can download the file to your ~student/Downloads directory and then run these two commands:
chmod +x ./jdk-8u45-nb-8_0_2-linux-x64.sh sudo ./jdk-8u45-nb-8_0_2-linux-x64.sh |
It produces the following output log:
Configuring the installer... Searching for JVM on the system... Preparing bundled JVM ... Extracting installation data... Running the installer wizard... |
Then, it launches the installer, which will be very similar to the steps you went through earlier. There are differences. There are only five screens that you navigate as opposed to the seven from the earlier JDK 7 with Netbeans 8 installation, as you’ll see below.
JDK 8 with Netbeans 8 Installation

- The first installation dialog welcomes you to the JDK 8 Update and NetBeans 8 Installer. Click the Next button to proceed.

- The second installation dialog installs the JDK 8. Click the Next button to proceed.

- The third installation dialog is a summary of what you’ll install. Click the Install button to proceed.

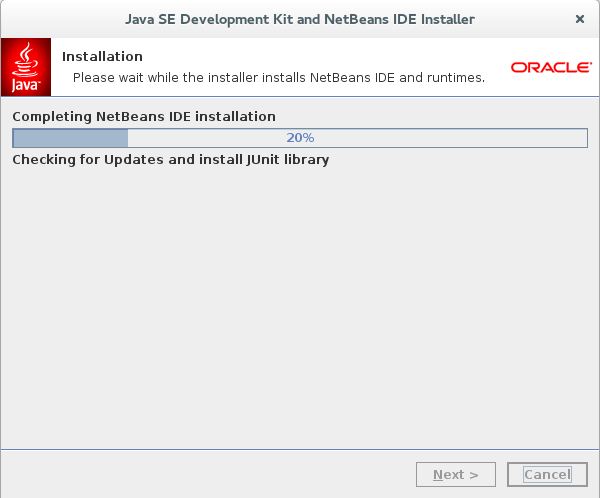
- The fourth installation dialog shows you a progress bar. You don’t need to do anything but watch the progress.

- The fifth installation dialog shows you the installation is complete. Click the Finish button to proceed when it doesn’t do it automatically.
After you have installed the JDK 8 SE, you can use Netbeans to add the JDK 8 platform.
Add the JDK 8 Platform to Netbeans 8
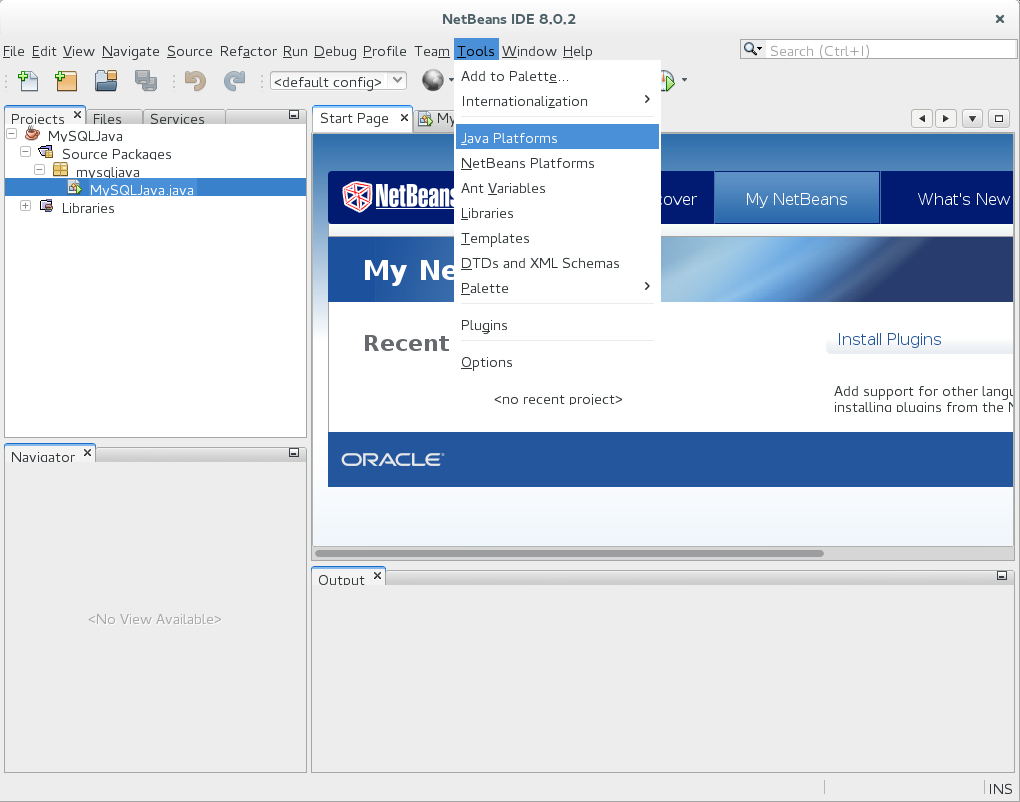
- After you open Netbeans 8, you choose the Tools menu choice. Then, you select the Java Platforms menu option.

- It launches the Java Platform Manager dialog. You click the Add Platform button to add the JDK 8 platform.

- It launches the Add Java Platform dialog. Leave the Java Standard Edition radio button checked. You click the Next button to proceed.

- It launches the Add Java Platform file chooser dialog. Here you navigate to find the JDK 8 software, which is located in
/usr/local/jdk1.8.0_45directory.

- After selecting the
/usr/local/jdk1.8.0_45directory as the platform folder, click the Next button to proceed.

- After setting the directory, you’re asked to verify the Java Platform information. If it’s correct, click the Finish button to proceed.

- After finishing the installation, you’ll see that you have two installed Java Platforms. Unfortunately, the first one installed is the default unless you modify the
netbeans.conffile. You click the Close button to complete the process.
Set JDK 8 Platform as the Default Java Platform for Netbeans 8
After adding the JDK 8 Java Platform, you can change the default setting my manually editing the /usr/local/netbeans-8.0.2/etc/netbeans.conf file. You simply remark out the line for JDK 7 and replace it with one for JDK 8, as shown below. The next time you boot the Netbeans application it uses Java 1.8.
netbeans_jdkhome="/usr/local/jdk1.8.0_45" |
The next time you launch Netbeans 8, it will use JDK 8 because you set that as the default Java Platform
As always, I hope this helps those looking for information like this.
Add zsh to Fedora
One of my students requested an option to the bash shell. It was interesting to hear that he wanted me to instal the zsh in my Fedora image. There’s only one book that I’m aware of that’s been published on the Z Shell, and it is From Bash to Z Shell.
This post shows how to add the zsh to my Fedora image because I already release a new one for the term without the zsh shell. You use the yum utility as the root user to install the zsh library:
yum install -y zsh |
It should produce an output stream like the following, which required accessing the alternate mirror site:
Loaded plugins: langpacks, refresh-packagekit mysql-connectors-community | 2.5 kB 00:00 mysql-tools-community | 2.5 kB 00:00 mysql56-community | 2.5 kB 00:00 pgdg93 | 3.6 kB 00:00 updates/20/x86_64/metalink | 14 kB 00:00 updates | 4.9 kB 00:00 (1/3): mysql-connectors-community/20/x86_64/primary_db | 8.8 kB 00:00 (2/3): pgdg93/20/x86_64/primary_db | 83 kB 00:01 (3/3): updates/20/x86_64/primary_db | 13 MB 00:13 updates/20/x86_64/pkgtags FAILED http://mirror.utexas.edu/fedora/linux/updates/20/x86_64/repodata/1ea83dc402a2bcba53f9b0011ecfa0d579b5a316e4c7f01ec5f1166dcdca138f-pkgtags.sqlite.gz: [Errno 14] HTTP Error 404 - Not Found Trying other mirror. (1/2): updates/20/x86_64/updateinfo | 1.9 MB 00:07 (2/2): updates/20/x86_64/pkgtags | 1.4 MB 00:01 Resolving Dependencies --> Running transaction check ---> Package zsh.x86_64 0:5.0.7-6.fc20 will be installed --> Finished Dependency Resolution Dependencies Resolved ================================================================================ Package Arch Version Repository Size ================================================================================ Installing: zsh x86_64 5.0.7-6.fc20 updates 2.5 M Transaction Summary ================================================================================ Install 1 Package Total download size: 2.5 M Installed size: 5.9 M Downloading packages: zsh-5.0.7-6.fc20.x86_64.rpm | 2.5 MB 00:03 Running transaction check Running transaction test Transaction test succeeded Running transaction (shutdown inhibited) Installing : zsh-5.0.7-6.fc20.x86_64 1/1 Verifying : zsh-5.0.7-6.fc20.x86_64 1/1 Installed: zsh.x86_64 0:5.0.7-6.fc20 Complete! |
Once you’ve installed the zsh, you can configure like you would the bash shell. You make edits to individual .zshrc files and generic changes to the /etc/zshrc file. You can find the documentation to edit the zsh in the User’s Guide to the Z-Shell.
The following is a modified .zshrc file. The changes enable the up-arrow in Oracle’s sqlplus and provides you with a color prompt, like this:
# Source global definitions if [ -f /etc/zshrc ]; then . /etc/zshrc fi # Uncomment the following line if you don't like systemctl's auto-paging feature: # export SYSTEMD_PAGER= # Set the JAVA_HOME path. export JAVA_HOME=/usr/lib/jvm/java-1.7.0-openjdk-1.7.0.75-2.5.4.2.fc20.x86_64 # Set the CLASSPATH path. export CLASSPATH=/usr/share/java/mysql-connector-java.jar:. # User specific aliases and functions . /u01/app/oracle/product/11.2.0/xe/bin/oracle_env.sh # Wrap sqlplus with rlwrap to edit prior lines with the # up, down, left and right keys. sqlplus() { if [ "$RLWRAP" = "0" ]; then sqlplus "$@" else rlwrap sqlplus "$@" fi } # Set the bindkey. bindkey -v bindkey "^R" history-incremental-search-backward export EDITOR="vim" # history stuff HISTFILE=~/.zsh-histfile HISTSIZE=2000 # Set vi as a command line editor. set -o vi autoload -U colors && colors PS1="[%{$fg[red]%}%n%{$reset_color%}@%{$fg[blue]%}%m %{$fg[yellow]%}%~%{$reset_color%}% ]$ " |
The zsh prompt looks like the following:
[student@localhost ~]$
If you’re configured with a bash shell, you can change your shell to a zsh with the following command:
chsh -s /bin/zsh |
As always, I hope this helps those looking for this type of information.
Wrapping SQL*Plus
One annoying thing from installing Oracle Database 11g on Fedora, was that the up arrows for command history didn’t work. I decided to fix that today after seeing Lutz Hartmann’s article on rlwrap. Unfortunately, the epel (Extra Packages for Enterprise Linux) package he recommended doesn’t run on Fedora 20. You can read my tale of woe, or skip to the .bashrc function that fixed it when I installed only rlwrap.
Attempting it on yum, gave me these errors:
# yum install http://www.mirrorservice.org/sites/dl.fedoraproject.org/pub/epel/6/i386/epel-release-6-8.noarch.rpm Loaded plugins: langpacks, refresh-packagekit epel-release-6-8.noarch.rpm | 14 kB 00:00 Examining /var/tmp/yum-root-5CLTPa/epel-release-6-8.noarch.rpm: epel-release-6-8.noarch Marking /var/tmp/yum-root-5CLTPa/epel-release-6-8.noarch.rpm to be installed Resolving Dependencies --> Running transaction check ---> Package epel-release.noarch 0:6-8 will be installed --> Processing Conflict: epel-release-6-8.noarch conflicts fedora-release No package matched to upgrade: epel-release --> Finished Dependency Resolution Error: epel-release conflicts with fedora-release-20-3.noarch You could try using --skip-broken to work around the problem You could try running: rpm -Va --nofiles –nodigest |
Poking around for an epel fix wasn’t successful, so I chose to install only the rlwrap package. Here’s that command and log file:
[root@localhost ~]# yum install rlwrap Loaded plugins: langpacks, protectbase, refresh-packagekit 0 packages excluded due to repository protections Resolving Dependencies --> Running transaction check ---> Package rlwrap.x86_64 0:0.41-1.fc20 will be installed --> Finished Dependency Resolution Dependencies Resolved ================================================================================ Package Arch Version Repository Size ================================================================================ Installing: rlwrap x86_64 0.41-1.fc20 updates 95 k Transaction Summary ================================================================================ Install 1 Package Total download size: 95 k Installed size: 204 k Is this ok [y/d/N]: y Downloading packages: rlwrap-0.41-1.fc20.x86_64.rpm | 95 kB 00:00 Running transaction check Running transaction test Transaction test succeeded Running transaction (shutdown inhibited) Installing : rlwrap-0.41-1.fc20.x86_64 1/1 Verifying : rlwrap-0.41-1.fc20.x86_64 1/1 Installed: rlwrap.x86_64 0:0.41-1.fc20 Complete! |
The next step was getting it to work. A sqlplus function wrapper inside the .bashrc file seemed the easiest. Here’s the code to the .bashrc file:
# .bashrc # Source global definitions if [ -f /etc/bashrc ]; then . /etc/bashrc fi # Uncomment the following line if you don't like systemctl's auto-paging feature: # export SYSTEMD_PAGER= # User specific aliases and functions . /u01/app/oracle/product/11.2.0/xe/bin/oracle_env.sh # Wrap sqlplus with rlwrap to edit prior lines. sqlplus() { if [ "$RLWRAP" = "0" ]; then sqlplus "$@" else rlwrap sqlplus "$@" fi } # Set vi as a command line editor. set -o vi |
As always, I hope this helps some folks.
