Archive for September, 2012
MySQL Workbench Book
 Finally, I finished writing the MySQL Workbench book. It’ll be available next spring. Now it’s time to leave for the plane, fly to San Francisco, and see everyone at MySQL Connect.
I look forward to meeting folks, I’ll be presenting after MySQL Connect for those staying for Oracle Open World. My presentation is at Oracle Develop on Monday, 10/1/12 from 16:45 – 17:45, in the Marriott Marquis – Foothill F. As I mentioned in an earlier post, you can probably catch me in Moscone West at the bookstore. The publisher requests we attend book signings. 😉
Unfortunately as a speaker I need to convert my Keynote to Powerpoint, and had to purchase, install, and update Microsoft Office 2011 on my Mac. Open Office and Keynote weren’t on the approved list, alas …
Update: The book published 4/9/2013 (a bit of a delay from completing the write, eh?). It’s available on Safari as of yesterday.
MySQL 5.0 migration bug
At present, you can’t use the MySQL Workbench migration tool to migrate MySQL 5.0 to MySQL 5.5, as documented in Bug 66861. The only documentation reference that I could find that references the mysql.proc table. Since the physical definition of the mysql.proc table changes across the MySQL 5.0, 5.1, and 5.6 releases, I modified my documentation Bug 66886 to suggest providing online documentation (as a feature request) for the mysql, information_schema, and performance_schema tables across all releases.
The actual definition of the mysql.proc table for MySQL 5.0.91 holds 16 columns not 20 columns as presently expected by the MySQL Workbench migration tool, and is summarized below:
| Field | Type | Null | Key |
|---|---|---|---|
| db | char(64) | NO | PRI |
| name | char(64) | NO | PRI |
| type | enum(‘FUNCTION’,’PROCEDURE’) | NO | PRI |
| specific_name | char(64) | NO | |
| language | enum(‘SQL’) | NO | SQL |
| sql_data_access | enum(‘CONTAINS_SQL’,…) | NO | CONTAINS_SQL |
| is_deterministic | enum(‘YES’,’NO’) | NO | NO |
| security_type | enum(‘INVOKER’,’DEFINER’) | NO | DEFINER |
| param_list | blob | NO | |
| returns | char(64) | NO | |
| body | longblob | NO | |
| definer | char(77) | NO | |
| created | timestamp | NO | CURRENT_TIMESTAMP |
| modified | timestamp | NO | 0000-00-00 00:00:00 |
| sql_mode | set(‘REAL_AS_FLOAT’,…) | NO | |
| comment | char(64) | NO |
I found out about the issue through a comment on my blog from Marc, who was trying to migrate his production instance. I hope this provides a heads-up to anybody else attempting to migrate a MySQL 5.0 database to a MySQL 5.5. The good news is that the MySQL Workbench team appears to be actively working the issue.
Bulk Transfer Works
As many already know, I’ve been trying to get the MySQL Workbench migration feature working between Microsoft SQL Server 2012 and MySQL 5.5. There are a number of features added to the 5.2.43 point release, and one led me to believe that the Migration tool expects to find the data in a schema of its own, as opposed to the dbo schema. Having made that change in Microsoft SQL Server, it did appear to have a positive impact on the migration and when I corrected a character set mismatch it worked perfectly!
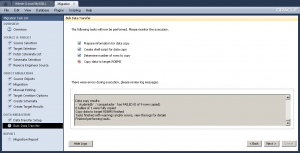 MySQL Workbench successfully migrated the schema and table but failed to migrate the data because of a character set mismatch. I updated Bug 66516 the log file from the character set mismatch before I retyped all 9 test rows to make sure they were in a
 latin1 character set.
I shortened the original log file because the actual log had over 2,000 blanks line :-(. That’s probably something that should be fixed in the code too.
Starting... Prepare information for data copy... Prepare information for data copy done Create shell script for data copy... Table copy script written to C:\Users\McLaughlinM\Desktop\copy_migrated_tables.cmd Create shell script for data copy done Determine number of rows to copy.... Counting number of rows in tables... wbcopytables.exe --count-only --passwords-from-stdin --odbc-source=DSN=SQL Server ODBC;DATABASE=;UID=sa --table [studentdb] [studentdb].[conquistador] 18:29:13 [INF][ copytable]: Opening ODBC connection to 'DSN=SQL Server ODBC;DATABASE=;UID=sa;PWD=XXX' 18:29:14 [INF][ copytable]: ODBC connection to 'DSN=SQL Server ODBC;DATABASE=;UID=sa;PWD=' opened 9 total rows in 1 tables need to be copied: - [studentdb].[studentdb].[conquistador]: 9 Determine number of rows to copy finished Copy data to target RDBMS.... Migrating data... wbcopytables.exe --odbc-source=DSN=SQL Server ODBC;DATABASE=;UID=sa --target=student@mclaughlinsql:3306 --progress --passwords-from-stdin --thread-count=1 --table [studentdb] [studentdb].[conquistador] `studentdb` `conquistador` [conquistador_id], [conquistador], [actual_name], [nationality] `studentdb`.`conquistador`:Copying 4 columns of 9 rows from table [studentdb].[studentdb].[conquistador] ERROR: `studentdb`.`conquistador`:Inserting Batch: Incorrect string value: '\x9Acak' for column 'actual_name' at row 7 `studentdb`.`conquistador`:Finished copying 0 rows in 0m00s 29:15 [INF][ copytable]: Opening ODBC connection to 'DSN=SQL Server ODBC;DATABASE=;UID=sa;PWD=XXX' 29:16 [INF][ copytable]: ODBC connection to 'DSN=SQL Server ODBC;DATABASE=;UID=sa;PWD=' opened 29:16 [INF][ copytable]: Connecting to MySQL server at mclaughlinsql:3306 with user student 29:16 [INF][ copytable]: Connection to MySQL opened Copy helper has finished Data copy results: - `studentdb`.`conquistador` has FAILED (0 of 9 rows copied) 0 tables of 1 were fully copied Copy data to target RDBMS finished Tasks finished with warnings and/or errors, view the logs for details Finished performing tasks. |
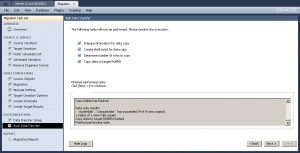 Originally, I thought the failure was due to the extended ASCII characters in the Microsoft SQL Server table. It still failed when I took all of the extended characters out. However, Alfredo suggested it was a character set issue, which is obvious when I looked more closely at the log –
 '\x9Acak' is clearly an incorrect string. I retyped the INSERT statement for the nine rows and it worked perfectly. Naturally, I’ve updated open Bug 66516 with the log file.
If you’re curious about the Microsoft SQL Server configuration check this post.
Setup SQL Server Schema
After you’ve installed Microsoft SQL Server 2012 and created a database schema, you still need to setup or configure the database schema. This is the recommended Microsoft SQL Server Best Practice.That means you must grant permissions to a user to work in the database schema, otherwise you get the following type of error message.
Msg 2760, Level 16, State 1, Line 1 The specified schema name "studentdb" either does not exist or you do not have permission to use it. |
You receive the foregoing error message when trying to create a table in a database schema that hasn’t been assigned a user or role. This typically occurs after you create a new database schema, which has a <default> owner.
For those new to the idea of schemas (or scheme), they were introduced by Microsoft in SQL Server 2005. Here are some rules of thumb on schemas:
- Database schema names are distinct from user names.
- Multiple users may share a schema, which means it can hold objects owned by multiple users.
- Permissions to act inside the schema may be granted to individual users, and you have a varied set of privileges that you can assign to users.
- Ownership of objects in a schema can be transferred using the
ALTER SCHEMAcommand. - Ownership of a schema can be changed by using the
ALTER AUTHORIZATIONcommand. - Database users can be dropped without changing objects in schemas, which is a big difference between Oracle and SQL Server.
The following example occurs when you try to create a table in a studentdb database schema. It doesn’t expose you to the SQL syntax but demonstrates how to manage the changes within the SQL Server Management Studio (SSMS).
By the way, you start the new schema creation process by right clicking on the Databases folder in the SQL Server Management Studio. Then, you give the new database schema a name in the New Database dialog; and click the OK button to complete the process.
The balance of the instructions show you how to create a user account that will map to your new database schema. It assumes you’ve installed it on your local machine and have privileges through local Windows Authentication to the System Administrator (sa) account. You create a student user account, assign the studentdb database schema, log off as the System Administrator, log in as the new user, conditionally drop a table from the studentdb schema, create a table in the studentdb schema, and query the results. It’s also possible to create the user first, database second, and assign the database as the default database for the user account.
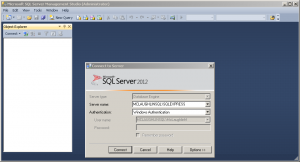
- The first screen asks you to authenticate as the System Administrator using Windows Authentication. Click the Connect button to connect to the SQL Server Management System (SMSS).
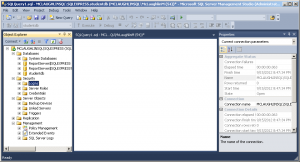
- Click the Security folder and expand the subordinate list of folders. Right click on the Logins folder and click on the New Login option in the context menu. It launches a new dialog where you enter a user account.
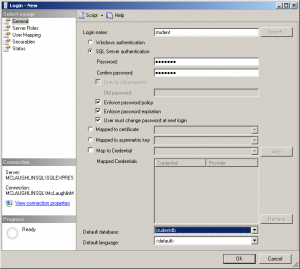
- On the General page of the Login – New dialog, enter a Login name and click the SQL Server authentication radio button. Clicking the radio button enables the Password and Confirm password fields where you enter the same password twice. Click the Default database drop down and choose the studentdb created earlier. Click the Server Roles page to continue.
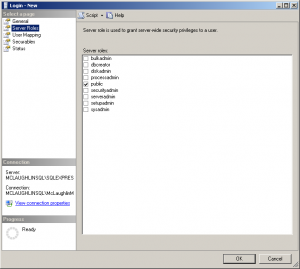
- On the Server Roles page, ensure that only the public server role is checked. Click on the User Mapping page to continue.
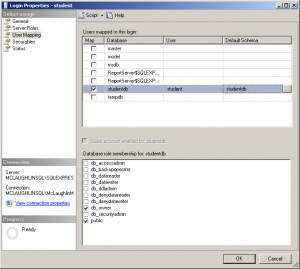
- On the User Mapping page, click the Map check box for the
studentdbdatabase, enterstudentin the User field, and enterstudentdbin the Default Schema field. Click the db_owner and public database role membership forstudentdb. Click on the Securables page to continue.
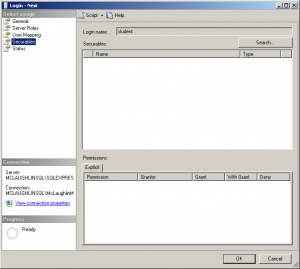
- There are no required changes on the Securables page. Check that screen matches the illustration at the left, and click on the Status page to continue.
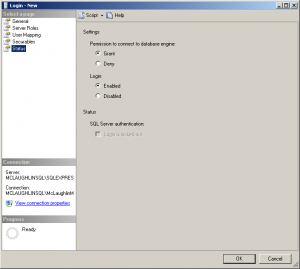
- There are no required changes on the Status page. Check that screen matches the illustration at the left, and click on the OK button to complete creating the user. Then, exit the SQL Server Management Studio as the System Administrator.
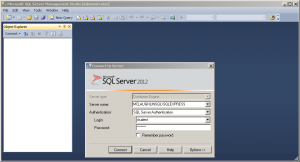
- Launch the SQL Server Management Studio, choose SQL Server Authentication as the authentication method, and enter the
studentLogin (user name) and Password before clicking the Connect button to continue.
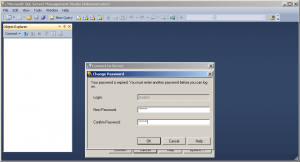
- The first time a user logs in, they must re-enter a valid password. After entering the password twice, click the OK button to continue.
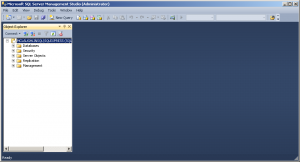
- The initial display shows only the Object Explorer. Click the New Query option in the menu toolbar.
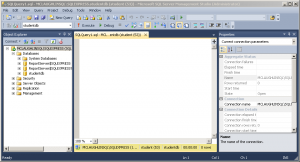
- Click on the Databases folder to expand the list and you will see the
studentdbdatabase schema displayed, as shown in the illustration on the left.
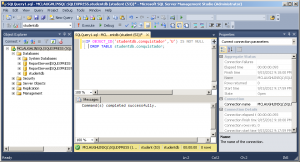
- Enter a conditional drop of a
conquistadortable from thestudentdbdatabase schema. Click the Execute button from the toolbar menu to run the statement.
IF OBJECT_ID('studentdb.conquistador','U') IS NOT NULL DROP TABLE studentdb.conquistador; |
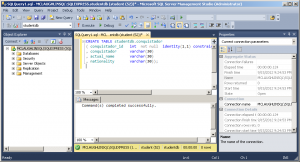
- Enter a
CREATEstatement for aconquistadortable in thestudentdbdatabase schema. Click the Execute button from the toolbar menu to run the statement.
CREATE TABLE studentdb.conquistador ( conquistador_id INT NOT NULL IDENTITY(1,1) CONSTRAINT pk_conquistador PRIMARY KEY , conquistador VARCHAR(30) , actual_name VARCHAR(30) , nationality VARCHAR(30)); |
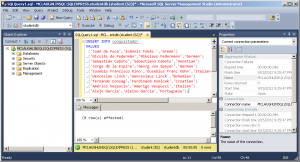
- Enter an
INSERTstatement to theconquistadortable in thestudentdbdatabase schema. Click the Execute button from the toolbar menu to run the statement and see that it inserted 9 rows.
INSERT INTO conquistador VALUES ('Juan de Fuca','Ioánnis Fokás','Greek') ,('Nicolás de Federmán','Nikolaus Federmann','German') ,('Sebastián Caboto','Sebastiano Caboto','Venetian') ,('Jorge de la Espira','Georg von Speyer','German') ,('Eusebio Francisco Kino','Eusebius Franz Kühn','Italian') ,('Wenceslao Linck','Wenceslaus Linck','Bohemian') ,('Fernando Consag','Ferdinand Konšcak','Croatian') ,('Américo Vespucio','Amerigo Vespucci','Italian') ,('Alejo García','Aleixo Garcia','Portuguese'); |
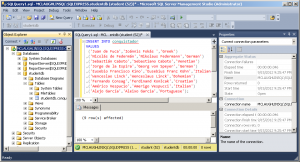
- Click the
studentdbfolder to expand content, and you should see theconquistadortable.
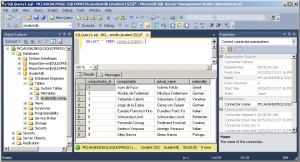
SELECT * FROM conquistador; |
- Click in the SQL Query frame and enter a query against the
conquistadortable. Click the Execute button to run the query and you should see the following output from theconquistadortable.
As always, I hope this helps those trying to sort out how to solve a similar problem.
Trying to Migrate Data
Getting the MySQL Workbench’s Database Migration has been interesting, and at present incomplete. While I can now successfully connect to the SQL Server 2012 source database and capture a schemata list, migrating the data from SQL Server doesn’t work. Actually, the connection doesn’t work without modifying a Python library in the current MySQL Workbench release.
I blogged about the SQL Server 2012 installation and Windows SQL Server DSN setup last night because the development manager requested them to create a repeatable test case to help resolve Bug 66516. The existing blog post on the MySQL Workbench blog provides step-by-step instructions, so I passed on providing them. This post documents how far I’ve been able to get with the database migration and where I’m stuck.
MySQL Workbench 5.2.42, which is the current release at time of writing, doesn’t retrieve a schemata list from SQL Server 2008 or 2012 unless you edit one of the Python libraries. The instructions for the change are in Bug 66030.
You need to edit the db_mssql_grt.py source file and include the fix from the bug. While the bug lists where to find the file on Mac OS X, you find the db_mssql_grt.py source and compiled files are in the following Windows directory (on a 64-bit OS). Then, you delete the db_mssql_grt.pyc file, which is recompiled the next time you launch MySQL Workbench and there’s a call to a function in the module (or library).
C:\Program Files (x86)\MySQL\MySQL Workbench 5.2 CE\modules |
You need to edit line 173, and add the CAST function call before you attempt the migration.
170 171 172 173 174 175 176 177 178 | def getServerVersion(connection): """Returns a GrtVersion instance containing information about the server version.""" version = grt.classes.GrtVersion() ver_string = execute_query(connection, "SELECT CAST(SERVERPROPERTY('ProductVersion') AS VARCHAR)").fetchone()[0] ver_parts = [ int(part) for part in ver_string.split('.') ] + 4*[ 0 ] version.majorNumber, version.minorNumber, version.releaseNumber, version.buildNumber = ver_parts[0:4] return version @ModuleInfo.export(grt.LIST, grt.classes.db_mgmt_Connection) |
After editing the file and saving it, you need to delete the compiled version and start MySQL Workbench to generate the db_mssql_grt.pyc. If MySQL Workbench is running you need to shut it down after deleting the compiled Python file and restart it to generate a new compiled file.
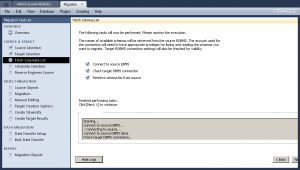 Having fixed the error, you should see verification of your connection to the Microsoft SQL Server. If it fails at this point, you have made an error installing or configuring the Microsoft SQL Server or Windows DSN, or you haven’t made the change to the
 db_mssql_grt.py file.
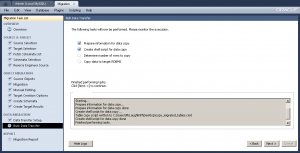 All the other steps work except for copying the data from the Microsoft SQL Server to the MySQL Server. The failure occurs in Bulk Data Transfer segment of the Database Migration wizard. The first error occurs on the Determine number of rows to copy step. The error log didn’t help very much, so I generated the manual script file.
Testing the generated script manually it fails to connect to the SQL Server instance. It appears the command syntax in the generated script is incorrect or one or more of the choices made during the installation of SQL Server or definition of the Windows SQL Server DSN is incorrect.
Here’s the generated script file:
REM Workbench Table Data copy script REM REM Execute this to copy table data from a source RDBMS to MySQL. REM Edit the options below to customize it. You will need to provide passwords, at least. REM REM Source DB: Mssql@SQL Server ODBC (Microsoft SQL Server) REM Target DB: Mysql@mclaughlinsql:3306 REM Source and target DB passwords REM set arg_source_password= REM set arg_target_password= REM Uncomment the following options according to your needs REM Whether target tables should be truncated before copy REM set arg_truncate_target=--truncate-target REM Enable debugging output REM set arg_debug_output=--log-level=debug3 wbcopytables.exe '--odbc-source=DSN=SQL Server ODBC;DATABASE=studentdb;UID=sa' --target=student@mclaughlinsql:3306 --source-password=%arg_source_password% --target-password=%arg_target_password% %arg_truncate_target% %arg_debug_output% --table '[dbo].[ORGANIZATION]' '`studentdb`' '`ORGANIZATION`' |
You need to add the following directory to your %PATH% environment variable to test a call to wbcopytables executable:
SET PATH=%PATH%;C:\Program Files (x86)\MySQL\MySQL Workbench 5.2 CE |
The following call to the wbcopytables executable requires you unremark the source and target password statements or set them externally from the script. This call should connect and migrate data from the Microsoft SQL Server database to the MySQL Workbench.
wbcopytables.exe --odbc-source='[DSN=SQL Server ODBC;DATABASE=studentdb;UID=sa]' --target=student@mclaughlinsql:3306 --source-password=cangetin --target-password=student --table '[dbo].[ORGANIZATION]' '`studentdb`' '`ORGANIZATION`' |
However, running it in my environment generates the following error:
wbcopytables.exe: Invalid option '--odbc-source=DRIVER={.\SQLEXPRESS};DSN=SQL |
This was resolved by development in MySQL Workbench 5.2.43; and you can reference Bug 66516 for more information. Although, you need to watch out for character set mismatches, as qualified in this later post.
SQL Server ODBC DSN
 You must install and then configure a Windows Data Source Name (DSN) for SQL Server’s ODBC before you can connect MySQL Workbench to a SQL Server and migrate data. If you fail to set it up, you can’t complete the first step of the MySQL Workbench migration wizard, as shown in the image to the right.
For MySQL readers, this was posted as part of a replicateable test case for Alfredo’s MySQL Workbench team. A Windows OS version of Bug 66516.
You configure a Windows Data Source Name (DSN) for Microsoft SQL Server 2012 after a successful installation (shown in this related blog post), by performing the following steps.
- You need to create a data source in the operating system. You should open the Control Panel and click on the Administrative Tools menu item to begin the installation of a new data source.
- Click the Data Sources (ODBC) menu item to start the process.
- This is where you add a new User Data Source. Click the Add button on the right of the dialog box.
- The Create New Data Source dialog box should show the SQL Server Native Client 11.0 that was installed when you installed the database. Click on it in the selection box, and then click the Finish button.
- The first dialog of the Create a New Data Source to SQL Server process presents the following dialog, which prompts you for a Data Source Name (DSN), a description, a target server. I’ve entered
SQL Server ODBCas the DSN and description, and chosen thelocaldatabase server. The local database server is the server running on thelocalhostmachine. Click the Next button to continue the process.
- The second dialog of the Create a New Data Source to SQL Server process prompts with the following dialog, which lets you opt for integrated Windows authentication or user credential authentication. The easiest set up when you’re running a test case on a single instance selects integrated windows authentication. Click the Next button to continue the process.
- The third dialog of the Create a New Data Source to SQL Server process prompts with the following dialog, which lets you change the default database, attach a database filename, set ANSI rules, the application intent, and multi-subnet failover. The default options are selected in the dialog. Click the Next button to continue the process.
- The fourth dialog of the Create a New Data Source to SQL Server process prompts with the following dialog, which lets you change the language, encryption, character translation, regional settings, and long query execution. The default options are selected in the dialog. Click the Next button to continue the process.
- The next dialog displays the settings for the ODBC SQL Server Setup. You should always confirm that things work by clicking the Test Data Source button.
- The next dialog displays success when you made working choices and failure when something is misconfigured. Click the OK button to continue the process.
- The OK button concludes the Create a New Data Source to SQL Server process, and returns you to the list of valid ODBC Data Sources. Click the OK button to conclude the process.
Hopefully, this helps those learning how to set up Microsoft SQL Server to work with MySQL Workbench’s migration tool.
SQL Server 2012 Install
While testing the MySQL Workbench migration tool, I needed to install Microsoft SQL Server 2012 Express (the free one up to 8 GB of data). These are my notes on installing the product, and you can click on any image to see the full size resolution and details. (The approach using small snapshots on the left was suggested from somebody who uses the blog and felt these would be easier than large but slightly reduced image files.)
For MySQL readers, this was posted as part of a replicateable test case for Alfredo’s MySQL Workbench team. A Windows OS version of Bug 66516.
Installation Steps
For reference, I’ve already installed the pre-requisites of Windows PowerShell 2.0 and Microsoft .NET Framework 3.5. You’ll see that when you get to step #6.
- The first screen gives you the appearance of a wizard format with the list of tasks on the left and the details on the right. Click the New SQL Server stand-alone installation or add features to an existing installation to install a copy of SQL Server 2012 Express with a sample database.
- The Microsoft SQL Server 2012 installation firsts checks the rules for the installation. This screen lasts for about 20-30 seconds before you get the licensing dialog box.
- There’s not much choice with this dialog but you must confirm you’ve read the license terms. If you want to keep Microsoft apprise about your platform leave the button check box enabled. It’s unchecked in my installation. 😉 After you address the check boxes, click the Next button to proceed with the installation.
- This dialog should quickly scan for any product updates, which are minimal if you’ve downloaded the file from Microsoft’s download site. Mine was up to date and skipped downloading and extracting tasks. It does take a small amount of time to install the setup files, and you’re parked on this screen while that happens. Click the Install button to continue with the installation.
- A second rule check runs to make sure anything from the software update is completed. Click the Next button to proceed.
- This page presents the Features that you want installed. It installs everything but a local database by default. If you’re building a stand alone instance you should check the LocalDB check box.
- After you check the LocalDB check box, the Features display shows that all features are selected. Click the Next button to continue.
- This dialog lets you choose whether you install a default or named instance. You also provide the instance unique identifier (ID), and root directory. After making sure that’s completed, click the Next button ton continue.
- This section lets you name and set Microsoft Service names for the database engine, reporting services, full-text filter daemon launche, and browser. My settings enable the database engine and reporting services as automatic, which means they start when the operating systems wakes. Click the Next button to continue with the install.
- This dialog lets you set the authentication mode of Microsoft SQL Server. By default, Microsoft SQL Server uses Windows authentication mode. I recommend you opt for Mixed Mode by clicking the radio button and entering a password twice.
- After entering the SQL Server Administrators’ password in the Server Configuration tab view, click the Data Directories tab to check the data directories.
- On the Data Directories tab verify the installation directories. The 64-bit directory default root directory is:
C:\Program Files\Microsoft SQL Server\
- After inspecting the Data Directories, click the User Instances tab and enable the Users are allowed to run a separate instance of the Database Engine check box.
- Clicking the FILESTREAM tab, you click the Enable FILESTREAM for Transact-SQL access check box. This enables FILESTREAM for Transact-SQL. Click the Next button to proceed.
- This dialog of the wizard lets you configure the reporting services. Click the Install and configure radio button and then the Next button to proceed.
- This dialog lets you set the error reporting. Click the Send Windows and SQL Server Error Reports to Microsoft if you want to advise them of errors. After making your notification decision, click the Next button to proceed.
- The installation program takes several minutes to run, and this is a copy of the progress dialog. After the installation completes, the program automatically advances to the completion dialog.
- When everything succeeds you’ll see a dialog like the one on the left. Click the Close button to complete the installation.
- Click on the Start button, choose All Programs, choose Microsoft SQL Server 2012, and choose the SQL Server Management Studio that launches the SQL Server 2012 login screen.
- This launches the Microsoft SQL Server Management Studio as an Administrator. This base image only displays the Object Explorer view.
- Click the View Query button and it displays the SQL Query and Properties view.
Post Installation Configuration Step
After installing the Microsoft SQL Server 2012 Express Edition, I discovered that the pipe definition was incorrect and had to fix it, which was exactly like the fix for Microsoft SQL Server 2008 that I blogged about 3 years ago here.
If you want to set up databases that hold tables of their own as opposed to deploying everything in the dbo schema, you should read this post on configuring SQL Server 2012. It shows you how to create a database, user, and schema.
You’ll need to configure a Windows Data Name Source (DSN) for SQL Server, when you’re planning to connect Microsoft Excel to SQL Server or migrate data from SQL Server using MySQL Workbench.
Encrypting a Column
A few years ago, I gave a session on Oracle’s Data Vault. An attendee from that session and I happened to be seated at the same table for lunch last Thursday when I presented at Utah Oracle User Group Fall Symposium. He asked if I’d ever found a way to encrypt a column from the prying eyes of the SYS user. I said yes, and he asked how. It was a bit more than could be explained at lunch and promised to put it on the blog. (Disclaimer: It is possible to unwrap wrapped code but the mechanics change with each release and they require access to the SYS schema and substantial Application DBA knowledge; however, there are scripts published on the Internet to unwrap the code. There are also other vulnerabilities in the example, but I’ll pass on exposing them. After all this was written to illustrate an approach.)
It’s important to note you can now hide columns in Oracle Database 12c, but they’re still visible to the DBA-level staff. That’s why I’ll publish a new article on re-writing this encrypted object as a Java library, and disclose how to hide password exchanges from the SGA area.
This demonstrates how you can encapsulate a column from even the SYS user. I also put it into Appendix D, PL/SQL Built-in Packages and Types to illustrate the DBMS_CRYPTO package. It uses a User Defined Type (UDT) and assumes you have a working knowledge of object types in Oracle 10g forward. If not, you can find them in:
- Chapter 11 of my Oracle Database 12c PL/SQL Programming book.
- Chapter 14 of my Oracle Database 11g PL/SQL Programming book.
It also assumes basic knowledge of Oracle’s encryption technology, some of which is explained in the new Oracle Database 12c PL/SQL Programming book.
For reference, a good DBA would simply find this clear text password in the SGA. A more secure approach might be hiding the encryption keyword in a one column and table or embedded in some string within a common lookup table column value as a position specific substring. Alas, I don’t have time to write something so elaborate.
The steps are:
- You must create a user defined type (UDT), which sets the up a single salary column.
1 2 3 4 5 6 7 8 9 10 | CREATE OR REPLACE TYPE masked IS OBJECT ( salary RAW(1000) , CONSTRUCTOR FUNCTION masked RETURN SELF AS RESULT , CONSTRUCTOR FUNCTION masked ( salary NUMBER ) RETURN SELF AS RESULT , MEMBER FUNCTION get_raw_salary RETURN RAW , MEMBER FUNCTION get_salary ( KEY VARCHAR2 ) RETURN NUMBER , MEMBER PROCEDURE to_string , ORDER MEMBER FUNCTION equals ( object MASKED ) RETURN NUMBER ) INSTANTIABLE FINAL; / |
- As the
SYSuser, you must grantEXECUTEprivilege on theDBMS_CRYPTOpackage to the targetSCHEMAuser.
1 | GRANT EXECUTE ON dbms_crypto TO schema_name; |
- You implement the
MASKEDUDT, as follows below (source unencrypted, don’t worry I show you how to encrypt [wrap] it in a moment).
1 2 3 4 5 6 7 8 9 10 11 12 13 14 15 16 17 18 19 20 21 22 23 24 25 26 27 28 29 30 31 32 33 34 35 36 37 38 39 40 41 42 43 44 45 46 47 48 49 50 51 52 53 54 55 56 57 58 59 60 61 62 63 64 65 66 67 68 69 70 71 72 73 74 75 76 77 78 79 80 81 82 83 84 85 86 87 88 89 90 91 92 93 94 95 96 97 98 99 100 101 102 103 104 105 | CREATE OR REPLACE TYPE BODY masked IS CONSTRUCTOR FUNCTION masked RETURN SELF AS RESULT IS /* Create a placeholder for a zero salary, like an empty_clob() call. */ zero MASKED := masked(0); BEGIN /* Assign an encrypted zero salary to the instance. */ self := zero; RETURN; END masked; CONSTRUCTOR FUNCTION masked ( salary NUMBER ) RETURN SELF AS RESULT IS /* Declare local variables for encryption, object types hold instance objects and object body variables are method specific. Placing them inside the methods while tedious prevents their disclosure. */ lv_key_string VARCHAR2(4000) := 'Encrypt Me!'; lv_key RAW(1000); lv_raw RAW(1000); lv_encrypted_data RAW(1000); BEGIN /* Dynamic assignment. */ lv_raw := UTL_RAW.cast_to_raw(NVL(salary,0)); /* Convert to a RAW 64-character key. */ lv_key := UTL_RAW.cast_to_raw(lv_key_string); lv_key := RPAD(lv_key,64,'0'); /* Encrypt the salary before assigning it to the object type attribute */ lv_encrypted_data := DBMS_CRYPTO.ENCRYPT(lv_raw, dbms_crypto.ENCRYPT_AES256 + dbms_crypto.CHAIN_CBC + dbms_crypto.PAD_PKCS5,lv_key); self.salary := lv_encrypted_data; RETURN; END masked; MEMBER FUNCTION get_raw_salary RETURN RAW IS BEGIN RETURN self.salary; END get_raw_salary; MEMBER FUNCTION get_salary( key VARCHAR2 ) RETURN NUMBER IS /* Declare local variables for encryption, object types hold instance objects and object body variables are method specific. Placing them inside the methods while tedious prevents their disclosure. */ lv_key_string VARCHAR2(4000) := 'Encrypt Me!'; lv_decrypted_data RAW(4000); lv_key RAW(1000); lv_return_value NUMBER; BEGIN /* Verify key value matches local value before decrypting, substitute a zero value when the key doesn't match. */ IF key = lv_key_string THEN lv_key := UTL_RAW.cast_to_raw(lv_key_string); lv_key := RPAD(lv_key,64,'0'); lv_decrypted_data := DBMS_CRYPTO.DECRYPT(self.salary, dbms_crypto.ENCRYPT_AES256 + dbms_crypto.CHAIN_CBC + dbms_crypto.PAD_PKCS5,lv_key); lv_return_value := TO_NUMBER(TO_CHAR(UTL_RAW.cast_to_number(lv_decrypted_data),'9999990.00')); ELSE lv_return_value := 0; END IF; RETURN lv_return_value; END get_salary; ORDER MEMBER FUNCTION equals ( object MASKED ) RETURN NUMBER IS /* Declare local variables for encryption, object types hold instance objects and object body variables are method specific. Placing them inside the methods while tedious prevents their disclosure. */ lv_key_string VARCHAR2(4000) := 'Encrypt Me!'; lv_decrypted_self RAW(4000); lv_decrypted_peer RAW(4000); lv_key RAW(1000); BEGIN /* Decrypt the current and peer object attribute values before comparing their values. */ lv_key := UTL_RAW.cast_to_raw(lv_key_string); lv_key := RPAD(lv_key,64,'0'); lv_decrypted_self := DBMS_CRYPTO.DECRYPT(self.salary, dbms_crypto.ENCRYPT_AES256 + dbms_crypto.CHAIN_CBC + dbms_crypto.PAD_PKCS5, lv_key); lv_decrypted_peer := DBMS_CRYPTO.DECRYPT(object.get_raw_salary(), dbms_crypto.ENCRYPT_AES256 + dbms_crypto.CHAIN_CBC + dbms_crypto.PAD_PKCS5, lv_key); /* Sort order key. */ IF lv_decrypted_self < lv_decrypted_peer THEN RETURN 1; ELSE RETURN 0; END IF; END equals; MEMBER PROCEDURE to_string IS BEGIN /* Provide a to_string method for good practice. */ DBMS_OUTPUT.put_line('Encrypted value'); END to_string; END; / |
- You implement the
MASKEDUDT encrypted by using theDBMS_DDLpackage, as follows below. This ensures that others can’t read the source code by querying theALL_,DBA_, orUSER_SOURCEviews. You should note that I’ve removed comments and unnecessary spaces.
1 2 3 4 5 6 7 8 9 10 11 12 13 14 15 16 17 18 19 20 21 22 23 24 25 26 27 28 29 30 31 32 33 34 35 36 37 38 39 40 41 42 43 44 45 46 47 48 49 50 51 52 53 54 55 56 57 58 59 60 61 62 63 64 | BEGIN DBMS_DDL.create_wrapped( 'CREATE OR REPLACE TYPE BODY masked IS ' || 'CONSTRUCTOR FUNCTION masked RETURN SELF AS RESULT IS ' || 'zero MASKED := masked(0); ' || 'BEGIN ' || 'self := zero; ' || 'RETURN; ' || 'END masked; ' || 'CONSTRUCTOR FUNCTION masked ( salary NUMBER ) RETURN SELF AS RESULT IS ' || 'lv_key_string VARCHAR2(4000) := ''Encrypt Me!''; ' || 'lv_key RAW(1000); ' || 'lv_raw RAW(1000) := RPAD(utl_raw.cast_from_number(salary),32,''0''); ' || 'lv_encrypted_data RAW (1000); ' || 'BEGIN ' || 'lv_key := utl_raw.cast_to_raw(lv_key_string); ' || 'lv_key := RPAD(lv_key,64,''0''); ' || 'lv_encrypted_data := DBMS_CRYPTO.ENCRYPT(lv_raw, dbms_crypto.ENCRYPT_AES256 + dbms_crypto.CHAIN_CBC + dbms_crypto.PAD_PKCS5,lv_key); ' || 'self.salary := lv_encrypted_data; ' || 'RETURN; ' || 'END masked; ' || 'MEMBER FUNCTION get_raw_salary RETURN RAW IS ' || 'BEGIN ' || 'RETURN self.salary; ' || 'END get_raw_salary; ' || 'MEMBER FUNCTION get_salary( key VARCHAR2 ) RETURN NUMBER IS ' || 'lv_key_string VARCHAR2(4000) := ''Encrypt Me!''; ' || 'lv_decrypted_data RAW(4000); ' || 'lv_key RAW(1000); ' || 'lv_return_value NUMBER; ' || 'BEGIN ' || 'IF key = lv_key_string THEN ' || 'lv_key := utl_raw.cast_to_raw(lv_key_string); ' || 'lv_key := RPAD(lv_key,64,''0''); ' || 'lv_decrypted_data := DBMS_CRYPTO.DECRYPT(self.salary, dbms_crypto.ENCRYPT_AES256 + dbms_crypto.CHAIN_CBC + dbms_crypto.PAD_PKCS5,lv_key); ' || 'lv_return_value := TO_NUMBER(TO_CHAR(utl_raw.cast_to_number(lv_decrypted_data),''9999990.00'')); ' || 'ELSE ' || 'lv_return_value := 0; ' || 'END IF; ' || 'RETURN lv_return_value; ' || 'END get_salary; ' || 'ORDER MEMBER FUNCTION equals ( object MASKED ) RETURN NUMBER IS ' || 'lv_key_string VARCHAR2(4000) := ''Encrypt Me!''; ' || 'lv_decrypted_self RAW(4000); ' || 'lv_decrypted_peer RAW(4000); ' || 'lv_key RAW(1000); ' || 'BEGIN ' || 'lv_key := utl_raw.cast_to_raw(lv_key_string);' || 'lv_key := RPAD(lv_key,64,''0''); ' || 'lv_decrypted_self := DBMS_CRYPTO.DECRYPT(self.salary, dbms_crypto.ENCRYPT_AES256 + dbms_crypto.CHAIN_CBC + dbms_crypto.PAD_PKCS5, lv_key); ' || 'lv_decrypted_peer := DBMS_CRYPTO.DECRYPT(object.get_raw_salary(), dbms_crypto.ENCRYPT_AES256 + dbms_crypto.CHAIN_CBC + dbms_crypto.PAD_PKCS5, lv_key); ' || 'IF lv_decrypted_self < lv_decrypted_peer THEN ' || 'RETURN 1; ' || 'ELSE ' || 'RETURN 0; ' || 'END IF; ' || 'END equals; ' || 'MEMBER PROCEDURE to_string IS ' || 'BEGIN ' || 'dbms_output.put_line(''Encrypted value''); ' || 'END to_string; ' || 'END; '); END; / |
You can read more about wrapping PL/SQL in Appendix F of Oracle Database 12c PL/SQL Programming.
- You can test a single instance with this anonymous PL/SQL block.
1 2 3 4 5 6 7 8 9 | DECLARE o MASKED := masked(82000.12); BEGIN DBMS_OUTPUT.put('Override: '); o.to_string(); DBMS_OUTPUT.put_line('Decrypted: '||o.get_salary('Encrypt Me!')); DBMS_OUTPUT.put_line('Bad Key: '||o.get_salary('Incorrect')); END; / |
Override: Encrypted value Decrypted: 82000.12 Bad Key: 0 |
- You can test a series of instances by making them persistent objects, or columns in a table, and then query values from them. It also lets you you test the sorting feature provided in the UDT.
1 2 3 4 5 6 7 8 9 10 11 12 13 14 15 16 17 18 | CREATE TABLE sort_demo (salary MASKED); INSERT INTO sort_demo VALUES (masked(82000.24)); INSERT INTO sort_demo VALUES (masked(61000.12)); INSERT INTO sort_demo VALUES (masked(93000.36)); SELECT salary AS "Encrypted" FROM sort_demo; COLUMN unordered FORMAT 9,999,990.00 HEADING "Unordered|List" SELECT TREAT(salary AS MASKED).get_salary('Encrypt Me!') AS Unordered FROM sort_demo; COLUMN ordered FORMAT 9,999,990.00 HEADING "Ordered|List" SELECT TREAT(salary AS MASKED).get_salary('Encrypt Me!') AS Ordered FROM sort_demo ORDER BY 1; |
Encrypted(SALARY)
--------------------------------------------------------------------------
MASKED('1798C04F8342C53A826144568075CBDB145D0C9BD226B410C8C7167B76382D86')
MASKED('82F783F2E117AA60955B0A2E73545506936D6F8FFBEC5D9E0D8E70B82D4B694D')
MASKED('1551F350AAEB30ADFC1527F25CAA935732243858AF1C5D724A78B997A4394EAD')

    Unordered
         List
-------------
    82,000.24
    61,000.12
    93,000.36


      Ordered
         List
-------------
    61,000.12
    82,000.24
93,000.36 |
If you want to retest this, make sure you drop the SORT_DEMO table first. Hope this helps any interested in an elaborate solution.
UTOUG Fall Symposium
Heading out to speak on Comparative SQL between Oracle and MySQL at the Utah Oracle User’s Group Fall Symposium. I’ll look forward to meeting old and new friends. Also, I’ve got a couple promotional copies of my Oracle Database 11g and MySQL 5.6 Developer Handbook to give out at the end of the session.
I’m also presenting Monday evening at Oracle Develop during Oracle Open World 2012. I’ll also have copies of the Oracle Database 11g PL/SQL Programming and Oracle Database 11g PL/SQL Programming Workbook books to give away at the end of the session. Naturally, McGraw-Hill wants me to stop by the bookstore for a signing. If you have time and are in Moscone West, stop by and visit.
Naturally, I’m also attending MySQL Connect to see the brilliant sessions being presented. Hope to see you in San Francisco! 🙂
Hostname Change Error
While staging to rebuild the Oracle DB Console (Oracle Enterprise Manager – OEM), I needed to check something in my MySQL instance and ran into the following error after changing the machine’s hostname for that OEM test. The message basically says that MySQL Workbench can’t resolve the connection.
The dialog error provides an excellent note, which lists the actual error as the first thing to check. The dialog follows:
This lists the text of the error dialog:
Your connection attempt failed for user '<user_name>' from your host to server at <server_name>:3306: Unknown MySQL server host '<server_name>' (0) Please: 1 Check that mysql is running on server <server_name> 2 Check that mysql is running on port 3306 (note: 3306 is the default, but this can be changed) 3 Check the student has rights to connect to <server_name> from your address (mysql rights define what clients can connect to the server and from which machines) 4 Make sure you are both providing a password if needed and using the correct password for <server_name> connecting from the host address you're connecting from |
Navigate to Database -> Manage Connections… in the menu. This opens a dialog where you can manage the details of a connection.
It opens the following dialog page:
The Test button lets you retest whether the connection works. The error message raised by the test, noted below, is not nearly as detailed as the previous error message.
Inspecting the Parameters tab below, you see the hostname value McLaughlinMySQL. The actual hostname is mclaughlinsql. You need to replace the displayed value with the correct value.
After making the change, click the Test Connection button. A correct change prompts you for the user’s password and when successfully entered yields the following dialog.
Hope this helps a few folks resolve the problem when the machine hostname changes.
