Archive for the ‘Oracle 11g’ Category
Oracle 11gR2 on Windows 7
Here are step-by-step instructions for installing Oracle Database 11g Release 2 on Windows 7 (Oracle 12c is here). It’s provided in response to questions posted on my step-by-step instructions for installing Oracle 11gR1 on Windows 7. For reference, I posted the former because it didn’t work without intervention. I hadn’t updated step-by-step instructions because Oracle Database 11g Release 2 has always worked for me when installing on Windows 7.
A number of students and blog readers have mentioned that it didn’t work for them. My guess is that they had configuration issues within the Windows 7 environment. There are some Windows 7 configuration caveats before you perform this installation, and they are:
Windows 7 Configuration Steps
- Make sure you have at least 3 GB of memory on your Windows PC, or that you can allocate 4 GB of memory to your virtual machine (the latter typically requires 8 GB of real memory to avoid extensive disk caching of memory).
- Install Oracle’s SJDK and run time for Java 6 or 7 on Windows 7 (I installed Java 7). Although either work with the database, you need the Java 6 SDK 32-bit version (at least SJDK 1.6.0_4) for Oracle SQL Developer. This means you need to download the 32-bit version even when you’re installing the 64-bit Oracle Database 11g version. The SQL Developer fix is found in this blog post.
- Disable Microsoft’s User Access Controls (UAC). I blogged about a set of Windows 7 gripes, and the second point shows you the screen shots that let you disable UAC on Windows 7.
- Configure your
C:\Windows\System32\drivers\etc\hostsfile. Use lines 1 through 3 when you’re using a DHCP IP address, and lines 1 through 4 when you’re using a static IP address. If you want to set a static IP address, check this old post on how to set a static IP address. Please note that thehostnameneeds to be lowercase.
1 2 3 4 | 127.0.0.1 localhost
::1 localhost
127.0.0.1 mclaughlinmysql mclaughlinmysql.techtinker.com
172.26.126.131 mclaughlinmysql mclaughlinmysql.techtinker.com |
- Create a user account name that doesn’t have a white space, like
McLaughlinMin the screen shots, and assign it Administrator privileges. - The Oracle Enterprise Manager (OEM) uses port ranges above 5,000, which according to Microsoft requires that you set
MaxUserPortkey in the Windows Registry. You can find more details at this Microsoft Support page. Personally, I haven’t found this necessary and after adding it to please somebody without setting it everything ran fine in Windows 7.
Registry key: HKEY_LOCAL_MACHINE\SYSTEM\CurrentControlSet\Services\Tcpip\Parameters
| Value Name | MaxUserPort |
| Value Type | DWORD |
| Value Data | 65534 |
| Value Range | 5000-65534 (decimal) |
| Value Default | 0x1388 (5000 decimal) |
| Description | This parameter controls the maximum port number that is used when a program requests any available user port from the system. Typically, ephemeral (short-lived) ports are allocated between the values of 1024 and 5000 inclusive. After the release of security bulletin MS08-037, the behavior of Windows Server 2003 was changed to more closely match that of Windows Server 2008 and Windows Vista. For more information about Microsoft security bulletin MS08-037 |
Oracle 11g Release 2 Installation Steps
- The Oracle Database 11g Release 2 files are broken down into two zip files on the Oracle site. That means you need to download both files, and then expand them into an installation directory. I called my installation directory
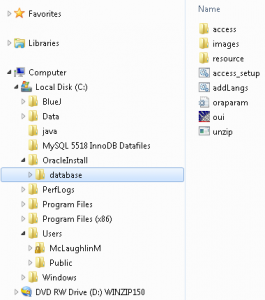
C:\OracleInstall, but you can call it whatever works for you. Here’s a screen shot of the directory after expanding both compressed files (done with WinZip 15).
database directory (or folder). Within the installation folder (C:\OracleInstall\database), you double click on the oui icon to launch (start) the Oracle Universal Installer. It’ll open a command prompt that may dwell on the screen for a few seconds up to maybe fifteen seconds.
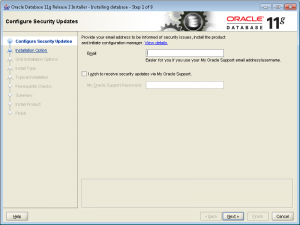
- It’s a good idea to provide an email address for security updates no matter what. You can uncheck the box if you don’t want updates via Oracle Support Services. Click the Next button to continue.
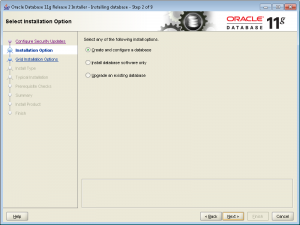
- Most developers want to Create and configure a database. If that’s your desire, leave the default radio button checked. Click the Next button to continue.
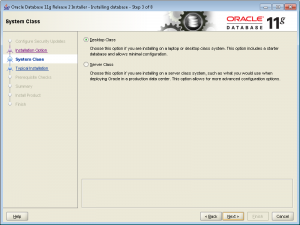
- Most developers install their test instance on a desktop or laptop. If that’s your desire, leave the default Desktop Class radio button checked. Click the Next button to continue.
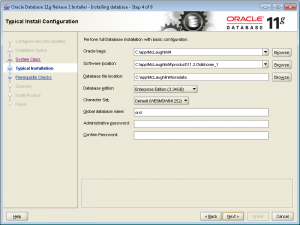
- These are default settings and generally the easiest to use. I’d suggest you change the Character Set drop down to Unicode. Then, enter a password twice. Oracle requires that you use at least one capital letter and one number in a 6 character or more long password. Click the Next button to continue.
- The next screen is a progress bar that checks for prerequisites. You shouldn’t have to do anything here because it automatically advances you to the next dialog screen. This generally takes less than a minute to run but can take two or so. If you’re much beyond 3 minutes there may be a resource problem with your Windows PC or virtual machine.
- This shows you all the selected values for the installation. Unless you want to abort the installation, click the Finish button to proceed.
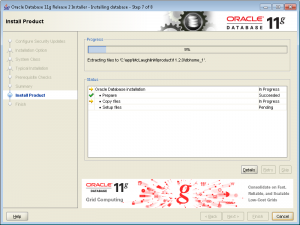
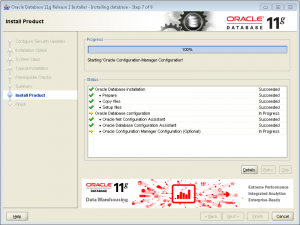
- This screen is the main progress bar, and you’ll be here somewhere between 5 and 10 minutes. The downside is that there are some dialogs that will popup during this phase and you need to authorize them, so it’s a bad time to take a break.
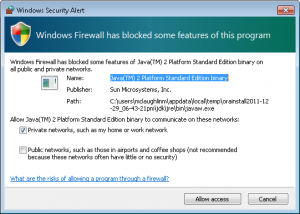
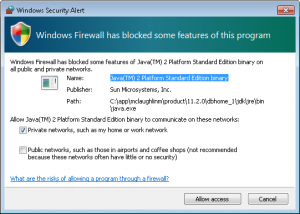
- The first popup screen requires you to authorize the Java runtime to call home. You should click the Allow Access button to proceed.
- When the progress bar starts configuring the instance, failures can occur. The first may occur during the network configuration, which typically happens if you didn’t preconfigure the
hostsfile. You don’t need to do anything but watch here unless the installer triggers an error.
- The following progress bar is launched by the Oracle Database Configuration Assistant. It typically runs without a problem. You don’t need to do anything but watch here unless the installer triggers an error. This takes a few minutes, and unfortunately requires you to stick aroung to again authorize Java.
- The second popup screen requires you to authorize the Java runtime to call home. You should click the Allow Access button to proceed.
- The third and last popup screen asks you to whether you want to open other scheme. Generally, you should click the OK button to proceed.
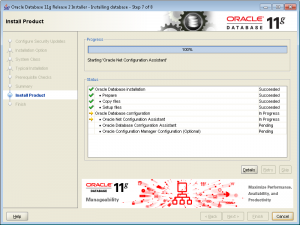
- The next dialog shows you that the network and database instances are configured. It’s also running the OEM (Oracle Enterprise Manager) installation. You can wait here but it won’t be a long wait.
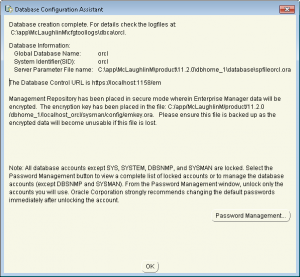
- This is the last dialog and says you’ve installed Oracle Database 11g Release 2 successfully. You can the Close button to complete the installation.
The next step is probably running Oracle Enterprise Manager (OEM). I’ve recently added this post, which arose from a question. It shows you how to run the DB Console.
Also, it’s possible that you could have a problem launching SQL Developer. If so, check how to set the proper JVM for SQL Developer post.
As always, I hope this helps folks.
Fedora Install of Oracle 11g
After the installation of Oracle 11g XE on Windows, I anticipated problems installing on Fedora. It’s terrific to report it was by far simpler to install on Fedora. This post provides the steps, and builds on the Fedora configuration published earlier this week.
- After you download the software from the Oracle web site, you’ll need to expand the compressed file. When you double click on the download item you will see the following screen. Click Extract at the top of the display.
- The Extract displays the following dialog. Click the Create Folder button and you’ll get an entry point for a new directory in your user’s directory. For the example, Oracle11gXE
- After creating the directory, click the Extract button.
- The extract process completes and shows the following dialog.
- The Disk1 directory will show the following contents.
- You need to drop down into a Terminal session, which you can launch by clicking on Applications, System Tools, and Terminal in the menu.
sudo rpm -iv oracle-xe-11.2.0-1.0.x86_64.rpm |
This command will install the packages in verbose syntax and display the following messages:
[sudo] password for mclaughlinm: Preparing packages for installation... oracle-xe-11.2.0-1.0 Executing post-install steps... You must run '/etc/init.d/oracle-xe configure' as the root user to configure the database. |
- This step requires that you assume the role of the
rootuser, which can be done with this syntax:
sudo sh |
In this root shell, you run the Oracle 11g XE configuration with this command:
/etc/init.d/oracle-xe configure |
The following are the text prompts that you accept to configure Oracle 11g XE:
Oracle Database 11g Express Edition Configuration ------------------------------------------------- This will configure on-boot properties of Oracle Database 11g Express Edition. The following questions will determine whether the database should be starting upon system boot, the ports it will use, and the passwords that will be used for database accounts. Press <Enter> to accept the defaults. Ctrl-C will abort. Specify the HTTP port that will be used for Oracle Application Express [8080]: Specify a port that will be used for the database listener [1521]: Specify a password to be used for database accounts. Note that the same password will be used for SYS and SYSTEM. Oracle recommends the use of different passwords for each database account. This can be done after initial configuration: Confirm the password: Do you want Oracle Database 11g Express Edition to be started on boot (y/n) [y]: Starting Oracle Net Listener...Done Configuring database... Starting Oracle Database 11g Express Edition instance...Done Installation completed successfully. |
After completing the configuration, you need to do two things. First, you need to modify the .bash_profile file for your user (covered in the next step). Second, you need to reboot your system.
- This step requires that you exit the
rootshell by typing theexitcommand. This should put you back into your administration account with sudoer privileges. You usevito edit and add the following to the.bashrcfile.
. /u01/app/oracle/product/11.2.0/xe/bin/oracle_env.sh |
Or, you can write your own file, like this:
# Oracle Settings TMP=/tmp; export TMP TMPDIR=$TMP; export TMPDIR ORACLE_HOSTNAME=localhost.localdomain; export ORACLE_HOSTNAME ORACLE_UNQNAME=DB11G; export ORACLE_UNQNAME ORACLE_BASE=/u01/app/oracle; export ORACLE_BASE ORACLE_HOME=$ORACLE_BASE/product/11.2.0/xe; export ORACLE_HOME ORACLE_SID=XE; export ORACLE_SID NLS_LANG=`$ORACLE_HOME/bin/nls_lang.sh`; export NLS_LANG ORACLE_TERM=xterm; export ORACLE_TERM PATH=/usr/sbin:$PATH; export PATH PATH=$ORACLE_HOME/bin:$PATH; export PATH LD_LIBRARY_PATH=$ORACLE_HOME/lib:/lib:/usr/lib; export LD_LIBRARY_PATH CLASSPATH=$ORACLE_HOME/JRE:$ORACLE_HOME/jlib:$ORACLE_HOME/rdbms/jlib; export CLASSPATH if [ $USER = "oracle" ]; then if [ $SHELL = "/bin/ksh" ]; then ulimit -p 16384 ulimit -n 65536 else ulimit -u 16384 -n 65536 fi fi |
You can now log in to the Oracle database with the following syntax from the command line. You’ll be prompted for the system password that you entered during the configuration steps. I’ll add another post on SQL Developer later this week.
sqlplus system |
- This step is optional. You can configure an
oracleenv.shfile in theoracleuser’s home directory. While you could put this in the.bashrcfile, theoracleaccount isn’t bootable. That’s why I recommend putting it in an environment file.
# .bashrc # Source global definitions if [ -f /etc/bashrc ]; then . /etc/bashrc fi # Uncomment the following line if you don't like systemctl's auto-paging feature: # export SYSTEMD_PAGER= # User specific aliases and functions . /u01/app/oracle/product/11.2.0/xe/bin/oracle_env.sh # Wrap sqlplus with rlwrap to edit prior lines with the # up, down, left and right keys. sqlplus() { if [ "$RLWRAP" = "0" ]; then sqlplus "$@" else rlwrap sqlplus "$@" fi } # Set vi as a command line editor. set -o vi |
If you want to use the menu choices added by the installation, you need to put your privileged sudoer in the dba group. I wrote a blog post on it here.
Oracle 11g on Windows 7
I finally got around to installing Oracle 11g on Windows 7 Professional Edition, 64-bit (click here for Oracle 11g Release 2 on Windows 7). The only catch was that the Oracle 11g (11.1.0.7) installer validates only against Windows 5.0, 5.1, 5.2 or 6.0. Windows 7 is actually Windows Code Base 6.1, as seen in this screen shot after successful installation:
With that knowledge, first you should download the software from Oracle’s web site. You should unzip the contents into another directory. I used a C:\Stage directory. Inside that you’ll find the database directory, and it should look like this:
- Click on the
setupicon to launch the installer. You should then see the following screen shot. Enter a password for theSYSandSYSTEMusers (if you’re coming to Oracle from a MySQL background they’re like therootuser in MySQL). When you’ve entered a matching password in both fields, the Install button becomes active. Click the Install button to proceed.
- In this screen, you’re prompted for your Email and MetaLink Password. If this is a test database (a throw away instance without any real data), you can uncheck the box for automatic security updates. You should enter a password even for test databases. Click the Next button to proceed.
- You’ll only see this failure if you’re installing Oracle 11g (11.1.0.7) on a Windows 7 operating system, which is actually version 6.1 according to their code control numbering. You simply check the Checking operating system requirements … and Checking service pack requirements … to override the prerequisite checks. Another error that you may encounter is related to networking. It is a warning and occurs when you’re operating system uses DHCP to get its IP address. You really should configure the operating system with a static IP address. You can set a static IP address in Windows 7 with these instructions.
- At this point, you’ll get a Windows System Alert asking you to unblock the installer’s
javaw.exeprogram. You must grant the access or forget about installing Oracle 11g. Click the Allow access button to proceed.
- The dialog tells you what will be installed. Click the Install button to proceed.
- This is the installation progress dialog. It’s running while the Oracle Installer lays down the operating system files for the database management system. It takes about 8 to 9 minutes, so stretch your legs if you want to take a break. When it’s 100% complete, click the Next button to continue.
- After the installation, you’ll see the first of the Configuration Assistants, which is the Oracle Net Configuration Assistant (unfortunately, I didn’t capture that screen shot but I provided a temporary substitute until I re-install it). Provided everything happens successfully, it’ll move to the next step without your intervention.
java.exe proceed with the installation.
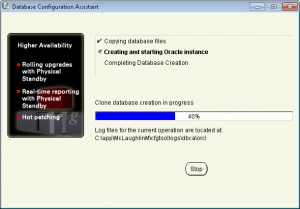
- This one is exactly where it belongs. It means you have approximately a 5 to 6 minute break while a sample database instance is cloned for you. The cloning process copies a sample compressed database from the installation staging area to your local operating system.
- The last Configuration Assistant is the Oracle Configuration Manager Configuration. It’s a short process, it configures the cloned sample database against your installation names and passwords. When it completes it enables the Next button. Click the Next button to complete the installation.
- You’ve finally reached almost the end of the installation. Click the Exit button on this dialog to proceed to the “are you sure” dialog box.
You’ve successfully installed Oracle 11g on Windows 7.
Inline views, fabrication, & the WITH clause
Sometimes working with a product like Oracle brings a surprise, like a new feature you failed to catch when it was released. I’ve seen a lot of entries using inline views through the WITH clause in the Oracle forums. It caught my eye because it is such a radical departure from portable SQL syntax of an inline view. I finally went searching to find the rationale for this approach.
The answer doesn’t lie with the Charlotte like National Treasure, but with simplifying the join syntax, as qualified in the Oracle Database 2 Day + Data Warehousing Guide 11g, Release 1. The following looks at this approach, and compares using the WITH clause instead of the inline view to perform table fabrication.
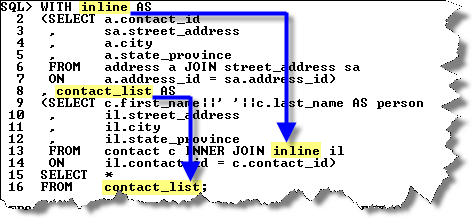
Oracle tells us to use the WITH clause when a query has multiple references to the same query block and there are joins and aggregations. The official name of the WITH clause is a subquery factoring clause. Basically, the WITH clause lets you name inline views and then reuse them inside other inline views. This behavior avoids having to call different copies of the same inline view in different parts of a query or DML statement, which reduces overhead and increases view response time for resolution.
Like local named PL/SQL blocks, subquery factoring clauses must be defined before they can be referenced. Unlike PL/SQL, they have no equivalent function and procedure stubs used for forward referencing in a PL/SQL program unit. They simply become available in sequence, the top most universally available and the next only available below to those statements below it.
The WITH clause (or subquery factoring clause) feature comes to us from the ANSI SQL:1999 specification. It is implemented in Oracle databases with the same syntax as it is in Microsoft SQL Server 2005. The only difference is Microsoft brands it as a Common Table Expression (CTE). It also happens to be the only way to implement a recursive query in Microsoft SQL Server.
The basic syntax is:
The first code block is assigned the subquery factoring clause’s name. You can then reuse the name in subsequent code blocks or the master query. The idea is that this syntax is simpler than the traditional inline view approach and more efficient.
The WITH clause is also capable of letting you create tables from literal values, which is known as table fabrication. The following syntax uses the with clause to fabricate a table of two columns (x and y) and two rows.
SQL> WITH fabricated AS 2 (SELECT 1 AS x, 2 AS y FROM dual 3 UNION ALL 4 SELECT 3 AS x, 4 AS y FROM dual) 5 SELECT x, y FROM fabricated; |
This produces the following results:
         X          Y
---------- ----------
         1          2
3 4 |
The next shows the traditional way of fabricating a table using an inline view:
SQL> SELECT x, y 2 FROM (SELECT 1 AS x, 2 AS y FROM dual 3 UNION ALL 4 SELECT 3 AS x, 4 AS y FROM dual) fabricated; |
This also produces the same results as before, two rows of X and Y variables.
You can also use this type of syntax in MySQL to fabricate a table. You can’t use the WITH clause in MySQL because it’s not supported. You’ll notice in the example that the FROM dual portion is omitted in MySQL. Wouldn’t it be nice if Oracle let that happen too?
SQL> SELECT x, y 2 FROM (SELECT 1 AS x, 2 AS y 3 UNION ALL 4 SELECT 3 AS x, 4 AS y) fabricated; |
A neat function that I picked up on the Oracle Technical Network is the NUMTODSINTERVAL (number to date-stamp interval) function, which can create intervals for qualifying sales by hour or quarter hour. More or less it is a way to fabricate timing intervals. Here’s a quick example:
SQL> SELECT TO_CHAR(SYSDATE - NUMTODSINTERVAL(dist,'HOUR') 2 ,'DD-MON-YYYY HH24:MI:SS') bracket 3 FROM (SELECT 1 AS dist FROM dual 4 UNION ALL 5 SELECT 2 AS dist FROM dual 6 UNION ALL 7 SELECT 3 AS dist FROM dual) fabricated; |
The output is:
BRACKET ------------------- 22-OCT-2008 23:07:15 22-OCT-2008 22:07:15 22-OCT-2008 21:07:15 |
This has been the syntax, now I’ll have to check whether there are any performance differences. I suspect that since the execution plan is the same that there aren’t any performance differences but you never know until you test it.
More or less they were but I tripped into a performance shortfall of the WITH clause. It was a complete accident when I was trying to convert a MySQL SQL syntax model into Oracle SQL. The smaller change to the code was to use a WITH clause but I found it didn’t work.
You can’t use the WITH clause inside a subquery for a multiple row insert. It raises an ORA-32034 error if you attempt it, which struck me as bizare. A normal inline view works fine but the WITH clause doesn’t.
Here’s a simple example of embedding an inline view into an INSERT statement. It works seamlessly in Oracle 11g:
INSERT INTO contact_copy ( SELECT contact_s1.nextval , 1001 , cl.contact_type , 'Doe' , 'John' , NULL , 3 , SYSDATE , 3 , SYSDATE FROM dual CROSS JOIN (SELECT common_lookup_id AS contact_type FROM common_lookup WHERE common_lookup_type LIKE '%DAY RENTAL') cl ); |
When I switched to what appeared as the equivalent syntax using a WITH clause, it failed and raised the ORA-32034: unsupported use of with clause error. The following shows you how the WITH would be used, if it could be used:
INSERT INTO contact_copy ( WITH cl AS (SELECT common_lookup_id AS contact_type FROM common_lookup WHERE common_lookup_type LIKE '%DAY RENTAL') SELECT contact_s1.nextval , 1001 , cl.contact_type , 'Doe' , 'John' , NULL , 3 , SYSDATE , 3 , SYSDATE FROM dual ); |
I thought that might be the reason why Oracle didn’t bother putting it in the SQL reference manual for Oracle Database 10g or 11g. However, Dominic Brooks provided the correct syntax. Very interesting that you simply start with the WITH clause and exclude the enclosing parentheses. Quite a departure from the normal syntax for a multiple row insert.
The correct syntax when the subquery cl returns only one row is like Dominic’s suggestion:
INSERT INTO contact_copy WITH cl AS (SELECT common_lookup_id AS contact_type FROM common_lookup WHERE common_lookup_type LIKE '%DAY RENTAL') SELECT contact_s1.nextval , 1001 , (SELECT cl.contact_type FROM cl) , 'Doe' , 'John' , NULL , 3 , SYSDATE , 3 , SYSDATE FROM dual; |
The correct syntax when the subquery cl subquery returns more than one row differs from Dominic’s. You need a CROSS JOIN to multiply the other static values by the number of rows returned by the subquery so that you have a multiple row insert statement.
INSERT INTO contact_copy WITH cl AS (SELECT common_lookup_id AS contact_type FROM common_lookup WHERE common_lookup_type LIKE '%DAY RENTAL') SELECT contact_s1.nextval , 1001 , cl.contact_type , 'Doe' , 'John' , NULL , 3 , SYSDATE , 3 , SYSDATE FROM dual CROSS JOIN cl; |
It turned into a longer discussion than I anticipated. Hope it helps solve problems and tune Oracle queries.
