Archive for the ‘SQL Server 2005’ Category
Variable Scope
SELECT-list, there are rules for how you can assign the SELECT-list values. The process is more or less an all or nothing approach when assigning values to a local variable.
The rule is quite simple for scalar variables because the SELECT-list may contain multiple values but assignments must be made one at a time. You can’t mix retrieving values with assignments. Lets say you try to write the following block of T-SQL code:
1 2 3 4 5 | SELECT 'Execution Scope' AS "Statement"; DECLARE @base NVARCHAR(MAX) = N''; WITH x AS (SELECT 'Chilly' AS cold, 'Burning up' AS hot) SELECT @base += cold, hot FROM x; SELECT @base AS "Result"; |
Msg 141, Level 15, State 1, Server DESKTOP-4U7EN27, Line 3 A SELECT statement that assigns a value to a variable must not be combined with data-retrieval operations. |
1 2 3 4 5 | SELECT 'Execution Scope' AS "Statement"; DECLARE @base NVARCHAR(MAX) = N''; WITH x AS (SELECT 'Chilly' AS cold, 'Burning up' AS hot) SELECT @base += cold FROM x; SELECT @base AS "Result"; |
SELECT-list, the assignment statement appends the value associated with the column name or alias, which acts like a key in a dictionary. While a dictionary is a collection of name and value pairs, you can use the name of any dictionary element as a key to return only one value from the dictionary. That is the value that the name identifies in the dictionary.
You can put a GO on line 6 in an interactive session or you can put the five lines into a T-SQL script file and call it from the sqlcmd utility. You can run the script file with the following syntax, assuming you have a student user with student as its password working against items in the studentdb schema:
sqlcmd -Ustudent -Pstudent -dstudentdb -y40 -itestScope.sql -otestScope.out |
GO command. T-SQL script files are bundles that execute in a single execution scope unless you embed the GO command.
Then, you can display the testScope.out file as follows from the command line (in a cmd session):
type testScope.out |
Statement --------------- Execution Scope (1 rows affected) Result ---------------------------------------- Chilly (1 rows affected) |
SQL Server XQuery
I promised my students an example of writing xquery statements in Microsoft SQL Server. This post builds on two earlier posts. The first qualifies how to build a marvel table with source data, and the second qualifies how you can create an XML Schema Collection and insert relational data into an XML structure.
You can query a sequence with xquery as follows:
DECLARE @x xml; SET @x = N''; SELECT @x.query('(1,2,(10,11,12,13,14,15)),-6'); |
It returns:
1 2 10 11 12 13 14 15 -6 |
You can query a sequence with an xquery FLOWR statement. FLOWR stands for: FOR, LET, ORDER BY, WHERE, and RETURN. A sample xquery with a FLOWER statement is:
DECLARE @x xml; SET @x = N''; SELECT @x.query('for $i in ((1,2,(10,11,12,13,14,15)),-6) order by $i return $i'); |
It returns:
-6 1 2 10 11 12 13 14 15 |
You can query the entire node tree with the following xquery statement because it looks for the occurrence of any node with the /* search string:
DECLARE @x xml; SET @x = N'<marvel> <avenger_name>Captain America</avenger_name> </marvel>'; SELECT @x.query('/*'); |
You can query the avenger_name elements from the marvel_xml table with the following syntax:
SELECT xml_table.query('/marvel/avenger_name') FROM marvel_xml; |
It returns the following set of avenger_name elements:
<avenger_name>Hulk</avenger_name> <avenger_name>Iron Man</avenger_name> <avenger_name>Black Widow</avenger_name> <avenger_name>Thor</avenger_name> <avenger_name>Captain America</avenger_name> <avenger_name>Hawkeye</avenger_name> <avenger_name>Winter Soldier</avenger_name> <avenger_name>Iron Patriot</avenger_name> |
You can query the fourth avenger_name element from the marvel_xml table with the following xquery statement:
SELECT xml_table.query('/marvel[4]/avenger_name') FROM marvel_xml; |
It returns the following avenger_name element:
<avenger_name>Thor</avenger_name> |
You can use the value() function to verify an avenger_name element exists:
SELECT CASE WHEN xml_table.value('(/marvel[4]/avenger_name)','nvarchar') = 'T' THEN 'Exists' END AS "Verified" FROM marvel_xml WHERE id = 3; |
The query returns the Exists string when it finds a valid avenger_name element. You have a number of other tools to query results sets from the XML node tree.
I hope this helps my students and anybody interested in writing xquery-enable queries.
Insert into XML Column
Working through Chapter 7 of the Querying Microsoft SQL Server 2012 book for Microsoft’s Exam 70-461, I found the XML examples incomplete for my students. I decided to put together a post on how to create:
- An XML Schema Collection type.
- A table that uses an XML Schema Collection as a column’s data type.
- An example on how you can transfer the contents of a table into the XML Schema Collection.
This post assumes you understand the basics about XML structures. If you’re unfamiliar with XML, please note that everything within it is case sensitive unlike SQL. You raise exceptions when the case of your XML fails to match the case of your XML Schema Collection definitions. I raised the following exception by using a Marvel element tag in title case when the XML Schema Collection uses a lowercase marvel element tag:
Msg 6913, Level 16, State 1, Line 2 XML Validation: Declaration not found for element 'Marvel'. Location: /*:Marvel[1] |
The basic marvel table is defined in this earlier blog post. To ensure you don’t run into conflicts with previously existing objects, you can delete the marvel table with the following syntax:
1 2 | IF OBJECT_ID('studentdb.marvel_xml','U') IS NOT NULL DROP TABLE marvel_xml; |
There is no predefined function that lets you conditionally drop the XML Schema Collection from the data base. The alternative is to query the Microsoft SQL Server data catalog for the existence of a row before dropping the XML Schema Collection, like this:
1 2 3 4 | IF EXISTS (SELECT * FROM sys.xml_schema_collections WHERE name = 'MarvelXMLTable') DROP XML SCHEMA COLLECTION MarvelXMLTable; ELSE SELECT 'Not found.'; |
You can now create the MarvelXMLTable XML Schema Collection with the following syntax:
1 2 3 4 5 6 7 8 9 10 11 12 13 14 15 16 17 | CREATE XML SCHEMA COLLECTION MarvelXMLTable AS N'<?xml version="1.0" encoding="UTF-16"?> <xsd:schema xmlns:xsd="http://www.w3.org/2001/XMLSchema" xmlns:sqltypes="http://schemas.microsoft.com/sqlserver/2004/sqltypes"> <xsd:import namespace="http://schemas.microsoft.com/sqlserver/2004/sqltypes" schemaLocation="http://schemas.microsoft.com/sqlserver/2004/sqltypes/sqltypes.xsd" /> <xsd:element name="Marvel"> <xsd:complexType> <xsd:sequence> <xsd:element name="marvel_id" type="sqltypes:int" /> <xsd:element name="avenger_name" type="sqltypes:nvarchar" /> <xsd:element name="first_name" type="sqltypes:nvarchar" /> <xsd:element name="last_name" type="sqltypes:nvarchar" /> </xsd:sequence> </xsd:complexType> </xsd:element> </xsd:schema>'; |
After creating the XML Schema Collection, you can confirm whether it works correctly with the following statements. It will fail when you use semicolons on the DECLARE or SET lines, so avoid them as shown below:
1 2 3 4 5 6 7 8 | DECLARE @marvel AS XML(MarvelXMLTable) SET @marvel = '<marvel> <marvel_id>1</marvel_id> <avenger_name>Falcon</avenger_name> <first_name>Sam</first_name> <last_name>Wilson</last_name> </marvel>' SELECT @marvel; |
After creating and verifying the integrity of the XML Schema Collection, you can create a marvel_xml table. The xml_table column of the marvel_xml table uses a strongly-typed XML type, as shown:
1 2 3 | CREATE TABLE marvel_xml ( id INT IDENTITY(1,1) CONSTRAINT marvel_xml_pk PRIMARY KEY , xml_table XML(MarvelXMLTable)); |
You can write an INSERT statement with single element like this:
1 2 3 4 5 6 7 8 9 | INSERT INTO marvel_xml ( xml_table ) VALUES ('<Marvel> <marvel_id>9</marvel_id> <avenger_name>Falcon</avenger_name> <first_name>Sam</first_name> <last_name>Wilson</last_name> </Marvel>'); |
You can insert two elements with an INSERT statement like this:
1 2 3 4 5 6 7 8 9 10 11 12 13 14 15 | INSERT INTO marvel_xml ( xml_table ) VALUES ('<Marvel> <marvel_id>9</marvel_id> <avenger_name>Falcon</avenger_name> <first_name>Sam</first_name> <last_name>Wilson</last_name> </Marvel> <Marvel> <marvel_id>10</marvel_id> <avenger_name>Scarlet Witch</avenger_name> <first_name>Wanda</first_name> <last_name>Witch</last_name> </Marvel>'); |
There’s a lot of typing to insert XML literal values. It a lot easier to transfer relational data from a table to an XML type. Unfortunately, Microsoft didn’t make it very easy. The FOR XML AUTO doesn’t work for two reasons. First, the FOR XML AUTO clause doesn’t render the correct XML structure. Second, the INSERT statement disallows nested SELECT queries that include the FOR XML AUTO clause.
Here’s the way you insert relational data into an XML type column:
1 2 3 4 5 6 7 8 9 10 11 12 13 | DECLARE @xml_elements NVARCHAR(MAX); SET @xml_elements = N''; WITH x AS (SELECT CONCAT(N'<marvel>' ,N'<marvel_id>',marvel_id,N'</marvel_id>' ,N'<avenger_name>',avenger_name,N'</avenger_name>' ,N'<first_name>',first_name,N'</first_name>' ,N'<last_name>',last_name,N'</last_name>' ,N'</marvel>') AS element FROM marvel) SELECT @xml_elements += element FROM x; INSERT INTO marvel_xml (xml_table) VALUES (@xml_elements); |
Line 1 declares an xml_element session variable. Line 2 initializes the xml_element session variable as an empty string. The WITH clause on lines 3 through 10 creates a Common Table Expression (CTE) with the valid XML structure for all rows in the marvel table. The nested SELECT statement on line 11 returns data from the CTE and adds returned row to the session-level string variable. Finally, the INSERT statement on lines 12 and 13 inserts the XML table into the xml_table column.
You can then query the table with the following statement:
SELECT xml_table FROM marvel_xml; |
Click on the return type in the SQL Server Management Studio (SSMS), and the XML structure will expand to show this:
<marvel> <marvel_id>1</marvel_id> <avenger_name>Hulk</avenger_name> <first_name>Bruce</first_name> <last_name>Banner</last_name> </marvel> <marvel> <marvel_id>2</marvel_id> <avenger_name>Iron Man</avenger_name> <first_name>Tony</first_name> <last_name>Stark</last_name> </marvel> <marvel> <marvel_id>3</marvel_id> <avenger_name>Black Widow</avenger_name> <first_name>Natasha</first_name> <last_name>Romanoff</last_name> </marvel> <marvel> <marvel_id>4</marvel_id> <avenger_name>Thor</avenger_name> <first_name>Thor</first_name> <last_name>Odinsson</last_name> </marvel> <marvel> <marvel_id>5</marvel_id> <avenger_name>Captain America</avenger_name> <first_name>Steve</first_name> <last_name>Rogers</last_name> </marvel> <marvel> <marvel_id>6</marvel_id> <avenger_name>Hawkeye</avenger_name> <first_name>Clint</first_name> <last_name>Barton</last_name> </marvel> <marvel> <marvel_id>7</marvel_id> <avenger_name>Winter Soldier</avenger_name> <first_name>Bucky</first_name> <last_name>Barnes</last_name> </marvel> <marvel> <marvel_id>8</marvel_id> <avenger_name>Iron Patriot</avenger_name> <first_name>James</first_name> <last_name>Rhodey</last_name> </marvel> |
As always, I hope this post benefits those who read it.
A T-SQL Table Function
I had an interesting conversation about table functions in Oracle’s PL/SQL; and the fact that they’re not available in MySQL. When I explained they’re available in Microsoft T-SQL User-Defined Functions (UDFs), my students wanted a small example. One of them said they’d tried to do it but couldn’t get it to work because they found the Microsoft web pages difficult to read and use. Specifically, they didn’t like the sparseness of this one on how to create a function.
Here’s a quick definition of a UDF table function that runs in the studentdb schema (created in this post for migrating SQL Server into a MySQL database). The following getConquistador function takes a single string, which acts to filter the result set from a query positioned as the return value of the function. You should note that this is an implementation of Microsoft’s Common Language Infrastructure (CLI).
CREATE FUNCTION studentdb.getConquistador (@nationality AS VARCHAR(30)) RETURNS TABLE RETURN SELECT * FROM studentdb.conquistador WHERE nationality = @nationality; |
Unlike Oracle SQL, where you need to use the TABLE function to read the content of a table result from a function, you don’t need anything other than the function call in the FROM clause of a T-SQL query. Here’s an example of calling the table function:
SELECT * FROM studentdb.getConquistador('German'); |
The complete result from the query would produce these results when run from the sqlcmd command-line interface:
conquistador_id conquistador          actual_name          nationality
--------------- --------------------- -------------------- ------------
             11 Nicolas de Federman   Nikolaus Federmann   German
             13 Jorge de la Espira    George von Speyer    German

(2 rows affected) |
However, you also have the ability to query only rows of interest without any specialized syntax, like this:
1> USE studentdb; 2> SELECT conquistador AS "Conquistador" 3> , actual_name AS "Name" 4> FROM studentdb.getConquistador('German'); 5> GO |
This produces the following two-column result set:
Conquistador Name --------------------- -------------------- Nicolas de Federman Nikolaus Federmann Jorge de la Espira George von Speyer (2 rows affected) |
Hope this helps those interested in T-SQL UDFs.
Setup SQL Server Schema
After you’ve installed Microsoft SQL Server 2012 and created a database schema, you still need to setup or configure the database schema. This is the recommended Microsoft SQL Server Best Practice.That means you must grant permissions to a user to work in the database schema, otherwise you get the following type of error message.
Msg 2760, Level 16, State 1, Line 1 The specified schema name "studentdb" either does not exist or you do not have permission to use it. |
You receive the foregoing error message when trying to create a table in a database schema that hasn’t been assigned a user or role. This typically occurs after you create a new database schema, which has a <default> owner.
For those new to the idea of schemas (or scheme), they were introduced by Microsoft in SQL Server 2005. Here are some rules of thumb on schemas:
- Database schema names are distinct from user names.
- Multiple users may share a schema, which means it can hold objects owned by multiple users.
- Permissions to act inside the schema may be granted to individual users, and you have a varied set of privileges that you can assign to users.
- Ownership of objects in a schema can be transferred using the
ALTER SCHEMAcommand. - Ownership of a schema can be changed by using the
ALTER AUTHORIZATIONcommand. - Database users can be dropped without changing objects in schemas, which is a big difference between Oracle and SQL Server.
The following example occurs when you try to create a table in a studentdb database schema. It doesn’t expose you to the SQL syntax but demonstrates how to manage the changes within the SQL Server Management Studio (SSMS).
By the way, you start the new schema creation process by right clicking on the Databases folder in the SQL Server Management Studio. Then, you give the new database schema a name in the New Database dialog; and click the OK button to complete the process.
The balance of the instructions show you how to create a user account that will map to your new database schema. It assumes you’ve installed it on your local machine and have privileges through local Windows Authentication to the System Administrator (sa) account. You create a student user account, assign the studentdb database schema, log off as the System Administrator, log in as the new user, conditionally drop a table from the studentdb schema, create a table in the studentdb schema, and query the results. It’s also possible to create the user first, database second, and assign the database as the default database for the user account.
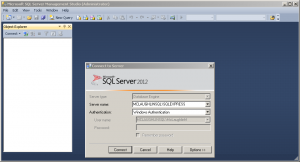
- The first screen asks you to authenticate as the System Administrator using Windows Authentication. Click the Connect button to connect to the SQL Server Management System (SMSS).
- Click the Security folder and expand the subordinate list of folders. Right click on the Logins folder and click on the New Login option in the context menu. It launches a new dialog where you enter a user account.
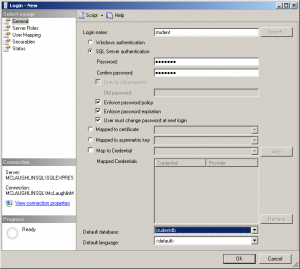
- On the General page of the Login – New dialog, enter a Login name and click the SQL Server authentication radio button. Clicking the radio button enables the Password and Confirm password fields where you enter the same password twice. Click the Default database drop down and choose the studentdb created earlier. Click the Server Roles page to continue.
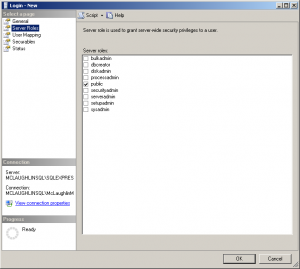
- On the Server Roles page, ensure that only the public server role is checked. Click on the User Mapping page to continue.
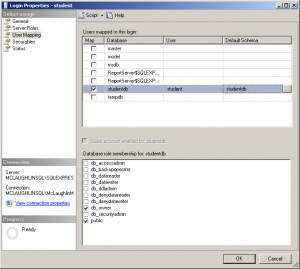
- On the User Mapping page, click the Map check box for the
studentdbdatabase, enterstudentin the User field, and enterstudentdbin the Default Schema field. Click the db_owner and public database role membership forstudentdb. Click on the Securables page to continue.
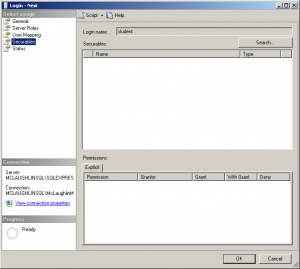
- There are no required changes on the Securables page. Check that screen matches the illustration at the left, and click on the Status page to continue.
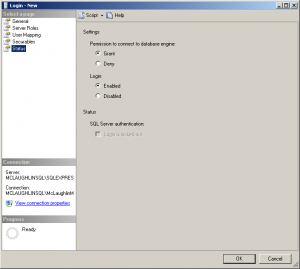
- There are no required changes on the Status page. Check that screen matches the illustration at the left, and click on the OK button to complete creating the user. Then, exit the SQL Server Management Studio as the System Administrator.
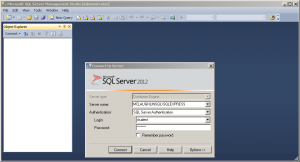
- Launch the SQL Server Management Studio, choose SQL Server Authentication as the authentication method, and enter the
studentLogin (user name) and Password before clicking the Connect button to continue.
- The first time a user logs in, they must re-enter a valid password. After entering the password twice, click the OK button to continue.
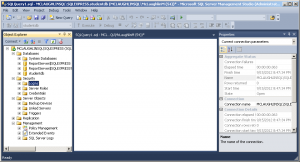
- The initial display shows only the Object Explorer. Click the New Query option in the menu toolbar.
- Click on the Databases folder to expand the list and you will see the
studentdbdatabase schema displayed, as shown in the illustration on the left.
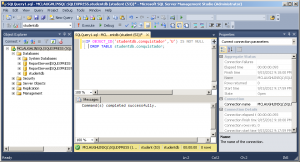
- Enter a conditional drop of a
conquistadortable from thestudentdbdatabase schema. Click the Execute button from the toolbar menu to run the statement.
IF OBJECT_ID('studentdb.conquistador','U') IS NOT NULL DROP TABLE studentdb.conquistador; |
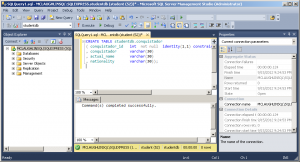
- Enter a
CREATEstatement for aconquistadortable in thestudentdbdatabase schema. Click the Execute button from the toolbar menu to run the statement.
CREATE TABLE studentdb.conquistador ( conquistador_id INT NOT NULL IDENTITY(1,1) CONSTRAINT pk_conquistador PRIMARY KEY , conquistador VARCHAR(30) , actual_name VARCHAR(30) , nationality VARCHAR(30)); |
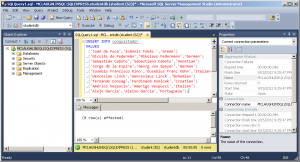
- Enter an
INSERTstatement to theconquistadortable in thestudentdbdatabase schema. Click the Execute button from the toolbar menu to run the statement and see that it inserted 9 rows.
INSERT INTO conquistador VALUES ('Juan de Fuca','Ioánnis Fokás','Greek') ,('Nicolás de Federmán','Nikolaus Federmann','German') ,('Sebastián Caboto','Sebastiano Caboto','Venetian') ,('Jorge de la Espira','Georg von Speyer','German') ,('Eusebio Francisco Kino','Eusebius Franz Kühn','Italian') ,('Wenceslao Linck','Wenceslaus Linck','Bohemian') ,('Fernando Consag','Ferdinand Konšcak','Croatian') ,('Américo Vespucio','Amerigo Vespucci','Italian') ,('Alejo García','Aleixo Garcia','Portuguese'); |
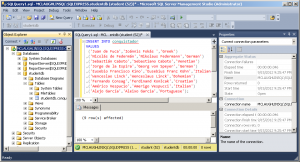
- Click the
studentdbfolder to expand content, and you should see theconquistadortable.
SELECT * FROM conquistador; |
- Click in the SQL Query frame and enter a query against the
conquistadortable. Click the Execute button to run the query and you should see the following output from theconquistadortable.
As always, I hope this helps those trying to sort out how to solve a similar problem.
Inline views, fabrication, & the WITH clause
Sometimes working with a product like Oracle brings a surprise, like a new feature you failed to catch when it was released. I’ve seen a lot of entries using inline views through the WITH clause in the Oracle forums. It caught my eye because it is such a radical departure from portable SQL syntax of an inline view. I finally went searching to find the rationale for this approach.
The answer doesn’t lie with the Charlotte like National Treasure, but with simplifying the join syntax, as qualified in the Oracle Database 2 Day + Data Warehousing Guide 11g, Release 1. The following looks at this approach, and compares using the WITH clause instead of the inline view to perform table fabrication.
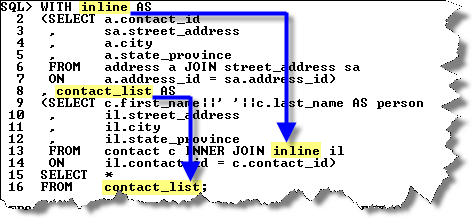
Oracle tells us to use the WITH clause when a query has multiple references to the same query block and there are joins and aggregations. The official name of the WITH clause is a subquery factoring clause. Basically, the WITH clause lets you name inline views and then reuse them inside other inline views. This behavior avoids having to call different copies of the same inline view in different parts of a query or DML statement, which reduces overhead and increases view response time for resolution.
Like local named PL/SQL blocks, subquery factoring clauses must be defined before they can be referenced. Unlike PL/SQL, they have no equivalent function and procedure stubs used for forward referencing in a PL/SQL program unit. They simply become available in sequence, the top most universally available and the next only available below to those statements below it.
The WITH clause (or subquery factoring clause) feature comes to us from the ANSI SQL:1999 specification. It is implemented in Oracle databases with the same syntax as it is in Microsoft SQL Server 2005. The only difference is Microsoft brands it as a Common Table Expression (CTE). It also happens to be the only way to implement a recursive query in Microsoft SQL Server.
The basic syntax is:
The first code block is assigned the subquery factoring clause’s name. You can then reuse the name in subsequent code blocks or the master query. The idea is that this syntax is simpler than the traditional inline view approach and more efficient.
The WITH clause is also capable of letting you create tables from literal values, which is known as table fabrication. The following syntax uses the with clause to fabricate a table of two columns (x and y) and two rows.
SQL> WITH fabricated AS 2 (SELECT 1 AS x, 2 AS y FROM dual 3 UNION ALL 4 SELECT 3 AS x, 4 AS y FROM dual) 5 SELECT x, y FROM fabricated; |
This produces the following results:
         X          Y
---------- ----------
         1          2
3 4 |
The next shows the traditional way of fabricating a table using an inline view:
SQL> SELECT x, y 2 FROM (SELECT 1 AS x, 2 AS y FROM dual 3 UNION ALL 4 SELECT 3 AS x, 4 AS y FROM dual) fabricated; |
This also produces the same results as before, two rows of X and Y variables.
You can also use this type of syntax in MySQL to fabricate a table. You can’t use the WITH clause in MySQL because it’s not supported. You’ll notice in the example that the FROM dual portion is omitted in MySQL. Wouldn’t it be nice if Oracle let that happen too?
SQL> SELECT x, y 2 FROM (SELECT 1 AS x, 2 AS y 3 UNION ALL 4 SELECT 3 AS x, 4 AS y) fabricated; |
A neat function that I picked up on the Oracle Technical Network is the NUMTODSINTERVAL (number to date-stamp interval) function, which can create intervals for qualifying sales by hour or quarter hour. More or less it is a way to fabricate timing intervals. Here’s a quick example:
SQL> SELECT TO_CHAR(SYSDATE - NUMTODSINTERVAL(dist,'HOUR') 2 ,'DD-MON-YYYY HH24:MI:SS') bracket 3 FROM (SELECT 1 AS dist FROM dual 4 UNION ALL 5 SELECT 2 AS dist FROM dual 6 UNION ALL 7 SELECT 3 AS dist FROM dual) fabricated; |
The output is:
BRACKET ------------------- 22-OCT-2008 23:07:15 22-OCT-2008 22:07:15 22-OCT-2008 21:07:15 |
This has been the syntax, now I’ll have to check whether there are any performance differences. I suspect that since the execution plan is the same that there aren’t any performance differences but you never know until you test it.
More or less they were but I tripped into a performance shortfall of the WITH clause. It was a complete accident when I was trying to convert a MySQL SQL syntax model into Oracle SQL. The smaller change to the code was to use a WITH clause but I found it didn’t work.
You can’t use the WITH clause inside a subquery for a multiple row insert. It raises an ORA-32034 error if you attempt it, which struck me as bizare. A normal inline view works fine but the WITH clause doesn’t.
Here’s a simple example of embedding an inline view into an INSERT statement. It works seamlessly in Oracle 11g:
INSERT INTO contact_copy ( SELECT contact_s1.nextval , 1001 , cl.contact_type , 'Doe' , 'John' , NULL , 3 , SYSDATE , 3 , SYSDATE FROM dual CROSS JOIN (SELECT common_lookup_id AS contact_type FROM common_lookup WHERE common_lookup_type LIKE '%DAY RENTAL') cl ); |
When I switched to what appeared as the equivalent syntax using a WITH clause, it failed and raised the ORA-32034: unsupported use of with clause error. The following shows you how the WITH would be used, if it could be used:
INSERT INTO contact_copy ( WITH cl AS (SELECT common_lookup_id AS contact_type FROM common_lookup WHERE common_lookup_type LIKE '%DAY RENTAL') SELECT contact_s1.nextval , 1001 , cl.contact_type , 'Doe' , 'John' , NULL , 3 , SYSDATE , 3 , SYSDATE FROM dual ); |
I thought that might be the reason why Oracle didn’t bother putting it in the SQL reference manual for Oracle Database 10g or 11g. However, Dominic Brooks provided the correct syntax. Very interesting that you simply start with the WITH clause and exclude the enclosing parentheses. Quite a departure from the normal syntax for a multiple row insert.
The correct syntax when the subquery cl returns only one row is like Dominic’s suggestion:
INSERT INTO contact_copy WITH cl AS (SELECT common_lookup_id AS contact_type FROM common_lookup WHERE common_lookup_type LIKE '%DAY RENTAL') SELECT contact_s1.nextval , 1001 , (SELECT cl.contact_type FROM cl) , 'Doe' , 'John' , NULL , 3 , SYSDATE , 3 , SYSDATE FROM dual; |
The correct syntax when the subquery cl subquery returns more than one row differs from Dominic’s. You need a CROSS JOIN to multiply the other static values by the number of rows returned by the subquery so that you have a multiple row insert statement.
INSERT INTO contact_copy WITH cl AS (SELECT common_lookup_id AS contact_type FROM common_lookup WHERE common_lookup_type LIKE '%DAY RENTAL') SELECT contact_s1.nextval , 1001 , cl.contact_type , 'Doe' , 'John' , NULL , 3 , SYSDATE , 3 , SYSDATE FROM dual CROSS JOIN cl; |
It turned into a longer discussion than I anticipated. Hope it helps solve problems and tune Oracle queries.
