Archive for the ‘cups’ tag
VMWare Fusion 2.x causes Ubuntu printing failure
I’d already upgraded my Windows x86 instances to 2.x on my Mac Book Pro but hadn’t got around to Ubuntu until today. The upgrade went fine, and VMWare Tools compilation succeeded and kernel reports were normal. Unfortunately, CUPS (Common Unix Printing Service) fails to start correctly and there doesn’t appear to be any way to fix it without changing the VMWare Fusion libraries. It appears to be a bug introduced by VMWare Tools. I’ve updated my Ubuntu VMWare printer set up steps to note it. If you’ve got a fix for the problem, let me know.
Setting up a printer in VMWare Ubuntu instance
As I mentioned before, working in the virtual machine is a great solution when you need to work in multiple operating systems. Setting up printing is a step that goes with the operating system. It is very easy to configure in Ubuntu running in VMWare on a Mac OS X machine.
I found that the standard printer in the virtual machine wouldn’t work. I tried it in both VMWare 1.x and 2.x but without any luck. It did work ineffectively in VMWare 2.x but it embedded characters in simple documents that shouldn’t be there. Finally, I pursued this course. It has the benefit of working like you’d expect! It lets you print your native Ubuntu documents when you’ve configured the VMWare machine in NAT or bridged networking mode. The only difference is that a bridged network doesn’t require you to share the printer on the Mac OS because it directly accesses it.
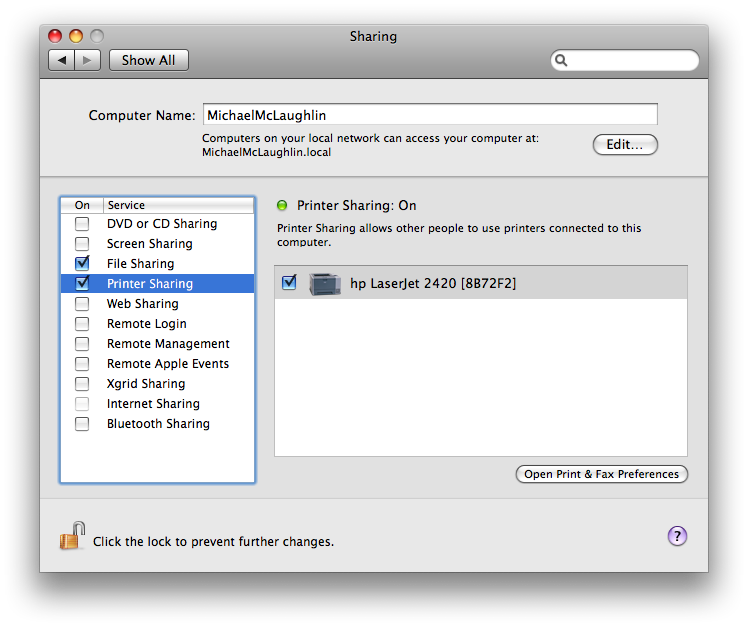
The first step using a NAT network requires that you share you printer setup on the Mac OS. You do that by launching System Preferences, then click on Sharing. In Sharing, you enable print sharing by chosing the network printer …
After you’ve enabled sharing on the Mac OS, you can take the following steps in Ubuntu:
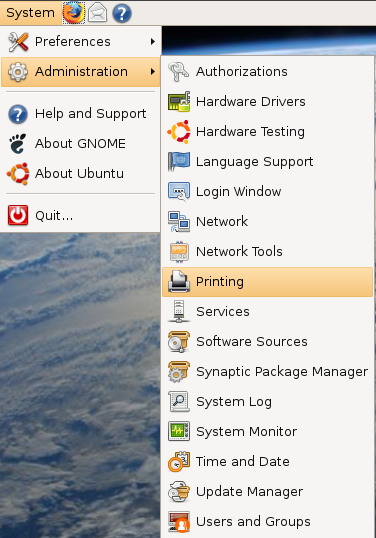
1. Click the System menu choice, choose Administration. and Printing, as shown in screen shot:
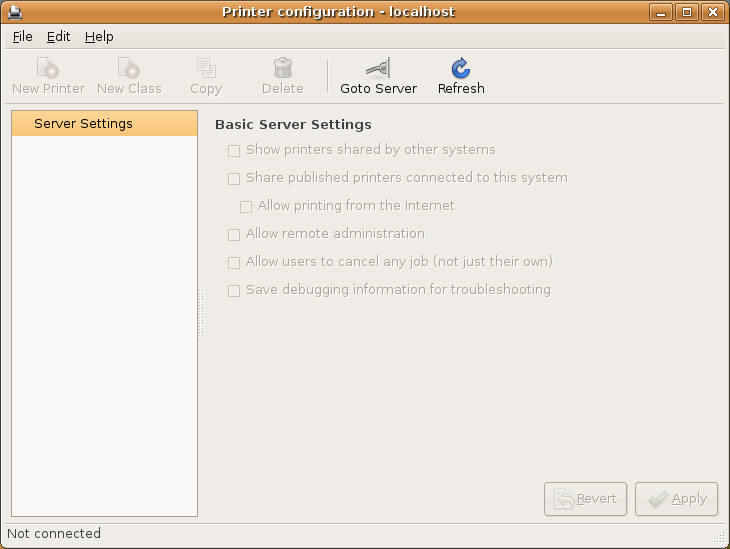
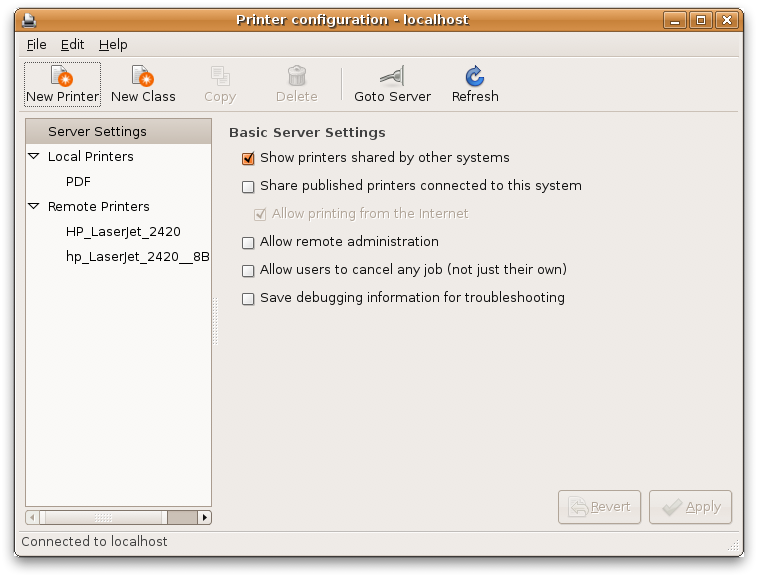
2. You’ll then see the following screen but not gray scaled. If you don’t, you’ll also see the following form. a gray scaled version indicates that you’ve run VMWare Tools before updating the Ubuntu OS CUPS service:
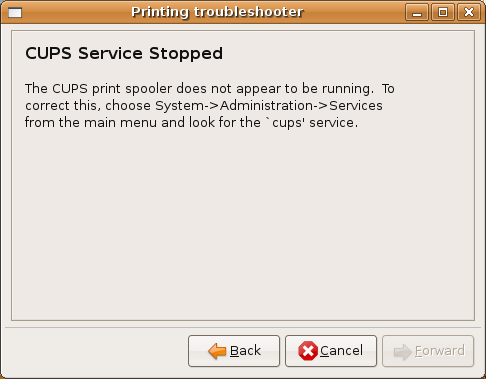
As mentioned, this means there’s a problem with a disabled service – typically cups (Common Unix Printing Service). You can click the Help, then Troubleshoot to further diagnose the problem. In the first screen click the Forward button to continue. In this screen, click the Not Listed (because it should be an empty list), and then click the Forward button to continue. You most likely will see the following dialog box, which tells you that the cups service is stopped (a general occurrence when you upgrade from VMWare Fusion 1.x to 2.x).
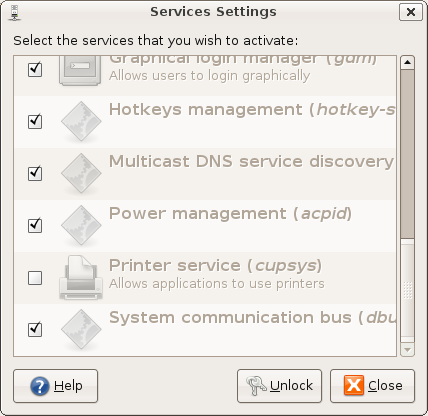
There’s a temptation to follow the instructions, and I yielded to it without a positive outcome. What you’ll find is that the cups (cupsys) service is enabled but if you use the VMWare Fusion menu, you’ll find that it isn’t, as shown:
If you stop here and check in a terminal session, you’ll see that life isn’t rosy after the upgrade. Even if you check it and restart the VM, the printing problem won’t resolve. This appears to be a part of the recompilation of cups by the VMWare Tools. It appears to happen when you opt to compile Ubuntu CUPS while running the VMWare Tools. You’re only prompted to compile these if you’re not on the most current CUPS release by Ubuntu.
You use the following command to check the status of the printer service:
# sudo /etc/init.d/cupsys status |
You will most likely get something like this if you have a problem:
Status of Common Unix Printing System: cupsd is not running but /var/run/cups/cupsd.pid exists. |
This is where it becomes obvious that the VMWare Fusion 2.x upgrade can introduce the problem. It is simple to avoid the problem by ensuring that the Ubuntu OS is patched to the most current CUPs version before running the VMWare Tools. I fixed the problem by reinstalling Ubuntu from scratch, and patching it to the current level. Then, you won’t have a failure of the CUPS process.
When you fix any errors from the upgrade or provided you’re on VMWare Fusion 2.x, you should click the Show printers shared by other systems check box, then click the Refresh button to display any network printers if they don’t refresh automatically.
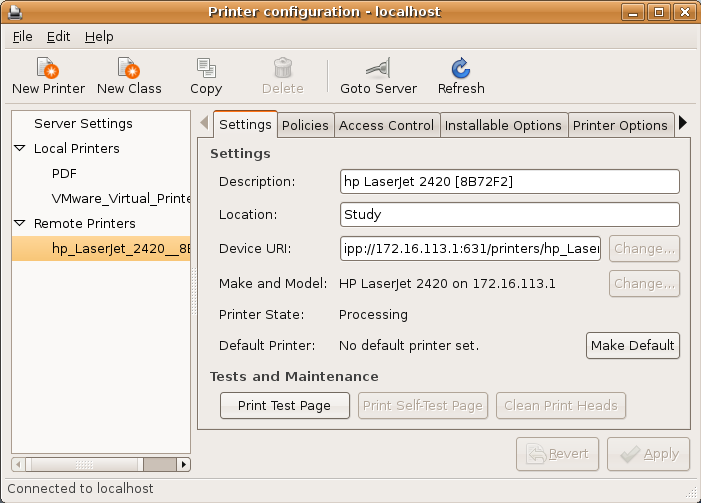
3. You click on the desired network printer, which displays the following screen. Click the Make Default button after you click the Print Test Page button.
If you caught my post on doing this in a Microsoft Windows environment, isn’t it stuning how easy Ubuntu is compared to the “user-friendly” Windows interface (unless you’re upgrading). If you need the Windows instructions, you can find them here.
