Archive for September, 2011
Fedora Install of Oracle 11g
After the installation of Oracle 11g XE on Windows, I anticipated problems installing on Fedora. It’s terrific to report it was by far simpler to install on Fedora. This post provides the steps, and builds on the Fedora configuration published earlier this week.
- After you download the software from the Oracle web site, you’ll need to expand the compressed file. When you double click on the download item you will see the following screen. Click Extract at the top of the display.
- The Extract displays the following dialog. Click the Create Folder button and you’ll get an entry point for a new directory in your user’s directory. For the example, Oracle11gXE
- After creating the directory, click the Extract button.
- The extract process completes and shows the following dialog.
- The Disk1 directory will show the following contents.
- You need to drop down into a Terminal session, which you can launch by clicking on Applications, System Tools, and Terminal in the menu.
sudo rpm -iv oracle-xe-11.2.0-1.0.x86_64.rpm |
This command will install the packages in verbose syntax and display the following messages:
[sudo] password for mclaughlinm: Preparing packages for installation... oracle-xe-11.2.0-1.0 Executing post-install steps... You must run '/etc/init.d/oracle-xe configure' as the root user to configure the database. |
- This step requires that you assume the role of the
rootuser, which can be done with this syntax:
sudo sh |
In this root shell, you run the Oracle 11g XE configuration with this command:
/etc/init.d/oracle-xe configure |
The following are the text prompts that you accept to configure Oracle 11g XE:
Oracle Database 11g Express Edition Configuration ------------------------------------------------- This will configure on-boot properties of Oracle Database 11g Express Edition. The following questions will determine whether the database should be starting upon system boot, the ports it will use, and the passwords that will be used for database accounts. Press <Enter> to accept the defaults. Ctrl-C will abort. Specify the HTTP port that will be used for Oracle Application Express [8080]: Specify a port that will be used for the database listener [1521]: Specify a password to be used for database accounts. Note that the same password will be used for SYS and SYSTEM. Oracle recommends the use of different passwords for each database account. This can be done after initial configuration: Confirm the password: Do you want Oracle Database 11g Express Edition to be started on boot (y/n) [y]: Starting Oracle Net Listener...Done Configuring database... Starting Oracle Database 11g Express Edition instance...Done Installation completed successfully. |
After completing the configuration, you need to do two things. First, you need to modify the .bash_profile file for your user (covered in the next step). Second, you need to reboot your system.
- This step requires that you exit the
rootshell by typing theexitcommand. This should put you back into your administration account with sudoer privileges. You usevito edit and add the following to the.bashrcfile.
. /u01/app/oracle/product/11.2.0/xe/bin/oracle_env.sh |
Or, you can write your own file, like this:
# Oracle Settings TMP=/tmp; export TMP TMPDIR=$TMP; export TMPDIR ORACLE_HOSTNAME=localhost.localdomain; export ORACLE_HOSTNAME ORACLE_UNQNAME=DB11G; export ORACLE_UNQNAME ORACLE_BASE=/u01/app/oracle; export ORACLE_BASE ORACLE_HOME=$ORACLE_BASE/product/11.2.0/xe; export ORACLE_HOME ORACLE_SID=XE; export ORACLE_SID NLS_LANG=`$ORACLE_HOME/bin/nls_lang.sh`; export NLS_LANG ORACLE_TERM=xterm; export ORACLE_TERM PATH=/usr/sbin:$PATH; export PATH PATH=$ORACLE_HOME/bin:$PATH; export PATH LD_LIBRARY_PATH=$ORACLE_HOME/lib:/lib:/usr/lib; export LD_LIBRARY_PATH CLASSPATH=$ORACLE_HOME/JRE:$ORACLE_HOME/jlib:$ORACLE_HOME/rdbms/jlib; export CLASSPATH if [ $USER = "oracle" ]; then if [ $SHELL = "/bin/ksh" ]; then ulimit -p 16384 ulimit -n 65536 else ulimit -u 16384 -n 65536 fi fi |
You can now log in to the Oracle database with the following syntax from the command line. You’ll be prompted for the system password that you entered during the configuration steps. I’ll add another post on SQL Developer later this week.
sqlplus system |
- This step is optional. You can configure an
oracleenv.shfile in theoracleuser’s home directory. While you could put this in the.bashrcfile, theoracleaccount isn’t bootable. That’s why I recommend putting it in an environment file.
# .bashrc # Source global definitions if [ -f /etc/bashrc ]; then . /etc/bashrc fi # Uncomment the following line if you don't like systemctl's auto-paging feature: # export SYSTEMD_PAGER= # User specific aliases and functions . /u01/app/oracle/product/11.2.0/xe/bin/oracle_env.sh # Wrap sqlplus with rlwrap to edit prior lines with the # up, down, left and right keys. sqlplus() { if [ "$RLWRAP" = "0" ]; then sqlplus "$@" else rlwrap sqlplus "$@" fi } # Set vi as a command line editor. set -o vi |
If you want to use the menu choices added by the installation, you need to put your privileged sudoer in the dba group. I wrote a blog post on it here.
Configure Fedora on VMWare
It seems Fedora is always a bit of work. You begin by mistakenly downloading Fedora Live, which isn’t really the product but a run-time demonstration product. After finding the product, if you choose a full installation, there are post installation steps to complete. The first time you launch it in VMWare, you’ll see a Gnome 3 Failed to Load error dialog like this:
I suspected that installing VMWare Tools would fix that, and it did. However, your entry account doesn’t have “sudoers” permissions. You must add them before you can run VMWare Tools. There are six steps to enable your user with the sudoers permissions and four others to configure the standard installation:
- Navigate to the Applications menu choice in the upper left hand corner. You’ll get the following drop-down menu. Click on Other menu item to launch a dependent floating menu.
- The following floating menu displays to the right. Click on Users and Groups menu item at the bottom of the list.
- The choice from the floating menu prompts account validation. Enter your password and click the OK button.
- After validating your password, the User Manager dialog opens. Click on the single user that should be installed –
mclaughlinm. Click the Properties button to change the groups assigned to the user.
- The User Properties dialog opens with the default User Data tab clicked. Click on the Groups tab to add the user to the
wheelgroup as a property of your user.
- Scroll down through the list of groups and click the
wheelgroup check box. Like the Mac OS, the wheel group provides “sudoer” privileges. Click the OK button to assign the group to the user.
- Navigate to the VMWare Menu, choose Virtual Machine and in the drop down menu Install VMWare Tools. This will mount a virtual CD in the Fedora virtual machine.
- Navigate to the Places menu choice and then Computer. Inside the Computer, choose the VMware Tools from the Devices section and you’ll see the following:
- Open a terminal session by choosing Applications, within the drop down choose System Tools, and then launch a Terminal session. You can then run the VMWare Toolkit by following these instructions:
cd /media/VMware\ Tools cp VMwareTools-8.4.7-416484.tar.gz /tmp cd /tmp gunzip VMwareTools-8.4.7-416484.tar.gz tar -xvf VMwareTools-8.4.7-416484.tar cd vmware-tools-distrib sudo ./vmware-install.pl |
The last step requires that you reply to a set of prompts. If you’d like to accept the default at one time, you can use the following command:
sudo ./vmware-install.pl --default |
If you find limited access to the system after installing or upgrading VMWare Tools, you may have packages in the caught between start and finish. You can clean them up with the following syntax, as the root user:
sudo yum-complete-transaction |
- In the terminal session you should configure three files to make sure your networking works. I found that the dialogs failed to set one key element, so it’s simply easier to do this manually. Rather than using
sudo, you should open arootshell with the following command:
sudo sh |
Enter your user’s password:
[sudo] password for mclaughlinm: |
You should use vi to edit and save the resolv.conf file with appropriate domain, search, and nameserver values. The values below work for VMWare when the gateway IP address is 172.16.123.2.
# Generated by NetworkManager
domain localdomain
search localdomain
nameserver 172.16.123.2 |
Using vi, edit the /etc/sysconfig/network file to include an appropriate gateway IP address, like so:
NETWORKING=yes HOSTNAME=localhost.localdomain GATEWAY=172.16.123.2 |
The last file to fix is /etc/sysconfig/network-scripts/ifcfg-eth0 file. This is the file that isn’t completely configured by the GUI component (it fails set the ONBOOT value to yes).
DEVICE=eth0 HWADDR=00:0c:29:31:ef:46 ONBOOT=yes NM_CONTROLLED=yes BOOTPROTO=dhcp TYPE=Ethernet DNS1=172.16.123.2 USERCTL=no PEERDNS=yes IPV6INIT=no |
You reset networking with the following command:
/etc/rc.d/init.d/network restart |
As always, I hope this helps a few folks.
Oracle & MySQL Handbook
 My new Oracle Database 11g & MySQL 5.6 Developer Handbook will be available at Oracle Open World 2011 (OOW2011). It’s a great book to compare and contrast approaches in Oracle and MySQL. It covers Oracle SQL & PL/SQL and MySQL SQL & SQL/PSM (Persistent Stored Modules – functions and procedures). Unfortunately, it seems like the book won’t be available on amazon.com until much later in the month, and not available from amazon.de until November. You can read about it at McGraw Hill Professional’s web site. They’ve made a special effort to get copies to OOW2011. Here’s the source code for the book because I don’t know when it’ll be on the publisher’s web site.
I’ll also be at OOW2011. They’ve scheduled me in the bookstore (probably 2nd floor of Moscone North, as usual) from 10 to 10:30 A.M. on Monday and Wednesday for a book signing. If you’re at OOW2011 and you like to stop by and say hello, I look forward to meeting you. Many folks leave comments on the posts but only a few suggest what they’d like me to write on when I’ve got a chance, and you can do that if you stop by to chat.
It’s also interesting to know how many folks use both Oracle and MySQL (any updates on that are always appreciated). Last year at the Bioinformatics and Computation Biology (ACM-BCB 2010) Conference in Niagara Falls, I found it interesting to discover how many pharmaceutical companies and national labs were using both Oracle and MySQL. They appeared consistent about using Oracle for their systems governed by legal compliance rules and MySQL for actual research.
The pharmaceutical companies also had clear barriers between the researchers and professional IT staff, specifically the DBAs. It seems that the DBAs don’t want to cede any control over installed Oracle instances, and they place barriers to research by denying additional Oracle instances when their site licenses would allow them to do so at no incremental cost. On the other hand, the DBAs are fine with letting researchers host and pilot with the MySQL Community Edition databases. This book supports those trying to figure out how to write portable SQL and how to port solutions from MySQL to Oracle and vice versa.
Hope to meet a few new folks at OOW2011. The Kindle version of the book became available 11/25/2011.
As an addendum to this original post, some folks asked for the summary of content for the new book, and the location of the errata (the errors of omission and commission in the book). Below is a summary of the book from page XVIII of the Introduction, and the errata is in the second comment to this post:
Part I: Development Components
- Chapter 1, “Architectures,” explains the Oracle 11g and MySQL 5.6 development architectures and highlights the comparative aspects of both client and server environments.
- Chapter 2, “Client Interfaces,” explains and demonstrates the basics of how you use SQL*Plus and MySQL Monitor client software.
- Chapter 3, “Security,” explains the security barriers for database servers and Data Control Language (DCL) commands that let you manage user and account privileges in the database servers.
- Chapter 4, “Transactions,” explains the nature of ACID-compliant transactions and the Two-phase Commit (2PC) process demonstrated by INSERT, UPDATE, and DELETE statements.
- Chapter 5, “Constraints,” explains the five primary database-level constraints and covers the check, not null, unique, primary key, and foreign key constraints.
Part II: SQL Development
- Chapter 6, “Creating Users and Structures,” explains how you can create users, databases, tables, sequences, and indexes.
- Chapter 7, “Modifying Users and Structures,” explains how you modify users, databases, tables, sequences, and indexes.
- Chapter 8, “Inserting Data,” explains how you insert data into tables.
- Chapter 9, “Updating Data,” explains how you update data in tables.
- Chapter 10, “Deleting Data,” explains how you delete data from tables.
- Chapter 11, “Querying Data,” explains how you query data from a single table, from a join of two or more tables, and from a join of two or more queries through set operators.
- Chapter 12, “Merging Data,” explains how you import denormalized data from external tables or source files and insert or update records in normalized tables.
Part III: Stored Program Development
- Chapter 13, “PL/SQL Basics,” explains the basics of using PL/SQL to write transactional blocks of code.
- Chapter 14, “SQL/PSM Basics,” explains the basics of using SQL/PSM to write transactional blocks of code.
- Chapter 15, “Triggers,” explains how to write database triggers in Oracle and MySQL databases.
Part IV: Appendix
- Appendix, Covers the answers to the mastery questions at the end of the chapters.
Reset 11g XE APEX Password
I’ve been busy working on other things since APEX 4 shipped. After I got through the installations of Oracle Database 11g XE (see prior posts), figuring out the default user name and password for APEX Administration became a tedious task. The documentation didn’t really help point to what was needed but it’s always in the code.
You reset the APEX Administration Account for Oracle Database 11g XE by doing the following steps:
- Open a command shell and change the directory to the
%ORACLE_HOME%\apexdirectory (the default Oracle Home isc:\oraclexe\app\oracle\product\11.2.0\server). Then, connect as theSYSTEMuser to the SQL*Plus utility, and run the following command that sets the temporary password to “admin“. You’ll reset the password when you connect through the web interface.
@apxxepwd admin |
- Open APEX Administration by navigating to the
http://localhost:8080/apex/apex_admin, and you’ll see the following APEX Administration Login screen. Enter admin as the user name and admin as the password and click the Login button.
- You’ll be prompted to reset the password in the following Change Password screen. Enter admin as the old password and a new password that complies with the following rules, and click the Apply Changes button.
- Password must contain at least 6 characters.
- New password must differ from old password by at least 2 characters.
- Password must contain at least one numeric character (0123456789).
- Password must contain at least one punctuation character (!”#$%&()“*+,-/:;<=>?_).
- Password must contain at least one upper-case alphabetic character.
- Password must not contain username.
- After configuring the APEX Administration account, click on the Manage Workspaces icon (or button), as shown below. If re-opening the browser to go straight here, just type the following URL
http://localhost:8080/apex/apex_admin.
- The upper left box contains what you need to create a workspace. Click on the Create Workspace option as shown below.
- The choice to add a workspace launched a provisioning workflow. You first Identify Workspace.

- The dialog box for this second provisioning step is:
- The dialog box for this third provisioning step is:
- The dialog box for this fourth provisioning step cpmfirms what you’re doing before you perform the task:
- The dialog box for this fifth provisioning step confirms success or reports failure:
- After you’ve provisioned a workspace, you can create objects like you did with APEX 3. Enter the following URL:
http://localhost:8080/apexand you’ll be brought to this login screen.
- After logging in to your Basic workspace, you’ll have these four principal widgets, as shown in the screen capture.
Maybe I went through the 2-Day APEX manual too quickly but I didn’t see how to do this, all I saw was how to use the HR sample schema. As always, I hope this helps others.
Oracle 11g XE Install
Here’s the Oracle Database 11g Express Edition step-by-step installation. I did the installation on Window 7 64-bit, and did run into a problem with the Windows Registry on a fresh installation (posted earlier on the blog).
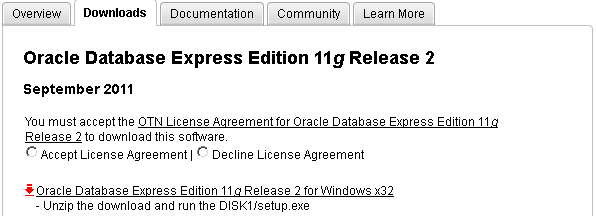
When you download the software from Oracle, you’ll need an account and you’ll need to accept the license agreement.
- You’re prompted to accept the license agreement and can’t proceed without doing it.
- After accepting the license agreement you can download the software.
- Unlike, the Oracle 10g XE MSI file, you’ve downloaded a compressed (
OracleXE112_Win32.zip) file, and you’ll need to explode the zip file and write it to a directory. When you write it to a directory, it looks like the following and you double click on thesetup.msifile.

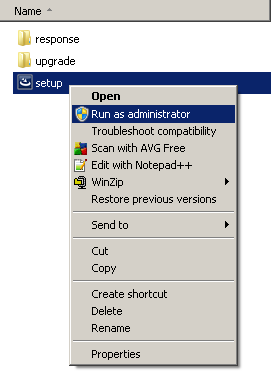
It’s recommended that you right click on the setup.msi program and run it as the Administrator. If you’ve not disabled Microsoft User Access Controls (UAC), I’d do that first.
- After launching the
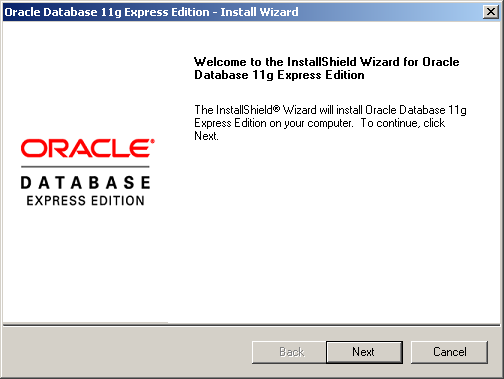
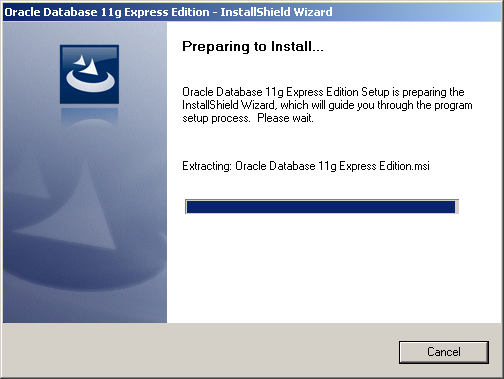
setup.msifile, you see the Install Shield wizard screen while the file loads, like this:
After launching the setup.msi file, and loading the MSI file, you see the first dialog box of the installation. Click the Next button to start the installation.
- The second dialog box is the license for the installation. Click the I accept the terms in the license agreement. radio button and then the Next button.
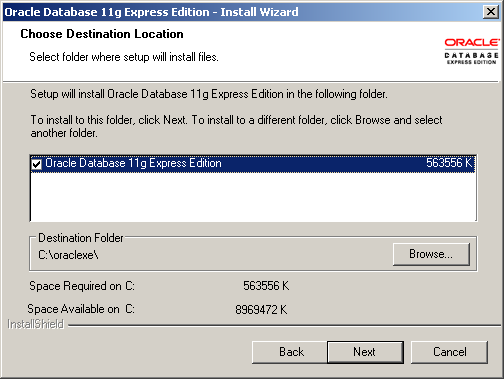
- The third dialog box lets you accept the default location or provide an override location. If you accept the default location, click the Next button to continue.
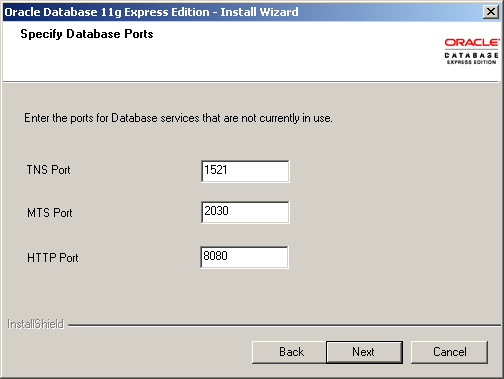
- The fourth dialog box lets you specify the TNS, MTS, and HTTP Ports. The default values are shown in the following screen shot but I’ve change my TNS port to 1621, which you’ll see later. Click the Next button to continue.
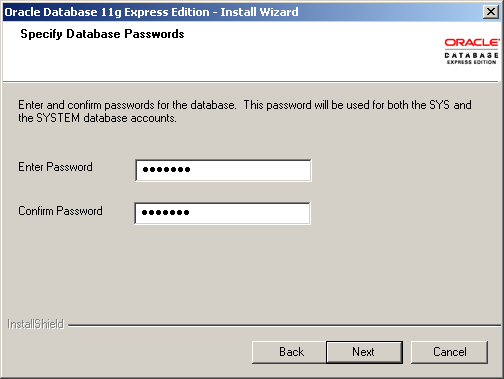
- The fifth dialog box lets you enter the password for the
SYSandSYSTEMusers. You must enter it twice and naturally they must match each other. Click the Next button to continue.
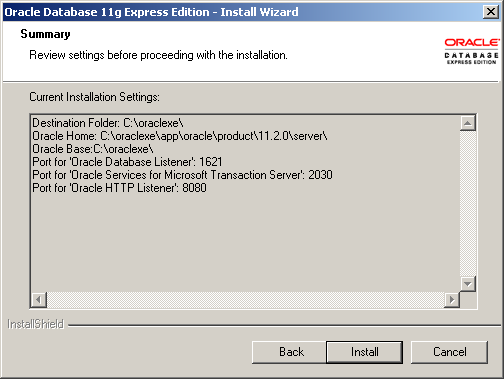
- The sixth dialog box lets you see the configuration options you’ve chosen. Note that this installation is using a TNS port of 1621 rather than the default of 1521. Click the Next button to continue.
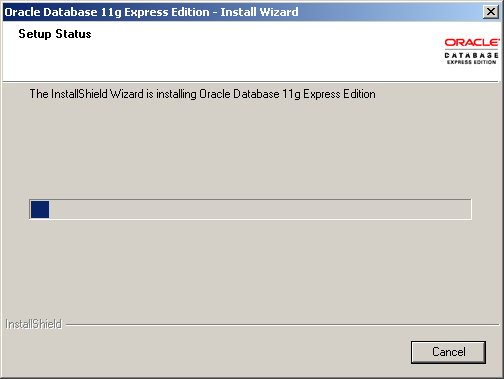
- The seventh dialog box lets you see the progress bar, take a break it can run for two or three minutes. Click the Next button to continue.
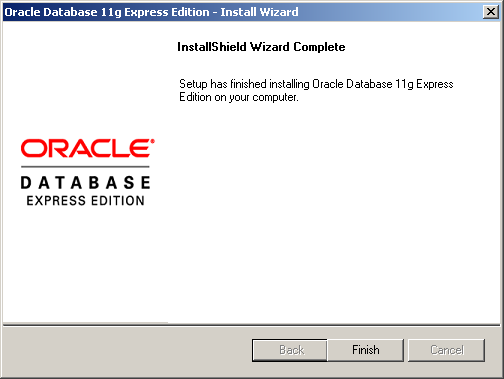
- The last dialog box lets you see that you’ve installed the product. Click the Finish button to complete the installation.
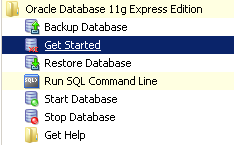
You’ve now installed Oracle Database 11g Express Edition. You can start the command line by typing sqlplus system/password in command shell or the Get Started option in your Program Menus, as shown below.
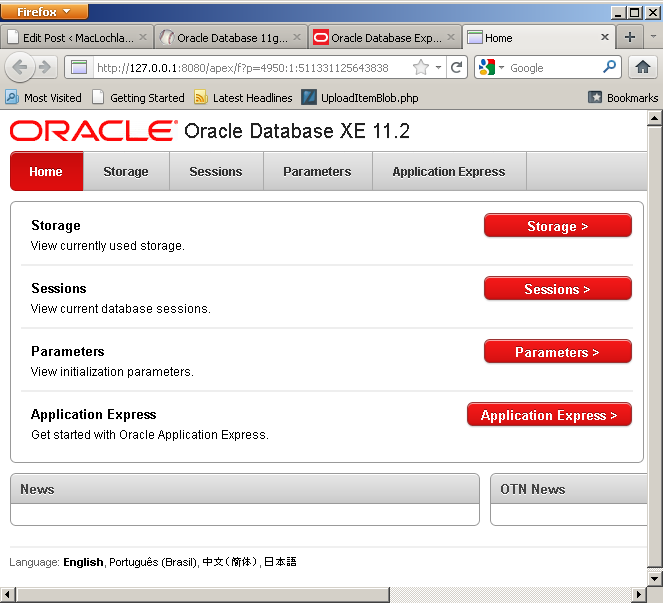
You should see this console when you launch Get Started or manually type http://localhost:8080/apex. There’s more to the web page but I scrunched it to fit into the blog. Alas, space is always at a premium.
Hope this helps folks.
Oracle 11g XE Installer
Finally, I got to install Oracle Database 11g Express Edition (XE) tonight. Unfortunately, I ran into an error during the installation. A quick Google search landed me in the forum, where it gave me the impression it wouldn’t work on Windows 7, 64-bit. However, I’m tenacious with problems like this. Here’s the screenshot for the error:
The text from the image is noted below to help folks find the solution.
The installer is unable to instantiate the file C:\Users\McLAUGH~1\AppData\Local\Temp\{078E83D7-3FCC-4A72-903B-995C7CE44681}\KEY_XE.reg. The file does not appear to exist. |
The physical file isn’t missing, what failed to happen was that the installer didn’t write a Registry Key’s Data value. You can add the missing registry key’s Data value, and then click OK on the Error dialog box to continue the installation. (Replying to Andrea, I’ve provided screen shots on editing the Registry in a comment below.) It will succeed, at least it succeeded for me on Windows 7 64-bit. Rather than use abbreviations like the forum entry, the missing key is found here in the Windows Registry:
- HKEY_CLASSES_ROOT\Installer\Products\266B7A503A089BE4EAD1986A429434C1\SourceList\Media |
A screenshot shows that the Data value of the key wasn’t populated by the MSI (Microsoft Software Installer), the arguments remain for a script to populate:
You need to add the message value from your Error dialog as Data value of the Name entry 1, like this screenshot shows:
Since I believe the only things that should change are your Administrator’s hostname and the key value (type in the one that shows in the your dialog box), here’s the text you’ll need to enter:
C:\Users\hostname\AppData\Local\Temp\{078E83D7-3FCC-4A72-903B-995C7CE44681}\ |
This fix worked for me, and I hope the same holds true for you.
Oracle Database 11g XE
It’s finally available for download, and the documentation is posted too. However, there’s no official word on the next release of the Oracle database.
I’ve posted Step-by-step Installation Instructions and ran into a registry problem on Window 7 64-bit, the instructions for fixing the registry and salvaging the in-progress installation are in this blog post.


