Archive for the ‘Oracle XE’ Category
Oracle SQL Tuning Example
Somebody wanted a post on SQL statement tuning, so here it is. SQL statement tuning requires that you understand table definitions, constraints, and indexes plus how they interact through joins before you can begin tuning. Oracle presents some of the most advanced tools for tuning SQL statements.
This example works through a demonstration of tuning one statement with multiple joins. The key elements of tuning any SQL statements is understanding the table structures and data. The key worry about tuning is that optimizing for a query can harm the effectiveness of OLTP processing by slowing the performance of INSERT and UPDATE statements. Any DML statement that adds or modifies data in tables also modifies indexes built to support queries against the table.
Oracle
You have two approaches in an Oracle database. The old way and the new way. They’re really not that different but the DBMS_XPLAN package provides a richer set of analytical data for less work.
The old way and the new way both use a single way for generating the SQL execution plan. You do that with the EXPLAIN PLAN statement.
The EXPLAIN PLAN statement is followed by a SET operator. You use the SET operator to assign a value to the STATEMENT_ID column. This is a column that uniquely identifies statements in the PLAN_TABLE. You must ensure that all STATEMENT_ID values are unique, or you’ll get incorrect results when you analyze plans. There’s no constraint that magically does this for you. After you set the statement identifier, you use the FOR keyword before the statement that you want to analyze.
An example query follows below:
1 2 3 4 5 6 7 8 9 10 11 12 13 14 15 16 17 18 19 20 21 | EXPLAIN PLAN SET STATEMENT_ID = '&input' FOR SELECT DISTINCT r.rental_id , c.contact_id , tu.check_out_date AS check_out_date , tu.return_date AS return_date , 3 AS created_by , TRUNC(SYSDATE) AS creation_date , 3 AS last_updated_by , TRUNC(SYSDATE) AS last_update_date FROM member m INNER JOIN contact c ON m.member_id = c.member_id INNER JOIN transaction_upload tu ON c.first_name = tu.first_name AND NVL(c.middle_name,'x') = NVL(tu.middle_name,'x') AND c.last_name = tu.last_name AND tu.account_number = m.account_number LEFT JOIN rental r ON c.contact_id = r.customer_id AND tu.check_out_date = r.check_out_date AND tu.return_date = r.return_date; |
After you explain a statement, you need to analyze it. Oracle uses hierarchical queries to analyze them. The following is a simple script that lets you display the execution plan by nesting the levels of the explained plan.
Here’s where you chose to follow the old or new way. Click on the link below to see the old way if you’re interested but I’d suggest you use the new way.
Oracle’s Old Fashioned Way ↓
This sections shows the old way of analyzing explain plans.
The first step after you’ve explained the statement, is to analyze it. The following query performs that analysis and returns the cost of the join. More information is available with the DBMS_XPLAN package. You can also extend this to get more information from the PLAN_TABLE but it’s a lot of work that’s already done for you.
It’s nice to see the mechanics of how this analysis is performed, and that’s why this is in the post. This uses Oracle’s hierarchical query mechanism.
1 2 3 4 5 6 7 8 9 10 11 12 13 14 15 16 17 18 19 20 21 22 23 24 25 26 27 28 29 30 31 32 33 34 35 36 37 38 39 40 41 42 43 44 45 | -- Clear any reporting breaks, columns, or computing. CLEAR BREAKS CLEAR COLUMNS CLEAR COMPUTES -- Set environment to capture explained plan. SET FEEDBACK OFF SET NULL "" SET LINESIZE 120 SET PAGESIZE 9999 SET PAUSE OFF SET VERIFY OFF -- Override default substitution variable prompt. ACCEPT input1 PROMPT "What do you want as a statement ID? " -- Format the Query Plan based on a 120 character length. COL c1 FORMAT A80 HEADING 'Query Plan' -- Spool it to file. SPOOL explain_it.log -- Create the hierarchy of the join plan. SELECT LPAD(' ',2*(LEVEL-1)) || operation||' ' || options||' ' || object_name||' ' || DECODE(id,0,'Cost = '||POSITION) "Query Plan" FROM plan_table START WITH id = 0 AND statement_id = '&input1' CONNECT BY PRIOR id = parent_id AND statement_id = '&input1'; -- Reset operating environment to default. SET FEEDBACK ON SET NULL "<Null>" SET LINESIZE 80 SET PAGESIZE 999 SET VERIFY ON -- Close output file. SPOOL OFF |
Assuming you entered Query1 as the input response to the EXPLAIN PLAN statement and you name the query above explain_it.sql, then you’d call it with the following syntax:
1 2 | @explain_it.sql What do you want AS a statement ID? Query1 |
The query starts at the top-most node aligned to the left. Each level down the node shifts two spaces in to the right. You start moving out of the process when the indenting reverses. It would generate an output file like the following:
1 2 3 4 5 6 7 8 9 10 11 12 | Query Plan
--------------------------------------------------------------------------------
SELECT STATEMENT Cost = 34
HASH UNIQUE
HASH JOIN OUTER
VIEW
NESTED LOOPS
HASH JOIN
TABLE ACCESS FULL MEMBER
TABLE ACCESS FULL CONTACT
INDEX RANGE SCAN IMPORT_DATE_RANGE
TABLE ACCESS FULL RENTAL |
This tells you that the join isn’t cheap from a system resource standpoint. You can improve the query by creating indexes. Those steps are shown using the new method.
Oracle’s New Way
Oracle’s new way uses the DBMS_XPLAN package. In this post, you’ll examine only how to display results and check the impact of small changes that lead to improved query performance.
Assuming you entered Query1 as the &input response to the EXPLAIN PLAN statement above, then you’d call it with the following syntax:
1 2 3 4 5 6 7 8 | -- Expand the width of displayed output. SET LINESIZE 120 -- Query using the TABLE function that returns a user-defined object type (UDT) -- into a SQL aggregate table, which is a fancy word for normal SQL output -- (unfortunately, it's the technically accurate word). SELECT * FROM TABLE(dbms_xplan.display(NULL,'Query1')); |
The query using the DISPLAY function of the DBMS_XPLAN returns a table of data. It should generate an output stream like the following:
1 2 3 4 5 6 7 8 9 10 11 12 13 14 15 16 17 18 19 20 21 22 23 24 25 26 27 28 29 30 31 32 33 34 | PLAN_TABLE_OUTPUT
----------------------------------------------------------------------------------------------------------
Plan hash value: 3289798709
-----------------------------------------------------------------------------------------------------
| Id | Operation | Name | Rows | Bytes | Cost (%CPU)| Time |
-----------------------------------------------------------------------------------------------------
| 0 | SELECT STATEMENT | | 229 | 24274 | 50 (8)| 00:00:01 |
| 1 | HASH UNIQUE | | 229 | 24274 | 50 (8)| 00:00:01 |
|* 2 | HASH JOIN OUTER | | 229 | 24274 | 49 (7)| 00:00:01 |
| 3 | VIEW | | 4 | 248 | 37 (6)| 00:00:01 |
|* 4 | HASH JOIN | | 4 | 572 | 37 (6)| 00:00:01 |
|* 5 | HASH JOIN | | 15 | 1230 | 7 (15)| 00:00:01 |
| 6 | TABLE ACCESS FULL | MEMBER | 9 | 180 | 3 (0)| 00:00:01 |
| 7 | TABLE ACCESS FULL | CONTACT | 15 | 930 | 3 (0)| 00:00:01 |
| 8 | EXTERNAL TABLE ACCESS FULL| TRANSACTION_UPLOAD | 8168 | 486K| 30 (4)| 00:00:01 |
| 9 | TABLE ACCESS FULL | RENTAL | 4689 | 201K| 11 (0)| 00:00:01 |
-----------------------------------------------------------------------------------------------------
Predicate Information (identified by operation id):
---------------------------------------------------
2 - access("TU"."RETURN_DATE"="R"."RETURN_DATE"(+) AND
"TU"."CHECK_OUT_DATE"="R"."CHECK_OUT_DATE"(+) AND "C"."CONTACT_ID"="R"."CUSTOMER_ID"(+))
4 - access("C"."FIRST_NAME"="TU"."FIRST_NAME" AND
NVL("C"."MIDDLE_NAME",'x')=NVL("TU"."MIDDLE_NAME",'x') AND "C"."LAST_NAME"="TU"."LAST_NAME"
AND "TU"."ACCOUNT_NUMBER"="M"."ACCOUNT_NUMBER")
5 - access("C"."MEMBER_ID"="M"."MEMBER_ID")
Note
-----
- dynamic sampling used for this statement
30 rows selected. |
The first thing to do is move the data immediately from an external table into a production table. You do that with the following command:
1 2 | -- Create a new table from an existing one. CREATE TABLE transaction_uploaded AS SELECT * FROM transaction_upload; |
Truncating the PLAN_TABLE table, is the easiest way to start over by reusing the statement identifiers, like Query1. Then, you can edit your EXPLAIN PLAN script and change TRANSACTION_UPLOAD table reference to TRANSACTION_UPLOADED. Now, the query using the DISPLAY function of the DBMS_XPLAN returns a reduction in cost from 50 to 34.
1 2 3 4 5 6 7 8 9 10 11 12 13 14 15 16 17 18 19 20 21 22 23 24 25 26 27 28 29 30 31 32 33 34 35 | PLAN_TABLE_OUTPUT
--------------------------------------------------------------------------------------------
Plan hash value: 3624831533
--------------------------------------------------------------------------------------------
| Id | Operation | Name | Rows | Bytes | Cost (%CPU)| Time |
--------------------------------------------------------------------------------------------
| 0 | SELECT STATEMENT | | 400 | 42400 | 34 (6)| 00:00:01 |
| 1 | HASH UNIQUE | | 400 | 42400 | 34 (6)| 00:00:01 |
|* 2 | HASH JOIN OUTER | | 400 | 42400 | 33 (4)| 00:00:01 |
| 3 | VIEW | | 7 | 434 | 22 (5)| 00:00:01 |
| 4 | NESTED LOOPS | | 7 | 1001 | 22 (5)| 00:00:01 |
|* 5 | HASH JOIN | | 15 | 1230 | 7 (15)| 00:00:01 |
| 6 | TABLE ACCESS FULL| MEMBER | 9 | 180 | 3 (0)| 00:00:01 |
| 7 | TABLE ACCESS FULL| CONTACT | 15 | 930 | 3 (0)| 00:00:01 |
|* 8 | INDEX RANGE SCAN | IMPORT_DATE_RANGE | 1 | 61 | 1 (0)| 00:00:01 |
| 9 | TABLE ACCESS FULL | RENTAL | 4689 | 201K| 11 (0)| 00:00:01 |
--------------------------------------------------------------------------------------------
Predicate Information (identified by operation id):
---------------------------------------------------
2 - access("TU"."RETURN_DATE"="R"."RETURN_DATE"(+) AND
"TU"."CHECK_OUT_DATE"="R"."CHECK_OUT_DATE"(+) AND
"C"."CONTACT_ID"="R"."CUSTOMER_ID"(+))
5 - access("C"."MEMBER_ID"="M"."MEMBER_ID")
8 - access("TU"."ACCOUNT_NUMBER"="M"."ACCOUNT_NUMBER" AND
"C"."LAST_NAME"="TU"."LAST_NAME" AND "C"."FIRST_NAME"="TU"."FIRST_NAME" AND
NVL("C"."MIDDLE_NAME",'x')=NVL("MIDDLE_NAME",'x'))
Note
-----
- dynamic sampling used for this statement
31 rows selected. |
A downside or quirk of thought, I’m never quite sure but folks look to the bottom not the middle first. Maybe in this case you tackle it first because it’s the attractive inefficiency due to the number of rows returned by a full table scan (most expensive).
You add a unique index that maps to the natural key for the RENTAL table, like this:
1 2 | CREATE UNIQUE INDEX natural_key_rental ON rental (rental_id, customer_id, check_out_date, return_date); |
You run the EXPLAIN PLAN again, using Query2, and then analyze it. You’ll see that the query uses an index fast full scan and that the cost decreases by 2.
1 2 3 4 5 6 7 8 9 10 11 12 13 14 15 16 17 18 19 20 21 22 23 24 25 26 27 28 29 30 31 32 33 34 35 | PLAN_TABLE_OUTPUT
-----------------------------------------------------------------------------------------------
Plan hash value: 3402838417
---------------------------------------------------------------------------------------------
| Id | Operation | Name | Rows | Bytes | Cost (%CPU)| Time |
---------------------------------------------------------------------------------------------
| 0 | SELECT STATEMENT | | 400 | 42400 | 32 (7)| 00:00:01 |
| 1 | HASH UNIQUE | | 400 | 42400 | 32 (7)| 00:00:01 |
|* 2 | HASH JOIN OUTER | | 400 | 42400 | 31 (4)| 00:00:01 |
| 3 | VIEW | | 7 | 434 | 22 (5)| 00:00:01 |
| 4 | NESTED LOOPS | | 7 | 1001 | 22 (5)| 00:00:01 |
|* 5 | HASH JOIN | | 15 | 1230 | 7 (15)| 00:00:01 |
| 6 | TABLE ACCESS FULL| MEMBER | 9 | 180 | 3 (0)| 00:00:01 |
| 7 | TABLE ACCESS FULL| CONTACT | 15 | 930 | 3 (0)| 00:00:01 |
|* 8 | INDEX RANGE SCAN | IMPORT_DATE_RANGE | 1 | 61 | 1 (0)| 00:00:01 |
| 9 | INDEX FAST FULL SCAN| NATURAL_KEY_RENTAL | 4689 | 201K| 9 (0)| 00:00:01 |
---------------------------------------------------------------------------------------------
Predicate Information (identified by operation id):
---------------------------------------------------
2 - access("TU"."RETURN_DATE"="R"."RETURN_DATE"(+) AND
"TU"."CHECK_OUT_DATE"="R"."CHECK_OUT_DATE"(+) AND
"C"."CONTACT_ID"="R"."CUSTOMER_ID"(+))
5 - access("C"."MEMBER_ID"="M"."MEMBER_ID")
8 - access("TU"."ACCOUNT_NUMBER"="M"."ACCOUNT_NUMBER" AND
"C"."LAST_NAME"="TU"."LAST_NAME" AND "C"."FIRST_NAME"="TU"."FIRST_NAME" AND
NVL("C"."MIDDLE_NAME",'x')=NVL("MIDDLE_NAME",'x'))
Note
-----
- dynamic sampling used for this statement
31 rows selected. |
You add a unique index that maps the surrogate and natural key for the MEMBER table, like this:
1 2 | CREATE UNIQUE INDEX member_account ON member (member_id, account_number); |
You run the EXPLAIN PLAN again, using Query3, and then analyze it. You’ll see that the query uses an index range scan instead of a full table access of the MEMBER table. This decreases the cost by 2.
1 2 3 4 5 6 7 8 9 10 11 12 13 14 15 16 17 18 19 20 21 22 23 24 25 26 27 28 29 30 31 32 33 34 35 | PLAN_TABLE_OUTPUT
----------------------------------------------------------------------------------------------
Plan hash value: 656512492
---------------------------------------------------------------------------------------------
| Id | Operation | Name | Rows | Bytes | Cost (%CPU)| Time |
---------------------------------------------------------------------------------------------
| 0 | SELECT STATEMENT | | 400 | 42400 | 30 (7)| 00:00:01 |
| 1 | HASH UNIQUE | | 400 | 42400 | 30 (7)| 00:00:01 |
|* 2 | HASH JOIN OUTER | | 400 | 42400 | 29 (4)| 00:00:01 |
| 3 | VIEW | | 7 | 434 | 19 (0)| 00:00:01 |
| 4 | NESTED LOOPS | | 7 | 1001 | 19 (0)| 00:00:01 |
| 5 | NESTED LOOPS | | 15 | 1230 | 4 (0)| 00:00:01 |
| 6 | TABLE ACCESS FULL| CONTACT | 15 | 930 | 3 (0)| 00:00:01 |
|* 7 | INDEX RANGE SCAN | MEMBER_ACCOUNT | 1 | 20 | 1 (0)| 00:00:01 |
|* 8 | INDEX RANGE SCAN | IMPORT_DATE_RANGE | 1 | 61 | 1 (0)| 00:00:01 |
| 9 | INDEX FAST FULL SCAN| NATURAL_KEY_RENTAL | 4689 | 201K| 9 (0)| 00:00:01 |
---------------------------------------------------------------------------------------------
Predicate Information (identified by operation id):
---------------------------------------------------
2 - access("TU"."RETURN_DATE"="R"."RETURN_DATE"(+) AND
"TU"."CHECK_OUT_DATE"="R"."CHECK_OUT_DATE"(+) AND
"C"."CONTACT_ID"="R"."CUSTOMER_ID"(+))
7 - access("C"."MEMBER_ID"="M"."MEMBER_ID")
8 - access("TU"."ACCOUNT_NUMBER"="M"."ACCOUNT_NUMBER" AND
"C"."LAST_NAME"="TU"."LAST_NAME" AND "C"."FIRST_NAME"="TU"."FIRST_NAME" AND
NVL("C"."MIDDLE_NAME",'x')=NVL("MIDDLE_NAME",'x'))
Note
-----
- dynamic sampling used for this statement
31 rows selected. |
You add a unique index that maps the surrogate, foreign key to the MEMBER table, and the natural key for the CONTACT table, like this:
1 2 | CREATE UNIQUE INDEX contact_member ON contact (contact_id, member_id, last_name, first_name, NVL(middle_name,'x')); |
You run the EXPLAIN PLAN again, using Query3, and then analyze it. You’ll see that the query uses an index full scan instead of a full table access of the CONTACT table. This decreases the cost by another 2.
1 2 3 4 5 6 7 8 9 10 11 12 13 14 15 16 17 18 19 20 21 22 23 24 25 26 27 28 29 30 31 32 33 34 35 | PLAN_TABLE_OUTPUT
----------------------------------------------------------------------------------------------
Plan hash value: 1185696375
---------------------------------------------------------------------------------------------
| Id | Operation | Name | Rows | Bytes | Cost (%CPU)| Time |
---------------------------------------------------------------------------------------------
| 0 | SELECT STATEMENT | | 400 | 42400 | 28 (8)| 00:00:01 |
| 1 | HASH UNIQUE | | 400 | 42400 | 28 (8)| 00:00:01 |
|* 2 | HASH JOIN OUTER | | 400 | 42400 | 27 (4)| 00:00:01 |
| 3 | VIEW | | 7 | 434 | 17 (0)| 00:00:01 |
| 4 | NESTED LOOPS | | 7 | 1001 | 17 (0)| 00:00:01 |
| 5 | NESTED LOOPS | | 15 | 1230 | 2 (0)| 00:00:01 |
| 6 | INDEX FULL SCAN | CONTACT_MEMBER | 15 | 930 | 1 (0)| 00:00:01 |
|* 7 | INDEX RANGE SCAN | MEMBER_ACCOUNT | 1 | 20 | 1 (0)| 00:00:01 |
|* 8 | INDEX RANGE SCAN | IMPORT_DATE_RANGE | 1 | 61 | 1 (0)| 00:00:01 |
| 9 | INDEX FAST FULL SCAN| NATURAL_KEY_RENTAL | 4689 | 201K| 9 (0)| 00:00:01 |
---------------------------------------------------------------------------------------------
Predicate Information (identified by operation id):
---------------------------------------------------
2 - access("TU"."RETURN_DATE"="R"."RETURN_DATE"(+) AND
"TU"."CHECK_OUT_DATE"="R"."CHECK_OUT_DATE"(+) AND
"C"."CONTACT_ID"="R"."CUSTOMER_ID"(+))
7 - access("C"."MEMBER_ID"="M"."MEMBER_ID")
8 - access("TU"."ACCOUNT_NUMBER"="M"."ACCOUNT_NUMBER" AND
"C"."LAST_NAME"="TU"."LAST_NAME" AND "C"."FIRST_NAME"="TU"."FIRST_NAME" AND
NVL("MIDDLE_NAME",'x')=NVL("MIDDLE_NAME",'x'))
Note
-----
- dynamic sampling used for this statement
31 rows selected. |
The question evolves after you tune the first query. Then, you must check what impacts may exist on other queries, like the statement that you use to merge data into the TRANSACTION table. You may have to suppress indexes in a subsequent query, or after you tune it, return and suppress an index here. You suppress an index by adding a '0' to a NUMBER or DATE column, and by concatenating a null string to a character data type.
Examples of Suppressing Indexes
The following is an example of suppressing an index built on a string. It extends the tuning statement earlier in the blog post, and references line #17. The concatenation of a null string suppresses the index.
17 | AND c.last_name = tu.last_name||'' |
The following is an example of suppressing an index built on a date. It extends the tuning statement earlier in the blog post, and references line #20. Adding a zero leaves the value intact and suppresses the index.
20 | AND tu.check_out_date = r.check_out_date+0 |
Fedora Install of Oracle 11g
After the installation of Oracle 11g XE on Windows, I anticipated problems installing on Fedora. It’s terrific to report it was by far simpler to install on Fedora. This post provides the steps, and builds on the Fedora configuration published earlier this week.
- After you download the software from the Oracle web site, you’ll need to expand the compressed file. When you double click on the download item you will see the following screen. Click Extract at the top of the display.
- The Extract displays the following dialog. Click the Create Folder button and you’ll get an entry point for a new directory in your user’s directory. For the example, Oracle11gXE
- After creating the directory, click the Extract button.
- The extract process completes and shows the following dialog.
- The Disk1 directory will show the following contents.
- You need to drop down into a Terminal session, which you can launch by clicking on Applications, System Tools, and Terminal in the menu.
sudo rpm -iv oracle-xe-11.2.0-1.0.x86_64.rpm |
This command will install the packages in verbose syntax and display the following messages:
[sudo] password for mclaughlinm: Preparing packages for installation... oracle-xe-11.2.0-1.0 Executing post-install steps... You must run '/etc/init.d/oracle-xe configure' as the root user to configure the database. |
- This step requires that you assume the role of the
rootuser, which can be done with this syntax:
sudo sh |
In this root shell, you run the Oracle 11g XE configuration with this command:
/etc/init.d/oracle-xe configure |
The following are the text prompts that you accept to configure Oracle 11g XE:
Oracle Database 11g Express Edition Configuration ------------------------------------------------- This will configure on-boot properties of Oracle Database 11g Express Edition. The following questions will determine whether the database should be starting upon system boot, the ports it will use, and the passwords that will be used for database accounts. Press <Enter> to accept the defaults. Ctrl-C will abort. Specify the HTTP port that will be used for Oracle Application Express [8080]: Specify a port that will be used for the database listener [1521]: Specify a password to be used for database accounts. Note that the same password will be used for SYS and SYSTEM. Oracle recommends the use of different passwords for each database account. This can be done after initial configuration: Confirm the password: Do you want Oracle Database 11g Express Edition to be started on boot (y/n) [y]: Starting Oracle Net Listener...Done Configuring database... Starting Oracle Database 11g Express Edition instance...Done Installation completed successfully. |
After completing the configuration, you need to do two things. First, you need to modify the .bash_profile file for your user (covered in the next step). Second, you need to reboot your system.
- This step requires that you exit the
rootshell by typing theexitcommand. This should put you back into your administration account with sudoer privileges. You usevito edit and add the following to the.bashrcfile.
. /u01/app/oracle/product/11.2.0/xe/bin/oracle_env.sh |
Or, you can write your own file, like this:
# Oracle Settings TMP=/tmp; export TMP TMPDIR=$TMP; export TMPDIR ORACLE_HOSTNAME=localhost.localdomain; export ORACLE_HOSTNAME ORACLE_UNQNAME=DB11G; export ORACLE_UNQNAME ORACLE_BASE=/u01/app/oracle; export ORACLE_BASE ORACLE_HOME=$ORACLE_BASE/product/11.2.0/xe; export ORACLE_HOME ORACLE_SID=XE; export ORACLE_SID NLS_LANG=`$ORACLE_HOME/bin/nls_lang.sh`; export NLS_LANG ORACLE_TERM=xterm; export ORACLE_TERM PATH=/usr/sbin:$PATH; export PATH PATH=$ORACLE_HOME/bin:$PATH; export PATH LD_LIBRARY_PATH=$ORACLE_HOME/lib:/lib:/usr/lib; export LD_LIBRARY_PATH CLASSPATH=$ORACLE_HOME/JRE:$ORACLE_HOME/jlib:$ORACLE_HOME/rdbms/jlib; export CLASSPATH if [ $USER = "oracle" ]; then if [ $SHELL = "/bin/ksh" ]; then ulimit -p 16384 ulimit -n 65536 else ulimit -u 16384 -n 65536 fi fi |
You can now log in to the Oracle database with the following syntax from the command line. You’ll be prompted for the system password that you entered during the configuration steps. I’ll add another post on SQL Developer later this week.
sqlplus system |
- This step is optional. You can configure an
oracleenv.shfile in theoracleuser’s home directory. While you could put this in the.bashrcfile, theoracleaccount isn’t bootable. That’s why I recommend putting it in an environment file.
# .bashrc # Source global definitions if [ -f /etc/bashrc ]; then . /etc/bashrc fi # Uncomment the following line if you don't like systemctl's auto-paging feature: # export SYSTEMD_PAGER= # User specific aliases and functions . /u01/app/oracle/product/11.2.0/xe/bin/oracle_env.sh # Wrap sqlplus with rlwrap to edit prior lines with the # up, down, left and right keys. sqlplus() { if [ "$RLWRAP" = "0" ]; then sqlplus "$@" else rlwrap sqlplus "$@" fi } # Set vi as a command line editor. set -o vi |
If you want to use the menu choices added by the installation, you need to put your privileged sudoer in the dba group. I wrote a blog post on it here.
Oracle 11g XE Install
Here’s the Oracle Database 11g Express Edition step-by-step installation. I did the installation on Window 7 64-bit, and did run into a problem with the Windows Registry on a fresh installation (posted earlier on the blog).
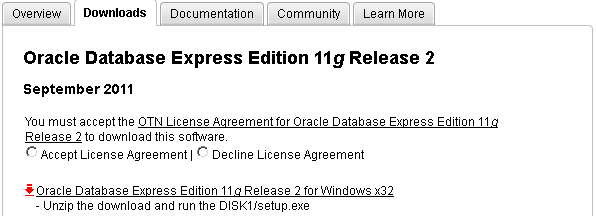
When you download the software from Oracle, you’ll need an account and you’ll need to accept the license agreement.
- You’re prompted to accept the license agreement and can’t proceed without doing it.
- After accepting the license agreement you can download the software.
- Unlike, the Oracle 10g XE MSI file, you’ve downloaded a compressed (
OracleXE112_Win32.zip) file, and you’ll need to explode the zip file and write it to a directory. When you write it to a directory, it looks like the following and you double click on thesetup.msifile.

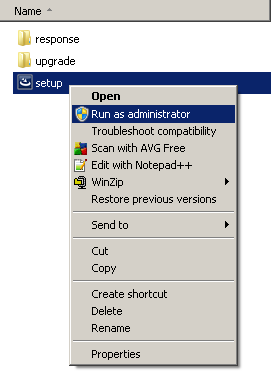
It’s recommended that you right click on the setup.msi program and run it as the Administrator. If you’ve not disabled Microsoft User Access Controls (UAC), I’d do that first.
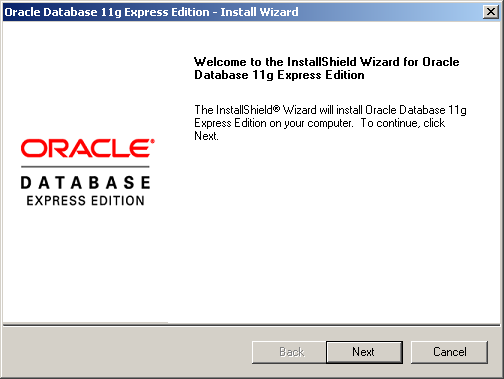
- After launching the
setup.msifile, you see the Install Shield wizard screen while the file loads, like this:
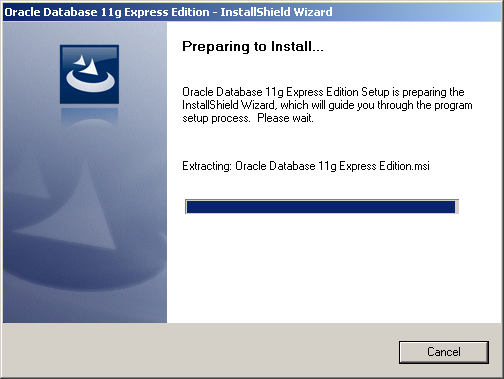
After launching the setup.msi file, and loading the MSI file, you see the first dialog box of the installation. Click the Next button to start the installation.
- The second dialog box is the license for the installation. Click the I accept the terms in the license agreement. radio button and then the Next button.
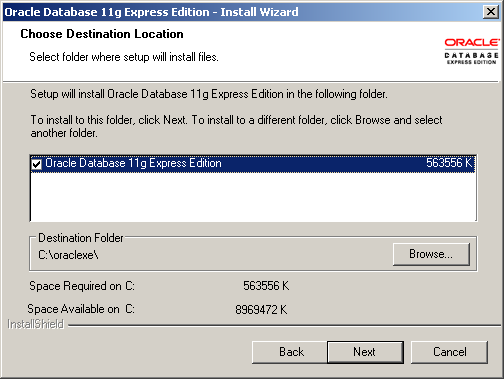
- The third dialog box lets you accept the default location or provide an override location. If you accept the default location, click the Next button to continue.
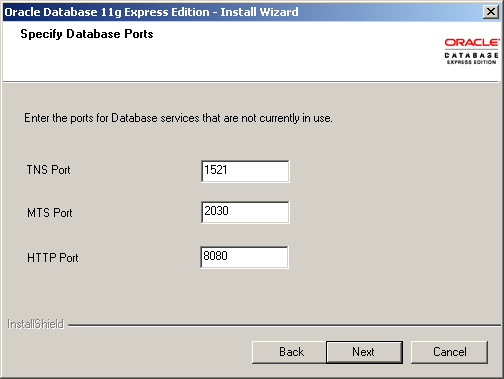
- The fourth dialog box lets you specify the TNS, MTS, and HTTP Ports. The default values are shown in the following screen shot but I’ve change my TNS port to 1621, which you’ll see later. Click the Next button to continue.
- The fifth dialog box lets you enter the password for the
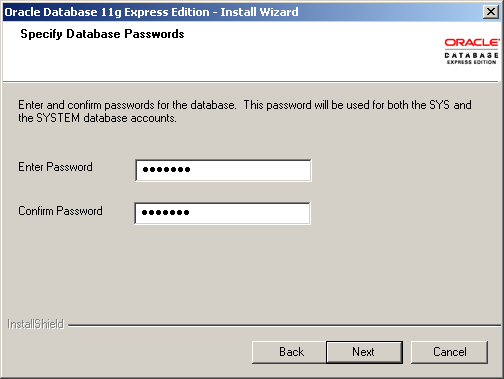
SYSandSYSTEMusers. You must enter it twice and naturally they must match each other. Click the Next button to continue.
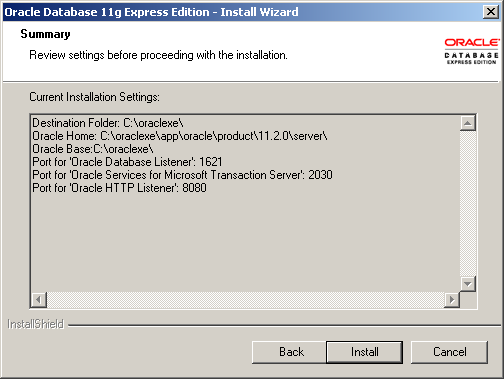
- The sixth dialog box lets you see the configuration options you’ve chosen. Note that this installation is using a TNS port of 1621 rather than the default of 1521. Click the Next button to continue.
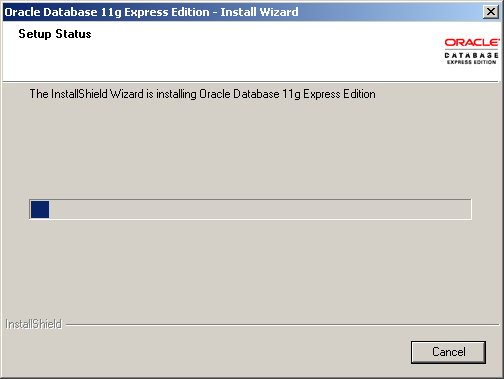
- The seventh dialog box lets you see the progress bar, take a break it can run for two or three minutes. Click the Next button to continue.
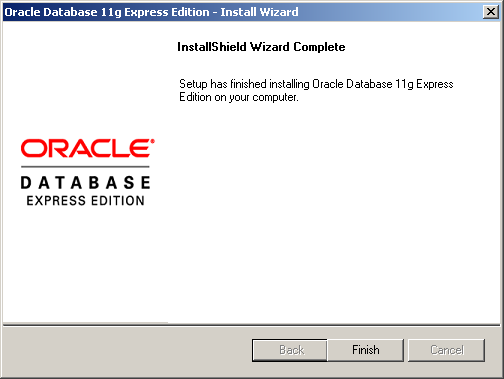
- The last dialog box lets you see that you’ve installed the product. Click the Finish button to complete the installation.
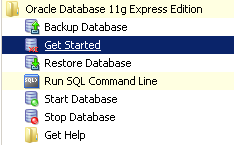
You’ve now installed Oracle Database 11g Express Edition. You can start the command line by typing sqlplus system/password in command shell or the Get Started option in your Program Menus, as shown below.
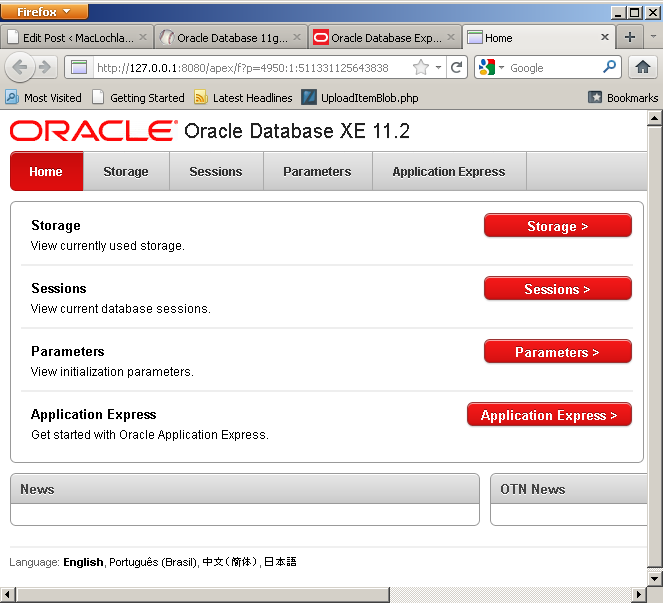
You should see this console when you launch Get Started or manually type http://localhost:8080/apex. There’s more to the web page but I scrunched it to fit into the blog. Alas, space is always at a premium.
Hope this helps folks.
Oracle 11g XE Installer
Finally, I got to install Oracle Database 11g Express Edition (XE) tonight. Unfortunately, I ran into an error during the installation. A quick Google search landed me in the forum, where it gave me the impression it wouldn’t work on Windows 7, 64-bit. However, I’m tenacious with problems like this. Here’s the screenshot for the error:
The text from the image is noted below to help folks find the solution.
The installer is unable to instantiate the file C:\Users\McLAUGH~1\AppData\Local\Temp\{078E83D7-3FCC-4A72-903B-995C7CE44681}\KEY_XE.reg. The file does not appear to exist. |
The physical file isn’t missing, what failed to happen was that the installer didn’t write a Registry Key’s Data value. You can add the missing registry key’s Data value, and then click OK on the Error dialog box to continue the installation. (Replying to Andrea, I’ve provided screen shots on editing the Registry in a comment below.) It will succeed, at least it succeeded for me on Windows 7 64-bit. Rather than use abbreviations like the forum entry, the missing key is found here in the Windows Registry:
- HKEY_CLASSES_ROOT\Installer\Products\266B7A503A089BE4EAD1986A429434C1\SourceList\Media |
A screenshot shows that the Data value of the key wasn’t populated by the MSI (Microsoft Software Installer), the arguments remain for a script to populate:
You need to add the message value from your Error dialog as Data value of the Name entry 1, like this screenshot shows:
Since I believe the only things that should change are your Administrator’s hostname and the key value (type in the one that shows in the your dialog box), here’s the text you’ll need to enter:
C:\Users\hostname\AppData\Local\Temp\{078E83D7-3FCC-4A72-903B-995C7CE44681}\ |
This fix worked for me, and I hope the same holds true for you.
Oracle Database 11g XE
It’s finally available for download, and the documentation is posted too. However, there’s no official word on the next release of the Oracle database.
I’ve posted Step-by-step Installation Instructions and ran into a registry problem on Window 7 64-bit, the instructions for fixing the registry and salvaging the in-progress installation are in this blog post.
Surprise, Oracle 11g XE Beta
Finally, the Oracle 11g XE Beta has arrived. Actually, it appears I missed it when Justin announce it. Anyway, it is available for download here. It’s now complete and downloadable, the links are here.
Troubleshooting ORA-12514
A student encountered a connection problem with a PHP application that failed to resolve to the database. The steps to validate this are to check the PHP credentials, which are in this older post. Once you’ve done that, you should do:
- Check the
tnsnames.orafile contents, they should have ahostnamevalue not an IP address. When you’ve not set your machinehostnamein Microsoft Windowshostfile (mine in the example is:McLaughlin7x64), Oracle opts for the IP address.
XE = (DESCRIPTION = (ADDRESS = (PROTOCOL = TCP)(HOST = McLaughlin7x64)(PORT = 1521)) (CONNECT_DATA = (SERVER = DEDICATED) (SERVICE_NAME = xe) ) ) |
- Check if the Oracle TNS (Transparent Network Substrate) validates with this command:
tnsping xe |
- If the prior step fails, check to see if you’re listener is running and that it’s configuration file looks more or less like this sample. If it doesn’t, you should edit this
listener.orafile and start the listener process through the services dialog.
LISTENER = (DESCRIPTION_LIST = (DESCRIPTION = (ADDRESS = (PROTOCOL = IPC)(KEY = EXTPROC1521)) (ADDRESS = (PROTOCOL = TCP)(HOST = McLaughlin7x64)(PORT = 1521)) ) ) |
- You should then be able to connect like this:
sqlplus username/password@xe |
Hope this helps a few people.
Drop Object If Exists
Writing an anonymous block to conditionally drop tables and sequences got very old. I figured it was time to simply put a procedure that would simplify it. Avoiding repetition was important too, so it supports an invoker rights model. This mimics the IF EXISTS syntax available in MySQL.
You need to create this as the SYSTEM user and then grant execute permission on the procedure to PUBLIC. Then, you need to create a couple public synonyms.
1 2 3 4 5 6 7 8 9 10 11 12 13 14 15 16 17 18 19 20 21 22 23 24 25 26 27 28 29 30 31 32 33 34 35 36 37 | -- Create a procedure to simplify dropping objects. CREATE OR REPLACE PROCEDURE drop_ifexists ( pv_type VARCHAR2 , pv_table VARCHAR2 ) AUTHID CURRENT_USER IS -- String for DDL command. sql_text VARCHAR2(2000); -- Declare a parameterized cursor. CURSOR find_object ( cv_type VARCHAR2 , cv_table VARCHAR2 ) IS SELECT uo.object_name , uo.object_type FROM user_objects uo WHERE uo.object_name = UPPER(cv_table) AND uo.object_type = UPPER(cv_type); BEGIN -- Open the cursor with the input variables. FOR i IN find_object(pv_type, pv_table) LOOP -- Check for a table object and append cascade constraints. IF i.object_type = 'TABLE' THEN sql_text := 'DROP '||i.object_type||' '||i.object_name||' CASCADE CONSTRAINTS'; ELSE sql_text := 'DROP '||i.object_type||' '||i.object_name; END IF; -- Run dynamic command. EXECUTE IMMEDIATE sql_text; END LOOP; END drop_ifexists; / |
After creating the procedure in the SYSTEM user schema, you should run these Data Control Language (DCL) commands:
GRANT EXECUTE ON drop_ifexists TO PUBLIC; CREATE PUBLIC SYNONYM drop_ifexists FOR system.drop_ifexists; |
Assuming you have a table named MESSAGE, you can call the drop_ifexists procedure to conditionally delete it as follows below. The same procedure works with any object in a user’s schema.
EXECUTE drop_ifexists('table','message'); |
The only problem comes with types because they can have dependents. When they have dependents you can’t drop them until you’ve removed all the dependents. There are two types of dependents types and collection types.
Since discovering those may be difficult for new users, here’s another invoker rights function to discover user defined types. You should note that you’ll need to create the types before you try to compile the code (create the stored program in the Oracle database).
1 2 3 4 5 6 7 8 9 10 11 12 13 14 15 16 17 18 19 20 21 22 23 24 25 26 27 28 29 30 31 32 33 34 35 36 37 38 39 40 41 42 43 44 45 46 47 48 49 50 | -- Create a SQL structure. CREATE OR REPLACE TYPE dependent_type_obj IS OBJECT ( dependent_type VARCHAR2(10) , type_name VARCHAR2(30)); / -- Create a SQL collection of a user-defined data structure. CREATE OR REPLACE TYPE dependent_type_tab IS TABLE OF dependent_type_obj; / -- Create a procedure to discover type dependents. CREATE OR REPLACE FUNCTION type_dependents ( pv_type_name VARCHAR2 ) RETURN dependent_type_tab AUTHID CURRENT_USER IS -- Declare a counter for the collection variable. c NUMBER := 1; -- Declare a return type variable. list DEPENDENT_TYPE_TAB := dependent_type_tab(); -- Declare a parameterized cursor for dependent types. CURSOR find_dependent_types ( cv_type VARCHAR2 ) IS SELECT 'STANDALONE' AS dependent_type , at.type_name FROM all_types at INNER JOIN all_type_attrs ata ON at.type_name = ata.type_name WHERE at.owner = USER AND ata.attr_type_name = UPPER(cv_type) UNION ALL SELECT 'COLLECTION' AS dependent_type , act.type_name FROM all_types at INNER JOIN all_coll_types act ON at.type_name = act.elem_type_name WHERE at.owner = USER AND act.elem_type_name = UPPER(cv_type); BEGIN -- Loop through all returns and add them to the return collection. FOR i IN find_dependent_types(pv_type_name) LOOP list.EXTEND; list(c) := dependent_type_obj(i.dependent_type, i.type_name); c := c + 1; END LOOP; -- Return the list. RETURN list; END type_dependents; / |
You should also make the following grants and synonyms:
GRANT EXECUTE ON system.type_dependents TO PUBLIC; CREATE PUBLIC SYNONYM type_dependents FOR system.type_dependents; GRANT ALL ON system.dependent_type_obj TO PUBLIC; GRANT ALL ON system.dependent_type_tab TO PUBLIC; |
Then, you can call the type_dependents function to find any dependent user-defined data types. If so, you must drop them from the bottom or most specialized straight up the type tree to the root node data type.
SELECT * FROM TABLE(type_dependents('&type_name')); |
Why SELECT-INTO, eh?
Somebody raised the question about writing stored functions while we were discussing scalar subqueries against COMMON_LOOKUP tables. Common look up tables store collections of possible <OPTION> elements. They’re basically generalized tables that contain a set of smaller tables, where the row sets make up a list of unique values.
When you write a function that must return one and only one row, the SELECT-INTO syntax is ideal in Oracle because it automatically raises an exception when the query returns no row or two or more rows. MySQL doesn’t raise an automatic exception when a SELECT-INTO fails to return a row but it does raise an ERROR 1722 when two or more rows are found.
Here are sample implementations written in Oracle’s PL/SQL and MySQL’s SQL/PSM languages. If you’re an Oracle developer and new to MySQL, the biggest oddity may be the delimiter, or it may be the sizing of formal parameters. Hopefully, its not the lack of formal declaration and exception blocks in SQL/PSM. For those coming from MySQL, the OR REPLACE command or dynamic sizing of formal parameter list values are the big changes.
Oracle PL/SQL Function
The Oracle PL/SQL function is very straightforward and helped by pre-defined exceptions for both the no data found and too many rows found errors. Formal parameters inherit their physical size at run time from the calling scope program.
1 2 3 4 5 6 7 8 9 10 11 12 13 14 15 16 17 18 19 20 21 22 23 24 25 26 27 28 29 30 31 32 33 | -- Create or replace existing function with new implementation. CREATE OR REPLACE FUNCTION get_common_lookup_id ( pv_table VARCHAR2 , pv_column VARCHAR2 , pv_type VARCHAR2 ) RETURN NUMBER IS -- Declare a return variable. lv_return NUMBER; BEGIN -- Query data and assign it to a local variable. SELECT common_lookup_id INTO lv_return FROM common_lookup WHERE common_lookup_table = pv_table AND common_lookup_column = pv_column AND common_lookup_type = pv_type; -- Return the value found. RETURN lv_return; EXCEPTION -- Handle errors. WHEN NO_DATA_FOUND THEN RAISE; WHEN TOO_MANY_ROWS THEN RAISE; END; / |
MySQL SQL/PSM Function
The lack of an implicitly raised exception when a SELECT-INTO structure fails to return a row adds several steps to a SQL/PSM function. You must define a custom exception and an if-block to raise the exception, which is trigger by returning a null value into the lv_return local variable.
1 2 3 4 5 6 7 8 9 10 11 12 13 14 15 16 17 18 19 20 21 22 23 24 25 26 27 28 29 30 31 32 33 34 35 36 37 38 39 40 41 | /* Conditionally drop the function before trying to create it. */ DROP FUNCTION IF EXISTS get_common_lookup_id; /* Change the delimiter to write a stored procedure into the database. */ DELIMITER $$ /* Create a function that replaces a scalar subquery. */ CREATE FUNCTION get_common_lookup_id ( pv_table VARCHAR(30) , pv_column VARCHAR(30) , pv_type VARCHAR(30)) RETURNS INT UNSIGNED BEGIN /* Declare a return variable. */ DECLARE lv_return INT UNSIGNED; /* Declare a local variable for a subsequent handler. */ DECLARE no_data_found CONDITION FOR SQLSTATE '99001'; /* Query data and assign it to a local variable. */ SELECT common_lookup_id INTO lv_return FROM common_lookup WHERE common_lookup_table = pv_table AND common_lookup_column = pv_column AND common_lookup_type = pv_type; /* The local variable is only null when no rows are returned by the implicit cursor. */ IF lv_return IS NULL THEN SIGNAL no_data_found SET MESSAGE_TEXT = 'Result was no rows found.'; END IF; /* Return the value found. */ RETURN lv_return; END; $$ /* Reset the delimiter to the default to run other programs. */ DELIMITER ; |
Hope this help solve your problems.
Oracle Legacy Workaround
We had a discussion today about how you can manage legacy code that you can’t change. For example, how do you access a PL/SQL function in PHP that returns a PL/SQL table of record structures? PL/SQL tables, index-by tables, or associate arrays are one in the same dependent on the release documentation. They’ve been available since Oracle 7.3 (roughly 15+ years).
You’ve a handful of solutions but I think the best is to wrap it in a Pipelined Table function (more on that in this older post). Here’s an example of such a package, wrapper function, and PHP program calling the wrapper function (command-line only PHP sample code).
Let’s say you have the following type of legacy package specification and body:
1 2 3 4 5 6 7 8 9 10 11 12 13 14 15 16 17 18 19 20 21 22 23 24 25 26 27 28 29 30 31 32 33 34 35 36 37 38 39 40 41 42 43 44 45 46 47 48 49 50 51 52 53 54 55 56 57 58 | -- Create the package specification. CREATE OR REPLACE PACKAGE lib IS /* Define a record structure. */ TYPE movie_title_record IS RECORD ( title VARCHAR2(60) , subtitle VARCHAR2(60)); /* Define an associative array of a package record structure. */ TYPE movie_title_table IS TABLE OF movie_title_record INDEX BY BINARY_INTEGER; /* Define a prototype of a package function. */ FUNCTION get_movie ( pv_title VARCHAR2 ) RETURN lib.movie_title_table; END lib; / -- Create the package body. CREATE OR REPLACE PACKAGE BODY lib IS /* Implement the package function. */ FUNCTION get_movie ( pv_title VARCHAR2 ) RETURN lib.movie_title_table IS /* Declare a counter variable. */ lv_counter INTEGER := 1; /* Declare an instance of the package nested table and initialize it. */ lv_table LIB.MOVIE_TITLE_TABLE := lib.movie_title_table(); /* Define a parameterized cursor to read values from the ITEM table. */ CURSOR c ( cv_partial_title VARCHAR2 ) IS SELECT i.item_title , i.item_subtitle FROM item i WHERE i.item_title LIKE '%'||cv_partial_title||'%'; BEGIN /* Read the contents of the parameterized cursor. */ FOR i IN c (pv_title) LOOP /* Extend space, assign values from the cursor to the record structure of the nested table, and increment counter. */ lv_table.EXTEND; lv_table(lv_counter) := i; lv_counter := lv_counter + 1; END LOOP; /* Return PL/SQL-scope nested table. */ RETURN lv_table; END get_movie; END lib; / |
You can wrap the lib package’s get_movie function with a schema-level function provided you convert the older associative array to a PL/SQL-scope nested table. You can do that in two steps. The first requires that you create a wrapper package specification, like the following example. The second step requires you to write a conversion wrapper function, shown later.
The table is dependent on the named record structure from the lib, and as such the packages are now tightly coupled. This is not uncommon when you can’t fix a vendors legacy code set.
1 2 3 4 5 6 7 | CREATE OR REPLACE PACKAGE wlib IS /* Define a nested table of a package record structure. */ TYPE movie_title_table IS TABLE OF lib.movie_title_record; END wlib; / |
The wrapper function also converts the Oracle Database 7.3 forward data type to an Oracle Database 8.0.3 data type, and then pipes it into a SQL aggregate table. SQL aggregate tables are valid call parameters in the SQL-context. The TABLE function converts the collection of record structures into an inline view or derived table, as you’ll see a little farther along.
You should note that the return type of this function differs from the original package-level get_movie function. The former uses an associative array defined in the lib, while the latter uses a nested table defined in the wlib package.
1 2 3 4 5 6 7 8 9 10 11 12 13 14 15 16 17 18 19 20 21 22 23 24 | CREATE OR REPLACE FUNCTION get_movie ( pv_title VARCHAR2 ) RETURN wlib.movie_title_table PIPELINED IS /* Define a PL/SQL-scope associative array (Available Oracle 7.3). */ lv_table_source LIB.MOVIE_TITLE_TABLE; /* Define a PL/SQL-scope nested table (Available Oracle 8.0.3). */ lv_table_target WLIB.MOVIE_TITLE_TABLE := wlib.movie_title_table(); BEGIN /* Assign the results of a PL/SQL-scope call to the package function. */ lv_table_source := lib.get_movie(dbms_assert.simple_sql_name(pv_title)); /* Read the contents of the PL/SQL-scope nested table into a PIPE ROW. */ FOR i IN 1..lv_table_source.COUNT LOOP lv_table_target.EXTEND; lv_table_target(i) := lv_table_source(i); PIPE ROW(lv_table_target(i)); END LOOP; END; / |
You can test this exclusively in SQL*Plus with the following formatting and query. The TABLE function translates the returned array into an inline view or derived table for processing.
-- Format columns for display with SQL*Plus. COLUMN title FORMAT A20 HEADING "Movie Title" COLUMN subtitle FORMAT A20 HEADING "Movie Subtilte" -- Select the contents of the schema-level function in a SQL-context. SELECT * FROM TABLE(get_movie('Star')); |
If you’re using my sample code from the Oracle Database 11g PL/SQL Programming book, you should see:
Movie Title Movie Subtilte -------------------- -------------------- Star Wars I Phantom Menace Star Wars II Attack of the Clones Star Wars II Attack of the Clones Star Wars III Revenge of the Sith |
The following is a simple command-line PHP program that calls the wrapper function. It calls the wrapper function, which calls the lib.get_movie() function, and it converts the PL/SQL data type from an associative array (Oracle 7.3+ data type) to a nested table (Oracle 8.0.3+ data type). The nested table is defined in the wlib library, which supplements rather than replaces the original lib library.
The last thing that the wrapper function does is transform the associative array result into a nested table before placing it in the pipe (this process is known as a Pipelined Table function). Only nested table and varray data types may be piped into a SQL aggregate table. Then, the external programming language can manage the output as if it were a query.
Here’s the PHP program:
1 2 3 4 5 6 7 8 9 10 11 12 13 14 15 16 17 18 19 20 21 22 23 24 25 26 27 28 29 30 31 32 33 34 35 36 37 38 39 40 41 42 43 44 45 46 47 48 49 50 51 52 53 54 55 56 57 58 59 60 61 62 63 | <?php // Connect to the database. if ($c = oci_connect("student","student","localhost/orcl")) { // Parsing a statement into a digestable SQL statement. $s = oci_parse($c,"SELECT * FROM TABLE(get_movie('Star'))"); // Execute the parsed statement. oci_execute($s,OCI_DEFAULT); // Store control variable for the number of columns returned by the statement. $columns = oci_num_fields($s); // Find the number of columns, loop through them, and write their column name metadata. for ($i = 1; $i <= $columns; $i++) { // Print the column names, also known as field names. print oci_field_name($s,$i); // Define a variable. $line; /* Check whether a variable is declared and pad it. * The numeric literal is for my convenience because the maximum size * of possible returns is known. In a real situation, you'd use the * following str_pad() call: * * str_pad($temp,oci_field_size($s,$i),"-") */ if (!isset($line)) $line .= str_pad($temp,15,"-"); else $line .= " ".str_pad($temp,20,"-"); /* One of the values requires a double tab to line up, otherwise this practice is unwise. */ if ($i < $columns) print "\t\t"; } // Print line return for the header and a line to mimic Oracle SQL*Plus output. print "\n"; print $line .= "\n"; // Process row-by-row data returned when data is returned. while (oci_fetch($s)) { // Process column-by-column data returned for each row. for ($i = 1; $i <= $columns; $i++) { print oci_result($s,$i); if ($i < $columns) print "\t"; } // Print line return for the row of data returned. print "\n"; } // Release resources. oci_close($c); // Explicitly free any resources. oci_free_statement($s); oci_free_cursor($c); } ?> |
Assuming you call this callOracle.php, you can call it from the command-line with this syntax:
php callOracle.php |
It prints, like it would in SQL*Plus:
TITLE SUBTITLE --------------- -------------------- Star Wars I Phantom Menace Star Wars II Attack of the Clones Star Wars II Attack of the Clones Star Wars III Revenge of the Sith |
Hope that helps those working with legacy Oracle code.


