Archive for the ‘Oracle’ Category
Java Generics in Oracle
Somebody posed the question about using a Comparator in the sorting examples provided in this earlier post on Updating Table View Columns (columns using a Varray or Nested Table of a single scalar data type). It seems the individual thought that you can’t use Java Generics inside an Oracle Database 11g’s Java libraries. It’s seems odd since they’ve been around since Java 5.
You can use Generics like those shown in the following example. It builds on explanation from the prior post. If you want to get the whole set of facts click the link above but you should have all the code you need in this post.
An example like this requires you first define a collection of strings in the database. This one uses the following definition:
1 2 | CREATE OR REPLACE TYPE stringlist IS TABLE OF VARCHAR2(4000); / |
This creates the Java library source, and line 21 shows the use of Generics in the instantiation of a anonymous Comparator class:
1 2 3 4 5 6 7 8 9 10 11 12 13 14 15 16 17 18 19 20 21 22 23 24 25 26 27 28 29 30 31 32 33 34 35 36 37 38 39 40 41 42 43 44 45 46 47 48 | CREATE OR REPLACE AND COMPILE JAVA SOURCE NAMED "SortList" AS // Import required classes. import java.io.*; import java.security.AccessControlException; import java.sql.*; import java.util.Arrays; import java.util.Comparator; import oracle.sql.driver.*; import oracle.sql.ArrayDescriptor; import oracle.sql.ARRAY; // Define class. public class Sorting { public static ARRAY sortTitleCaseList(oracle.sql.ARRAY list) throws SQLException, AccessControlException { // Convert Oracle data type to Java data type. String[] unsorted = (String[])list.getArray(); // Sort elements. Arrays.sort(unsorted, new Comparator<String>() { public int compare(String s1, String s2) { // Declare a sorting key integer for the return value. int sortKey; // Check if lowercase words match and sort on first letter only. if (s1.toLowerCase().compareTo(s2.toLowerCase()) == 0) sortKey = s1.substring(0,1).compareTo(s2.substring(0,1)); else sortKey = s1.toLowerCase().compareTo(s2.toLowerCase()); // Return the sorting index. return sortKey; }}); // Define a connection (this is for Oracle 11g). Connection conn = DriverManager.getConnection("jdbc:default:connection:"); // Declare a mapping to the schema-level SQL collection type. ArrayDescriptor arrayDescriptor = new ArrayDescriptor("STRINGLIST",conn); // Translate the Java String{} to the Oracle SQL collection type. ARRAY sorted = new ARRAY(arrayDescriptor,conn,((Object[])unsorted)); // Return the sorted list. return sorted; } } / |
The PL/SQL wrapper for this class would be:
1 2 3 4 | CREATE OR REPLACE FUNCTION sortTitleCaseList(list STRINGLIST) RETURN STRINGLIST IS LANGUAGE JAVA NAME 'Sorting.sortNaturalCaseList(oracle.sql.ARRAY) return oracle.sql.ARRAY'; / |
You can test the code with the following query:
1 2 | SELECT column_value FROM TABLE(sortTitleCaseList(stringlist('Oranges','apples','Apples','Bananas','Apricots','apricots'))); |
It sorts the strings based on a title case sort, like:
COLUMN_VALUE ------------------------ Apples apples Apricots apricots Bananas Oranges 6 rows selected. |
If you want a quick example of a Generic Collection sort operation outside of the database, here a sample file.
1 2 3 4 5 6 7 8 9 10 11 12 13 14 15 16 17 18 19 20 21 22 23 24 25 26 27 28 29 30 31 32 33 34 35 36 37 38 39 40 41 42 43 44 45 46 47 | // Import required classes. import java.util.Arrays; import java.util.Comparator; /** * An example of using a Comparator sort. */ public class SortStaticString { /* * Sort the instance array. */ public static String[] sortTitleCaseList(String[] list) { // Sort elements by title case. Arrays.sort(list, new Comparator<String>() { public int compare(String s1, String s2) { // Declare a sorting key integer for the return value. int sortKey; // Check if lowercase words match and sort on first letter only. if (s1.toLowerCase().compareTo(s2.toLowerCase()) == 0) sortKey = s1.substring(0,1).compareTo(s2.substring(0,1)); else sortKey = s1.toLowerCase().compareTo(s2.toLowerCase()); // Return the sorting index. return sortKey; }}); // Return the sorted Index. return list; } /* * Test case. */ public static void main(String[] args) { // Construct and instance and apply sort method. args = SortStaticString.sortTitleCaseList(args); // Print the title case sorted list. for (int i = 0; i < args.length; i++) { System.out.println(args[i]); } } } |
You would call the SortStaticString class as follows:
java SortStaticString apples Oranges Pears Apples orange Grapefruit |
I hope this helps the interested party and any others looking for a sample file. 😉
Oracle 11gR2 on Windows 7
Here are step-by-step instructions for installing Oracle Database 11g Release 2 on Windows 7 (Oracle 12c is here). It’s provided in response to questions posted on my step-by-step instructions for installing Oracle 11gR1 on Windows 7. For reference, I posted the former because it didn’t work without intervention. I hadn’t updated step-by-step instructions because Oracle Database 11g Release 2 has always worked for me when installing on Windows 7.
A number of students and blog readers have mentioned that it didn’t work for them. My guess is that they had configuration issues within the Windows 7 environment. There are some Windows 7 configuration caveats before you perform this installation, and they are:
Windows 7 Configuration Steps
- Make sure you have at least 3 GB of memory on your Windows PC, or that you can allocate 4 GB of memory to your virtual machine (the latter typically requires 8 GB of real memory to avoid extensive disk caching of memory).
- Install Oracle’s SJDK and run time for Java 6 or 7 on Windows 7 (I installed Java 7). Although either work with the database, you need the Java 6 SDK 32-bit version (at least SJDK 1.6.0_4) for Oracle SQL Developer. This means you need to download the 32-bit version even when you’re installing the 64-bit Oracle Database 11g version. The SQL Developer fix is found in this blog post.
- Disable Microsoft’s User Access Controls (UAC). I blogged about a set of Windows 7 gripes, and the second point shows you the screen shots that let you disable UAC on Windows 7.
- Configure your
C:\Windows\System32\drivers\etc\hostsfile. Use lines 1 through 3 when you’re using a DHCP IP address, and lines 1 through 4 when you’re using a static IP address. If you want to set a static IP address, check this old post on how to set a static IP address. Please note that thehostnameneeds to be lowercase.
1 2 3 4 | 127.0.0.1 localhost
::1 localhost
127.0.0.1 mclaughlinmysql mclaughlinmysql.techtinker.com
172.26.126.131 mclaughlinmysql mclaughlinmysql.techtinker.com |
- Create a user account name that doesn’t have a white space, like
McLaughlinMin the screen shots, and assign it Administrator privileges. - The Oracle Enterprise Manager (OEM) uses port ranges above 5,000, which according to Microsoft requires that you set
MaxUserPortkey in the Windows Registry. You can find more details at this Microsoft Support page. Personally, I haven’t found this necessary and after adding it to please somebody without setting it everything ran fine in Windows 7.
Registry key: HKEY_LOCAL_MACHINE\SYSTEM\CurrentControlSet\Services\Tcpip\Parameters
| Value Name | MaxUserPort |
| Value Type | DWORD |
| Value Data | 65534 |
| Value Range | 5000-65534 (decimal) |
| Value Default | 0x1388 (5000 decimal) |
| Description | This parameter controls the maximum port number that is used when a program requests any available user port from the system. Typically, ephemeral (short-lived) ports are allocated between the values of 1024 and 5000 inclusive. After the release of security bulletin MS08-037, the behavior of Windows Server 2003 was changed to more closely match that of Windows Server 2008 and Windows Vista. For more information about Microsoft security bulletin MS08-037 |
Oracle 11g Release 2 Installation Steps
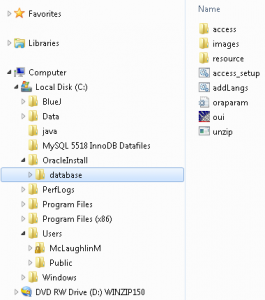
- The Oracle Database 11g Release 2 files are broken down into two zip files on the Oracle site. That means you need to download both files, and then expand them into an installation directory. I called my installation directory
C:\OracleInstall, but you can call it whatever works for you. Here’s a screen shot of the directory after expanding both compressed files (done with WinZip 15).
database directory (or folder). Within the installation folder (C:\OracleInstall\database), you double click on the oui icon to launch (start) the Oracle Universal Installer. It’ll open a command prompt that may dwell on the screen for a few seconds up to maybe fifteen seconds.
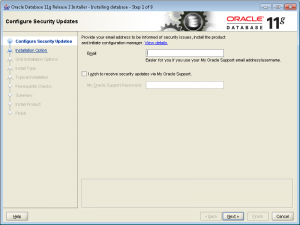
- It’s a good idea to provide an email address for security updates no matter what. You can uncheck the box if you don’t want updates via Oracle Support Services. Click the Next button to continue.
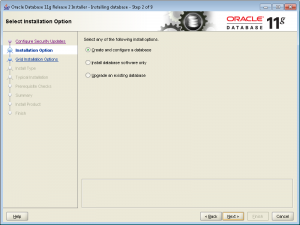
- Most developers want to Create and configure a database. If that’s your desire, leave the default radio button checked. Click the Next button to continue.
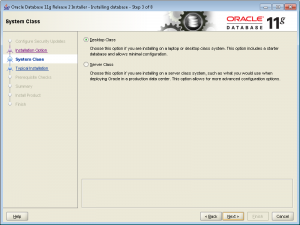
- Most developers install their test instance on a desktop or laptop. If that’s your desire, leave the default Desktop Class radio button checked. Click the Next button to continue.
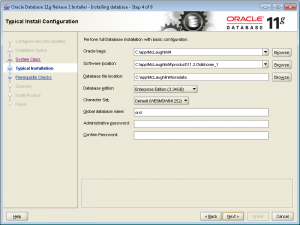
- These are default settings and generally the easiest to use. I’d suggest you change the Character Set drop down to Unicode. Then, enter a password twice. Oracle requires that you use at least one capital letter and one number in a 6 character or more long password. Click the Next button to continue.
- The next screen is a progress bar that checks for prerequisites. You shouldn’t have to do anything here because it automatically advances you to the next dialog screen. This generally takes less than a minute to run but can take two or so. If you’re much beyond 3 minutes there may be a resource problem with your Windows PC or virtual machine.
- This shows you all the selected values for the installation. Unless you want to abort the installation, click the Finish button to proceed.
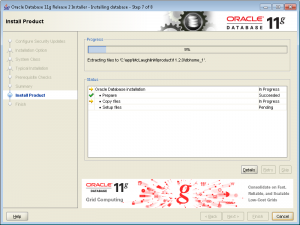
- This screen is the main progress bar, and you’ll be here somewhere between 5 and 10 minutes. The downside is that there are some dialogs that will popup during this phase and you need to authorize them, so it’s a bad time to take a break.
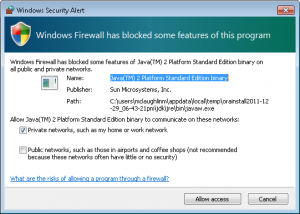
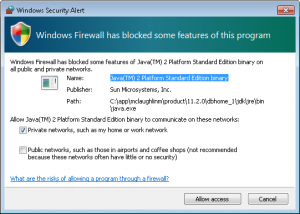
- The first popup screen requires you to authorize the Java runtime to call home. You should click the Allow Access button to proceed.
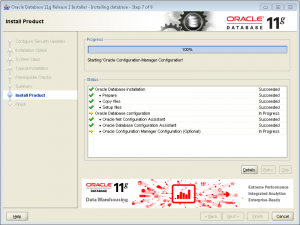
- When the progress bar starts configuring the instance, failures can occur. The first may occur during the network configuration, which typically happens if you didn’t preconfigure the
hostsfile. You don’t need to do anything but watch here unless the installer triggers an error.
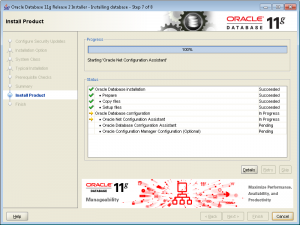
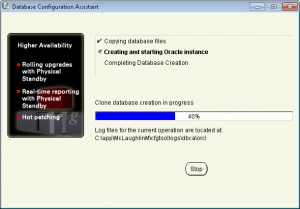
- The following progress bar is launched by the Oracle Database Configuration Assistant. It typically runs without a problem. You don’t need to do anything but watch here unless the installer triggers an error. This takes a few minutes, and unfortunately requires you to stick aroung to again authorize Java.
- The second popup screen requires you to authorize the Java runtime to call home. You should click the Allow Access button to proceed.
- The third and last popup screen asks you to whether you want to open other scheme. Generally, you should click the OK button to proceed.
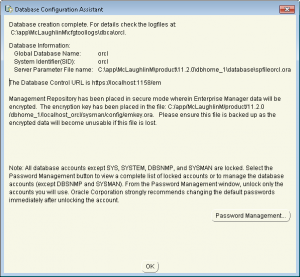
- The next dialog shows you that the network and database instances are configured. It’s also running the OEM (Oracle Enterprise Manager) installation. You can wait here but it won’t be a long wait.
- This is the last dialog and says you’ve installed Oracle Database 11g Release 2 successfully. You can the Close button to complete the installation.
The next step is probably running Oracle Enterprise Manager (OEM). I’ve recently added this post, which arose from a question. It shows you how to run the DB Console.
Also, it’s possible that you could have a problem launching SQL Developer. If so, check how to set the proper JVM for SQL Developer post.
As always, I hope this helps folks.
Updating Table View Columns
Answering a reader’s question: How can you sort data inside an Oracle table view column? This blog post shows you how to perform the trick, but for the record I’m not a fan of nested tables. A table view column is an Oracle specific user-defined type (UDT), and is nested table or varray of a scalar data type.
Oracle’s assigned a formal name to this type of UDT. It’s now labeled an Attribute Data Type (ADT). The ADT doesn’t allow you to update nested elements outside of PL/SQL program units.
This blog post reviews table view columns, and extends concepts from Oracle Database 11g & MySQL 5.6 Developer Handbook (by the way virtually everything in the book is relevant from MySQL 5.1 forward). It demonstrates how you can use PL/SQL user-defined functions (UDFs) to supplement the SQL semantics for updating nested tables, and then it shows how you can reshuffle (sort) data store the sorted data in table view columns.
Before you implement table view columns, you should answer two design questions and one relational modeling principal. You should also understand that this direction isn’t portable across database implementations. It currently supported fully by the Oracle database and mostly by PostgreSQL database. You can find how to join nested tables helpful in understanding the UPDATE statements used in this posting, and this earlier post on UPDATE and DELETE statements.
Design Questions:
- Should you implement full object types with access methods in PL/SQL? The object type solution says there is no value in the nested data outside of the complete object. While choosing the table view column solution says that there is value to just implementing a nested list without element handling methods.
- Should you embed the elements in an XML_TYPE? An XML solution supports hierarchical node structures more naturally, like when you only access child nodes through the parent node. While choosing the table view column solution says that you want to avoid the XML Software Development Kit and that the data set is small and more manageable in a table view column.
Design Principle:
- Should you implement an ID-dependent relational modeling concept? An ID-dependent model replaces the primary and foreign keys with the relative position of parent and child elements. This is the design adopted when you choose a table view column, and it is more complex than single subject relational tables.
You should note that table view columns are inherently static at creation. You must also update the entire nested table view column when using Oracle SQL. Oracle SQL does let you modified attributes of object types in nested tables, as qualified in my new book (page 252).
Any attempt to modify a table view column element in SQL raises an ORA-25015 error. The error message states that (you) cannot perform DML on this nested TABLE VIEW COLUMN.
You can update the table view column value by replacing it with a new collection, and that’s done with a PL/SQL function. This type of function preserves the ordered list in the table view column by finding and replacing an element in the collection.
Unfortunately, developers who use nested tables typically design table view columns with an internal ordering scheme. That means the collection is ordered during insert or update. This type of design relies on the fact that you can’t change the order without re-writing the stored structure.
While common for those you use these, it is a bad practice to rely on the ordering of elements in a collection. At least, it’s a bad practice when we’re trying to work within the relational model. All that aside, here’s how you ensure element updates while preserving element position:
1 2 3 4 5 6 7 8 9 10 11 12 13 14 15 16 17 18 19 20 21 22 23 24 25 26 | CREATE OR REPLACE FUNCTION update_collection ( old_element_collection STREET_LIST , old_element_value VARCHAR2 , new_element_value VARCHAR2 ) RETURN STREET_LIST IS -- Declare and initial a new counter. lv_counter NUMBER := 1; -- Declare local return collection variable. lv_element_collection STREET_LIST := street_list(); BEGIN FOR i IN 1..old_element_collection.COUNT LOOP IF NOT old_element_collection(i) = old_element_value THEN lv_element_collection.EXTEND; lv_element_collection(lv_counter) := old_element_collection(i); ELSE lv_element_collection.EXTEND; lv_element_collection(lv_counter) := new_element_value; END IF; lv_counter := lv_counter + 1; END LOOP; RETURN lv_element_collection; END update_collection; / |
Then, you can use the user-defined function (UDF) inside a SQL UPDATE statement, like this:
1 2 3 4 5 6 | UPDATE TABLE (SELECT e.home_address FROM employee e WHERE e.employee_id = 1) e SET e.street_address = update_collection(e.street_address, 'Suite 525','Suite 522') , e.city = 'Oakland' WHERE e.address_id = 1; |
The UPDATE_COLLECTION function replaces Suite 525 with Suite 522, and preserves the sequence of elements in a new nested table. The UPDATE statement assigns the modified nested table to the table view column. You can find the code to create the employee table in Chapter 6 (pages 148-149), and the code to insert the default data in Chapter 8 (page 229) of Oracle Database 11g & MySQL 5.6.
The lv_counter variable could be replaced with a reference to the for loop’s iterator (i) because the counts of both collections are the same. I opted for the local variable to make the code easier to read.
While common for those you use these, it is a bad practice to rely on the ordering of elements in a collection. At least, it’s a bad practice when we’re trying to work within the relational model. Along the same line of thought, you also have the ability of removing elements from a table view column with a similar PL/SQL function. You could write the function like this:
1 2 3 4 5 6 7 8 9 10 11 12 13 14 15 16 17 18 19 20 21 22 23 | CREATE OR REPLACE FUNCTION delete_from_collection ( old_element_collection STREET_LIST , old_element_value VARCHAR2 ) RETURN STREET_LIST IS -- Declare and initial a new counter. lv_counter NUMBER := 1; -- Declare local return collection variable. lv_element_collection STREET_LIST := street_list(); BEGIN FOR i IN 1..old_element_collection.COUNT LOOP IF NOT old_element_collection(i) = old_element_value THEN lv_element_collection.EXTEND; lv_element_collection(lv_counter) := old_element_collection(i); lv_counter := lv_counter + 1; END IF; END LOOP; RETURN lv_element_collection; END delete_from_collection; / |
Then, you can use the user-defined function (UDF) to delete an element from the collection inside a SQL UPDATE statement, like this:
1 2 3 4 5 6 | UPDATE TABLE (SELECT e.home_address FROM employee1 e WHERE e.employee_id = 1) e SET e.street_address = delete_from_collection(e.street_address,'Suite 522') , e.city = 'Oakland' WHERE e.address_id = 1; |
After understanding all that, let’s examine how you sort data in a nested table or varray of a scalar data type (the basis of a table view column). The easiest way is a BULK COLLECT INTO statement nested inside a function, like this:
1 2 3 4 5 6 7 8 9 10 11 12 13 14 15 16 17 18 19 | CREATE OR REPLACE FUNCTION sort_collection ( old_element_collection STREET_LIST) RETURN STREET_LIST IS -- Declare and initial a new counter. lv_counter NUMBER := 1; -- Declare local return collection variable. lv_element_collection STREET_LIST := street_list(); BEGIN -- Sort a collection alphabetically based on case sensitivity. SELECT column_value BULK COLLECT INTO lv_element_collection FROM TABLE(old_element_collection) ORDER BY column_value; RETURN lv_element_collection; END sort_collection; / |
You could test it with this:
1 2 | SELECT column_value FROM TABLE(sort_collection(street_list('Adams', 'Lewis', 'Clark', 'Fallon'))); |
Then, you can use the user-defined function (UDF) to update a table view column like this:
1 2 3 4 5 6 | UPDATE TABLE (SELECT e.home_address FROM employee1 e WHERE e.employee_id = 1) e SET e.street_address = sort_collection(e.street_address) , e.city = 'Oakland' WHERE e.address_id = 1; |
The funny thing about database solutions these days is that some Java developers don’t appreciate the simplicity of SQL and PL/SQL and would solve the problem with Java. Especially, if it was an case insensitive sort operation. That’s the hard way (easy way at the bottom), but I figured it should be thrown in because some folks think everything is generic if written in Java. Though, I thought making it proprietary would increase the irony and wrote it as a Java library for Oracle.
Here’s the Java library, which you can run from the SQL*Plus command line, SQL Developer, or that pricey Toad:
1 2 3 4 5 6 7 8 9 10 11 12 13 14 15 16 17 18 19 20 21 22 23 24 25 26 27 28 29 30 31 | CREATE OR REPLACE AND COMPILE JAVA SOURCE NAMED "SortOracleList" AS // Import required classes. import java.io.*; import java.security.AccessControlException; import java.sql.*; import java.util.Arrays; import oracle.sql.driver.*; import oracle.sql.ArrayDescriptor; import oracle.sql.ARRAY; // Define class. public class DemoSort { public static ARRAY getList(oracle.sql.ARRAY list) throws SQLException, AccessControlException { // Convert Oracle data type to Java data type. String[] unsorted = (String[])list.getArray(); // Sort elements. Arrays.sort(unsorted, String.CASE_INSENSITIVE_ORDER); // Define a connection (this is for Oracle 11g). Connection conn = DriverManager.getConnection("jdbc:default:connection:"); // Declare a mapping to the schema-level SQL collection type. ArrayDescriptor arrayDescriptor = new ArrayDescriptor("STRINGLIST",conn); // Translate the Java String{} to the Oracle SQL collection type. ARRAY sorted = new ARRAY(arrayDescriptor,conn,((Object[])unsorted)); return sorted; }} / |
Then, you write the PL/SQL wrapper like this:
1 2 3 4 | CREATE OR REPLACE FUNCTION sortTable(list STRINGLIST) RETURN STRINGLIST IS LANGUAGE JAVA NAME 'DemoSort.getList(oracle.sql.ARRAY) return oracle.sql.ARRAY'; / |
You could test the case insensitive sort with this:
1 2 | SELECT column_value FROM TABLE(sort_collection(street_list('Adams', 'adams', 'Lewis', 'Clark', 'Fallon'))); |
Naturally, it ignores the fact you could do it like this without Java by using the UPPER function in the purely PL/SQL SORT_COLLECTION function shown earlier in this post:
12 13 14 15 | -- Sort a collection alphabetically based on case insensitive comparison. SELECT column_value BULK COLLECT INTO lv_element_collection FROM TABLE(old_element_collection) ORDER BY UPPER(column_value); |
Anyway, it’s a bunch of thoughts about writing solutions for table view columns. Hope it helps those interested in nested tables.
Set up Gnome for Oracle
Back in September, I showed how to setup Oracle Database 11g XE on Fedora. It was straightforward more or less, but tonight I ran into a problem while working with the Oracle Stop Database menu option. When I selected it form the menu, I got the user must be in the DBA OS group to stop the database.
Since the database started automatically on boot and shutdown when closing the operating system, I missed this nuance in the setup. The screen shot for the error is:
Oracle Database 11g XE automatically creates an oracle user with a dba group. While the mclaughlinm user was in the wheel group and an authorized sudoer, the mclaughlinm user needed to also be in the dba group. That’s more tricky in Fedora 15 and 16 because they’ve removed the System menu and the options that let you install and modify users.
Here are the steps to add your user to the dba group. Open a terminal session, and launch the User Manager application with the following command:
system-config-users |
You have to enter the root password to get this to work. Then, it launches the User Manager application. Click on the target user, and click the Properties button.
The User Manager application launches the User Properties dialog. Click on the Groups tab.
Scroll in the groups list to the dba group. Click the checkbox for the dba group and the OK button.
Now, you’ll be able to navigate to through the menu to Stop Database to shutdown and Start Database to restart the Oracle database.
Hope this helps a few folks.
Excel-Oracle ODBC Driver
Somebody was trying to query Oracle via Microsoft Excel 2007, and didn’t have an Oracle ODBC Data Source that enable them to choose Oracle. I’d referred them to this post on adding MySQL’s ODBC driver to Windows 7 but that didn’t help enough. Posting this screen shot may not have helped either.
It appears I assumed too, like everyone would know that it’s on Windows 7 when Oracle 11g (or another Oracle database) is installed locally. The person who posed the question doesn’t have Oracle installed locally and can’t install it.
For those who don’t have an Oracle instance running locally, you can download the Oracle Data Access Components for Windows from the Oracle web site. It’s in the driver sections, as shown in the screen capture below:
This driver contains the necessary OLE DB and ODBC drivers, as you can see in this screen shot.
Once you’ve downloaded it, you can return to this post where you set up an Excel query against a remote Oracle database. You should take note that Microsoft’s future direction adopts Oracle ODBC, like the approach they’ve chosen with MySQL’s ODBC driver. As always, I hope this helps.
Oracle SQL Tuning Example
Somebody wanted a post on SQL statement tuning, so here it is. SQL statement tuning requires that you understand table definitions, constraints, and indexes plus how they interact through joins before you can begin tuning. Oracle presents some of the most advanced tools for tuning SQL statements.
This example works through a demonstration of tuning one statement with multiple joins. The key elements of tuning any SQL statements is understanding the table structures and data. The key worry about tuning is that optimizing for a query can harm the effectiveness of OLTP processing by slowing the performance of INSERT and UPDATE statements. Any DML statement that adds or modifies data in tables also modifies indexes built to support queries against the table.
Oracle
You have two approaches in an Oracle database. The old way and the new way. They’re really not that different but the DBMS_XPLAN package provides a richer set of analytical data for less work.
The old way and the new way both use a single way for generating the SQL execution plan. You do that with the EXPLAIN PLAN statement.
The EXPLAIN PLAN statement is followed by a SET operator. You use the SET operator to assign a value to the STATEMENT_ID column. This is a column that uniquely identifies statements in the PLAN_TABLE. You must ensure that all STATEMENT_ID values are unique, or you’ll get incorrect results when you analyze plans. There’s no constraint that magically does this for you. After you set the statement identifier, you use the FOR keyword before the statement that you want to analyze.
An example query follows below:
1 2 3 4 5 6 7 8 9 10 11 12 13 14 15 16 17 18 19 20 21 | EXPLAIN PLAN SET STATEMENT_ID = '&input' FOR SELECT DISTINCT r.rental_id , c.contact_id , tu.check_out_date AS check_out_date , tu.return_date AS return_date , 3 AS created_by , TRUNC(SYSDATE) AS creation_date , 3 AS last_updated_by , TRUNC(SYSDATE) AS last_update_date FROM member m INNER JOIN contact c ON m.member_id = c.member_id INNER JOIN transaction_upload tu ON c.first_name = tu.first_name AND NVL(c.middle_name,'x') = NVL(tu.middle_name,'x') AND c.last_name = tu.last_name AND tu.account_number = m.account_number LEFT JOIN rental r ON c.contact_id = r.customer_id AND tu.check_out_date = r.check_out_date AND tu.return_date = r.return_date; |
After you explain a statement, you need to analyze it. Oracle uses hierarchical queries to analyze them. The following is a simple script that lets you display the execution plan by nesting the levels of the explained plan.
Here’s where you chose to follow the old or new way. Click on the link below to see the old way if you’re interested but I’d suggest you use the new way.
Oracle’s Old Fashioned Way ↓
This sections shows the old way of analyzing explain plans.
The first step after you’ve explained the statement, is to analyze it. The following query performs that analysis and returns the cost of the join. More information is available with the DBMS_XPLAN package. You can also extend this to get more information from the PLAN_TABLE but it’s a lot of work that’s already done for you.
It’s nice to see the mechanics of how this analysis is performed, and that’s why this is in the post. This uses Oracle’s hierarchical query mechanism.
1 2 3 4 5 6 7 8 9 10 11 12 13 14 15 16 17 18 19 20 21 22 23 24 25 26 27 28 29 30 31 32 33 34 35 36 37 38 39 40 41 42 43 44 45 | -- Clear any reporting breaks, columns, or computing. CLEAR BREAKS CLEAR COLUMNS CLEAR COMPUTES -- Set environment to capture explained plan. SET FEEDBACK OFF SET NULL "" SET LINESIZE 120 SET PAGESIZE 9999 SET PAUSE OFF SET VERIFY OFF -- Override default substitution variable prompt. ACCEPT input1 PROMPT "What do you want as a statement ID? " -- Format the Query Plan based on a 120 character length. COL c1 FORMAT A80 HEADING 'Query Plan' -- Spool it to file. SPOOL explain_it.log -- Create the hierarchy of the join plan. SELECT LPAD(' ',2*(LEVEL-1)) || operation||' ' || options||' ' || object_name||' ' || DECODE(id,0,'Cost = '||POSITION) "Query Plan" FROM plan_table START WITH id = 0 AND statement_id = '&input1' CONNECT BY PRIOR id = parent_id AND statement_id = '&input1'; -- Reset operating environment to default. SET FEEDBACK ON SET NULL "<Null>" SET LINESIZE 80 SET PAGESIZE 999 SET VERIFY ON -- Close output file. SPOOL OFF |
Assuming you entered Query1 as the input response to the EXPLAIN PLAN statement and you name the query above explain_it.sql, then you’d call it with the following syntax:
1 2 | @explain_it.sql What do you want AS a statement ID? Query1 |
The query starts at the top-most node aligned to the left. Each level down the node shifts two spaces in to the right. You start moving out of the process when the indenting reverses. It would generate an output file like the following:
1 2 3 4 5 6 7 8 9 10 11 12 | Query Plan
--------------------------------------------------------------------------------
SELECT STATEMENT Cost = 34
HASH UNIQUE
HASH JOIN OUTER
VIEW
NESTED LOOPS
HASH JOIN
TABLE ACCESS FULL MEMBER
TABLE ACCESS FULL CONTACT
INDEX RANGE SCAN IMPORT_DATE_RANGE
TABLE ACCESS FULL RENTAL |
This tells you that the join isn’t cheap from a system resource standpoint. You can improve the query by creating indexes. Those steps are shown using the new method.
Oracle’s New Way
Oracle’s new way uses the DBMS_XPLAN package. In this post, you’ll examine only how to display results and check the impact of small changes that lead to improved query performance.
Assuming you entered Query1 as the &input response to the EXPLAIN PLAN statement above, then you’d call it with the following syntax:
1 2 3 4 5 6 7 8 | -- Expand the width of displayed output. SET LINESIZE 120 -- Query using the TABLE function that returns a user-defined object type (UDT) -- into a SQL aggregate table, which is a fancy word for normal SQL output -- (unfortunately, it's the technically accurate word). SELECT * FROM TABLE(dbms_xplan.display(NULL,'Query1')); |
The query using the DISPLAY function of the DBMS_XPLAN returns a table of data. It should generate an output stream like the following:
1 2 3 4 5 6 7 8 9 10 11 12 13 14 15 16 17 18 19 20 21 22 23 24 25 26 27 28 29 30 31 32 33 34 | PLAN_TABLE_OUTPUT
----------------------------------------------------------------------------------------------------------
Plan hash value: 3289798709
-----------------------------------------------------------------------------------------------------
| Id | Operation | Name | Rows | Bytes | Cost (%CPU)| Time |
-----------------------------------------------------------------------------------------------------
| 0 | SELECT STATEMENT | | 229 | 24274 | 50 (8)| 00:00:01 |
| 1 | HASH UNIQUE | | 229 | 24274 | 50 (8)| 00:00:01 |
|* 2 | HASH JOIN OUTER | | 229 | 24274 | 49 (7)| 00:00:01 |
| 3 | VIEW | | 4 | 248 | 37 (6)| 00:00:01 |
|* 4 | HASH JOIN | | 4 | 572 | 37 (6)| 00:00:01 |
|* 5 | HASH JOIN | | 15 | 1230 | 7 (15)| 00:00:01 |
| 6 | TABLE ACCESS FULL | MEMBER | 9 | 180 | 3 (0)| 00:00:01 |
| 7 | TABLE ACCESS FULL | CONTACT | 15 | 930 | 3 (0)| 00:00:01 |
| 8 | EXTERNAL TABLE ACCESS FULL| TRANSACTION_UPLOAD | 8168 | 486K| 30 (4)| 00:00:01 |
| 9 | TABLE ACCESS FULL | RENTAL | 4689 | 201K| 11 (0)| 00:00:01 |
-----------------------------------------------------------------------------------------------------
Predicate Information (identified by operation id):
---------------------------------------------------
2 - access("TU"."RETURN_DATE"="R"."RETURN_DATE"(+) AND
"TU"."CHECK_OUT_DATE"="R"."CHECK_OUT_DATE"(+) AND "C"."CONTACT_ID"="R"."CUSTOMER_ID"(+))
4 - access("C"."FIRST_NAME"="TU"."FIRST_NAME" AND
NVL("C"."MIDDLE_NAME",'x')=NVL("TU"."MIDDLE_NAME",'x') AND "C"."LAST_NAME"="TU"."LAST_NAME"
AND "TU"."ACCOUNT_NUMBER"="M"."ACCOUNT_NUMBER")
5 - access("C"."MEMBER_ID"="M"."MEMBER_ID")
Note
-----
- dynamic sampling used for this statement
30 rows selected. |
The first thing to do is move the data immediately from an external table into a production table. You do that with the following command:
1 2 | -- Create a new table from an existing one. CREATE TABLE transaction_uploaded AS SELECT * FROM transaction_upload; |
Truncating the PLAN_TABLE table, is the easiest way to start over by reusing the statement identifiers, like Query1. Then, you can edit your EXPLAIN PLAN script and change TRANSACTION_UPLOAD table reference to TRANSACTION_UPLOADED. Now, the query using the DISPLAY function of the DBMS_XPLAN returns a reduction in cost from 50 to 34.
1 2 3 4 5 6 7 8 9 10 11 12 13 14 15 16 17 18 19 20 21 22 23 24 25 26 27 28 29 30 31 32 33 34 35 | PLAN_TABLE_OUTPUT
--------------------------------------------------------------------------------------------
Plan hash value: 3624831533
--------------------------------------------------------------------------------------------
| Id | Operation | Name | Rows | Bytes | Cost (%CPU)| Time |
--------------------------------------------------------------------------------------------
| 0 | SELECT STATEMENT | | 400 | 42400 | 34 (6)| 00:00:01 |
| 1 | HASH UNIQUE | | 400 | 42400 | 34 (6)| 00:00:01 |
|* 2 | HASH JOIN OUTER | | 400 | 42400 | 33 (4)| 00:00:01 |
| 3 | VIEW | | 7 | 434 | 22 (5)| 00:00:01 |
| 4 | NESTED LOOPS | | 7 | 1001 | 22 (5)| 00:00:01 |
|* 5 | HASH JOIN | | 15 | 1230 | 7 (15)| 00:00:01 |
| 6 | TABLE ACCESS FULL| MEMBER | 9 | 180 | 3 (0)| 00:00:01 |
| 7 | TABLE ACCESS FULL| CONTACT | 15 | 930 | 3 (0)| 00:00:01 |
|* 8 | INDEX RANGE SCAN | IMPORT_DATE_RANGE | 1 | 61 | 1 (0)| 00:00:01 |
| 9 | TABLE ACCESS FULL | RENTAL | 4689 | 201K| 11 (0)| 00:00:01 |
--------------------------------------------------------------------------------------------
Predicate Information (identified by operation id):
---------------------------------------------------
2 - access("TU"."RETURN_DATE"="R"."RETURN_DATE"(+) AND
"TU"."CHECK_OUT_DATE"="R"."CHECK_OUT_DATE"(+) AND
"C"."CONTACT_ID"="R"."CUSTOMER_ID"(+))
5 - access("C"."MEMBER_ID"="M"."MEMBER_ID")
8 - access("TU"."ACCOUNT_NUMBER"="M"."ACCOUNT_NUMBER" AND
"C"."LAST_NAME"="TU"."LAST_NAME" AND "C"."FIRST_NAME"="TU"."FIRST_NAME" AND
NVL("C"."MIDDLE_NAME",'x')=NVL("MIDDLE_NAME",'x'))
Note
-----
- dynamic sampling used for this statement
31 rows selected. |
A downside or quirk of thought, I’m never quite sure but folks look to the bottom not the middle first. Maybe in this case you tackle it first because it’s the attractive inefficiency due to the number of rows returned by a full table scan (most expensive).
You add a unique index that maps to the natural key for the RENTAL table, like this:
1 2 | CREATE UNIQUE INDEX natural_key_rental ON rental (rental_id, customer_id, check_out_date, return_date); |
You run the EXPLAIN PLAN again, using Query2, and then analyze it. You’ll see that the query uses an index fast full scan and that the cost decreases by 2.
1 2 3 4 5 6 7 8 9 10 11 12 13 14 15 16 17 18 19 20 21 22 23 24 25 26 27 28 29 30 31 32 33 34 35 | PLAN_TABLE_OUTPUT
-----------------------------------------------------------------------------------------------
Plan hash value: 3402838417
---------------------------------------------------------------------------------------------
| Id | Operation | Name | Rows | Bytes | Cost (%CPU)| Time |
---------------------------------------------------------------------------------------------
| 0 | SELECT STATEMENT | | 400 | 42400 | 32 (7)| 00:00:01 |
| 1 | HASH UNIQUE | | 400 | 42400 | 32 (7)| 00:00:01 |
|* 2 | HASH JOIN OUTER | | 400 | 42400 | 31 (4)| 00:00:01 |
| 3 | VIEW | | 7 | 434 | 22 (5)| 00:00:01 |
| 4 | NESTED LOOPS | | 7 | 1001 | 22 (5)| 00:00:01 |
|* 5 | HASH JOIN | | 15 | 1230 | 7 (15)| 00:00:01 |
| 6 | TABLE ACCESS FULL| MEMBER | 9 | 180 | 3 (0)| 00:00:01 |
| 7 | TABLE ACCESS FULL| CONTACT | 15 | 930 | 3 (0)| 00:00:01 |
|* 8 | INDEX RANGE SCAN | IMPORT_DATE_RANGE | 1 | 61 | 1 (0)| 00:00:01 |
| 9 | INDEX FAST FULL SCAN| NATURAL_KEY_RENTAL | 4689 | 201K| 9 (0)| 00:00:01 |
---------------------------------------------------------------------------------------------
Predicate Information (identified by operation id):
---------------------------------------------------
2 - access("TU"."RETURN_DATE"="R"."RETURN_DATE"(+) AND
"TU"."CHECK_OUT_DATE"="R"."CHECK_OUT_DATE"(+) AND
"C"."CONTACT_ID"="R"."CUSTOMER_ID"(+))
5 - access("C"."MEMBER_ID"="M"."MEMBER_ID")
8 - access("TU"."ACCOUNT_NUMBER"="M"."ACCOUNT_NUMBER" AND
"C"."LAST_NAME"="TU"."LAST_NAME" AND "C"."FIRST_NAME"="TU"."FIRST_NAME" AND
NVL("C"."MIDDLE_NAME",'x')=NVL("MIDDLE_NAME",'x'))
Note
-----
- dynamic sampling used for this statement
31 rows selected. |
You add a unique index that maps the surrogate and natural key for the MEMBER table, like this:
1 2 | CREATE UNIQUE INDEX member_account ON member (member_id, account_number); |
You run the EXPLAIN PLAN again, using Query3, and then analyze it. You’ll see that the query uses an index range scan instead of a full table access of the MEMBER table. This decreases the cost by 2.
1 2 3 4 5 6 7 8 9 10 11 12 13 14 15 16 17 18 19 20 21 22 23 24 25 26 27 28 29 30 31 32 33 34 35 | PLAN_TABLE_OUTPUT
----------------------------------------------------------------------------------------------
Plan hash value: 656512492
---------------------------------------------------------------------------------------------
| Id | Operation | Name | Rows | Bytes | Cost (%CPU)| Time |
---------------------------------------------------------------------------------------------
| 0 | SELECT STATEMENT | | 400 | 42400 | 30 (7)| 00:00:01 |
| 1 | HASH UNIQUE | | 400 | 42400 | 30 (7)| 00:00:01 |
|* 2 | HASH JOIN OUTER | | 400 | 42400 | 29 (4)| 00:00:01 |
| 3 | VIEW | | 7 | 434 | 19 (0)| 00:00:01 |
| 4 | NESTED LOOPS | | 7 | 1001 | 19 (0)| 00:00:01 |
| 5 | NESTED LOOPS | | 15 | 1230 | 4 (0)| 00:00:01 |
| 6 | TABLE ACCESS FULL| CONTACT | 15 | 930 | 3 (0)| 00:00:01 |
|* 7 | INDEX RANGE SCAN | MEMBER_ACCOUNT | 1 | 20 | 1 (0)| 00:00:01 |
|* 8 | INDEX RANGE SCAN | IMPORT_DATE_RANGE | 1 | 61 | 1 (0)| 00:00:01 |
| 9 | INDEX FAST FULL SCAN| NATURAL_KEY_RENTAL | 4689 | 201K| 9 (0)| 00:00:01 |
---------------------------------------------------------------------------------------------
Predicate Information (identified by operation id):
---------------------------------------------------
2 - access("TU"."RETURN_DATE"="R"."RETURN_DATE"(+) AND
"TU"."CHECK_OUT_DATE"="R"."CHECK_OUT_DATE"(+) AND
"C"."CONTACT_ID"="R"."CUSTOMER_ID"(+))
7 - access("C"."MEMBER_ID"="M"."MEMBER_ID")
8 - access("TU"."ACCOUNT_NUMBER"="M"."ACCOUNT_NUMBER" AND
"C"."LAST_NAME"="TU"."LAST_NAME" AND "C"."FIRST_NAME"="TU"."FIRST_NAME" AND
NVL("C"."MIDDLE_NAME",'x')=NVL("MIDDLE_NAME",'x'))
Note
-----
- dynamic sampling used for this statement
31 rows selected. |
You add a unique index that maps the surrogate, foreign key to the MEMBER table, and the natural key for the CONTACT table, like this:
1 2 | CREATE UNIQUE INDEX contact_member ON contact (contact_id, member_id, last_name, first_name, NVL(middle_name,'x')); |
You run the EXPLAIN PLAN again, using Query3, and then analyze it. You’ll see that the query uses an index full scan instead of a full table access of the CONTACT table. This decreases the cost by another 2.
1 2 3 4 5 6 7 8 9 10 11 12 13 14 15 16 17 18 19 20 21 22 23 24 25 26 27 28 29 30 31 32 33 34 35 | PLAN_TABLE_OUTPUT
----------------------------------------------------------------------------------------------
Plan hash value: 1185696375
---------------------------------------------------------------------------------------------
| Id | Operation | Name | Rows | Bytes | Cost (%CPU)| Time |
---------------------------------------------------------------------------------------------
| 0 | SELECT STATEMENT | | 400 | 42400 | 28 (8)| 00:00:01 |
| 1 | HASH UNIQUE | | 400 | 42400 | 28 (8)| 00:00:01 |
|* 2 | HASH JOIN OUTER | | 400 | 42400 | 27 (4)| 00:00:01 |
| 3 | VIEW | | 7 | 434 | 17 (0)| 00:00:01 |
| 4 | NESTED LOOPS | | 7 | 1001 | 17 (0)| 00:00:01 |
| 5 | NESTED LOOPS | | 15 | 1230 | 2 (0)| 00:00:01 |
| 6 | INDEX FULL SCAN | CONTACT_MEMBER | 15 | 930 | 1 (0)| 00:00:01 |
|* 7 | INDEX RANGE SCAN | MEMBER_ACCOUNT | 1 | 20 | 1 (0)| 00:00:01 |
|* 8 | INDEX RANGE SCAN | IMPORT_DATE_RANGE | 1 | 61 | 1 (0)| 00:00:01 |
| 9 | INDEX FAST FULL SCAN| NATURAL_KEY_RENTAL | 4689 | 201K| 9 (0)| 00:00:01 |
---------------------------------------------------------------------------------------------
Predicate Information (identified by operation id):
---------------------------------------------------
2 - access("TU"."RETURN_DATE"="R"."RETURN_DATE"(+) AND
"TU"."CHECK_OUT_DATE"="R"."CHECK_OUT_DATE"(+) AND
"C"."CONTACT_ID"="R"."CUSTOMER_ID"(+))
7 - access("C"."MEMBER_ID"="M"."MEMBER_ID")
8 - access("TU"."ACCOUNT_NUMBER"="M"."ACCOUNT_NUMBER" AND
"C"."LAST_NAME"="TU"."LAST_NAME" AND "C"."FIRST_NAME"="TU"."FIRST_NAME" AND
NVL("MIDDLE_NAME",'x')=NVL("MIDDLE_NAME",'x'))
Note
-----
- dynamic sampling used for this statement
31 rows selected. |
The question evolves after you tune the first query. Then, you must check what impacts may exist on other queries, like the statement that you use to merge data into the TRANSACTION table. You may have to suppress indexes in a subsequent query, or after you tune it, return and suppress an index here. You suppress an index by adding a '0' to a NUMBER or DATE column, and by concatenating a null string to a character data type.
Examples of Suppressing Indexes
The following is an example of suppressing an index built on a string. It extends the tuning statement earlier in the blog post, and references line #17. The concatenation of a null string suppresses the index.
17 | AND c.last_name = tu.last_name||'' |
The following is an example of suppressing an index built on a date. It extends the tuning statement earlier in the blog post, and references line #20. Adding a zero leaves the value intact and suppresses the index.
20 | AND tu.check_out_date = r.check_out_date+0 |
Fedora Install of Oracle 11g
After the installation of Oracle 11g XE on Windows, I anticipated problems installing on Fedora. It’s terrific to report it was by far simpler to install on Fedora. This post provides the steps, and builds on the Fedora configuration published earlier this week.
- After you download the software from the Oracle web site, you’ll need to expand the compressed file. When you double click on the download item you will see the following screen. Click Extract at the top of the display.
- The Extract displays the following dialog. Click the Create Folder button and you’ll get an entry point for a new directory in your user’s directory. For the example, Oracle11gXE
- After creating the directory, click the Extract button.
- The extract process completes and shows the following dialog.
- The Disk1 directory will show the following contents.
- You need to drop down into a Terminal session, which you can launch by clicking on Applications, System Tools, and Terminal in the menu.
sudo rpm -iv oracle-xe-11.2.0-1.0.x86_64.rpm |
This command will install the packages in verbose syntax and display the following messages:
[sudo] password for mclaughlinm: Preparing packages for installation... oracle-xe-11.2.0-1.0 Executing post-install steps... You must run '/etc/init.d/oracle-xe configure' as the root user to configure the database. |
- This step requires that you assume the role of the
rootuser, which can be done with this syntax:
sudo sh |
In this root shell, you run the Oracle 11g XE configuration with this command:
/etc/init.d/oracle-xe configure |
The following are the text prompts that you accept to configure Oracle 11g XE:
Oracle Database 11g Express Edition Configuration ------------------------------------------------- This will configure on-boot properties of Oracle Database 11g Express Edition. The following questions will determine whether the database should be starting upon system boot, the ports it will use, and the passwords that will be used for database accounts. Press <Enter> to accept the defaults. Ctrl-C will abort. Specify the HTTP port that will be used for Oracle Application Express [8080]: Specify a port that will be used for the database listener [1521]: Specify a password to be used for database accounts. Note that the same password will be used for SYS and SYSTEM. Oracle recommends the use of different passwords for each database account. This can be done after initial configuration: Confirm the password: Do you want Oracle Database 11g Express Edition to be started on boot (y/n) [y]: Starting Oracle Net Listener...Done Configuring database... Starting Oracle Database 11g Express Edition instance...Done Installation completed successfully. |
After completing the configuration, you need to do two things. First, you need to modify the .bash_profile file for your user (covered in the next step). Second, you need to reboot your system.
- This step requires that you exit the
rootshell by typing theexitcommand. This should put you back into your administration account with sudoer privileges. You usevito edit and add the following to the.bashrcfile.
. /u01/app/oracle/product/11.2.0/xe/bin/oracle_env.sh |
Or, you can write your own file, like this:
# Oracle Settings TMP=/tmp; export TMP TMPDIR=$TMP; export TMPDIR ORACLE_HOSTNAME=localhost.localdomain; export ORACLE_HOSTNAME ORACLE_UNQNAME=DB11G; export ORACLE_UNQNAME ORACLE_BASE=/u01/app/oracle; export ORACLE_BASE ORACLE_HOME=$ORACLE_BASE/product/11.2.0/xe; export ORACLE_HOME ORACLE_SID=XE; export ORACLE_SID NLS_LANG=`$ORACLE_HOME/bin/nls_lang.sh`; export NLS_LANG ORACLE_TERM=xterm; export ORACLE_TERM PATH=/usr/sbin:$PATH; export PATH PATH=$ORACLE_HOME/bin:$PATH; export PATH LD_LIBRARY_PATH=$ORACLE_HOME/lib:/lib:/usr/lib; export LD_LIBRARY_PATH CLASSPATH=$ORACLE_HOME/JRE:$ORACLE_HOME/jlib:$ORACLE_HOME/rdbms/jlib; export CLASSPATH if [ $USER = "oracle" ]; then if [ $SHELL = "/bin/ksh" ]; then ulimit -p 16384 ulimit -n 65536 else ulimit -u 16384 -n 65536 fi fi |
You can now log in to the Oracle database with the following syntax from the command line. You’ll be prompted for the system password that you entered during the configuration steps. I’ll add another post on SQL Developer later this week.
sqlplus system |
- This step is optional. You can configure an
oracleenv.shfile in theoracleuser’s home directory. While you could put this in the.bashrcfile, theoracleaccount isn’t bootable. That’s why I recommend putting it in an environment file.
# .bashrc # Source global definitions if [ -f /etc/bashrc ]; then . /etc/bashrc fi # Uncomment the following line if you don't like systemctl's auto-paging feature: # export SYSTEMD_PAGER= # User specific aliases and functions . /u01/app/oracle/product/11.2.0/xe/bin/oracle_env.sh # Wrap sqlplus with rlwrap to edit prior lines with the # up, down, left and right keys. sqlplus() { if [ "$RLWRAP" = "0" ]; then sqlplus "$@" else rlwrap sqlplus "$@" fi } # Set vi as a command line editor. set -o vi |
If you want to use the menu choices added by the installation, you need to put your privileged sudoer in the dba group. I wrote a blog post on it here.
Oracle & MySQL Handbook
 My new Oracle Database 11g & MySQL 5.6 Developer Handbook will be available at Oracle Open World 2011 (OOW2011). It’s a great book to compare and contrast approaches in Oracle and MySQL. It covers Oracle SQL & PL/SQL and MySQL SQL & SQL/PSM (Persistent Stored Modules – functions and procedures). Unfortunately, it seems like the book won’t be available on amazon.com until much later in the month, and not available from amazon.de until November. You can read about it at McGraw Hill Professional’s web site. They’ve made a special effort to get copies to OOW2011. Here’s the source code for the book because I don’t know when it’ll be on the publisher’s web site.
I’ll also be at OOW2011. They’ve scheduled me in the bookstore (probably 2nd floor of Moscone North, as usual) from 10 to 10:30 A.M. on Monday and Wednesday for a book signing. If you’re at OOW2011 and you like to stop by and say hello, I look forward to meeting you. Many folks leave comments on the posts but only a few suggest what they’d like me to write on when I’ve got a chance, and you can do that if you stop by to chat.
It’s also interesting to know how many folks use both Oracle and MySQL (any updates on that are always appreciated). Last year at the Bioinformatics and Computation Biology (ACM-BCB 2010) Conference in Niagara Falls, I found it interesting to discover how many pharmaceutical companies and national labs were using both Oracle and MySQL. They appeared consistent about using Oracle for their systems governed by legal compliance rules and MySQL for actual research.
The pharmaceutical companies also had clear barriers between the researchers and professional IT staff, specifically the DBAs. It seems that the DBAs don’t want to cede any control over installed Oracle instances, and they place barriers to research by denying additional Oracle instances when their site licenses would allow them to do so at no incremental cost. On the other hand, the DBAs are fine with letting researchers host and pilot with the MySQL Community Edition databases. This book supports those trying to figure out how to write portable SQL and how to port solutions from MySQL to Oracle and vice versa.
Hope to meet a few new folks at OOW2011. The Kindle version of the book became available 11/25/2011.
As an addendum to this original post, some folks asked for the summary of content for the new book, and the location of the errata (the errors of omission and commission in the book). Below is a summary of the book from page XVIII of the Introduction, and the errata is in the second comment to this post:
Part I: Development Components
- Chapter 1, “Architectures,” explains the Oracle 11g and MySQL 5.6 development architectures and highlights the comparative aspects of both client and server environments.
- Chapter 2, “Client Interfaces,” explains and demonstrates the basics of how you use SQL*Plus and MySQL Monitor client software.
- Chapter 3, “Security,” explains the security barriers for database servers and Data Control Language (DCL) commands that let you manage user and account privileges in the database servers.
- Chapter 4, “Transactions,” explains the nature of ACID-compliant transactions and the Two-phase Commit (2PC) process demonstrated by INSERT, UPDATE, and DELETE statements.
- Chapter 5, “Constraints,” explains the five primary database-level constraints and covers the check, not null, unique, primary key, and foreign key constraints.
Part II: SQL Development
- Chapter 6, “Creating Users and Structures,” explains how you can create users, databases, tables, sequences, and indexes.
- Chapter 7, “Modifying Users and Structures,” explains how you modify users, databases, tables, sequences, and indexes.
- Chapter 8, “Inserting Data,” explains how you insert data into tables.
- Chapter 9, “Updating Data,” explains how you update data in tables.
- Chapter 10, “Deleting Data,” explains how you delete data from tables.
- Chapter 11, “Querying Data,” explains how you query data from a single table, from a join of two or more tables, and from a join of two or more queries through set operators.
- Chapter 12, “Merging Data,” explains how you import denormalized data from external tables or source files and insert or update records in normalized tables.
Part III: Stored Program Development
- Chapter 13, “PL/SQL Basics,” explains the basics of using PL/SQL to write transactional blocks of code.
- Chapter 14, “SQL/PSM Basics,” explains the basics of using SQL/PSM to write transactional blocks of code.
- Chapter 15, “Triggers,” explains how to write database triggers in Oracle and MySQL databases.
Part IV: Appendix
- Appendix, Covers the answers to the mastery questions at the end of the chapters.
Reset 11g XE APEX Password
I’ve been busy working on other things since APEX 4 shipped. After I got through the installations of Oracle Database 11g XE (see prior posts), figuring out the default user name and password for APEX Administration became a tedious task. The documentation didn’t really help point to what was needed but it’s always in the code.
You reset the APEX Administration Account for Oracle Database 11g XE by doing the following steps:
- Open a command shell and change the directory to the
%ORACLE_HOME%\apexdirectory (the default Oracle Home isc:\oraclexe\app\oracle\product\11.2.0\server). Then, connect as theSYSTEMuser to the SQL*Plus utility, and run the following command that sets the temporary password to “admin“. You’ll reset the password when you connect through the web interface.
@apxxepwd admin |
- Open APEX Administration by navigating to the
http://localhost:8080/apex/apex_admin, and you’ll see the following APEX Administration Login screen. Enter admin as the user name and admin as the password and click the Login button.
- You’ll be prompted to reset the password in the following Change Password screen. Enter admin as the old password and a new password that complies with the following rules, and click the Apply Changes button.
- Password must contain at least 6 characters.
- New password must differ from old password by at least 2 characters.
- Password must contain at least one numeric character (0123456789).
- Password must contain at least one punctuation character (!”#$%&()“*+,-/:;<=>?_).
- Password must contain at least one upper-case alphabetic character.
- Password must not contain username.
- After configuring the APEX Administration account, click on the Manage Workspaces icon (or button), as shown below. If re-opening the browser to go straight here, just type the following URL
http://localhost:8080/apex/apex_admin.
- The upper left box contains what you need to create a workspace. Click on the Create Workspace option as shown below.
- The choice to add a workspace launched a provisioning workflow. You first Identify Workspace.

- The dialog box for this second provisioning step is:
- The dialog box for this third provisioning step is:
- The dialog box for this fourth provisioning step cpmfirms what you’re doing before you perform the task:
- The dialog box for this fifth provisioning step confirms success or reports failure:
- After you’ve provisioned a workspace, you can create objects like you did with APEX 3. Enter the following URL:
http://localhost:8080/apexand you’ll be brought to this login screen.
- After logging in to your Basic workspace, you’ll have these four principal widgets, as shown in the screen capture.
Maybe I went through the 2-Day APEX manual too quickly but I didn’t see how to do this, all I saw was how to use the HR sample schema. As always, I hope this helps others.
Oracle 11g XE Install
Here’s the Oracle Database 11g Express Edition step-by-step installation. I did the installation on Window 7 64-bit, and did run into a problem with the Windows Registry on a fresh installation (posted earlier on the blog).
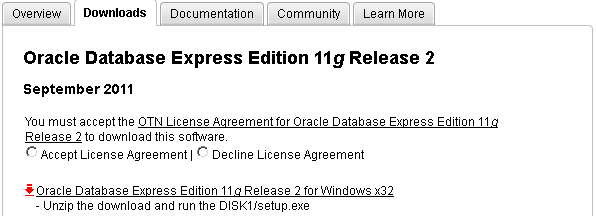
When you download the software from Oracle, you’ll need an account and you’ll need to accept the license agreement.
- You’re prompted to accept the license agreement and can’t proceed without doing it.
- After accepting the license agreement you can download the software.
- Unlike, the Oracle 10g XE MSI file, you’ve downloaded a compressed (
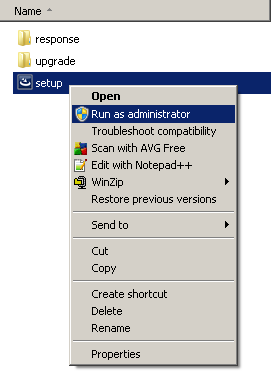
OracleXE112_Win32.zip) file, and you’ll need to explode the zip file and write it to a directory. When you write it to a directory, it looks like the following and you double click on thesetup.msifile.

It’s recommended that you right click on the setup.msi program and run it as the Administrator. If you’ve not disabled Microsoft User Access Controls (UAC), I’d do that first.
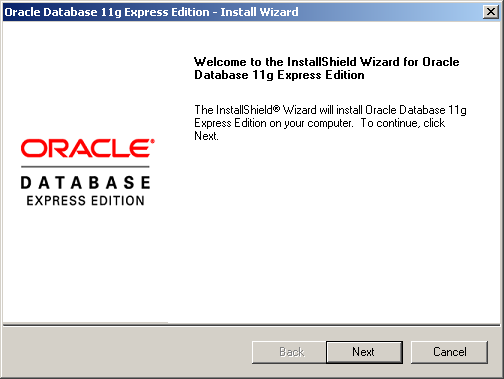
- After launching the
setup.msifile, you see the Install Shield wizard screen while the file loads, like this:
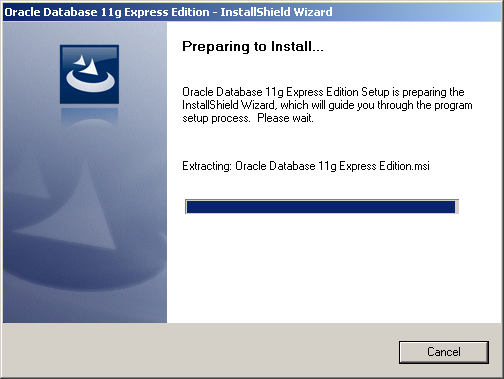
After launching the setup.msi file, and loading the MSI file, you see the first dialog box of the installation. Click the Next button to start the installation.
- The second dialog box is the license for the installation. Click the I accept the terms in the license agreement. radio button and then the Next button.
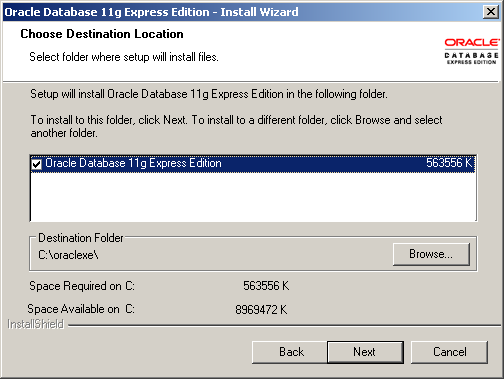
- The third dialog box lets you accept the default location or provide an override location. If you accept the default location, click the Next button to continue.
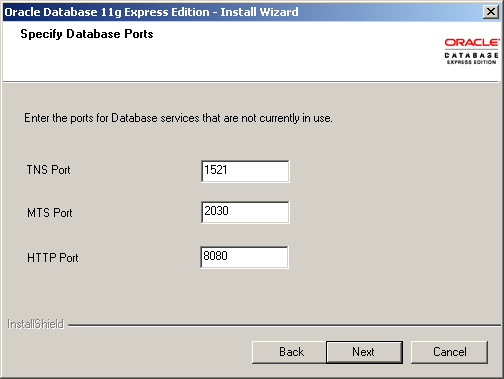
- The fourth dialog box lets you specify the TNS, MTS, and HTTP Ports. The default values are shown in the following screen shot but I’ve change my TNS port to 1621, which you’ll see later. Click the Next button to continue.
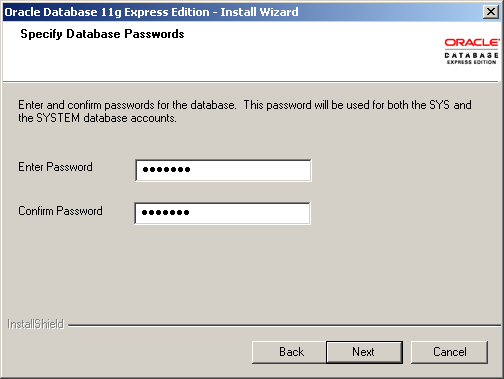
- The fifth dialog box lets you enter the password for the
SYSandSYSTEMusers. You must enter it twice and naturally they must match each other. Click the Next button to continue.
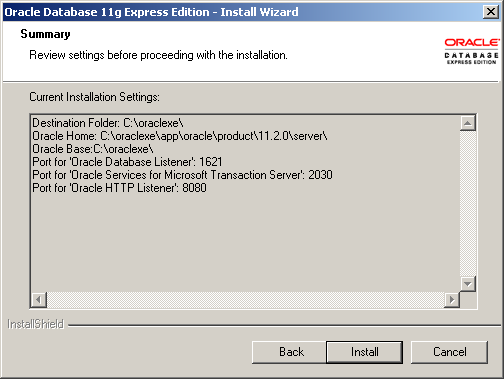
- The sixth dialog box lets you see the configuration options you’ve chosen. Note that this installation is using a TNS port of 1621 rather than the default of 1521. Click the Next button to continue.
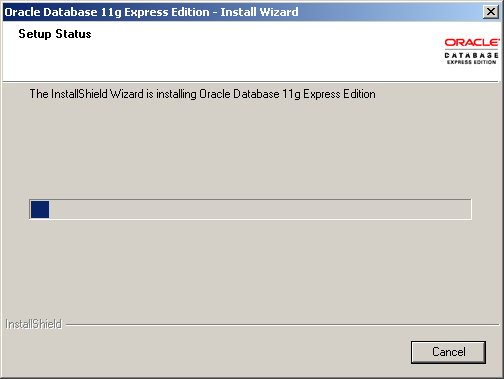
- The seventh dialog box lets you see the progress bar, take a break it can run for two or three minutes. Click the Next button to continue.
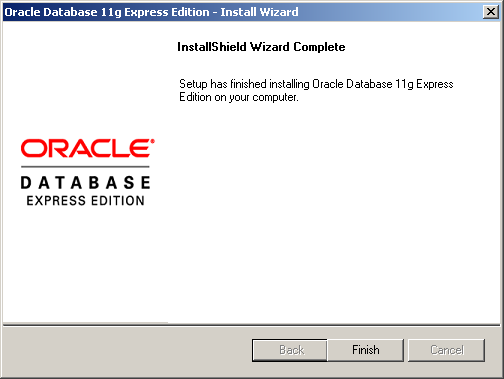
- The last dialog box lets you see that you’ve installed the product. Click the Finish button to complete the installation.
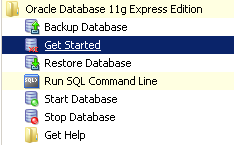
You’ve now installed Oracle Database 11g Express Edition. You can start the command line by typing sqlplus system/password in command shell or the Get Started option in your Program Menus, as shown below.
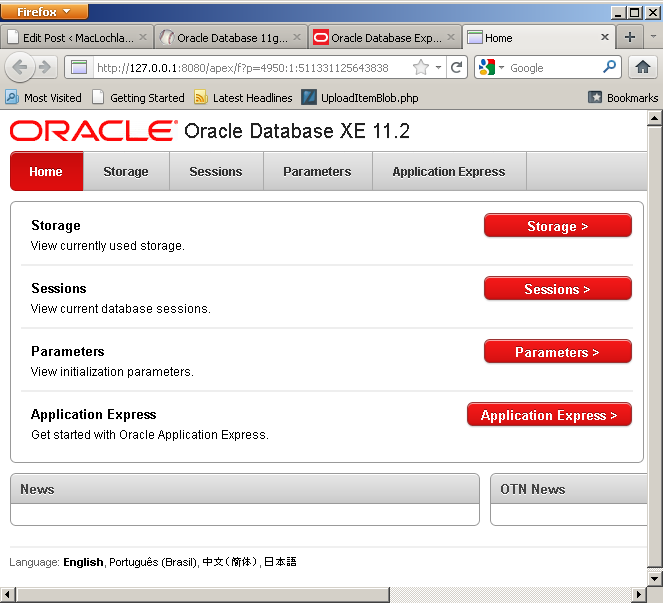
You should see this console when you launch Get Started or manually type http://localhost:8080/apex. There’s more to the web page but I scrunched it to fit into the blog. Alas, space is always at a premium.
Hope this helps folks.
