Archive for the ‘Oracle DBA’ tag
SQL Developer & PL/SQL
While SQL Developer installs with a dbms_output view, some organizations close it before they distribute images or virtual machine (VM) instances. This post shows you how to re-enable the Dbms Output view for SQL Developer.
SQL Developer DBMS_OUTPUT Configuration
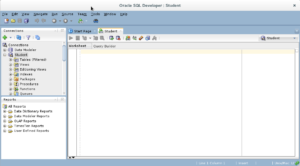
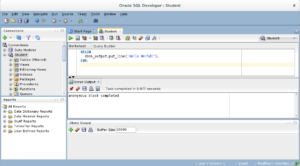
- You need to open SQL Developer, which may look like this when the
DBMS_OUTPUTview isn’t visible.
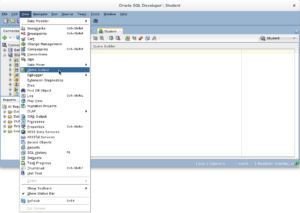
- You need to click on the View menu option in SQL Developer and choose the Dbms Output dropdown menu element.
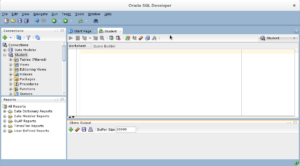
- You should see a grayed-out Dbms Output view.
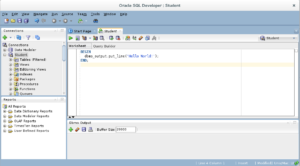
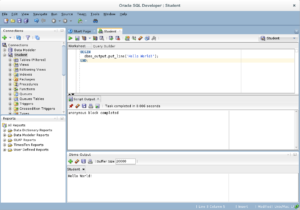
- You should type a simply “Hello World!” anonymous block program in PL/SQL, like the one shown in the drawing.
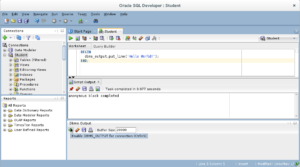
- After writing the “Hello World!” anonymous block program in PL/SQL, click the green arrow to start the statement and you will see two things. There is now a Script Output view between your console and Dbms Output views, and it should say “anonymous block completed.” Unfortunately, none of your output is displayed in the Dbms Output view because you need to enable it.
- If you hover over the Dbms Output view’s green arrow, you see the help message that describes the behavior of the green arrow. The Dbms Output green arrow lets you enable the Dbms Output view for output.
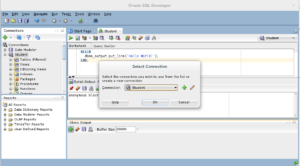
- After you click the Dbms Output view’s green arrow, you receive a Select Connection prompt for the view. Make sure you have the right user, and click the OK button to continue.
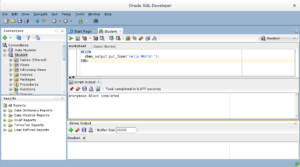
- After you create the connection for the Dbms Output stream, the view area becomes white rather than gray.
- Click the green arrow to start the statement and you will see the “Hello World!” string in the Dbms Output view.”
As always, I hope this helps those looking for a solution.
Using a Sparse Index
My vacation from my blog is officially over. The question that I’m answering today is: How can you pass a set of non-sequential ID values to a function and return a result set? You can solve the problem by passing an ADT (Attribute Data Type) or UDT (User Defined Type) variable into a subquery of a cursor. The subquery leverages the TABLE function to translate the ADT or UDT into SQL result set, which is equivalent to a comma-delimited list of values.
You can also solve this problem with Native Dynamic SQL (NDS). However, the person who posed the question didn’t want to use NDS to build out a variable length list of comma-delimited numbers.
You need to create three object types for this example. They are:
- a list of numbers
- a record structure, declared as an object type without methods
- a list of the record structure
These are the SQL commands to create the required data types:
CREATE OR REPLACE TYPE list_ids IS TABLE OF NUMBER; / |
CREATE OR REPLACE TYPE item_struct IS OBJECT ( item_id NUMBER , item_title VARCHAR2(80) , release_date DATE ); / |
CREATE OR REPLACE TYPE item_struct_list IS TABLE OF item_struct; / |
Next, you create a nonsynchronous function. It takes a sparsely populated list of values that map to the surrogate key of the column, which is typically the table’s primary key column. It returns a collection of the item_struct object type. This type of function is an object-table function.
The code follows:
1 2 3 4 5 6 7 8 9 10 11 12 13 14 15 16 17 18 19 20 21 22 23 24 25 26 27 28 29 30 31 32 33 | CREATE OR REPLACE FUNCTION nonsynchronous ( pv_list_ids LIST_IDS ) RETURN item_struct_list IS /* Declare a record data structure list. */ lv_struct_list ITEM_STRUCT_LIST := item_struct_list(); /* Declare a sparsely indexed list of film items. */ CURSOR get_items ( cv_list_ids LIST_IDS ) IS SELECT item_id AS item_id , item_title || CASE WHEN item_subtitle IS NOT NULL THEN ': '|| item_subtitle END AS item_title , release_date AS release_date FROM item WHERE item_id IN (SELECT * FROM TABLE(cv_list_ids)) ORDER BY item_id; BEGIN /* Lood through the sparsely populated list of numbers. */ FOR i IN get_items(pv_list_ids) LOOP lv_struct_list.EXTEND; lv_struct_list(lv_struct_list.COUNT) := item_struct( item_id => i.item_id , item_title => i.item_title , release_date => i.release_date ); END LOOP; /* Return the record structure list. */ RETURN lv_struct_list; END; / |
The foregoing nonsynchronous function uses a nested query that transforms to a result set on lines 18 and 19. In the execution block of the program, it uses a call to the item_struct structure to capture and assign row values to an element of the lv_struct_list variable.
You can now test the nonsynchronous function with the following query:
COL item_id FORMAT 9999 HEADING "Item|ID #" COL item_title FORMAT A40 HEADING "Item Title" COL release_date FORMAT A11 HEADING "Release|Date" SELECT * FROM TABLE(nonsynchronous(list_ids(1002, 1013, 1007))); |
The query returns the record set as an ordered list in the result set, like:
Item Release ID # Item Title Date ----- ---------------------------------------- ----------- 1002 Star Wars I: Phantom Menace 04-MAY-99 1007 RoboCop 24-JUL-03 1013 The DaVinci Code 19-MAY-06 |
I hope this answers the question about how to get results sets with sparsely populated ID values.
REGEXP_LIKE Behavior
Often, the biggest problem with regular expressions is that those who use them sometimes don’t use them correctly. A great example occurs in the Oracle Database with the REGEXP_LIKE function. For example, some developer use the following to validate whether a string is a number but it only validates whether the first character is a number.
1 2 3 4 5 6 7 8 9 10 11 12 13 14 | DECLARE lv_input VARCHAR2(100); BEGIN /* Assign input value. */ lv_input := '&input'; /* Check for numeric string. */ IF REGEXP_LIKE(lv_input,'[[:digit:]]') THEN dbms_output.put_line('It''s a number.'); ELSE dbms_output.put_line('It''s a string.'); END IF; END; / |
When they test numbers it appears to works, it even appears to work when the test string start with number, but it fails with any string that starts with a character. That’s because the REGEXP_LIKE function on line 8 only checks the first character, but the following checks all the characters in the string.
8 | IF REGEXP_LIKE(lv_inputs(i),'[[:digit:]]{'||LENGTH(lv_inputs(i))||'}') THEN |
You can also fix it with the following non-Posix solution:
8 | IF REGEXP_LIKE(lv_input,'[[0-9]]') THEN |
You can add a collection to the program and use it to test single-digit, double-digit, and string with a leading integer. Save the program as test.sql and you can test three conditions with one call.
1 2 3 4 5 6 7 8 9 10 11 12 13 14 15 16 17 18 19 20 | DECLARE /* Declare the local collection type. */ TYPE inputs IS TABLE OF VARCHAR2(100); /* Declare a local variable of the collection type. */ lv_inputs INPUTS; BEGIN /* Assign the inputs to the collection variable. */ lv_inputs := inputs('&1','&2','&3'); /* Read through the collection and print whether it's an number or string. */ FOR i IN 1..lv_inputs.COUNT LOOP IF REGEXP_LIKE(lv_inputs(i),'[[:digit:]]{'||LENGTH(lv_inputs(i))||',}') THEN dbms_output.put_line('It''s a number.'); ELSE dbms_output.put_line('It''s a string.'); END IF; END LOOP; END; / |
You can run the test.sql program like this:
SQL> @test.sql 1 12 1a |
It prints:
It's a number. It's a number. It's a string. |
As always, I hope this helps those looking for a solution.
SQL*Plus Tricks
Have you ever wondered how to leverage substitution variables in anonymous block programs? There are several tricks that you can use beyond passing numeric and string values to local variable. The generic default appears to take a number unless you cast it as a string but that’s not really the whole story. The first two are standard examples of how to use numeric and string substitution values.
The following accept a numeric substitution value:
1 2 3 4 5 6 7 8 9 10 | DECLARE lv_input NUMBER; BEGIN /* Assign substitution value to local variable. */ lv_input := &input; /* Print the local variable. */ dbms_output.put_line('['||lv_input||']'); END; / |
The following accept a string substitution value, casts the input as a string, assigns the string value to a 4,000 character length local variable, checks whether the 4,000 character length is greater than 10, and assigns the first 10 characters to the lv_parse_input variable:
1 2 3 4 5 6 7 8 9 10 11 12 13 14 15 16 | DECLARE lv_unparsed_input VARCHAR2(4000); lv_parsed_input VARCHAR2(10); BEGIN /* Assign substitution value to local variable. */ lv_unparsed_input := '&input'; /* Check size of input value. */ IF LENGTH(lv_unparsed_input) > 10 THEN lv_parsed_input := SUBSTR(lv_unparsed_input,1,10); END IF; /* Print the local variable. */ dbms_output.put_line('Print {lv_parsed_input}: ['||lv_parsed_input||']'); END; / |
Next, let’s examine two tricks. The first passes a case insensitive variable name and the second passes a case sensitive variable name as a parameter to an anonymous block program.
This declares an anonymous block program that uses a substitution value as a variable name:
1 2 3 4 5 6 7 | DECLARE mine VARCHAR2(10) := 'Default'; BEGIN /* Print the local variable's value. */ dbms_output.put_line('Print {mine} variable value: ['||&input||']'); END; / |
When you run the anonymous block, you’re prompted for an input variable. You provide a case insensitive variable name as the input value:
Enter value for input: MINE
old   5:   dbms_output.put_line('['||&input||']');
new   5:   dbms_output.put_line('['||MINE||']');
Print {mine} variable value: [Default] |
The downside of this approach, yields an ORA-06550 and PLS-00201 exception. Neither of these can be caught because Oracle raises the errors during parsing when the variable name isn’t a 100% case insensitive match. The same type of problem occurs in the next example when the input variable isn’t a 100% case sensitive match.
You can rewrite the program to handle case insensitive variables like this:
1 2 3 4 5 6 7 | DECLARE "Mine" VARCHAR2(10) := 'Default'; BEGIN /* Print the local variable's value. */ dbms_output.put_line('Print {mine} variable value: ['||"&input"||']'); END; / |
When you run the anonymous block, you’re prompted for an input variable. You provide a case sensitive variable name as the input value:
Enter value for input: Mine
old   5:   dbms_output.put_line('['||&input||']');
new   5:   dbms_output.put_line('['||"Mine"||']');
Print {Mine} variable value: [Default] |
Hope this helps those looking for a solution.
Using CALIBRATE_IO
Using Oracle’s Resource Manager requires you to understand the IO dynamics. The first step requires you to run the CALIBRATE_IO procedure from the DBMS_RESOURCE_MANAGER package.
Oracle provides some great examples about how to use the CALIBRATE_IO procedure of the DBMS_RESOURCE_MANAGER package in the Oracle Database Database PL/SQL Packages and Types Reference. The CALIBRATE_IO procedure returns the best answer when you provide a valid number of files, which you can capture by querying the V$ASM_DISK view.
The following code queries the view and assigns the value to a session level variable:
CLEAR BREAKS CLEAR COLUMNS CLEAR COMPUTES VARIABLE files NUMBER BEGIN SELECT COUNT(DISTINCT name) disks INTO :files FROM v$asm_disk; END; / |
When you have the number of files, you can calibrate the IO with the following anonymous block. The query should always work but just in case the NVL function on line 9 assigns the default number of files.
1 2 3 4 5 6 7 8 9 10 11 12 13 14 15 16 17 18 19 | DECLARE lv_num_physical_disks BINARY_INTEGER; — v$asm_disk lv_max_latency BINARY_INTEGER := 10; lv_max_iops BINARY_INTEGER; lv_max_mbps BINARY_INTEGER; lv_actual_latency BINARY_INTEGER; BEGIN /* Assign actual files to anonymous block variable. */ lv_num_physical_disks := NVL(:files,2); /* Run the calibrate_io procedure. */ DBMS_RESOURCE_MANAGER.CALIBRATE_IO( num_physical_disks => lv_num_physical_disks , max_latency => lv_max_latency , max_iops => lv_max_iops , max_mbps => lv_max_mbps , actual_latency => lv_actual_latency); END; / |
You can query the results like this:
SELECT max_iops , max_mbps , max_pmbps , latency , num_physical_disks FROM dba_rsrc_io_calibrate; |
It should show results like these:
MAX_IOPS MAX_MBPS MAX_PMBPS LATENCY NUM_PHYSICAL_DISKS
-------- -------- --------- ------- ------------------
8894 443 294 9 18 |
Hope this helps those using the CALIBRATE_IO procedure of the DBMS_RESOURCE_MANAGER package.
Free Oracle Tuning Book
 Who can resist a free Rich Nimeiec book on SQL Tuning? O.K., those who know everything can resist. If you’re like me, this is an opportunity to learn from Rich. Click on the book image or this link to get a free copy, or if you want to pay $10 for a copy click here to buy Quick Start Guide to Oracle Query Tuning: Tips for DBAs and Developers
 from Amazon.com.
The book is four chapters long, is a 129 pages in length, and is in a PDF format. The outline is:
- Query Tuning: Developer and Beginning DBA
- Query Tuning: Basics for DBAs and Developers
- Advanced Performance Tuning
- Tips for Tuning When You Have Everything Tuned
Enjoy reading it. His more comprehensive book is Oracle Database 11g Release 2 Performance Tuning Tips & Techniques (Oracle Press) and it’s $30, but it’s written for an advanced audience (more or less OCA or higher).
Use an object in a query?
Using an Oracle object type’s instance in a query is a powerful capability. Unfortunately, Oracle’s SQL syntax doesn’t make it immediately obvious how to do it. Most get far enough to put it in a runtime view (a subquery in the FROM clause), but then they get errors like this:
SELECT instance.get_type() * ERROR AT line 4: ORA-00904: "INSTANCE"."GET_TYPE": invalid identifier |
The problem is how Oracle treats runtime views, which appears to me as a casting error. Somewhat like the ORDER BY clause irregularity that I noted in July, the trick is complete versus incomplete syntax. The following query fails and generates the foregoing error:
1 2 3 4 | SELECT instance.get_type() AS object_type , instance.to_string() AS object_content FROM (SELECT dependent()AS instance FROM dual); |
If you add a table alias, or name, to the runtime view on line 4, it works fine:
1 2 3 4 | SELECT cte.instance.get_type() AS object_type , cte.instance.to_string() AS object_content FROM (SELECT dependent() AS instance FROM dual) cte; |
That is the trick. You use an alias for the query, which assigns the alias like a table reference. The reference lets you access instance methods in the scope of a query. Different columns in the query’s SELECT-list may return different results from different methods from the same instance of the object type.
You can also raise an exception if you forget the open and close parentheses for a method call to a UDT, which differs from how Oracle treats no argument functions and procedures. That type of error would look like this:
SELECT cte.instance.get_type AS object_type * ERROR AT line 1: ORA-00904: : invalid identifier |
It is an invalid identifier because there’s no public variable get_type, and a method is only found by using the parenthesis and a list of parameters where they’re required.
The object source code is visible by clicking on the expandable label below.
Setup Object Types ↓
1 2 3 4 5 6 7 8 9 10 11 12 13 14 15 16 17 18 19 20 21 22 23 24 25 26 27 28 29 30 31 32 33 34 35 36 37 38 39 40 41 42 43 44 45 46 47 48 49 50 51 52 53 54 55 56 57 58 59 60 61 62 63 64 65 66 67 68 69 70 71 | DROP TYPE dependent_t; DROP TYPE base_t; SET SERVEROUTPUT ON SIZE UNLIMITED -- Create an object. CREATE OR REPLACE TYPE base_t IS OBJECT ( TYPE VARCHAR2(20) , CONSTRUCTOR FUNCTION base_t RETURN SELF AS RESULT , MEMBER FUNCTION get_type RETURN VARCHAR2 , MEMBER FUNCTION to_string RETURN VARCHAR2) INSTANTIABLE NOT FINAL; / -- Create an object body. CREATE OR REPLACE TYPE BODY base_t IS CONSTRUCTOR FUNCTION base_t RETURN SELF AS RESULT IS BEGIN RETURN; END base_t; MEMBER FUNCTION get_type RETURN VARCHAR2 IS BEGIN RETURN self.TYPE; END; MEMBER FUNCTION to_string RETURN VARCHAR2 IS BEGIN RETURN self.TYPE; END to_string; END; / -- Create a subtype. CREATE OR REPLACE TYPE dependent UNDER base_t ( child VARCHAR2(40) , CONSTRUCTOR FUNCTION dependent RETURN SELF AS RESULT , CONSTRUCTOR FUNCTION dependent ( child VARCHAR2 ) RETURN SELF AS RESULT , OVERRIDING MEMBER FUNCTION get_type RETURN VARCHAR2 , OVERRIDING MEMBER FUNCTION to_string RETURN VARCHAR2) INSTANTIABLE NOT FINAL; / -- Create a subtype body. CREATE OR REPLACE TYPE BODY dependent IS CONSTRUCTOR FUNCTION dependent RETURN SELF AS RESULT IS BEGIN /* Assign subtype name to type. */ self.TYPE := 'DEPENDENT'; RETURN; END dependent; CONSTRUCTOR FUNCTION dependent ( child VARCHAR2 ) RETURN SELF AS RESULT IS lv_dependent DEPENDENT := dependent(); BEGIN /* Assign default constructor to self instance. */ self := lv_dependent; /* Assign parameters to object instance. */ self.TYPE := 'DEPENDENT'; self.child := child; RETURN; END dependent; OVERRIDING MEMBER FUNCTION get_type RETURN VARCHAR2 IS BEGIN RETURN self.TYPE; END; OVERRIDING MEMBER FUNCTION to_string RETURN VARCHAR2 IS BEGIN RETURN self.TYPE; END to_string; END; / |
As always, I hope this helps those solving problems.
Bash Arrays & Oracle
Last week, I wrote about how to use bash arrays and the MySQL database to create unit and integration test scripts. While the MySQL example was nice for some users, there were some others who wanted me to show how to write bash shell scripts for Oracle unit and integration testing. That’s what this blog post does.
If you don’t know much about bash shell, you should start with the prior post to learn about bash arrays, if-statements, and for-loops. In this blog post I only cover how to implement a bash shell script that runs SQL scripts in silent mode and then queries the database in silent mode and writes the output to an external file.
I’ve copied the basic ERD for the example because of a request from a reader. In their opinion it makes cross referencing the two posts unnecessary.
To run the bash shell script, you’ll need the following SQL files, which you can see by clicking not he title below. There are several differences. For example, Oracle doesn’t support a DROP IF EXISTS syntax and requires you to write anonymous blocks in their PL/SQL language; and you must explicitly issue a QUIT; statement even when running in silent mode unlike MySQL, which implicitly issues an exit.
Setup SQL Files ↓
The actor.sql file:
1 2 3 4 5 6 7 8 9 10 11 12 13 14 15 16 17 18 19 20 21 22 23 24 25 26 27 28 29 30 | -- Drop actor table and actor_s sequence. BEGIN FOR i IN (SELECT object_name , object_type FROM user_objects WHERE object_name IN ('ACTOR','ACTOR_S')) LOOP IF i.object_type = 'TABLE' THEN EXECUTE IMMEDIATE 'DROP TABLE ' || i.object_name || ' CASCADE CONSTRAINTS'; ELSIF i.object_type = 'SEQUENCE' THEN EXECUTE IMMEDIATE 'DROP SEQUENCE ' || i.object_name; END IF; END LOOP; END; / -- Create an actor table. CREATE TABLE actor ( actor_id NUMBER CONSTRAINT actor_pk PRIMARY KEY , actor_name VARCHAR(30) NOT NULL ); -- Create an actor_s sequence. CREATE SEQUENCE actor_s; -- Insert two rows. INSERT INTO actor VALUES (actor_s.NEXTVAL,'Chris Hemsworth'); INSERT INTO actor VALUES (actor_s.NEXTVAL,'Chris Pine'); INSERT INTO actor VALUES (actor_s.NEXTVAL,'Chris Pratt'); -- Quit session. QUIT; |
The film.sql file:
1 2 3 4 5 6 7 8 9 10 11 12 13 14 15 16 17 18 19 20 21 22 23 24 25 26 27 28 29 30 31 32 | -- Drop film table and film_s sequence. BEGIN FOR i IN (SELECT object_name , object_type FROM user_objects WHERE object_name IN ('FILM','FILM_S')) LOOP IF i.object_type = 'TABLE' THEN EXECUTE IMMEDIATE 'DROP TABLE ' || i.object_name || ' CASCADE CONSTRAINTS'; ELSIF i.object_type = 'SEQUENCE' THEN EXECUTE IMMEDIATE 'DROP SEQUENCE ' || i.object_name; END IF; END LOOP; END; / -- Create a film table. CREATE TABLE film ( film_id NUMBER CONSTRAINT film_pk PRIMARY KEY , film_name VARCHAR(30) NOT NULL ); -- Create an actor_s sequence. CREATE SEQUENCE film_s; -- Insert four rows. INSERT INTO film VALUES (film_s.NEXTVAL,'Thor'); INSERT INTO film VALUES (film_s.NEXTVAL,'Thor: The Dark World'); INSERT INTO film VALUES (film_s.NEXTVAL,'Star Trek'); INSERT INTO film VALUES (film_s.NEXTVAL,'Star Trek into Darkness'); INSERT INTO film VALUES (film_s.NEXTVAL,'Guardians of the Galaxy'); -- Quit session. QUIT; |
The movie.sql file:
1 2 3 4 5 6 7 8 9 10 11 12 13 14 15 16 17 18 19 20 21 22 23 24 25 26 27 28 29 30 31 32 33 34 35 36 37 38 39 40 41 42 43 44 45 46 47 48 49 50 51 52 53 54 55 56 57 58 59 60 61 62 63 64 65 66 67 68 69 70 71 72 73 74 75 76 77 78 79 80 81 | -- Drop movie table and movie_s sequence. BEGIN FOR i IN (SELECT object_name , object_type FROM user_objects WHERE object_name IN ('MOVIE','MOVIE_S')) LOOP IF i.object_type = 'TABLE' THEN EXECUTE IMMEDIATE 'DROP TABLE ' || i.object_name || ' CASCADE CONSTRAINTS'; ELSIF i.object_type = 'SEQUENCE' THEN EXECUTE IMMEDIATE 'DROP SEQUENCE ' || i.object_name; END IF; END LOOP; END; / -- Create an movie table. CREATE TABLE movie ( movie_id NUMBER CONSTRAINT movie_pk PRIMARY KEY , actor_id NUMBER CONSTRAINT movie_nn1 NOT NULL , film_id NUMBER CONSTRAINT movie_nn2 NOT NULL , CONSTRAINT actor_fk FOREIGN KEY (actor_id) REFERENCES actor (actor_id) , CONSTRAINT film_fk FOREIGN KEY (film_id) REFERENCES film(film_id)); -- Create table constraint. CREATE SEQUENCE movie_s; -- Insert translation rows. INSERT INTO movie VALUES ( movie_s.NEXTVAL ,(SELECT actor_id FROM actor WHERE actor_name = 'Chris Hemsworth') ,(SELECT film_id FROM film WHERE film_name = 'Thor')); INSERT INTO movie VALUES ( movie_s.NEXTVAL ,(SELECT actor_id FROM actor WHERE actor_name = 'Chris Hemsworth') ,(SELECT film_id FROM film WHERE film_name = 'Thor: The Dark World')); INSERT INTO movie VALUES ( movie_s.NEXTVAL ,(SELECT actor_id FROM actor WHERE actor_name = 'Chris Pine') ,(SELECT film_id FROM film WHERE film_name = 'Star Trek')); INSERT INTO movie VALUES ( movie_s.NEXTVAL ,(SELECT actor_id FROM actor WHERE actor_name = 'Chris Pine') ,(SELECT film_id FROM film WHERE film_name = 'Star Trek into Darkness')); INSERT INTO movie VALUES ( movie_s.NEXTVAL ,(SELECT actor_id FROM actor WHERE actor_name = 'Chris Pratt') ,(SELECT film_id FROM film WHERE film_name = 'Guardians of the Galaxy')); -- Quit session. QUIT; |
The tables.sql file, lets you verify the creation of the actor, film, and movie tables:
1 2 3 4 5 6 7 8 9 | -- Set Oracle column width. COL table_name FORMAT A30 HEADING "Table Name" -- Query the tables. SELECT table_name FROM user_tables; -- Exit SQL*Plus. QUIT; |
The results.sql file, lets you see join results from actor, film, and movie tables:
1 2 3 4 5 6 7 8 9 10 11 | -- Format query. COL film_actors FORMAT A40 HEADING "Actors in Films" -- Diagnostic query. SELECT a.actor_name || ', ' || f.film_name AS film_actors FROM actor a INNER JOIN movie m ON a.actor_id = m.actor_id INNER JOIN film f ON m.film_id = f.film_id; -- Quit the session. QUIT; |
If you don’t have a sample test schema to use to test this script, you can create a sample schema with the following create_user.sql file. The file depends on the existence of a users and temp tablespace.
Click the link below to see the source code for a script that let’s you create a sample user account as the system user:
Create sample User SQL File ↓
You can use the dbms_metadata.get_ddl function to discover the existence of the tablespaces. The following SQL syntax returns the SQL DDL statement that created a users or temp tablespace:
1 2 | SET LONG 200000 SELECT dbms_metadata.get_ddl('TABLESPACE','USERS') FROM dual; |
You create the sample database with the following SQL statements:
1 2 3 4 5 6 7 8 9 10 11 12 13 14 15 16 17 18 19 20 21 | -- Drop the sample user table. BEGIN FOR i IN (SELECT username FROM dba_users WHERE username = 'SAMPLE') LOOP EXECUTE IMMEDIATE 'DROP USER ' || i.username || ' CASCADE'; END LOOP; END; / -- Create the sample user table. CREATE USER sample IDENTIFIED BY sample DEFAULT TABLESPACE users TEMPORARY TABLESPACE temp QUOTA 50M ON users; -- Grant privileges to sample user. GRANT CREATE CLUSTER, CREATE INDEXTYPE, CREATE OPERATOR , CREATE PROCEDURE, CREATE SEQUENCE, CREATE SESSION , CREATE TABLE, CREATE TRIGGER, CREATE TYPE , CREATE VIEW TO sample; |
The following list_oracle.sh shell script expects to receive the username, password, and fully qualified path in that specific order. The script names are entered manually in the array because this should be a unit test script.
This is an insecure version of the list_oracle.sh script because you provide the password on the command line. It’s better to provide the password as you run the script.
1 2 3 4 5 6 7 8 9 10 11 12 13 14 15 16 17 18 19 20 21 22 23 24 25 26 27 28 29 30 31 32 33 34 35 36 37 38 39 | #!/usr/bin/bash # Assign user and password username="${1}" password="${2}" directory="${3}" echo "User name:" ${username} echo "Password: " ${password} echo "Directory:" ${directory} # Define an array. declare -a cmd # Assign elements to an array. cmd[0]="actor.sql" cmd[1]="film.sql" cmd[2]="movie.sql" # Call the array elements. for i in ${cmd[*]}; do sqlplus -s ${username}/${password} @${directory}/${i} > /dev/null done # Connect and pipe the query result minus errors and warnings to the while loop. sqlplus -s ${username}/${password} @${directory}/tables.sql 2>/dev/null | # Read through the piped result until it's empty. while IFS='\n' read actor_name; do echo $actor_name done # Connect and pipe the query result minus errors and warnings to the while loop. sqlplus -s ${username}/${password} @${directory}/result.sql 2>/dev/null | # Read through the piped result until it's empty. while IFS='\n' read actor_name; do echo $actor_name done |
The IFS (Internal Field Separator) works with whitespace by default. The IFS on lines 29 and 37 sets the IFS to a line return ('\n'). That’s the trick to display the data, and you can read more about the IFS in this question and answer post.
You can run the shell script with the following syntax:
./list_oracle.sh sample sample /home/student/Code/bash/oracle > output.txt |
You can then display the results from the output.txt file with the following command:
cat output.txt command: |
It will display the following output:
User name: sample Password: sample Directory: /home/student/Code/bash/oracle Table Name ------------------------------ MOVIE FILM ACTOR Actors in Films ---------------------------------------- Chris Hemsworth, Thor Chris Hemsworth, Thor: The Dark World Chris Pine, Star Trek Chris Pine, Star Trek into Darkness Chris Pratt, Guardians of the Galaxy |
As always, I hope this helps those looking for a solution.
Leaf node queries
A reader posted A dynamic level limiting hierarchical query about Oracle’s hierarchical queries. They wanted to know how to capture only the hierarchy above the level where the first leaf node occurs. They gave me the following hierarchy map as an example:
               1                                    2
        +-------------+                       +-----------+
        |             |                       |           |
        3             5                       4           6
    +---------+    +-----------+           +-----+    +------+
    |         |    |           |           |     |    |      |
    7         9    11          13          8     10   12     14
+-----+   +-----+  +--+    +-------+                       +-----+
|     |   |     |     |    |       |                       |     |
15    17  19    21    23   27      29                     16     18
                                                                 +---+
                                                                     |
20 |
You can find the node values and hierarchical level with the following query:
SELECT tt.child_id , LEVEL FROM test_temp tt WHERE CONNECT_BY_ISLEAF = 1 START WITH tt.parent_id IS NULL CONNECT BY PRIOR tt.child_id = tt.parent_id ORDER BY 2; |
We really don’t need the node values to solve the problem. We only need the lowest LEVEL value returned by the query, which is 3. The combination of the MIN and CONNECT_BY_ISLEAF functions let us solve this problem without writing a PL/SQL solution. The subquery returns the lowest level value, which is the first level where a leaf node occurs.
SELECT LPAD(' ', 2*(LEVEL - 1)) || tt.child_id AS child_id FROM test_temp tt WHERE LEVEL <= (SELECT MIN(LEVEL) FROM test_temp tt WHERE CONNECT_BY_ISLEAF = 1 START WITH tt.parent_id IS NULL CONNECT BY PRIOR tt.child_id = tt.parent_id) START WITH tt.parent_id IS NULL CONNECT BY PRIOR tt.child_id = tt.parent_id; |
It returns:
               1                                    2
        +-------------+                       +-----------+
        |             |                       |           |
        3             5                       4           6
    +---------+    +-----------+           +-----+    +------+
    |         |    |           |           |     |    |      |
7 9 11 13 8 10 12 14 |
While I answered the question in a comment originally, it seemed an important trick that should be shared in its own post.
SQL Developer – Fedora
This is the continuation of my efforts to stage an awesome Fedora developer’s instance. It shows you how to install Java 1.8 software development kit, which is nice to have. Though you can’t use Java 1.8 officially with Oracle SQL Developer 4.0.3 it is required for Oracle SQL Developer 4.1. Fortunately, the Oracle Product Manager, Jeff Smith has advised us that you can use Java 1.8 JDK with Oracle SQL Developer 4.0.3, and he’s written a comment to the blog post that it runs better with the Java 1.8 SDK.
After you install Oracle SQL Developer 4.0.3 or Oracle SQL Developer 4.1, you can watch Jeff Smith’s YouTube Video on SQL Developer 3.1 to learn how to use the basics of SQL Developer. I couldn’t find an updated version of the video for SQL Developer 4 but I didn’t try too hard.
You use yum as the root user to install Java SDK 1.8, much like my earlier Installing the Java SDK 1.7 and Java-MySQL Sample Program. The following command installs Java 8:
yum install -y java-1.8* |
It produces the following output:
Loaded plugins: langpacks, refresh-packagekit
fedora/20/x86_64/metalink                                   |  18 kB  00:00
mysql-connectors-community                                  | 2.5 kB  00:00
mysql-tools-community                                       | 2.5 kB  00:00
mysql56-community                                           | 2.5 kB  00:00
pgdg93                                                      | 3.6 kB  00:00
updates/20/x86_64/metalink                                  |  16 kB  00:00
updates                                                     | 4.9 kB  00:00
(1/2): mysql-tools-community/20/x86_64/primary_db           |  21 kB  00:00
(2/2): updates/20/x86_64/primary_db                         |  13 MB  00:09
updates/20/x86_64/pkgtags
updates
(1/2): updates/20/x86_64/pkgtags                            | 1.4 MB  00:02
(2/2): updates/20/x86_64/updateinfo                         | 1.9 MB  00:04
Package 1:java-1.8.0-openjdk-headless-1.8.0.31-1.b13.fc20.x86_64 already installed and latest version
Package 1:java-1.8.0-openjdk-javadoc-1.8.0.31-1.b13.fc20.noarch already installed and latest version
Resolving Dependencies
--> Running transaction check
---> Package java-1.8.0-openjdk.x86_64 1:1.8.0.31-1.b13.fc20 will be installed
---> Package java-1.8.0-openjdk-accessibility.x86_64 1:1.8.0.31-1.b13.fc20 will be installed
---> Package java-1.8.0-openjdk-demo.x86_64 1:1.8.0.31-1.b13.fc20 will be installed
---> Package java-1.8.0-openjdk-devel.x86_64 1:1.8.0.31-1.b13.fc20 will be installed
---> Package java-1.8.0-openjdk-src.x86_64 1:1.8.0.31-1.b13.fc20 will be installed
--> Finished Dependency Resolution

Dependencies Resolved

================================================================================
 Package                          Arch   Version                  Repository
                                                                           Size
================================================================================
Installing:
 java-1.8.0-openjdk               x86_64 1:1.8.0.31-1.b13.fc20    updates 201 k
 java-1.8.0-openjdk-accessibility x86_64 1:1.8.0.31-1.b13.fc20    updates  12 k
 java-1.8.0-openjdk-demo          x86_64 1:1.8.0.31-1.b13.fc20    updates 1.9 M
 java-1.8.0-openjdk-devel         x86_64 1:1.8.0.31-1.b13.fc20    updates 9.2 M
 java-1.8.0-openjdk-src           x86_64 1:1.8.0.31-1.b13.fc20    updates  45 M

Transaction Summary
================================================================================
Install  5 Packages

Total download size: 56 M
Installed size: 92 M
Downloading packages:
(1/5): java-1.8.0-openjdk-accessibility-1.8.0.31-1.b13.fc20 |  12 kB  00:00
(2/5): java-1.8.0-openjdk-1.8.0.31-1.b13.fc20.x86_64.rpm    | 201 kB  00:02
(3/5): java-1.8.0-openjdk-demo-1.8.0.31-1.b13.fc20.x86_64.r | 1.9 MB  00:03
(4/5): java-1.8.0-openjdk-devel-1.8.0.31-1.b13.fc20.x86_64. | 9.2 MB  00:07
(5/5): java-1.8.0-openjdk-src-1.8.0.31-1.b13.fc20.x86_64.rp |  45 MB  05:05
--------------------------------------------------------------------------------
Total                                              187 kB/s |  56 MB  05:05
Running transaction check
Running transaction test
Transaction test succeeded
Running transaction (shutdown inhibited)
  Installing : 1:java-1.8.0-openjdk-1.8.0.31-1.b13.fc20.x86_64              1/5
  Installing : 1:java-1.8.0-openjdk-devel-1.8.0.31-1.b13.fc20.x86_64        2/5
  Installing : 1:java-1.8.0-openjdk-demo-1.8.0.31-1.b13.fc20.x86_64         3/5
  Installing : 1:java-1.8.0-openjdk-accessibility-1.8.0.31-1.b13.fc20.x86   4/5
  Installing : 1:java-1.8.0-openjdk-src-1.8.0.31-1.b13.fc20.x86_64          5/5
  Verifying  : 1:java-1.8.0-openjdk-devel-1.8.0.31-1.b13.fc20.x86_64        1/5
  Verifying  : 1:java-1.8.0-openjdk-demo-1.8.0.31-1.b13.fc20.x86_64         2/5
  Verifying  : 1:java-1.8.0-openjdk-1.8.0.31-1.b13.fc20.x86_64              3/5
  Verifying  : 1:java-1.8.0-openjdk-accessibility-1.8.0.31-1.b13.fc20.x86   4/5
  Verifying  : 1:java-1.8.0-openjdk-src-1.8.0.31-1.b13.fc20.x86_64          5/5

Installed:
  java-1.8.0-openjdk.x86_64 1:1.8.0.31-1.b13.fc20
  java-1.8.0-openjdk-accessibility.x86_64 1:1.8.0.31-1.b13.fc20
  java-1.8.0-openjdk-demo.x86_64 1:1.8.0.31-1.b13.fc20
  java-1.8.0-openjdk-devel.x86_64 1:1.8.0.31-1.b13.fc20
  java-1.8.0-openjdk-src.x86_64 1:1.8.0.31-1.b13.fc20

Complete! |
Then, you go to Oracle’s SQL Developer 4.0.3 web page or Oracle’s Beta SQL Developer 4.1 web page and download the SQL Developer RPM. At the time of writing, you download the following SQL Developer 4.0.3 RPM:
sqldeveloper-4.0.3.16.84-1.noarch.rpm |
Assuming you download the sqldeveloper-4.0.3.16.84-1.noarch.rpm file to the student user’s account. It will download into the /home/student/Downloads directory. You run the SQL Developer RPM file with the following syntax as the root user:
rpm -Uhv /home/student/Downloads/sqldeveloper-4.0.3.16.84-1.noarch.rpm |
Running the SQL Developer RPM produces the following output:
Preparing... ################################# [100%] Updating / installing... 1:sqldeveloper-4.0.3.16.84-1 ################################# [100%] |
You can now run the sqldeveloper.sh file as the root user with the following syntax:
/opt/sqldeveloper/sqldeveloper.sh |
At this point, it’s important to note that my download from the Oracle SQL Developer 4.1 page turned out to be SQL Developer 4.0.3. It prompts you for the correct Java JDK, as shown below. You may opt to enter the path to the Java JDK 1.8 for SQL Developer 4.1 because until today you downloaded the Oracle SQL Developer 4.0.3 version from the Oracle SQL Developer 4.1 page. Naturally, the Oracle SQL Developer 4.1 instructions say to use the Java 1.8 JDK on the RPM for Linux Installation Notes web page, as shown below:
If you assume from the instructions on the Oracle instruction page above that Oracle SQL Developer 4.0.3 and Oracle SQL Developer 4.1 support Java 1.8 JDK, you may enter the location for the Java JDK 1.8 when prompted. Jeff Smith, the Product Manager wrote this blog post on Oracle SQL Developer 4: Windows and the JDK. Unfortunately, you’ll see the following message if you attempt to run Oracle SQL Developer 4.0.3 with the Java 1.8 SDK at the command-line:
Oracle SQL Developer Copyright (c) 1997, 2014, Oracle and/or its affiliates. All rights reserved. Type the full pathname of a JDK installation (or Ctrl-C to quit), the path will be stored in /root/.sqldeveloper/4.0.0/product.conf /usr/lib/jvm/java-1.8.0-openjdk-1.8.0.31.x86_64 OpenJDK 64-Bit Server VM warning: ignoring option MaxPermSize=256M; support was removed in 8.0 |
It also raises the following error message dialog:
Text version of Unsupported JDK Version error message:
Running this product is supported with a minimum Java version of 1.7.0_51 and a maximum version less than 1.8.
Update the SetJavaHome in “/root/.sqldeveloper/4.0.0/product.conf” to point to another Java.
This produce will not be supported, and may not run correctly if you proceed. Continue anyway?
The error dialog message tells us that the instructions on the RPM for Linux Installation Notes web page can be misleading. You really need to use the Java JDK 1.7 to be supported officially, but you can safely ignore the error.
If you want a certified component, leave the “Skip This Message Next Time” checkbox unchecked and click the “No” button to continue. At this point, there’s no automatic recovery. You need to open the following file:
/root/.sqldeveloper/4.0.0/product.conf |
You need to change the SetJavaHome parameter in the file to the following:
# SetJavaHome /path/jdk SetJavaHome /usr/lib/jvm/java-1.7.0-openjdk-1.7.0.79-2.5.5.0.fc20.x86_64 |
After making the change, you can re-run the sqldeveloper.sh shell as follows:
/opt/sqldeveloper/sqldeveloper.sh |
It launches the following dialog message:
The installation pauses to ask you if you want to transfer an existing SQL Developer configuration by raising the following dialog. Assuming this is a new installation, the installer won’t find a prior configuration file. You need to click the “No” button to proceed.
The installation continues and launches SQL Developer. The first time launch shows you the following Oracle Usage Tracking dialog. If you don’t want your use monitored, uncheck the “Allow automated usage reporting to Oracle” checkbox. Click the “OK” button to continue.
After dismissing the Oracle Usage Tracking dialog, you see the SQL Developer environment:
After installing SQL Developer in the root account, you can install it as the student user. You use this command as the student user:
/opt/sqldeveloper/sqldeveloper.sh |
It returns the following error because it’s the second installation and SQL Developer doesn’t prompt you to configure the user’s product.conf file with the working JDK location:
Oracle SQL Developer Copyright (c) 1997, 2014, Oracle and/or its affiliates. All rights reserved. Type the full pathname of a JDK installation (or Ctrl-C to quit), the path will be stored in /home/student/.sqldeveloper/4.0.0/product.conf Error: Unable to get APP_JAVA_HOME input from stdin after 10 tries |
You need to edit the /home/student/.sqldeveloper/4.0.0/product.conf file, and add the following line to the file:
# SetJavaHome /path/jdk SetJavaHome /usr/lib/jvm/java-1.7.0-openjdk-1.7.0.79-2.5.5.0.fc20.x86_64 |
Now, you can launch SQL Developer with the following command:
/opt/sqldeveloper/sqldeveloper.sh |
Alternatively, you can add the following alias to the student user’s .bashrc file:
# Set alias for SQL Developer tool. alias sqldeveloper="/opt/sqldeveloper/sqldeveloper.sh" |
You can now launch the SQL Developer tool, like this as the student user:
sqldeveloper |
You see the following when SQL Developer launches:
As always, I hope this helps those trying to sort out installing SQL Developer on a Fedora server.
