Archive for the ‘Oracle APEX’ Category
Listener for APEX
Unless dbca lets us build the listener.ora file, we often leave off some component. For example, running listener control program the following status indicates an incorrectly configured listener.ora file.
lsnrctl status |
It returns the following, which displays an endpoint for the XDB Server (I’m using Oracle Database 11g XE because it’s pre-containerized and has a small testing footprint):
LSNRCTL for Linux: Version 11.2.0.2.0 - Production on 24-MAR-2023 00:59:06 Copyright (c) 1991, 2011, Oracle. All rights reserved. Connecting to (DESCRIPTION=(ADDRESS=(PROTOCOL=IPC)(KEY=EXTPROC_FOR_XE))) STATUS of the LISTENER ------------------------ Alias LISTENER Version TNSLSNR for Linux: Version 11.2.0.2.0 - Production Start Date 21-MAR-2023 21:17:37 Uptime 2 days 3 hr. 41 min. 29 sec Trace Level off Security ON: Local OS Authentication SNMP OFF Default Service XE Listener Parameter File /u01/app/oracle/product/11.2.0/xe/network/admin/listener.ora Listener Log File /u01/app/oracle/diag/tnslsnr/localhost/listener/alert/log.xml Listening Endpoints Summary... (DESCRIPTION=(ADDRESS=(PROTOCOL=ipc)(KEY=EXTPROC_FOR_XE))) (DESCRIPTION=(ADDRESS=(PROTOCOL=tcp)(HOST=localhost)(PORT=1521))) (DESCRIPTION=(ADDRESS=(PROTOCOL=tcp)(HOST=localhost)(PORT=8080))(Presentation=HTTP)(Session=RAW)) Services Summary... Service "PLSExtProc" has 1 instance(s). Instance "PLSExtProc", status UNKNOWN, has 1 handler(s) for this service... Service "XE" has 1 instance(s). Instance "XE", status READY, has 1 handler(s) for this service... Service "XEXDB" has 1 instance(s). Instance "XE", status READY, has 1 handler(s) for this service... The command completed successfully |
The listener is missing the second SID_LIST_LISTENER value of CLRExtProc value. A complete listener.ora file should be as follows for the Oracle Database XE:
# listener.ora Network Configuration FILE: SID_LIST_LISTENER = (SID_LIST = (SID_DESC = (SID_NAME = PLSExtProc) (ORACLE_HOME = /u01/app/oracle/product/11.2.0/xe) (PROGRAM = extproc) ) (SID_DESC = (SID_NAME = CLRExtProc) (ORACLE_HOME = /u01/app/oracle/product/11.2.0/xe) (PROGRAM = extproc) ) ) LISTENER = (DESCRIPTION_LIST = (DESCRIPTION = (ADDRESS = (PROTOCOL = IPC)(KEY = EXTPROC_FOR_XE)) (ADDRESS = (PROTOCOL = TCP)(HOST = localhost.localdomain)(PORT = 1521)) ) ) DEFAULT_SERVICE_LISTENER = (XE) |
With this listener.ora file, the Oracle listener control utility will return the following correct status, which hides the XDB Server’s endpoint:
LSNRCTL for Linux: Version 11.2.0.2.0 - Production on 24-MAR-2023 02:38:57 Copyright (c) 1991, 2011, Oracle. All rights reserved. Connecting to (DESCRIPTION=(ADDRESS=(PROTOCOL=IPC)(KEY=EXTPROC_FOR_XE))) STATUS of the LISTENER ------------------------ Alias LISTENER Version TNSLSNR for Linux: Version 11.2.0.2.0 - Production Start Date 24-MAR-2023 02:38:15 Uptime 0 days 0 hr. 0 min. 42 sec Trace Level off Security ON: Local OS Authentication SNMP OFF Default Service XE Listener Parameter File /u01/app/oracle/product/11.2.0/xe/network/admin/listener.ora Listener Log File /u01/app/oracle/product/11.2.0/xe/log/diag/tnslsnr/localhost/listener/alert/log.xml Listening Endpoints Summary... (DESCRIPTION=(ADDRESS=(PROTOCOL=ipc)(KEY=EXTPROC_FOR_XE))) (DESCRIPTION=(ADDRESS=(PROTOCOL=tcp)(HOST=localhost)(PORT=1521))) Services Summary... Service "CLRExtProc" has 1 instance(s). Instance "CLRExtProc", status UNKNOWN, has 1 handler(s) for this service... Service "PLSExtProc" has 1 instance(s). Instance "PLSExtProc", status UNKNOWN, has 1 handler(s) for this service... The command completed successfully |
It seems a number of examples on the web left the SID_LIST_LISTENER value of CLRExtProc value out of the listener.ora file. As always, I hope this helps those looking for a complete solution rather than generic instructions without a concrete example.
APEX New Workspace
After you install APEX or upgrade a base APEX, you need to create workspaces. These instructions show you how to create a workspace in APEX 18. You have two options, you can use the base url while specifying the INTERNAL workspace.
- You start the process by accessing the Oracle APEX through the standard form by entering the following URL:
http://localhost:8080/apex
- Workspace:
INTERNAL - Username:
ADMIN - Password:
installation_system_password
- Workspace:
- The better approach is to use the APEX administrator login:
http://localhost:8080/apex/apex_admin
- Username:
ADMIN - Password:
installation_system_password
- Username:
- After logging into the Oracle Application Express (APEX) Administration console, you see the Administration home page.
- You click the Create Workspace button to start creating a work space.
- You enter a workspace name, ID number (greater than 100,000), and description and click the Next button to move to the next step.
- You choose whether to reuse an existing schema, which gives you more control. You then choose a schema from the list of available schemas. You do not use a password or schema size when you reuse a schema. You enter a password that has a capital letter, number, and special character that is not a
%when you do not reuse a schema. You also need to choose a size. The default value is 100 megabytes. Click the Next button to move to the next step.
- This dialog identifies the workspace administrator. Click the Next button to move to the next step.
- This dialog confirms what you have done in the workflow. Click the Next button to move to the next step.
- This dialog tells you that you have successfully provisioned a workspace. Click the Done button to complete the workflow.
As always, I hope this helps those trying to figure out how to do something that should not be and is not actually hard to do.
Upgrade APEX 4 to 5.1
This blog post shows you how to upgrade APEX Version 4.0.2 on a default Oracle Database 11g XE instance to APEX 5.1.2. Oracle’s APEX t upgrade document was just a bit too short and missed some details. It divided into five parts. The first part confirms your starting point. The second part downloads and positions the extracted software. The third part installs APEX 5. The fourth part configures APEX 5. The fifth part shows you how to access and get to the APEX 5 home page.
Confirm APEX 4 Installation
- Verify the database version by connecting as the
systemuser through SQL*Plus and running the following query:SELECT banner FROM v$version WHERE banner LIKE 'Oracle Database%';
It should return the following when you’re upgrading the Oracle Database 11g XE:
BANNER
--------------------------------------------------------------------------------
Oracle Database 11g Express Edition Release 11.2.0.2.0 - 64bit Production
- Verify the APEX version by connecting as the
systemuser through SQL*Plus and running the following query:COLUMN version_no FORMAT A16 HEADING "Version Number" COLUMN api_compatibility FORMAT A16 HEADING "API|Compatibility" COLUMN patch_applied FORMAT A14 HEADING "Patch Applied" SELECT * FROM apex_release;
It should return the following when you start with the base Oracle Database 11g XE:
		 API
Version Number	 Compatibility	  Patch Applied
---------------- ---------------- --------------
4.0.2.00.09      2010.05.13
- Verify the XML Database version by connecting as the
systemuser through SQL*Plus and running the following query:COLUMN comp_name FORMAT A20 COLUMN version FORMAT A12 COLUMN status FORMAT A8 SELECT comp_name , version , status FROM dba_registry WHERE comp_id = 'XDB';
It should return the following when you’re upgrading the Oracle Database 11g XE:
COMP_NAME            VERSION      STATUS
-------------------- ------------ --------
Oracle XML Database  11.2.0.2.0   VALID
- Verify the
memory_targetof the instance by connecting as the system user through SQL*Plus and running the following query. It should be no smaller than 300 MB.show parameter memory_target
It should return the following when you’re upgrading the Oracle Database 11g XE:
NAME                                 TYPE        VALUE
------------------------------------ ----------- ------------------------------
memory_target                        big integer 1G
- Oracle’s instructions qualify that APEX 5 will install into the
APEX_050000schema. Oracle creates the newAPEX_050000schema with a default of thesysauxandtemptable space. You can verify these as the system user through SQL*Plus by running the following two queries. The first one checks for the tablespaces and the second for available space and auto extensibility.COLUMN default_tablespace FORMAT A22 COLUMN temporary_tablespace FORMAT A22 SELECT default_tablespace , temporary_tablespace FROM dba_users WHERE username = 'APEX_040000';
It should return the following when you’re upgrading the Oracle Database 11g XE:
DEFAULT_TABLESPACE     TEMPORARY_TABLESPACE
---------------------- ----------------------
SYSAUX                 TEMP
COLUMN tablespace_name FORMAT A10        HEADING "Tablespace Name"
COLUMN file_name       FORMAT A38        HEADING "File Name"
COLUMN available_space FORMAT 999,999.00 HEADING "Available|Space MB"
COLUMN autoextensible  FORMAT A10        HEADING "Auto|Extensible"
SELECT   tablespace_name
,        file_name
,      ((maxbytes - bytes) / 1024) / 1024 AS available_space
,        autoextensible
FROM     dba_data_files
WHERE    tablespace_name IN ('SYSAUX','SYSTEM');
It should return the following when you’re upgrading the Oracle Database 11g XE:
Tablespace                                        Available   Auto
Name       File Name                              Space MB    Extensible
---------- -------------------------------------- ----------- ----------
SYSAUX     /u01/app/oracle/oradata/XE/sysaux.dbf    32,027.98 YES
SYSTEM     /u01/app/oracle/oradata/XE/system.dbf       200.00 YES
Download APEX 5
- Download the APEX software from the Oracle web site. Assuming you download the software as the
studentuser, you can save it in yourDownloadsdirectory.You should open a Terminal session and connect as the
oracleuser. If you’ve setup your instance correctly, you will need to first become therootuser and then theoracleuser. As theoracleuser, you source the Oracle environment and copy theapex_x.x.x.zipfile from the~student/Downloadsdirectory to the/u01/app/oracledirectory.
- You copy the file from the
studentuser’sDownloadsdirectory with the following command:cp /home/student/Downloads/apex_x.x.x.zip /u01/app/oracle
- You unzip the copied
apex_x.x.x.zipfile (version 5.1.2 in this example) with the following command, and it will create a newapexdirectory as a subdirectory of the/u01/app/oracledirectory.unzip apex_5.1.2.zip
Install APEX 5
- You should query the
dba_usersview to check the status of theapex_public_userandanonymoususer accounts, like this:COLUMN username FORMAT A18 HEADING "User Name" COLUMN account_status FORMAT A10 HEADING "Account|Status" SELECT username , account_status FROM dba_users WHERE username IN ('APEX_PUBLIC_USER','ANONYMOUS');
It should return the following when you’re upgrading the Oracle Database 11g XE but the anonymous user name may be open if you’ve previously unlocked it:
		   Account
User Name	   Status
------------------ ----------
APEX_PUBLIC_USER   LOCKED
ANONYMOUS	   LOCKED
- You can unlock the
apex_public_userandanonymousaccounts with the following statements:ALTER USER apex_public_user ACCOUNT UNLOCK; ALTER USER anonymous ACCOUNT UNLOCK;
- The installation uses the
flows_filesschema, which should be installed. You can verify the default and temporary tablespaces with the following query:COLUMN default_tablespace FORMAT A22 COLUMN temporary_tablespace FORMAT A22 SELECT default_tablespace , temporary_tablespace FROM dba_users WHERE username = 'FLOWS_FILES';
DEFAULT_TABLESPACE     TEMPORARY_TABLESPACE
---------------------- ----------------------
SYSAUX		       TEMP
- Open a Terminal session, connect as the
oracleuser, source the Oracle environment file, and change your active directory to the/u01/app/oracle/apexdirectory, and open a SQL*Plus connection as thesysuser. You need superuser privileges, which means you need to connect to the Oracle database with the “sys as sysdba” syntax.sqlplus sys as sysdbaYou can now install APEX 5.x.x by calling the following script with four parameters:
@apexins.sql SYSAUX SYSAUX TEMP /i/
It will take a couple minutes for the installation script to succeed. You will know that it is completed when you see the following message:
Thank you for installing Oracle Application Express 5.1.2.00.09

Oracle Application Express is installed in the APEX_050100 schema.

The structure of the link to the Application Express administration services is as follows:
http://host:port/pls/apex/apex_admin (Oracle HTTP Server with mod_plsql)
http://host:port/apex/apex_admin     (Oracle XML DB HTTP listener with the embedded PL/SQL gateway)
http://host:port/apex/apex_admin     (Oracle REST Data Services)

The structure of the link to the Application Express development interface is as follows:
http://host:port/pls/apex (Oracle HTTP Server with mod_plsql)
http://host:port/apex     (Oracle XML DB HTTP listener with the embedded PL/SQL gateway)
http://host:port/apex     (Oracle REST Data Services)

PL/SQL procedure successfully completed.

Disconnected from Oracle Database 11g Express Edition Release 11.2.0.2.0 - 64bit Production
- After installing APEX 5, you can re-verify the APEX version by connecting as the
systemuser through SQL*Plus and running the following query:COLUMN version_no FORMAT A16 HEADING "Version Number" COLUMN api_compatibility FORMAT A16 HEADING "API|Compatibility" COLUMN patch_applied FORMAT A14 HEADING "Patch Applied" SELECT * FROM apex_release;
It should return the following after upgrading with APEX 5:
		 API
Version Number	 Compatibility	  Patch Applied
---------------- ---------------- --------------
5.1.2.00.09	 2016.08.24	  APPLIED
Configure APEX 5
- At this point, you need to set the internal password, which you can do by navigating to the
/u01/app/oracle/apexdirectory. In that directory, you should open a SQL*Plus session as thesysuser with the “sys as sysdba” privilege. Run the following script to set the APEX Administrator’s credentials:@apxchpwd.SQLIt will prompt you for parameters, like so:
================================================================================
This script can be used to change the password of an Application Express
instance administrator. If the user does not yet exist, a user record will be
created.
================================================================================
Enter the administrator's username [ADMIN] ADMIN
User "ADMIN" exists.
Enter ADMIN's email [ADMIN] mclaughlinm@byui.edu
Enter ADMIN's password []
Changed password of instance administrator ADMIN.
- The next task requires you to run the
apex_epg_config.sqlscript with one directory parameter. You should be connect to thesysuser with the “sys as sysdba” privilege:@apex_epg_config.SQL /u01/app/oracle
It will take a couple minutes to complete this script, and when it is complete it displays:
. Loading images directory: /u01/app/oracle/apex/images
- While the default port for XML DB is 8080, you should confirm it with this query:
SELECT dbms_xdb.gethttpport
FROM   dual;
It should return the following:
GETHTTPPORT
-----------
       8080
Connect to and use APEX 5
- You can type the following URL into your local browser to get to the APEX 5 Administration page:
http://localhost:8080/apex/apex_admin
It should display the following login. The password is the one you entered when you ran the
apxchpwd.sqlscript in the configuration section of this post.
After you enter proper credentials, click the Sign in to Administration button to proceed. It should display the following APEX 5 home page.
You can now work in APEX 5 Administration and setup a individual workspaces.
Cleanup APEX 4
Migrating functionality to APEX 5 is possible but reworking the existing design in the context of new features is better. After you have migrated your applications and upgraded your production instance, you can drop the APEX_040000 user/schema and remove any APEX 4 workspaces. This segment of shows you how to remove an APEX 4 workspace and drop the APEX_040000 user/schema.
- The following anonymous PL/SQL block will remove an APEX 4 workspace from a user schema. It’s designed for you to run it inside the target schema but you can change it to run it as the system user against multiple schemas.
DECLARE
  /* Cursor for all APEX 4 tables and sequences. */
  CURSOR c IS
    SELECT   uo.object_type
    ,        uo.object_name
    FROM     user_objects uo
    WHERE    uo.object_name IN
               ('DEPT'
               ,'APEX$_WS_WEBPG_SECTION_HISTORY'
               ,'APEX$_ACL'
               ,'APEX$_WS_WEBPG_SECTIONS'
               ,'APEX$_WS_ROWS'
               ,'EMP'
               ,'APEX$_WS_FILES'
               ,'APEX$_WS_TAGS'
               ,'APEX$_WS_LINKS'
               ,'APEX$_WS_NOTES'
               ,'DEMO_USERS'
               ,'DEMO_CUSTOMERS'
               ,'DEMO_ORDERS'
               ,'DEMO_PRODUCT_INFO'
               ,'DEMO_ORDER_ITEMS'
               ,'DEMO_STATES'
               ,'APEX$_WS_HISTORY'
               ,'DEMO_USERS_SEQ'
               ,'DEMO_PROD_SEQ'
               ,'DEMO_ORD_SEQ'
               ,'DEMO_ORDER_ITEMS_SEQ'
               ,'DEMO_CUST_SEQ'
               ,'CUSTOM_HASH'
               ,'CUSTOM_AUTH')
    ORDER BY  uo.object_type DESC;
BEGIN
  FOR i IN c LOOP
    IF i.object_type = 'TABLE' THEN
      EXECUTE IMMEDIATE 'DROP '||i.object_type||' '||i.object_name||' CASCADE CONSTRAINTS';
    ELSE
      EXECUTE IMMEDIATE 'DROP '||i.object_type||' '||i.object_name;
    END IF;
  END LOOP;
END;
/
- You can then connect as the
sysuser with the “sys as sysdba” privilege and drop the APEX_040000 user/schema, like this:DROP USER apex_040000 CASCADE;
Oracle Segment Fails
The instance that I’ve built for my students in a Fedora VM is quite stable except for one feature. The feature is the hibernation process of the base operating system. Sometimes when the base operating system hibernates, it causes the Oracle shared memory segment to fail. When that happens you get the following error:
ERROR: ORA-01034: ORACLE NOT available ORA-27101: shared memory realm does NOT exist Linux-x86_64 Error: 2: No such FILE OR DIRECTORY Process ID: 0 SESSION ID: 0 Serial NUMBER: 0 |
I created the master sudoer account as the student user. The oracle user is configured so that you can’t log in to the Linux OS with it. To restart the instance you can do the following in a default Oracle 11g XE installation:
su - root |
or, you can do this:
sudo sh |
Then as the root user, you can sign on to the oracle user’s account by using the su command without a password, like:
su - oracle |
As the user who installed the Oracle instance, you can connect to the database without a password after you source the environment file. The standard Oracle 11g XE environment file can be sources like this:
. /u01/app/oracle/product/11.2.0/xe/bin/oracle_env.sh |
Alternatively, for my students there is a .bashrc file that they can manually source. It contains the following:
# Source global definitions if [ -f /etc/bashrc ]; then . /etc/bashrc fi # Uncomment the following line if you don't like systemctl's auto-paging feature: # export SYSTEMD_PAGER= # User specific aliases and functions . /u01/app/oracle/product/11.2.0/xe/bin/oracle_env.sh # Wrap sqlplus with rlwrap to edit prior lines with the # up, down, left and right keys. sqlplus () { # Discover the fully qualified program name. path=`which rlwrap 2>/dev/null` file='' # Parse the program name from the path. if [ -n ${path} ]; then file=${path##/*/} fi; # Wrap when there is a file and it is rewrap. if [ -n ${file} ] && [[ ${file} = "rlwrap" ]]; then rlwrap sqlplus "${@}" else echo "Command-line history unavailable: Install the rlwrap package." $ORACLE_HOME/bin/sqlplus "${@}" fi } # Set vi as a command line editor. set -o vi |
You can source the oracle user’s .bashrc account, like this:
. .bashrc |
After you’ve sourced the environment, you can connect as the internal user with the following syntax:
sqlplus / AS sysdba |
Connected as the internal user, run these two commands in sequence:
shutdown IMMEDIATE
startup |
Then, you should be able to connect as the student user or another ordinary user with the following syntax:
CONNECT student/student |
Hope this helps my students and those who want to know how to restart the Oracle instance.
Debug PL/SQL Web Pages
What happens when you can’t get a PL/SQL Web Toolkit to work because it only prints to a web page? That’s more tedious because any dbms_output.put_line command you embed only prints to a SQL*Plus session. The answer is quite simple, you create a test case and test it inside a SQL*Plus environment.
Here’s a sample web page that fails to run successfully …
1 2 3 4 5 6 7 8 9 10 11 12 13 14 15 16 17 18 19 20 21 22 23 24 | CREATE OR REPLACE PROCEDURE html_table_values ( name_array OWA_UTIL.VC_ARR , value_array OWA_UTIL.VC_ARR ) IS BEGIN /* Print debug to SQL*Plus session. */ FOR i IN 1..name_array.COUNT LOOP DBMS_OUTPUT.put_line('Value ['||name_array(i)||'='||value_array(i)||']'); END LOOP; /* Open HTML page with the PL/SQL toolkit. */ htp.print('<!DOCTYPE html>'); htp.htmlopen; htp.headopen; htp.htitle('Test'); htp.headclose; htp.bodyopen; htp.line; htp.print('Test'); htp.line; htp.bodyclose; htp.htmlclose; END; / |
You can test the program with the following anonymous block as the SYSTEM user, which is equivalent to the following URL:
http://localhost:8080/db/html_table_values?begin=1004&end=1012 |
The following test program lets you work:
1 2 3 4 5 6 7 8 9 10 11 12 13 14 15 16 | DECLARE x OWA_UTIL.VC_ARR; y OWA_UTIL.VC_ARR; BEGIN /* Insert first row element. */ x(1) := 'begin'; y(1) := '1004'; /* Insert second row element. */ x(2) := 'end'; y(2) := '1012'; /* Call the anonymous schema's web page. */ anonymous.html_table_values(x,y); END; / |
It should print:
Value [begin=1004] Value [end=1012] |
I hope this helps those looking for a solution.
SQL Developer & PL/SQL
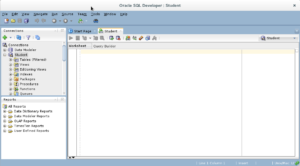
While SQL Developer installs with a dbms_output view, some organizations close it before they distribute images or virtual machine (VM) instances. This post shows you how to re-enable the Dbms Output view for SQL Developer.
SQL Developer DBMS_OUTPUT Configuration
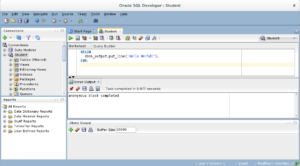
- You need to open SQL Developer, which may look like this when the
DBMS_OUTPUTview isn’t visible.
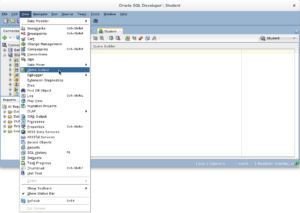
- You need to click on the View menu option in SQL Developer and choose the Dbms Output dropdown menu element.
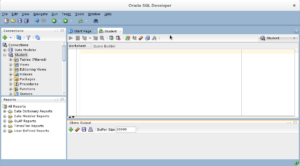
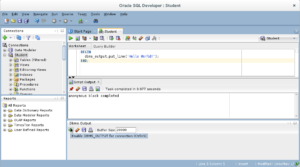
- You should see a grayed-out Dbms Output view.
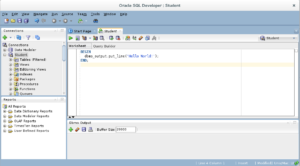
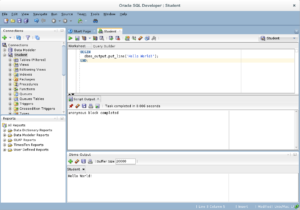
- You should type a simply “Hello World!” anonymous block program in PL/SQL, like the one shown in the drawing.
- After writing the “Hello World!” anonymous block program in PL/SQL, click the green arrow to start the statement and you will see two things. There is now a Script Output view between your console and Dbms Output views, and it should say “anonymous block completed.” Unfortunately, none of your output is displayed in the Dbms Output view because you need to enable it.
- If you hover over the Dbms Output view’s green arrow, you see the help message that describes the behavior of the green arrow. The Dbms Output green arrow lets you enable the Dbms Output view for output.
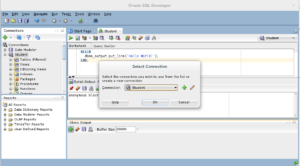
- After you click the Dbms Output view’s green arrow, you receive a Select Connection prompt for the view. Make sure you have the right user, and click the OK button to continue.
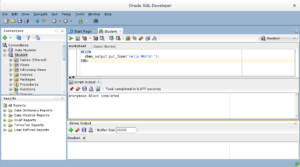
- After you create the connection for the Dbms Output stream, the view area becomes white rather than gray.
- Click the green arrow to start the statement and you will see the “Hello World!” string in the Dbms Output view.”
As always, I hope this helps those looking for a solution.
APEX Create Table
The following walks you through how you sign on to a STUDENT Workspace with Oracle’s APEX product. It shows you how to create a new table with the Object Browser tool.
You can find instructions on how to create your own STUDENT Workspace in this blog post. Overall, Oracle APEX is a valuable tool to learn and master.
- You start the process by accessing the Oracle Database 11g APEX, which you can access at
http://localhost:8080/apexby default on the server. If you’ve got a static IP address for your instance, you can replacelocalhostwith the IP address orhostnamefor the IP address.- Workspace:
STUDENT - Username:
ADMIN - Password:
STUDENT
- Workspace:
- After you login to the
STUDENTworkspace, you have four options. They are the: Application Builder, SQL Workshop, Team Development, and Administration. You start the process by accessing the Oracle Database 11g APEX, which you can access athttp://localhost:8080/apexby default on the server. If you’ve got a static IP address for your instance, you can replacelocalhostwith the IP address orhostnamefor the IP address. Click on the Object Browser icon to proceed.
- Clicking the SQL Workshop icon takes you to the second level menu. You click the Object Browser icon to create a database object.
- After clicking the Object Browser icon, you see the screen at the left. Click the Create button to create a table.
- After clicking the Create button, you see the screen at the left. Click the type of database object that you want to create. In our case, we click the Table hypertext to start the create table workflow.
- After clicking the Table hyperlink, you see the Create Table screen at the left. Enter the column names, choose their data types and set the scale and precision. You should also check the Not Null checkbox when you want a column to be mandatory. Click the Next button to continue the create table workflow.
- After entering the column names, you should choose the data types, enter the scale and precision, and check the
NOT NULLcheckbox to make appropriate columns mandatory by applyingNOT NULLdatabase constraints. If you run out of entry rows, you can click the Add Column button to add new rows. Click the Next button to continue the create table workflow when you’ve defined the columns.
- After defining the column names, you should choose whether the primary key will use a new sequence or an existing sequence. You also have the ability to not assign a primary key value or simply leave it unpopulated when inserting new rows. The example creates an
IMAGE_PKprimary key constraint on theIMAGE_IDcolumn, and declares anIMAGE_SEQsequence value. Click the Next button to continue the create table workflow when you’ve defined the primary key constraint and any new sequence value for the primary key column.
- After defining the primary key constraint, you can define foreign key column constraints. You enter a foreign key constraint name, choose between a Disallow Delete, Cascade Delete, or Set Null on Delete rule, select the foreign key column, the foreign key’s referenced table and column. Click the Add button to continue the create table workflow.
- After defining a foreign key constraint, you can see the constraint that you created. Then, you can define another foreign key column constraints. You repeat the steps from the prior steps to add another foreign key constraint. Click the Add button to create a second foreign key constraint and complete the create table workflow.
- After defining a second foreign key constraint, you see the following two foreign key constraints. Click the Next button to complete the create table workflow.
- After defining all the foreign key constraints, you can create check and unique constraints. You check a radio button for a check or unique constraint, and then you select the columns for the constraint’s key. Click the /Add button to create any check or unique constraints as part of the create table workflow.
- After defining all check and unique key constraints, you can see them in the Constraints box. Click the Next button to complete the create table workflow.
- After defining all items about the table, you can see the SQL to create the IMAGE table and its constraints. You can copy the SQL into a file for later use when writing a re-runnable script. Click the Create button to complete the create table workflow and create the table.
The following are the contents of the script for the actions you’ve defined:
CREATE table "IMAGE" (
    "IMAGE_ID"         NUMBER NOT NULL,
    "FILE_NAME"        VARCHAR2(60) NOT NULL,
    "MIME_TYPE"        NUMBER NOT NULL,
    "ITEM_IMAGE"       BLOB,
    "CREATED_BY"       NUMBER NOT NULL,
    "CREATION_DATE"    DATE NOT NULL,
    "LAST_UPDATED_BY"  NUMBER NOT NULL,
    "LAST_UPDATE_DATE" DATE NOT NULL,
    constraint  "IMAGE_PK" primary key ("IMAGE_ID")
)
/

CREATE sequence "IMAGE_SEQ"
/

CREATE trigger "BI_IMAGE"
  before insert on "IMAGE"
  for each row
begin
  if :NEW."IMAGE_ID" is null then
    select "IMAGE_SEQ".nextval into :NEW."IMAGE_ID" from dual;
  end if;
end;
/

ALTER TABLE "IMAGE" ADD CONSTRAINT "IMAGE_FK1"
FOREIGN KEY ("CREATED_BY")
REFERENCES "SYSTEM_USER" ("SYSTEM_USER_ID")

/
ALTER TABLE "IMAGE" ADD CONSTRAINT "IMAGE_FK2"
FOREIGN KEY ("LAST_UPDATED_BY")
REFERENCES "SYSTEM_USER" ("SYSTEM_USER_ID")

/
alter table "IMAGE" add
constraint "IMAGE_UK1"
unique ("FILE_NAME","MIME_TYPE")
/
- After creating the table, trigger, sequence, and constraints, you can see the table definition. You also have the ability to modify the table. At this point, you can create another structure or you can click the Home or SQL Workshop menu choice.
As always, I hope this helps those looking to learn new things and approaches.
APEX SQL Query
The following walks through how you sign on to a STUDENT Workspace with Oracle’s APEX product and write and run free-form SQL statements. You can find instructions on how to create your own STUDENT Workspace.
While this blog introduces several concepts and features of Oracle APEX, it only focuses on how to write and run free-form SQL statements. Overall, Oracle APEX is a valuable tool to learn and master.
- You start the process by accessing the Oracle Database 11g APEX, which you can access at
http://localhost:8080/apexby default on the server. If you’ve got a static IP address for your instance, you can replacelocalhostwith the IP address orhostnamefor the IP address.- Workspace:
STUDENT - Username:
ADMIN - Password:
STUDENT
- Workspace:
- After you login to the
STUDENTworkspace, you have four options. They are the: Application Builder, SQL Workshop, Team Development, and Administration. You start the process by accessing the Oracle Database 11g APEX, which you can access athttp://localhost:8080/apexby default on the server. If you’ve got a static IP address for your instance, you can replacelocalhostwith the IP address orhostnamefor the IP address. Click on the SQL Workshop icon to proceed.- Application Builder: Let’s you build custom APEX applications.
- SQL Workshop: Let’s you work with custom SQL, and APEX provides you with the following utilities:
- Object Browser: Lets you create tables, views, and other objects.
- SQL Commands: Lets you run individual SQL statements inside a browser window and returns results in the bottom pane.
- SQL Scripts: Lets you create, upload, delete, and run scripts from the browser.
- Query Builder: Lets you create free form queries that include joins between tables, but limits you to primary to foreign key table relationships. That means you can’t write range joins with a cross join and the
BETWEENoperator and you can’t write self-joins. - Utilities: Lets you work with the Data Workshop (imports and exports data), Object Reports (a SQL report writer tool), Generate DDL (a tool that creates structures in the database), User Interface Defaults (coordinate data dictionary), Schema Comparison (a tool to compare similarities between schemas, About Database (the ability to connect as the database administrator), and Recycle Bin (dropped and purged structures).
- Team Development: A project management tool.
- Administration: Lets you manage database services, users and groups, monitor activities, and dashboards. You should note that the SQL query doesn’t have a semicolon like it would in a SQL*Plus environment. The Run button acts as the execution operator and effectively replaces the role of the semicolon, which traditionally executes a statement.
- Clicking the SQL Workshop icon takes you to the second level menu. You click the SQL Commands icon to enter a free-form SQL statement. Click on the SQL Commands icon to proceed.
- The first text panel lets you enter free-form queries. The Autocommit checkbox is enabled, which means the result of
INSERTandUPDATEstatements are immediate and don’t require aCOMMITstatement. The second text panel displays results from a query or acknowledgment of statement completion.
- This screen shot shows a query in the first panel and the results of the query in the second panel.
As always, I hope this helps those looking to learn new things and approaches.
Excel-Oracle ODBC Driver
Somebody was trying to query Oracle via Microsoft Excel 2007, and didn’t have an Oracle ODBC Data Source that enable them to choose Oracle. I’d referred them to this post on adding MySQL’s ODBC driver to Windows 7 but that didn’t help enough. Posting this screen shot may not have helped either.
It appears I assumed too, like everyone would know that it’s on Windows 7 when Oracle 11g (or another Oracle database) is installed locally. The person who posed the question doesn’t have Oracle installed locally and can’t install it.
For those who don’t have an Oracle instance running locally, you can download the Oracle Data Access Components for Windows from the Oracle web site. It’s in the driver sections, as shown in the screen capture below:
This driver contains the necessary OLE DB and ODBC drivers, as you can see in this screen shot.
Once you’ve downloaded it, you can return to this post where you set up an Excel query against a remote Oracle database. You should take note that Microsoft’s future direction adopts Oracle ODBC, like the approach they’ve chosen with MySQL’s ODBC driver. As always, I hope this helps.
Reset 11g XE APEX Password
I’ve been busy working on other things since APEX 4 shipped. After I got through the installations of Oracle Database 11g XE (see prior posts), figuring out the default user name and password for APEX Administration became a tedious task. The documentation didn’t really help point to what was needed but it’s always in the code.
You reset the APEX Administration Account for Oracle Database 11g XE by doing the following steps:
- Open a command shell and change the directory to the
%ORACLE_HOME%\apexdirectory (the default Oracle Home isc:\oraclexe\app\oracle\product\11.2.0\server). Then, connect as theSYSTEMuser to the SQL*Plus utility, and run the following command that sets the temporary password to “admin“. You’ll reset the password when you connect through the web interface.
@apxxepwd admin |
- Open APEX Administration by navigating to the
http://localhost:8080/apex/apex_admin, and you’ll see the following APEX Administration Login screen. Enter admin as the user name and admin as the password and click the Login button.
- You’ll be prompted to reset the password in the following Change Password screen. Enter admin as the old password and a new password that complies with the following rules, and click the Apply Changes button.
- Password must contain at least 6 characters.
- New password must differ from old password by at least 2 characters.
- Password must contain at least one numeric character (0123456789).
- Password must contain at least one punctuation character (!”#$%&()“*+,-/:;<=>?_).
- Password must contain at least one upper-case alphabetic character.
- Password must not contain username.
- After configuring the APEX Administration account, click on the Manage Workspaces icon (or button), as shown below. If re-opening the browser to go straight here, just type the following URL
http://localhost:8080/apex/apex_admin.
- The upper left box contains what you need to create a workspace. Click on the Create Workspace option as shown below.
- The choice to add a workspace launched a provisioning workflow. You first Identify Workspace.

- The dialog box for this second provisioning step is:
- The dialog box for this third provisioning step is:
- The dialog box for this fourth provisioning step cpmfirms what you’re doing before you perform the task:
- The dialog box for this fifth provisioning step confirms success or reports failure:
- After you’ve provisioned a workspace, you can create objects like you did with APEX 3. Enter the following URL:
http://localhost:8080/apexand you’ll be brought to this login screen.
- After logging in to your Basic workspace, you’ll have these four principal widgets, as shown in the screen capture.
Maybe I went through the 2-Day APEX manual too quickly but I didn’t see how to do this, all I saw was how to use the HR sample schema. As always, I hope this helps others.


