MySQL PHP Transaction
My students liked the MySQL Transaction post but wanted one that showed how an external web application would interact with MySQL in the scope of a transaction. So, I put a little PHP function together that write across two related tables in the context of a transaction. It uses mysqli (MySQL Improved Extension) to connect PHP to the MySQL database.
The function is barebones and uses the oldest approach of hidden inputs to maintain context between rendered forms using an HTML POST method. The hidden inputs are preceded with “h_” and snake case is used for variable names.
The function only writes to two tables. It writes to the member table and when that completes successfully to the contact table. The function:
- Submits credentials from a file and raises an error when they don’t work.
- Initializes a SQL statement.
- Disables auto commit.
- Starts a transaction.
- Defines a first SQL statement with placeholders.
- Binds local variables to the first SQL statement’s placeholders.
- Rolls back the transaction when the first statement fails and continues to the next SQL statement when first statement succeeds.
- Defines a second SQL statement with placeholders.
- Binds local variables to the second SQL statement’s placeholders.
- Rolls back the transaction when the second statement fails and commits the work when the second statement succeeds.
- Closes a SQL statement.
The code for the PHP function is:
1 2 3 4 5 6 7 8 9 10 11 12 13 14 15 16 17 18 19 20 21 22 23 24 25 26 27 28 29 30 31 32 33 34 35 36 37 38 39 40 41 42 43 44 45 46 47 48 49 50 51 52 53 54 55 56 57 58 59 60 61 62 63 64 65 66 67 68 69 70 71 72 73 74 75 76 77 78 79 80 81 82 83 84 85 86 87 88 89 90 91 92 93 94 95 96 97 98 99 100 101 102 103 104 105 106 107 108 109 110 111 112 113 114 115 116 117 118 119 120 121 122 123 124 125 126 127 128 129 | /* || Function Name: update_membership || ---------------------------------------------------------------------- || No return, treated as a procedure, or method returning a void. || ---------------------------------------------------------------------- */ function update_membership( $h_account_number , $h_member_type , $h_credit_card_number , $h_credit_card_type , $account_number , $member_type , $credit_card_number , $credit_card_type , $h_first_name , $h_middle_name , $h_last_name , $h_contact_type , $first_name , $middle_name , $last_name , $contact_type) { // Include the credentials file if omitted. include_once("MySQLCredentials.inc"); // Assign credentials to connection. $mysqli = new mysqli(HOSTNAME, USERNAME, PASSWORD, DATABASE); // Check for connection error and print message. if ($mysqli->connect_errno) { print $mysqli->connect_error."<br />"; print "Connection not established ...<br />"; } else { // Initial statement. $stmt = $mysqli->stmt_init(); // Disable auto commit when you want two plus statements run. $mysqli->autocommit(FALSE); // Set the transaction guarantee. $mysqli->begin_transaction(MYSQLI_TRANS_START_READ_WRITE); // Declare a static query. $sql = "UPDATE member\n" . "SET member_type = ?\n" . ", credit_card_number = ?\n" . ", credit_card_type = ?\n" . "WHERE account_number = ?\n" . "AND member_type = ?\n" . "AND credit_card_number = ?\n" . "AND credit_card_type = ?\n"; // Prepare statement. if ($stmt->prepare($sql)) { $stmt->bind_param( "sssssss" , $member_type , $credit_card_number , $credit_card_type , $account_number , $h_member_type , $h_credit_card_number , $h_credit_card_type); } // Attempt query and exit with failure before processing. if (!$stmt->execute()) { // Rollback or undo the transaction. $mysqli->rollback(); // Print failure to resolve query message. print $mysqli->error."<br />\n"; print "Failed to resolve query ...<br />\n"; } // Declare a static query. $sql = "UPDATE contact\n" . "SET first_name = ?\n" . ", middle_name = ?\n" . ", last_name = ?\n" . ", contact_type = ?\n" . "WHERE first_name = ?\n" . "AND middle_name = ?\n" . "AND last_name = ?\n" . "AND contact_type = ?\n"; // Prepare statement. if ($stmt->prepare($sql)) { $stmt->bind_param( "ssssssss" , $first_name , $middle_name , $last_name , $contact_type , $h_first_name , $h_middle_name , $h_last_name , $h_contact_type); } // Attempt query and exit with failure before processing. if (!$stmt->execute()) { // Rollback or undo the transaction. $mysqli->rollback(); // Print failure to resolve query message. print $mysqli->error."<br />"; print "Failed to resolve query ...<br />"; } else { /* Manually commiting writes when you have disabled the || default auto commit setting, explained above. || ------------------------------------------------------------ || You would add the following command to commit the || transaction. || ------------------------------ || $mysqli->commit(); || ------------------------------------------------------------ */ $mysqli->commit(); // Close the transaction. $mysqli->close(); } } } |
Line 41 disables auto commit and line 44 starts the transaction. Each statement is managed with the subsequent statement nested inside a block of code that is only reachable when the prior statement succeeds. While this only uses the member and contact table, it could use any number of tables. The natural alternative is building an updatable view.
As always, I hope this helps anybody looking for a code complete example.
SQL Handling Nulls
Interesting questions always come via my students. For example, “Why does the selective aggregation sample return null values as totals from the SUM() function in MySQL?”
First, here’s the code to build the sample table for the problem:
DROP TABLE IF EXISTS transaction; CREATE TABLE transaction ( transaction_id int unsigned primary key auto_increment , transaction_date date , transaction_amount double ); INSERT INTO transaction ( transaction_date, transaction_amount ) VALUES ('2021-01-10', 56) ,('2021-02-14',23.02) ,('2021-03-31',31.06) ,('2021-01-01',.25) ,('2020-01-02', 52) ,('2020-02-08',22.02) ,('2020-03-26',32.06) ,('2020-01-12',.75);; |
Now, here’s the selective aggregation query:
SELECT EXTRACT(YEAR FROM transaction_date) AS "Year" , SUM( CASE WHEN EXTRACT(MONTH FROM transaction_date) = 1 THEN transaction_amount END) AS "Jan" , SUM( CASE WHEN EXTRACT(MONTH FROM transaction_date) = 2 THEN transaction_amount END) AS "Feb" , SUM( CASE WHEN EXTRACT(MONTH FROM transaction_date) = 3 THEN transaction_amount END) AS "Mar" , SUM( CASE WHEN EXTRACT(MONTH FROM transaction_date) IN (1,2,3) THEN transaction_amount END) AS "1FQ" FROM transaction WHERE transaction_date BETWEEN '2020-01-15' AND '2021-03-15' GROUP BY EXTRACT(YEAR FROM transaction_date) ORDER BY 1; |
It produces the following correct results (at least in response to the query above):
+------+-------+-------+-------+-------+ | Year | Jan | Feb | Mar | 1FQ | +------+-------+-------+-------+-------+ | 2020 | NULL | 22.02 | 32.06 | 54.08 | | 2021 | 56.25 | 23.02 | NULL | 79.27 | +------+-------+-------+-------+-------+ 2 rows in set (0.02 sec) |
Why do you get null values for January 2020 and March 2021? That’s because the query returns null values when the conditions in the SELECT-list aren’t met for a row return. This happens:
- When a row is returned for the month of February or March a null is returned in the January column.
- When a row is returned for the month of January or March a null is returned in the February column.
- When a row is returned for the month of January or February a null is returned in the March column.
That means there needs to be an ELSE clause in each of the CASE statements that sets the return value to zero. For example, the following query includes the ELSE clause and some nice formatting tricks:
SELECT EXTRACT(YEAR FROM transaction_date) AS "Year" , CONCAT('$',LPAD(FORMAT(SUM( CASE WHEN EXTRACT(MONTH FROM transaction_date) = 1 THEN transaction_amount ELSE 0 END),2),8,' ')) AS "Jan" , LPAD(FORMAT(SUM( CASE WHEN EXTRACT(MONTH FROM transaction_date) = 2 THEN transaction_amount ELSE 0 END),2),8,' ') AS "Feb" , LPAD(FORMAT(SUM( CASE WHEN EXTRACT(MONTH FROM transaction_date) = 3 THEN transaction_amount ELSE 0 END),2),8,' ') AS "Mar" , LPAD(FORMAT(SUM( CASE WHEN EXTRACT(MONTH FROM transaction_date) IN (1,2,3) THEN transaction_amount ELSE 0 END),2),8,' ') AS "1FQ" FROM transaction WHERE transaction_date BETWEEN '2020-01-15' AND '2021-03-15' GROUP BY EXTRACT(YEAR FROM transaction_date) ORDER BY 1; |
It returns:
+------+-----------+----------+----------+----------+ | Year | Jan | Feb | Mar | 1FQ | +------+-----------+----------+----------+----------+ | 2020 | $ 0.00 | 22.02 | 32.06 | 54.08 | | 2021 | $ 56.25 | 23.02 | 0.00 | 79.27 | +------+-----------+----------+----------+----------+ 2 rows in set (0.01 sec) |
As always, I hope this helps answer a question that somebody is trying to sort out.
Mongo List Databases
After you install MongoDB on your Linux system, you can connect without a user name or password and discover version and many other details about the installation, as shown in this prior post.
You can use the db.adminCommand() to understand the existing databases, as qualified in the online documentation. The basic syntax to list all databases is:
db.adminCommand( {listDatabases:1} ) |
In a generic Linux installation you should see something like the following:
{
        "databases" : [
                {
                        "name" : "admin",
                        "sizeOnDisk" : 32768,
                        "empty" : false
                },
                {
                        "name" : "config",
                        "sizeOnDisk" : 73728,
                        "empty" : false
                },
                {
                        "name" : "local",
                        "sizeOnDisk" : 90112,
                        "empty" : false
                },
                {
                        "name" : "test",
                        "sizeOnDisk" : 49152,
                        "empty" : false
                }
        ],
        "totalSize" : 245760,
        "ok" : 1
} |
You can filter for a test database and find only your authorization to use the test database with the following command:
db.adminCommand( {listDatabases:1, filter: {"name": /test/}, authorizedDatabases: true} ) |
It returns:
{
        "databases" : [
                {
                        "name" : "test",
                        "sizeOnDisk" : 49152,
                        "empty" : false
                }
        ],
        "totalSize" : 49152,
        "ok" : 1
} |
If you just want the names of your authorized databases, use this syntax:
db.adminCommand( {listDatabases:1, nameOnly: true, authorizedDatabases: true} ) |
It should return:
{
        "databases" : [
                {
                        "name" : "admin"
                },
                {
                        "name" : "config"
                },
                {
                        "name" : "local"
                },
                {
                        "name" : "test"
                }
        ],
        "ok" : 1
} |
As always, I hope this helps those trying to sort through the official documentation and learn how to do things.
MySQL Outer Joins
The students needed yet another example of LEFT JOIN, RIGHT JOIN, and FULL JOIN syntax (by combining a left and right join with the UNION set operator). To that end, I put this set of examples together.
The example also shows how to order the result set from a derived table with the UNION operator. It uses the WITH clause to build a Common Table Expression (CTE), which allows the query to order the UNION set operator’s product based on the left and right join queries. It uses a CASE statement to order the result sets. The left_table is the parent table and the right_table is the child table in the relationship, which means the right_table holds a left_id foreign key column that lets you connect matching rows in the left_table.
You build the little model with the following script:
-- ----------------------------------------------------------------- -- Drop the demonstration tables. -- ----------------------------------------------------------------- DROP TABLE IF EXISTS left_table, right_table; -- ----------------------------------------------------------------- -- Create left_table. -- ----------------------------------------------------------------- CREATE TABLE left_table ( left_id int unsigned primary key auto_increment , leftstring varchar(10)); -- ----------------------------------------------------------------- -- Create left_table. -- ----------------------------------------------------------------- CREATE TABLE right_table ( right_id int unsigned primary key auto_increment , left_id int unsigned , rightstring varchar(10)); -- ----------------------------------------------------------------- -- Insert five rows to the left table, which holds a -- left_id primary key column. -- ----------------------------------------------------------------- INSERT INTO left_table (leftstring) values ('One'); INSERT INTO left_table (leftstring) values ('Two'); INSERT INTO left_table (leftstring) values ('Three'); INSERT INTO left_table (leftstring) values ('Four'); INSERT INTO left_table (leftstring) values ('Five'); -- ----------------------------------------------------------------- -- Delete row four to create a gap. -- ----------------------------------------------------------------- DELETE FROM left_table where left_id = 4; -- ----------------------------------------------------------------- -- Insert four rows, skipping a foreign key value for the -- left_id primary key value of 2. -- ----------------------------------------------------------------- INSERT INTO right_table (rightstring,left_id) values ('One',1); INSERT INTO right_table (rightstring,left_id) values ('Three',3); INSERT INTO right_table (rightstring,left_id) values ('Four',4); INSERT INTO right_table (rightstring,left_id) values ('Five',5); |
Here are the join statements:
INNER JOIN
The INNER JOIN only returns those rows that match between a primary and foreign key column or set of columns.
SELECT l.left_id , l.leftstring , r.left_id , r.right_id , r.rightstring FROM left_table l INNER JOIN right_table r ON l.left_id = r.left_id; |
It produces the following result set:
+---------+------------+---------+----------+-------------+ | left_id | leftstring | left_id | right_id | rightstring | +---------+------------+---------+----------+-------------+ | 1 | One | 1 | 1 | One | | 3 | Three | 3 | 2 | Three | | 5 | Five | 5 | 4 | Five | +---------+------------+---------+----------+-------------+ 3 rows in set (0.00 sec) |
LEFT OUTER JOIN
The LEFT OUTER JOIN only returns those rows that match between a primary and foreign key column or set of columns and any rows in the table on the lefthand side of the join that fail to match with any row on the righthand side of the join. The non-matching rows are also known as the right complement of the join.
1 2 3 4 5 6 7 | SELECT l.left_id , l.leftstring , r.left_id , r.right_id , r.rightstring FROM left_table l LEFT JOIN right_table r ON l.left_id = r.left_id; |
It produces the following result set:
+---------+------------+---------+----------+-------------+ | left_id | leftstring | left_id | right_id | rightstring | +---------+------------+---------+----------+-------------+ | 1 | One | 1 | 1 | One | | 2 | Two | NULL | NULL | NULL | | 3 | Three | 3 | 2 | Three | | 5 | Five | 5 | 4 | Five | +---------+------------+---------+----------+-------------+ 4 rows in set (0.00 sec) |
Add the following line 8 to the query and you get only those rows in the lefthand table that have no child-related rows in the righthand table. These rows are sometimes called childless parent rows. More or less, the use case for this type of query is to find order headers without order lines.
6 7 8 | FROM left_table l LEFT JOIN right_table r ON l.left_id = r.left_id WHERE r.left_id IS NULL; |
It produces the following result set:
+---------+------------+---------+----------+-------------+ | left_id | leftstring | left_id | right_id | rightstring | +---------+------------+---------+----------+-------------+ | 2 | Two | NULL | NULL | NULL | +---------+------------+---------+----------+-------------+ 1 row in set (0.00 sec) |
RIGHT OUTER JOIN
1 2 3 4 5 6 7 | SELECT l.left_id , l.leftstring , r.left_id , r.right_id , r.rightstring FROM left_table l RIGHT JOIN right_table r ON l.left_id = r.left_id; |
It produces the following result set:
+---------+------------+---------+----------+-------------+ | left_id | leftstring | left_id | right_id | rightstring | +---------+------------+---------+----------+-------------+ | 1 | One | 1 | 1 | One | | 3 | Three | 3 | 2 | Three | | NULL | NULL | 4 | 3 | Four | | 5 | Five | 5 | 4 | Five | +---------+------------+---------+----------+-------------+ 4 rows in set (0.00 sec) |
Add the following line 8 to the query and you get only those rows in the righthand table that have no parent-related rows in the lefthand table. These rows are sometimes called orphans because they have no parent row. More or less, the use case for this type of query is to find latent order lines after deleting the order header.
6 7 8 | FROM left_table l LEFT JOIN right_table r ON l.left_id = r.left_id WHERE l.left_id IS NULL; |
It produces the following result set:
+---------+------------+---------+----------+-------------+ | left_id | leftstring | left_id | right_id | rightstring | +---------+------------+---------+----------+-------------+ | NULL | NULL | 4 | 3 | Four | +---------+------------+---------+----------+-------------+ 1 row in set (0.00 sec) |
FULL OUTER JOIN
The full outer join doesn’t exist in MySQL, so you combine a LEFT OUTER JOIN and RIGHT OUTER JOIN with the UNION operator. The UNION operator eliminates the duplicate row from the intersection of the joins.
Here’s the full query:
1 2 3 4 5 6 7 8 9 10 11 12 13 14 15 16 17 18 19 20 21 22 23 24 25 | WITH cte AS (SELECT l.left_id AS primary_left_id , l.leftstring , r.left_id AS foreign_left_id , r.right_id , r.rightstring FROM left_table l LEFT JOIN right_table r ON l.left_id = r.left_id UNION SELECT l.left_id AS primary_left_id , l.leftstring , r.left_id AS foreign_left_id , r.right_id , r.rightstring FROM left_table l RIGHT JOIN right_table r ON l.left_id = r.left_id) SELECT * FROM cte ORDER BY CASE WHEN 'One' IN (leftstring, rightstring) THEN 1 WHEN 'Two' IN (leftstring, rightstring) THEN 2 WHEN 'Three' IN (leftstring, rightstring) THEN 3 WHEN 'Four' IN (leftstring, rightstring) THEN 4 WHEN 'Five' IN (leftstring, rightstring) THEN 5 END; |
It produces the following result set:
+-----------------+------------+-----------------+----------+-------------+ | primary_left_id | leftstring | foreign_left_id | right_id | rightstring | +-----------------+------------+-----------------+----------+-------------+ | 1 | One | 1 | 1 | One | | 2 | Two | NULL | NULL | NULL | | 3 | Three | 3 | 2 | Three | | NULL | NULL | 4 | 3 | Four | | 5 | Five | 5 | 4 | Five | +-----------------+------------+-----------------+----------+-------------+ 5 rows in set (0.00 sec) |
Add the following lines 18 and 19 to the query and you get only those rows that are childless parent rows or orphaned child rows. More or less, the use case for this type of query is to find both order headers without order lines and order lines abandoned by deleted order headers.
17 18 19 | SELECT * FROM cte WHERE primary_left_id IS NULL OR foreign_left_id IS NULL |
It produces the following result set:
+-----------------+------------+-----------------+----------+-------------+ | primary_left_id | leftstring | foreign_left_id | right_id | rightstring | +-----------------+------------+-----------------+----------+-------------+ | 2 | Two | NULL | NULL | NULL | | NULL | NULL | 4 | 3 | Four | +-----------------+------------+-----------------+----------+-------------+ 2 rows in set (0.00 sec) |
The ORDER BY clause used is a variation on the more common choice of:
WHEN leftstring = 'One' OR rightstring = 'One' THEN 1 |
The position of two string literals in any statement is a bad idea. Inverting the literal on the right and using a IN operator gives you a better and clearer WHEN statement:
WHEN 'One' IN (leftstring, rightstring) THEN 1 |
As always, I hope this helps those looking for syntax examples.
SQL*Plus Tutorial
SQL Interactive and Batch Processing
SQL*Plus provides an interactive and batch processing environment that dispatches commands to the SQL and PL/SQL engines. You can work either in the interactive SQL*Plus command-line interface (CLI) or in Oracle SQL Developer through a Java-based GUI. This section explains how to use these two primary interfaces to the SQL and PL/SQL engines. There are many other commercial products from other vendors that let you work with Oracle, but coverage of those products is beyond the scope of this book.
SQL*Plus Command-Line Interface
SQL*Plus is the client software for Oracle that runs SQL statements and anonymous block PL/SQL statements in an interactive and batch development environment. The statements are organized in the order that you generally encounter them as you start working with SQL*Plus or the MySQL Monitor.
Connecting to and Disconnecting from SQL*Plus
After installing the Oracle Database on the Linux OS, you access SQL*Plus from the command line. This works when the operating system finds the sqlplus executable in its path environment variable ($PATH on Linux). Linux installations require that you configure
When sqlplus is in the path environment variable, you can access it by typing the following:
sqlplus some_username/some_password |
The preceding connect string may use IPC or the network to connect to the Oracle database. You can connect through the network by specifying a valid net service name, like this:
sqlplus some_username/some_password@some_net_service_name |
While this works, and many people use it, you should simply enter your user name and let the database prompt you for the password. That way, it’s not displayed as clear text.
To avoid displaying your password, you should connect in the following way, which uses IPC:
sqlplus some_username |
Or you can connect using the network layer by using a net service name like this:
sqlplus some_username@some_tns_alias |
You’ll then see a password prompt. As you type your password, it is masked from prying eyes. The password also won’t be visible in the window of the command session.
The problem with either of these approaches is that you’ve disclosed your user account name at the operating system level. No matter how carefully you’ve host-hardened your operating system, there’s no reason to disclose unnecessary details. The recommended best practice for connecting at the command line is to use /nolog, like this:
sqlplus /nolog |
After you’re connected as an authenticated user, you can switch to work as another user by using the following syntax, which discloses your password to the screen but not the session window:
SQL> CONNECT some_otheruser/some_password |
Or you can connect through a net service name, like
SQL> CONNECT some_otheruser@net_service_name/some_password |
Alternatively, you can connect with or without a net service name to avoid displaying your password:
SQL> CONNECT some_otheruser |
As with the preceding initial authorization example, you are prompted for the password. Entering it in this way also protects it from prying eyes.
If you try to run the sqlplus executable and it fails with a message that it can’t find the sqlplus executable, you must correct that issue. Check whether the $ORACLE_HOME/bin is found in the respective $PATH environment variable. Like PATH, the ORACLE_HOME is also an operating system environment variable. ORACLE_HOME should point to where you installed the Oracle database.
You can use the following commands to check the contents of your path environment variable. Instructions for setting these are in the Oracle Database Installation Guide for your platform and release:
Linux or Unix:
echo $PATH |
When you’ve connected to SQL*Plus, you will see the SQL> prompt, like:
SQL> |
Working in the SQL*Plus Environment
Unlike other SQL environments, the SQL*Plus environment isn’t limited simply to running SQL statements. Originally, it was written as a SQL report writer. This means SQL*Plus contains a number of features to make it friendlier and more useful. (That’s why SQL*Plus was originally known as an Advanced Friendly Interface [AFI]). Examples of these friendlier and useful features include a set of well-designed formatting extensions that enables you to format and aggregate result set data. SQL*Plus also lets you interactively edit files from the command line.
This section explains how you can dynamically configure your environment to suit your needs for each connection, configure SQL*Plus to remember settings for every connection, discover features through the interactive help menus, and shell out of or exit the SQL*Plus environment.
Configuring SQL*Plus Environment You can configure your SQL*Plus environment in two ways. One requires that you configure it each time that you start a session (dynamically). The other requires that you configure the glogin.sql file, which is the first thing that runs after a user authenticates and establishes a connection with the database. The caveat to modifying the glogin.sql file is that any changes become universal for all users of the Oracle Database installation. Also, only the owner of the Oracle account can make these changes.
Dynamically Configuring SQL*Plus—
Every connection to SQL*Plus is configurable. Some developers choose to put these instructions inside their script files, while others prefer to type them as they go. Putting them in the script files means you have to know what options you have first. The SQL*Plus SHOW command lets you find all of them with the keyword ALL, like this:
SHOW ALL |
The SQL*Plus SHOW command also lets you see the status of a given environment variable.
The following command displays the default value for the FEEDBACK environment variable:
SHOW FEEDBACK |
It returns the default value unless you’ve altered the default by configuring it in the glogin.sql file. The oracle user has the rights to make any desired changes in this file, but they apply to all users who connect to the database.
The default value for FEEDBACK is
FEEDBACK ON FOR 6 OR more ROWS |
By default, an Oracle database shows the number of rows touched by a SQL command only when six or more rows are affected. If you also want to show feedback when five or fewer rows are affected, the following syntax resets the environment variable:
SET FEEDBACK ON |
It returns 0 or the number of rows affected by any SQL statement.
Setting these environment variables inside script files allows you to designate runtime behaviors, but you should also reset them to the default at the conclusion of the script. When they’re not reset at the end of a script, they can confuse a user expecting the default behaviors.
Configuring the Default SQL*Plus Environment File—The glogin.sql file is where you define override values for the environment variables. You might want to put many things beyond environment variable values into your glogin.sql configuration file. The most common is a setting for the default editor in Linux or Unix, because it’s undefined out of the box. You can set the default editor to the vi text editor in Linux by adding the following line to the glogin.sql file:
DEFINE _EDITOR=vi |
The DEFINE keyword has two specialized uses in SQL*Plus. One lets you define substitution variables (sometimes called user variables) that act as session-level variables. The other lets you enable or disable the ampersand (&) symbol as a substitution variable operator. It is enabled by default because the DEFINE environment variable is ON by default. You disable the specialized role by setting DEFINE to OFF. SQL*Plus treats the ampersand (&) as an ordinary text character when DEFINE is OFF. You can find more on this use of the DEFINE environment variable in the “When to Disable Substitution Variables” sidebar later in this appendix.
Substitution variables are placeholder variables in SQL statements or session-level variables in script files. They are placeholder variables when you precede them with one ampersand (&) and are session-level variables when you precede them with two ampersands. As placeholders, they are discarded after a single use. Including two ampersands (&&) makes the assigned value of a substitution variable reusable. You can set a session-level variable either with the DEFINE command, as shown previously with the _EDITOR variable, or by using a double ampersand (&&), as in the following:
SELECT '&&BART' FROM dual; |
With two ampersands, the query prompts the user for a value for the BART session-level variable and sets the value as a session-level variable. A single ampersand would simply prompt, use it, and discard it. Assuming you enter “Cartoon Character” as the response to the preceding query, you see the value by querying it with a single or double ampersand:
SELECT '&BART' AS "Session Variable" FROM dual; |
This displays the following:
SESSION Variable ----------------- Cartoon Character |
Or you can use the DEFINE command like this:
DEFINE BART |
This displays the following:
DEFINE BART = "Cartoon Character" (CHAR) |
The scope of the session variable lasts throughout the connection unless you undefine it with the following command:
UNDEFINE BART |
Although you can define substitution variables, you can use them only by preceding their name with an ampersand. That’s because a single ampersand also lets you read the contents of substitution variables when they’re set as session-level variables. Several user variables are reserved for use by Oracle Database. These user variables can contain letters, underscores, or numbers in any order. When reserved for use by Oracle, these variables all start with an underscore, as is the case with the _EDITOR variable. Any reference to these variables is case-insensitive.
SQL*Plus checks the contents of the _EDITOR user variable when you type the EDIT command, often abbreviated as ED. The EDIT command launches the executable stored in the _EDITOR user variable. The Windows version of Oracle Database comes preconfigured with Notepad as the default editor. It finds the Notepad utility because it’s in a directory found in the operating system path variable. If you choose another editor, you need to ensure that the executable is in your default path environment.
The DEFINE command also lets you display the contents of all session-level variables. There is no all option for the DEFINE command, as there is for the SHOW command. You simply type DEFINE without any arguments to get a list of the default values:
DEFINE _DATE = "09-AUG-18" (CHAR) DEFINE _CONNECT_IDENTIFIER = "XE" (CHAR) DEFINE _USER = "STUDENT" (CHAR) DEFINE _PRIVILEGE = "" (CHAR) DEFINE _SQLPLUS_RELEASE = "1102000200" (CHAR) DEFINE _EDITOR = "vim" (CHAR) DEFINE _O_VERSION = "Oracle Database 11g Express Edition Release 11.2.0.2.0 - 64bit Production" (CHAR) DEFINE _O_RELEASE = "1102000200" (CHAR) |
The preceding user variables are set by Oracle during a /nolog connection. When you connect as a container or pluggable user, the DEFINE command displays a different result. Shown next is the example after having connected as the student (a pluggable database user):
DEFINE _DATE = "09-AUG-18" (CHAR) DEFINE _CONNECT_IDENTIFIER = "" (CHAR) DEFINE _USER = "" (CHAR) DEFINE _PRIVILEGE = "" (CHAR) DEFINE _SQLPLUS_RELEASE = "1102000200" (CHAR) DEFINE _EDITOR = "vim" (CHAR) |
The last two lines are displayed only when you’re connected as a user to the Oracle Database 12c database. As previously explained, you can define the contents of other substitution variables.
Although substitution variables have many uses, their primary purpose is to support the SQL*Plus environment. For example, you can use them to reset the SQL> prompt. You can reset the default SQL*Plus prompt by using two predefined session-level variables, like this:
SET sqlprompt "'SQL:'_user at _connect_identifier>" |
This would change the default prompt to look like this when the _user name is system and the _connect_identifier is orcl:
SQL: SYSTEM AT orcl> |
This type of prompt takes more space, but it shows you your current user and schema at a glance. It’s a handy prompt to help you avoid making changes in the wrong schema or instance, which occurs too often in daily practice.
Using Interactive Help in the SQL*Plus Environment SQL*Plus also provides an interactive help console that contains an index of help commands. You can find the index of commands by typing the following in SQL*Plus:
SQL> help INDEX |
It displays the following:
Enter Help [topic] FOR help. @ COPY PAUSE SHUTDOWN @@ DEFINE PRINT SPOOL / DEL PROMPT SQLPLUS ACCEPT DESCRIBE QUIT START APPEND DISCONNECT RECOVER STARTUP ARCHIVE LOG EDIT REMARK STORE ATTRIBUTE EXECUTE REPFOOTER TIMING BREAK EXIT REPHEADER TTITLE BTITLE GET RESERVED WORDS (SQL) UNDEFINE CHANGE HELP RESERVED WORDS (PL/SQL) VARIABLE CLEAR HOST RUN WHENEVER OSERROR COLUMN INPUT SAVE WHENEVER SQLERROR COMPUTE LIST SET XQUERY CONNECT PASSWORD SHOW |
You can discover more about the commands by typing help with one of the index keywords. The following demonstrates the STORE command, which lets you store the current buffer contents as a file:
SQL> help store |
It displays the following:
STORE ----- Saves attributes OF the CURRENT SQL*Plus environment IN a script. STORE {SET} file_name[.ext] [CRE[ATE] | REP[LACE] | APP[END]] |
This is one way to save the contents of your current SQL statement into a file. You’ll see another, the SAVE command, shortly in this appendix. You might want to take a peek in the “Writing SQL*Plus Log Files” section later in this appendix if you’re experimenting with capturing the results of the HELP utility by spooling the information to a log file.
As discussed, the duration of any SQL*Plus environment variable is from the beginning to the end of any session. Define environment variables in the glogin.sql file when you want them to be available in all SQL*Plus sessions.
Shelling Out of the SQL*Plus Environment In cases where you don’t want to exit an interactive session of SQL*Plus, you can leave the session (known as shelling out) and run operating system commands. The HOST command lets you do that, like so:
SQL> HOST |
Anything that you do inside this operating system session other than modify files is lost when you leave it and return to the SQL*Plus session. The most frequent things that most developers do in a shelled-out session are check the listing of files and rename files. Sometimes, developers make small modifications to files, exit the subshell session, and rerun the file from SQL*Plus.
You exit the operating system shell environment and return to SQL*Plus by typing EXIT.
An alternative to shelling out is to run a single operating system command from SQL*Plus. For example, you can type the following in Windows to see the contents of the directory from which you entered SQL*Plus:
SQL> HOST dir |
Linux works with the HOST command, too. In Linux, you also have the option of a shorthand version of the HOST command—the exclamation mark (!). You use it like this:
SQL> ! ls -al |
The difference between the ! and HOST commands is that you can’t use substitution variables with !.
Exiting SQL*Plus Environment You use QUIT or EXIT to exit a session in the SQL*Plus program. Either command ends a SQL*Plus session and releases any session variables.
The next sections show you how to write, save, edit, rerun, edit, abort, call, run, and pass parameters to SQL statements. Then you’ll learn how to call PL/SQL programs and write SQL*Plus log files.
Writing SQL Statements with SQL*Plus
A simple and direct way to demonstrate how to write SQL statements in SQL*Plus is to write a short query. Queries use the SELECT keyword to list columns from a table and use the FROM keyword to designate a table or set of tables. The following query selects a string literal value (“Hello World!”) from thin air with the help of the pseudo table dual. The dual pseudo table is a structure that lets you query one or more columns of data without accessing a table, view, or stored program. Oracle lets you select any type of column except a large object (LOB) from the dual table. The dual table returns only one row of data.
SELECT 'Hello World!' FROM dual; |
Notice that Oracle requires single quotation marks as delimiters of string literal values. Any attempt to substitute double quotation marks raises an ORA-00904 error message, which means you’ve attempted to use an invalid identifier. For example, you’d generate the following error if you used double quotes around the string literal in the original statement:
SELECT "Hello World!" FROM dual * ERROR AT line 1: ORA-00904: "Hello World!": invalid identifier |
If you’re coming from the MySQL world to work in Oracle databases, this may seem a bit provincial. MySQL works with either single or double quotes as string delimiters, but Oracle doesn’t. No quote delimiters are required for numeric literals.
SQL*Plus places a query or other SQL statement in a special buffer when you run it. Sometimes you may want to save these queries in files. The next section shows you how to do that.
Saving SQL Statements with SQL*Plus
Sometimes you’ll want to save a SQL statement in a file. That’s actually a perfect activity for the SAVE or STORE command (rather than spooling a log file). Using the SAVE or STORE command lets you save your current statement to a file. Capturing these ad hoc SQL statements is generally important—after all, SQL statements ultimately get bundled into rerunnable script files before they ever move into production systems.
Use the following syntax to save a statement as a runnable file:
SAVE some_new_file_name.SQL |
If the file already exists, you can save the file with this syntax:
SAVE some_new_file_name.SQL REPLACE |
Editing SQL Statements with SQL*Plus
You can edit your current SQL statements from within SQL*Plus by using EDIT. SQL*Plus preconfigures itself to launch Notepad when you type EDIT or the shorthand ED in any Windows installation of Oracle Database.
Although the EDIT command points to Notepad when you’re working in Windows, it isn’t configured by default in Linux or Unix. You have to set the editor for SQL*Plus when running on Linux or Unix. Refer to the “Working in the SQL*Plus Environment” section earlier in the appendix for details about setting up the editor.
Assuming you’ve configured the editor, you can edit the last SQL statement by typing EDIT like this (or you can use ED):
SQL> EDIT |
The temporary contents of any SQL statement are stored in the afiedt.buf file by default. After you edit the file, you can save the modified statement into the buffer and rerun the statement. Alternatively, you can save the SQL statement as another file.
Rerunning SQL*Plus SQL Statements from the Buffer
After you edit a SQL statement, SQL*Plus automatically lists it for you and enables you to rerun it. Use a forward slash (/)to run the last SQL statement from the buffer. The semicolon at the end of your original SQL statement isn’t stored in the buffer; it’s replaced by a forward slash. If you add the semicolon back when you edited the SQL statement, you would see something like the following with the semicolon at the end of the last line of the statement:
SQL> EDIT Wrote FILE afiedt.buf 1* SELECT 'Hello World!' AS statement FROM dual; |
A forward slash can’t rerun this from the buffer because the semicolon is an illegal character. You would get an error like this:
SQL> / SELECT 'Hello World!' AS statement FROM dual; * ERROR AT line 1: ORA-00911: invalid character |
To fix this error, you should re-edit the buffer contents and remove the semicolon. The forward slash would then run the statement.
Some SQL statements have so many lines that they don’t fit on a single page in your terminal or shell session. In these cases, you can use the LIST command (or simply a lowercase l or uppercase L) to see only a portion of the current statement from the buffer. The LIST command by itself reads the buffer contents and displays them with line numbers at the SQL prompt.
If you’re working with a long PL/SQL block or SQL statement, you can inspect ranges of line numbers with the following syntax:
SQL> LIST 23 32 |
This will echo back to the console the inclusive set of lines from the buffer if they exist. Another command-line interface is used to edit line numbers. It’s very cumbersome and limited in its utility, so you should simply edit the SQL statement in a text editor.
Aborting Entry of SQL Statements in SQL*Plus
When you’re working at the command line, you can’t just point the mouse to the prior line and correct an error; instead, if your statement has an error, your must either abort the statement or run it and wait for it to fail. SQL*Plus lets you abort statements with errors.
To abort a SQL statement that you’re writing interactively, press ENTER, type a period (.) as the first character on the new line, and then press ENTER again. This aborts the statement but leaves it in the active buffer file in case you went to edit it.
After aborting a SQL statement, you can use the instructions in the previous “Editing SQL Statements with SQL*Plus” section to edit the statement with the ed utility—that is, if editing the statement is easier than retyping the whole thing.
Calling and Running SQL*Plus Script Files
Script (or batch) files are composed of related SQL statements and are the primary tool for implementing new software and patching old software. You use script files when you run installation or update programs in test, stage, and production environments. Quality and assurance departments want script files to ensure code integrity during predeployment testing. If errors are found in the script file, the script file is fixed by a new version. The final version of the script file is the one that a DBA runs when installing or upgrading an application or database system.
A script is rerunnable only if it can manage preexisting conditions in the production database without raising errors. You must eliminate all errors because administrators might not be able to judge which errors can be safely ignored. This means the script must perform conditional drops of tables and data migration processes.
Assuming you have a file named create_data.sql in a /Home/student/Data directory, you can run it with the @ (at) command in SQL*Plus. This script can be run from within SQL*Plus with either a relative filename or an absolute filename. A relative filename contains no path element because it assumes the present working path. An absolute filename requires a fully qualified path (also known as a canonical path) and filename.
The relative filename syntax depends on starting SQL*Plus from the directory where you have saved the script file. Here’s the syntax to run the create_data.sql file:
@create_data.SQL |
Although the relative filename is easy to use, it limits you to starting SQL*Plus from a specific directory, which is not always possible. The absolute filename syntax works regardless of where you start SQL*Plus. Here’s an example for Linux:
@/home/student/Data/create_data.SQL |
The @ command is also synonymous with the SQL*Plus START command. This means you can also run a script file based on its relative filename like this:
START create_data.SQL |
The @ command reads the script file into the active buffer and then runs the script file. You use two @@ symbols when you call one script file from another script file that exists in the same directory. Combining the @@ symbols instructs SQL*Plus to look in the directory specified by the command that ran the calling script. This means that a call such as the following runs a subordinate script file from the same directory:
@@some_subordinate.SQL |
If you need to run scripts delivered by Oracle and they reside in the ORACLE_HOME, you can use a handy shortcut: the question mark (?). The question mark maps to the ORACLE_HOME. This means you can run a library script from the \rdbms subdirectory of the ORACLE_HOME with this syntax in Linux:
?\rdbms\somescript.SQL |
The shortcuts and relative path syntax are attractive during development but should be avoided in production. Using fully qualified paths from a fixed environment variable such as the $ORACLE_HOME in Linux is generally the best approach.
Passing Parameters to SQL*Plus Script Files
Understanding how to write and run static SQL statements or script files is important, but understanding how to write and run SQL statements or script files that can solve dynamic problems is even more important. To write dynamic scripts, you use substitution variables, which act like placeholders in SQL statements or scripts. As mentioned earlier, SQL*Plus supports two modes of processing: interactive mode and call mode.
Interactive Mode Parameter Passing When you call a script that contains substitution variables, SQL*Plus prompts for values that you want to assign to the substitution variables. The standard prompt is the name of the substitution variable, but you can alter that behavior by using the ACCEPT SQL*Plus command.
For example, assume that you want to write a script that looks for a table with a name that’s some partial string, but you know that the search string will change. A static SQL statement wouldn’t work, but a dynamic one would. The following dynamic script enables you to query the database catalog for any table based on only the starting part of the table name. The placeholder variable is designated using an ampersand (&) or two. Using a single ampersand instructs SQL*Plus to make the substitution at runtime and forget the value immediately after the substitution. Using two ampersands (&&) instructs SQL*Plus to make the substitution, store the variable as a session-level variable, and undefine the substitution variable.
SQL> SELECT table_name 2 , column_id 3 , column_name 4 FROM user_tab_columns 5 WHERE TABLE LIKE UPPER('&input')||'%'; |
The UPPER function on line 5 promotes the input to uppercase letters because Oracle stores all metadata in uppercase and performs case-sensitive comparisons of strings by default. The query prompts as follows when run:
Enter VALUE FOR input: it |
When you press ENTER, it shows the substitution of the value for the placeholder, like so:
old 5: WHERE table_name LIKE UPPER('&input')||'%' NEW 5: WHERE table_name LIKE UPPER('it')||'%' |
At least this is the default behavior. The behavior depends on the value of the SQL*Plus VERIFY environment variable, which is set to ON by default. You can suppress that behavior by setting the value of VERIFY to OFF:
SET VERIFY OFF |
You can also configure the default prompt by using SQL*Plus formatting commands, like so:
ACCEPT input CHAR PROMPT 'Enter the beginning part of the table name:' |
This syntax acts like a double ampersand assignment and places the input substitution in memory as a session-level variable.
You can also format output through SQL*Plus. The COL[UMN] command qualifies the column name, the FORMAT command sets formatting to either numeric or alphanumeric string formatting, and the HEADING command lets you replace the column name with a reporting header. The following is an example of formatting for the preceding query:
SQL> COLUMN table_name FORMAT A20 HEADING "Table Name" SQL> COLUMN column_id FORMAT 9990 HEADING "Column|ID" SQL> COLUMN column_name FORMAT A20 HEADING "Column Name" |
The table_name column and column_name column now display the first 20 characters before wrapping to the next line because they are set to an alphanumeric size of 20 characters. The column_id column now displays the first four numeric values and would display a 0 when the column_id value is less than 1. Actually, this only illustrates the possibility of printing at least a 0 because a surrogate key value can’t have a value less than 1. The column headers for the table_name and column_name columns print in title case with an intervening whitespace, while the column_id column prints “Column” on one line and “ID” on the next.
Batch Mode Parameter Passing Batch mode operations typically involve a script file that contains more than a single SQL statement. The following example uses a file that contains a single SQL statement because it successfully shows the concept and conserves space.
The trick to batch submission is the -s option flag, or the silent option. Script files that run from the command line with this option flag are batch programs (those using the SQL*Plus call mode). They suppress a console session from being launched and run much like statements submitted through the JDBC API or ODBC API. Batch programs must include a QUIT or EXIT statement at the end of the file or they will hang in SQL*Plus. This technique lets you create a file that can run from an operating system script file, also commonly known as a shell script.
The following sample.sql file shows how you would pass a parameter to a dynamic SQL statement embedded in a script file:
-- Disable echoing substitution. SET VERIFY OFF -- Open log file. SPOOL demo.txt -- Query data based on an externally set parameter. SELECT table_name , column_id , column_name FROM user_tab_columns WHERE table_name LIKE UPPER('&1')||'%'; -- Close log file. SPOOL OFF -- End session connection. QUIT; |
You would call the program from a batch file in Windows or a shell script in Linux. The syntax would include the user name and password, which presents a security risk. Provided you’ve secured your local server and you routinely purge your command history, you would call a sample.sql script from the present working directory like this:
sqlplus -s student/student @sample.SQL |
You can also pass the user name and password as connection parameters, which is illustrated in the following sample:
SET VERIFY OFF SPOOL demo.txt CONNECT &1/&2 SELECT USER FROM dual; SPOOL OFF QUIT; |
The script depends on the /nolog option to start SQL*Plus without connecting to a schema.
You would call it like this, providing the user name and password:
sqlplus -s /nolog @create_data.sql student student |
As mentioned, there are risks to disclosing user names and passwords, because the information from the command line can be hacked from user history logs. Therefore, you should use anonymous login or operating system user validation when you want to run scripts like these.
Calling PL/SQL Programs
PL/SQL provides capabilities that don’t exist in SQL that are required by some database-centric applications. PL/SQL programs are stored programs that run inside a separate engine from the SQL statement engine. Their principal role is to group SQL statements and procedural logic to support transaction scopes across multiple SQL statements.
PL/SQL supports two types of stored programs: anonymous blocks and named blocks. Anonymous blocks are stored as trigger bodies and named blocks can be either stand-alone functions or procedures. PL/SQL also supports packages, which are groups of related functions and procedures. Packages support function and procedure overloading and provide many of the key utilities for Oracle databases. Oracle also supports object types and object bodies with the PL/SQL language. Object types support MEMBER and STATIC functions and procedures.
Oracle Database 12c PL/SQL Programming
Functions and procedures support pass-by-value and pass-by-reference methods available in other procedural programming languages. Functions return a value when they’re placed as right operands in an assignment and as calling parameters to other functions or procedures. Procedures don’t return a value or reference as a right operand and can’t be used as calling parameters to other functions or procedures.
Sometimes you’ll want to output diagnostic information to your console or formatted output from small PL/SQL programs to log files. This is easy to do in Oracle Database because PL/SQL supports anonymous block program units.
Before you can receive output from a PL/SQL block, you must open the buffer that separates the SQL*Plus environment from the PL/SQL engine. You do so with the following SQL*Plus command:
SET SERVEROUTPUT ON SIZE UNLIMITED |
You enable the buffer stream for display to the console by changing the status of the SERVEROUTPUT environment variable to ON. Although you can set the SIZE parameter to any value, the legacy parameter limit of 1 million bytes no longer exists. That limit made sense in earlier releases because of physical machine limits governing console speed and network bandwidth. Today, there’s really no reason to constrain the output size, and you should always use UNLIMITED when you open the buffer.
You now know how to call the various types of PL/SQL programs. Whether the programs are yours or built-ins provided by Oracle, much of the logic that supports features of Oracle databases rely on stored programs.
Executing an Anonymous Block Program The following example demonstrates a traditional “Hello World!” program in an anonymous PL/SQL block. It uses a specialized stored program known as a package. Packages contain data types, shared variables, and cursors, functions, and procedures. You use the package name, a dot (the component selector), and a function or procedure name when you call package components.
You print “Hello World!” with the following anonymous block program unit:
SQL> BEGIN 2 DBMS_OUTPUT.PUT_LINE('Hello World!'); 3 END; 4 / |
PL/SQL is a strongly typed language that uses declarative blocks rather than the curly braces you may know best from C, C#, C++, Java, Perl, or PHP. The execution block starts with the BEGIN keyword and ends with an EXCEPTION or END keyword. Since the preceding sample program doesn’t employ an exception block, the END keyword ends the program. All statements and blocks in PL/SQL end with a semicolon. The forward slash on line 4 executes the anonymous block program because the last semicolon ends the execution block. The program prints “Hello World!” to the console, provided you opened the buffer by enabling the SQL*Plus SERVEROUTPUT environment variable.
Anonymous block programs are very useful when you need one-time procedural processing and plan to execute it in the scope of a single batch or script file. Displaying results from the internals of the PL/SQL block is straightforward, as discussed earlier in this section: enable the SERVEROUTPUT environment variable.
Setting a Session Variable Inside PL/SQL Oracle databases also support session variables, which are not the same as session-level substitution variables. Session variables act like global variables in the scope and duration of your connection, as do session-level substitution variables, but the former differ from substitution variables in two ways. Substitution variables are limited to a string data type, while session variables may have any of the following data types: BINARY_DOUBLE, BINARY_FLOAT, CHAR, CLOB, NCHAR, NCLOB, NUMBER, NVARCHAR2, REFCURSOR, or VARCHAR2. Session variables, more commonly referred to as bind variables, can’t be assigned a value in SQL*Plus or SQL scope. You must assign values to session variables in an anonymous PL/SQL block.
Session variables, like session-level substitution variables, are very useful because you can share them across SQL statements. You must define session variables with the VARIABLE keyword, which gives them a name and data type but not a value. As an example, you can define a bind variable as a 20-character-length string like so:
VARIABLE whom VARCHAR2(20) |
You can assign a session variable with an anonymous PL/SQL block or a CALL to a stored function. Inside the anonymous block, you reference the variable with a colon preceding the variable name. The colon points to a session-level scope that is external to its local block scope:
BEGIN :whom := 'Sam'; END; / |
After assigning a value to the session variable, you can query it in a SQL statement or reuse it in another PL/SQL anonymous block program. The following query from the dual pseudo table concatenates string literals before and after the session variable:
SELECT 'Play it again, ' || :whom || '!' FROM dual; |
The colon appears in SQL statements, too. Both the anonymous block and SQL statement actually run in execution scopes that are equivalent to other subshells in operating system shell scripting. The query prints the following:
Play it again, Sam! |
The dual pseudo table is limited to a single row but can return one to many columns. You can actually display 999 columns, which is the same as the number of possible columns for a table in the Oracle Database.
Executing a Named Block Program Stored functions and procedures are known as named blocks, whether they’re stand-alone programs or part of a package. You can call a named function into a session variable or return the value in a query. Procedures are different because you execute them in the scope of a session or block and they have no return value (procedures are like functions that return a void data type).
The following is a “Hello World!” function that takes no parameters:
SQL> CREATE OR REPLACE FUNCTION hello_function RETURN VARCHAR2 IS 2 BEGIN 3 RETURN 'Hello World!'; 4 END hello_function; 5 / |
A query of the function uses the dual pseudo table, like so:
SELECT hello_function FROM dual; |
When you call in a query a function that doesn’t have defined parameters, you can omit the parentheses traditionally associated with function calls with no arguments. However, if you use the SQL*Plus CALL syntax, you must provide the opening and closing parentheses or you raise an ORA-06576 error message. Assuming that the return value of the function will be assigned to a bind variable of output, you need to define the session variable before calling the function value into the output variable.
The following defines a session variable as a 12-character, variable-length string:
VARIABLE my_output VARCHAR2(12) |
The following statement calls the function and puts the result in the session variable :my_output. Preceding the session variable with a colon is required to make it accessible from SQL statements or anonymous PL/SQL blocks.
CALL hello_world AS INTO :my_output; |
The lack of parentheses causes this statement to fail and raises an ORA-06576 error message.
Adding the parentheses to the CALL statement makes it work:
CALL hello_world() AS INTO :my_output; |
Procedures work differently and are run by the EXECUTE command. The following defines a stored procedure that echoes out the string "Hello World!" Procedures are easier to work with from SQL*Plus because you don’t need to define session variables to capture output. All you do is enable the SQL*Plus SERVEROUTPUT environment variable.
SQL> CREATE OR REPLACE PROCEDURE hello_procedure IS 2 BEGIN 3 dbms_output.put_line('Hello World!'); 4 END hello_procedure; 5 / |
You can execute the procedure successfully like so:
EXECUTE hello_procedure; |
Or you can execute the procedure with parentheses, like so:
EXECUTE hello_procedure(); |
You should see "Hello World!" using either form. If it isn’t displayed, enable the SQL*Plus SERVEROUTPUT environment variable. Remember that nothing returns to the console without enabling the SERVEROUTPUT environment variable.
All the examples dealing with calls to PL/SQL named blocks use a pass-by-value method, which means that values enter the program units, are consumed, and other values are returned.
Writing SQL*Plus Log Files
When you’re testing the idea of how a query should work and want to capture one that did work, you can write it directly to a file. You can also capture all the activity of a long script by writing it to a log file. You can write log files in either of two ways: capture only the feedback messages, such as “four rows updated,” or capture the statement executed and then the feedback message. The output of the latter method are called verbose log files.
You can write verbose log files by leveraging the SQL*Plus ECHO environment variable in SQL*Plus. You enable it with this command:
SET ECHO ON |
Enabling the ECHO command splits your SQL commands. It dispatches one to run against the server and echoes the other back to your console. This allows you to see statements in your log file before the feedback from their execution.
You open a log file with the following command:
SPOOL /home/student/Data/somefile.txt |
This logs all output from the script to the file /home/student/Data/somefile.txt until the SPOOL OFF command runs in the session. The output file’s extension is not required but defaults to .lst when not provided explicitly. As an extension, .lst doesn’t map to a default application in Windows or Linux environments. It’s a convention to use some file extension that maps to an editor as a text file.
You can append to an existing file with the following syntax:
SPOOL /home/student/Data/somefile.txt APPEND |
Both of the foregoing syntax examples use an absolute filename. You use a relative filename when you omit the qualified path, in which case the file is written to the directory where you launched sqlplus.
When using a relative path, you should know that it looks in the directory where you launched sqlplus. That directory is called the present working directory or, by some old csh (C Shell) folks, the current working directory.
You close a log file with the following command:
SPOOL OFF |
No file exists until you close the buffer stream. Only one open buffer stream can exist in any session. This means you can write only to one log file at a time from a given session. Therefore, you should spool only in script files that aren’t called by other script files that might also spool to a log file. You shouldn’t attempt to log from the topmost script because that makes triaging errors among the programming units more complex.
A pragmatic approach to development requires that you log work performed. Failure to log your work can have impacts on the integrity of data and processes.
MySQL INSERT-SET
I found myself explaining the nuances of INSERT statements and whether you should use named or positional notation. While the class was on Zoom, I could imagine the blank stares in the silence of my headphones. Then, I had to remind them about mandatory (NOT NULL constrained) and optional (nullable) columns in tables and how an INSERT statement requires an explicit NULL value for optional columns when the INSERT statement isn’t inserting a value into that column.
Then, I asked if somebody could qualify the different types of INSERT statements; and what would happen if a table with a first_name and last_name column order evolves when a new DBA decides to restructure the table and uses a last_name and first_name column order in the new table structure. Only a couple of the students recalled using a column-list between the table name and VALUES clause but none could remember how to write an INSERT-SET statement.
Below is a quick example of inserting data with column-lists and the SET clause. It builds an actor table with an actor_id column as a surrogate key and primary key column and a unique natural key composed of the first and last name columns (not a real world solution for uniqueness).
CREATE TABLE actor ( actor_id int unsigned primary key auto_increment , first_name varchar(30) not null , last_name varchar(30) not null , CONSTRAINT actor_uq UNIQUE (first_name, last_name)); |
Next, let’s insert a couple rows with a column-list approach. The column-list is a comma-delimited list of column values that must contain all mandatory columns and may contain optional columns.
INSERT INTO actor ( first_name , last_name ) VALUES ('Harrison','Ford') ,('Carrie','Fisher') ,('Mark','Hamill') ,('Alec','Guinness'); |
Now, let’s validate the unique constraint on the composite value of first and last name by trying to insert a second Harrison Ford into the actor table.
INSERT INTO actor (first_name, last_name) VALUES ('Harrison','Ford'); |
it fails and raises the following error:
ERROR 1062 (23000): Duplicate entry 'Harrison-Ford' for key 'actor.actor_uq' |
The following uses the INSERT-SET statement to add Tom Hanks to the actor table:
INSERT INTO actor SET first_name = 'Tom' , last_name = 'Hanks'; |
I believe the INSERT-SET is the best approach to a name-value model for INSERT statements. It’s a shame that only MySQL supports it. Query the actor table with the following:
SELECT * FROM actor ORDER BY actor_id; |
it returns:
+----------+------------+-----------+ | actor_id | first_name | last_name | +----------+------------+-----------+ | 1 | Harrison | Ford | | 2 | Carrie | Fisher | | 3 | Mark | Hamill | | 4 | Alec | Guinness | | 6 | Tom | Hanks | +----------+------------+-----------+ 5 rows in set (0.01 sec) |
There’s now a gap when you query the data because the second attempt at adding Harrison Ford consumed a sequence value from the internally managed list. That list is a property of the table when you create or alter a table to include an autoincrementing column, like actor_id. Anytime you attempt to insert a row that violates the table constraints, you consume a value from the internally managed sequence. While you can restore it and eliminate the gaps, I strongly recommend against it.
As always, I hope this helps those trying to learn and experiment with syntax.
MongoDB Duplicate Key
How do you avoid encountering a “duplicate key on update” in MongoDB? Well, that’s an interesting question if you’re coming at it from a relational perspective. The answer is understanding that while there may be a natural key, the update needs to use the unique identifier (or, _id). The unique identifier is essentially a primary key based on a system generated surrogate key, assigned by the insertOne() or insertMany() methods. As you’ll notice in the example, it’s not just a numeric value.
The following builds you a test case and is designed to run from the interactive mongo shell. It assumes you understand enough JavaScript to read the code dealing with the JSON (JavaScript Object Notation) structure.
- Insert three rows in a
peoplecollection with theinsertMany()method:> db.people.insertMany([ ... {"name" : "joe", "age" : 65} ... ,{"name" : "joe", "age" : 20} ... ,{"name" : "joe", "age" : 49}])
it returns the following unique identifiers:
{ "acknowledged" : true, "insertedIds" : [ ObjectId("60a4a67f8d03d82365e994ab"), ObjectId("60a4a67f8d03d82365e994ac"), ObjectId("60a4a67f8d03d82365e994ad") ] } - Assign the return value from a
findOne()method against thepeoplecollection to ajoevariable:> joe = db.people.findOne({"name" : "joe", "age" : 20})
Typically, you can print local variables in the
mongoshell with theprintcommand, like:print(joe)
it returns the following:
[object BSON]
The object is a Binary JSON object, which requires you use the following command:
printjson(joe)
It prints the following JSON element:
{ "_id" : ObjectId("60a4a67f8d03d82365e994ac"), "name" : "joe", "age" : 20 }
- Increment the age value from 20 to 21:
> joe.age++
You can show the change in the age member’s value by printing the JSON element with the
printjson()function:{ "_id" : ObjectId("60a4a67f8d03d82365e994ac"), "name" : "joe", "age" : 21 }
- If you attempt to replace the JSON structure in the MongoDB collection with anything other than the following, you’ll raise a duplicate key error. You must reference the
_idvalue to update the correct element of the collection. The following syntax works:db.people.replaceOne({"_id" : joe._id}, joe)
it should return the following:
{ "acknowledged" : true, "matchedCount" : 1, "modifiedCount" : 1 }
You can verify that the change only affected the originally queried row with the following command:
db.people.find()
it should return the following:
{ "_id" : ObjectId("60a4a67f8d03d82365e994ab"), "name" : "joe", "age" : 65 }
{ "_id" : ObjectId("60a4a67f8d03d82365e994ac"), "name" : "joe", "age" : 21 }
{ "_id" : ObjectId("60a4a67f8d03d82365e994ad"), "name" : "joe", "age" : 49 }
I thought this example may help others because the O’Reily’s MongoDB: The Definitive Guide example (on pages 35-37) uses a manually typed string, which doesn’t lend itself to a programmatic solutions. It also failed to clarify that value returned from the findOne() method and assigned to the local joe variable would be a BSON (Binary JSON) object; and it didn’t cover any means to easily convert the BSON to a JSON text. The reality is there’s no necessity to cast the BSON into a JSON object, also left out of the text. All that said, it’s still an excellent, if not essential, book for your technical library if you’re working with the MongoDB database.
MySQL Connect Dialog
About a month ago, I published how you can connect to MySQL with a small form. One suggestion, or lets promote it to a request, from that post was: “Nice, but how do you create a reusable library for the MySQL Connection Dialog box?”
That was a good question but I couldn’t get back until now to write a new blog post. This reusable MySQL connection dialog lets you remove MySQL connection data from the command-line history. This post also shows you how to create and test a Powershell Module.

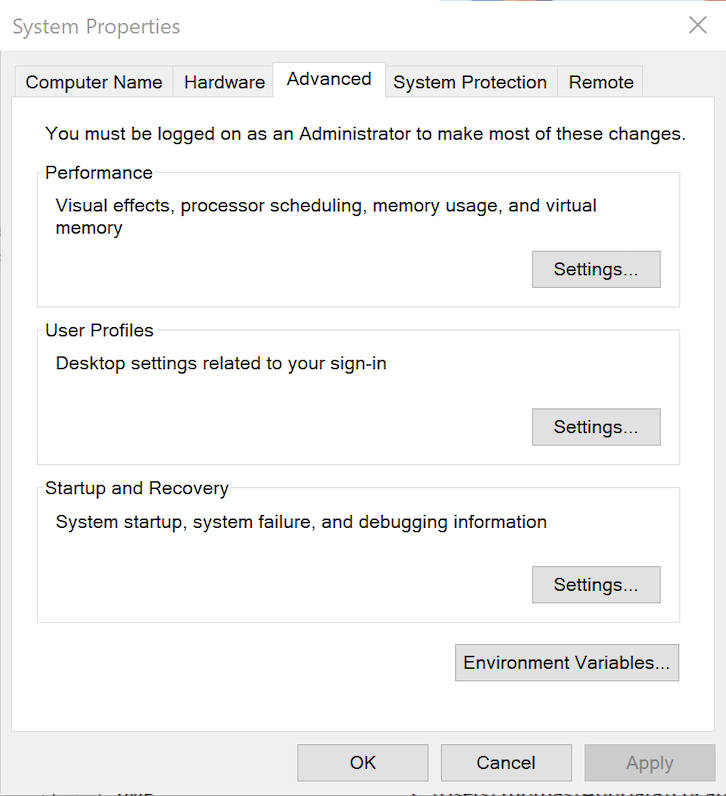
The first step to create a module requires that you set the proper %PSModulePath% environment variable. If you fail to do that, you can put it into a default PowerShell module location but that’s not too effective for testing. You launch the System Properties dialog and click the Environment Variables button:
Then, you edit the PSModulePath environment variable in the bottom list of environment variables and add a new path to the PSModulePath. My development path in this example is:
C:\Data\cit225\mysql\ps\mod |
I named the file the same as the function Get-Credentials.psm1 consistent with the Microsoft instructions for creating a PowerShell module and their instructions for Pascal case name with an approved verb and singular noun.
Below is the code for the Get-Credentials.psm1 file:
function Get-Credentials { # Add libraries for form components. Add-Type -AssemblyName System.Windows.Forms Add-Type -AssemblyName System.Drawing # Define a user credential form. $form = New-Object System.Windows.Forms.Form $form.Text = 'User Credential Form' $form.Size = New-Object System.Drawing.Size(300,240) $form.StartPosition = 'CenterScreen' # Define a button and assign it and its controls to a form. $loginButton = New-Object System.Windows.Forms.Button $loginButton.Location = New-Object System.Drawing.Point(60,160) $loginButton.Size = New-Object System.Drawing.Size(75,23) $loginButton.Text = 'Login' $loginButton.DialogResult = [System.Windows.Forms.DialogResult]::OK $form.AcceptButton = $loginButton $form.Controls.Add($loginButton) # Define a button and assign it and its controls to a form. $cancelButton = New-Object System.Windows.Forms.Button $cancelButton.Location = New-Object System.Drawing.Point(155,160) $cancelButton.Size = New-Object System.Drawing.Size(75,23) $cancelButton.Text = 'Cancel' $cancelButton.DialogResult = [System.Windows.Forms.DialogResult]::Cancel $form.CancelButton = $cancelButton $form.Controls.Add($cancelButton) # Define a label and assign it and its controls to a form. $userLabel = New-Object System.Windows.Forms.Label $userLabel.Location = New-Object System.Drawing.Point(30,15) $userLabel.Size = New-Object System.Drawing.Size(100,20) $userLabel.Text = 'Enter User Name:' $form.Controls.Add($userLabel) # Define a TextBox and assign it and its controls to a form. $userTextBox = New-Object System.Windows.Forms.TextBox $userTextBox.Location = New-Object System.Drawing.Point(140,15) $userTextBox.Size = New-Object System.Drawing.Size(100,20) $form.Controls.Add($userTextBox) # Define a label and assign it and its controls to a form. $pwdLabel = New-Object System.Windows.Forms.Label $pwdLabel.Location = New-Object System.Drawing.Point(30,40) $pwdLabel.Size = New-Object System.Drawing.Size(100,20) $pwdLabel.Text = 'Enter Password:' $form.Controls.Add($pwdLabel) # Define a TextBox and assign it and its controls to a form. $pwdTextBox = New-Object System.Windows.Forms.TextBox $pwdTextBox.Location = New-Object System.Drawing.Point(140,40) $pwdTextBox.Size = New-Object System.Drawing.Size(100,20) $pwdTextBox.PasswordChar = "*" $form.Controls.Add($pwdTextBox) # Define a label and assign it and its controls to a form. $hostLabel = New-Object System.Windows.Forms.Label $hostLabel.Location = New-Object System.Drawing.Point(30,65) $hostLabel.Size = New-Object System.Drawing.Size(100,20) $hostLabel.Text = 'Enter Hostname:' $form.Controls.Add($hostLabel) # Define a TextBox and assign it and its controls to a form. $hostTextBox = New-Object System.Windows.Forms.TextBox $hostTextBox.Location = New-Object System.Drawing.Point(140,65) $hostTextBox.Size = New-Object System.Drawing.Size(100,20) $form.Controls.Add($hostTextBox) # Define a label and assign it and its controls to a form. $portLabel = New-Object System.Windows.Forms.Label $portLabel.Location = New-Object System.Drawing.Point(30,90) $portLabel.Size = New-Object System.Drawing.Size(100,20) $portLabel.Text = 'Enter Port #:' $form.Controls.Add($portLabel) # Define a TextBox and assign it and its controls to a form. $portTextBox = New-Object System.Windows.Forms.TextBox $portTextBox.Location = New-Object System.Drawing.Point(140,90) $portTextBox.Size = New-Object System.Drawing.Size(100,20) $form.Controls.Add($portTextBox) # Define a label and assign it and its controls to a form. $dbLabel = New-Object System.Windows.Forms.Label $dbLabel.Location = New-Object System.Drawing.Point(30,115) $dbLabel.Size = New-Object System.Drawing.Size(100,20) $dbLabel.Text = 'Enter DB Name:' $form.Controls.Add($dbLabel) # Define a TextBox and assign it and its controls to a form. $dbTextBox = New-Object System.Windows.Forms.TextBox $dbTextBox.Location = New-Object System.Drawing.Point(140,115) $dbTextBox.Size = New-Object System.Drawing.Size(100,20) $form.Controls.Add($dbTextBox) $form.Topmost = $true $form.Add_Shown({$userTextBox.Select()}) $result = $form.ShowDialog() if ($result -eq [System.Windows.Forms.DialogResult]::OK) { # Assign inputs to connection variables. $uid = $userTextBox.Text $pwd = $pwdTextBox.Text $server = $hostTextBox.Text $port= $portTextBox.Text $dbName = $dbTextBox.Text # Declare connection string. $credentials = 'server=' + $server + ';port=' + $port + ';uid=' + $uid + ';pwd=' + $pwd + ';database=' + $dbName } else { $credentials = $null } return $credentials } |
You must create a Get-Connection directory in your C:\Data\cit225\mysql\ps\mod directory that you added to the PSModulePath. Then, you must put your module code in the Get-Connection subdirectory as the Get-Connection.psm1 module file.
The test.ps1 script imports the Get-Credentials.psm1 PowerShell module, launches the MySQL Connection Dialog form and returns the connection string. The test.ps1 code is:
# Import your custom module. Import-Module Get-Credentials # Test the Get-Credentials function. if (($credentials = Get-Credentials) -ne $undefinedVariable) { Write-Host($credentials) } |
You can test it from the local any directory with the following command-line:
powershell .\test.ps1 |
It should print something like this to the console:
server=localhost;port=3306;uid=student;pwd=student;database=studentdb |
If you got this far, that’s great! You’re ready to test a connection to the MySQL database. Before you do that, you should create the same avenger table I used in the initial post and insert the same or some additional data. Connect to the any of your test databases and rung the following code to create the avenger table and nine rows of data.
-- Create the avenger table. CREATE TABLE db_connect ( db_connect_id INT UNSIGNED PRIMARY KEY AUTO_INCREMENT , version VARCHAR(10) , user VARCHAR(24) , db_name VARCHAR(10)); -- Seed the avenger table with data. INSERT INTO avenger ( first_name, last_name, avenger ) VALUES ('Anthony', 'Stark', 'Iron Man') ,('Thor', 'Odinson', 'God of Thunder') ,('Steven', 'Rogers', 'Captain America') ,('Bruce', 'Banner', 'Hulk') ,('Clinton', 'Barton', 'Hawkeye') ,('Natasha', 'Romanoff', 'Black Widow') ,('Peter', 'Parker', 'Spiderman') ,('Steven', 'Strange', 'Dr. Strange') ,('Scott', 'Lange', 'Ant-man'); |
Now, let’s promote our use-case test.ps1 script to a testQuery.ps1 script, like:
# Import your custom module. Import-Module Get-Credentials # Test the Get-Credentials function. if (($credentials = Get-Credentials) -ne $undefinedVariable) { # Connect to the libaray MySQL.Data.dll Add-Type -Path 'C:\Program Files (x86)\MySQL\Connector NET 8.0\Assemblies\v4.5.2\MySql.Data.dll' # Create a MySQL Database connection variable that qualifies: # [Driver]@ConnectionString # ============================================================ # You can assign the connection string before using it or # while using it, which is what we do below by assigning # literal values for the following names: # - server=<ip_address> or 127.0.0.1 for localhost # - uid=<user_name> # - pwd=<password> # - port=<port#> or 3306 for default port # - database=<database_name> # ============================================================ $Connection = [MySql.Data.MySqlClient.MySqlConnection]@{ConnectionString=$credentials} $Connection.Open() # Define a MySQL Command Object for a non-query. $sqlCommand = New-Object MySql.Data.MySqlClient.MySqlCommand $sqlDataAdapter = New-Object MySql.Data.MySqlClient.MySqlDataAdapter $sqlDataSet = New-Object System.Data.DataSet # Assign the connection and command text to the MySQL command object. $sqlCommand.Connection = $Connection $sqlCommand.CommandText = 'SELECT CONCAT(first_name," ",last_name) AS full_name ' + ', avenger ' + 'FROM avenger' # Assign the connection and command text to the query method of # the data adapter object. $sqlDataAdapter.SelectCommand=$sqlCommand # Assign the tuples of data to a data set and return the number of rows fetched. $rowsFetched=$sqlDataAdapter.Fill($sqlDataSet, "data") # Print to console the data returned from the query. foreach($row in $sqlDataSet.tables[0]) { write-host "Avenger:" $row.avenger "is" $row.full_name } # Close the MySQL connection. $Connection.Close() } |
It should give you the MySQL Connection Dialog and with the correct credentials print the following to your console:
Avenger: Iron Man is Anthony Stark Avenger: God of Thunder is Thor Odinson Avenger: Captain America is Steven Rogers Avenger: Hulk is Bruce Banner Avenger: Hawkeye is Clinton Barton Avenger: Black Widow is Natasha Romanoff Avenger: Spiderman is Peter Parker Avenger: Dr. Strange is Steven Strange Avenger: Ant-man is Scott Lange |
As always, I hope this helps those looking to exploit technology.
MySQL Transaction Unit
Many of my students wanted to know how to write a simple PSM (Persistent Stored Module) for MySQL that saved the writes to all table as a group. So, to that end here’s simple example.
- Create four sample tables in a re-runnable script file:
/* Drop and create four tables. */
DROP TABLE IF EXISTS one, two, three, four;
CREATE TABLE one   ( id int primary key auto_increment, msg varchar(10));
CREATE TABLE two   ( id int primary key auto_increment, msg varchar(10));
CREATE TABLE three ( id int primary key auto_increment, msg varchar(10));
CREATE TABLE four  ( id int primary key auto_increment, msg varchar(10));
- Create a locking PSM across the four tables:
/* Conditionally drop procedure. */
DROP PROCEDURE IF EXISTS locking;

/* Set delimiter to $$ to allow ; inside the procedure. */
DELIMITER $$

/* Create a transaction procedure. */
CREATE PROCEDURE locking(IN pv_one   varchar(10)
                        ,IN pv_two   varchar(10)
			,IN pv_three varchar(10)
			,IN pv_four  varchar(10))
  BEGIN
    /* Declare an EXIT Handler when a string is too long
	   for a column. Undo all prior writes with a ROLLBACK
	   statement. */
    DECLARE EXIT HANDLER FOR 1406
      BEGIN
        ROLLBACK;
      END;

    /* Start transaction scope. */
    START TRANSACTION;

    /* A series of INSERT statement. */
    INSERT INTO one   (msg) VALUES (pv_one);
    INSERT INTO two   (msg) VALUES (pv_two);
    INSERT INTO three (msg) VALUES (pv_three);
    INSERT INTO four  (msg) VALUES (pv_four);

    /* Commit transaction set. */
    COMMIT;
  END;
$$

/* Reset delimiter to ; for SQL statements. */
DELIMITER ;
- Test program for inserting the data:
/* Call locking procedure. */
CALL locking('Donald','Goofy','Mickey','Pluto');
CALL locking('Squirrel','Chipmunk','Monkey business','Raccoon');
CALL locking('Curly','Larry','Moe','Shemp');
- Verify the test results:
/* Select from tables, which should be empty. */
SELECT * FROM one;
SELECT * FROM two;
SELECT * FROM three;
SELECT * FROM four;
As always, I hope this code complete example helps those trying to figure things out.
Defrag Collections
One of the problems with Oracle’s Collection is there implementation of lists, which they call object tables. For example, you declare a collection like this:
CREATE OR REPLACE TYPE list IS TABLE OF VARCHAR2(10); / |
A table collection like the LIST table above is always initialized as a densely populated list. However, over time the list’s index may become sparse when an item is deleted from the collection. As a result, you have no guarantee of a dense index when you pass a table collection to a function. That leaves you with one of two options, and they are:
- Manage all collections as if they’re compromised in your PL/SQL blocks that receive a table collection as a parameter.
- Defrag indexes before passing them to other blocks.
The first option works but it means a bit more care must be taken with how your organization develops PL/SQL programs. The second option defrays a collection. It requires that you write a DEFRAG() function for each of your table collections. You should probably put them all in a package to keep track of them.
While one may think the function is as easy as assigning the old table collection to a new table collection, like:
1 2 3 4 5 6 7 8 9 10 11 12 13 | CREATE OR REPLACE FUNCTION defrag ( sparse LIST ) RETURN LIST IS /* Declare return collection. */ dense LIST := list(); BEGIN /* Mimic an iterator in the loop. */ dense := sparse; /* Return the densely populated collection. */ RETURN dense; END defrag; / |
Line 8 assign the sparse table collection to the dense table collection without any changes in the memory allocation or values of the table collection. Effectively, it does not defrag the contents of the table collection. The following DEFRAG() function does eliminate unused memory and reindexes the table collection:
1 2 3 4 5 6 7 8 9 10 11 12 13 14 15 16 17 18 19 20 | CREATE OR REPLACE FUNCTION defrag ( sparse LIST ) RETURN LIST IS /* Declare return collection. */ dense LIST := list(); /* Declare a current index variable. */ CURRENT NUMBER; BEGIN /* Mimic an iterator in the loop. */ CURRENT := sparse.FIRST; WHILE NOT (CURRENT > sparse.LAST) LOOP dense.EXTEND; dense(dense.COUNT) := sparse(CURRENT); CURRENT := sparse.NEXT(CURRENT); END LOOP; /* Return the densely populated collection. */ RETURN dense; END defrag; / |
You can test the DEFRAG() function with this anonymous PL/SQL block:
DECLARE /* Declare the collection. */ lv_list LIST := list('Moe','Shemp','Larry','Curly'); /* Declare a current index variable. */ CURRENT NUMBER; BEGIN /* Create a gap in the densely populated index. */ lv_list.DELETE(2); /* Mimic an iterator in the loop. */ CURRENT := lv_list.FIRST; WHILE NOT (CURRENT > lv_list.LAST) LOOP dbms_output.put_line('['||CURRENT||']['||lv_list(CURRENT)||']'); CURRENT := lv_list.NEXT(CURRENT); END LOOP; /* Print a line break. */ dbms_output.put_line('----------------------------------------'); /* Call defrag function. */ lv_list := defrag(lv_list); FOR i IN 1..lv_list.COUNT LOOP dbms_output.put_line('['||i||']['||lv_list(i)||']'); END LOOP; END; / |
which prints the before and after state of the defrayed table collection:
[1][Moe] [3][Larry] [4][Curly] ---------------------------------------- [1][Moe] [2][Larry] [3][Curly] |
As always, I hope this helps those trying to sort out a feature of PL/SQL. In this case, it’s a poorly documented feature of the language.
