MySQL 8.0 Install
MySQL will be used for our online sections because the VMware instance and Docker configurations where too large to effectively download this term.
MySQL 8.0.21 Installation Steps
After you download the MySQL 8 MSI file, you will perform the following 24 steps to install MySQL on Windows 10. If you want a full developer install you must install Microsoft Excel and Visual Studio first.
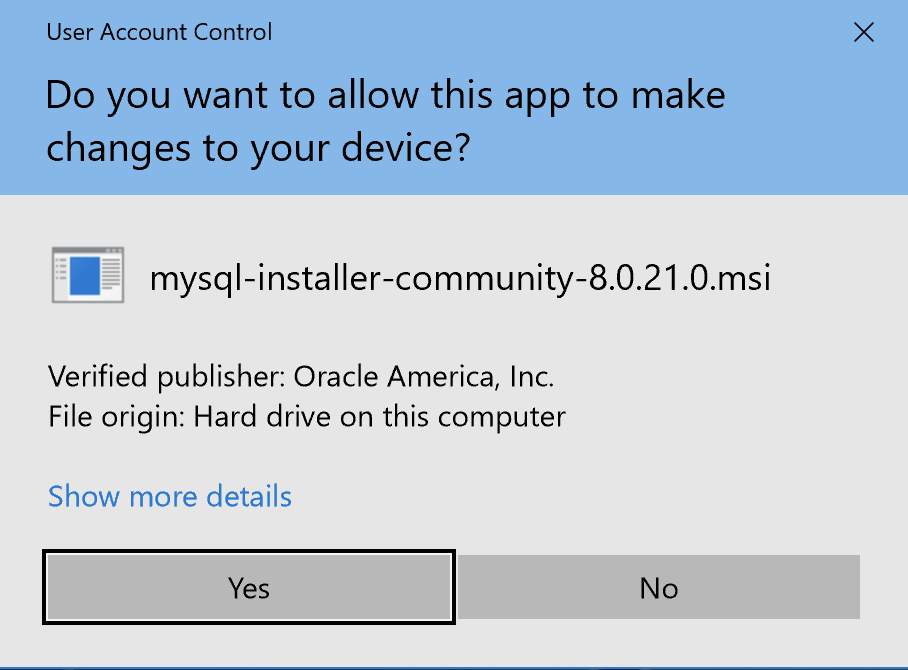
- The first thing you need to do is grant privileges to allow the MySQL Installer application to work in Windows 10. Click the Yes button to authorize the MySQL Installer to run.
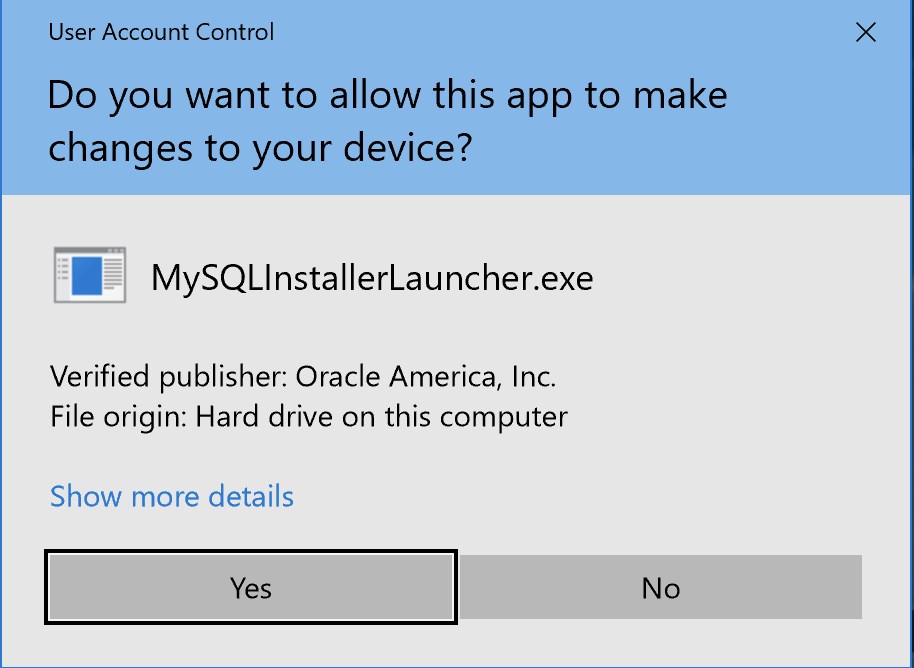
- The next thing you need to do is grant privileges to allow the MySQL Installer Launcher application to work in Windows 10. Click the Yes button to authorize the MySQL Installer to run.

- Now you start the install by choosing a setup type. As a rule, I recommend you install the Developer Default. It is the default selection and preselected for you. Click the Next button to verify that you can install what you’ve selected.
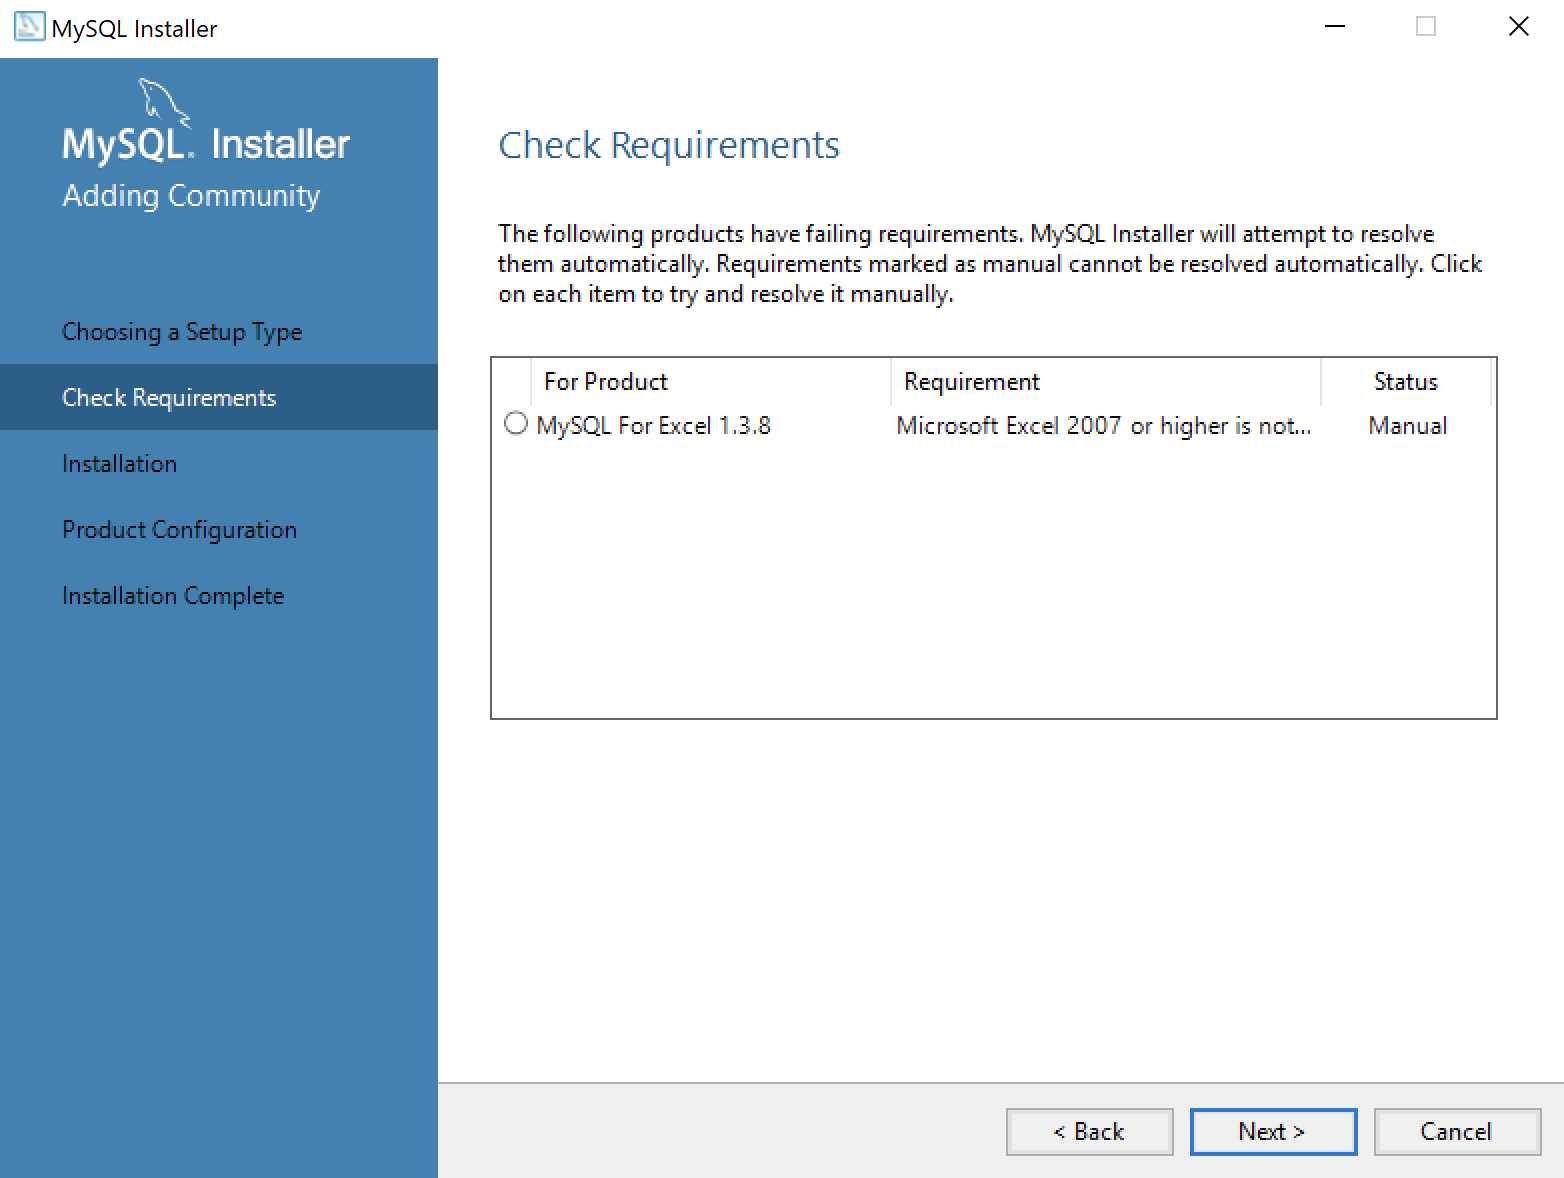
- The next workflow step checks requirements and lists any unmet requirements. The workflow lists the requirements for MySQL for Excel 1.3.8 as unmet because Microsoft Excel is not installed. Click the Next button when there are no unmet requirements in the list. Click the Back button to remove MySQL for Excel 1.3.8 from the setup selection.

- Returning to the setup type workflow, you should select the Custom radio button. Click the Next button to view the list of selected types.
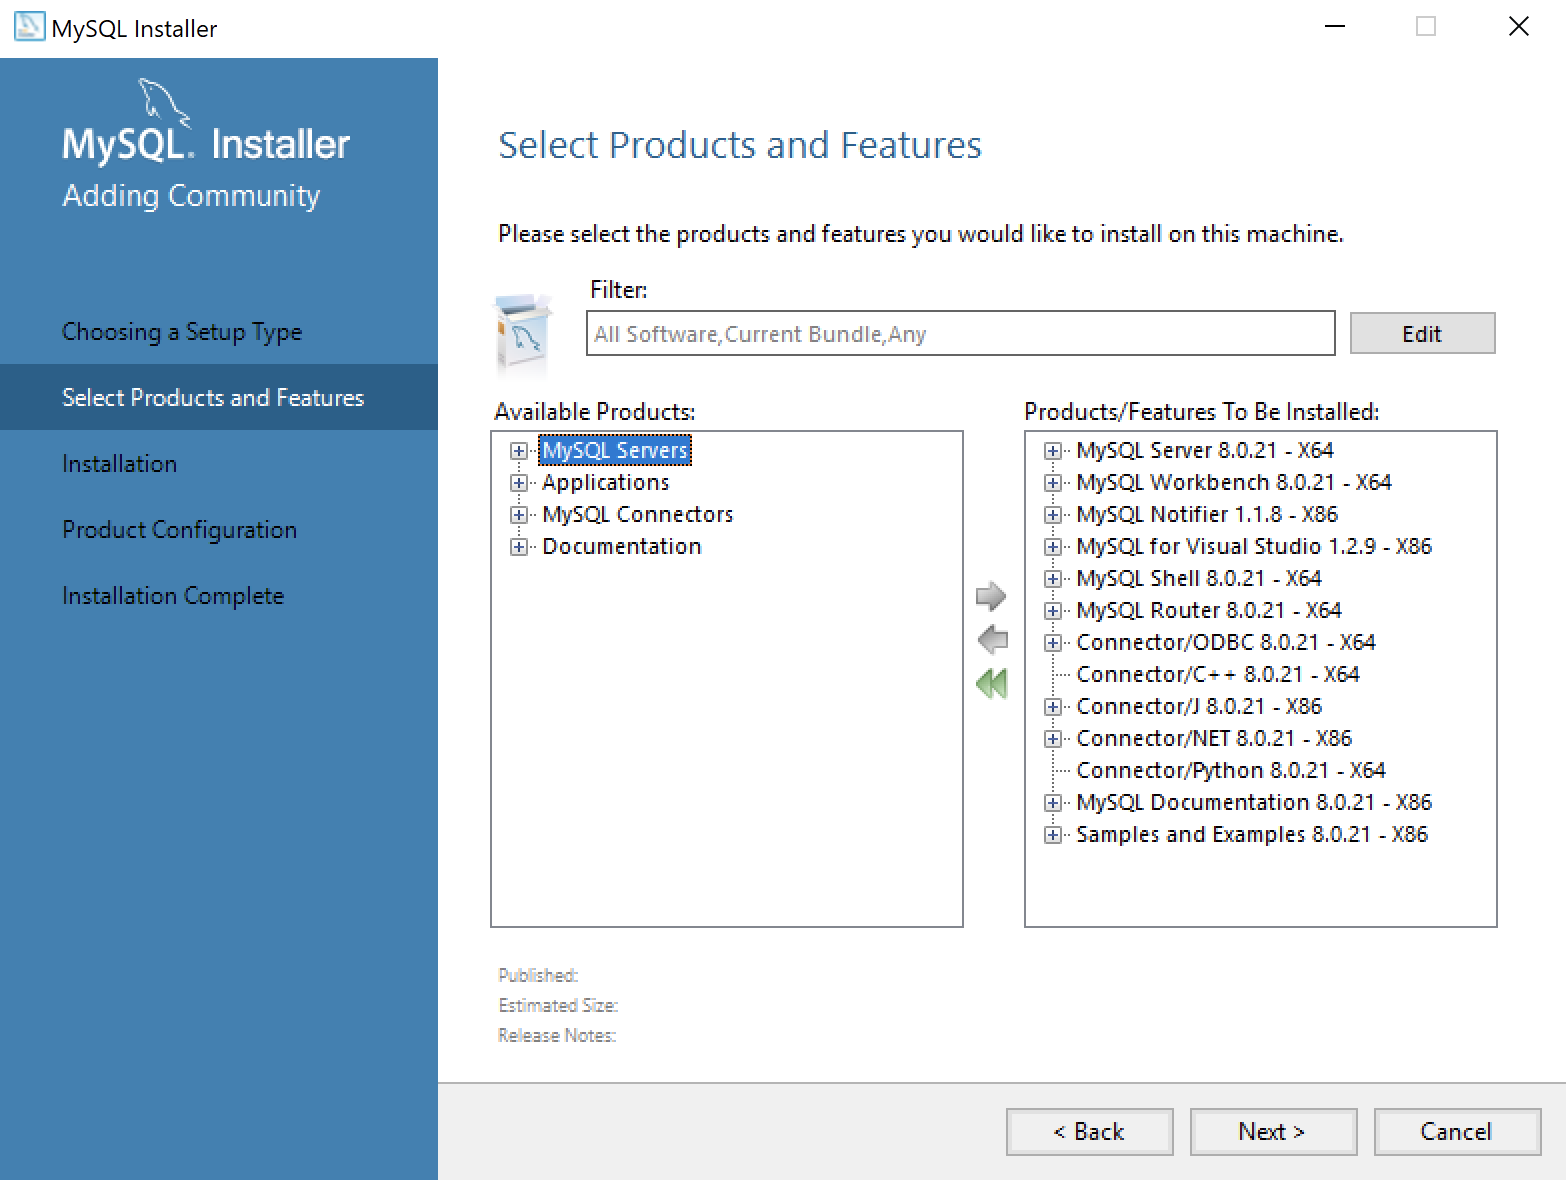
- Use the green arrow pointing to the left to remove MySQL for Excel 1.3.8 from the list. Click the Next button to continue the MySQL Installer to install the selected MySQL libraries.
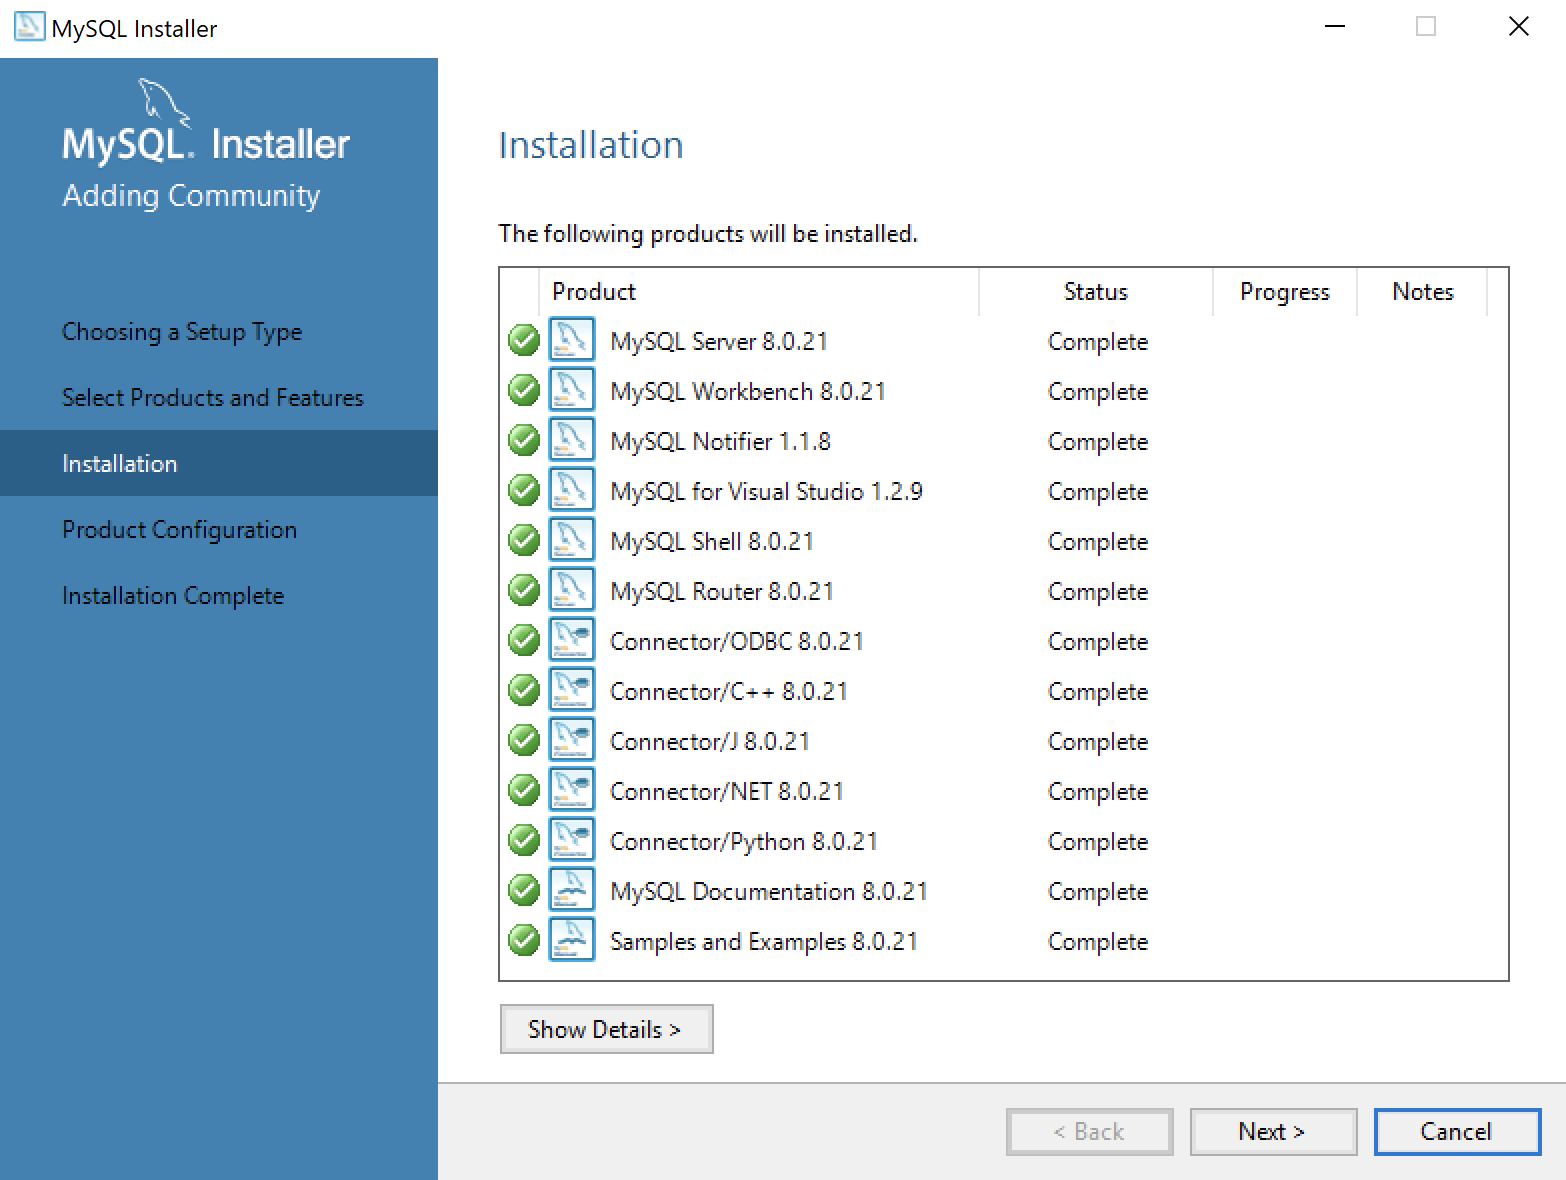
- This dialog will display for several minutes as each of the MySQL Installer modules is. Click the Next button to move forward in the MySQL Installer workflow.
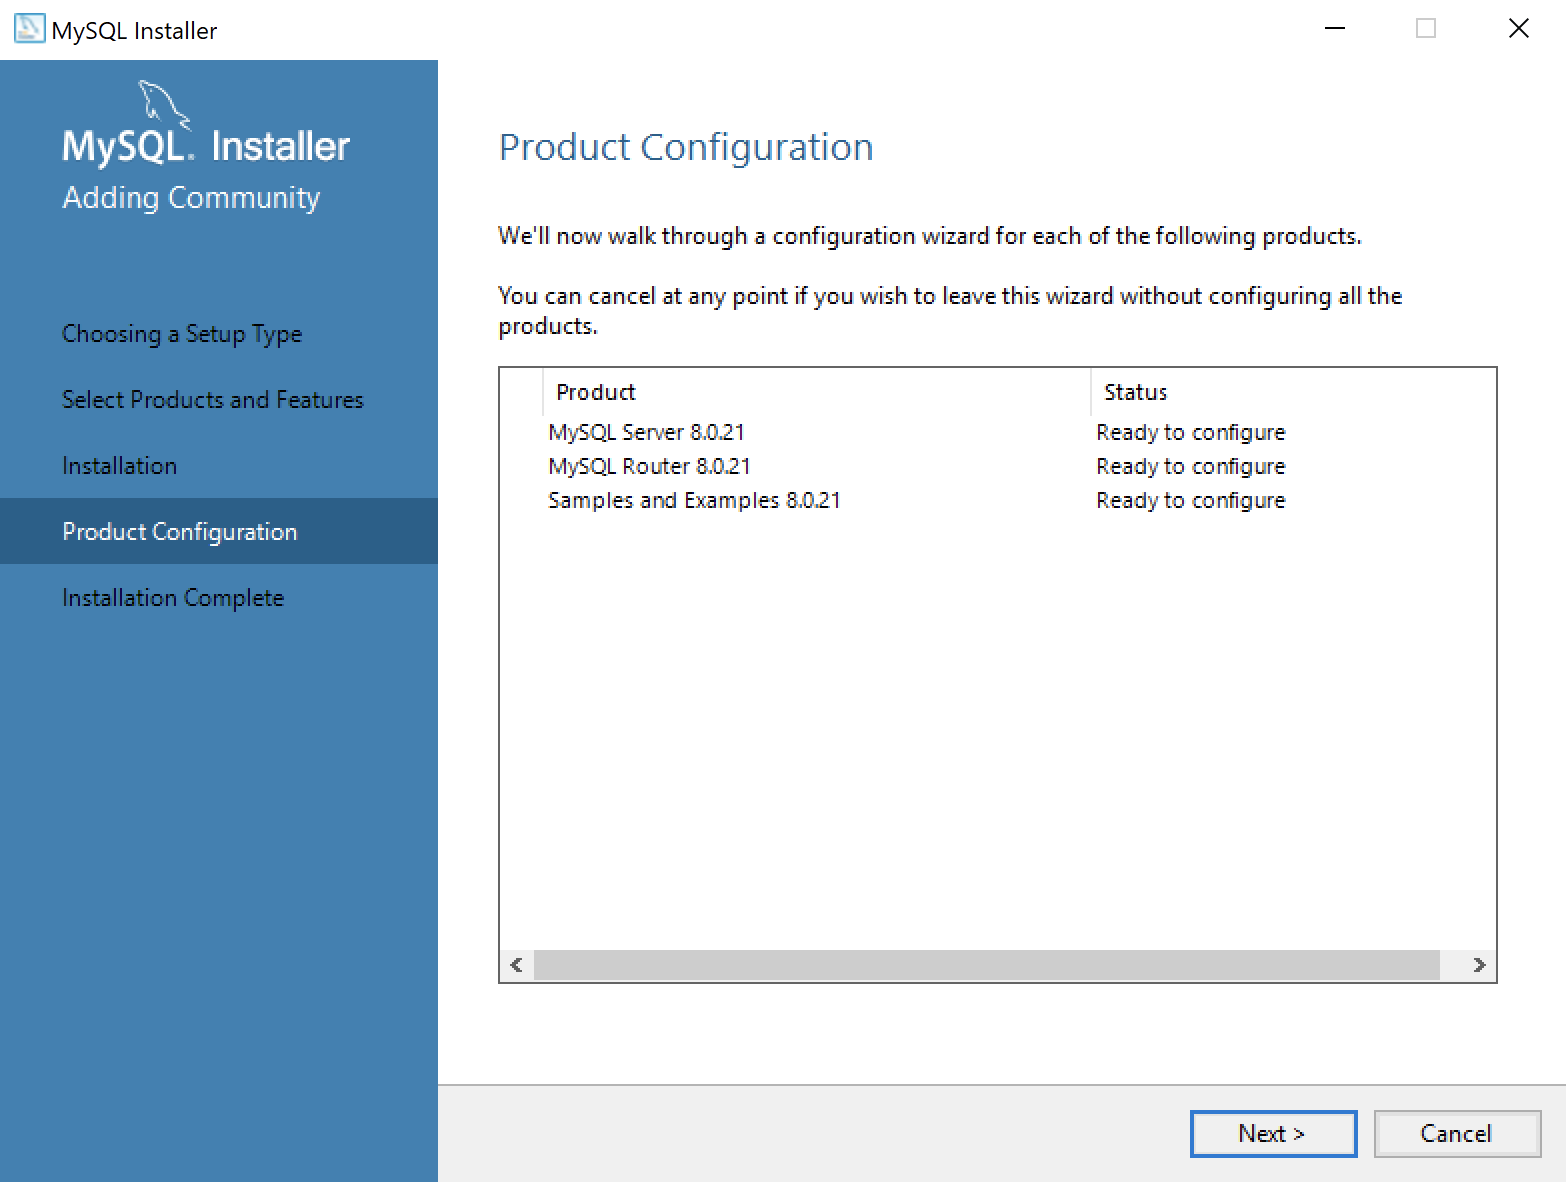
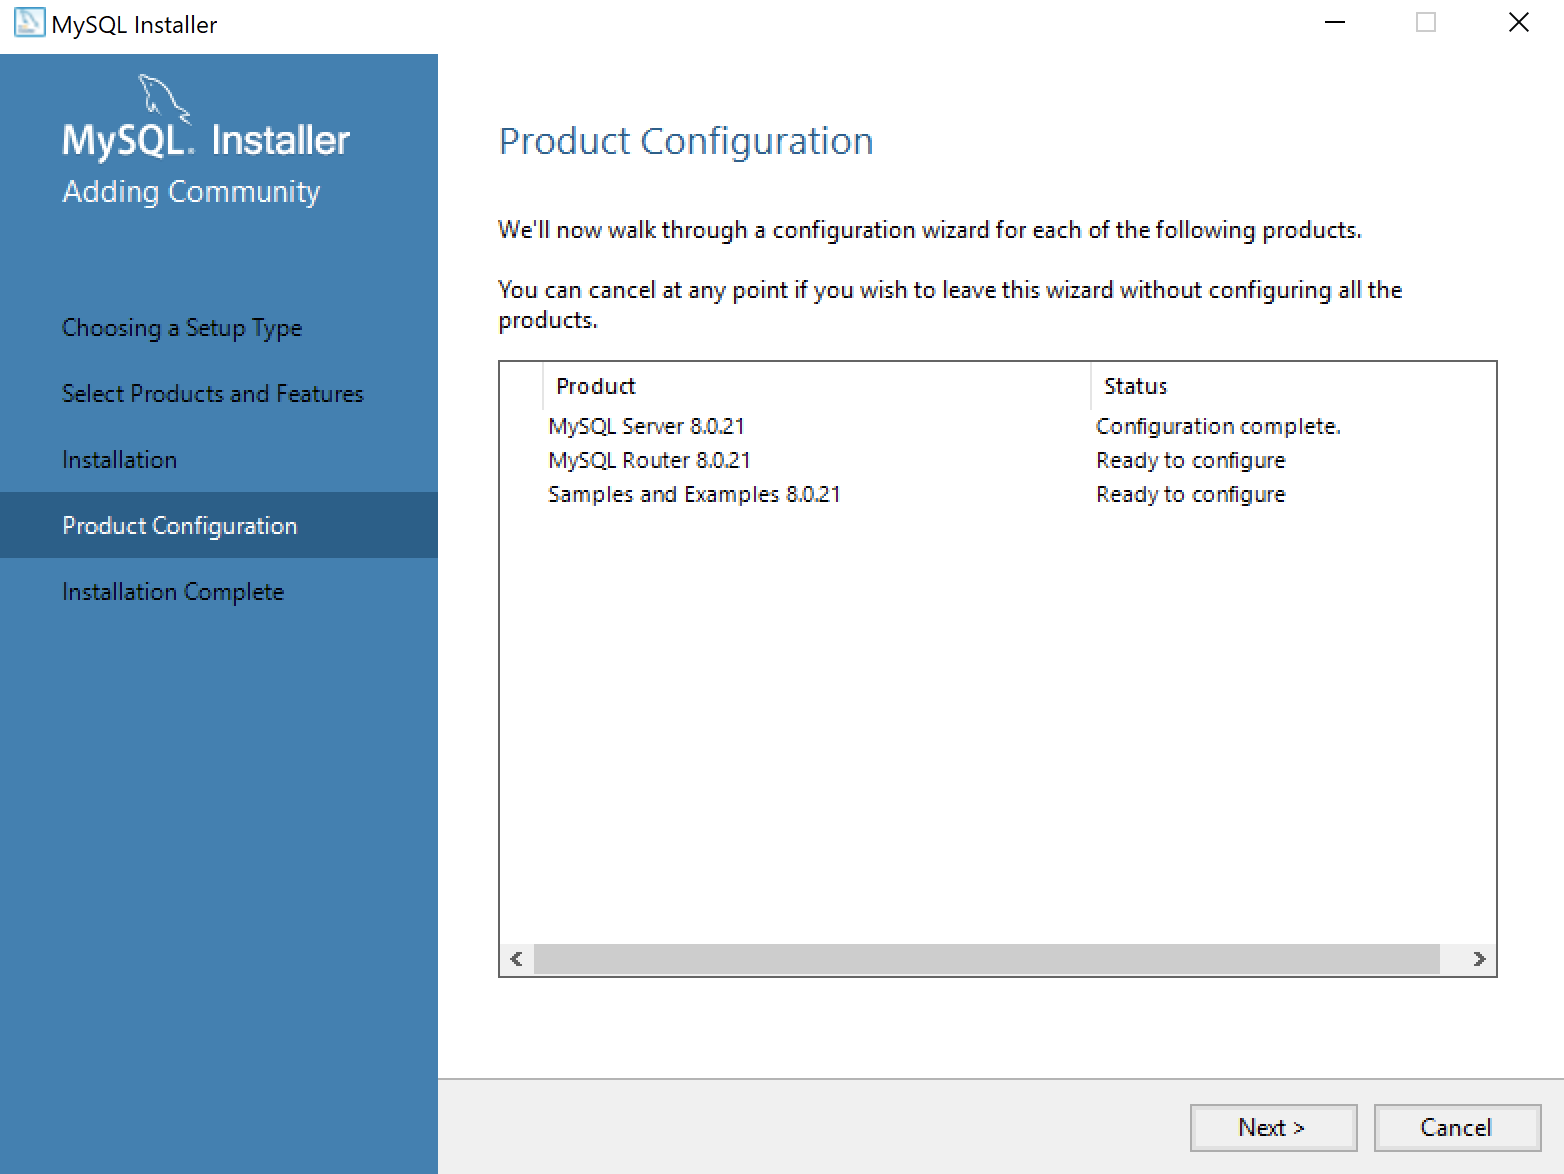
- This dialog qualifies that there are three products to configure. Click the Next button to begin configuration of these products.
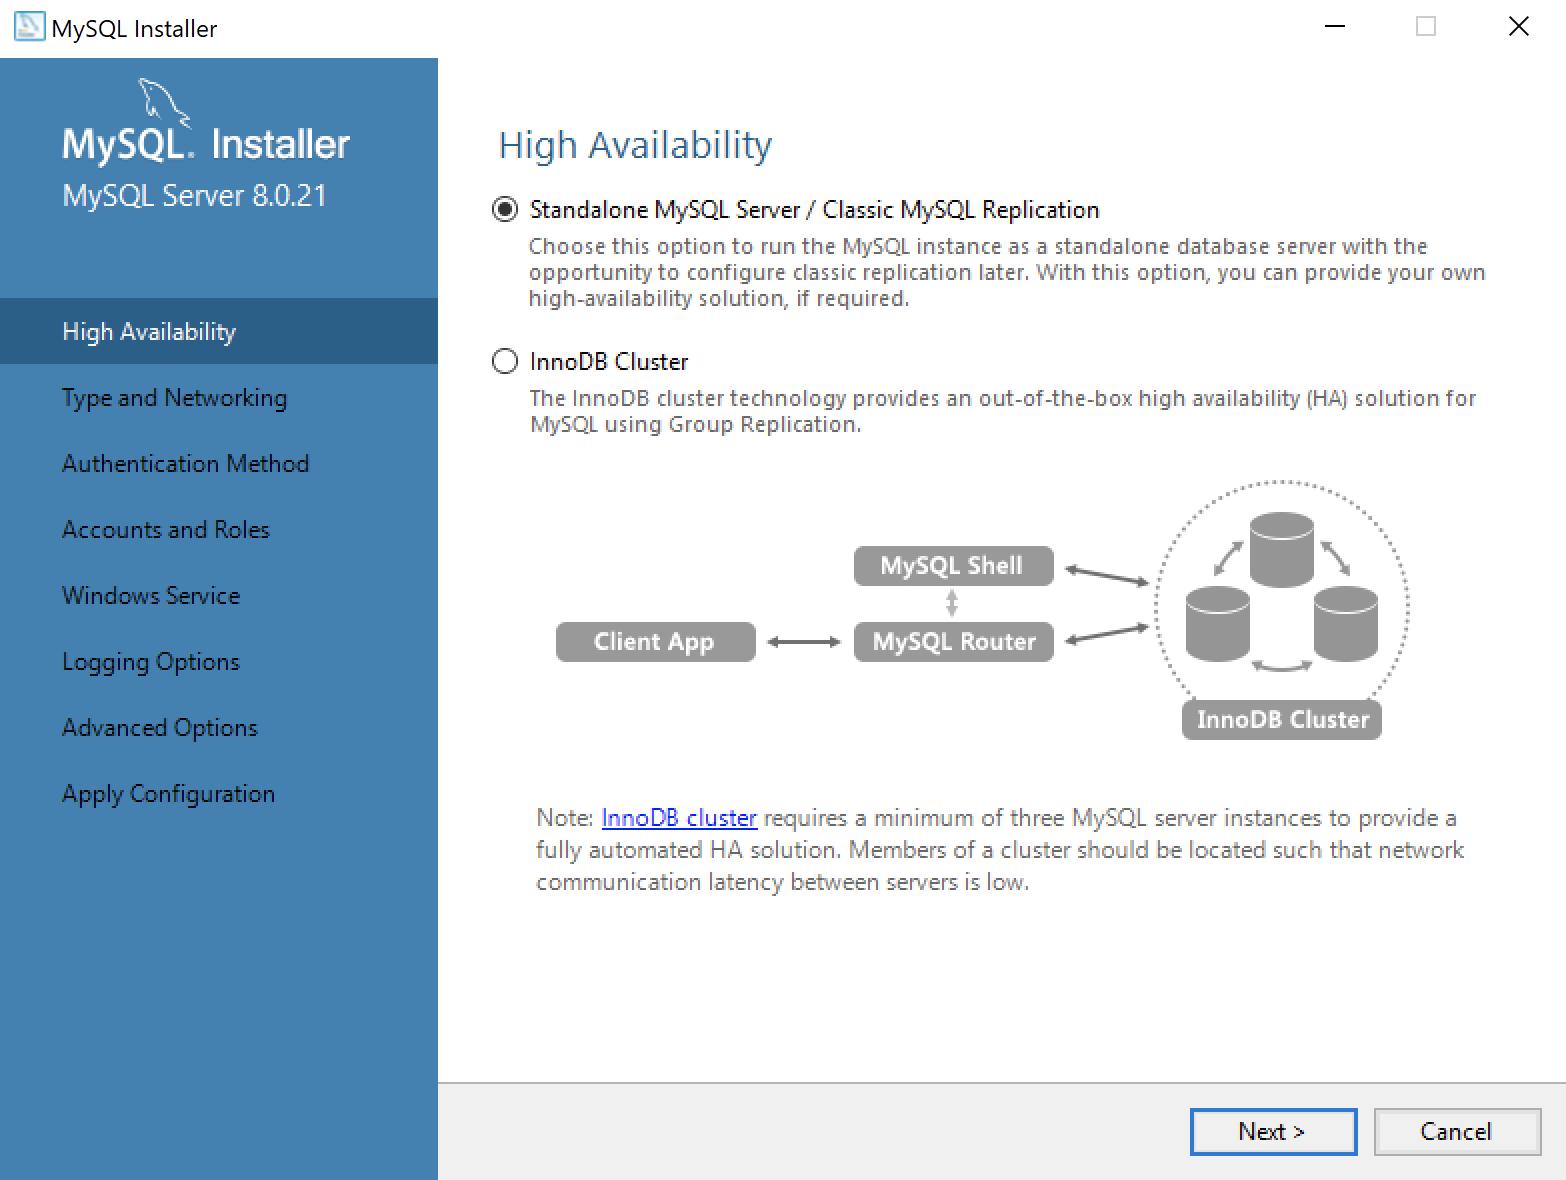
- This dialog lets you choose between a Standalone MySQL Server / Classic MySQL Replication and InnoDB Cluster. You should choose the Standalone MySQL Server for a developer installation on a laptop or desktop. Click the Next button to continue the MySQL Installer configuration.
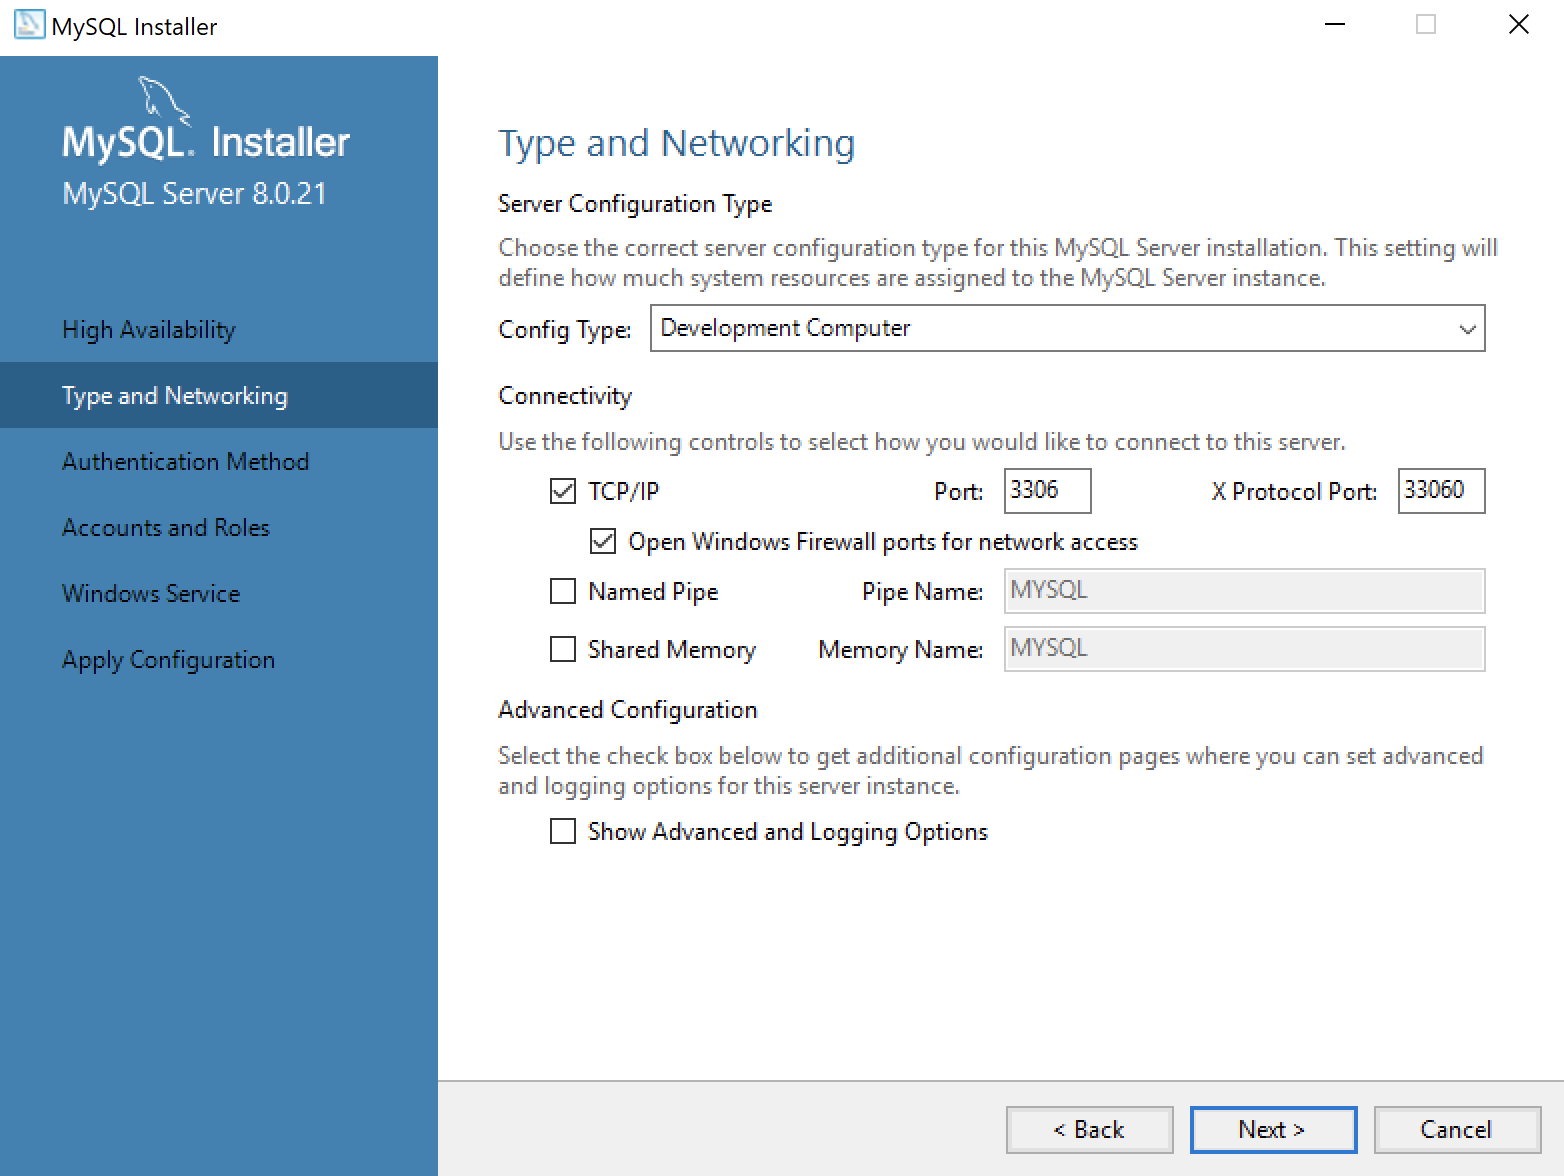
- This dialog lets you choose set the type and networking values. They should be preselected as they are in the screen image. Click the Next button to continue the MySQL Installer configuration.
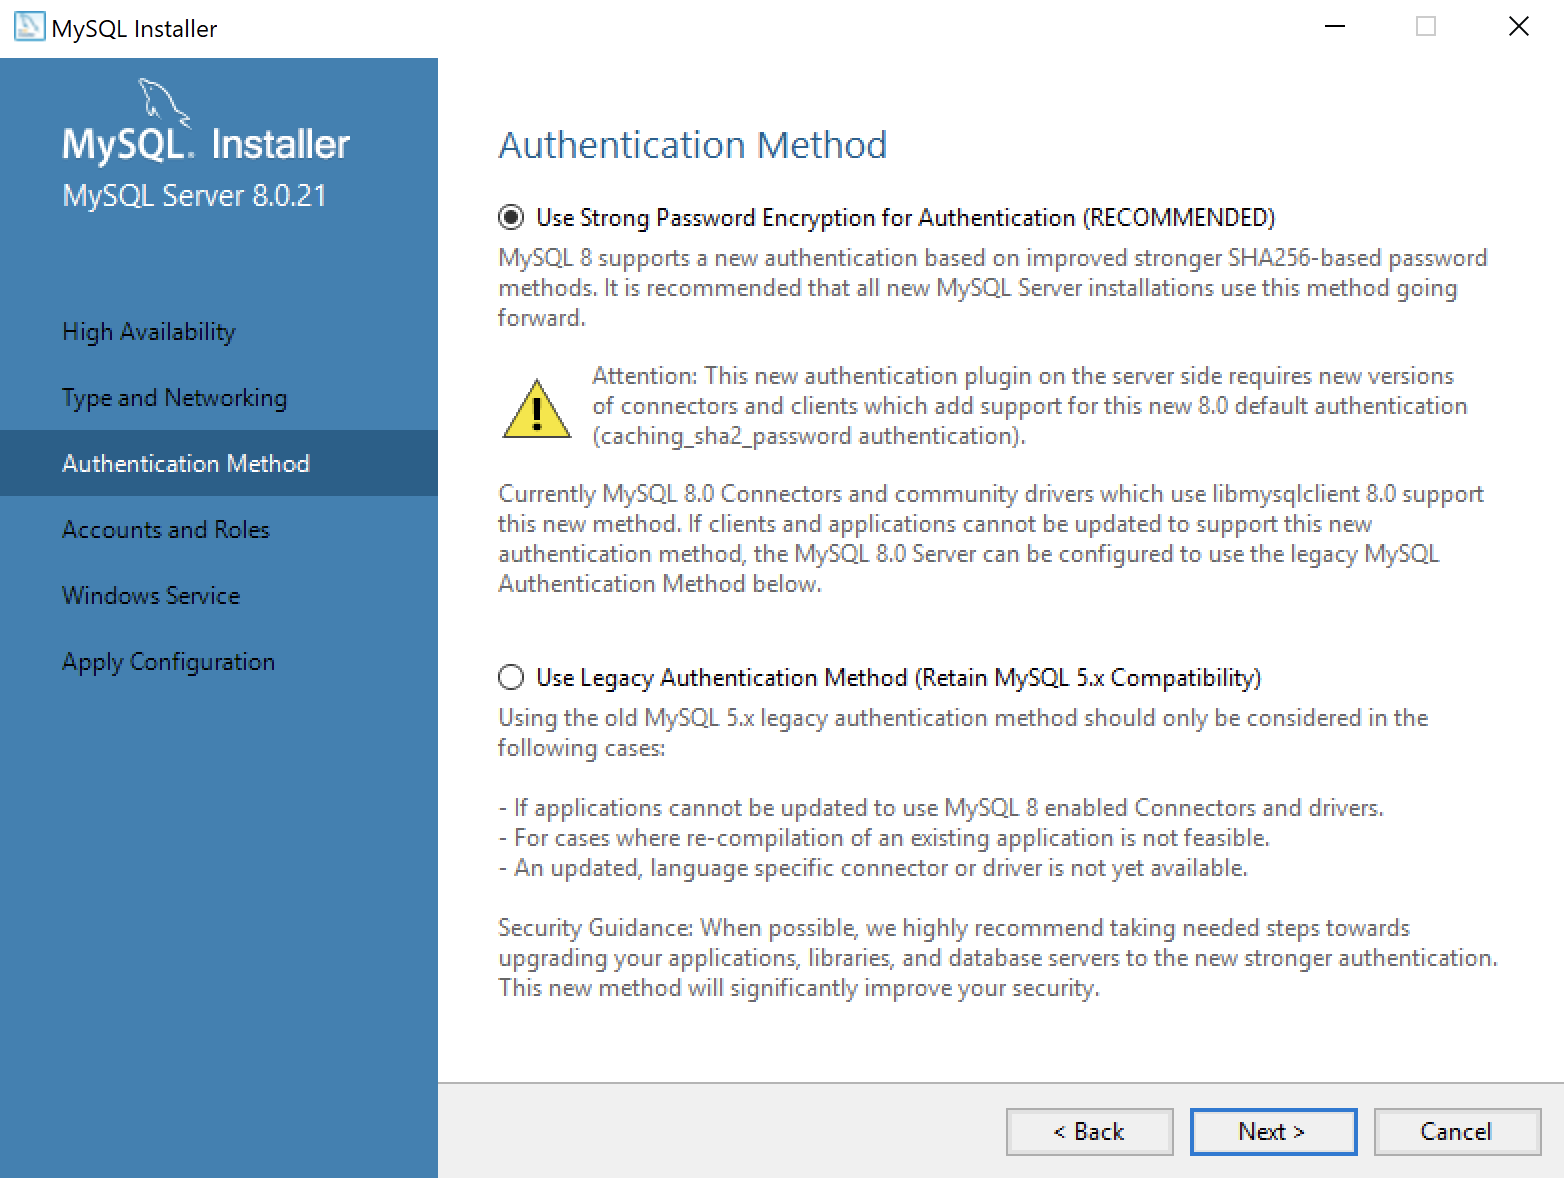
- This dialog lets you choose between SHA256-based and the older MD5 encryption. Click Use Strong Password Encryption for Authentication (RECOMMENDED) radio button. Click the Next button to continue the MySQL Installer configuration.
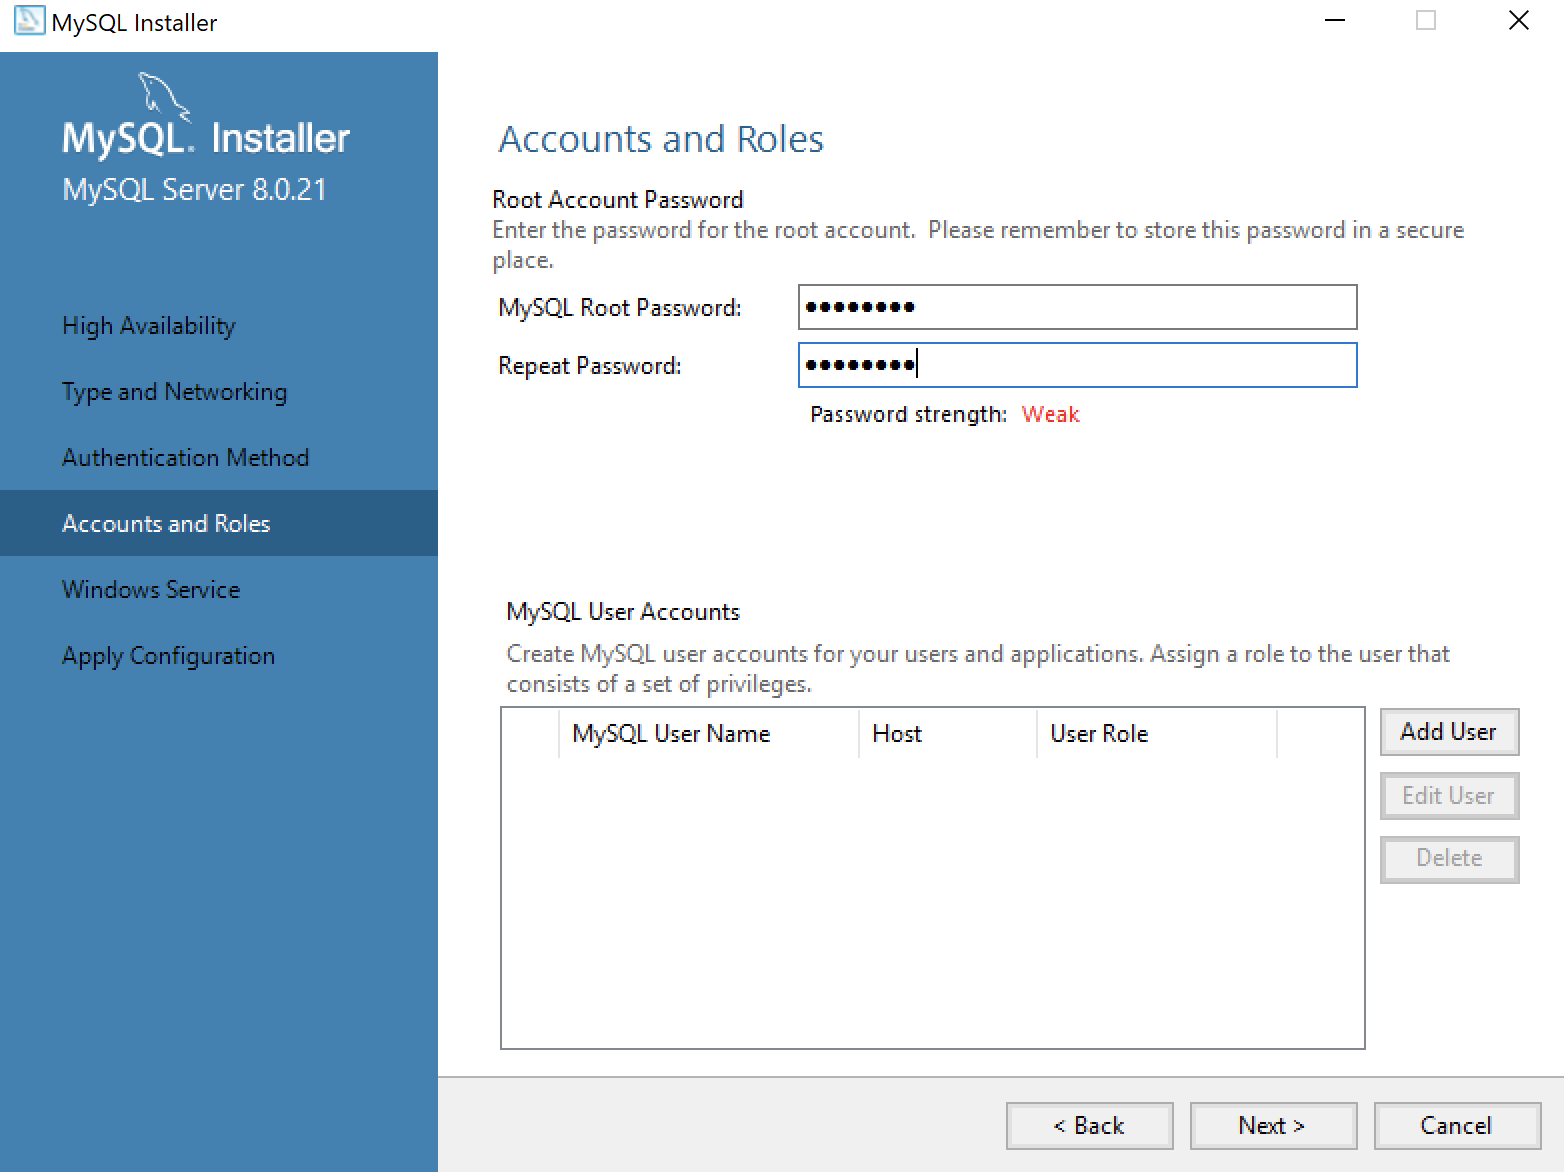
- This dialog lets you enter the MySQL Root Password. Click the Next button to continue the MySQL Installer configuration.
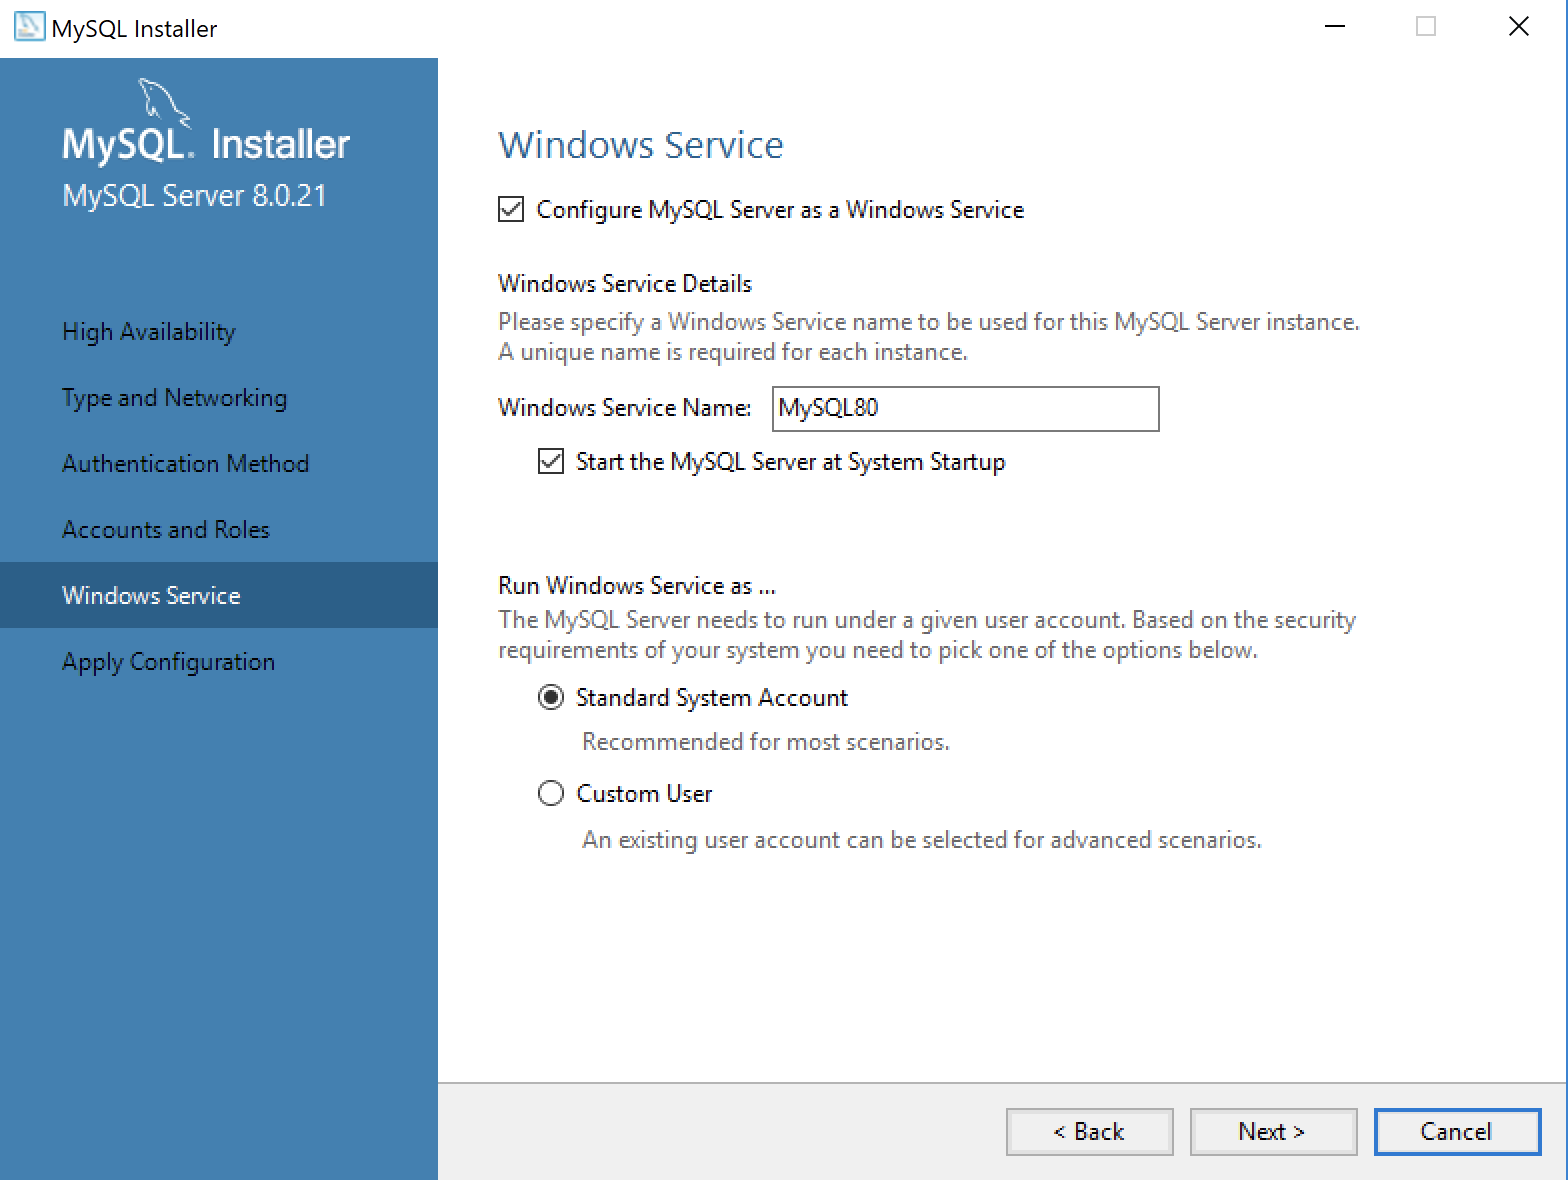
- This dialog lets you enter a Windows Service Name and install a Standard System Account or Custom User account. Click the Next button to continue the MySQL Installer configuration.
- This dialog lets you apply the configuration of the MySQL Server or Custom User product. Click the Next button to continue the MySQL Server configuration.
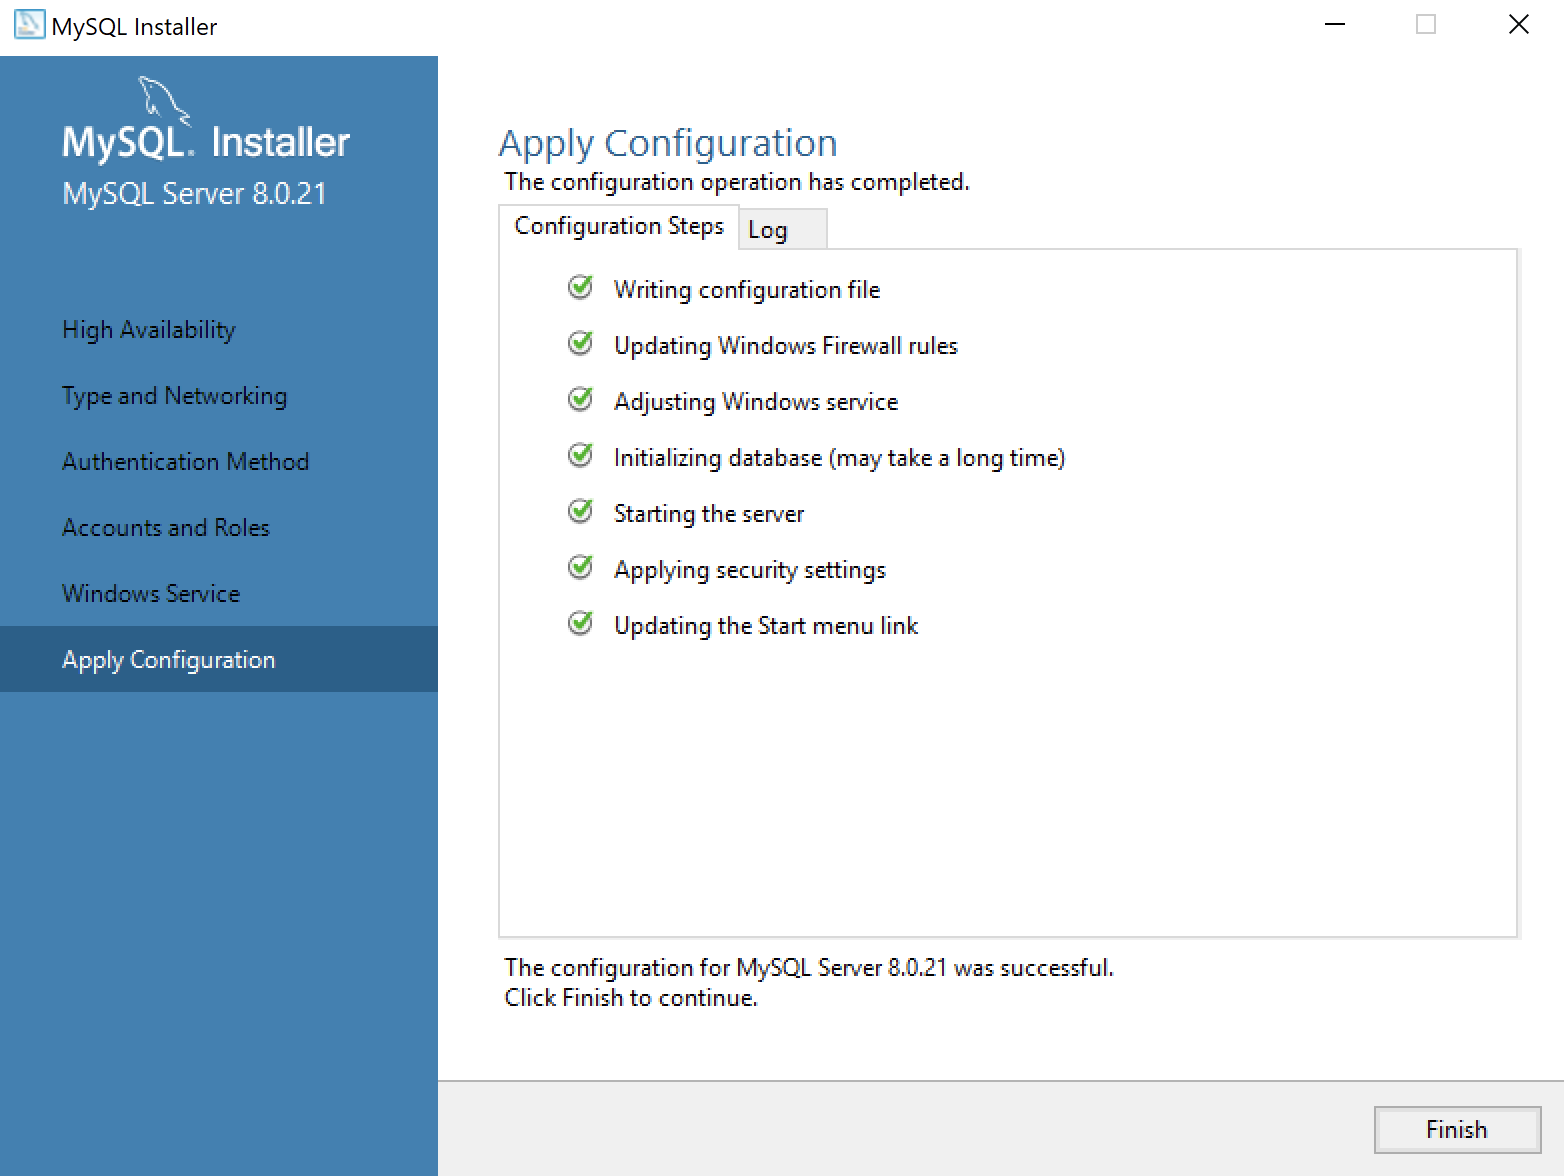
- This dialog lets you watch the progress of the MySQL Server or Custom User configuration. Click the Finish button to complete the MySQL Server configuration.
- This dialog lets you choose the next MySQL Router product for configuration. Click the Next button to begin the MySQL Router configuration.
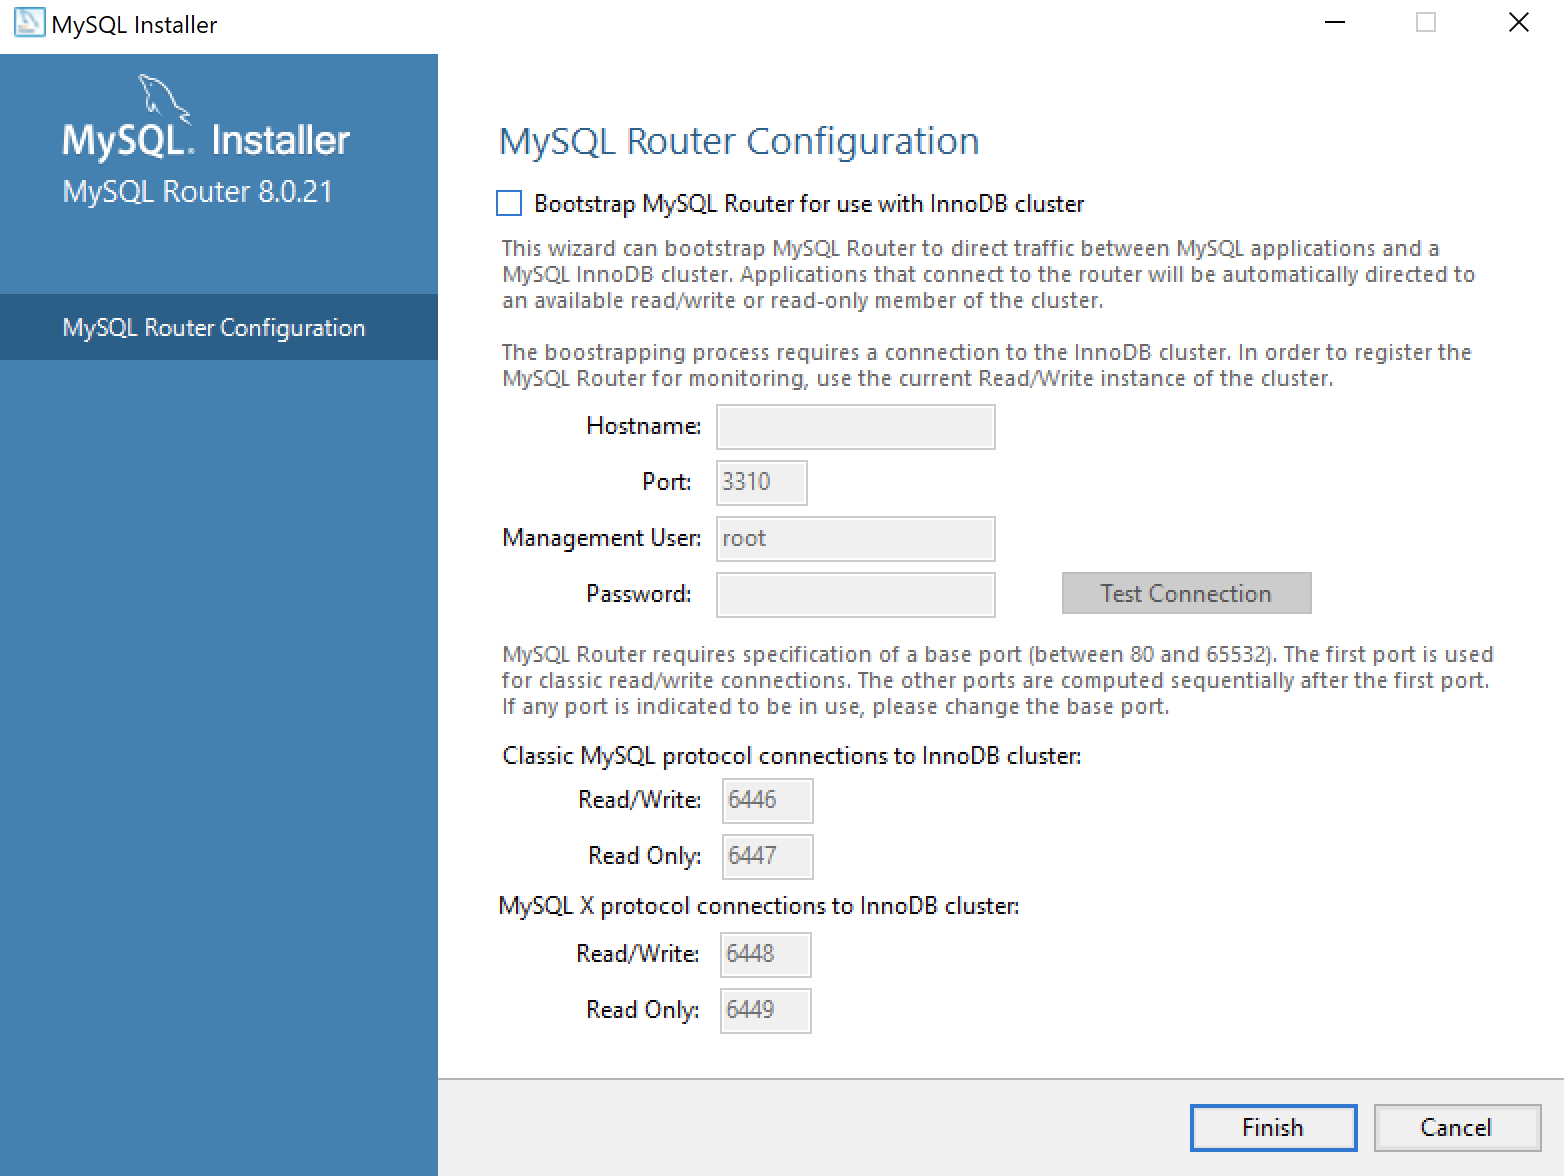
- This dialog allows you to configure the MySQL Router Configuration product. Leave the
HostnameandPasswordfields blank when you do not want to configure the MySQL Router Configuration product. Click the Finish button to complete the MySQL Router workflow.

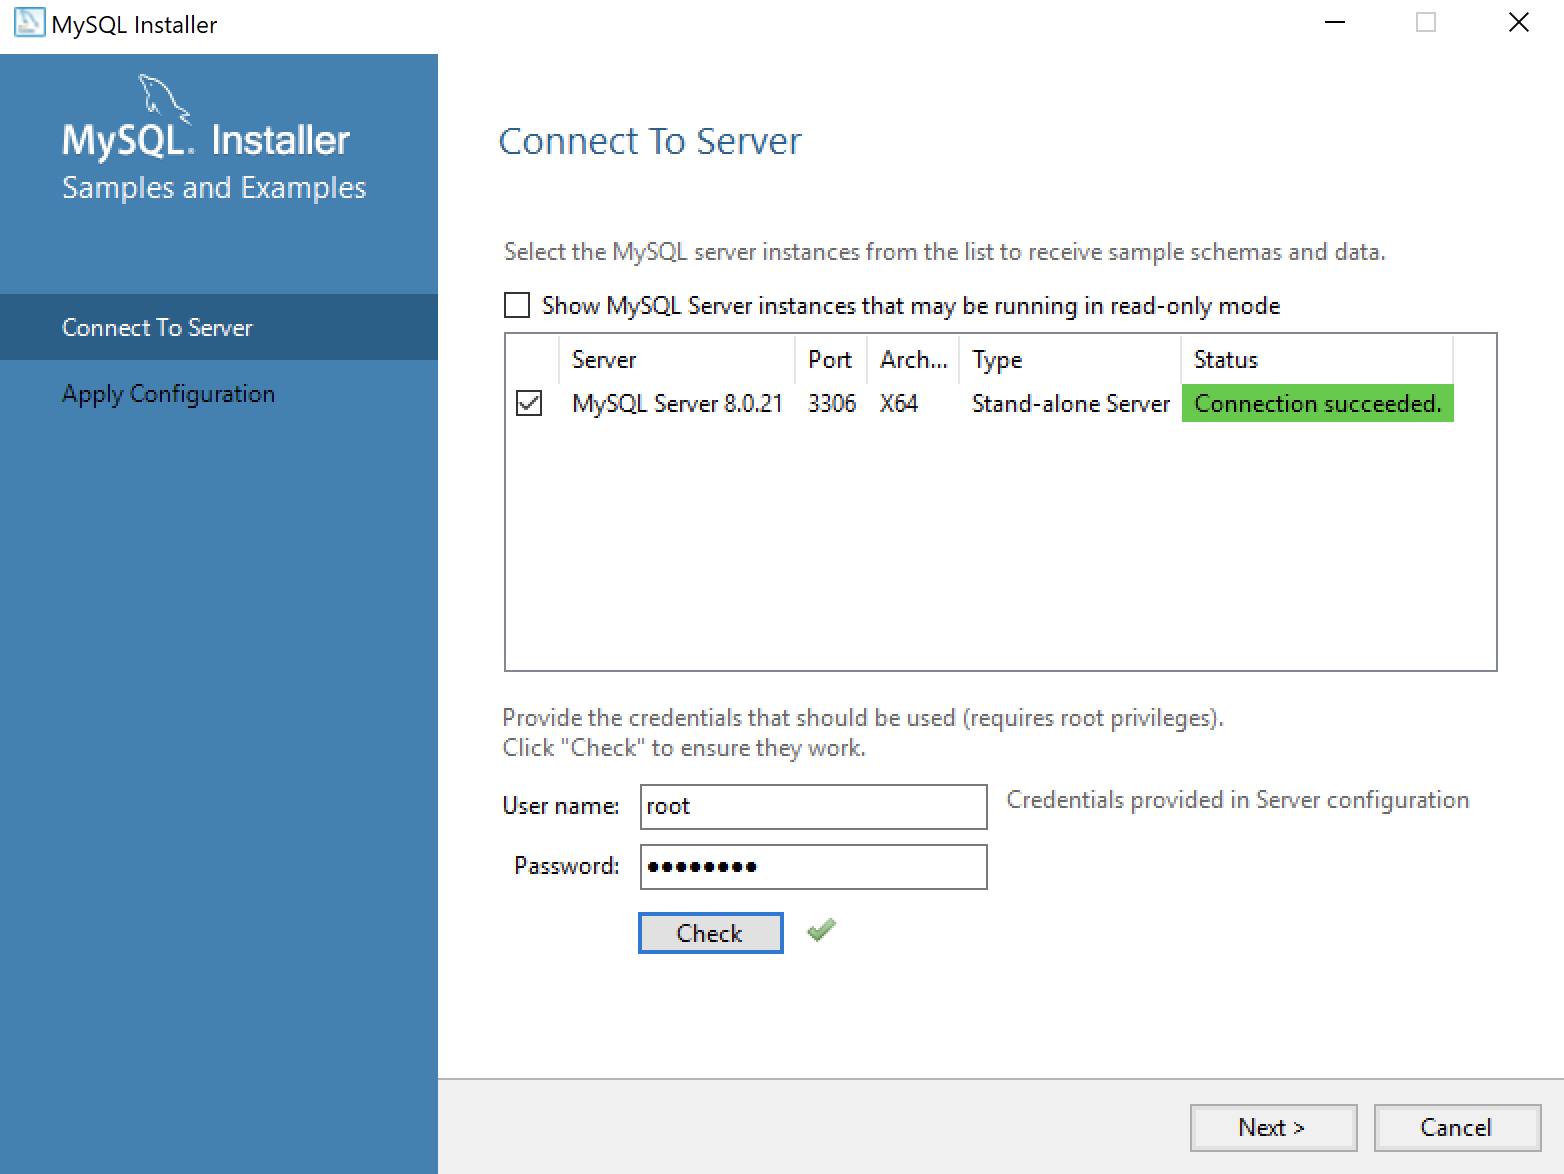
- This dialog lets you choose the next Samples and Examples product for configuration. Click the Next button to begin the Samples and Examples configuration.

- This dialog lets you create a Windows 10 MySQL Service. You enter the
rootpassword that you entered in Step #12. After you enterrootpassword, click the Check button to verify therootpassword. The Check button enables the Next button when therootaccount’s password is validated. Click the now enabled Next button to create the MySQL Service.
- This dialog lets you create a Windows 10 MySQL Service. Click the now enabled Next button to create the MySQL Service.
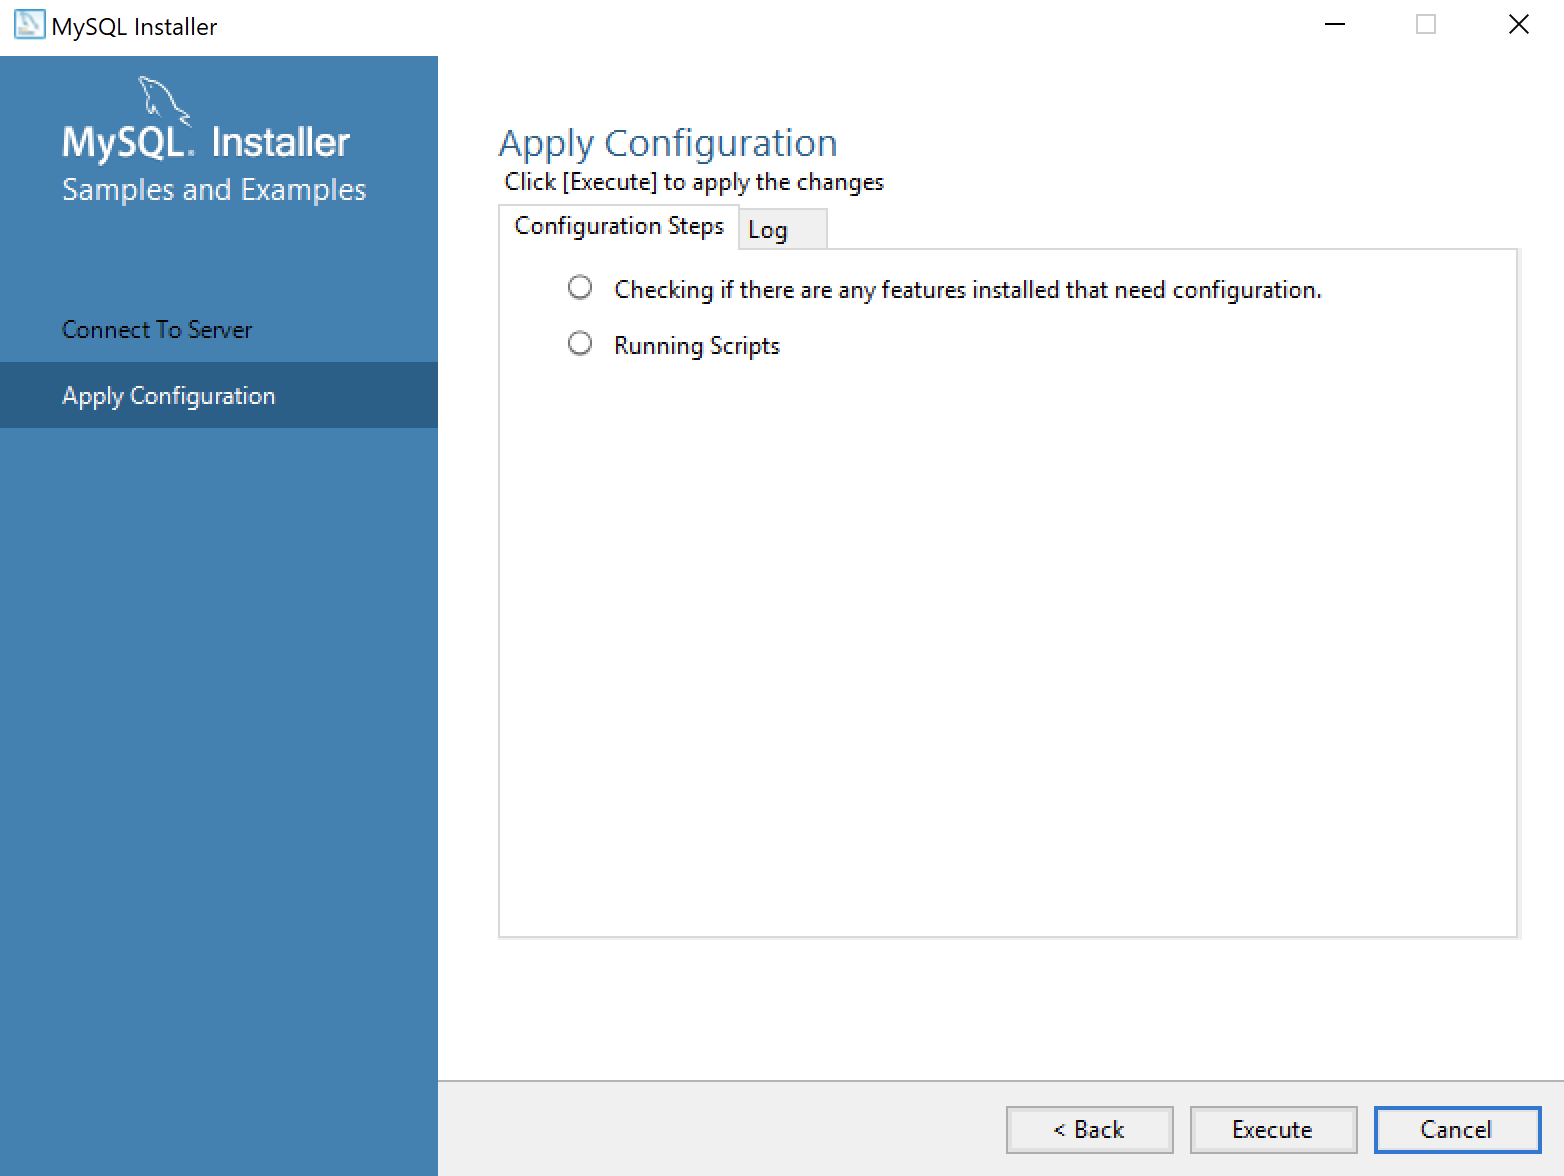
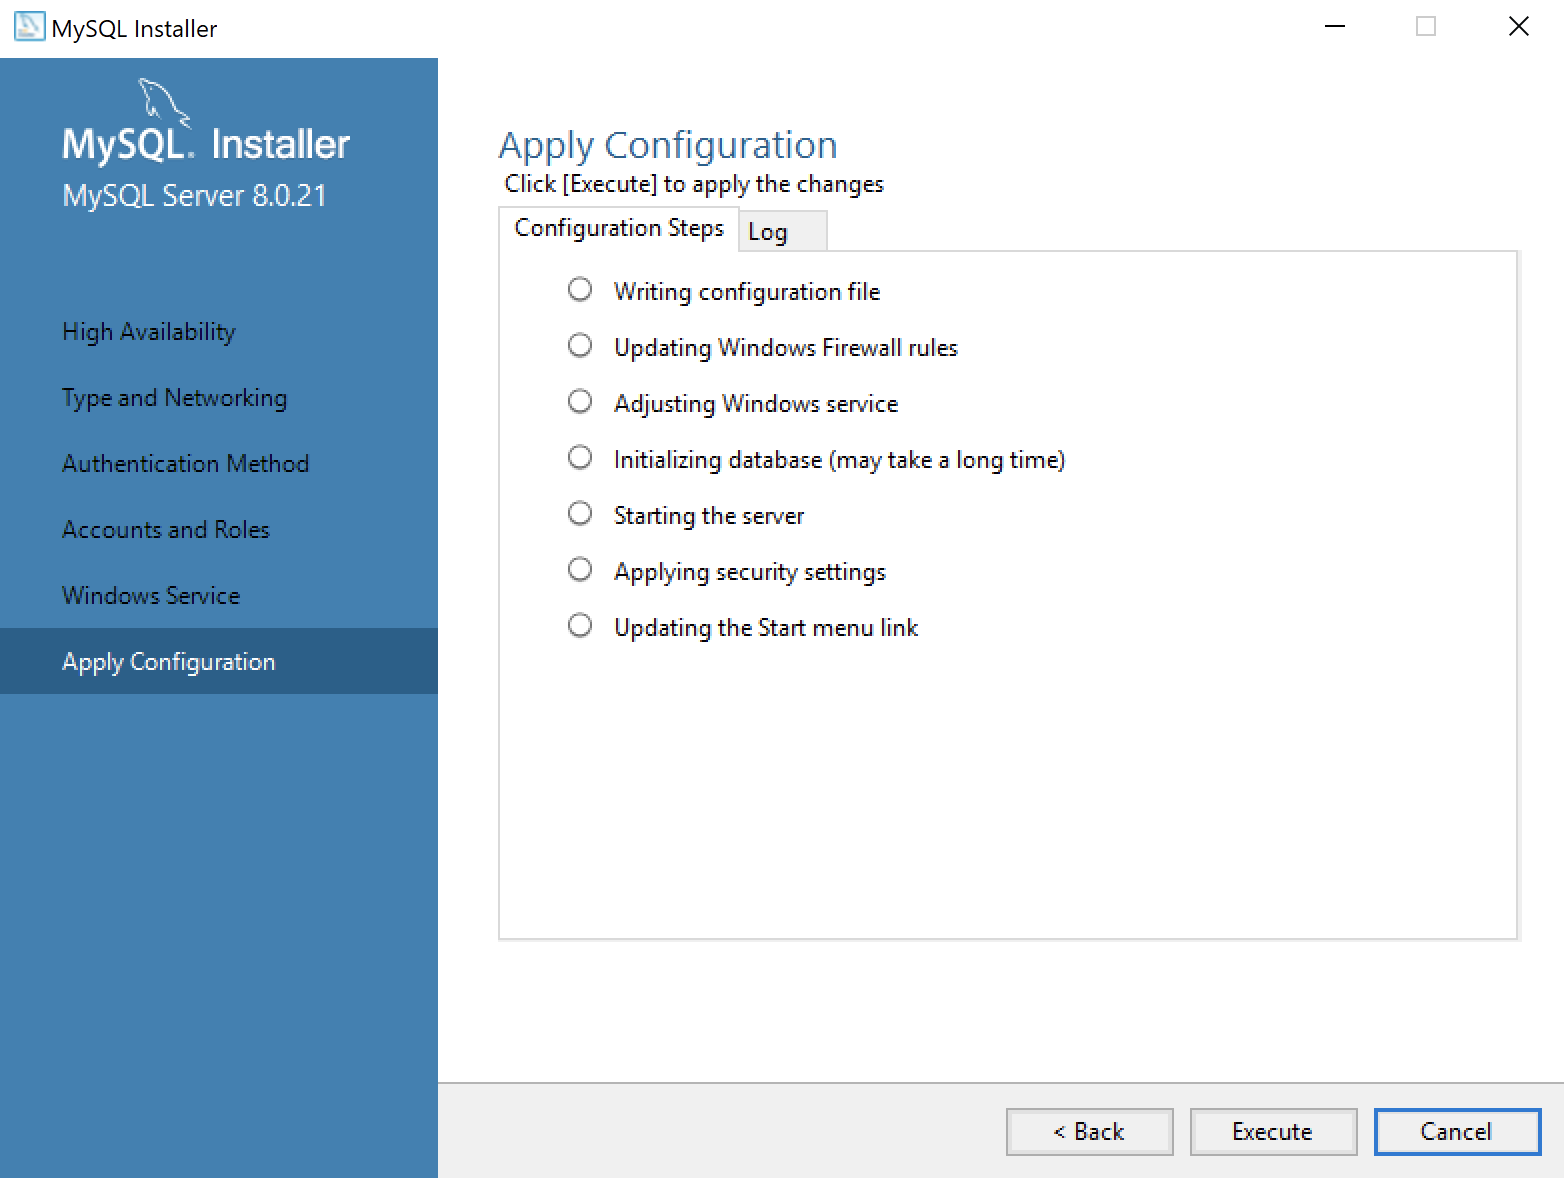
- This dialog applies all the configurations selected. Click the Execute button to proceed with the configuration.
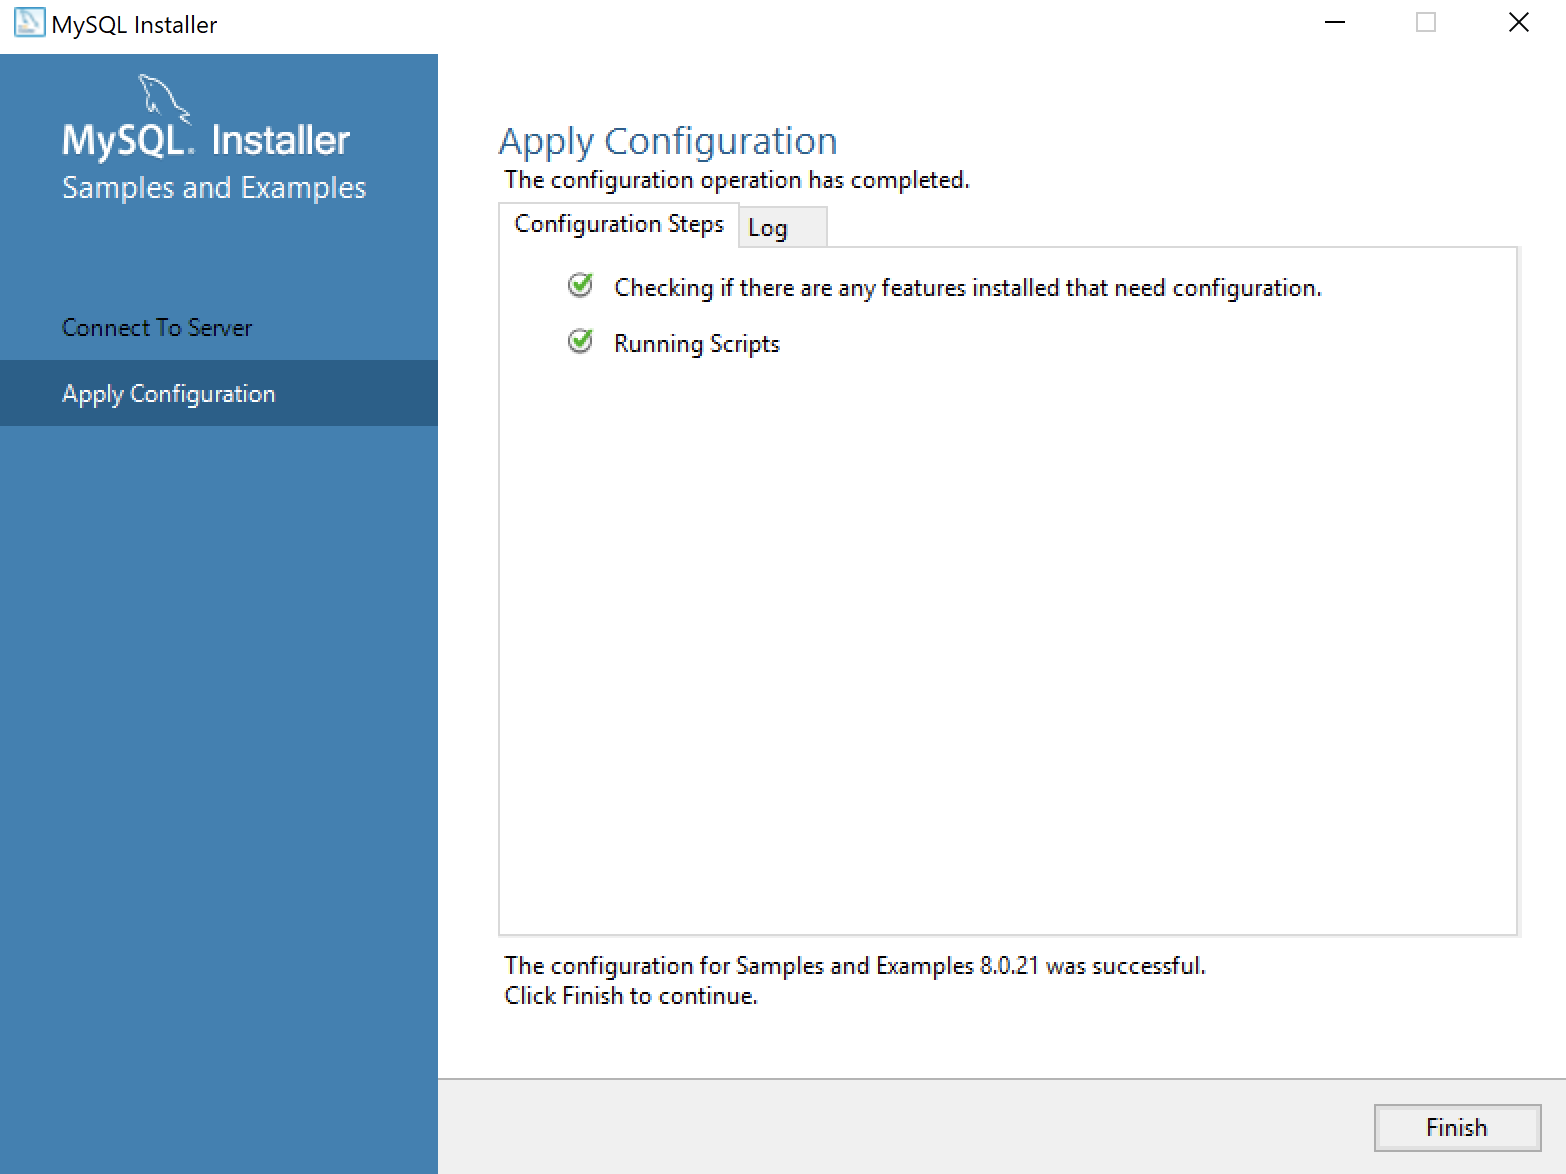
- This dialog lets you watch the progress of the configuration. Click the Finish button to complete the product configurations.

- This dialog the product configurations. You should note that the MySQL Router was not configured or needed. Click the Next button to complete the installation.
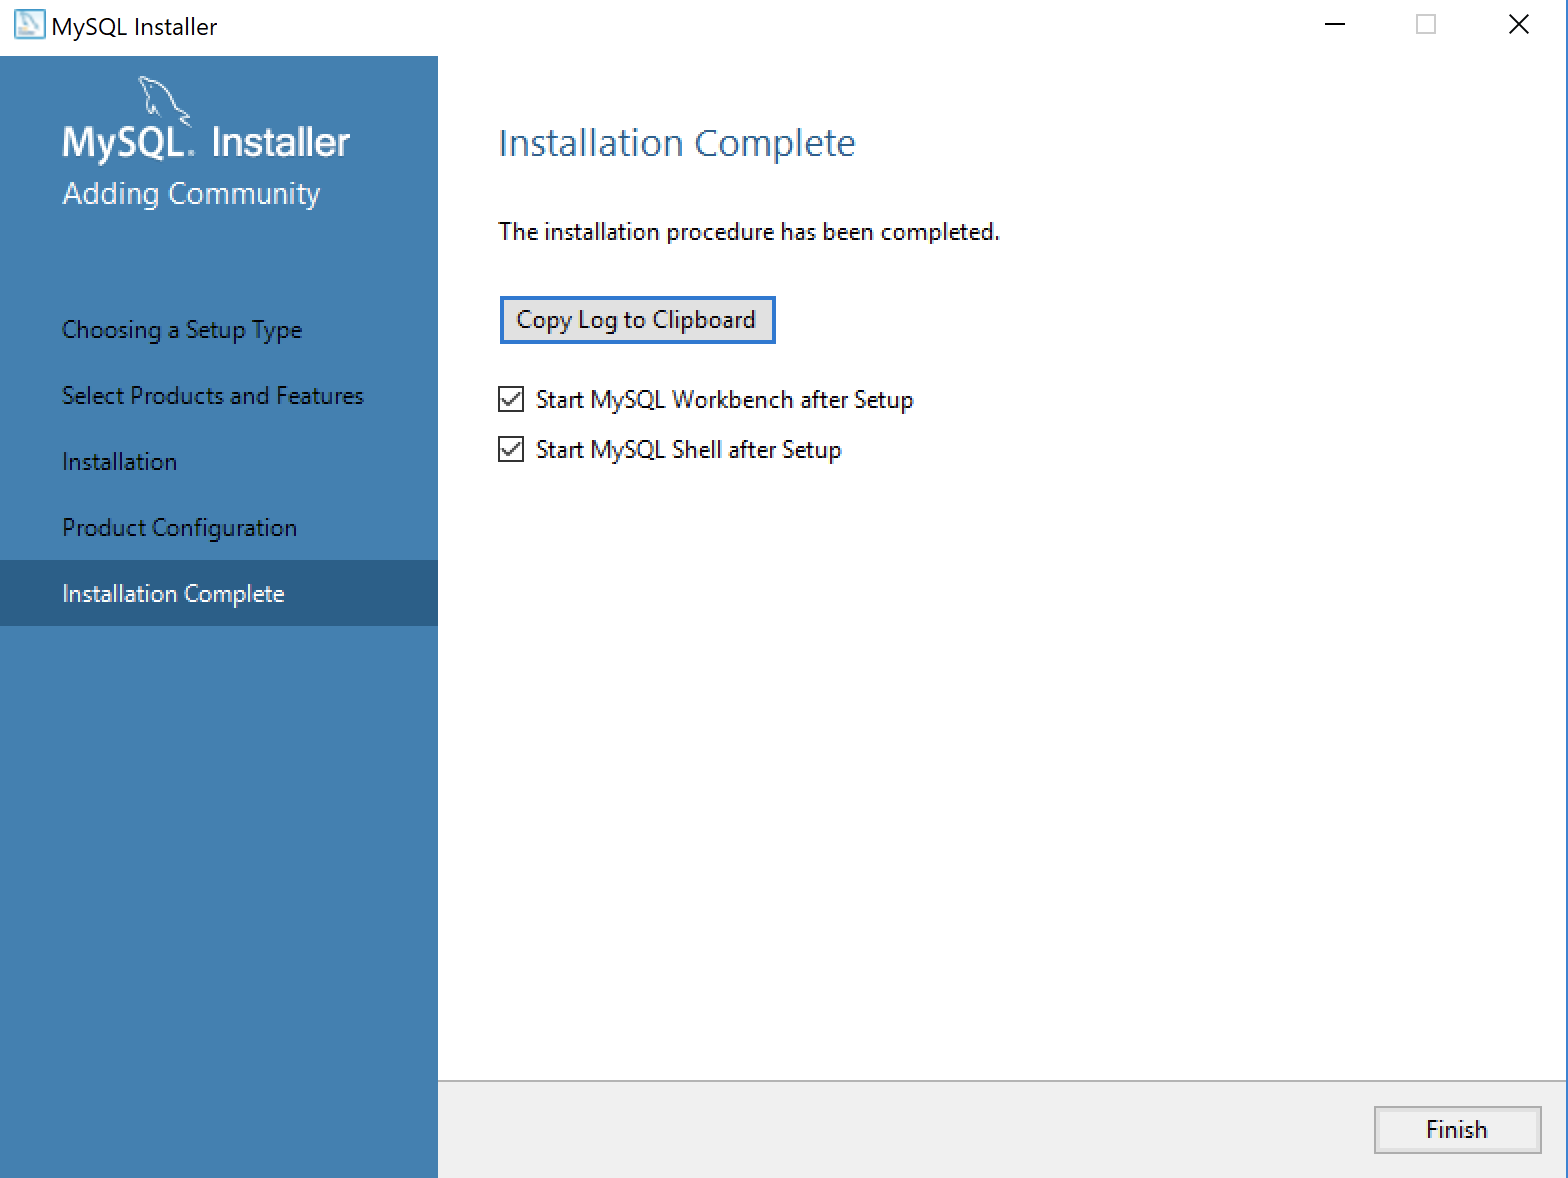
- This dialog completes the workflow and launches MySQL Workbench and Shell. Click the Finish button to complete the installation and configuration processes.
After you install MySQL, the following shows you how to provision a studentdb database. It also shows you how to enable the global file privilege and how to read data from an external comma-separated values (CSV) file.
