Archive for the ‘MySQL Connect/Python’ Category
SQL Calculations #1
This was principally written for my SQL students but I thought it might be useful to others. SQL calculation are performed row-by-row in the SELECT-list. In its simplest form without even touching a table, you can add two literal numbers like this:
1 | SELECT 2 + 2 AS result; |
It will display the result of the addition to the column alias result as a derived table, or the following result:
+--------+ | result | +--------+ | 4 | +--------+ 1 row in set (0.00 sec) |
Unfortunately, the use of literal values as shown above doesn’t really let you see how the calculation is made row-by-row because it only returns one row. You can rewrite the two literal values into one variable by using a Common Table Expressions (CTEs). The CTE creates an struct tuple with only one x element. Another way to describe what the CTE does would say, it creates a derived table named struct with a single x column in the SELECT-list.
The CTE runs first, then a subsequent query may use the CTE’s derived table results. Below is a query that uses the value in the struct.x derived table (or references the struct tuple’s x element) twice while assigning the value to a new column alias, labelled result. The FROM clause places the struct tuple in the queries namespace, which lets you reference it in the SELECT-list.
1 2 3 4 | WITH struct AS (SELECT 2 AS x) SELECT struct.x + struct.x AS result FROM struct; |
Like the literal example, it will display the result of the addition to the column alias result as a derived table of one row:
+--------+ | result | +--------+ | 4 | +--------+ 1 row in set (0.00 sec) |
Having laid a basis for a simple calculation in one row, let’s expand the example and demonstrate how to perform row-by-row calculations. The example requires introducing some new concepts. One uses the UNION ALL set operator to fabricate a CTE derived table with three rows. Another uses a comma within the WITH clause to create two derived tables or CTEs. The last uses the CROSS JOIN to add the single row CTE’s single y column to each of the rows returned by the multiple row CTE.
The CROSS JOIN is a Cartesian product, which multiplies the rows in one table against the rows in another table while adding the columns from each table. That means fabricating a table of one column and one row lets you put a variable into all the rows of another table or set of tables combined through an equijoin or non-equijoin operation.
The query below takes a struct1 derived table of one column and three rows and a struct2 derived table of one column and one row, then uses a CROSS JOIN to create a new derived table, which would be a table of two columns and three rows. The Cartesian product only provides the two columns that we will multiply to create new data.
The SELECT-list lets us fabricate a new column where we multiply the values of column x and column y to create a set of new results in column result.
1 2 3 4 5 6 7 8 9 10 | WITH struct1 AS (SELECT 1 AS x UNION ALL SELECT 2 AS x UNION ALL SELECT 3 AS x) , struct2 AS (SELECT 10 AS y) SELECT struct1.x AS x , struct2.y AS y , struct1.x * struct2.y AS result FROM struct1 CROSS JOIN struct2; |
The query returns the following results, which show the values used to calculate the result and the result:
+---+----+--------+ | x | y | result | +---+----+--------+ | 1 | 10 | 10 | | 2 | 10 | 20 | | 3 | 10 | 30 | +---+----+--------+ 3 rows in set (0.00 sec) |
As a rule, the columns x and y would not be displayed in the final derived table. You would only see the result columns’ values.
Let’s use an example from Alan Bwaulieu’s Learning SQL book with a twist. Rather than manually fabricating the ordinal numbers twice, let’s use the scope reference of a subsequent CTE to reference an earlier CTE. That would create two ten row tables of one column each, or a Cartesian product of a 100 row table with two columns. Then, let’s use the SELECT-list lets us fabricate only a new column, which will add 1 to the numbers 0 to 99 to give us the numbers 1 to a 100.
1 2 3 4 5 6 7 8 9 10 11 12 13 14 15 16 | WITH ones AS (SELECT 0 AS x UNION ALL SELECT 1 AS x UNION ALL SELECT 2 AS x UNION ALL SELECT 3 AS x UNION ALL SELECT 4 AS x UNION ALL SELECT 5 AS x UNION ALL SELECT 6 AS x UNION ALL SELECT 7 AS x UNION ALL SELECT 8 AS x UNION ALL SELECT 9 AS x ) , tens AS (SELECT x * 10 AS x FROM ones) SELECT ones.x + tens.x + 1 AS ordinal FROM ones CROSS JOIN tens ORDER BY ordinal; |
It returns the following result set:
+---------+ | ordinal | +---------+ | 1 | | 2 | | 3 | | 4 | | 5 | | 6 | | 7 | | 8 | | 9 | | 10 | | 11 | ... | 98 | | 99 | | 100 | +---------+ 100 rows in set (0.00 sec) |
Moving on to more complex math, let’s create a numerals table with the result from our prior query. It will enable calculating the factors of exponents. The easiest way to create the table is shown below (only caveat is that it will build it with a biting rather than an int data type).
1 2 3 4 5 6 7 8 9 10 11 12 13 14 15 16 17 | CREATE TABLE numerals AS WITH ones AS (SELECT 0 AS x UNION ALL SELECT 1 AS x UNION ALL SELECT 2 AS x UNION ALL SELECT 3 AS x UNION ALL SELECT 4 AS x UNION ALL SELECT 5 AS x UNION ALL SELECT 6 AS x UNION ALL SELECT 7 AS x UNION ALL SELECT 8 AS x UNION ALL SELECT 9 AS x ) , tens AS (SELECT x * 10 AS x FROM ones) SELECT ones.x + tens.x + 1 AS ordinal FROM ones CROSS JOIN tens ORDER BY ordinal; |
Line #15 sets the column alias that determines the name of the column for the numerals table. It can be described after running the foregoing script in MySQL as:
+---------+--------+------+-----+---------+-------+ | Field | Type | Null | Key | Default | Extra | +---------+--------+------+-----+---------+-------+ | ordinal | bigint | NO | | 0 | | +---------+--------+------+-----+---------+-------+ 1 row in set (0.00 sec) |
The next query accepts a substitution variable into the WITH clause, which means an external program will call it. (Although, you could use a session level variable, which I would discourage.) This query returns the factors for any given exponent:
1 2 3 4 5 6 7 8 9 | WITH magic AS (SELECT %s AS vkey) SELECT CONCAT(magic.vkey,'^',LOG(magic.vkey,n.ordinal)) AS powers , n.ordinal AS result FROM numerals n CROSS JOIN magic WHERE MOD(n.ordinal,magic.vkey) = 0 AND LOG(magic.vkey,n.ordinal) REGEXP '^[0-9]*$' OR n.ordinal = 1 ORDER BY n.ordinal; |
FYI, in the WHERE clause the regular expression is guarantees only rows returning integer values, and the 1 returns the identity property of an exponent raised to the zero power.
Assuming you created the numerals table, put the foregoing query in a query.sql file (because I was to lazy to write the full parameter handling), and you run it in the same directory as this Python program, it’ll take any valid integer as a value.
1 2 3 4 5 6 7 8 9 10 11 12 13 14 15 16 17 18 19 20 21 22 23 24 25 26 27 28 29 30 31 32 33 34 35 36 37 38 39 40 41 42 43 44 45 46 47 48 49 50 51 52 53 54 55 56 57 58 59 60 61 62 63 64 65 66 67 68 69 70 71 72 73 74 75 76 77 78 79 80 81 82 83 84 85 86 87 88 89 90 91 92 93 94 95 96 97 98 99 100 101 102 103 104 105 106 107 108 109 110 111 112 113 114 | #!/usr/bin/python # ------------------------------------------------------------ # Name: power.py # Date: 19 Oct 2024 # ------------------------------------------------------------ # Purpose: # ------- # The program shows you how to provide a single agrument # to a query and print the formatted output. # # You can call the program: # # ./power.py 3 # # ------------------------------------------------------------ # Import libraries. import sys import mysql.connector from mysql.connector import errorcode # ============================================================ # Define a local padding function. # ============================================================ def pad(valueIn): # Define local variable. padding = '' # Convert single digit numbers to strings. if isinstance(valueIn,int) and len(str(valueIn)) == 1: padding = ' ' # Return padding space. return padding # ============================================================ # End local function defintion. # ============================================================ # Define any local variables. powerIn = 2 query = "" # ============================================================ # Capture argument list minus the program name. # ============================================================ arguments = sys.argv[1:] # ============================================================ # If one or more arguments exists and the first one is an # a string that can cast to an int, convert it to an int, # assign it to a variable, and ignore any other arguments # in the list. # ============================================================ if len(arguments) >= 1 and arguments[0].isdigit(): powerIn = int(arguments[0]) # ============================================================ # Use a try-catch block to read and parse a query from a # a file found in the same local directory as the Python # program. # ============================================================ try: file = open('query.sql','r') query = file.read().replace('\n',' ').replace(';','') file.close() except IOError: print("Could not read file:", fileName) # ============================================================ # Attempt connection in a try-catch block. # ============================================================ # -------------------------------------------------------- # Open connection, bind variable in query and format # query output before closing the cursor. # -------------------------------------------------------- try: # Open connection. cnx = mysql.connector.connect(user='student', password='student', host='127.0.0.1', database='studentdb') # Create cursor. cursor = cnx.cursor() # Execute cursor, and coerce string to tuple. cursor.execute(query, (powerIn,)) # Display the rows returned by the query. for (powers, result) in cursor: print((" {} is: {}").format(powers, pad(result) + str(result))) # Close cursor. cursor.close() # -------------------------------------------------------- # Handle MySQL exception # -------------------------------------------------------- except mysql.connector.Error as e: if e.errno == errorcode.ER_ACCESS_DENIED_ERROR: print("Something is wrong with your user name or password") elif e.errno == errorcode.ER_BAD_DB_ERROR: print("Database does not exist") else: print("Error code:", e.errno) # error number print("SQLSTATE value:", e.sqlstate) # SQLSTATE value print("Error message:", e.msg) # error message # -------------------------------------------------------- # Close connection after try-catch completes. # -------------------------------------------------------- # Close the connection when the try block completes. else: cnx.close() |
If you forget to call it with a numeric parameter, it uses 2 as the default. You would call it as follows from a Linux prompt from the local directory:
./power.py |
It returns:
2^0 is: 1 2^1 is: 2 2^2 is: 4 2^3 is: 8 2^4 is: 16 2^5 is: 32 2^6 is: 64 |
If you call it with a numeric parameter, it uses the numeric value. You would call it as follows from a Linux prompt from the local directory:
./power.py 3 |
It returns:
3^0 is: 1 3^1 is: 3 3^2 is: 9 3^3 is: 27 3^4 is: 81 |
As always, I hope the post helps folks sort out how and why things work.
Setting SQL_MODE
In MySQL, the @@sql_mode parameter should generally use ONLY_FULL_GROUP_BY. If it doesn’t include it and you don’t have the ability to change the database parameters, you can use a MySQL PSM (Persistent Stored Module), like:
Create the set_full_group_by procedure:
1 2 3 4 5 6 7 8 9 10 11 12 13 14 15 16 17 18 19 20 21 22 23 24 25 26 27 | -- Drop procedure conditionally on whether it exists already. DROP PROCEDURE IF EXISTS set_full_group_by; -- Reset delimter to allow semicolons to terminate statements. DELIMITER $$ -- Create a procedure to verify and set connection parameter. CREATE PROCEDURE set_full_group_by() LANGUAGE SQL NOT DETERMINISTIC SQL SECURITY DEFINER COMMENT 'Set connection parameter when not set.' BEGIN /* Check whether full group by is set in the connection and if unset, set it in the scope of the connection. */ IF NOT EXISTS (SELECT NULL WHERE REGEXP_LIKE(@@SQL_MODE,'ONLY_FULL_GROUP_BY')) THEN SET SQL_MODE=(SELECT CONCAT(@@sql_mode,',ONLY_FULL_GROUP_BY')); END IF; END; $$ -- Reset the default delimiter. DELIMITER ; |
Run the following SQL command before you attempt the exercises in the same session scope:
CALL set_full_group_by(); |
As always, I hope this helps those looking for a solution. Naturally, you can simply use the SET command on line #21 above.
Read CSV with Python
In 2009, I showed an example of how to use the MySQL LOAD DATA INFILE command. Last year, I updated the details to reset the secure_file-priv privilege to use the LOAD DATA INFILE command, but you can avoid that approach with a simple Python 3 program like the one in this example. You also can use MySQL Shell’s new parallel table import feature, introduced in 8.0.17, as noted in a comment on this blog post.
The example requires creating an avenger table, avenger.csv file, a readWriteData.py Python script, run the readWriteData.py Python script, and a query that validates the insertion of the avenger.csv file’s data into the avenger table. The complete code in five steps using the sakila demonstration database:
- Creating the avenger table with the create_avenger.sql script:
-- Conditionally drop the avenger table.
DROP TABLE IF EXISTS avenger;

-- Create the avenger table.
CREATE TABLE avenger
( avenger_id    int unsigned PRIMARY KEY AUTO_INCREMENT
, first_name    varchar(20)
, last_name     varchar(20)
, avenger_name  varchar(20))
  ENGINE=InnoDB
  AUTO_INCREMENT=1001
  DEFAULT CHARSET=utf8mb4
  COLLATE=utf8mb4_0900_ai_ci;
- Create the avenger.csv file with the following data:
Anthony,Stark,Iron Man
Thor,Odinson,God of Thunder
Steven,Rogers,Captain America
Bruce,Banner,Hulk
Clinton,Barton,Hawkeye
Natasha,Romanoff,Black Widow
Peter,Parker,Spiderman
Steven,Strange,Dr. Strange
Scott,Lange,Ant-man
Hope,van Dyne,Wasp
- Create the readWriteFile.py Python 3 script:
# Import libraries.
import csv
import mysql.connector
from mysql.connector import errorcode
from csv import reader

#  Attempt the statement.
# ============================================================
#  Use a try-catch block to manage the connection.
# ============================================================
try:
  # Open connection.
  cnx = mysql.connector.connect( user='student'
                               , password='student'
                               , host='127.0.0.1'
                               , database='sakila')
  # Create cursor.
  cursor = cnx.cursor()

  # Open file in read mode and pass the file object to reader.
  with open('avenger.csv', 'r') as read_obj:
    csv_reader = reader(read_obj)

    # Declare the dynamic statement.
    stmt = ("INSERT INTO avenger "
            "(first_name, last_name, avenger_name) "
            "VALUES "
            "(%s, %s, %s)")

    # Iterate over each row in the csv using reader object
    for row in csv_reader:
      cursor.execute(stmt, row)

    # Commit the writes.
    cnx.commit()

    #close the connection to the database.
    cursor.close()

# Handle exception and close connection.
except mysql.connector.Error as e:
  if e.errno == errorcode.ER_ACCESS_DENIED_ERROR:
    print("Something is wrong with your user name or password")
  elif e.errno == errorcode.ER_BAD_DB_ERROR:
    print("Database does not exist")
  else:
    print("Error code:", e.errno)        # error number
    print("SQLSTATE value:", e.sqlstate) # SQLSTATE value
    print("Error message:", e.msg)       # error message

# Close the connection when the try block completes.
else:
  cnx.close()
- Run the readWriteFile.py file:
python3 readWriteFile.py
- Query the avenger table:
SELECT * FROM avenger;It returns:
+------------+------------+-----------+-----------------+
| avenger_id | first_name | last_name | avenger_name    |
+------------+------------+-----------+-----------------+
|       1001 | Anthony    | Stark     | Iron Man        |
|       1002 | Thor       | Odinson   | God of Thunder  |
|       1003 | Steven     | Rogers    | Captain America |
|       1004 | Bruce      | Banner    | Hulk            |
|       1005 | Clinton    | Barton    | Hawkeye         |
|       1006 | Natasha    | Romanoff  | Black Widow     |
|       1007 | Peter      | Parker    | Spiderman       |
|       1008 | Steven     | Strange   | Dr. Strange     |
|       1009 | Scott      | Lange     | Ant-man         |
|       1010 | Hope       | van Dyne  | Wasp            |
+------------+------------+-----------+-----------------+
10 rows in set (0.00 sec)
MySQL 8.0 Install
MySQL will be used for our online sections because the VMware instance and Docker configurations where too large to effectively download this term.
MySQL 8.0.21 Installation Steps
After you download the MySQL 8 MSI file, you will perform the following 24 steps to install MySQL on Windows 10. If you want a full developer install you must install Microsoft Excel and Visual Studio first.

- The first thing you need to do is grant privileges to allow the MySQL Installer application to work in Windows 10. Click the Yes button to authorize the MySQL Installer to run.

- The next thing you need to do is grant privileges to allow the MySQL Installer Launcher application to work in Windows 10. Click the Yes button to authorize the MySQL Installer to run.

- Now you start the install by choosing a setup type. As a rule, I recommend you install the Developer Default. It is the default selection and preselected for you. Click the Next button to verify that you can install what you’ve selected.

- The next workflow step checks requirements and lists any unmet requirements. The workflow lists the requirements for MySQL for Excel 1.3.8 as unmet because Microsoft Excel is not installed. Click the Next button when there are no unmet requirements in the list. Click the Back button to remove MySQL for Excel 1.3.8 from the setup selection.

- Returning to the setup type workflow, you should select the Custom radio button. Click the Next button to view the list of selected types.
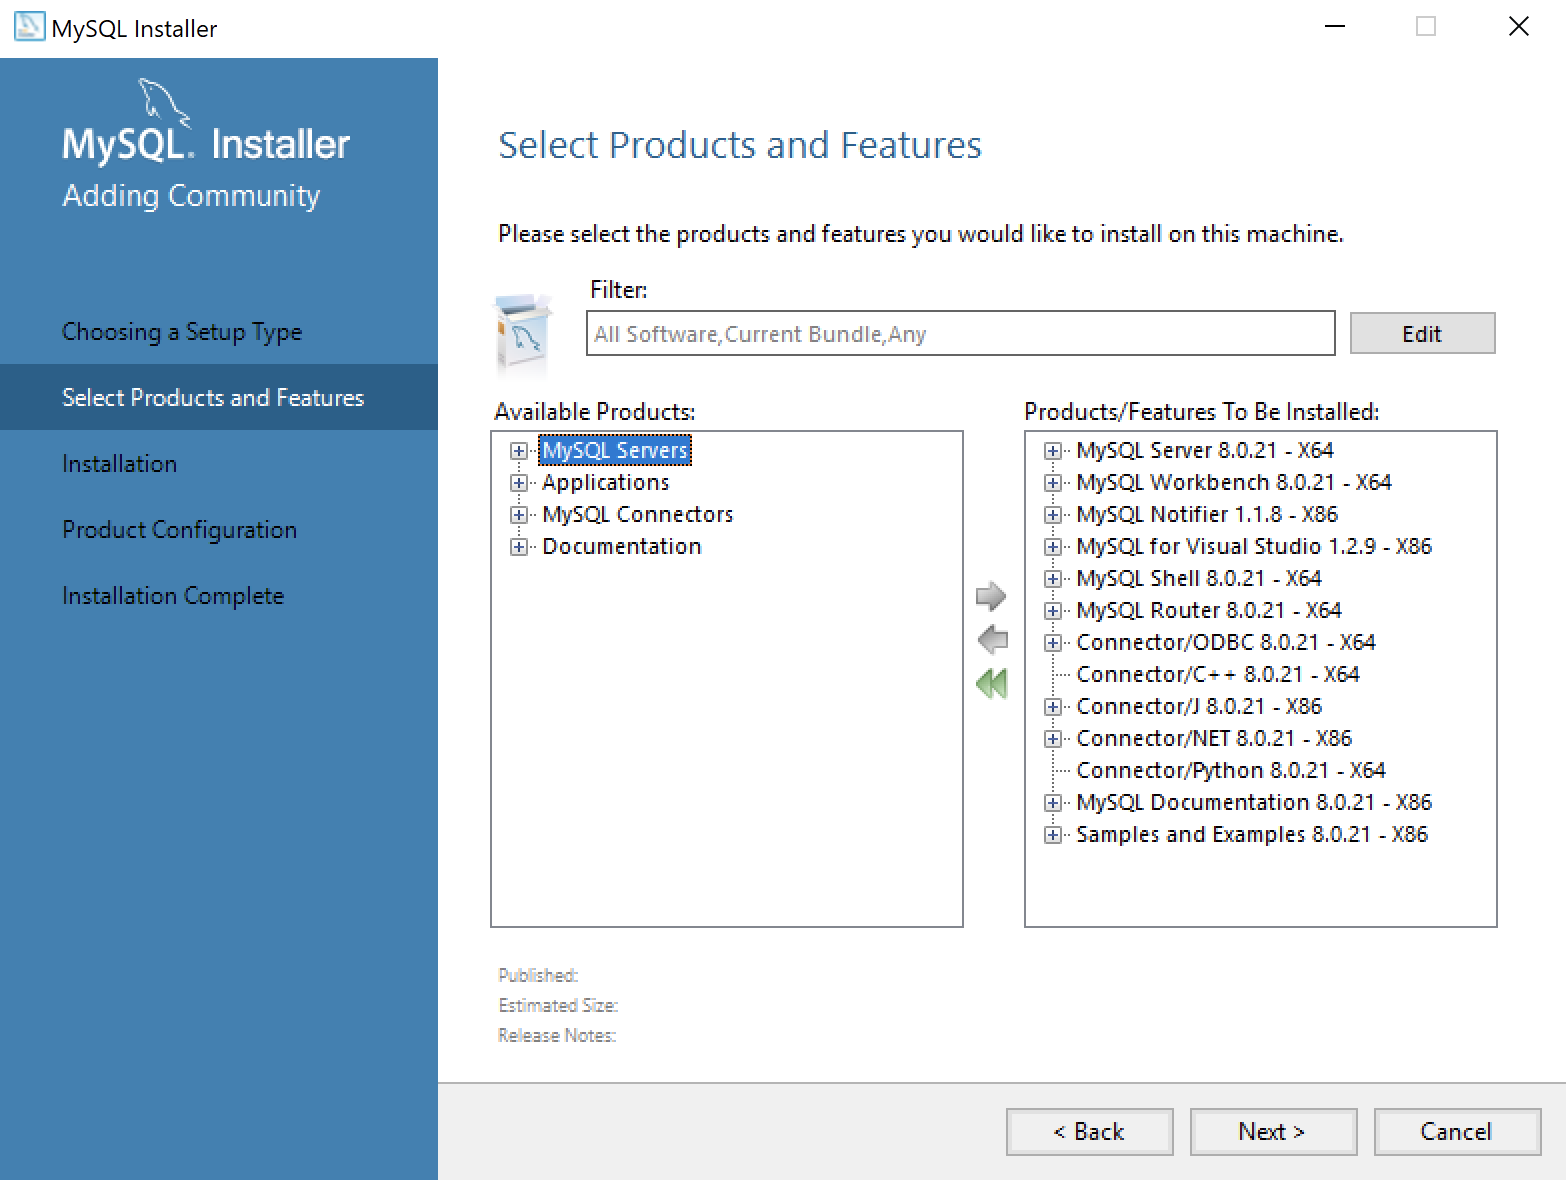
- Use the green arrow pointing to the left to remove MySQL for Excel 1.3.8 from the list. Click the Next button to continue the MySQL Installer to install the selected MySQL libraries.
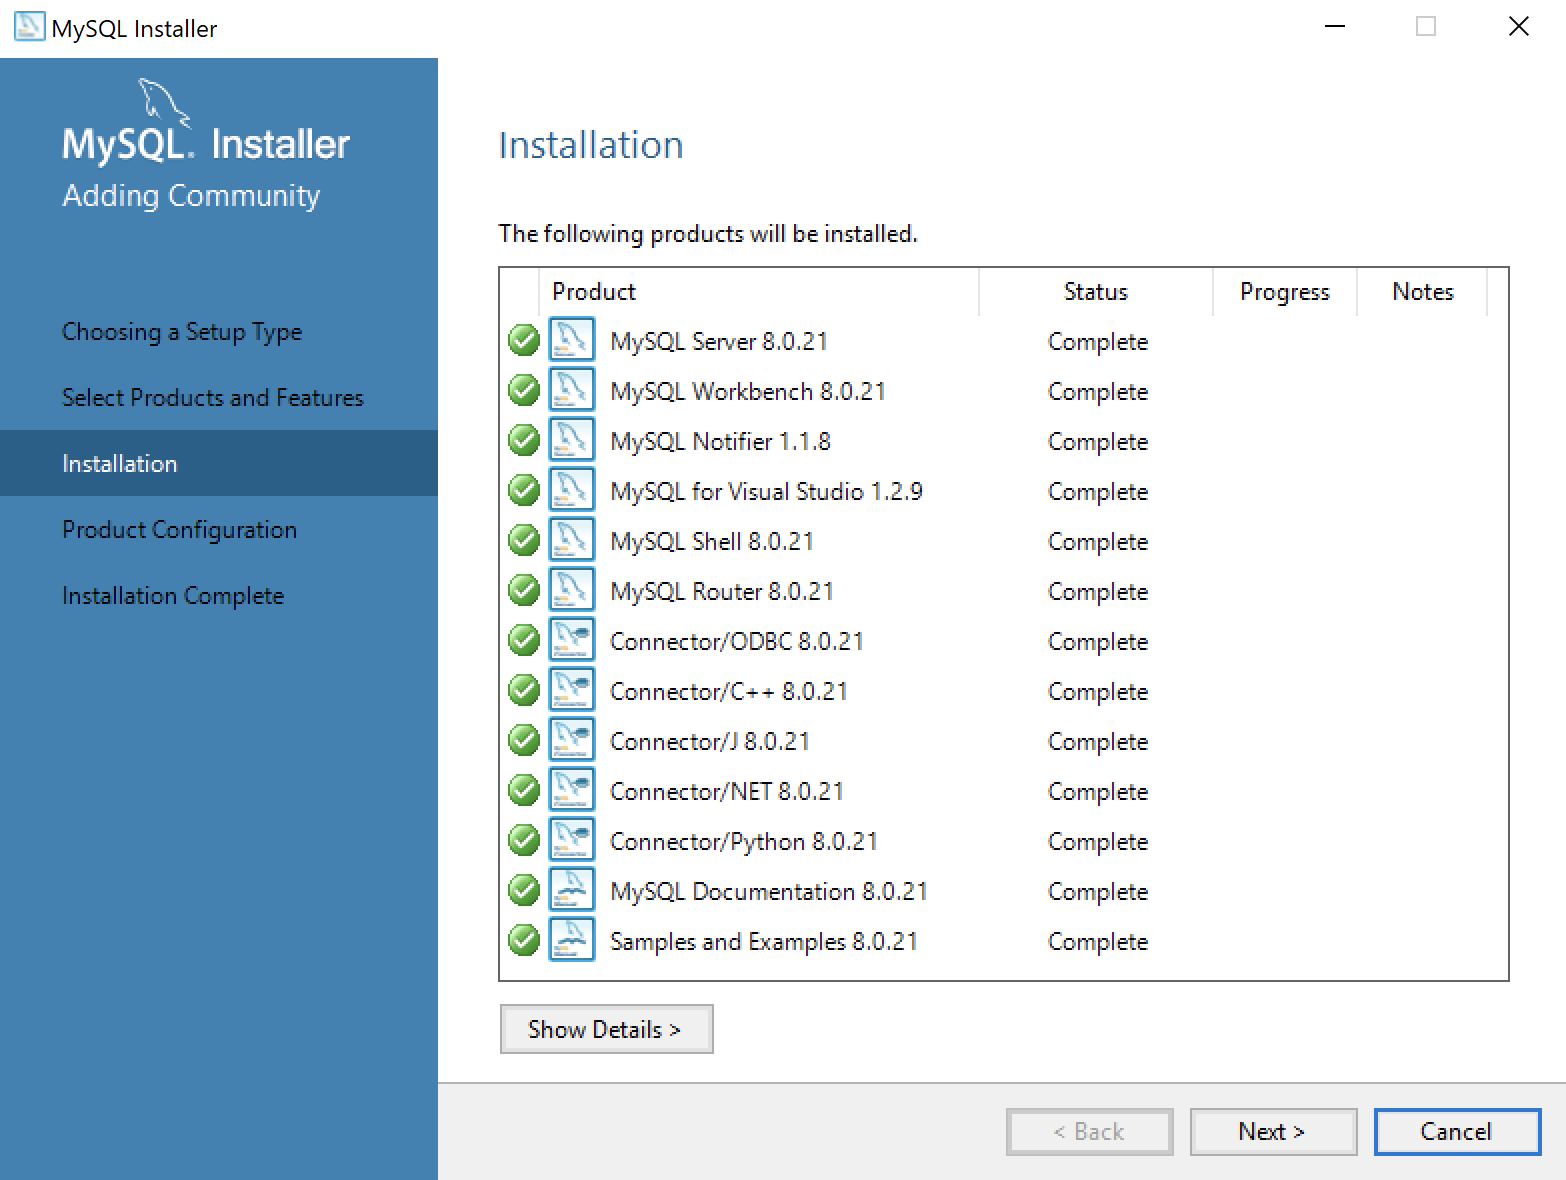
- This dialog will display for several minutes as each of the MySQL Installer modules is. Click the Next button to move forward in the MySQL Installer workflow.
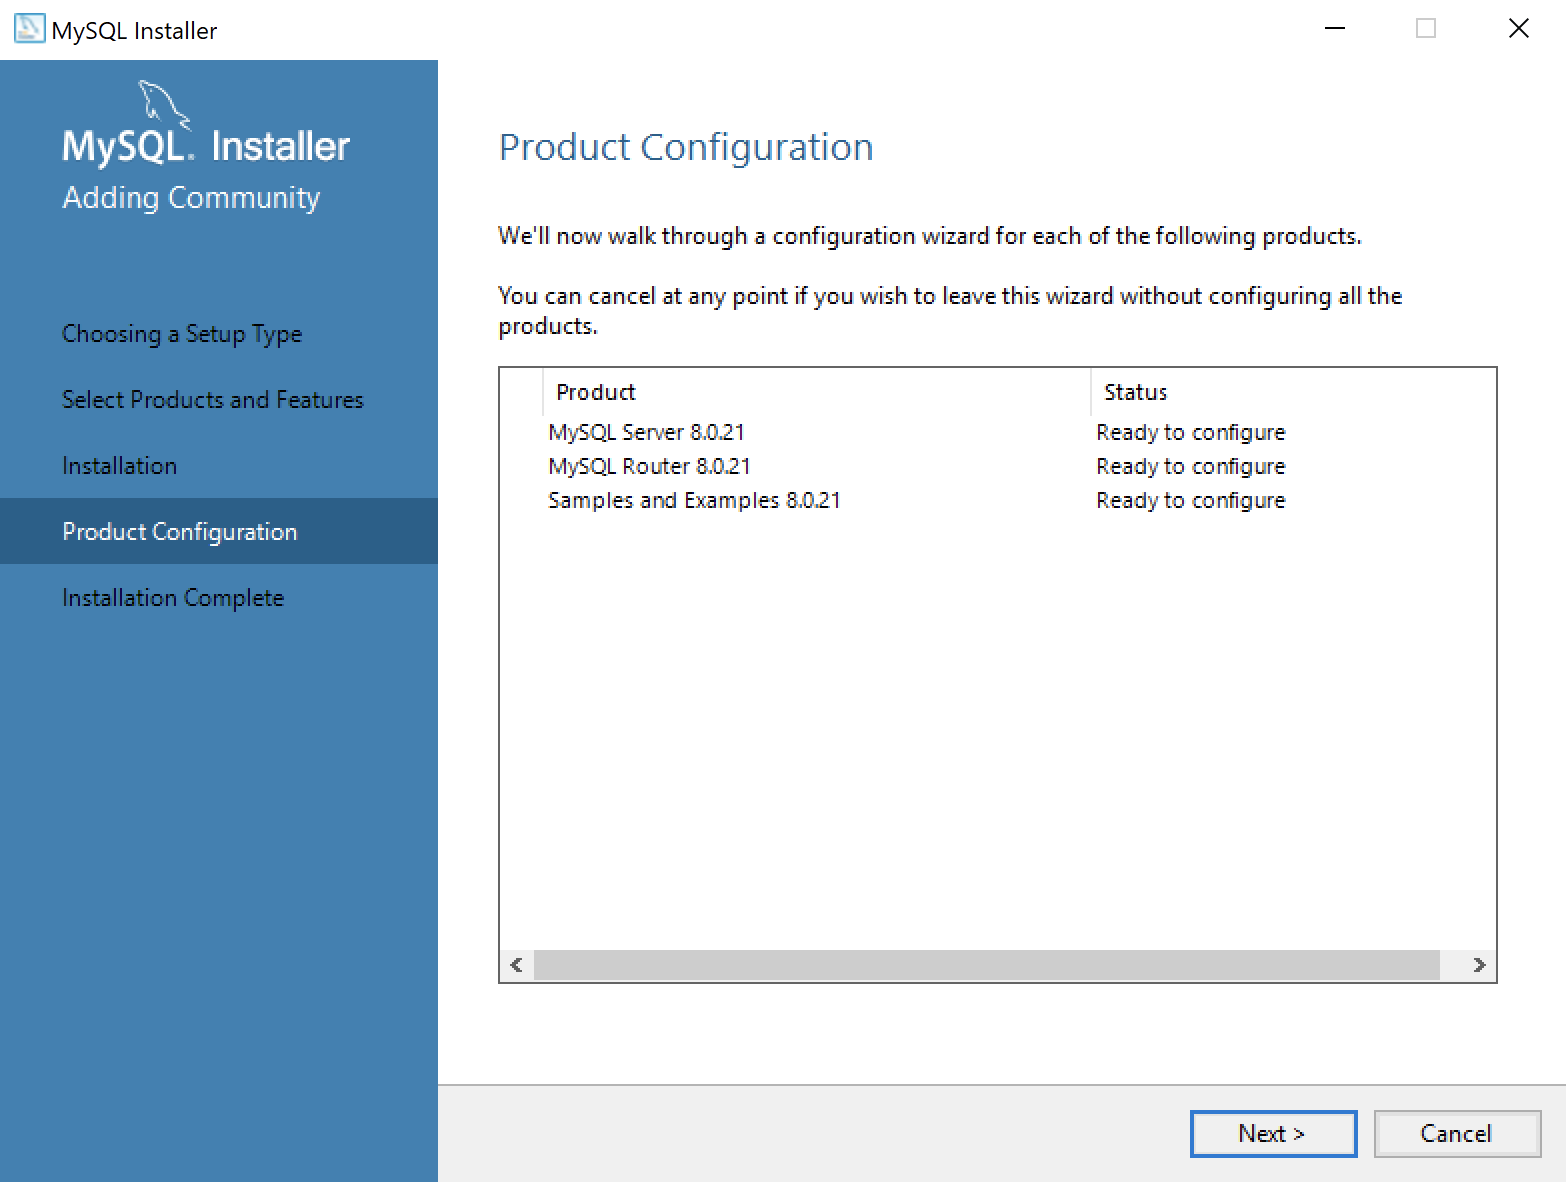
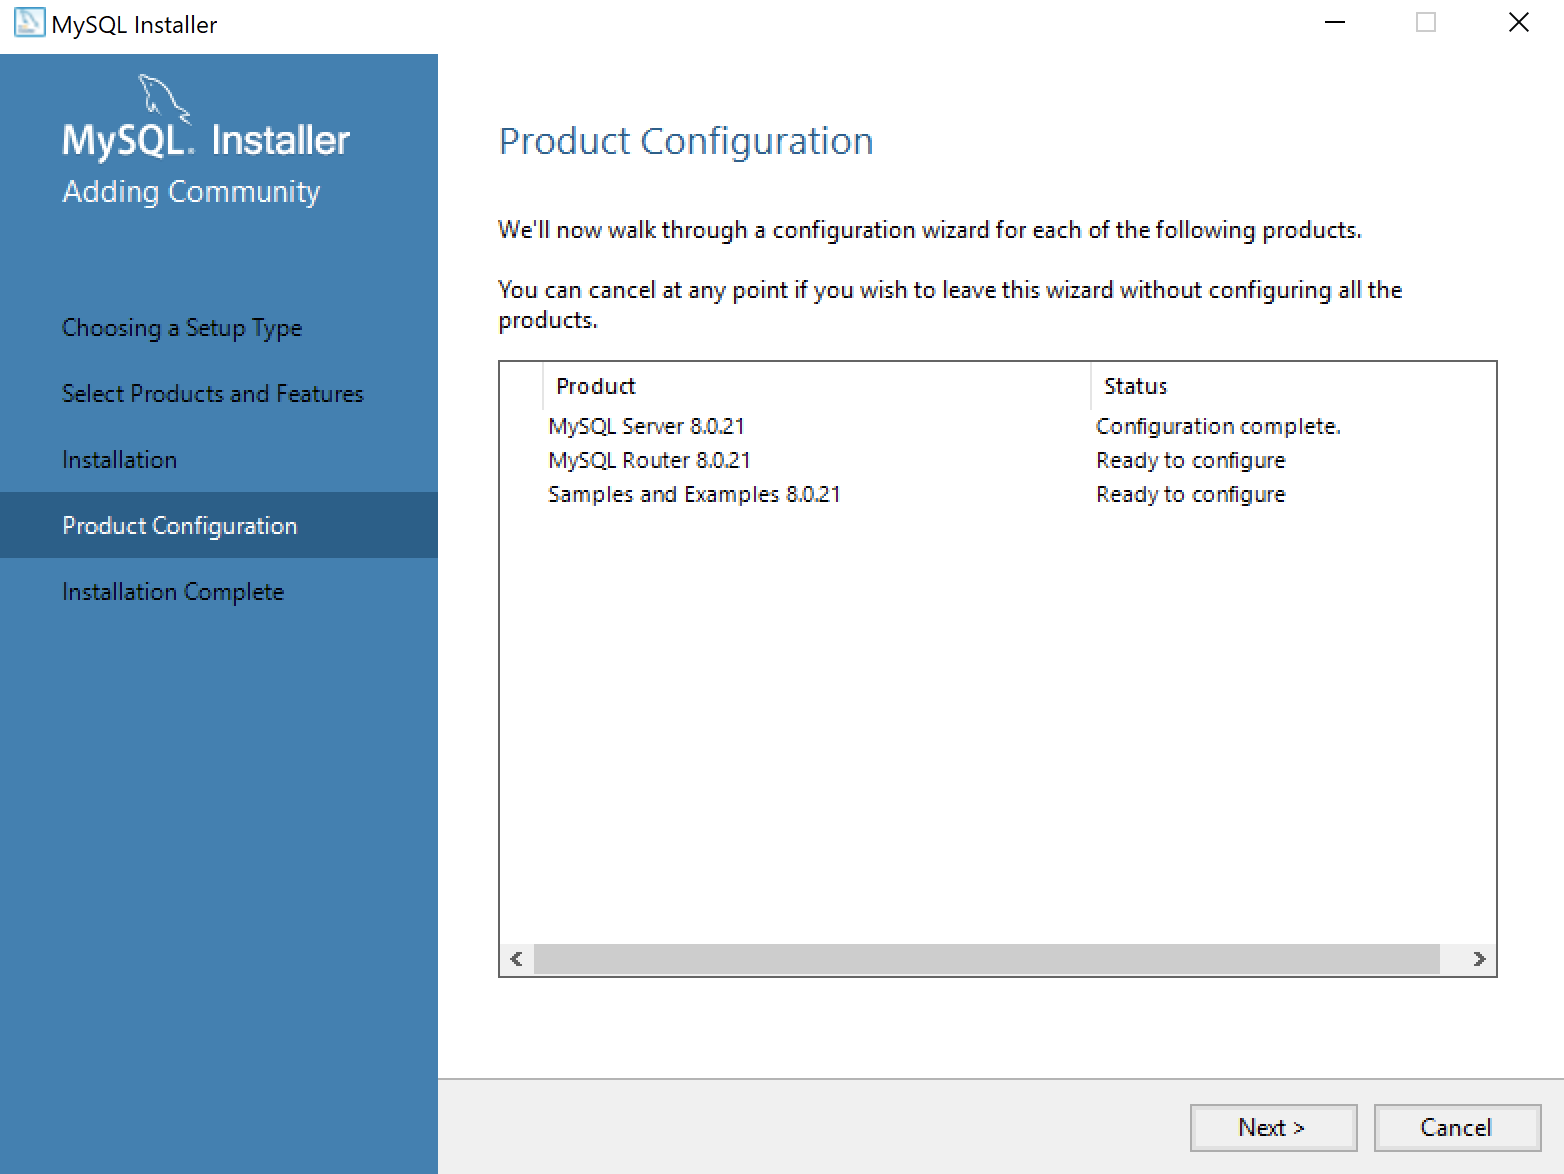
- This dialog qualifies that there are three products to configure. Click the Next button to begin configuration of these products.
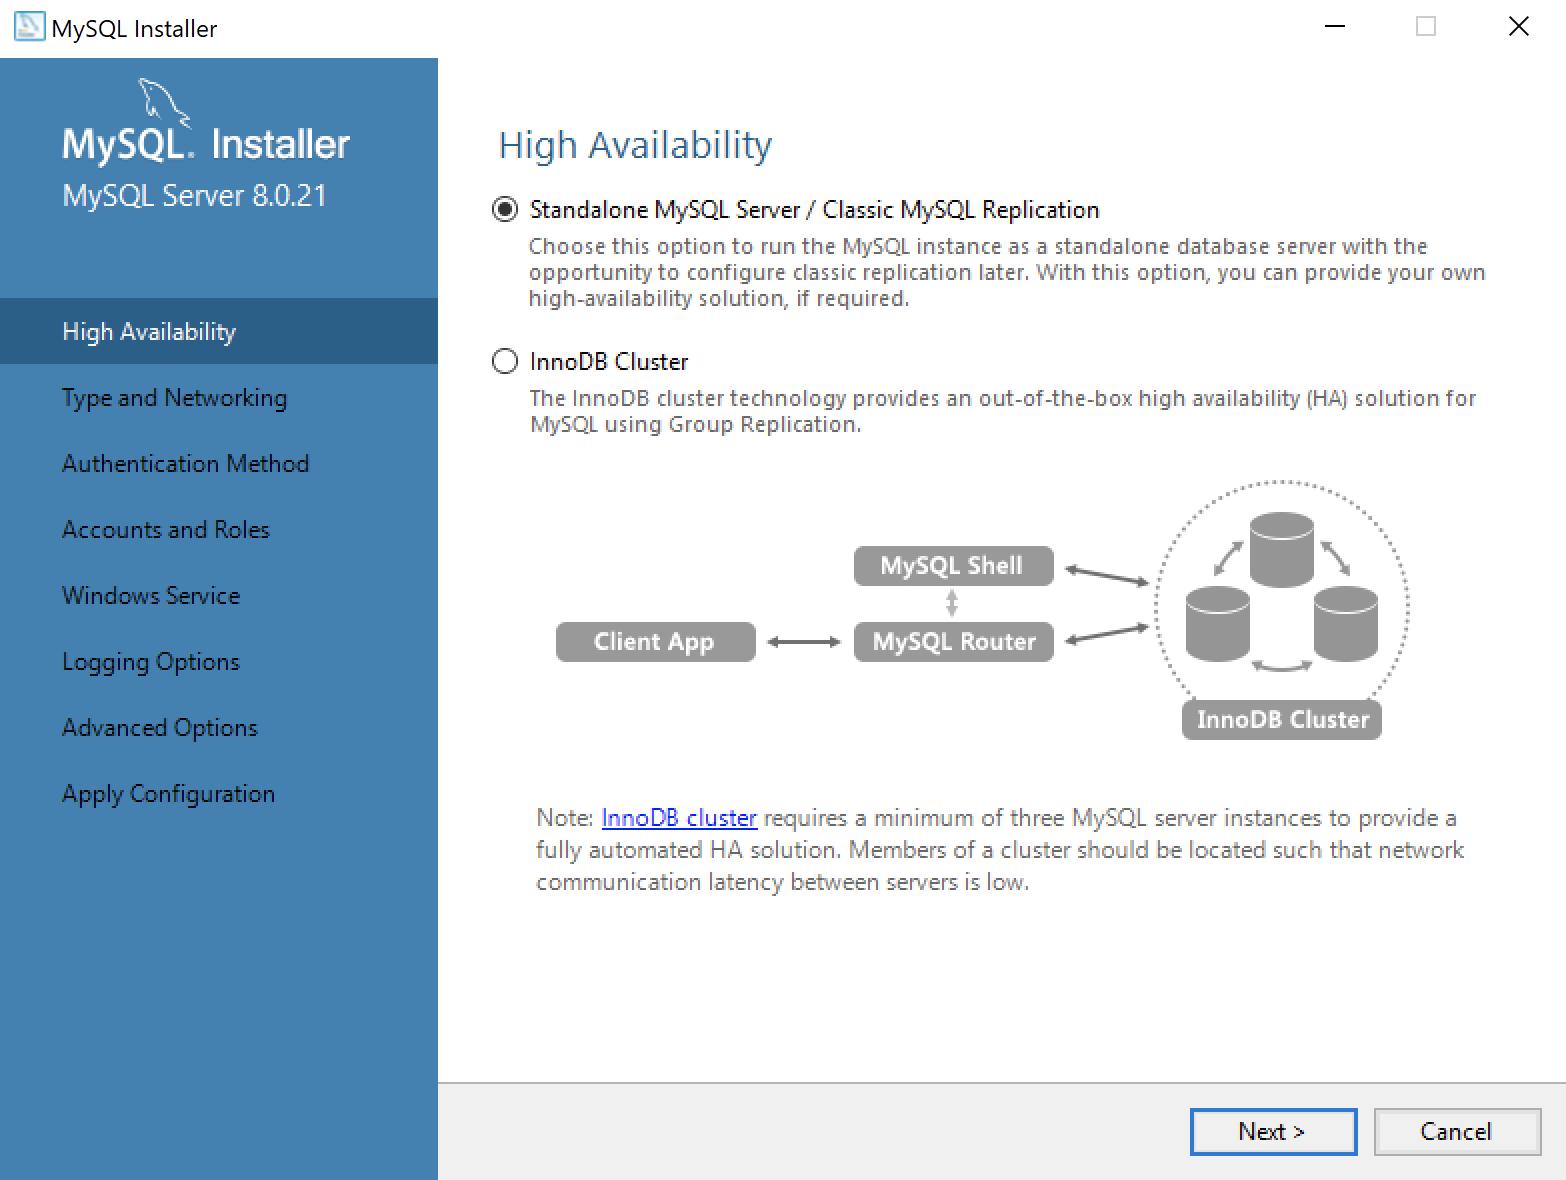
- This dialog lets you choose between a Standalone MySQL Server / Classic MySQL Replication and InnoDB Cluster. You should choose the Standalone MySQL Server for a developer installation on a laptop or desktop. Click the Next button to continue the MySQL Installer configuration.

- This dialog lets you choose set the type and networking values. They should be preselected as they are in the screen image. Click the Next button to continue the MySQL Installer configuration.

- This dialog lets you choose between SHA256-based and the older MD5 encryption. Click Use Strong Password Encryption for Authentication (RECOMMENDED) radio button. Click the Next button to continue the MySQL Installer configuration.
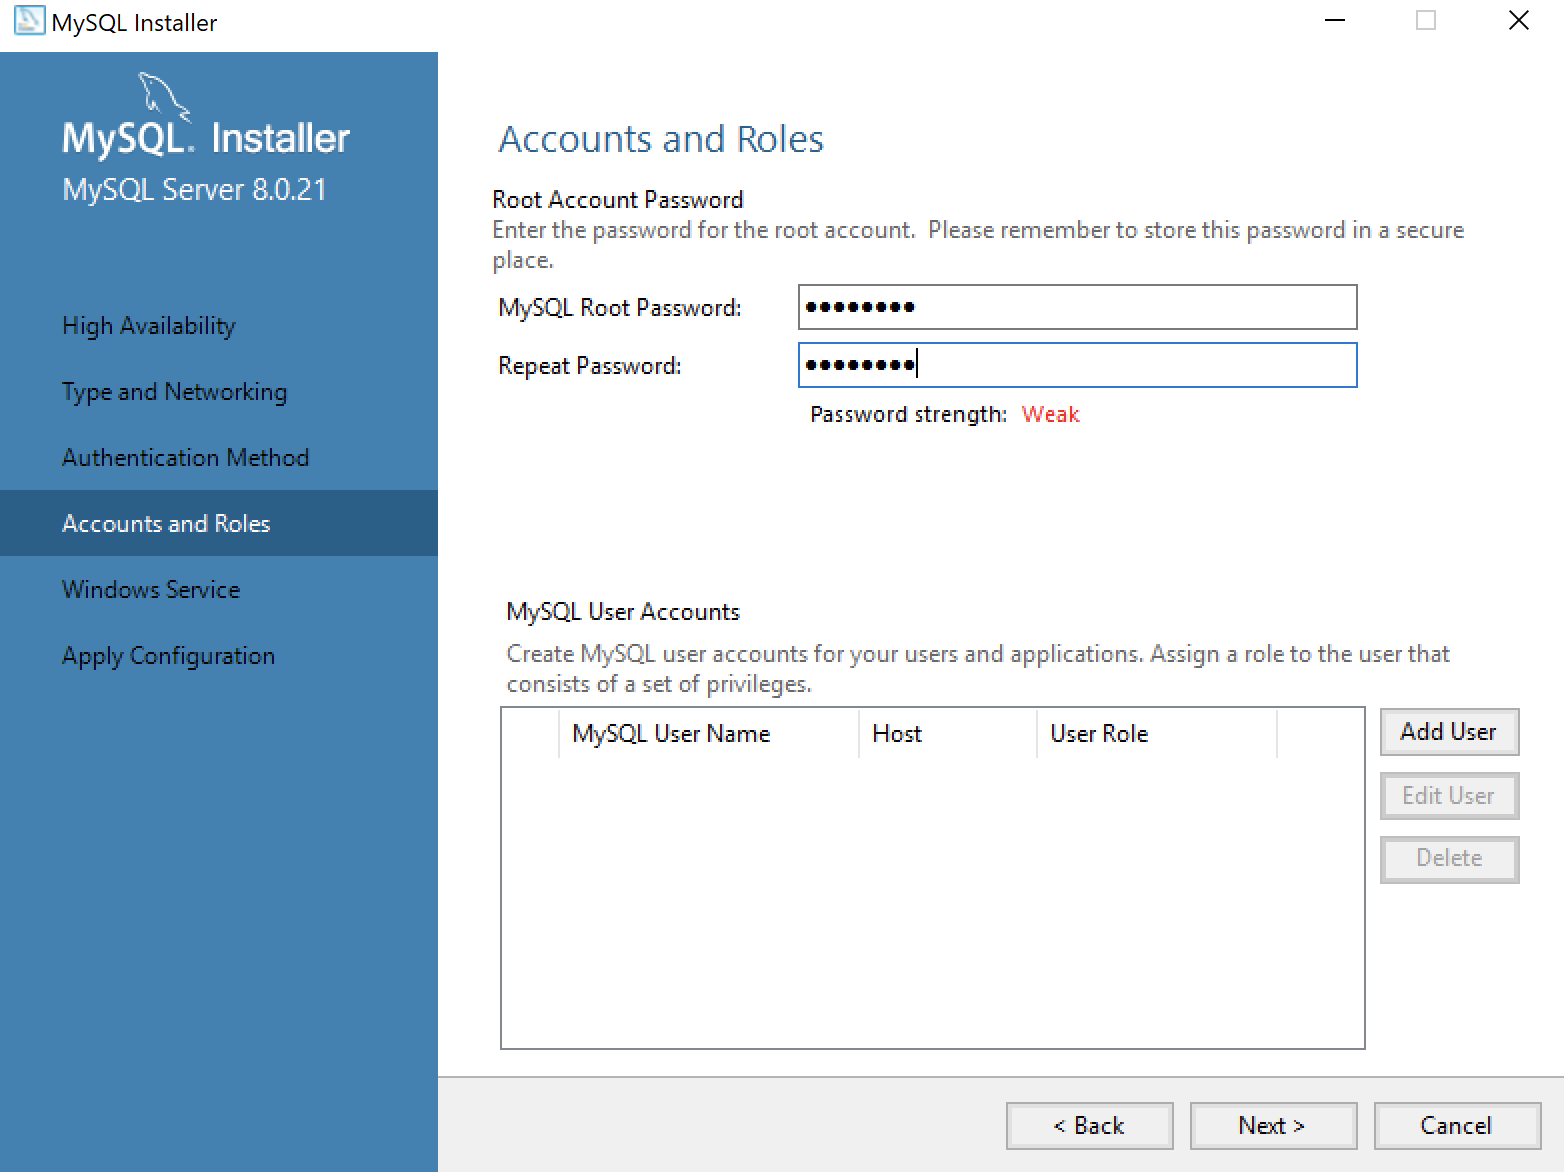
- This dialog lets you enter the MySQL Root Password. Click the Next button to continue the MySQL Installer configuration.

- This dialog lets you enter a Windows Service Name and install a Standard System Account or Custom User account. Click the Next button to continue the MySQL Installer configuration.

- This dialog lets you apply the configuration of the MySQL Server or Custom User product. Click the Next button to continue the MySQL Server configuration.
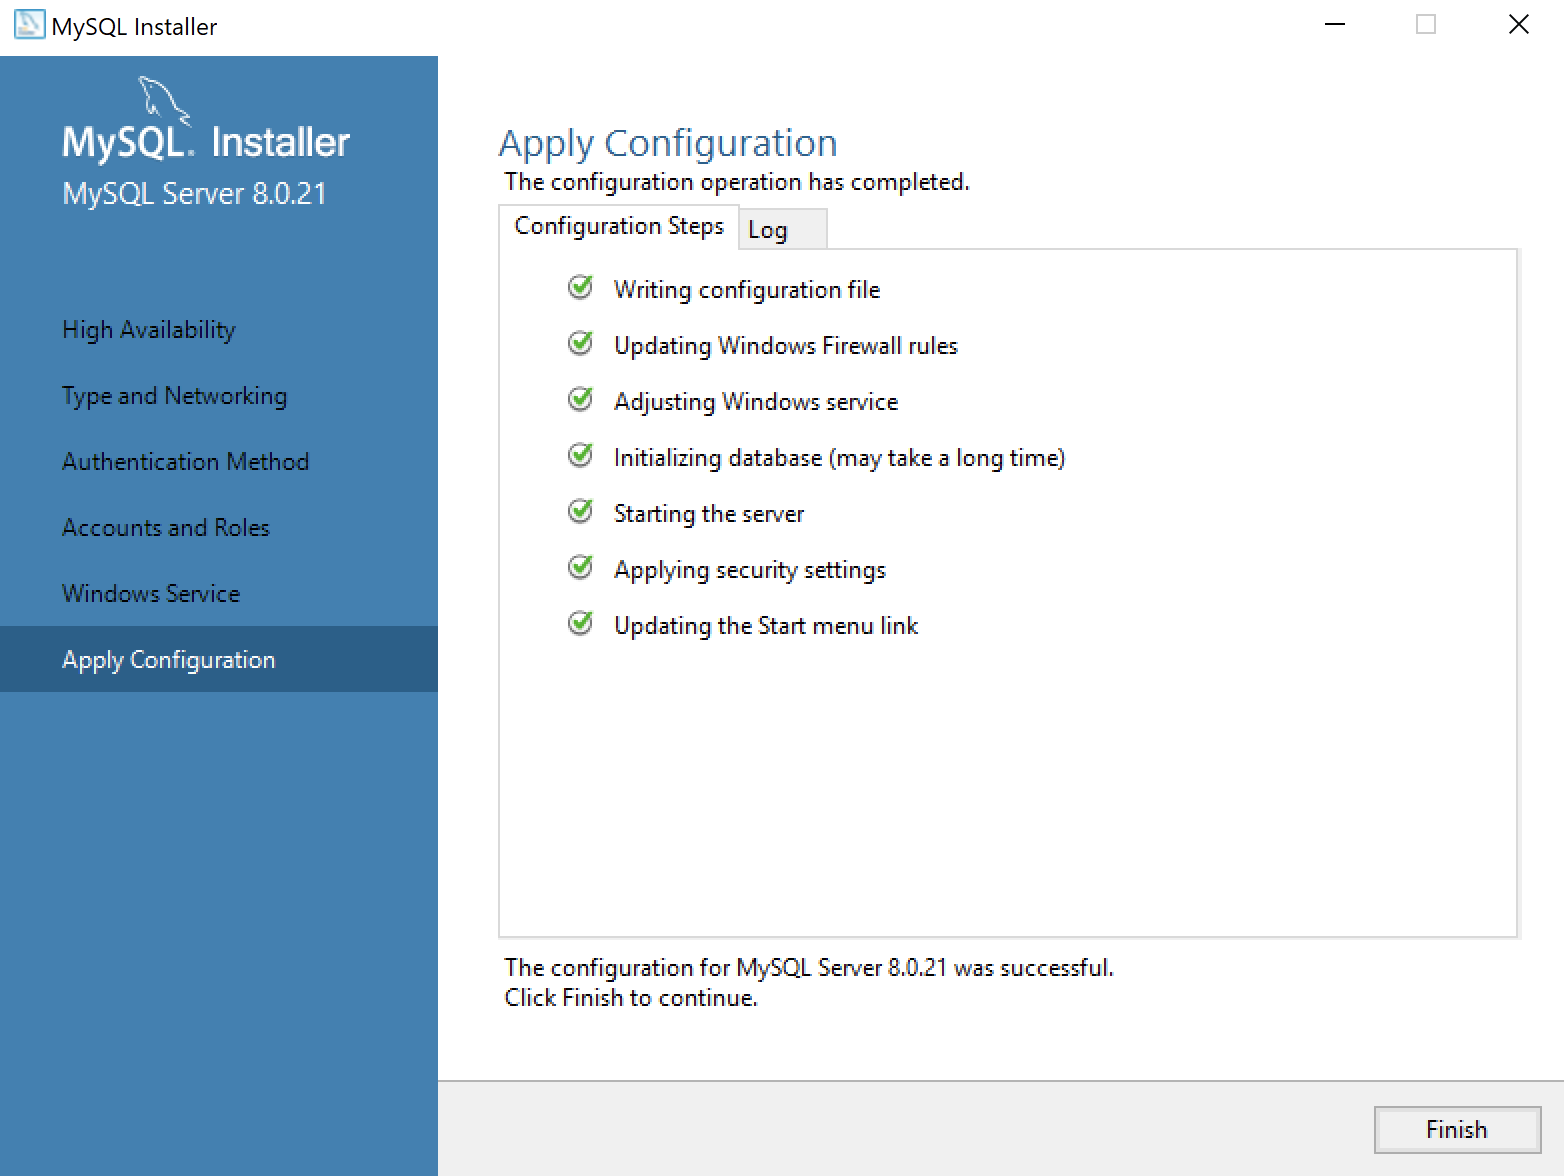
- This dialog lets you watch the progress of the MySQL Server or Custom User configuration. Click the Finish button to complete the MySQL Server configuration.
- This dialog lets you choose the next MySQL Router product for configuration. Click the Next button to begin the MySQL Router configuration.
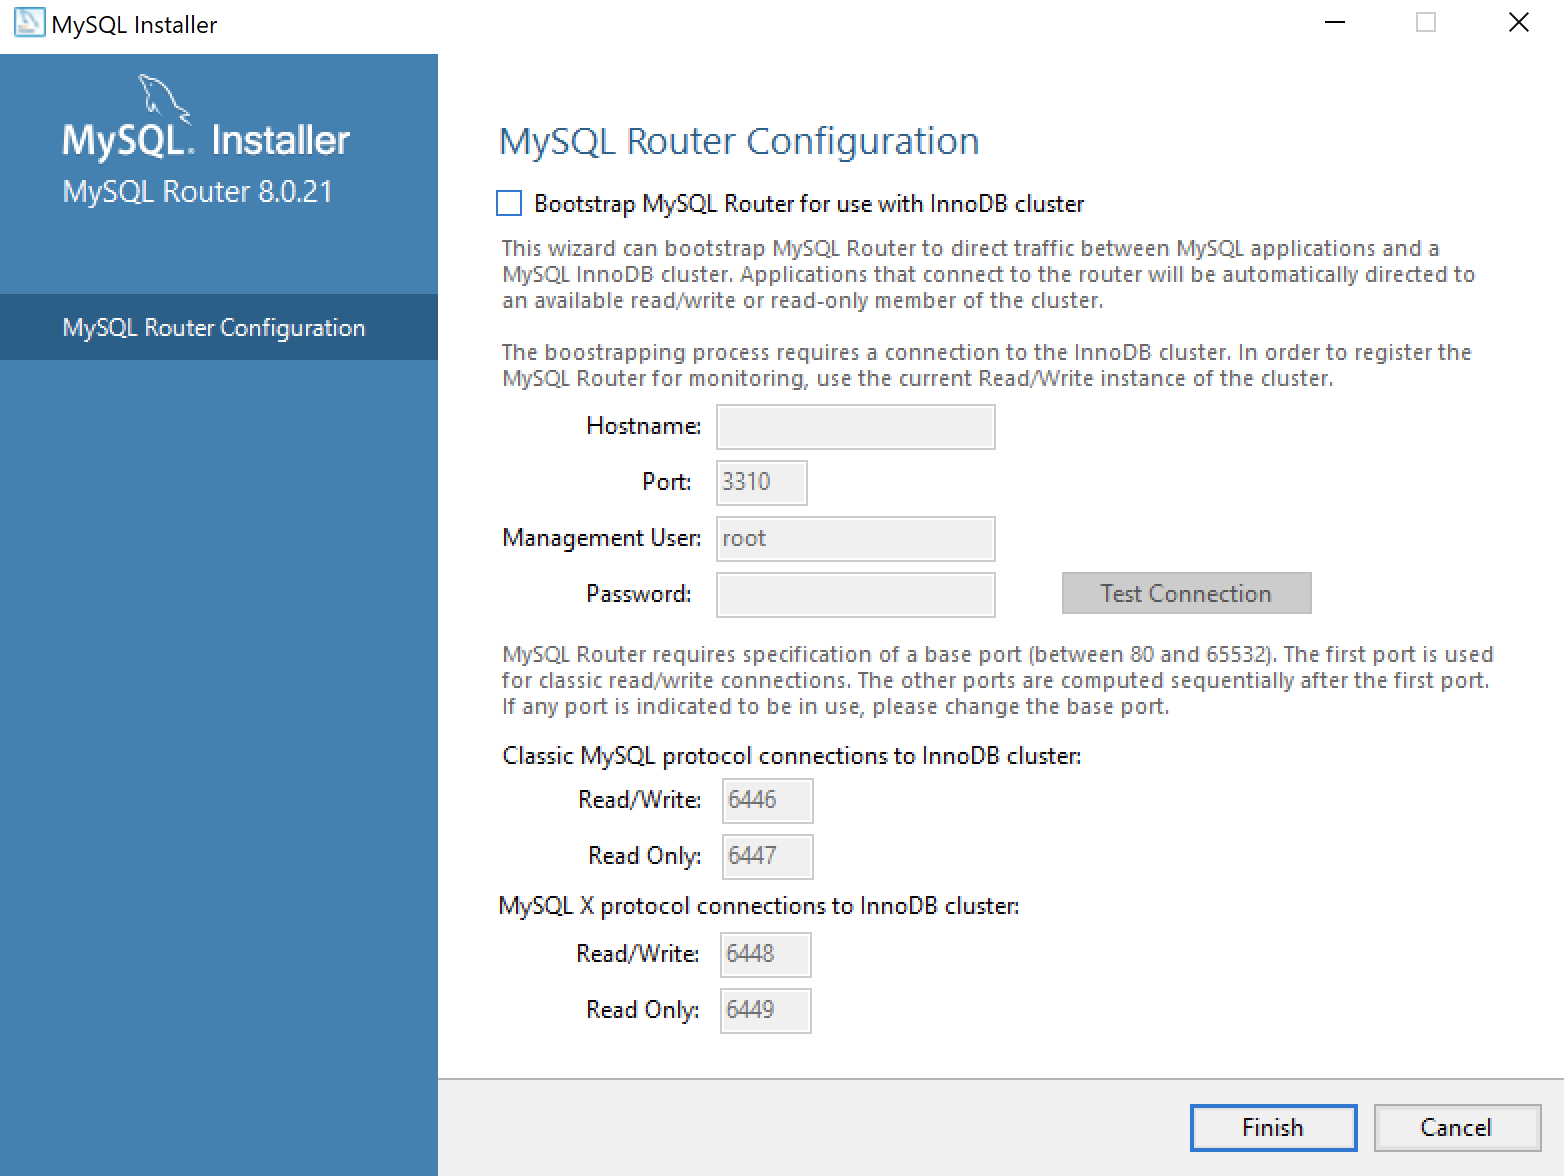
- This dialog allows you to configure the MySQL Router Configuration product. Leave the
HostnameandPasswordfields blank when you do not want to configure the MySQL Router Configuration product. Click the Finish button to complete the MySQL Router workflow.

- This dialog lets you choose the next Samples and Examples product for configuration. Click the Next button to begin the Samples and Examples configuration.

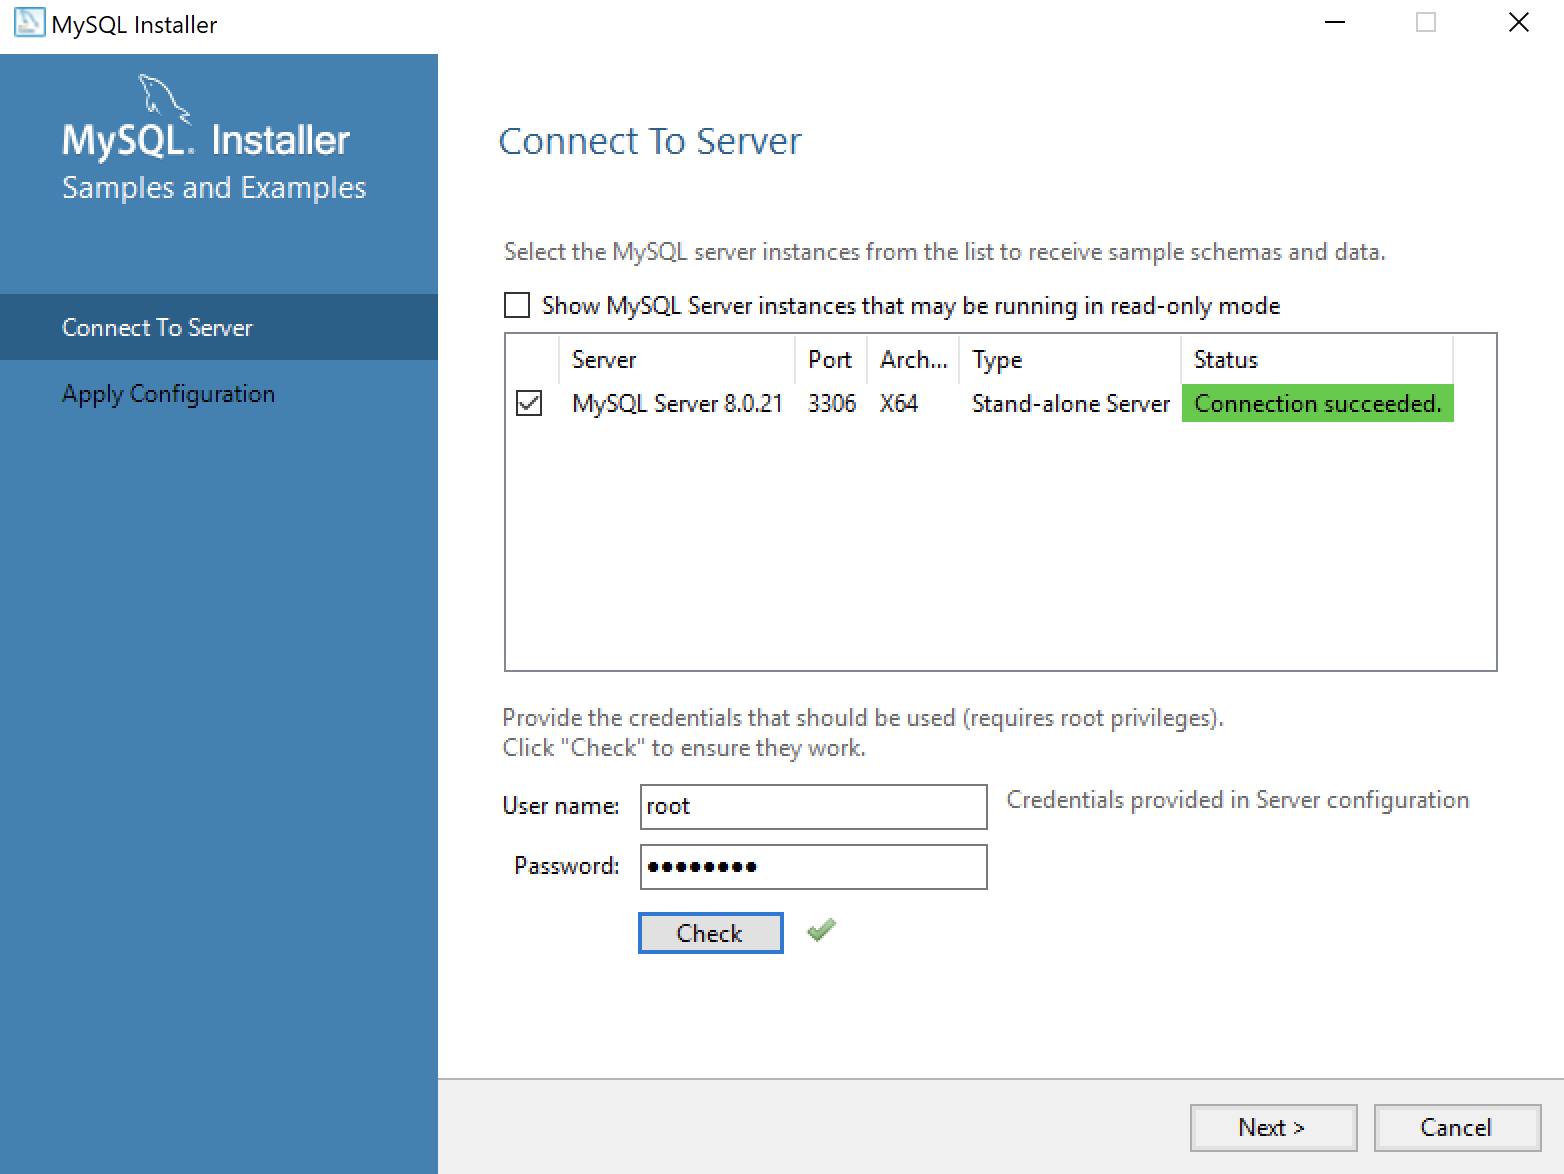
- This dialog lets you create a Windows 10 MySQL Service. You enter the
rootpassword that you entered in Step #12. After you enterrootpassword, click the Check button to verify therootpassword. The Check button enables the Next button when therootaccount’s password is validated. Click the now enabled Next button to create the MySQL Service.
- This dialog lets you create a Windows 10 MySQL Service. Click the now enabled Next button to create the MySQL Service.
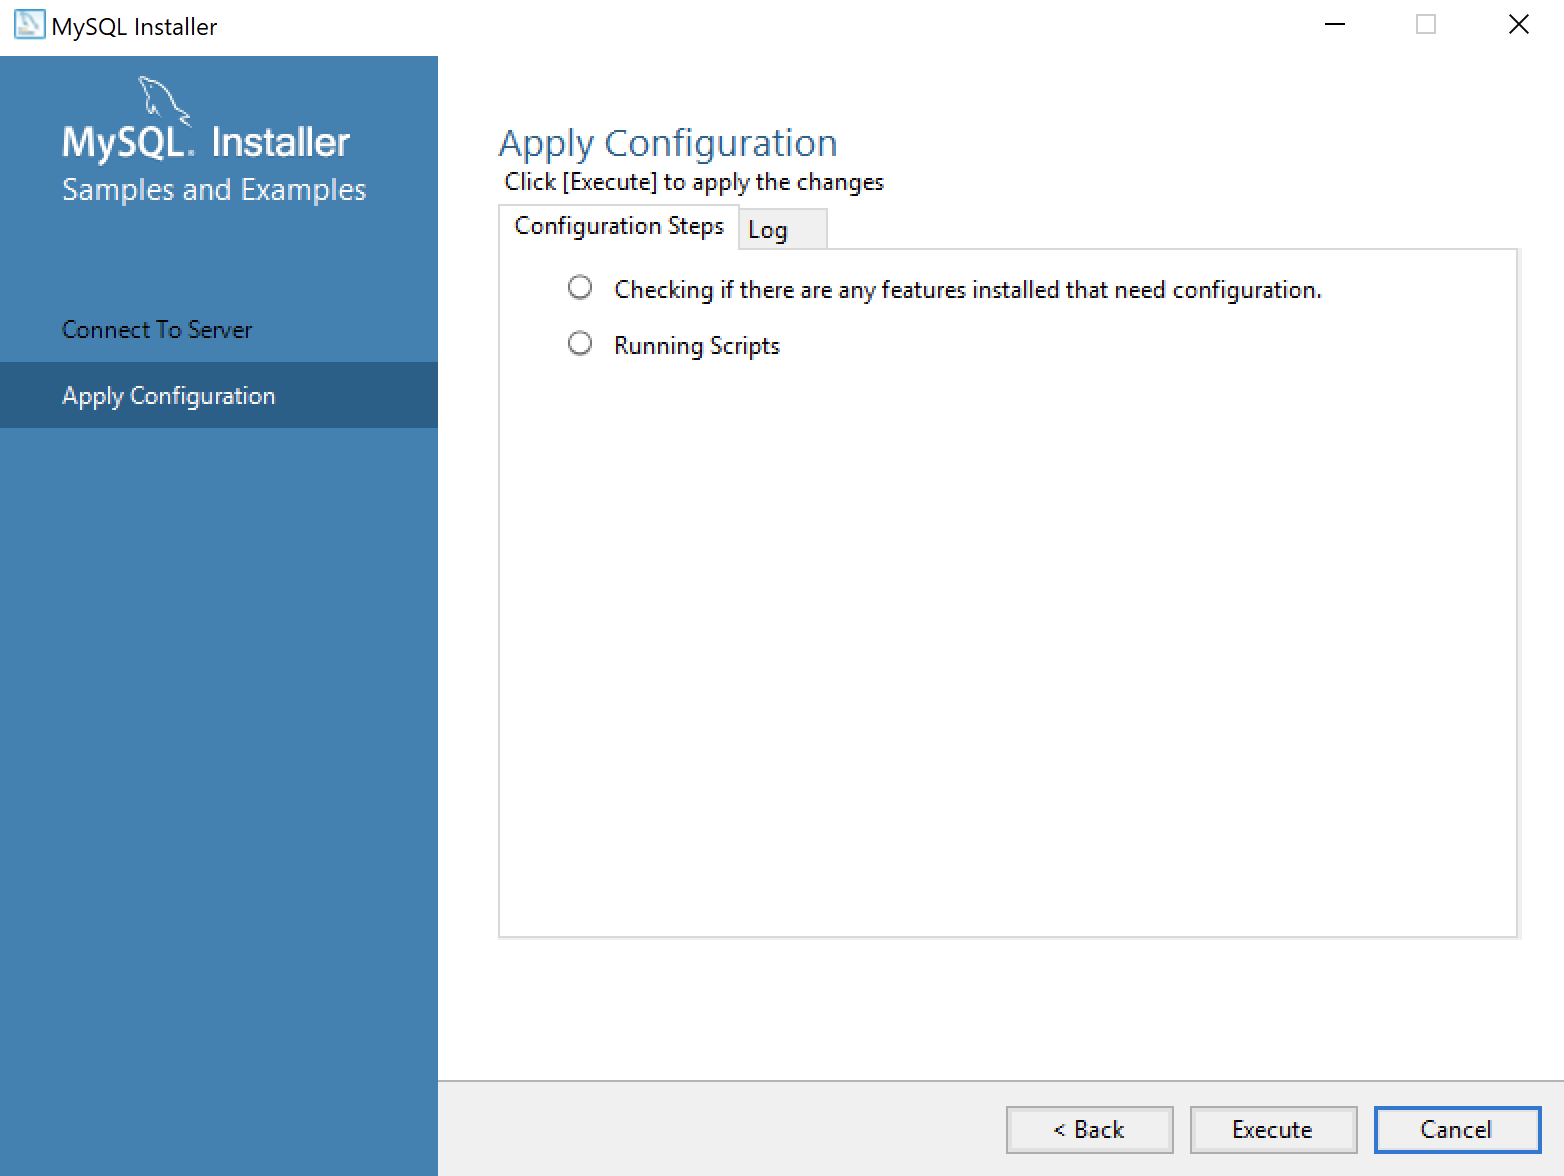
- This dialog applies all the configurations selected. Click the Execute button to proceed with the configuration.
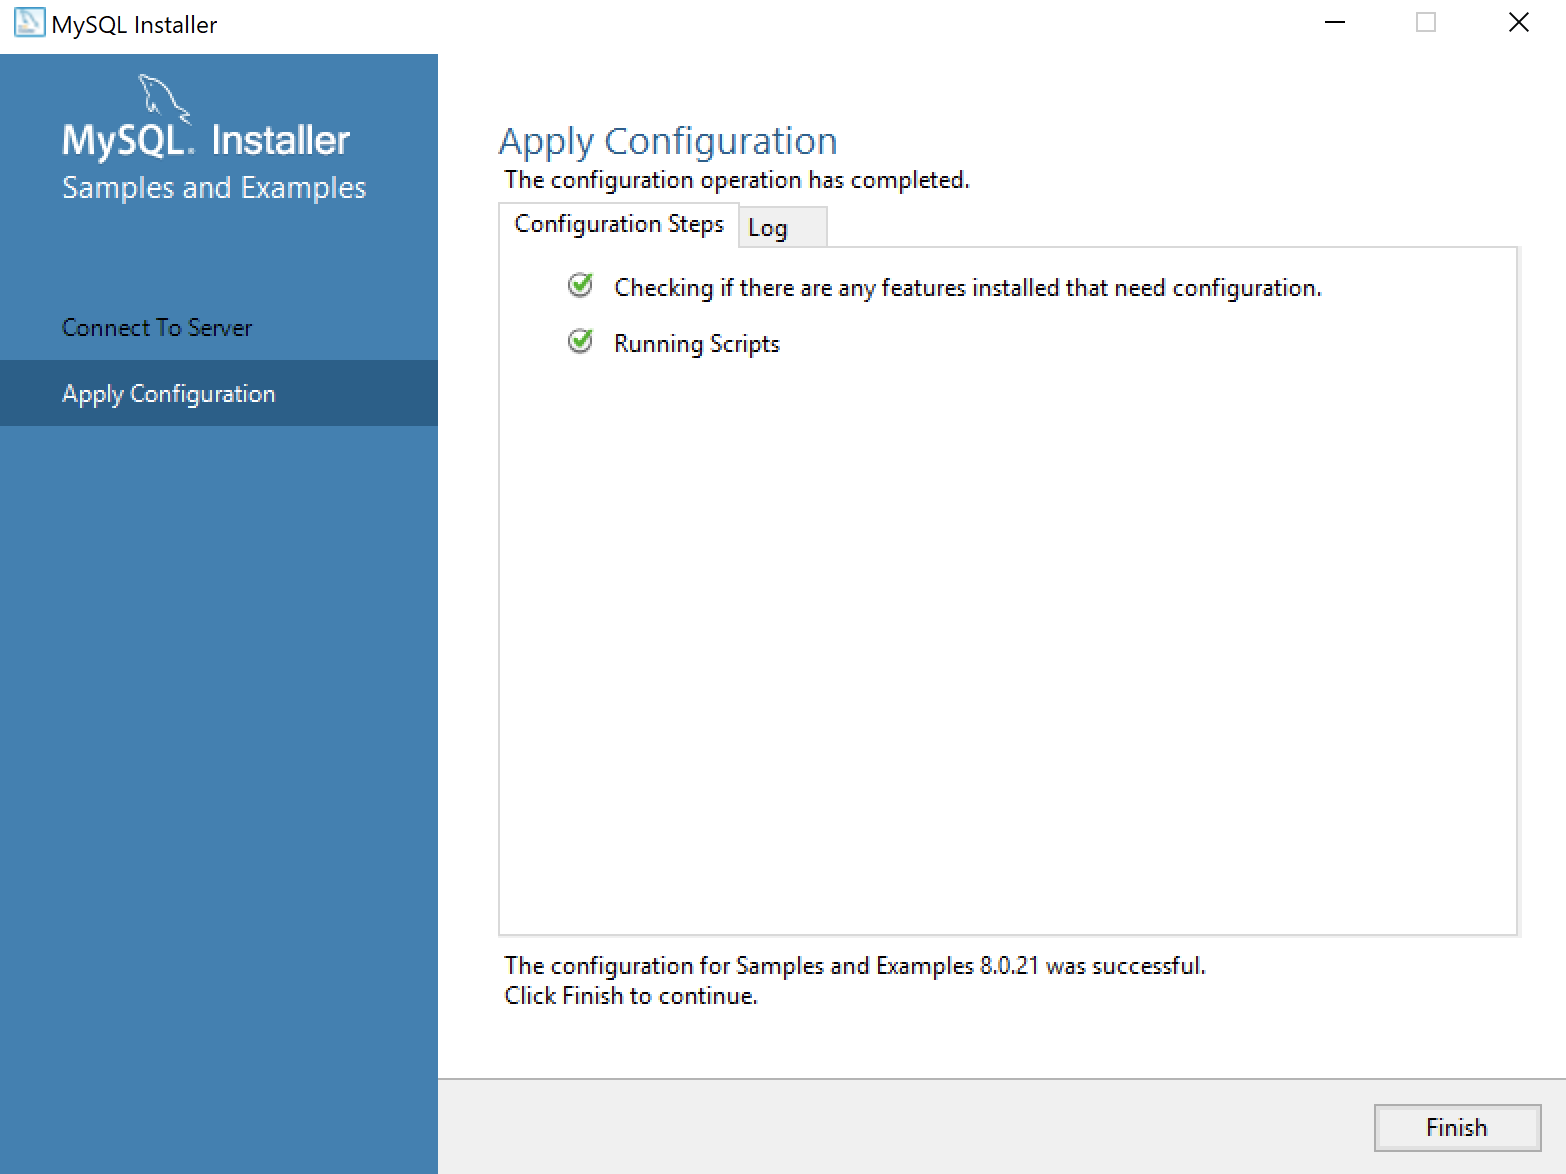
- This dialog lets you watch the progress of the configuration. Click the Finish button to complete the product configurations.

- This dialog the product configurations. You should note that the MySQL Router was not configured or needed. Click the Next button to complete the installation.
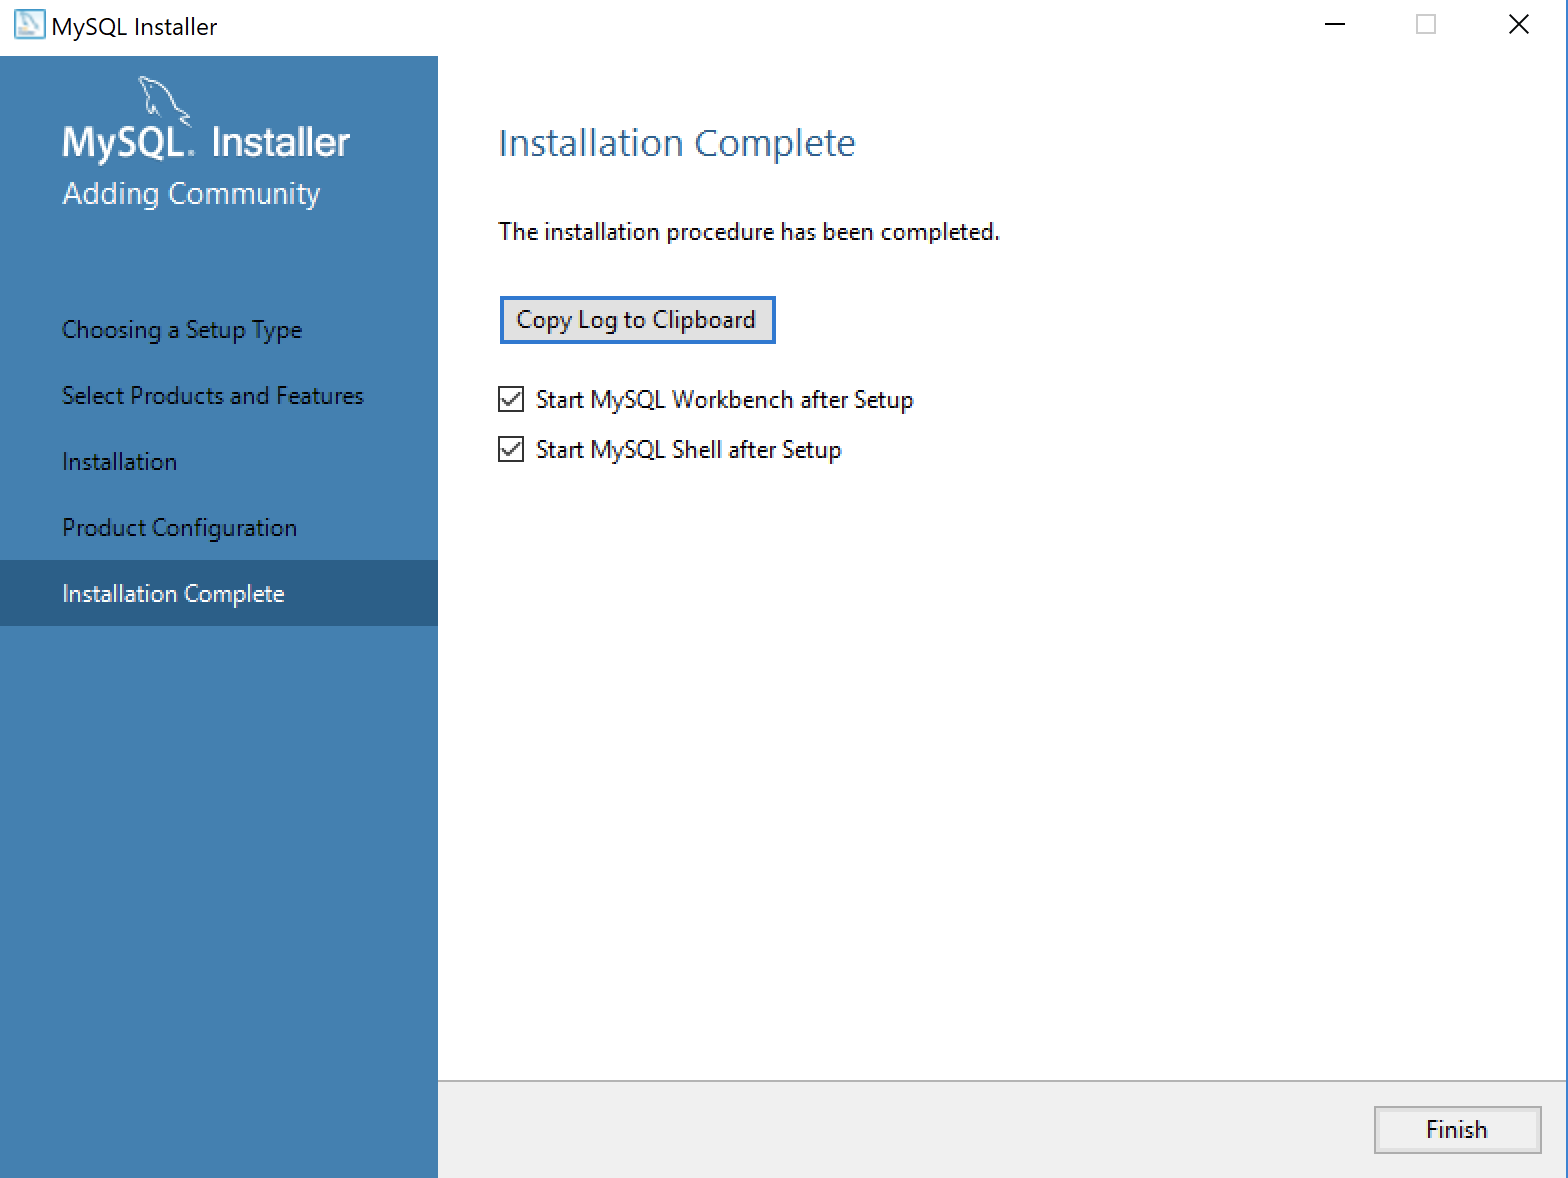
- This dialog completes the workflow and launches MySQL Workbench and Shell. Click the Finish button to complete the installation and configuration processes.
After you install MySQL, the following shows you how to provision a studentdb database. It also shows you how to enable the global file privilege and how to read data from an external comma-separated values (CSV) file.
MySQL Python Connector
While building my student image on Fedora 30, I installed the MySQL PHP Connector (php-mysqlndrp) but neglected to install the Python Connector. This adds the installation and basic test of the Python Connector to the original blog post.
You use the following command with a wildcard as a privileged user. The wildcard is necessary because you need to load two libraries to support Python 2.7 and 3.7, which are installed on Fedora 30. You also need to be the root user or a user that is found in the sudoer’s list:
yum install -y mysql-connector-python* |
Display detailed console log →
Last metadata expiration check: 0:35:46 ago on Tue 20 Aug 2019 05:36:29 PM MDT. Dependencies resolved. ===================================================================================================================================== Package Architecture Version Repository Size ===================================================================================================================================== Installing: mysql-connector-python x86_64 8.0.17-1.fc30 mysql-connectors-community 435 k mysql-connector-python-cext x86_64 8.0.17-1.fc30 mysql-connectors-community 7.7 M mysql-connector-python3 x86_64 8.0.17-1.fc30 mysql-connectors-community 429 k mysql-connector-python3-cext x86_64 8.0.17-1.fc30 mysql-connectors-community 7.7 M Installing dependencies: python2-protobuf noarch 3.6.1-3.fc30 fedora 563 k python3-protobuf noarch 3.6.1-3.fc30 fedora 568 k Transaction Summary ===================================================================================================================================== Install 6 Packages Total download size: 17 M Installed size: 89 M Downloading Packages: (1/6): python3-protobuf-3.6.1-3.fc30.noarch.rpm 1.0 MB/s | 568 kB 00:00 (2/6): python2-protobuf-3.6.1-3.fc30.noarch.rpm 994 kB/s | 563 kB 00:00 (3/6): mysql-connector-python-8.0.17-1.fc30.x86_64.rpm 481 kB/s | 435 kB 00:00 (4/6): mysql-connector-python3-8.0.17-1.fc30.x86_64.rpm 612 kB/s | 429 kB 00:00 (5/6): mysql-connector-python-cext-8.0.17-1.fc30.x86_64.rpm 3.8 MB/s | 7.7 MB 00:02 (6/6): mysql-connector-python3-cext-8.0.17-1.fc30.x86_64.rpm 4.2 MB/s | 7.7 MB 00:01 ------------------------------------------------------------------------------------------------------------------------------------- Total 5.4 MB/s | 17 MB 00:03 warning: /var/cache/dnf/mysql-connectors-community-8bcc2bd350b53f70/packages/mysql-connector-python-8.0.17-1.fc30.x86_64.rpm: Header V3 DSA/SHA1 Signature, key ID 5072e1f5: NOKEY MySQL Connectors Community 7.0 MB/s | 27 kB 00:00 Importing GPG key 0x5072E1F5: Userid : "MySQL Release Engineering <mysql-build@oss.oracle.com>" Fingerprint: A4A9 4068 76FC BD3C 4567 70C8 8C71 8D3B 5072 E1F5 From : /etc/pki/rpm-gpg/RPM-GPG-KEY-mysql Key imported successfully Running transaction check Transaction check succeeded. Running transaction test Transaction test succeeded. Running transaction Preparing : 1/1 Installing : python3-protobuf-3.6.1-3.fc30.noarch 1/6 Installing : python2-protobuf-3.6.1-3.fc30.noarch 2/6 Installing : mysql-connector-python-8.0.17-1.fc30.x86_64 3/6 Installing : mysql-connector-python3-8.0.17-1.fc30.x86_64 4/6 Installing : mysql-connector-python3-cext-8.0.17-1.fc30.x86_64 5/6 Installing : mysql-connector-python-cext-8.0.17-1.fc30.x86_64 6/6 Running scriptlet: mysql-connector-python-cext-8.0.17-1.fc30.x86_64 6/6 Verifying : python2-protobuf-3.6.1-3.fc30.noarch 1/6 Verifying : python3-protobuf-3.6.1-3.fc30.noarch 2/6 Verifying : mysql-connector-python-8.0.17-1.fc30.x86_64 3/6 Verifying : mysql-connector-python-cext-8.0.17-1.fc30.x86_64 4/6 Verifying : mysql-connector-python3-8.0.17-1.fc30.x86_64 5/6 Verifying : mysql-connector-python3-cext-8.0.17-1.fc30.x86_64 6/6 Installed: mysql-connector-python-8.0.17-1.fc30.x86_64 mysql-connector-python-cext-8.0.17-1.fc30.x86_64 mysql-connector-python3-8.0.17-1.fc30.x86_64 mysql-connector-python3-cext-8.0.17-1.fc30.x86_64 python2-protobuf-3.6.1-3.fc30.noarch python3-protobuf-3.6.1-3.fc30.noarch Complete! |
Leveraging the MySQL Connector/Python Coding Examples documentation, Section 5.1 Connecting to MySQL Using Connector/Python here’s a test of the connection to MySQL 8.
# Import the library. import mysql.connector from mysql.connector import errorcode try: # Open connection. cnx = mysql.connector.connect(user='student', password='student', host='127.0.0.1', database='studentdb') # Print the value. print("Database connection resolved.") # Handle exception and close connection. except mysql.connector.Error as e: if e.errno == errorcode.ER_ACCESS_DENIED_ERROR: print("Something is wrong with your user name or password") elif e.errno == errorcode.ER_BAD_DB_ERROR: print("Database does not exist") else: print(e) # Close the connection when the try block completes. else: cnx.close() |
Leveraging the MySQL Connector/Python Coding Examples documentation, Section 5.4 Querying Data Using Connector/Python here’s a test of the connection to MySQL 8.
# Import the library. import datetime import mysql.connector from mysql.connector import errorcode try: # Open connection. cnx = mysql.connector.connect(user='student', password='student', host='127.0.0.1', database='studentdb') # Create cursor. cursor = cnx.cursor() # Set the query statement. query = ("SELECT " "CASE " " WHEN item_subtitle IS NULL THEN item_title " " ELSE CONCAT(item_title,': ',item_subtitle) " "END AS title, " "release_date " "FROM item " "WHERE release_date BETWEEN %s AND %s " "ORDER BY item_title") # Set the start and end date. start_date = datetime.date(1991, 1, 1) end_date = datetime.date(2004, 12, 31) # Execute cursor. cursor.execute(query, (start_date, end_date)) # Display the rows returned by the query. for (item_name, release_date) in cursor: print("{}, {:%d %b %Y}".format(item_name, release_date)) # Close cursor. cursor.close() # ------------------------------------------------------------ # Handle exception and close connection. except mysql.connector.Error as e: if e.errno == errorcode.ER_ACCESS_DENIED_ERROR: print("Something is wrong with your user name or password") elif e.errno == errorcode.ER_BAD_DB_ERROR: print("Database does not exist") else: print "Error code:", e.errno # error number print "SQLSTATE value:", e.sqlstate # SQLSTATE value print "Error message:", e.msg # error message # Close the connection when the try block completes. else: cnx.close() |
If you run the above in Python 2.7 it works fine. It fails to parse successfully in Python 3.x because the print() function requires the parentheses all the time. You would need to re-write the except block, like this with the parentheses:
# Handle exception and close connection. except mysql.connector.Error as e: if e.errno == errorcode.ER_ACCESS_DENIED_ERROR: print("Something is wrong with your user name or password") elif e.errno == errorcode.ER_BAD_DB_ERROR: print("Database does not exist") else: print("Error code:", e.errno) # error number print("SQLSTATE value:", e.sqlstate) # SQLSTATE value print("Error message:", e.msg) # error message |
While it works without the parentheses in Python 2.7, it also works with the parentheses. That means the best practice is to write cross compatible code by always using the parentheses with the print() function.
As always, I hope this helps somebody.j
