Archive for the ‘MySQL Connect/ODBC’ Category
MySQL Windows DSN
Almost a Ripley’s Believe It or Not. An prior data science student told me that his new IT department setup a Windows component that let him connect his Excel Spreadsheets to their production MySQL database without a password. Intrigued, I asked if it was a MySQL Connector/ODBC Data Source Configuration, or DSN (Data Source Name)?
He wasn’t sure, so I asked him to connect to PowerShell and run the following command:
Get-Item -Path Registry::HKEY_LOCAL_MACHINE\SOFTWARE\ODBC\ODBC.INI\MySQL |
It returned something like this (substituting output from one of my test systems):
    Hive: HKEY_LOCAL_MACHINE\SOFTWARE\ODBC\ODBC.INI


Name                           Property
----                           --------
MySQL                          Driver      : C:\Program Files\MySQL\Connector ODBC 8.0\myodbc8w.dll
                               DESCRIPTION : MySQL ODBC Connector
                               SERVER      : localhost
                               UID         : student
                               PWD         : student
                               DATABASE    : studentdb
PORT : 3306 |
The student was stunned and concerned he was compromising his employer’s system security. I suggested he share the information with his IT department so they could provide a different approach for his access to the production database. His IT department immediately agreed. Unfortunately, he’s bummed he can’t simply access the data through Excel.
I told him they were welcome to use the MySQL Connect Dialog PowerShell solution that I wrote. It creates a minimal MySQL DSN and requires a manual password entry through the PowerShell Dialog box. I also suggested that they look into the PowerShell Excel Module.
I also suggested they develop a query only copy of the production database, or shift access to a data warehouse. Needless to say, it wasn’t a large corporation.
As always, I hope this helps others.
Setting SQL_MODE
In MySQL, the @@sql_mode parameter should generally use ONLY_FULL_GROUP_BY. If it doesn’t include it and you don’t have the ability to change the database parameters, you can use a MySQL PSM (Persistent Stored Module), like:
Create the set_full_group_by procedure:
1 2 3 4 5 6 7 8 9 10 11 12 13 14 15 16 17 18 19 20 21 22 23 24 25 26 27 | -- Drop procedure conditionally on whether it exists already. DROP PROCEDURE IF EXISTS set_full_group_by; -- Reset delimter to allow semicolons to terminate statements. DELIMITER $$ -- Create a procedure to verify and set connection parameter. CREATE PROCEDURE set_full_group_by() LANGUAGE SQL NOT DETERMINISTIC SQL SECURITY DEFINER COMMENT 'Set connection parameter when not set.' BEGIN /* Check whether full group by is set in the connection and if unset, set it in the scope of the connection. */ IF NOT EXISTS (SELECT NULL WHERE REGEXP_LIKE(@@SQL_MODE,'ONLY_FULL_GROUP_BY')) THEN SET SQL_MODE=(SELECT CONCAT(@@sql_mode,',ONLY_FULL_GROUP_BY')); END IF; END; $$ -- Reset the default delimiter. DELIMITER ; |
Run the following SQL command before you attempt the exercises in the same session scope:
CALL set_full_group_by(); |
As always, I hope this helps those looking for a solution. Naturally, you can simply use the SET command on line #21 above.
MySQL 8.0 Install
MySQL will be used for our online sections because the VMware instance and Docker configurations where too large to effectively download this term.
MySQL 8.0.21 Installation Steps
After you download the MySQL 8 MSI file, you will perform the following 24 steps to install MySQL on Windows 10. If you want a full developer install you must install Microsoft Excel and Visual Studio first.
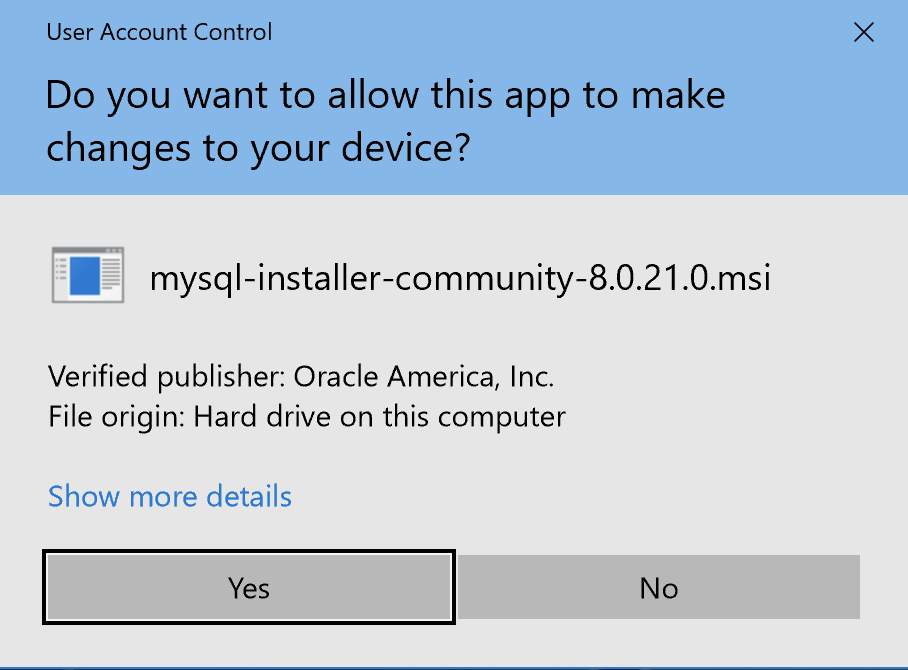
- The first thing you need to do is grant privileges to allow the MySQL Installer application to work in Windows 10. Click the Yes button to authorize the MySQL Installer to run.
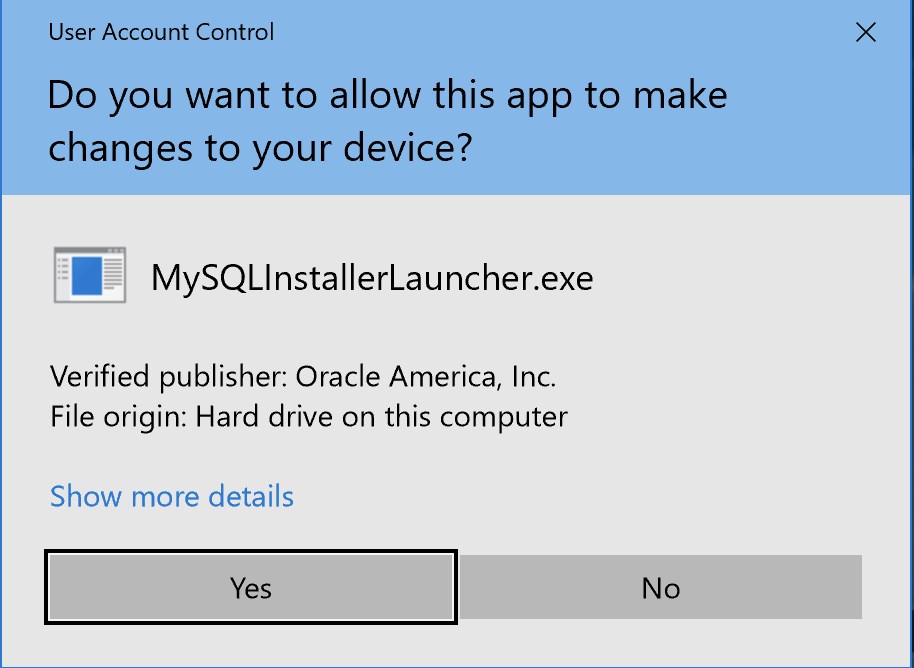
- The next thing you need to do is grant privileges to allow the MySQL Installer Launcher application to work in Windows 10. Click the Yes button to authorize the MySQL Installer to run.

- Now you start the install by choosing a setup type. As a rule, I recommend you install the Developer Default. It is the default selection and preselected for you. Click the Next button to verify that you can install what you’ve selected.
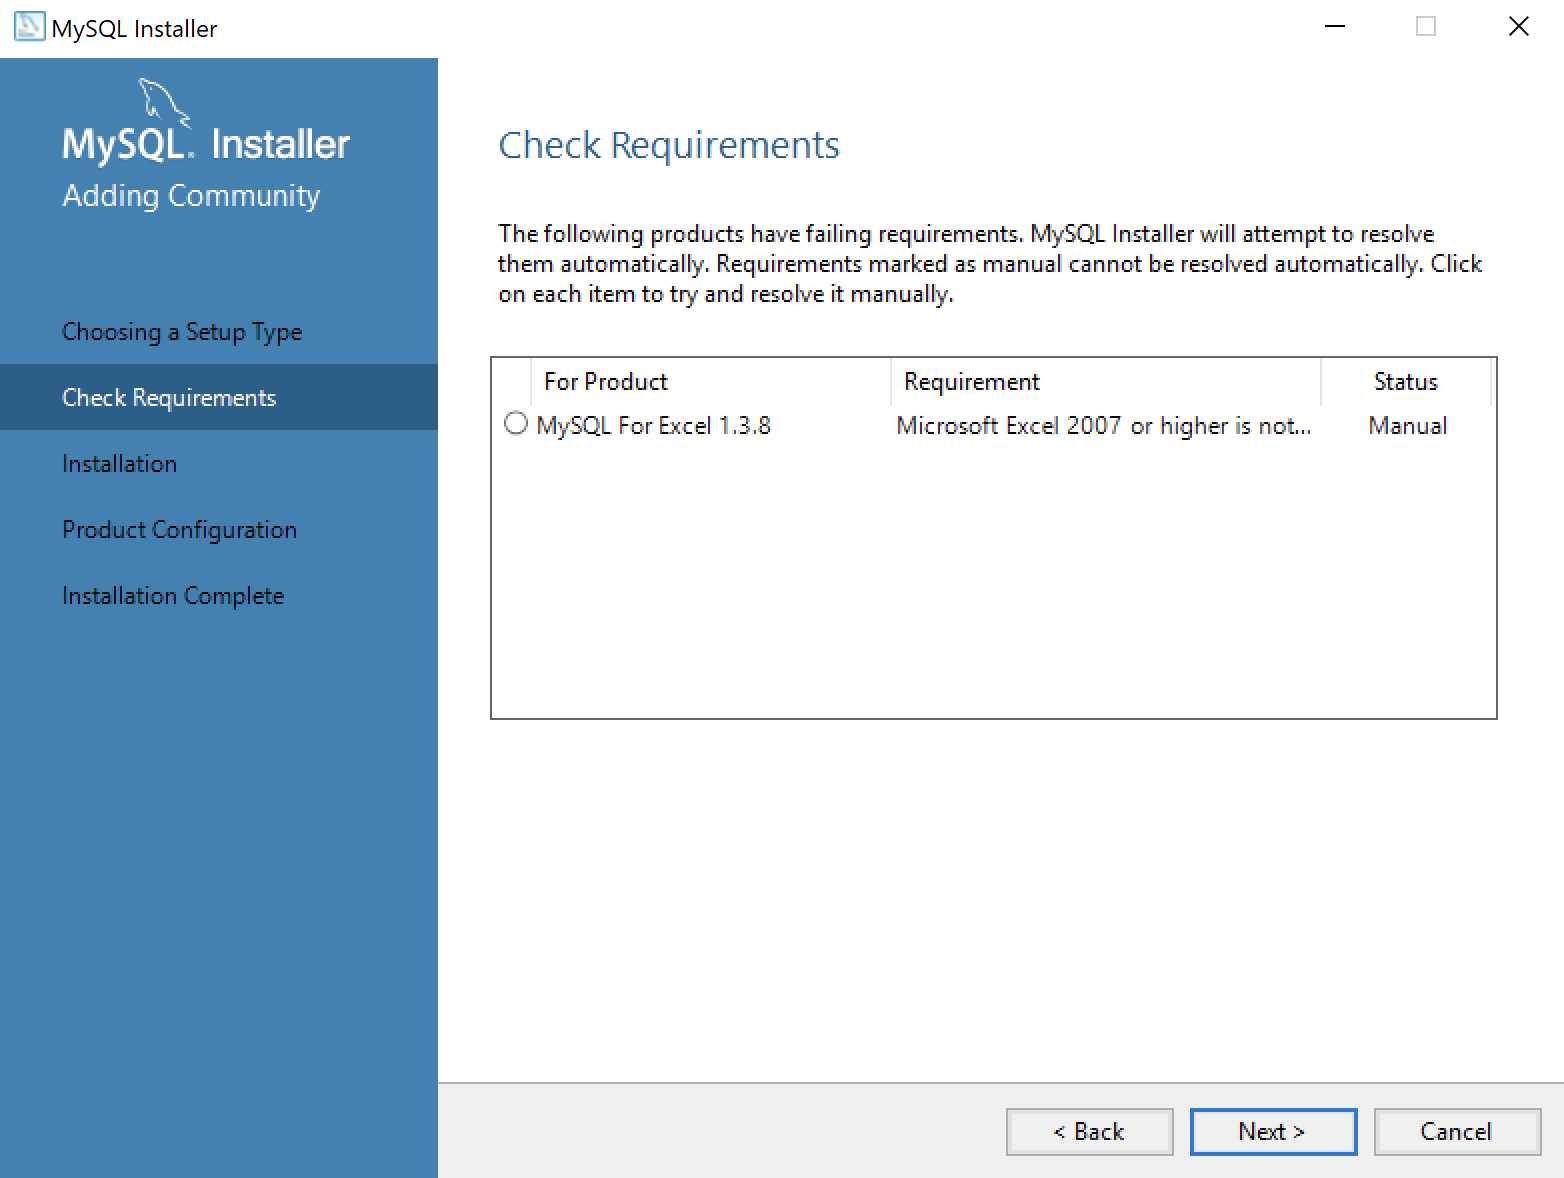
- The next workflow step checks requirements and lists any unmet requirements. The workflow lists the requirements for MySQL for Excel 1.3.8 as unmet because Microsoft Excel is not installed. Click the Next button when there are no unmet requirements in the list. Click the Back button to remove MySQL for Excel 1.3.8 from the setup selection.

- Returning to the setup type workflow, you should select the Custom radio button. Click the Next button to view the list of selected types.
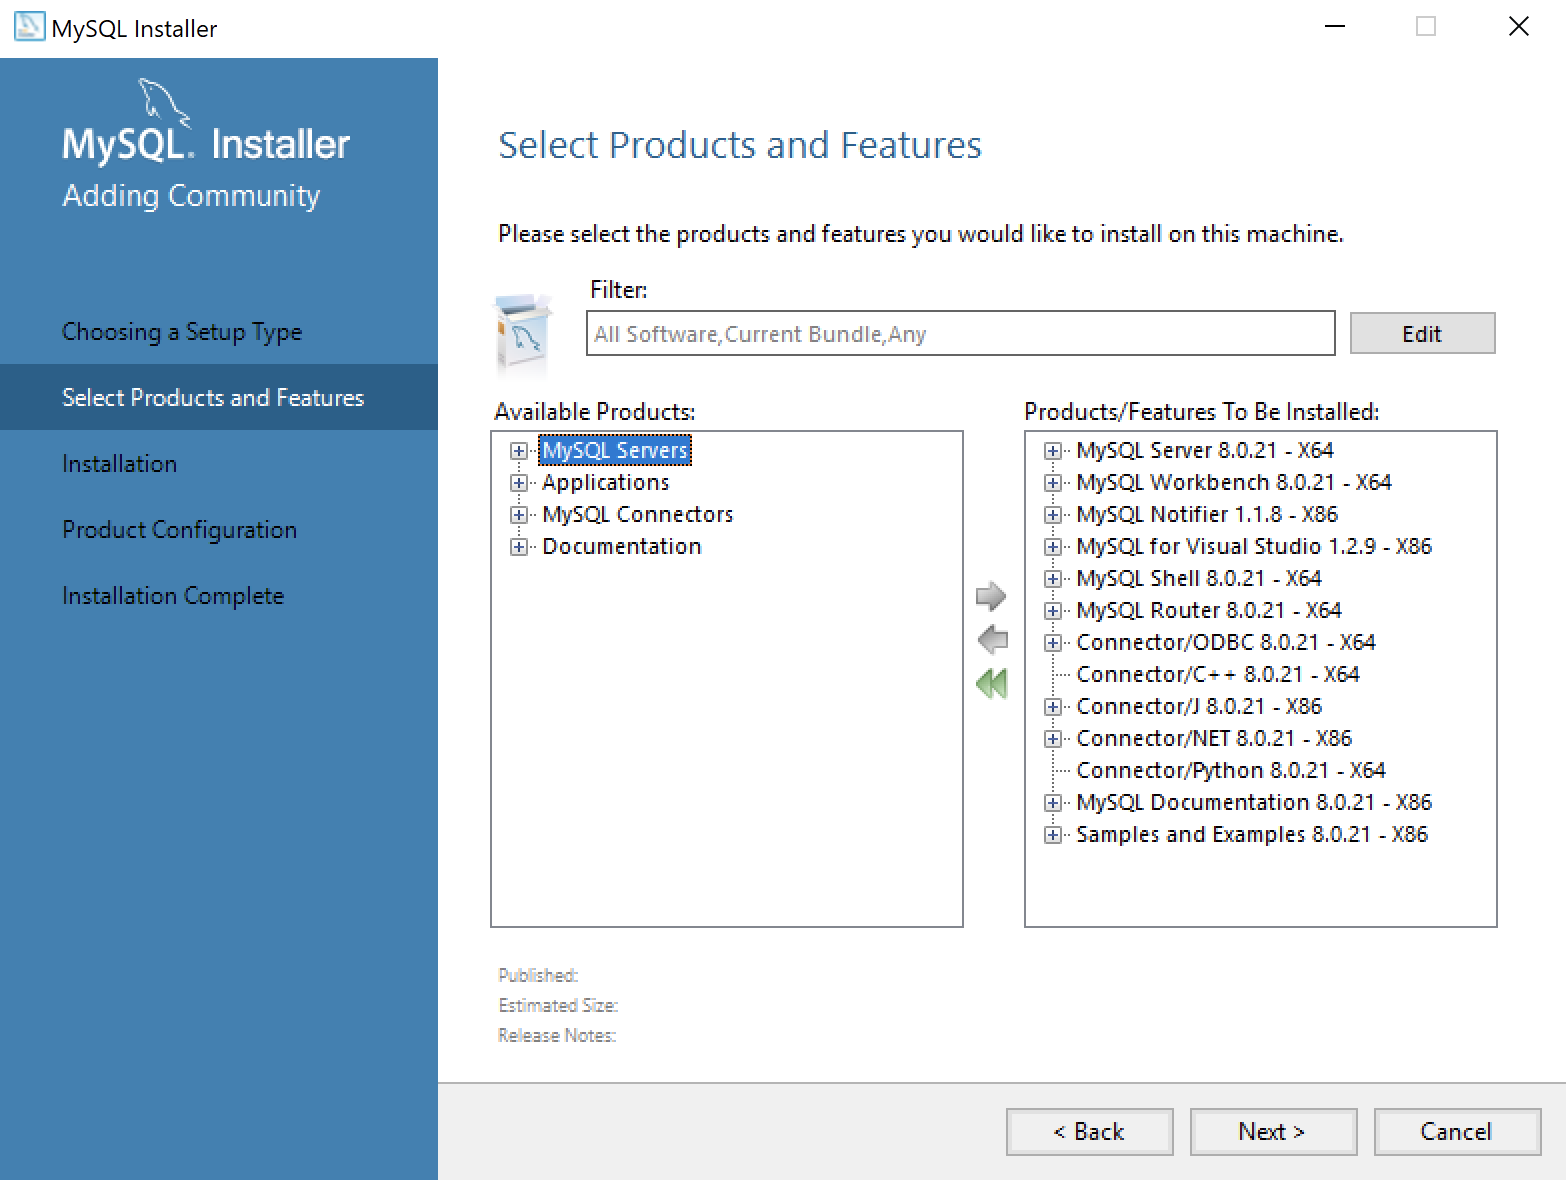
- Use the green arrow pointing to the left to remove MySQL for Excel 1.3.8 from the list. Click the Next button to continue the MySQL Installer to install the selected MySQL libraries.
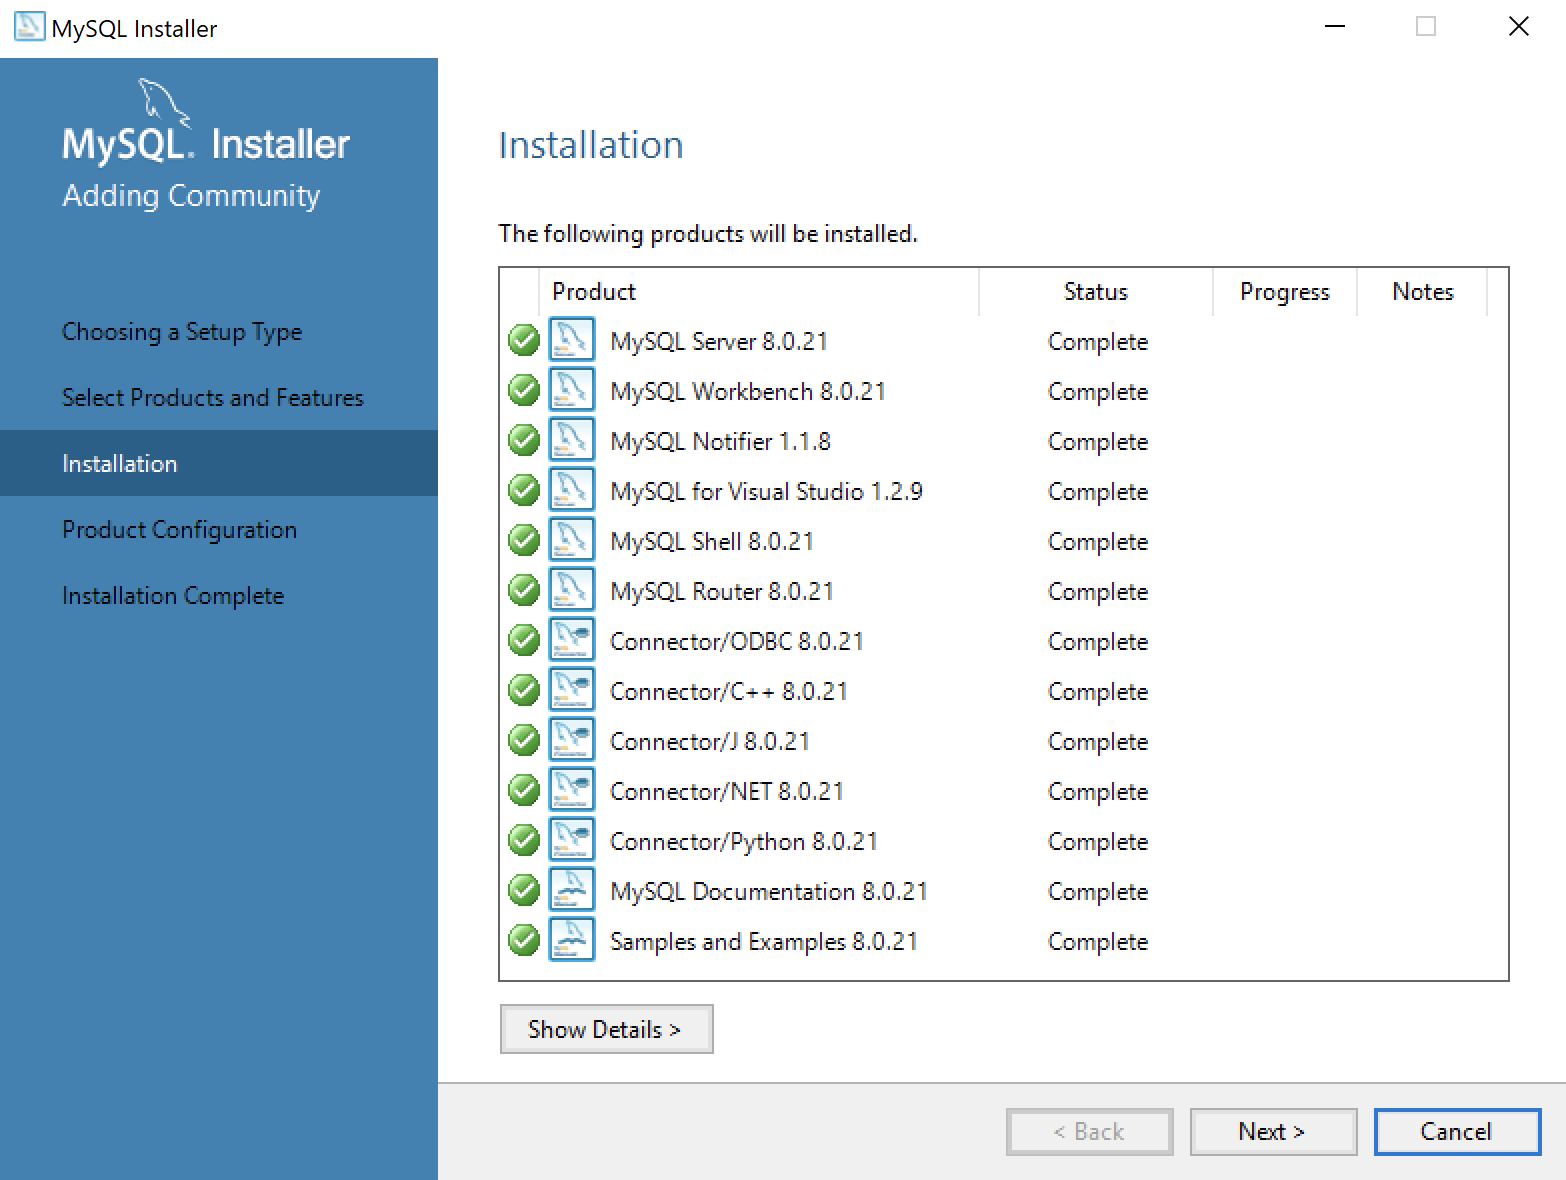
- This dialog will display for several minutes as each of the MySQL Installer modules is. Click the Next button to move forward in the MySQL Installer workflow.
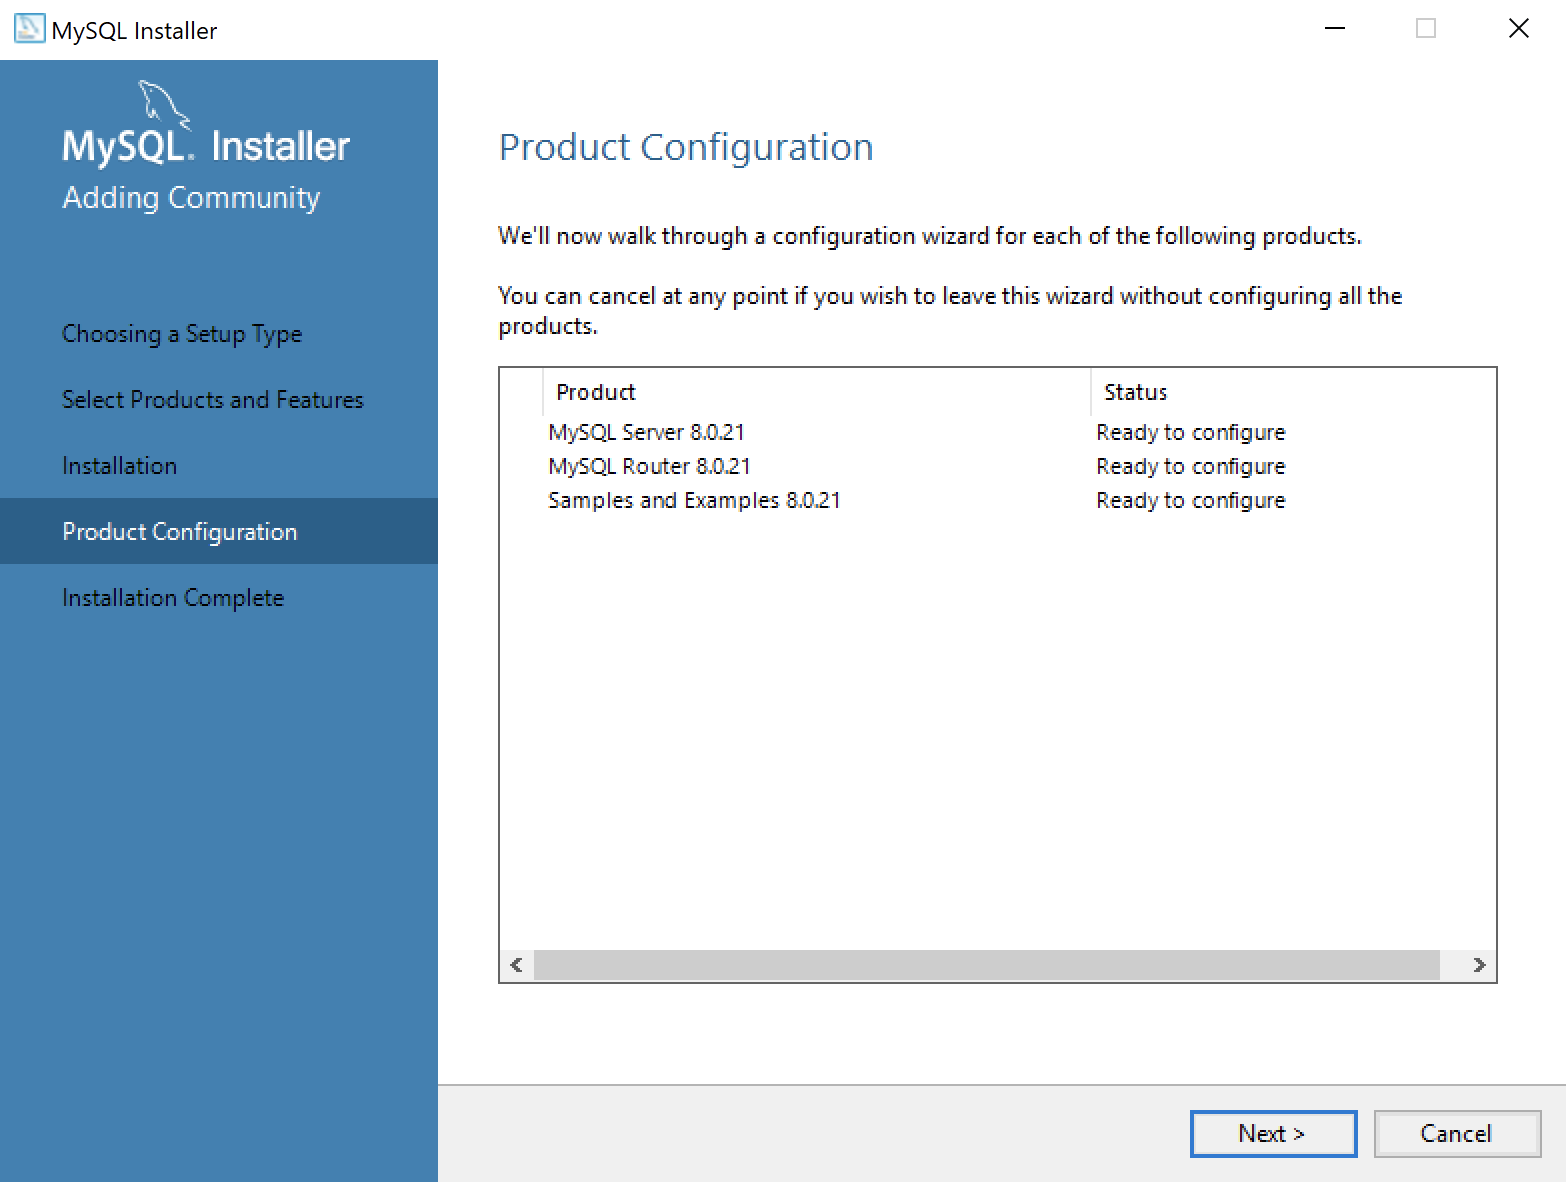
- This dialog qualifies that there are three products to configure. Click the Next button to begin configuration of these products.
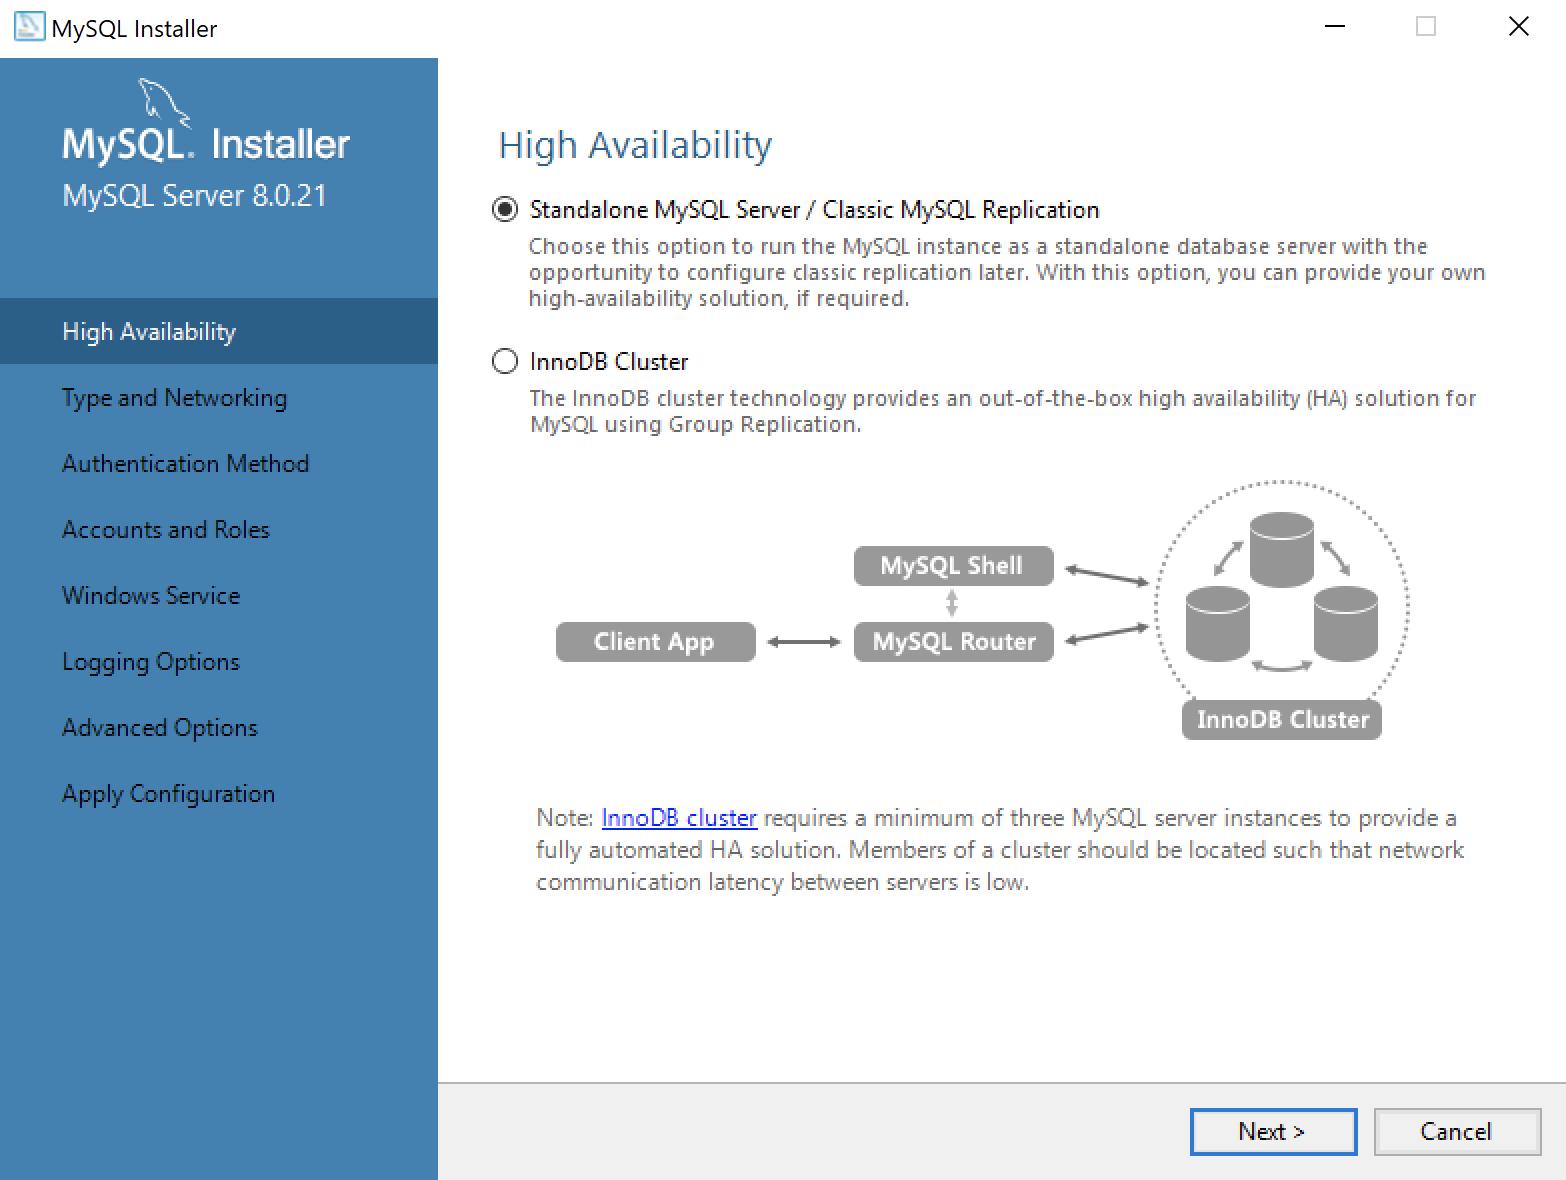
- This dialog lets you choose between a Standalone MySQL Server / Classic MySQL Replication and InnoDB Cluster. You should choose the Standalone MySQL Server for a developer installation on a laptop or desktop. Click the Next button to continue the MySQL Installer configuration.
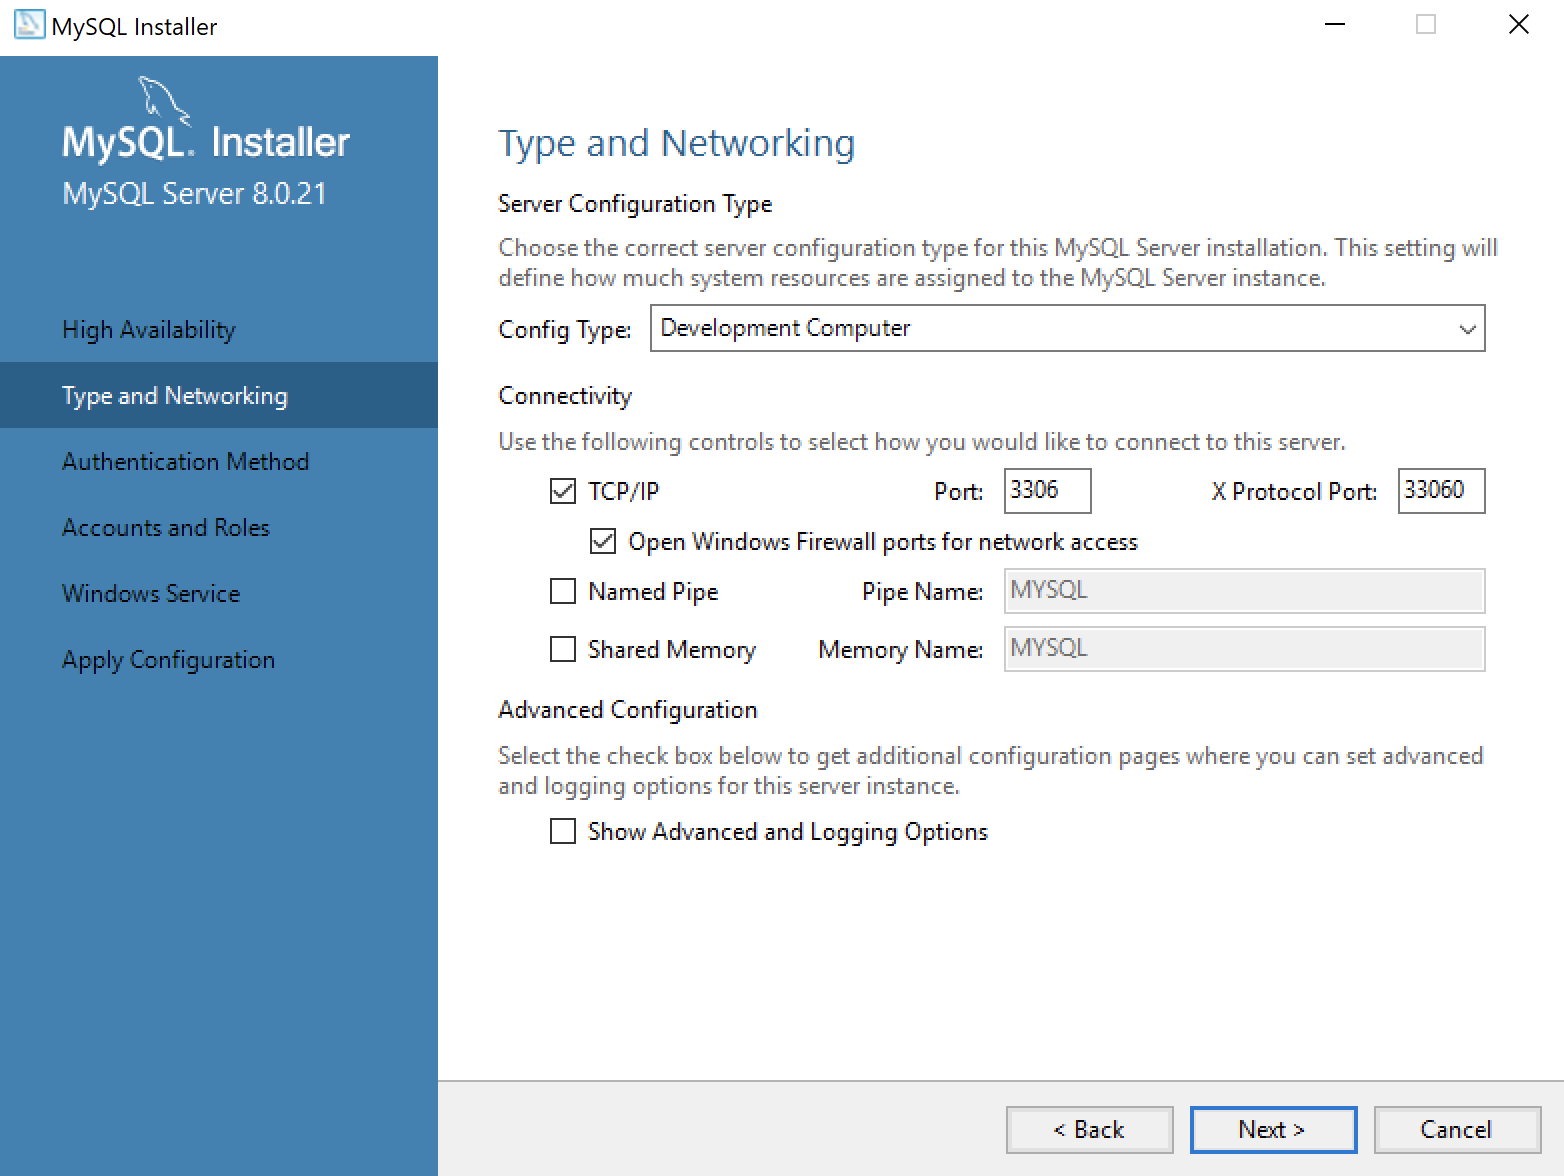
- This dialog lets you choose set the type and networking values. They should be preselected as they are in the screen image. Click the Next button to continue the MySQL Installer configuration.
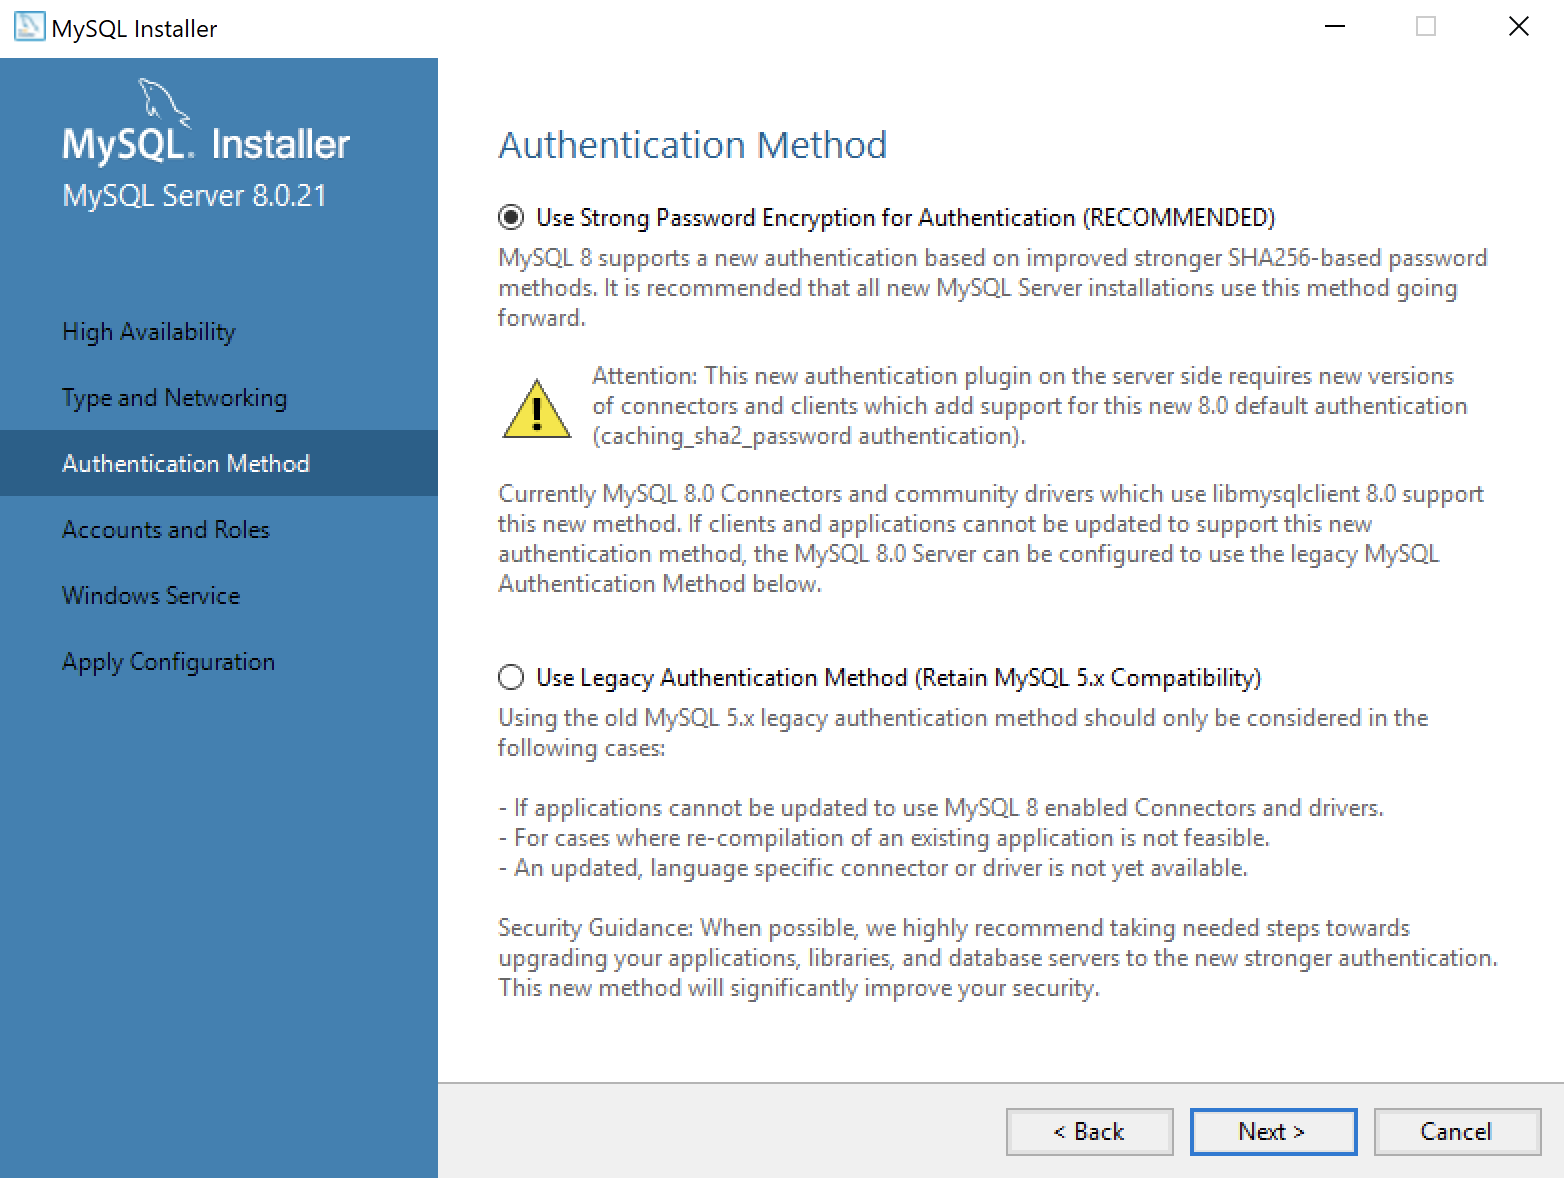
- This dialog lets you choose between SHA256-based and the older MD5 encryption. Click Use Strong Password Encryption for Authentication (RECOMMENDED) radio button. Click the Next button to continue the MySQL Installer configuration.
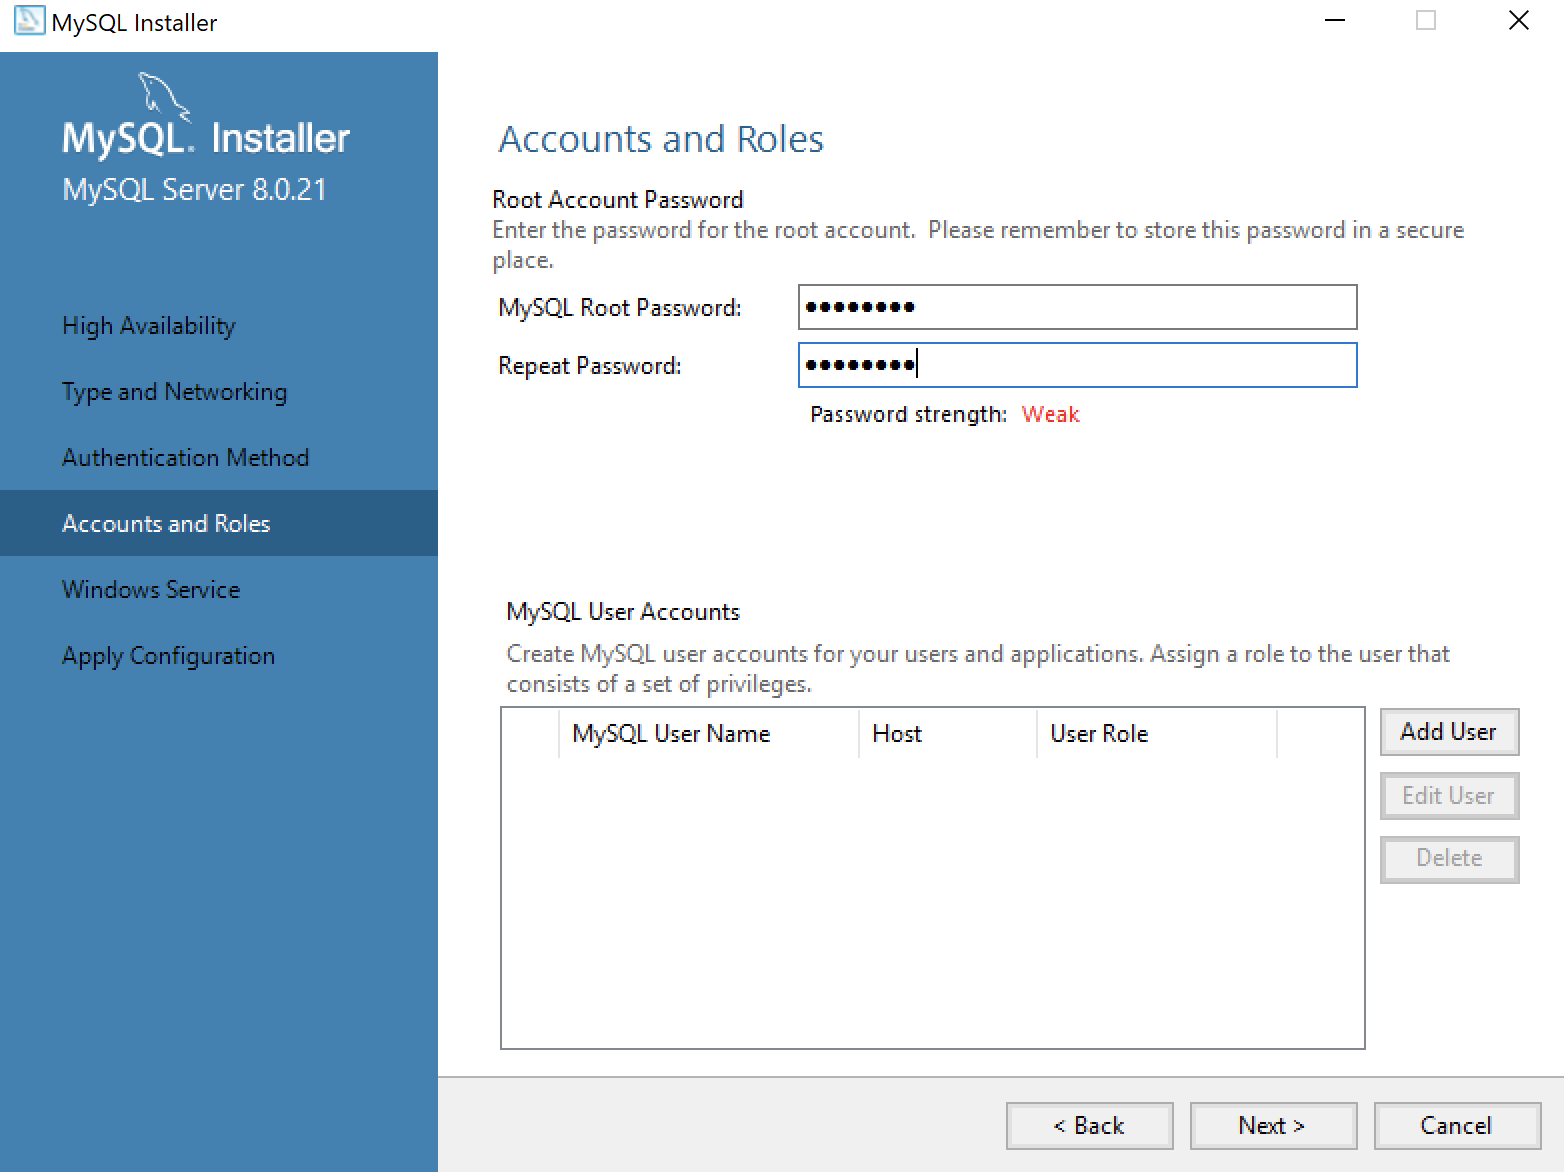
- This dialog lets you enter the MySQL Root Password. Click the Next button to continue the MySQL Installer configuration.
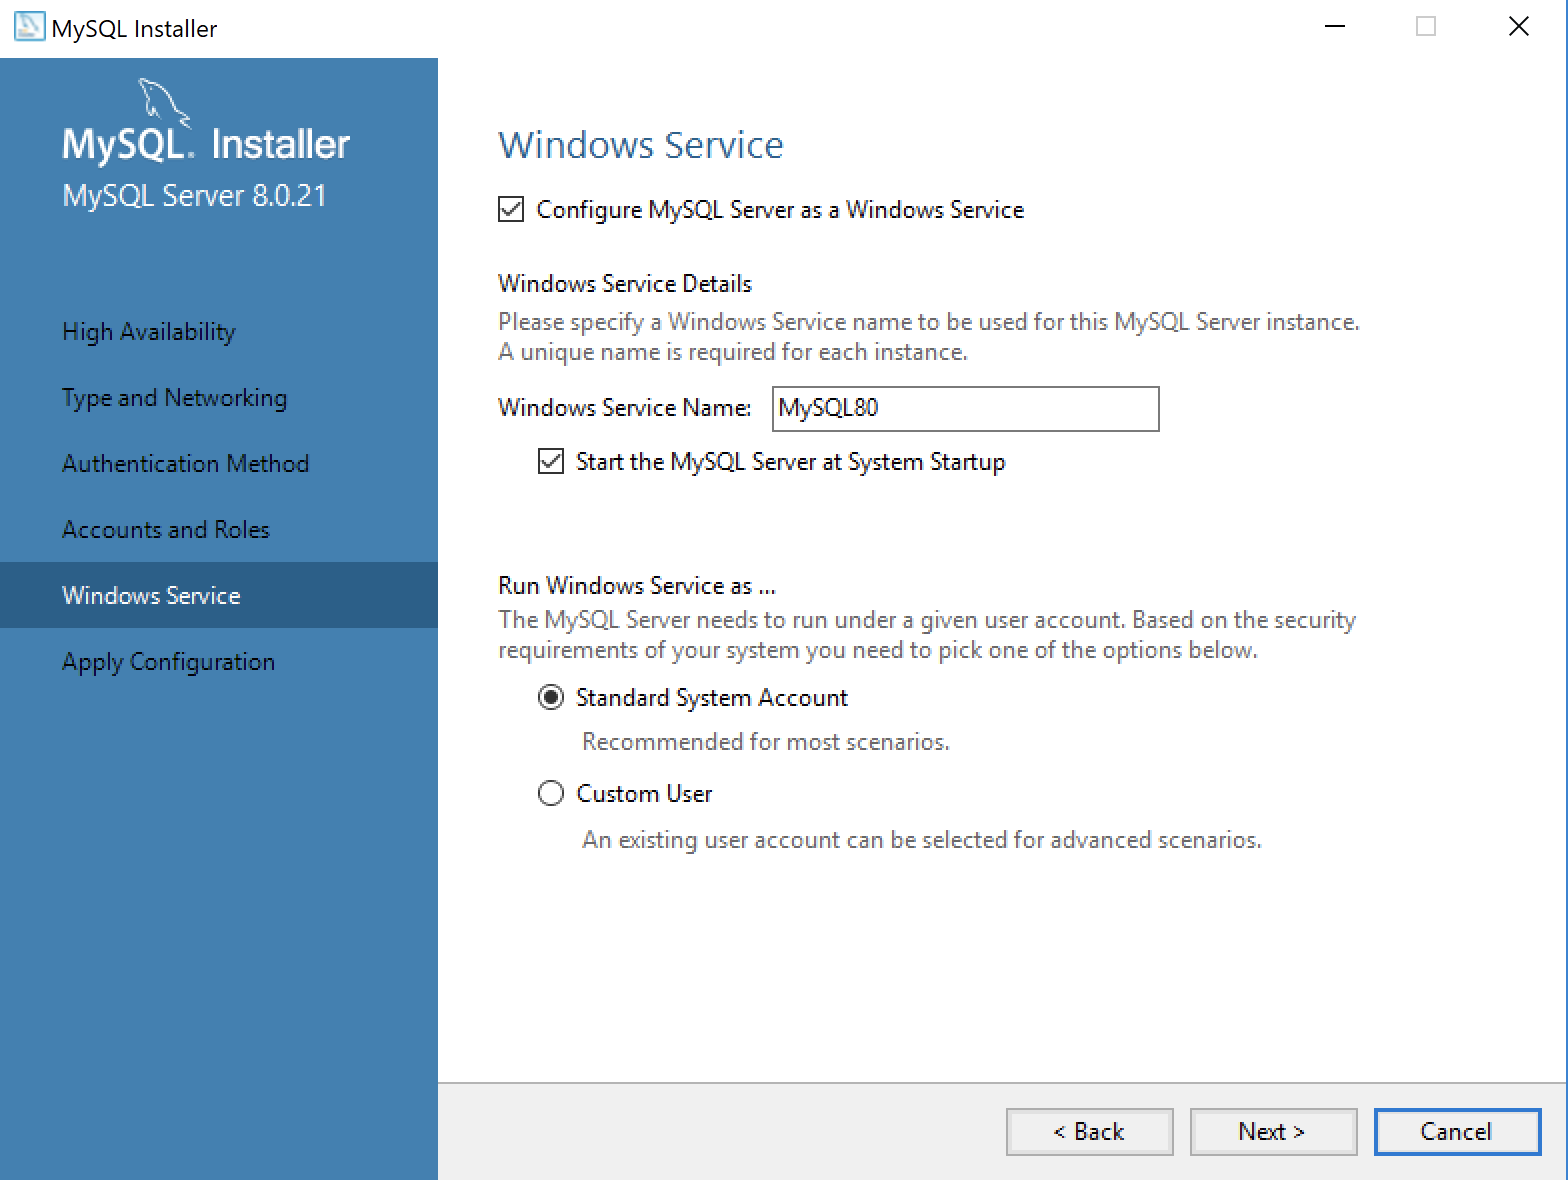
- This dialog lets you enter a Windows Service Name and install a Standard System Account or Custom User account. Click the Next button to continue the MySQL Installer configuration.
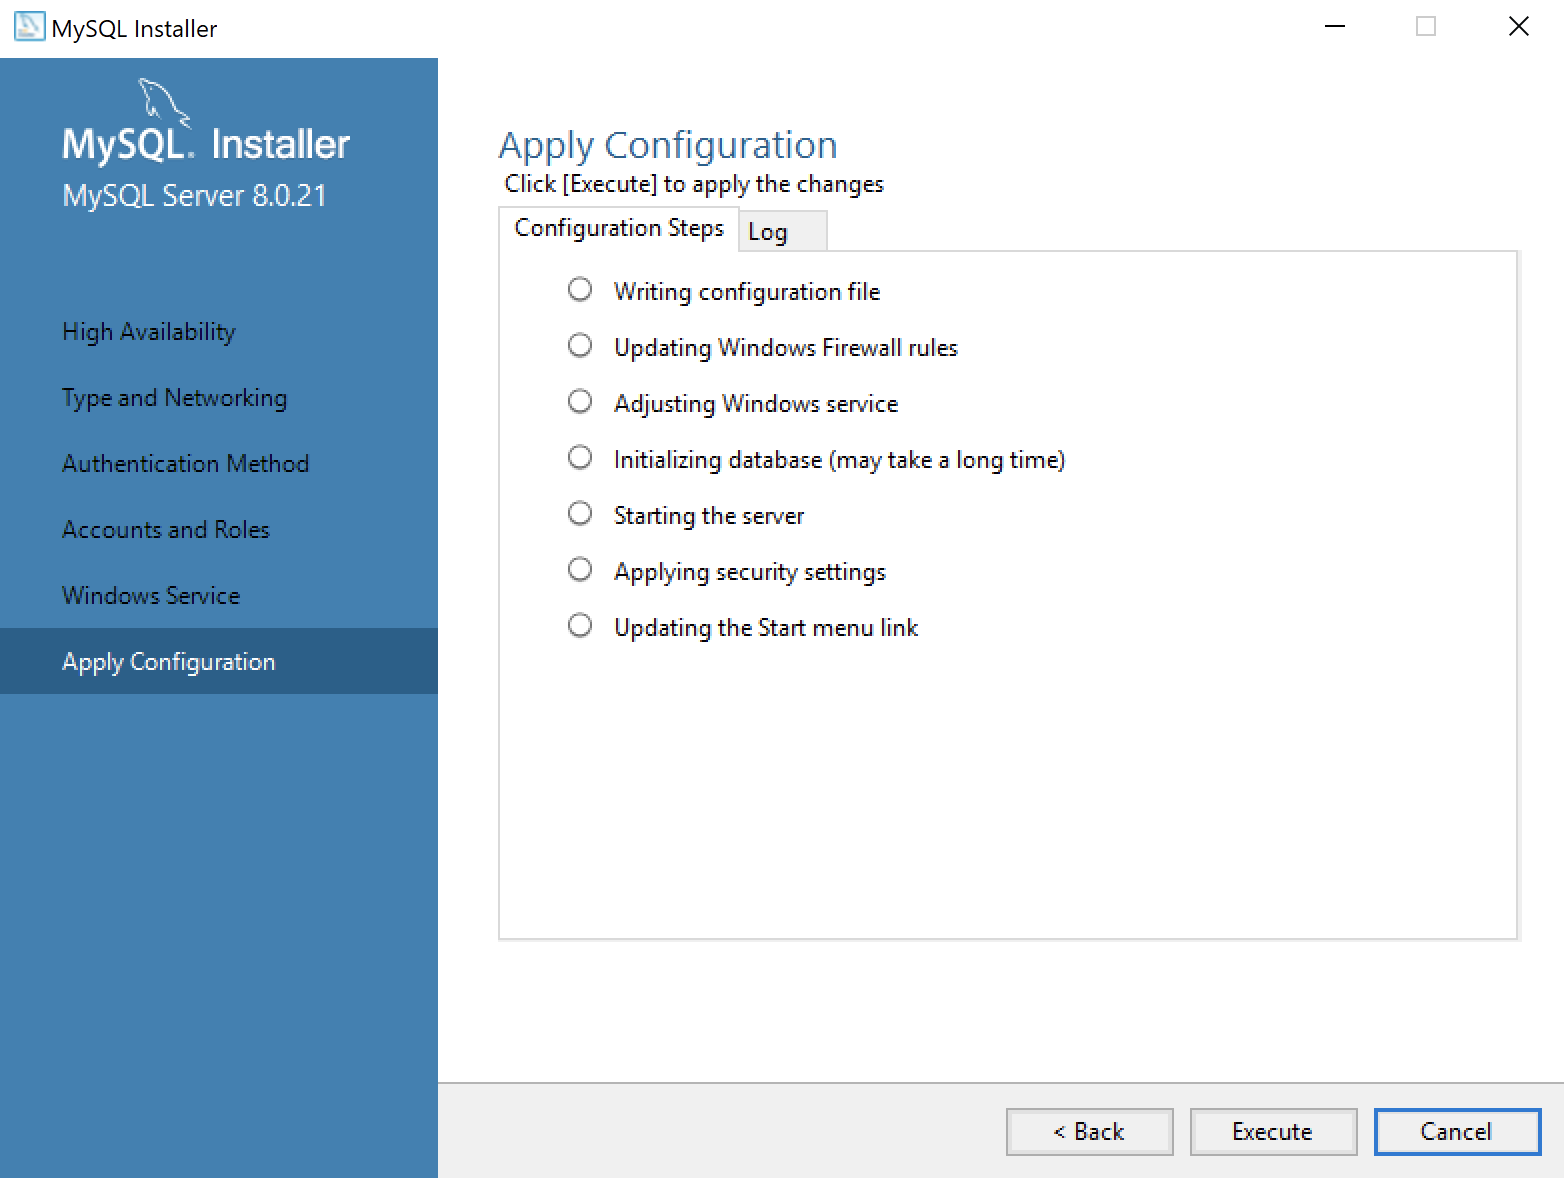
- This dialog lets you apply the configuration of the MySQL Server or Custom User product. Click the Next button to continue the MySQL Server configuration.
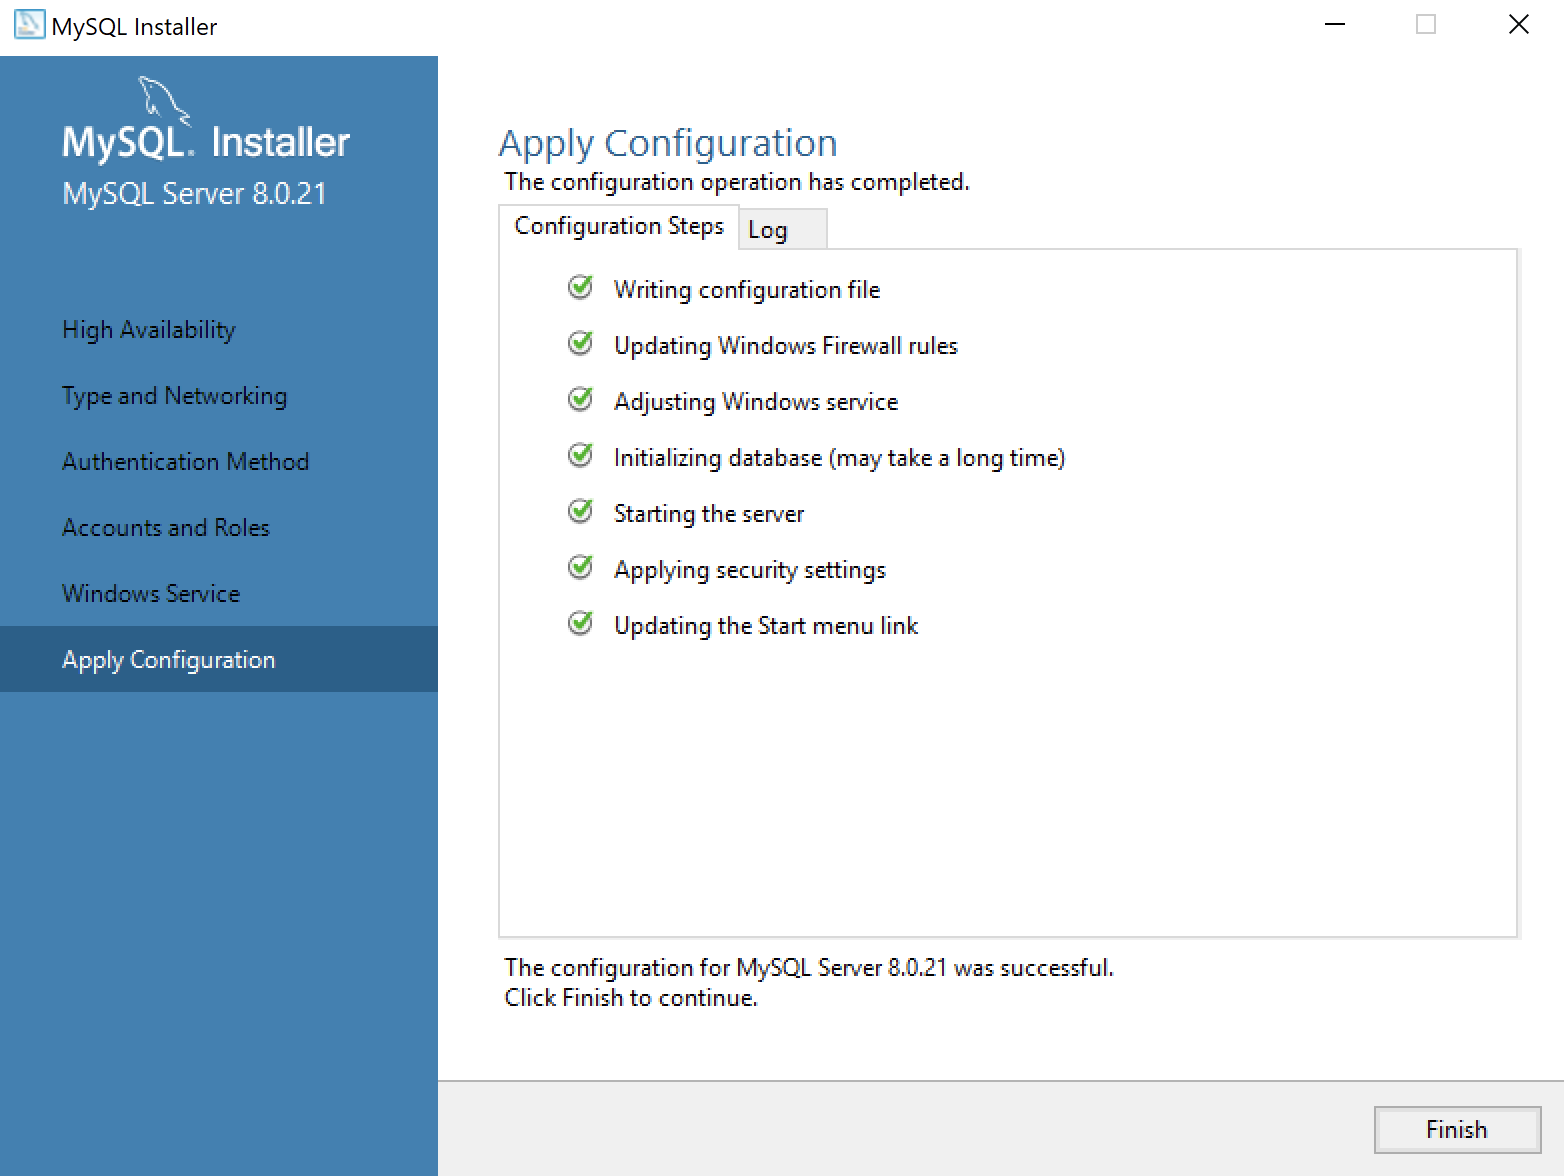
- This dialog lets you watch the progress of the MySQL Server or Custom User configuration. Click the Finish button to complete the MySQL Server configuration.
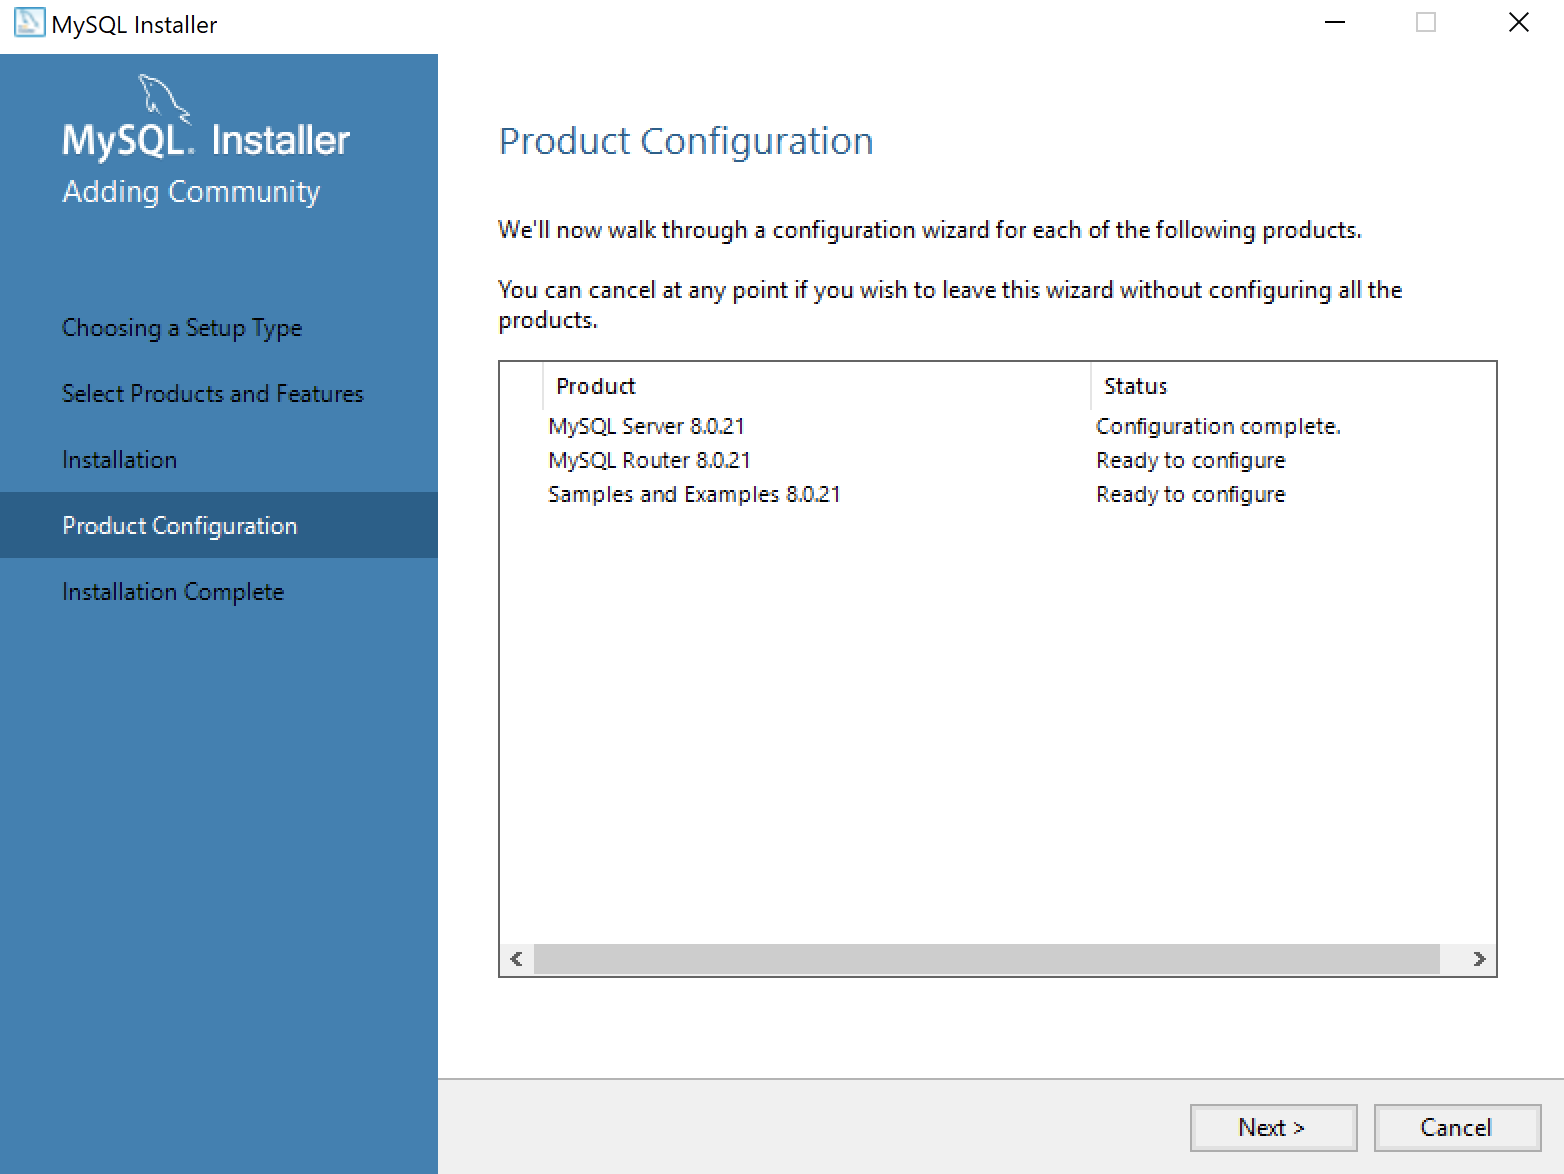
- This dialog lets you choose the next MySQL Router product for configuration. Click the Next button to begin the MySQL Router configuration.
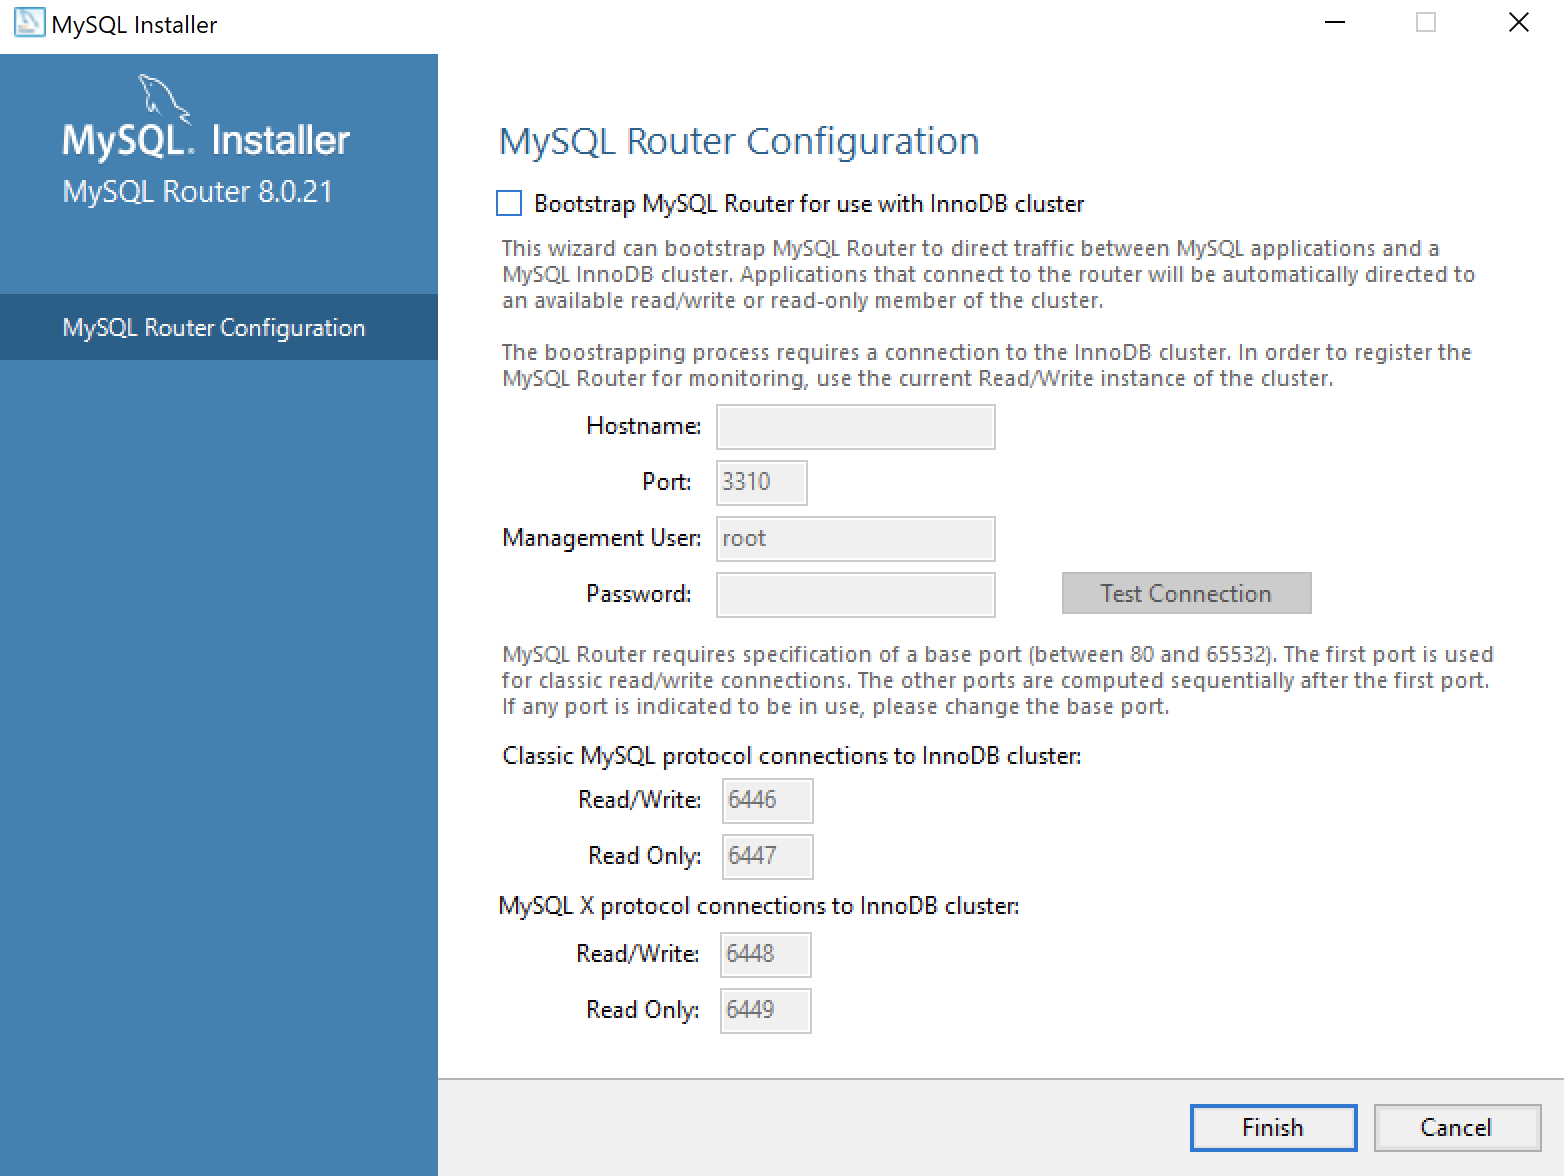
- This dialog allows you to configure the MySQL Router Configuration product. Leave the
HostnameandPasswordfields blank when you do not want to configure the MySQL Router Configuration product. Click the Finish button to complete the MySQL Router workflow.

- This dialog lets you choose the next Samples and Examples product for configuration. Click the Next button to begin the Samples and Examples configuration.

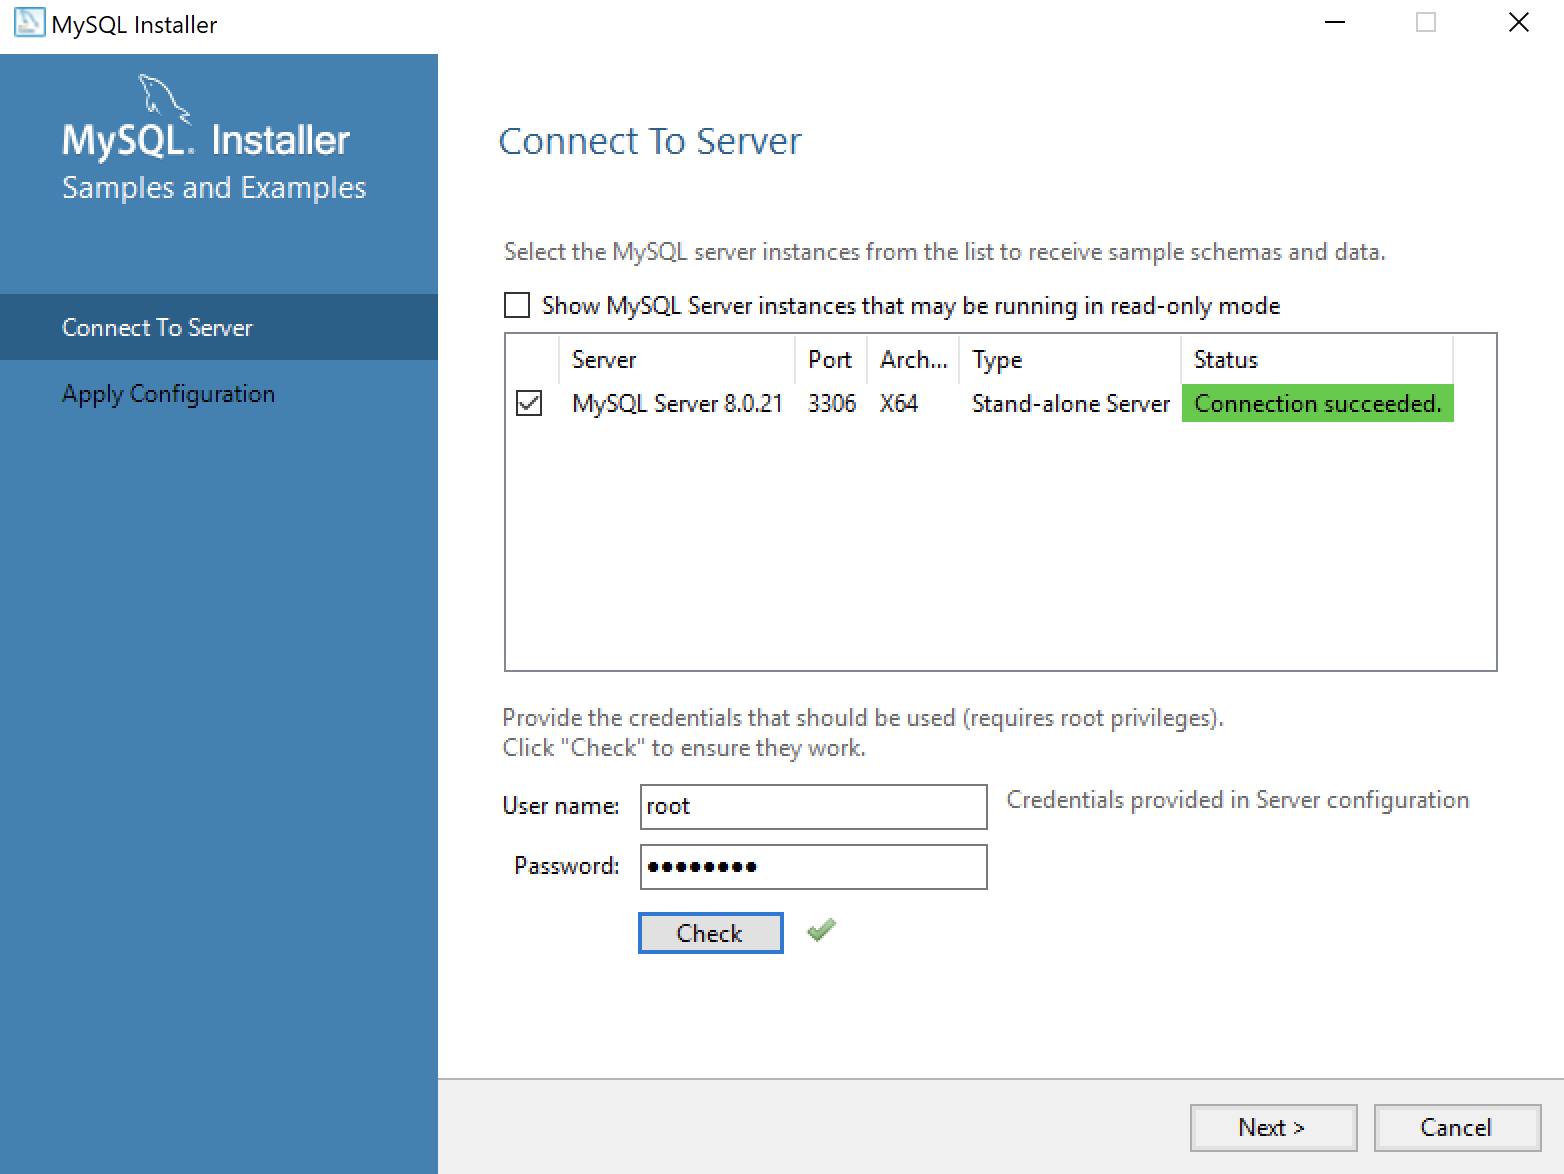
- This dialog lets you create a Windows 10 MySQL Service. You enter the
rootpassword that you entered in Step #12. After you enterrootpassword, click the Check button to verify therootpassword. The Check button enables the Next button when therootaccount’s password is validated. Click the now enabled Next button to create the MySQL Service.
- This dialog lets you create a Windows 10 MySQL Service. Click the now enabled Next button to create the MySQL Service.
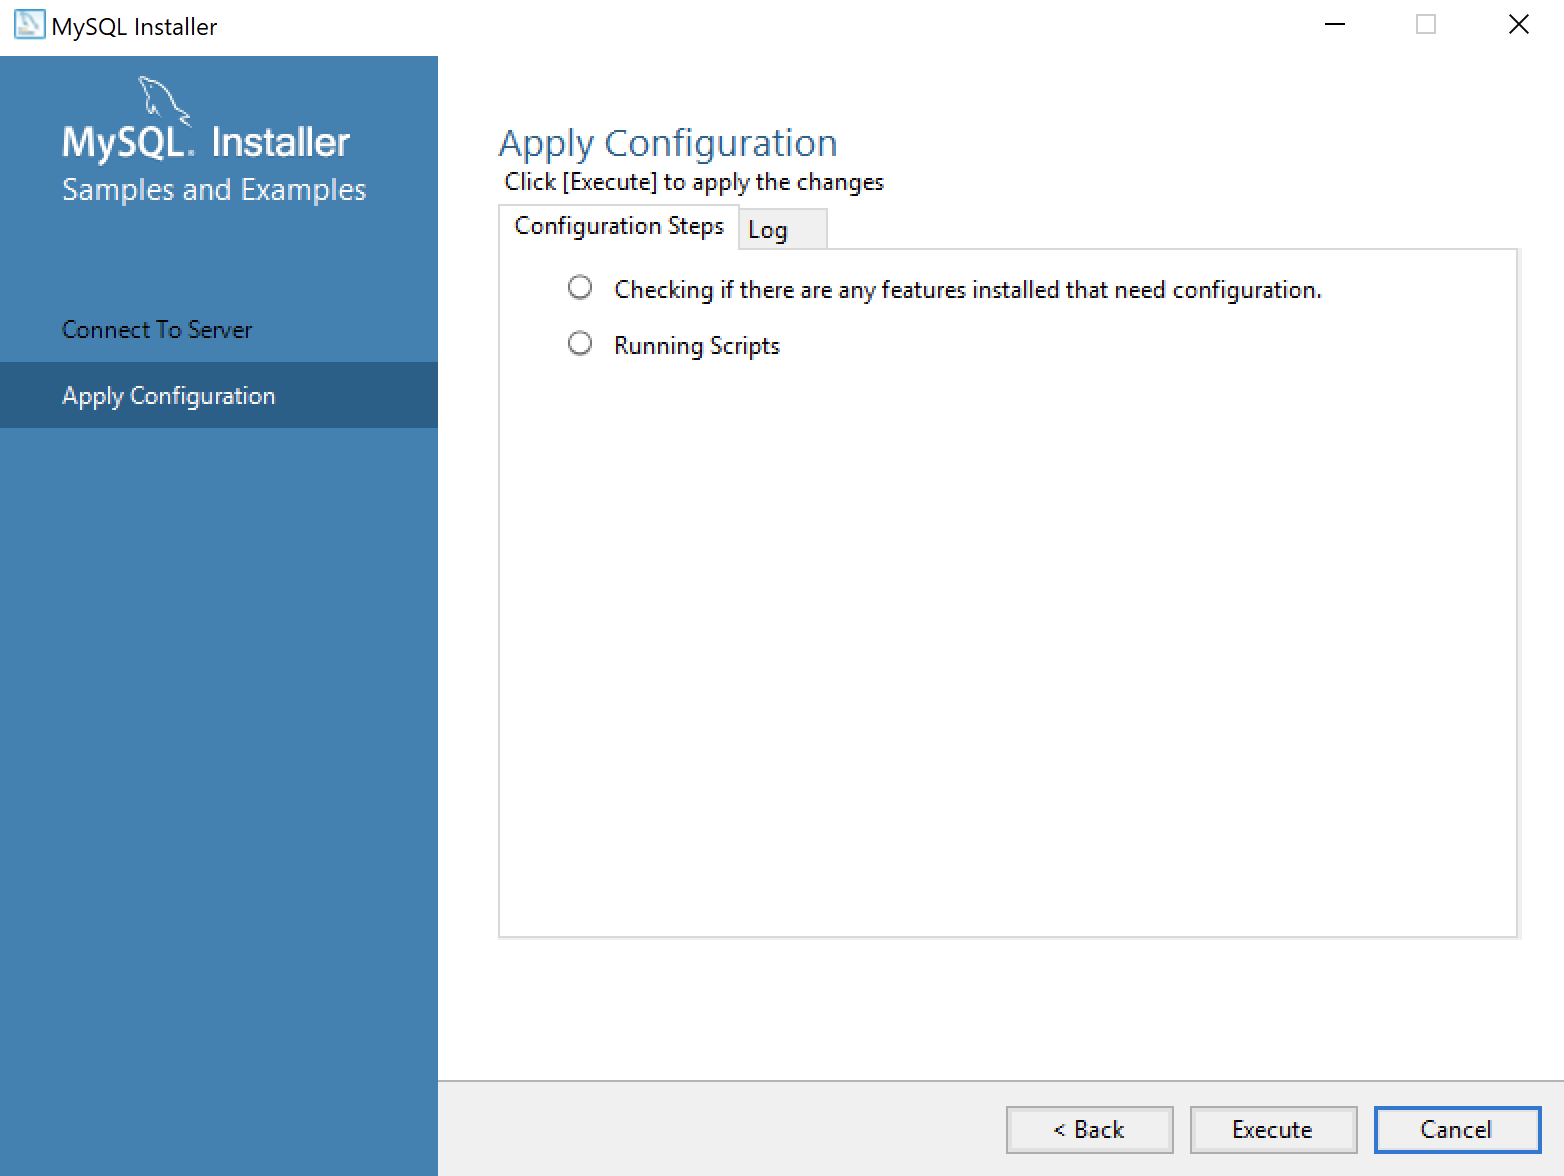
- This dialog applies all the configurations selected. Click the Execute button to proceed with the configuration.
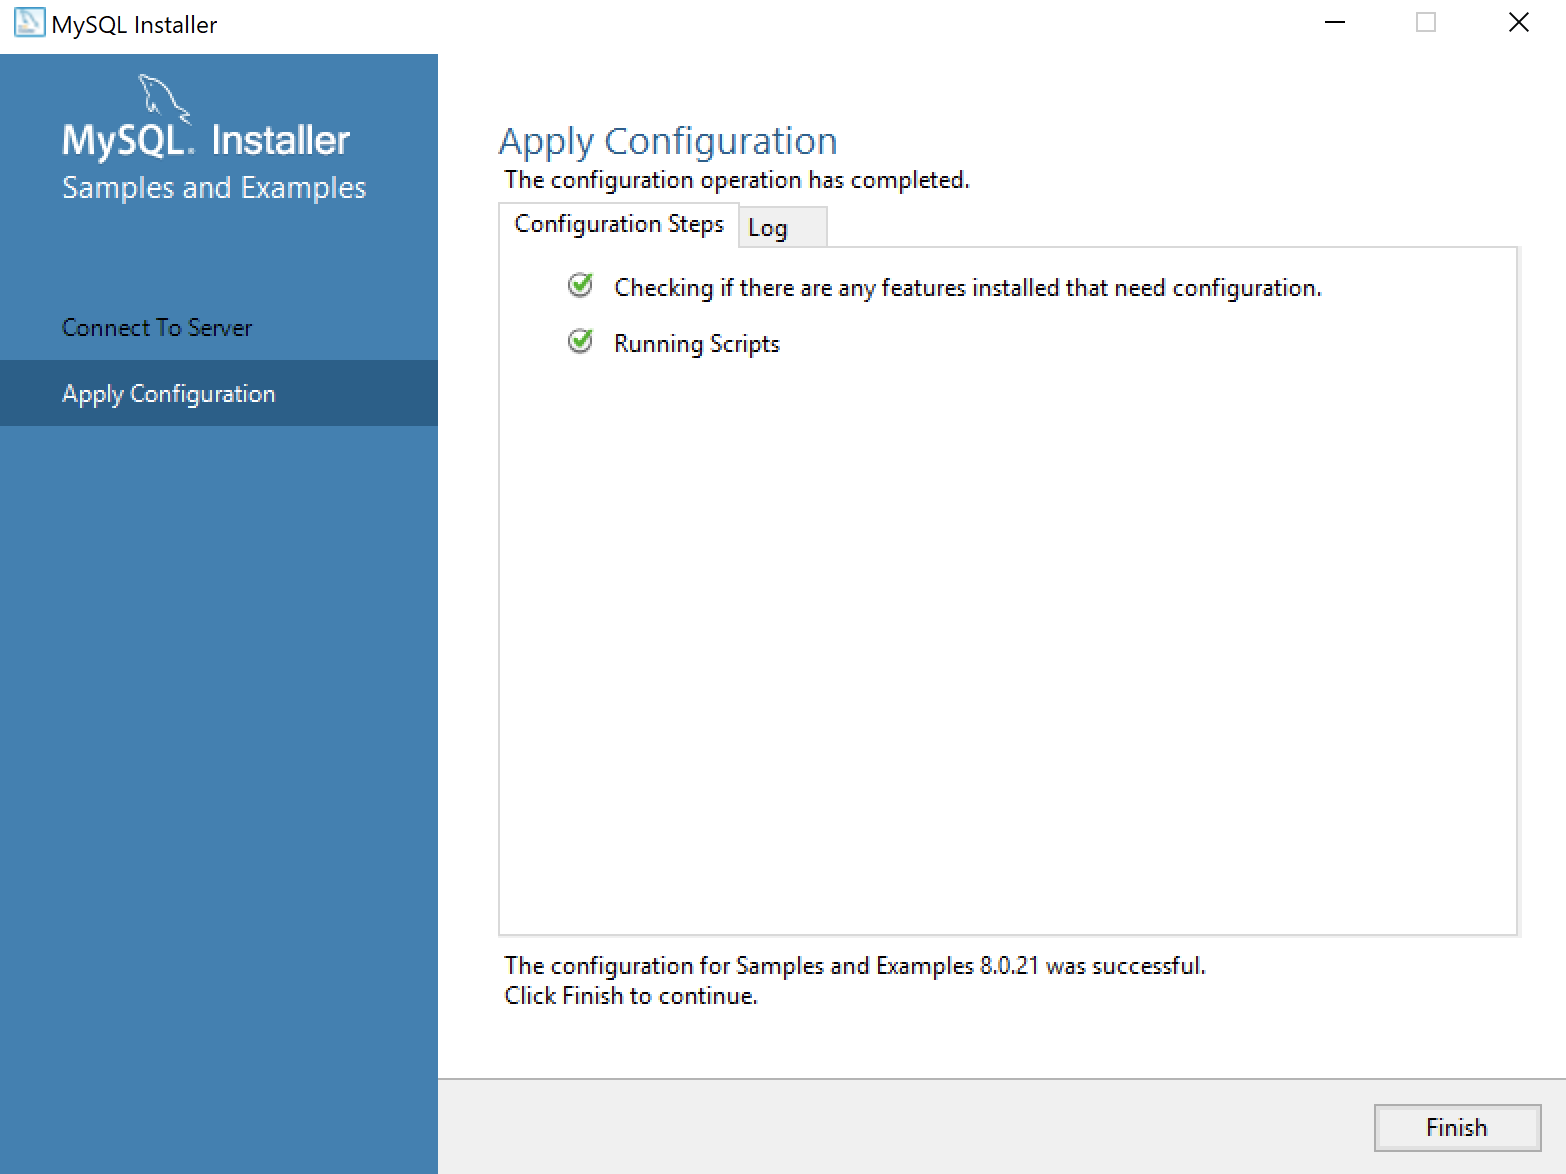
- This dialog lets you watch the progress of the configuration. Click the Finish button to complete the product configurations.

- This dialog the product configurations. You should note that the MySQL Router was not configured or needed. Click the Next button to complete the installation.
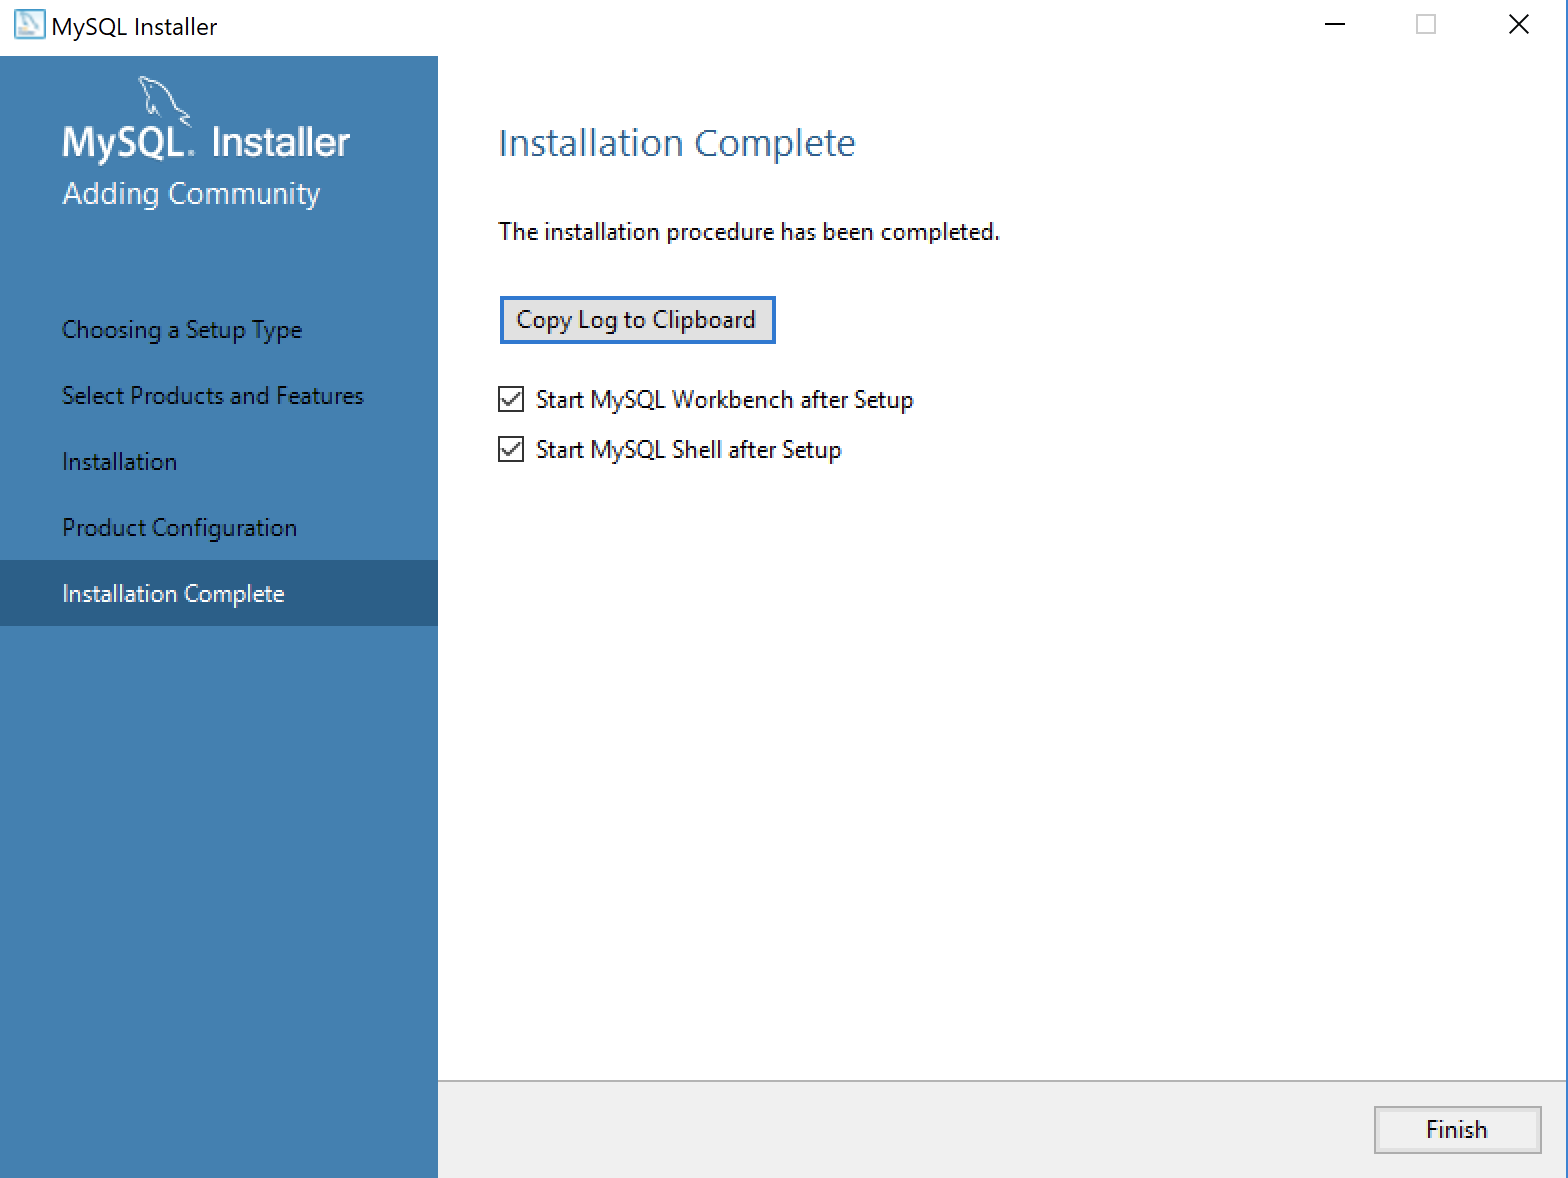
- This dialog completes the workflow and launches MySQL Workbench and Shell. Click the Finish button to complete the installation and configuration processes.
After you install MySQL, the following shows you how to provision a studentdb database. It also shows you how to enable the global file privilege and how to read data from an external comma-separated values (CSV) file.
Excel 2011 Query MySQL
I finally got around to finishing my testing of Excel 2011 querying MySQL. That meant installing and configuring Excel 2011 and MySQL 5.5.9 on Mac OS X (Snow Leopard). While installing Microsoft Office is pretty trivial, installing and configuring MySQL wasn’t. You can read about installing and configuring MySQL here. A quick test after this, led me to discover that you still need a third party ODBC, as covered in this earlier blog. You should take note that Microsoft’s future direction adopts Oracle ODBC, like the approach they’ve chosen with MySQL’s ODBC driver.
I downloaded and installed one of third party ODBC tool sets. I opted for OpenLink Software’s ODBC Driver. Instructions for the install with screen shots are in this blog page. The only downside of this was the discovery that Microsoft’s solution requires Rosetta, like Excel 2008. Rosetta enables Power PC application to run on Intel-based Mac OS X.

Launching the Database icon from Excel 2011, I configured the Data Source Name, which you can find here with screen shots. After you configure the Data Source Name, restarting Excel 2011 is the best choice because otherwise you may see several non-fatal errors.
The following screen shots show you how to establish a connection between Excel 2011 and MySQL, and how to query data from the MySQL database:
- After you click the Database icon, you see the following dialog. Select a Data Source Name and click the OK button to begin a query.

- The OpenLink MySQL Lite Login screen requires the user name and password. Click the Connect button to launch the Microsoft Query, which appears to be a native Power PC application that requires Rosetta to run it

- Microsoft Query appears to be a native Power PC application that requires Rosetta to run it. If you want to enter a query, click the SQL View button.

- Having clicked the SQL View button you now have a work area where you can enter a standard SQL
SELECTstatement, like the one below. Then, you click the Return Data button.

- This dialog lets you select where you want to put the return result set from the query. The default is the absolute cell reference of the top and left most cell,
$A$1. Click the OK button to query and load the data into the worksheet.

- Now you can see the data in the worksheet. The only problem is the extraneous characters returned into the column headers of the table. While tedious, they’re easy to fix. The following illustrates the downloaded result set from the previous query:

- If you perform a query with a join operation, the column names are never displayed whether you provide aliases to the query or not. It means you have to convert the table to a range, remove the false headers, and recreate the table. This appears to be a limitation of Microsoft Query and unlike the behavior in Excel 2010 on Windows. Perhaps it’s all wrapped up in the emulation provided by Rosetta but I couldn’t find any information about what’s happening. That leaves me with pure speculation, which I never like. If you find the reason, post a comment with a link because everyone would benefit.

As always, I hope this helps those who want to work only in the Mac OS X environment. The risk is Rosetta because it will go away, the only question is when and whether the vendors will fix their dependency first or not. The problem with this solution is that Microsoft Query doesn’t return any tables when it appears that it should.
Query MySQL in Excel 2007
The original blog post with the images was causing a page loading delay, so I’ve moved the post to a page of it’s own. This link send you to the original post with how you setup MySQL Connector/ODBC driver, add a new data source in Windows 7, and a new data import source in Excel 2007. As with other “how-to” posts, it includes screen shots to clear up any ambiguity. I apologize for any inconvenience caused by moving the content.
If you want instructions for using Excel to access an Oracle database, check this older post. I’m working on documentation for a native Mac OS X and Excel 2011 solution and will update this when it’s ready.
As always, I hope this helps those trying to sort through how this works. Naturally, a Visual Basic for Applications (VBA) solution is a better alternative once you’ve set up the data source. This is also on my calendar for documentation.
