Archive for the ‘mysqli’ Category
AlmaLinux LAMP

After installing and configuring MySQL 8.0.30, I installed the Apache Web Server, PHP and the MySQLi packages. Here are the step-by-step instructions after installing and configuring the MySQL Server and provisioning a student user and the sakila and studentdb databases (blog for those steps). After installing the major components, I completed the HTTPS configuration steps for Apache 2.
The installation steps are:
- Install the Apache packages as the sudoer user with this command:
sudo dnf install -y httpd
- Enable Apache as the sudoer user with this command:
chkconfig httpd on
This returns the following completion message:
Note: Forwarding request to 'systemctl enable httpd.service'.
Created symlink /etc/systemd/system/multi-user.target.wants/httpd.service → /usr/lib/systemd/system/httpd.service.
A quick Linux syntax note in the event you want to confirm the link or link target later. You can use the following syntax as a sudoer user to find the link:
ls `find /etc -type l | grep httpd.service 2>/dev/null`
and the following syntax as a sudoer user to find the link’s target:
readlink `find /etc -type l | grep httpd.service 2>/dev/null`
- You still need to start the Apache service unless you reboot the operating system as the sudoer user with this command:
apachectl start - At this point, you need to check the firewall settings because Apache can’t even read localhost at this point. If you’re new to these firewall commands, you should consider reviewing Korbin Brown’s tutorial. As the sudoer user check the Apache available services with this command:
firewall-cmd --zone=public --list-services
It should return:
cockpit dhcpv6-client sshAdd the following services and ports with these commands:
firewall-cmd --zone=public --add-port 80/tcp --permanent
firewall-cmd --zone=public --add-port 443/tcp --permanent
firewall-cmd --zone=public --add-port 8080/tcp --permanent
firewall-cmd --zone=public --add-service=http --permanent
firewall-cmd --zone=public --add-service=https --permanent
Check the open ports with the following command:
firewall-cmd --zone=public --list-ports
It should return:
80/tcp 443/tcp 8080/tcp
Check the open services with the following command:
firewall-cmd --zone=public --list-services
It should return:
cockpit dhcpv6-client http https ssh - Create the hello.htm file in the /var/www/html directory as the root user:
Restart the Apache service as the sudoer user:
apache restart
<html>
<body>
Hello World!
</body>
</html>
Then, you can launch the Firefox browser and type the following:
localhost/hello.htmIt should print “Hello World!” in the browser.
- Install the php package as the sudoer user with the following command:
sudo dnf install -y php
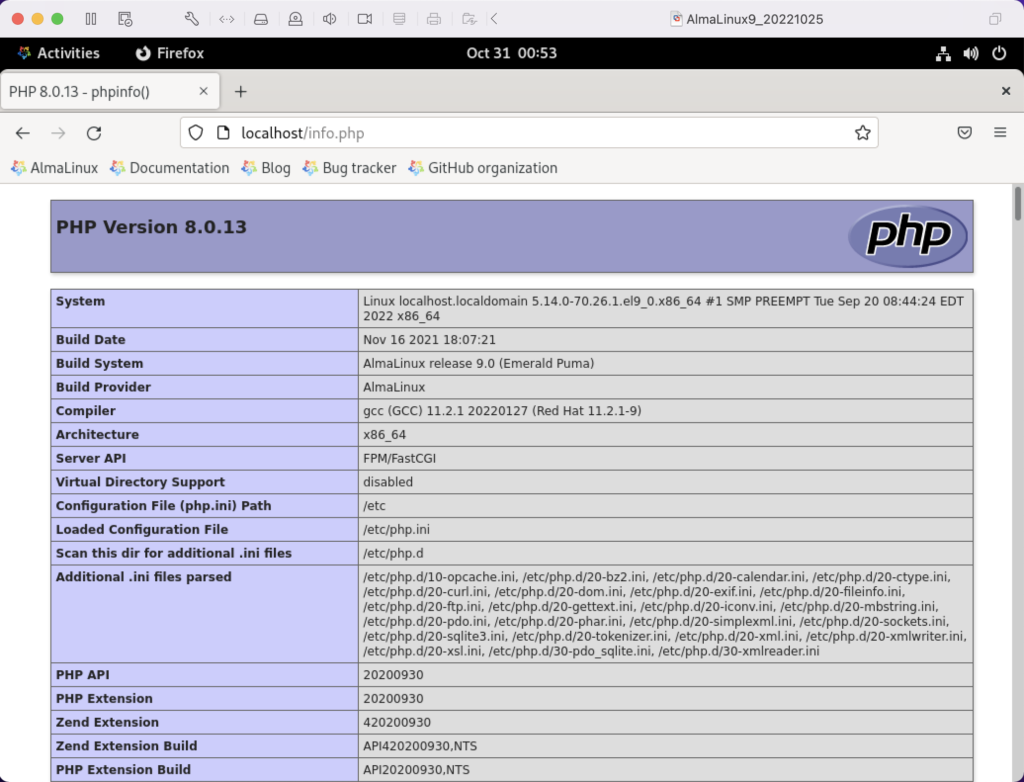
Create the info.php file in the /var/www/html directory as the root user:
<?php
  phpinfo();
?>
apache restart
Then, you can launch the Firefox browser and type the following:
localhost/info.php
It should return the following in the browser.
- Install the php_mysqli package as the sudoer user with the following command:
dnf install -y php-mysqli
Create the mysqli_check.php file in the /var/www/html directory as the root user:
<html>
<header>
<title>Static Query Object Sample</title>
</header>
<body>
<?php
  if (!function_exists('mysqli_init') && !extension_loaded('mysqli')) {
    print 'mysqli not installed.'; }
  else {
    print 'mysqli installed.'; }
  if (!function_exists('pdo_init') && !extension_loaded('pdo')) {
    print '<p>pdo not installed.</p>'; }
  else {
    print '<p>pdo installed.</p>'; }
?>
</script>
</body>
</html>
apache restart
Then, you can launch the Firefox browser and type the following:
localhost/mysqli_check.php
It should print the following in the browser.
mysqli installed.

pdo installed.
- Check if the mod_ssl module is installed. You can use the following command::
rpm -qa | grep mod_ssl
Assuming it’s not installed, you install it like this:
dnf install -y mod_ssl
Recheck after installing mod_ssl with the following command::
rpm -qa | grep mod_ssl
It should print:
mod_ssl-2.4.51-7.el9_0.x86_64
- AlmaLinux and Apache require you to resolve the ServerName values and the public and private keys. Run this command on AlmaLinux to begin verifying and configuring the ServerName values and the public and private keys:
httpd -M | grep ssl
Assuming a new installation consistent with were MySQL and Apache were just configured, you should get the following message:
AH00558: httpd: Could not reliably determine the server's fully qualified domain name, using localhost.localdomain. Set the 'ServerName' directive globally to suppress this message
 ssl_module (shared)
Recheck the failure for more detail with this command:
sudo systemctl status httpd.service -l --no-pager
It should print:
● httpd.service - The Apache HTTP Server Loaded: loaded (/usr/lib/systemd/system/httpd.service; enabled; vendor preset: disabled) Drop-In: /usr/lib/systemd/system/httpd.service.d └─php-fpm.conf Active: active (running) since Sun 2022-11-13 22:39:07 EST; 1h 37min ago Docs: man:httpd.service(8) Main PID: 1351 (httpd) Status: "Total requests: 0; Idle/Busy workers 100/0;Requests/sec: 0; Bytes served/sec: 0 B/sec" Tasks: 213 (limit: 23280) Memory: 43.1M CPU: 2.733s CGroup: /system.slice/httpd.service ├─1351 /usr/sbin/httpd -DFOREGROUND ├─1443 /usr/sbin/httpd -DFOREGROUND ├─1452 /usr/sbin/httpd -DFOREGROUND ├─1456 /usr/sbin/httpd -DFOREGROUND └─1459 /usr/sbin/httpd -DFOREGROUND Nov 13 22:39:06 localhost.localdomain systemd[1]: Starting The Apache HTTP Server... Nov 13 22:39:07 localhost.localdomain httpd[1351]: AH00558: httpd: Could not reliably determine the server's fully qualified domain name, using localhost.localdomain. Set the 'ServerName' directive globally to suppress this message Nov 13 22:39:07 localhost.localdomain systemd[1]: Started The Apache HTTP Server. Nov 13 22:39:07 localhost.localdomain httpd[1351]: Server configured, listening on: port 80It takes the next set of steps to fix the ServerName values.
- Generically, on Linux you need to find the files to modify. You can use the following command from within the /etc directory to find the configuration files in the /etc directory that include ServerName in them. Their values will be proceeded by a # symbol because they’re comments by default.
find /etc -type f | xargs grep -i ServerName
It should return the following:
./httpd/conf.d/ssl.conf:#ServerName www.example.com:443
./httpd/conf/httpd.conf:# ServerName gives the name and port that the server uses to identify itself.
./httpd/conf/httpd.conf:#ServerName www.example.com:80
./dnsmasq.conf:# tftp_servername (the third option to dhcp-boot) and in that
- Add the following line to the ssl.conf file as the root user:
ServerName localhost:443 - Add the following line to the httpd.conf file as the root user:
ServerName localhost:443 - After adding the two values, restart Apache with the following command:
sudo apachectl restart
- Rerun the systemctl command to get the status of the httpd service with this command:
sudo systemctl status httpd.service -l --no-pager
It should print:
● httpd.service - The Apache HTTP Server
     Loaded: loaded (/usr/lib/systemd/system/httpd.service; enabled; vendor preset: disabled)
    Drop-In: /usr/lib/systemd/system/httpd.service.d
             └─php-fpm.conf
     Active: active (running) since Mon 2022-11-14 00:37:03 EST; 3min 23s ago
       Docs: man:httpd.service(8)
   Main PID: 53596 (httpd)
     Status: "Total requests: 0; Idle/Busy workers 100/0;Requests/sec: 0; Bytes served/sec:   0 B/sec"
      Tasks: 213 (limit: 23280)
     Memory: 34.0M
        CPU: 183ms
     CGroup: /system.slice/httpd.service
             ├─53596 /usr/sbin/httpd -DFOREGROUND
             ├─53597 /usr/sbin/httpd -DFOREGROUND
             ├─53598 /usr/sbin/httpd -DFOREGROUND
             ├─53599 /usr/sbin/httpd -DFOREGROUND
             └─53600 /usr/sbin/httpd -DFOREGROUND

Nov 14 00:37:03 localhost.localdomain systemd[1]: Starting The Apache HTTP Server...
Nov 14 00:37:03 localhost.localdomain systemd[1]: Started The Apache HTTP Server.
Nov 14 00:37:03 localhost.localdomain httpd[53596]: Server configured, listening on: port 443, port 80
- Generically, on Linux you need to find the files to modify. You can use the following command from within the /etc directory to find the configuration files in the /etc directory that include ServerName in them. Their values will be proceeded by a # symbol because they’re comments by default.
- Your next step requires setting up an SSL Certificate. Consistent with the design to build a standalone test system that uses a DHCP assigned IP address to resolve a localhost server name, you require the following two tasks to create an openssl self-signed certificate.
- On the new instance, you create a private subdirectory with this command:
sudo mkdir /etc/ssl/private
- Then, you can build a self-signed certificate with this command:
sudo openssl req -x509 -nodes -days 365 -newkey rsa:2048 -keyout /etc/ssl/private/apache-selfsigned.key -out /etc/ssl/certs/apache-selfsigned.crt
The openssl command will prompt you for these values to create a private key:
You are about to be asked to enter information that will be incorporated
into your certificate request.
What you are about to enter is what is called a Distinguished Name or a DN.
There are quite a few fields but you can leave some blank
For some fields there will be a default value,
If you enter '.', the field will be left blank.
-----
Country Name (2 letter code) [XX]:
State or Province Name (full name) []:
Locality Name (eg, city) [Default City]:
Organization Name (eg, company) [Default Company Ltd]:
Organizational Unit Name (eg, section) []:
Common Name (eg, your name or your server's hostname) []:
Email Address []:
- On the new instance, you create a private subdirectory with this command:
- Your last step requires three tasks to configure Apache to use SSL.
- You need to create the following sites-available directory with the following command as the root user:
mkdir /etc/httpd/sites-available
- Add the following localhost.conf/etc/httpd/sites-available directory:
<VirtualHost *:443>
   ServerName localhost
   DocumentRoot /var/www/html

   SSLEngine on
   SSLCertificateFile /etc/ssl/certs/localhost.crt
   SSLCertificateKeyFile /etc/ssl/private/apache-selfsigned.key
</VirtualHost>
- Restart Apache with the following command:
sudo apachectl restart
- You need to create the following sites-available directory with the following command as the root user:
- After configuring everything, let’s test our self-signed HTTPS skunkworks. Launch the default Firefox browser and enter the following URL, which uses the mysql_check.php file from step #7:
https://localhost/mysqli_check.php
It will raise a warning message about a potential security risk, which is caused by our self-signed certificate. Click the Advanced… button and will see the option to Accept the Risk and Continue. If you want to use the self-signed and contained AlmaLinux LAMP stack for developer testing, accept the risk.

Having assumed the risk, the confirmation of the configuration will be displayed as follows:

As always, I hope this helps those looking to install MySQL, PHP, on AlmaLinux.
MySQL PHP Transaction
My students liked the MySQL Transaction post but wanted one that showed how an external web application would interact with MySQL in the scope of a transaction. So, I put a little PHP function together that write across two related tables in the context of a transaction. It uses mysqli (MySQL Improved Extension) to connect PHP to the MySQL database.
The function is barebones and uses the oldest approach of hidden inputs to maintain context between rendered forms using an HTML POST method. The hidden inputs are preceded with “h_” and snake case is used for variable names.
The function only writes to two tables. It writes to the member table and when that completes successfully to the contact table. The function:
- Submits credentials from a file and raises an error when they don’t work.
- Initializes a SQL statement.
- Disables auto commit.
- Starts a transaction.
- Defines a first SQL statement with placeholders.
- Binds local variables to the first SQL statement’s placeholders.
- Rolls back the transaction when the first statement fails and continues to the next SQL statement when first statement succeeds.
- Defines a second SQL statement with placeholders.
- Binds local variables to the second SQL statement’s placeholders.
- Rolls back the transaction when the second statement fails and commits the work when the second statement succeeds.
- Closes a SQL statement.
The code for the PHP function is:
1 2 3 4 5 6 7 8 9 10 11 12 13 14 15 16 17 18 19 20 21 22 23 24 25 26 27 28 29 30 31 32 33 34 35 36 37 38 39 40 41 42 43 44 45 46 47 48 49 50 51 52 53 54 55 56 57 58 59 60 61 62 63 64 65 66 67 68 69 70 71 72 73 74 75 76 77 78 79 80 81 82 83 84 85 86 87 88 89 90 91 92 93 94 95 96 97 98 99 100 101 102 103 104 105 106 107 108 109 110 111 112 113 114 115 116 117 118 119 120 121 122 123 124 125 126 127 128 129 | /* || Function Name: update_membership || ---------------------------------------------------------------------- || No return, treated as a procedure, or method returning a void. || ---------------------------------------------------------------------- */ function update_membership( $h_account_number , $h_member_type , $h_credit_card_number , $h_credit_card_type , $account_number , $member_type , $credit_card_number , $credit_card_type , $h_first_name , $h_middle_name , $h_last_name , $h_contact_type , $first_name , $middle_name , $last_name , $contact_type) { // Include the credentials file if omitted. include_once("MySQLCredentials.inc"); // Assign credentials to connection. $mysqli = new mysqli(HOSTNAME, USERNAME, PASSWORD, DATABASE); // Check for connection error and print message. if ($mysqli->connect_errno) { print $mysqli->connect_error."<br />"; print "Connection not established ...<br />"; } else { // Initial statement. $stmt = $mysqli->stmt_init(); // Disable auto commit when you want two plus statements run. $mysqli->autocommit(FALSE); // Set the transaction guarantee. $mysqli->begin_transaction(MYSQLI_TRANS_START_READ_WRITE); // Declare a static query. $sql = "UPDATE member\n" . "SET member_type = ?\n" . ", credit_card_number = ?\n" . ", credit_card_type = ?\n" . "WHERE account_number = ?\n" . "AND member_type = ?\n" . "AND credit_card_number = ?\n" . "AND credit_card_type = ?\n"; // Prepare statement. if ($stmt->prepare($sql)) { $stmt->bind_param( "sssssss" , $member_type , $credit_card_number , $credit_card_type , $account_number , $h_member_type , $h_credit_card_number , $h_credit_card_type); } // Attempt query and exit with failure before processing. if (!$stmt->execute()) { // Rollback or undo the transaction. $mysqli->rollback(); // Print failure to resolve query message. print $mysqli->error."<br />\n"; print "Failed to resolve query ...<br />\n"; } // Declare a static query. $sql = "UPDATE contact\n" . "SET first_name = ?\n" . ", middle_name = ?\n" . ", last_name = ?\n" . ", contact_type = ?\n" . "WHERE first_name = ?\n" . "AND middle_name = ?\n" . "AND last_name = ?\n" . "AND contact_type = ?\n"; // Prepare statement. if ($stmt->prepare($sql)) { $stmt->bind_param( "ssssssss" , $first_name , $middle_name , $last_name , $contact_type , $h_first_name , $h_middle_name , $h_last_name , $h_contact_type); } // Attempt query and exit with failure before processing. if (!$stmt->execute()) { // Rollback or undo the transaction. $mysqli->rollback(); // Print failure to resolve query message. print $mysqli->error."<br />"; print "Failed to resolve query ...<br />"; } else { /* Manually commiting writes when you have disabled the || default auto commit setting, explained above. || ------------------------------------------------------------ || You would add the following command to commit the || transaction. || ------------------------------ || $mysqli->commit(); || ------------------------------------------------------------ */ $mysqli->commit(); // Close the transaction. $mysqli->close(); } } } |
Line 41 disables auto commit and line 44 starts the transaction. Each statement is managed with the subsequent statement nested inside a block of code that is only reachable when the prior statement succeeds. While this only uses the member and contact table, it could use any number of tables. The natural alternative is building an updatable view.
As always, I hope this helps anybody looking for a code complete example.
MySQL 8.0 Install
MySQL will be used for our online sections because the VMware instance and Docker configurations where too large to effectively download this term.
MySQL 8.0.21 Installation Steps
After you download the MySQL 8 MSI file, you will perform the following 24 steps to install MySQL on Windows 10. If you want a full developer install you must install Microsoft Excel and Visual Studio first.
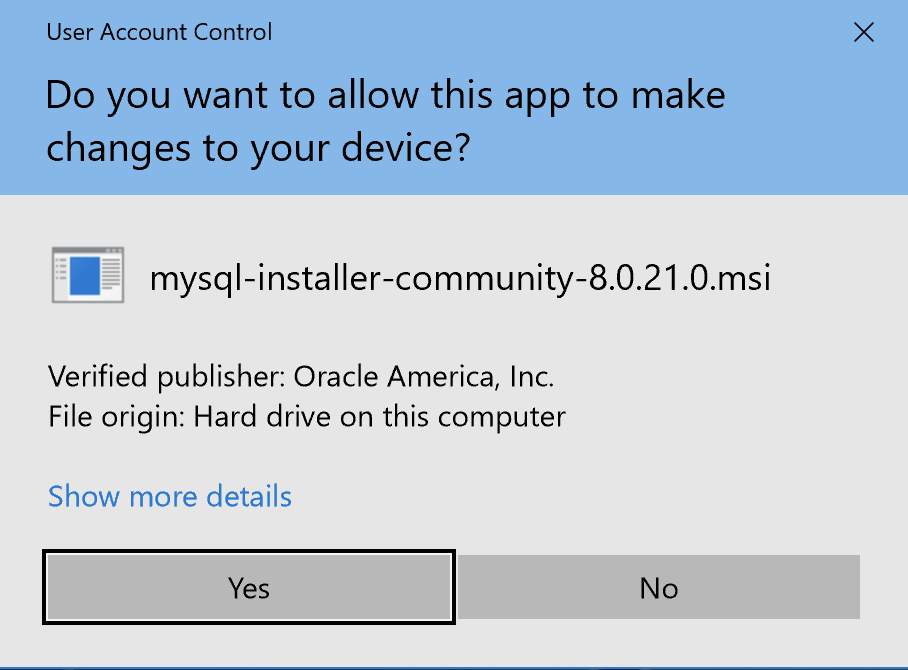
- The first thing you need to do is grant privileges to allow the MySQL Installer application to work in Windows 10. Click the Yes button to authorize the MySQL Installer to run.
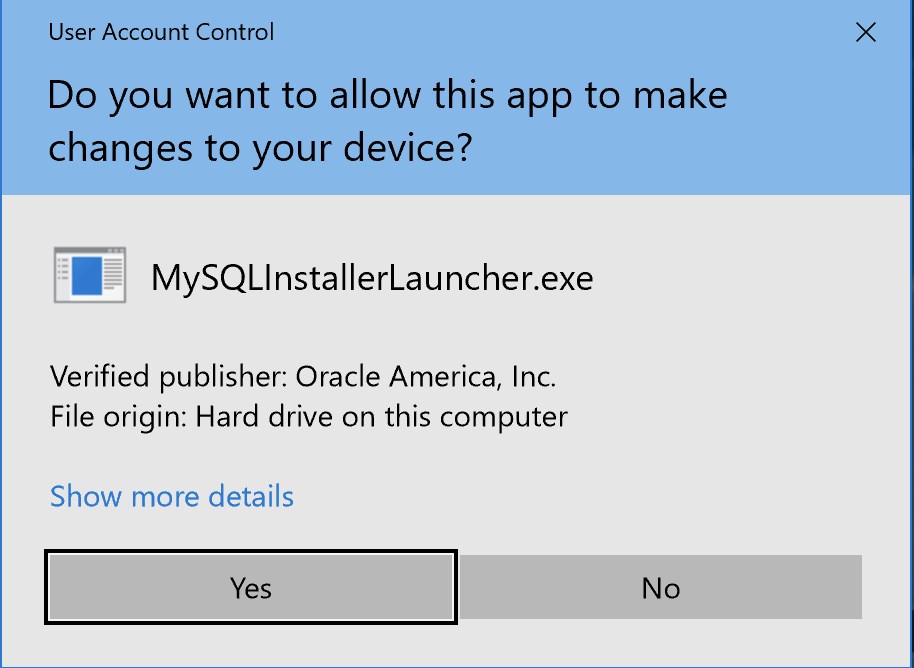
- The next thing you need to do is grant privileges to allow the MySQL Installer Launcher application to work in Windows 10. Click the Yes button to authorize the MySQL Installer to run.

- Now you start the install by choosing a setup type. As a rule, I recommend you install the Developer Default. It is the default selection and preselected for you. Click the Next button to verify that you can install what you’ve selected.
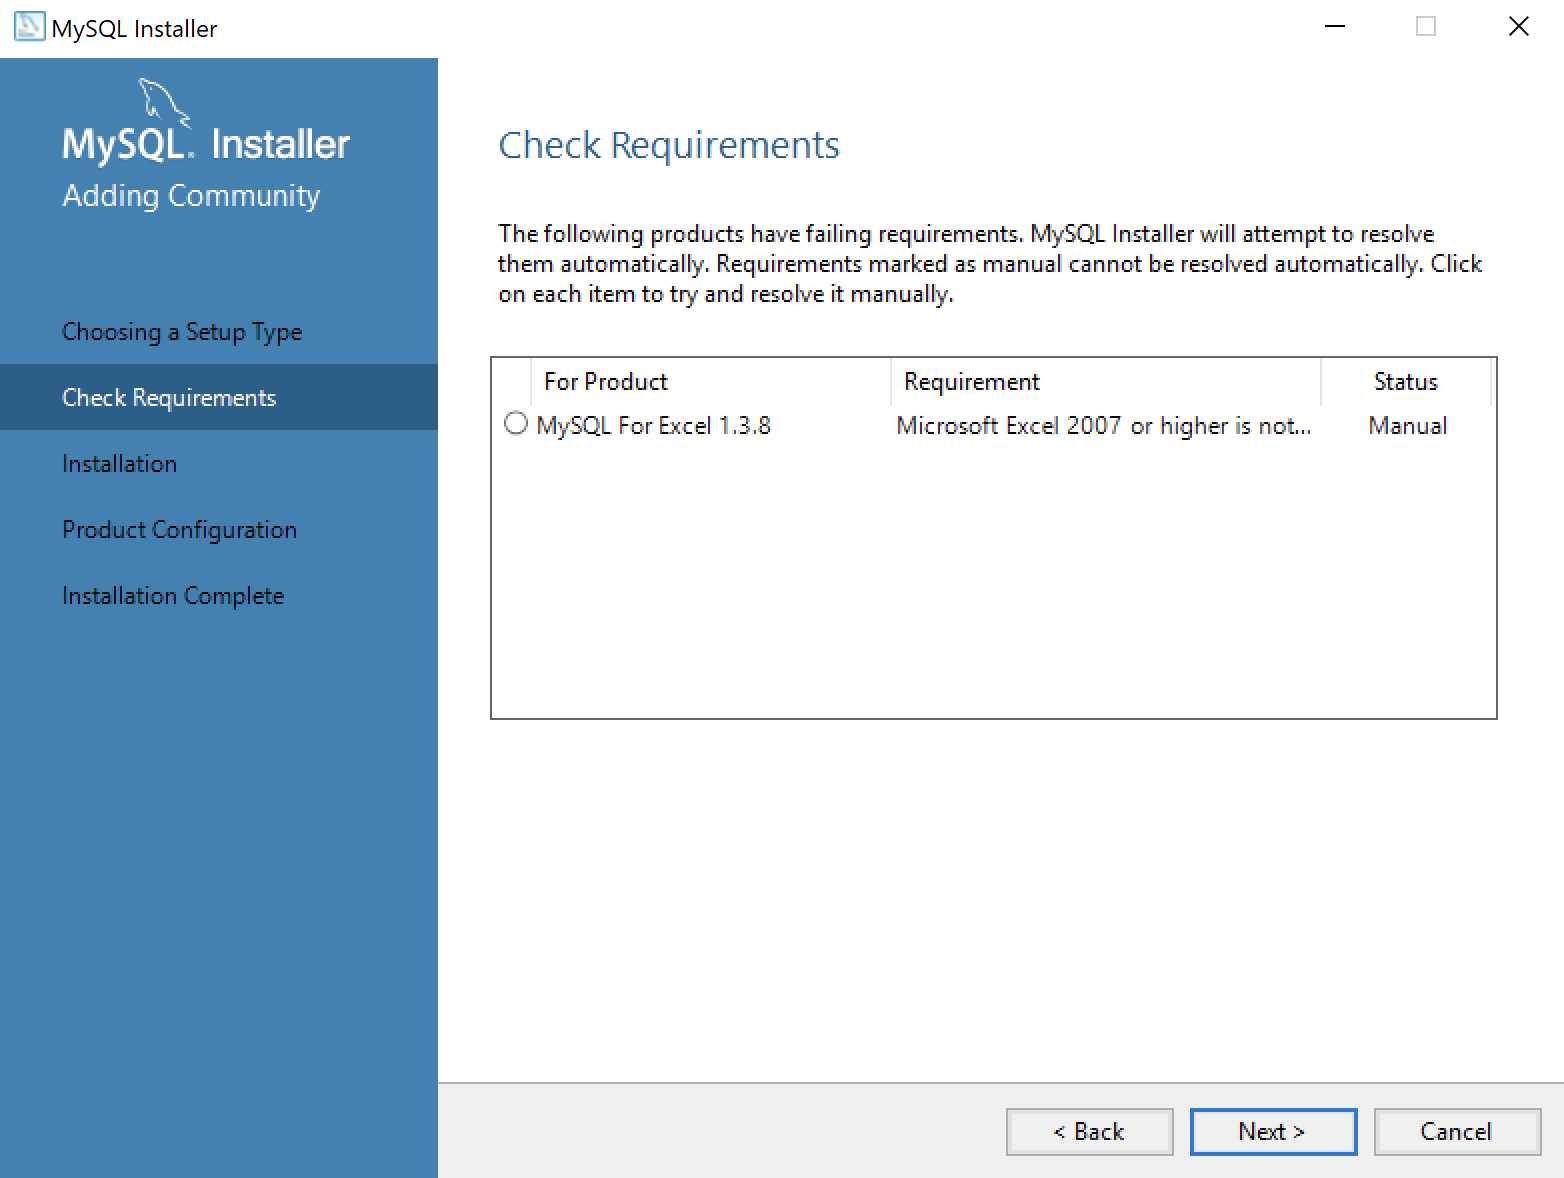
- The next workflow step checks requirements and lists any unmet requirements. The workflow lists the requirements for MySQL for Excel 1.3.8 as unmet because Microsoft Excel is not installed. Click the Next button when there are no unmet requirements in the list. Click the Back button to remove MySQL for Excel 1.3.8 from the setup selection.

- Returning to the setup type workflow, you should select the Custom radio button. Click the Next button to view the list of selected types.
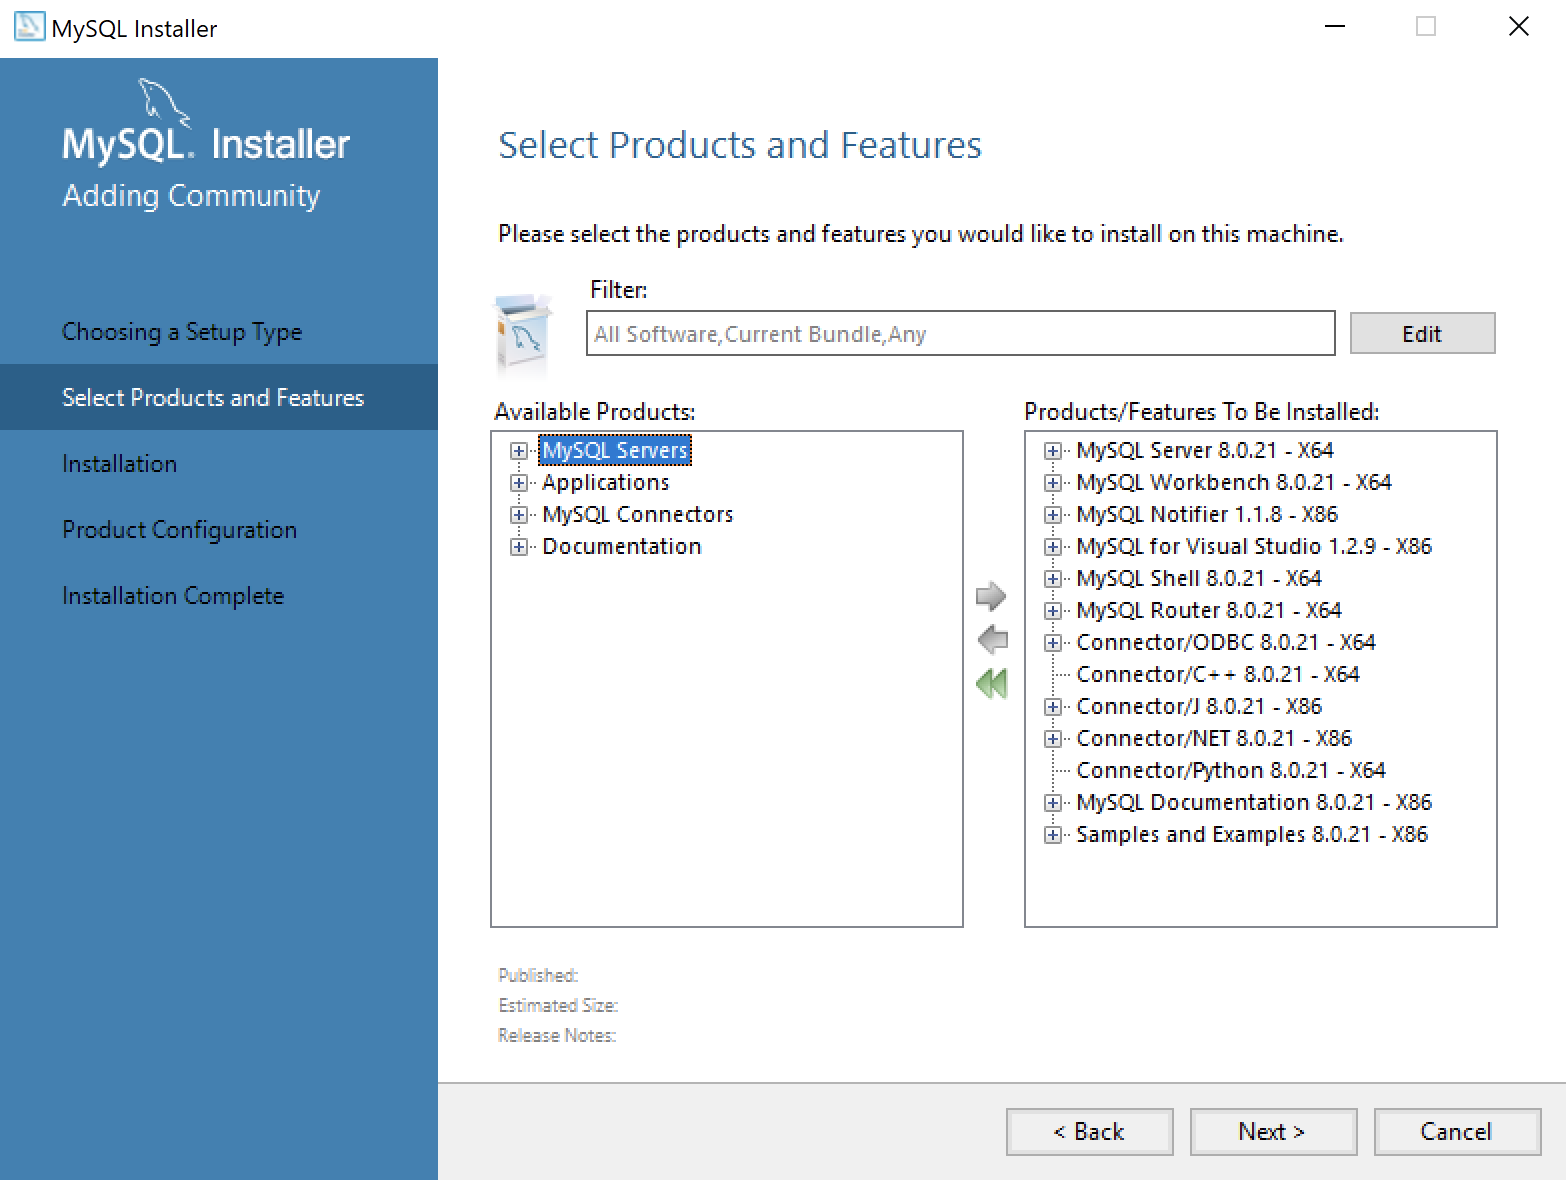
- Use the green arrow pointing to the left to remove MySQL for Excel 1.3.8 from the list. Click the Next button to continue the MySQL Installer to install the selected MySQL libraries.
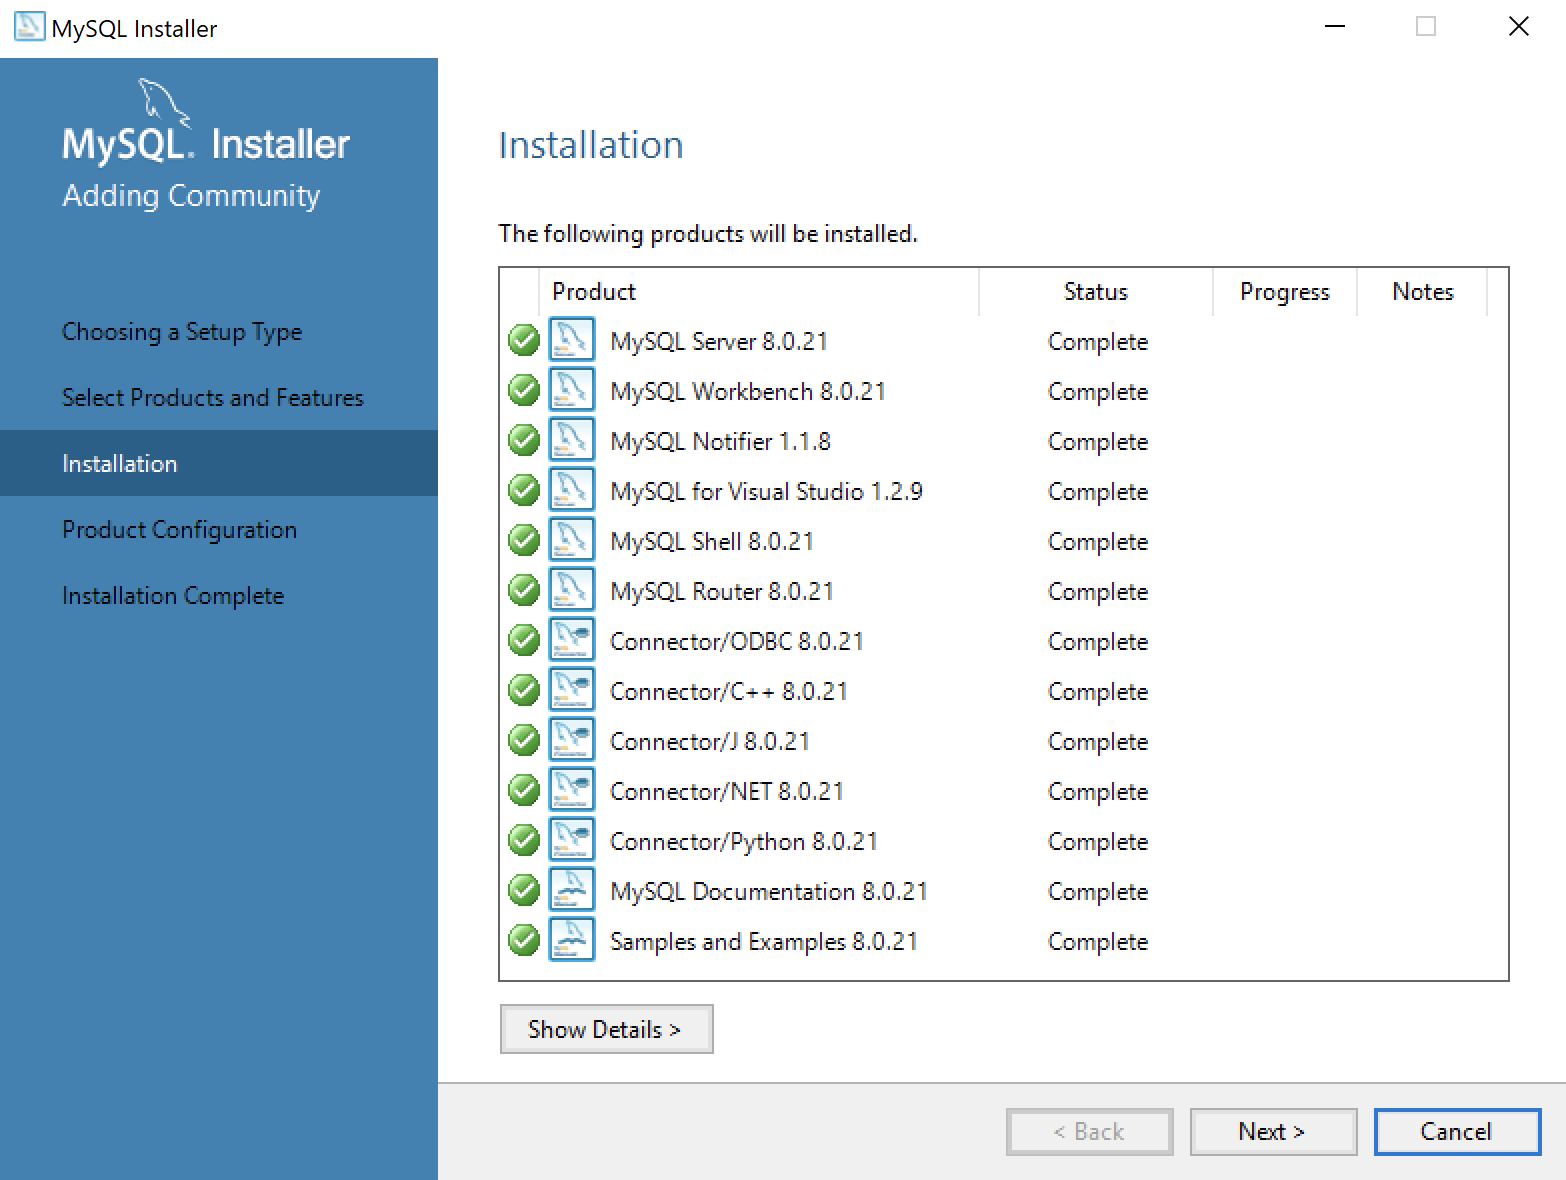
- This dialog will display for several minutes as each of the MySQL Installer modules is. Click the Next button to move forward in the MySQL Installer workflow.
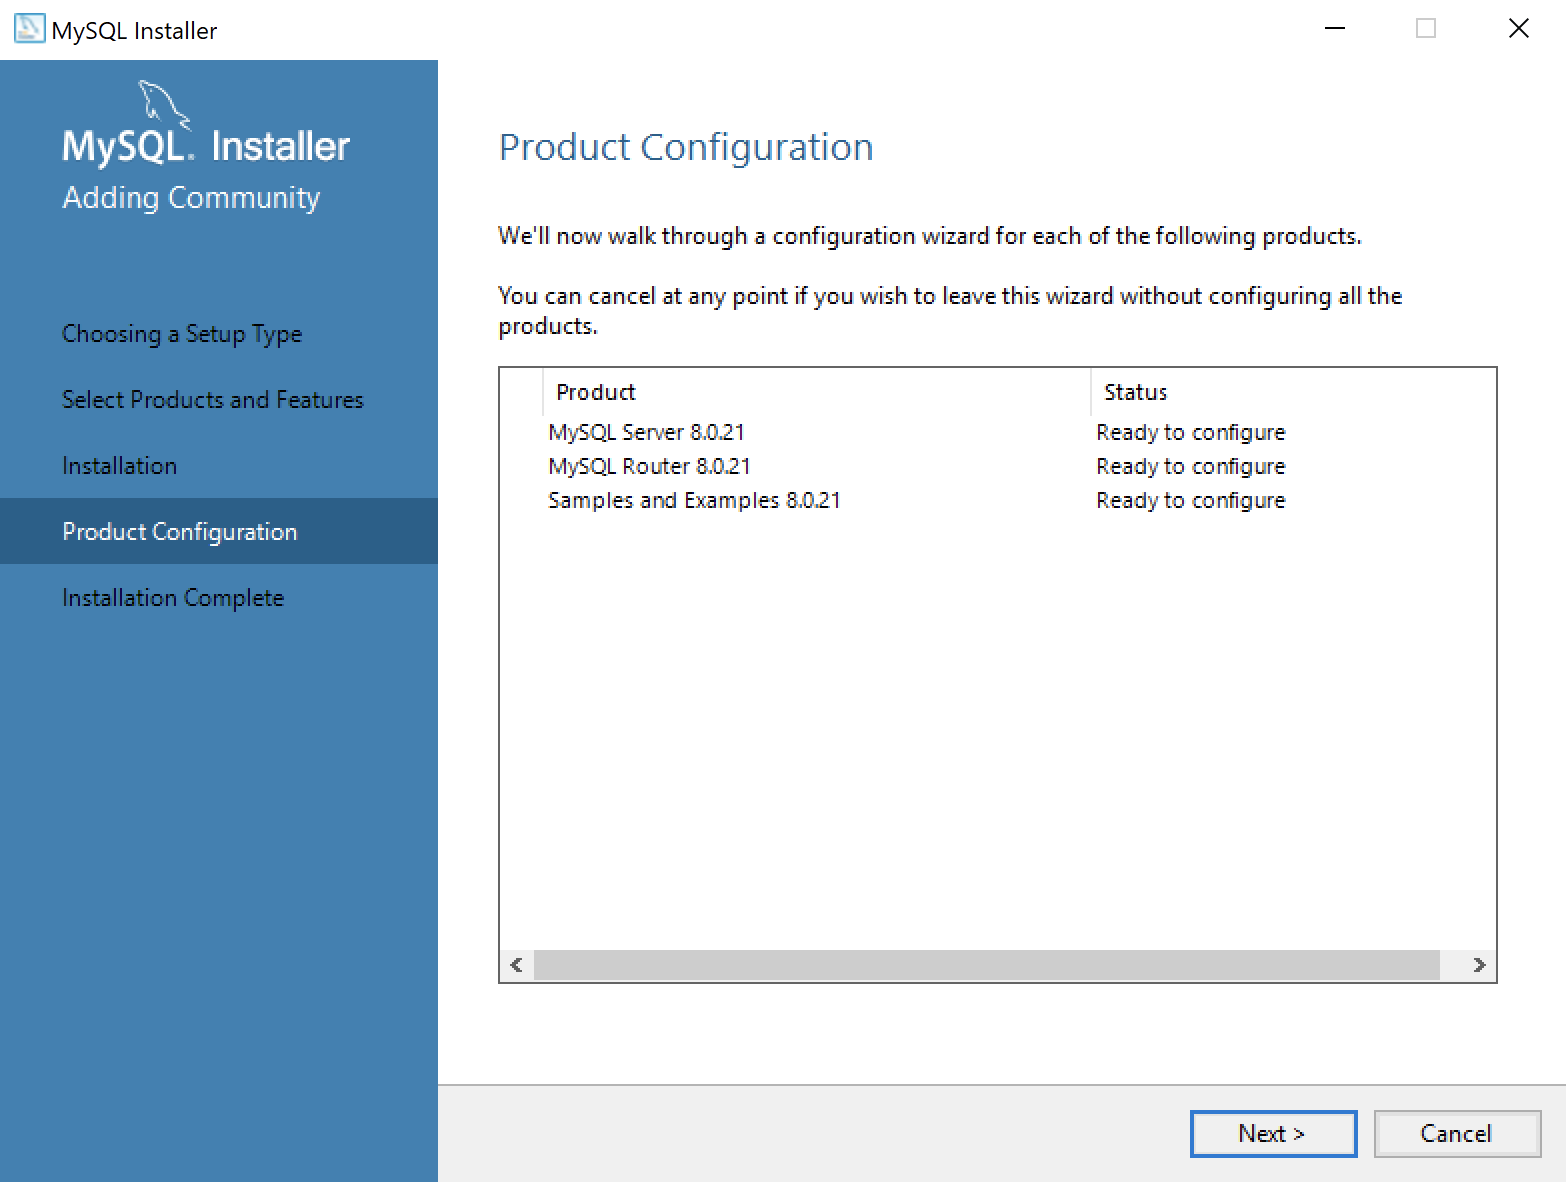
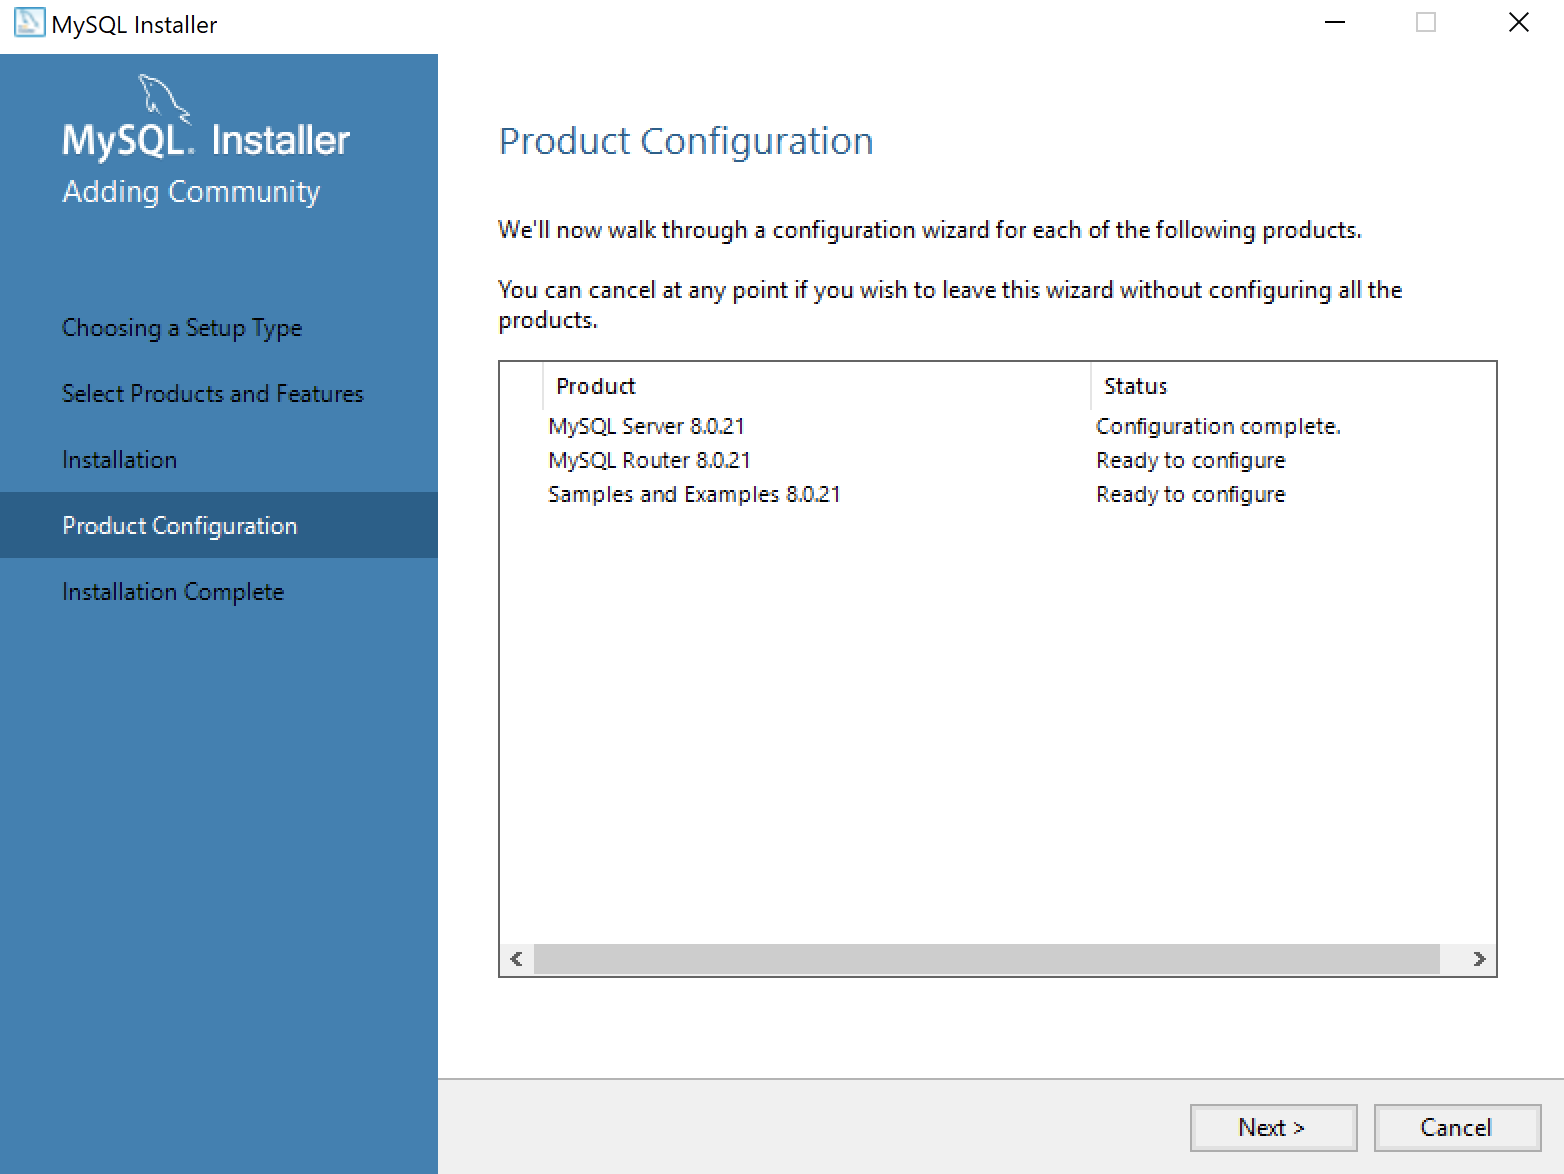
- This dialog qualifies that there are three products to configure. Click the Next button to begin configuration of these products.
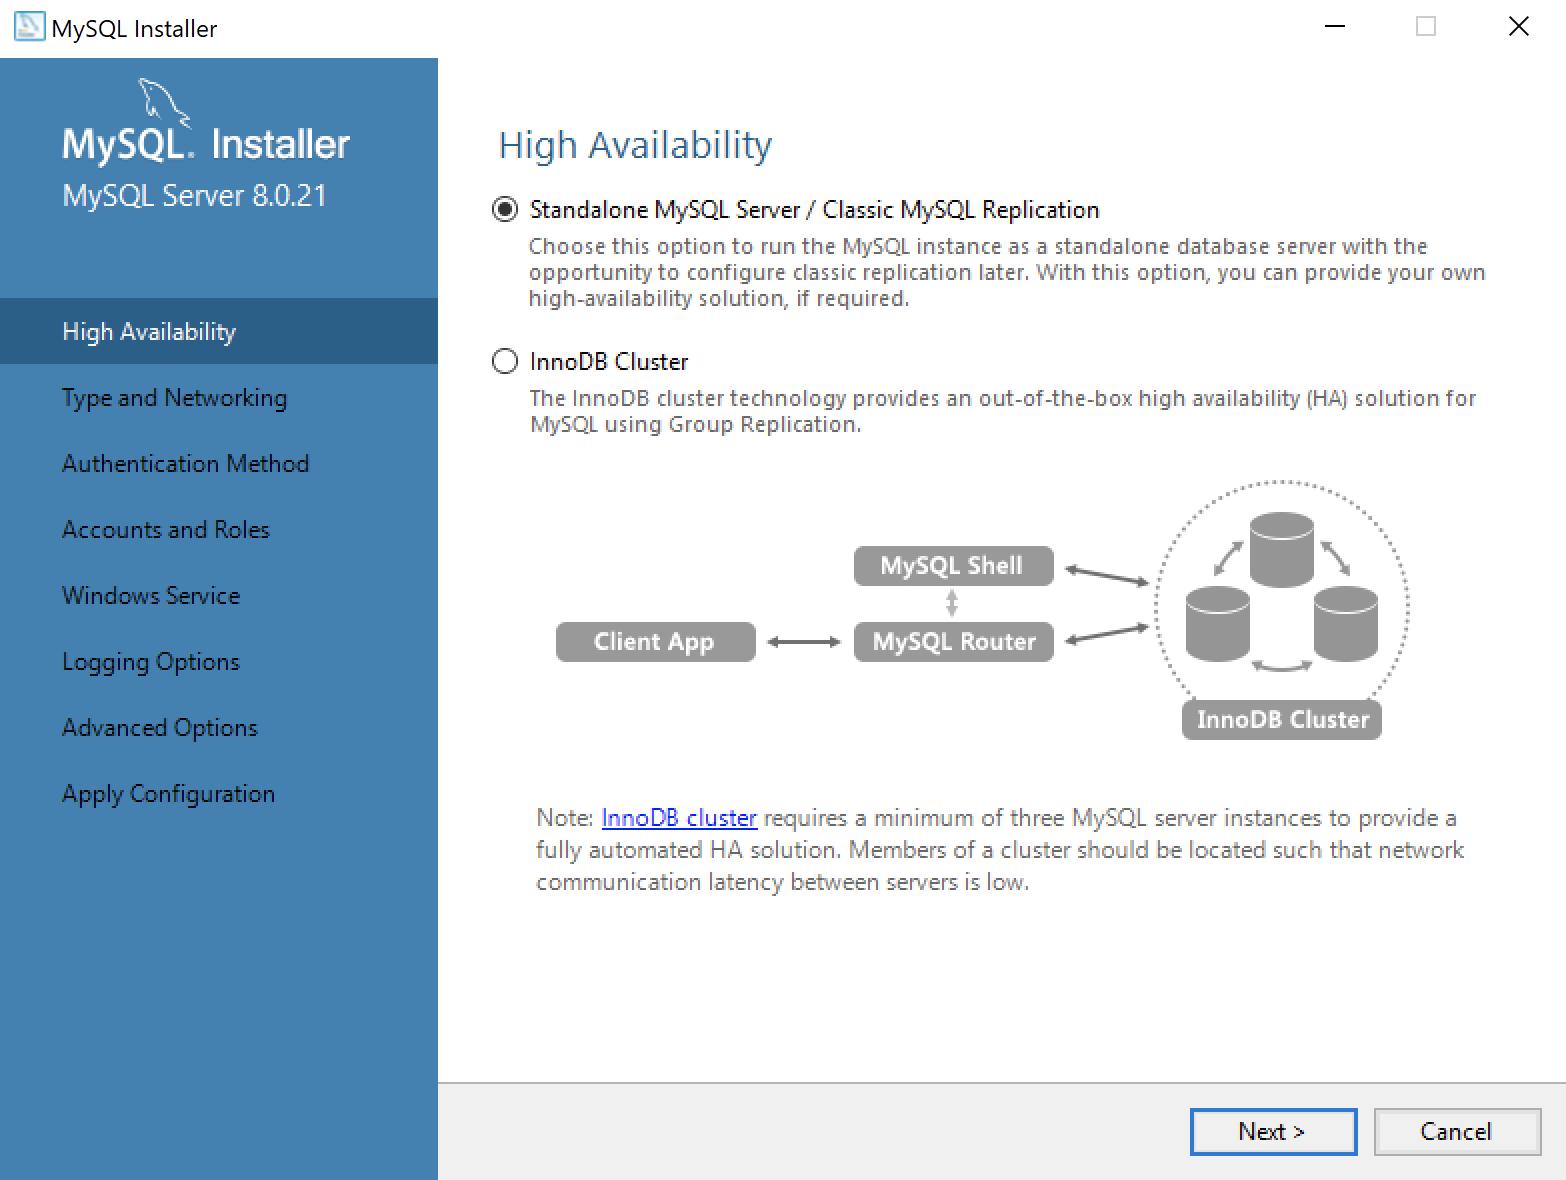
- This dialog lets you choose between a Standalone MySQL Server / Classic MySQL Replication and InnoDB Cluster. You should choose the Standalone MySQL Server for a developer installation on a laptop or desktop. Click the Next button to continue the MySQL Installer configuration.
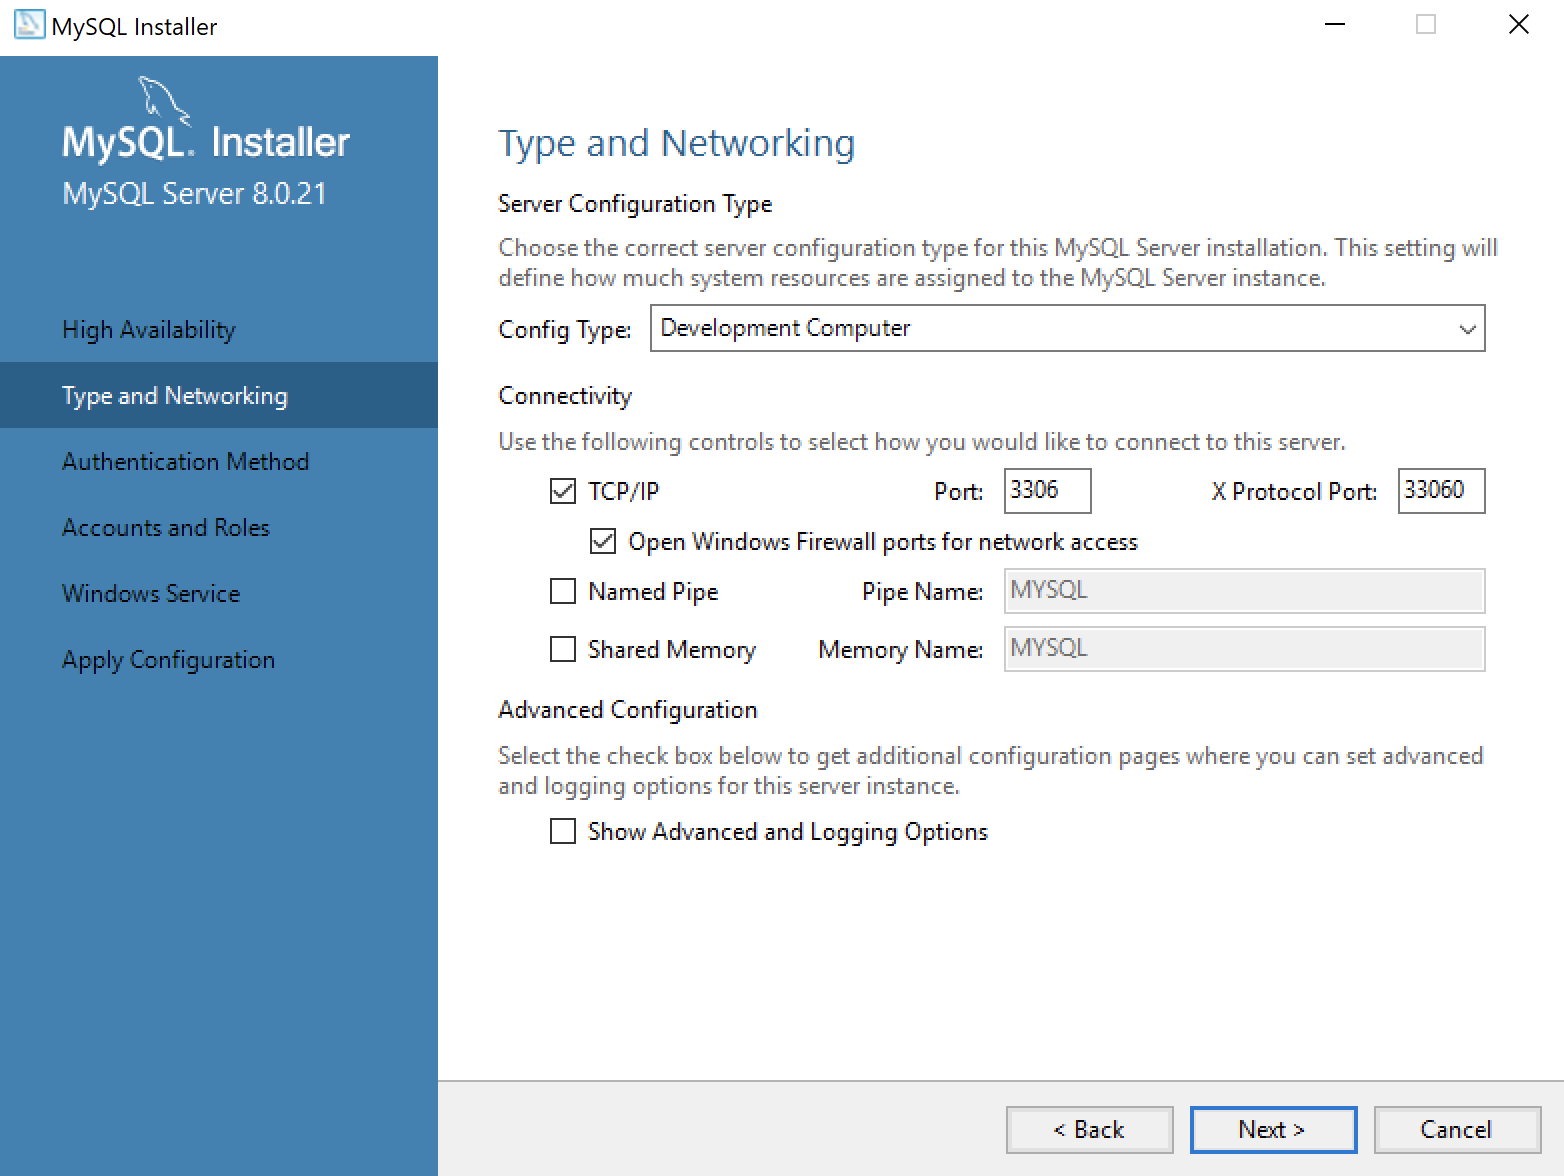
- This dialog lets you choose set the type and networking values. They should be preselected as they are in the screen image. Click the Next button to continue the MySQL Installer configuration.
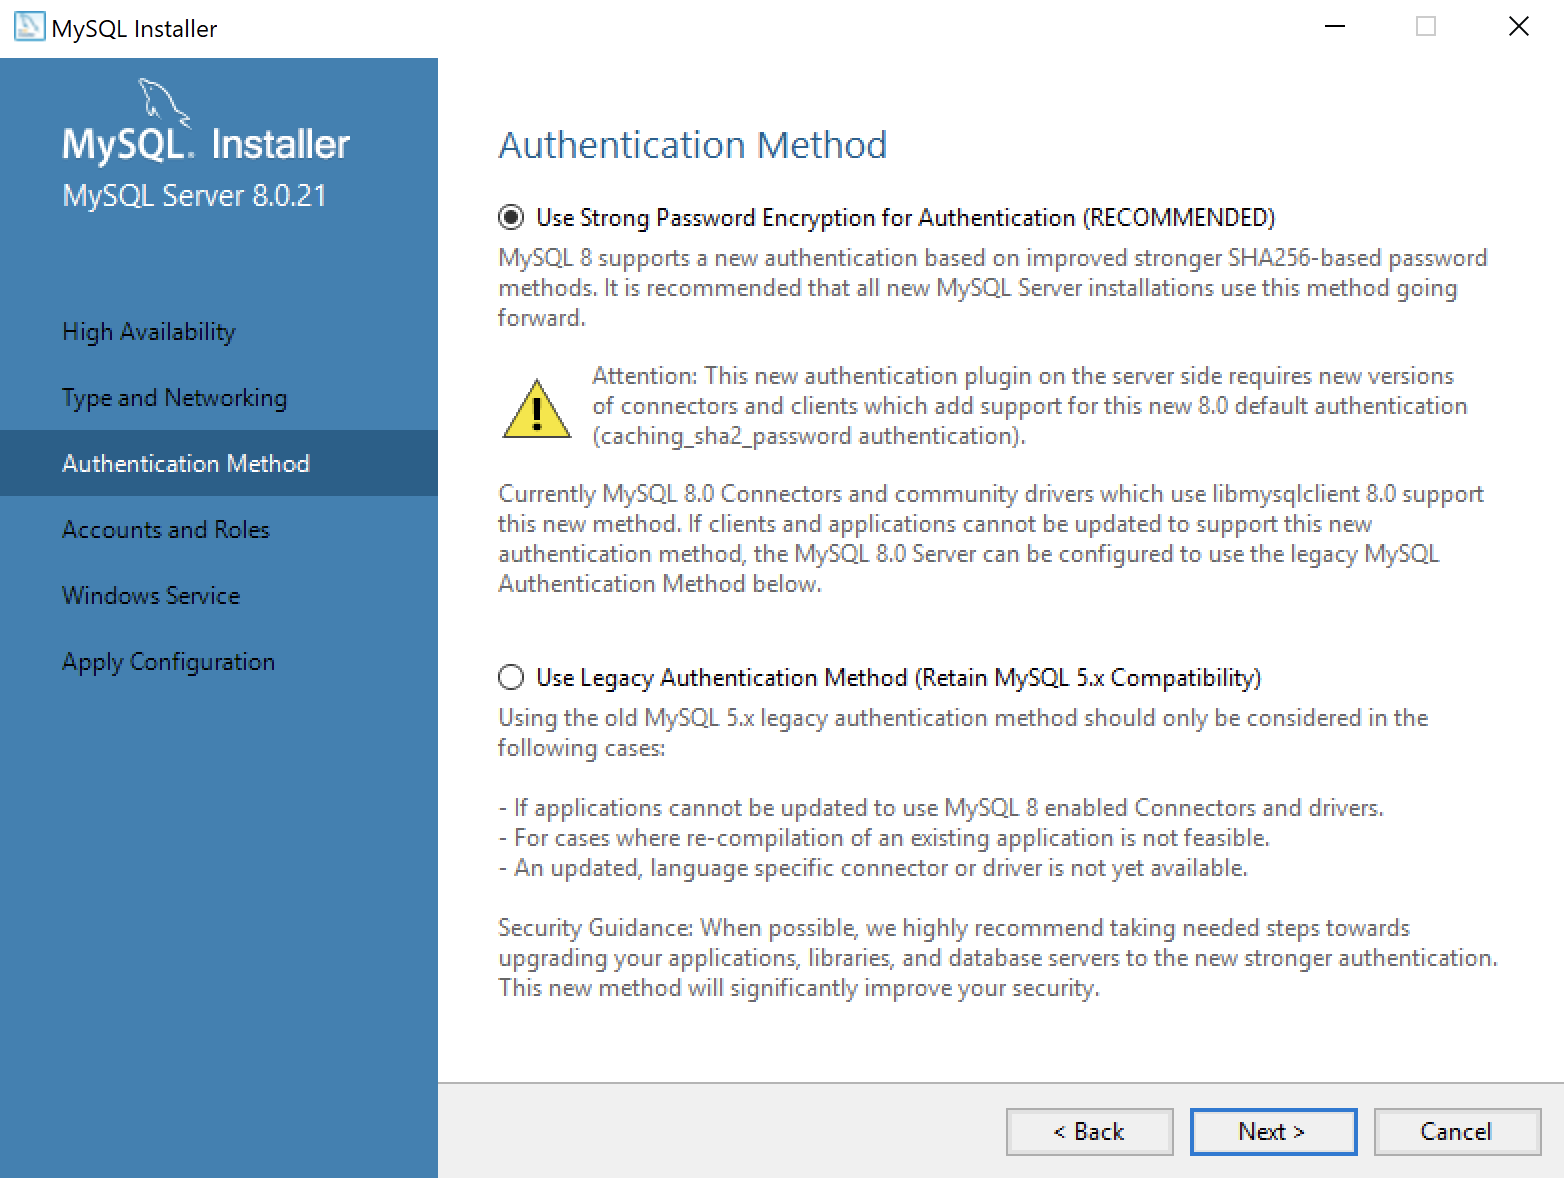
- This dialog lets you choose between SHA256-based and the older MD5 encryption. Click Use Strong Password Encryption for Authentication (RECOMMENDED) radio button. Click the Next button to continue the MySQL Installer configuration.
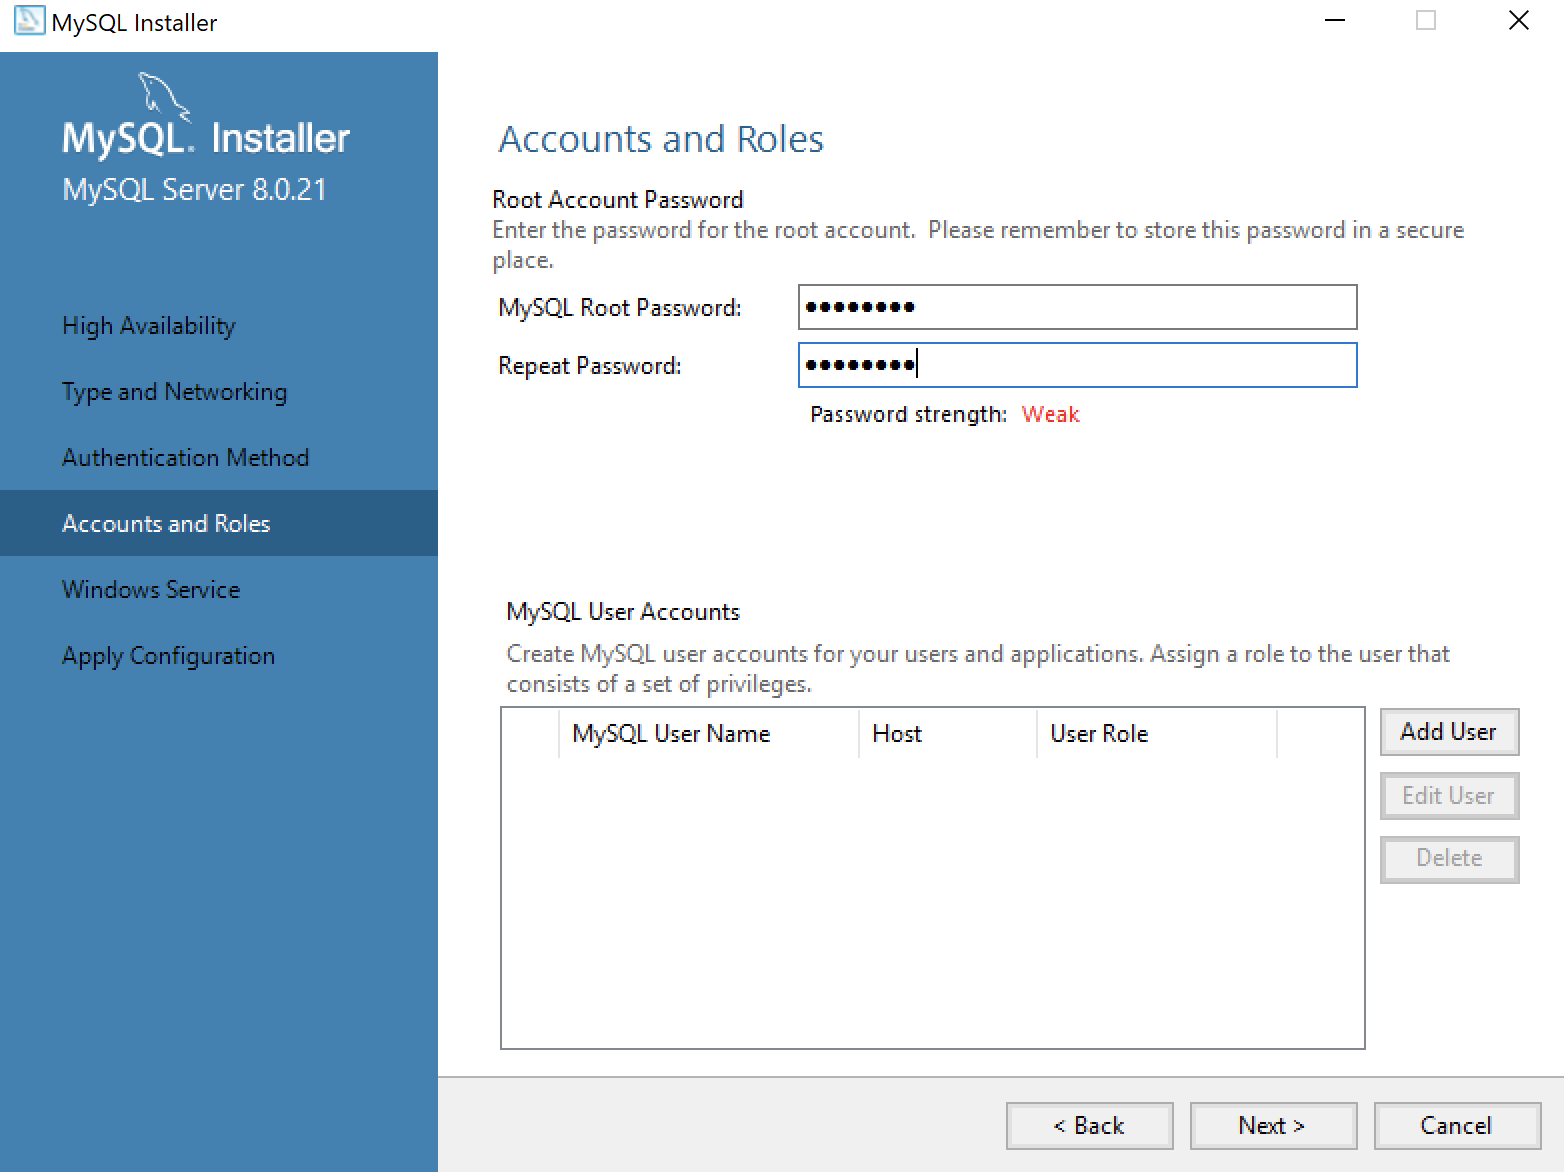
- This dialog lets you enter the MySQL Root Password. Click the Next button to continue the MySQL Installer configuration.
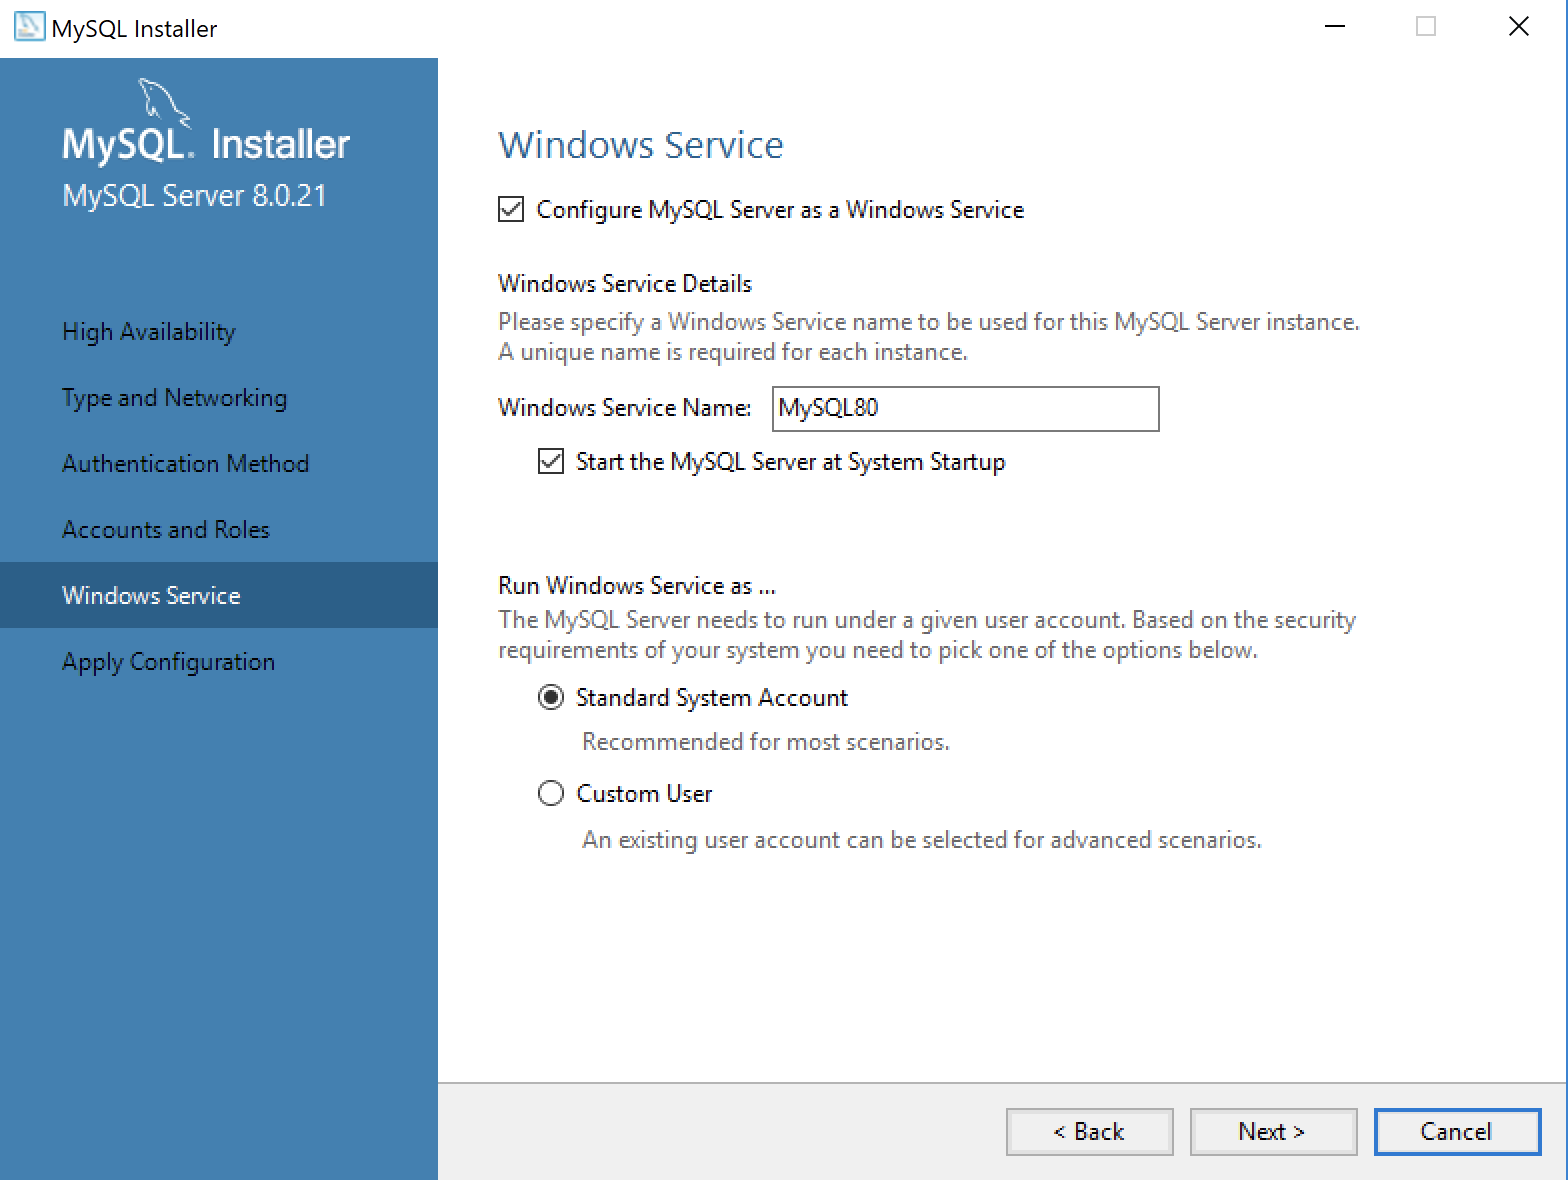
- This dialog lets you enter a Windows Service Name and install a Standard System Account or Custom User account. Click the Next button to continue the MySQL Installer configuration.
- This dialog lets you apply the configuration of the MySQL Server or Custom User product. Click the Next button to continue the MySQL Server configuration.
- This dialog lets you watch the progress of the MySQL Server or Custom User configuration. Click the Finish button to complete the MySQL Server configuration.
- This dialog lets you choose the next MySQL Router product for configuration. Click the Next button to begin the MySQL Router configuration.
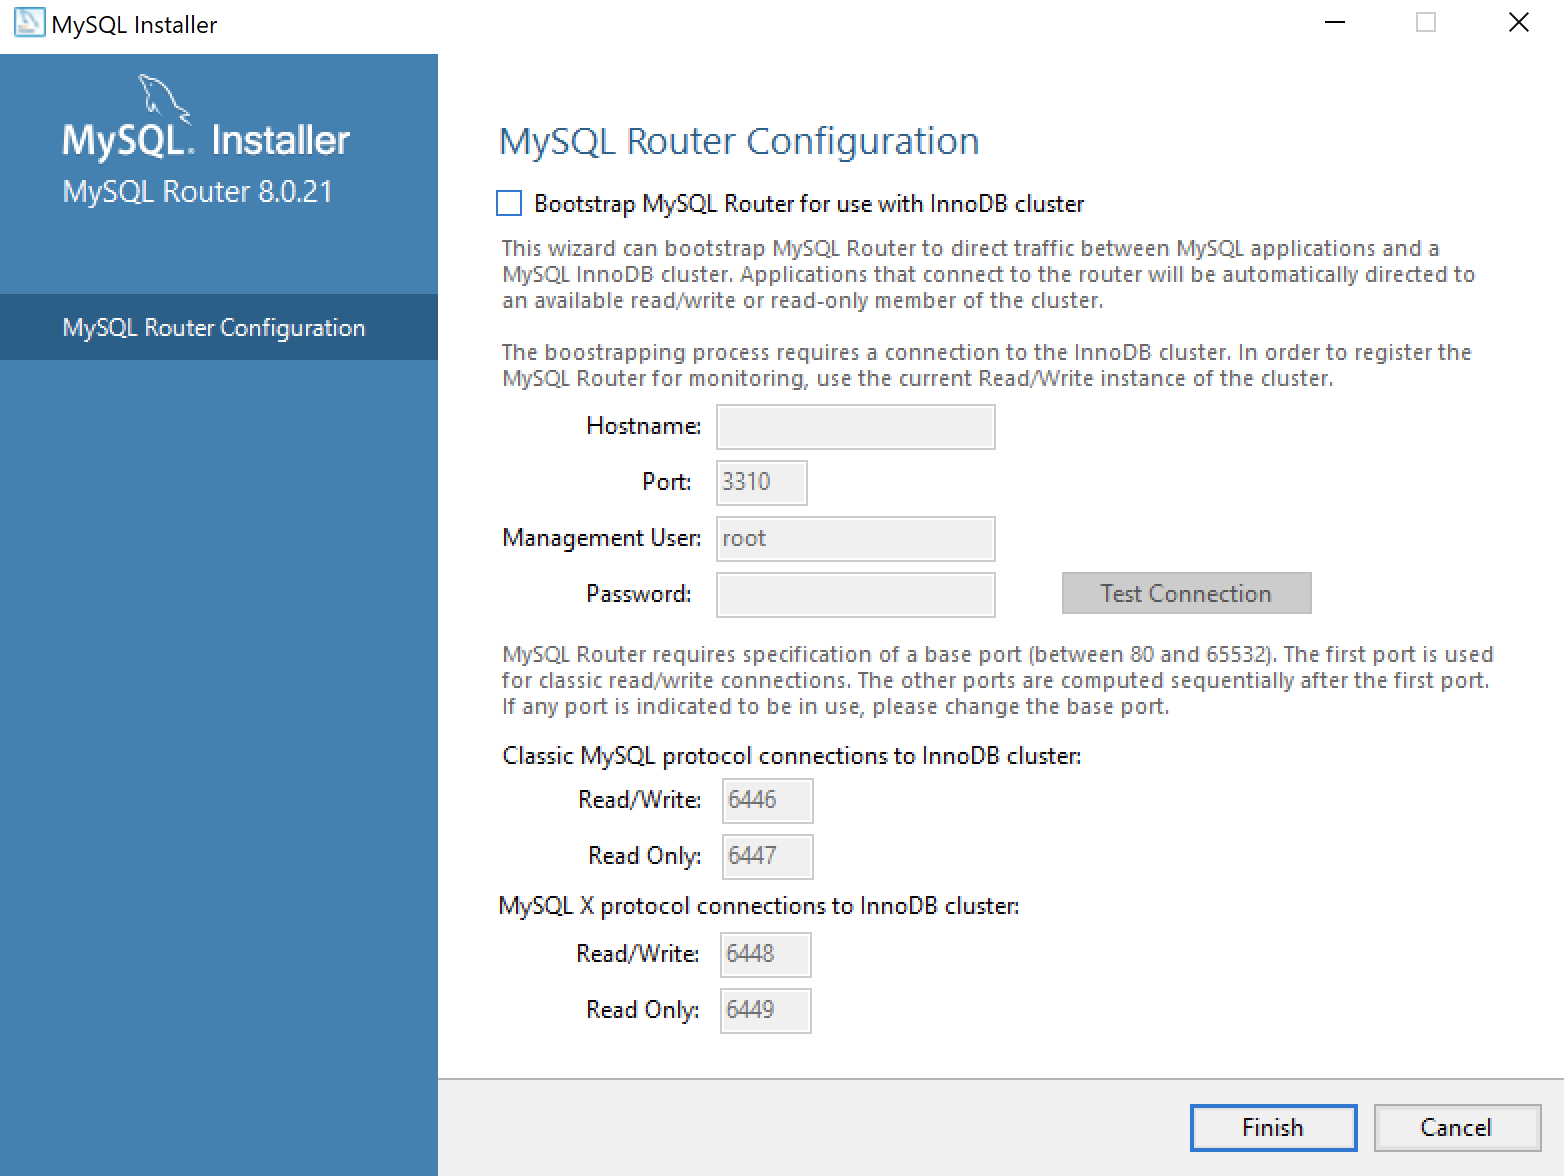
- This dialog allows you to configure the MySQL Router Configuration product. Leave the
HostnameandPasswordfields blank when you do not want to configure the MySQL Router Configuration product. Click the Finish button to complete the MySQL Router workflow.

- This dialog lets you choose the next Samples and Examples product for configuration. Click the Next button to begin the Samples and Examples configuration.

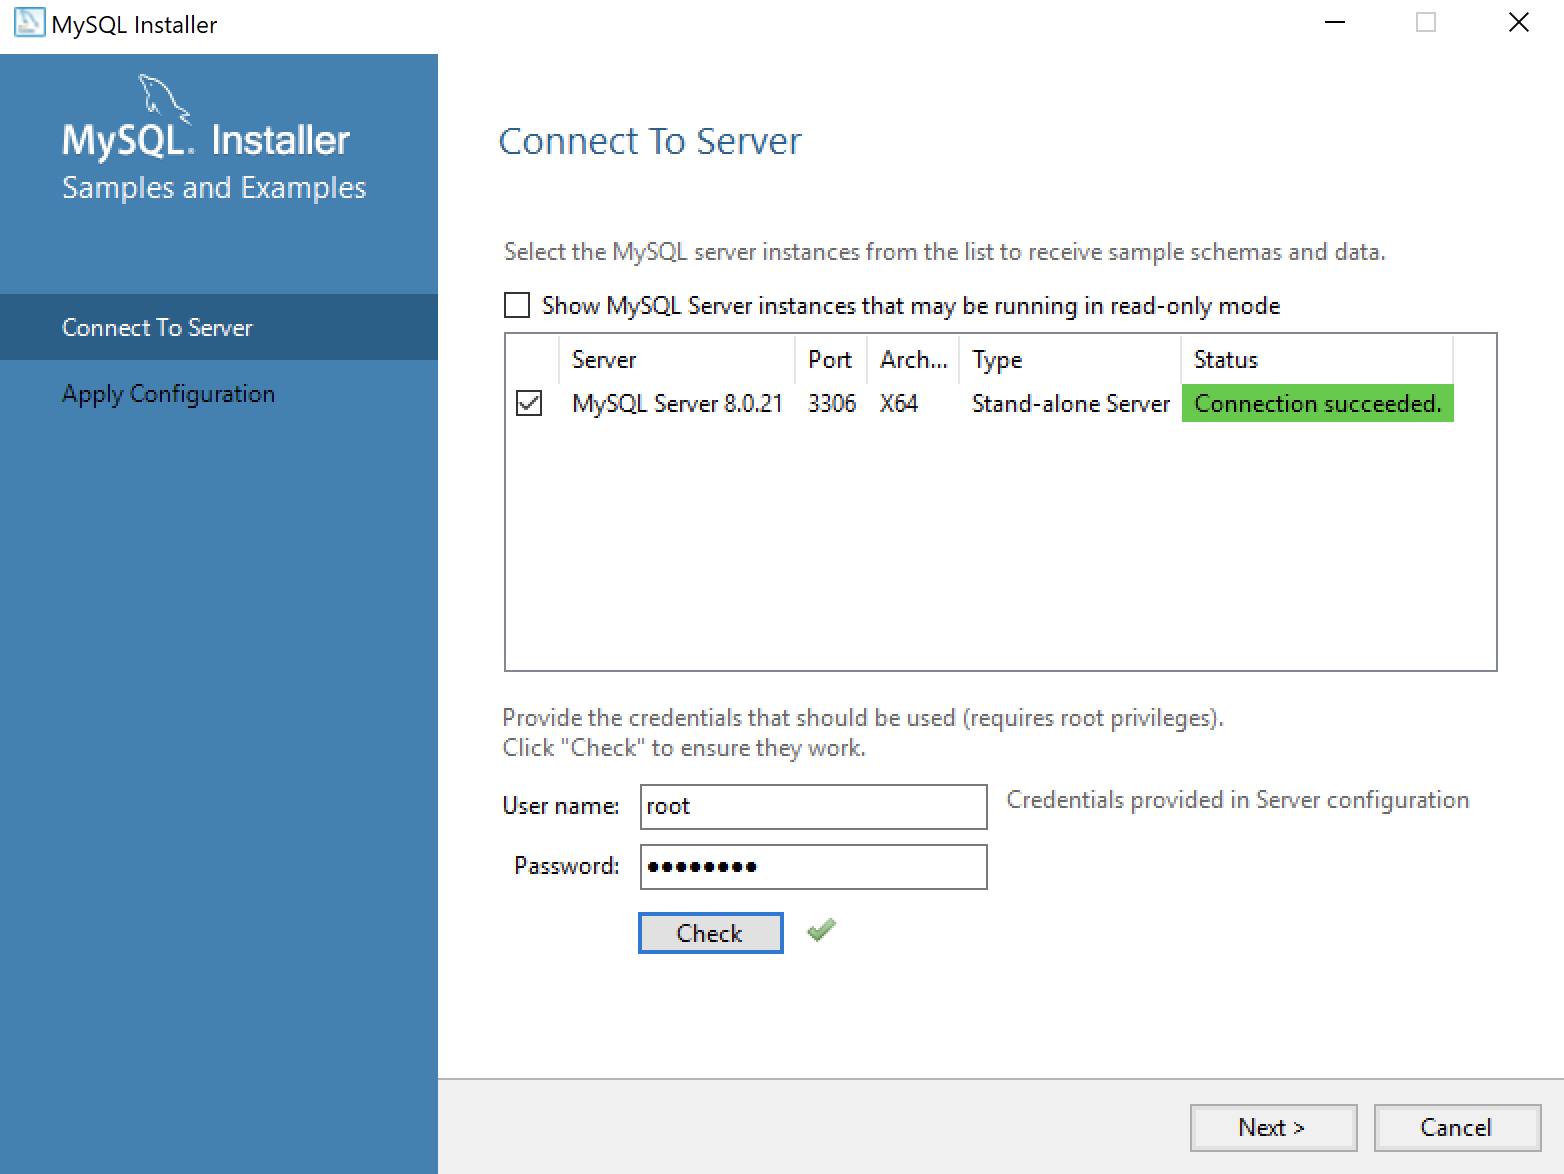
- This dialog lets you create a Windows 10 MySQL Service. You enter the
rootpassword that you entered in Step #12. After you enterrootpassword, click the Check button to verify therootpassword. The Check button enables the Next button when therootaccount’s password is validated. Click the now enabled Next button to create the MySQL Service.
- This dialog lets you create a Windows 10 MySQL Service. Click the now enabled Next button to create the MySQL Service.
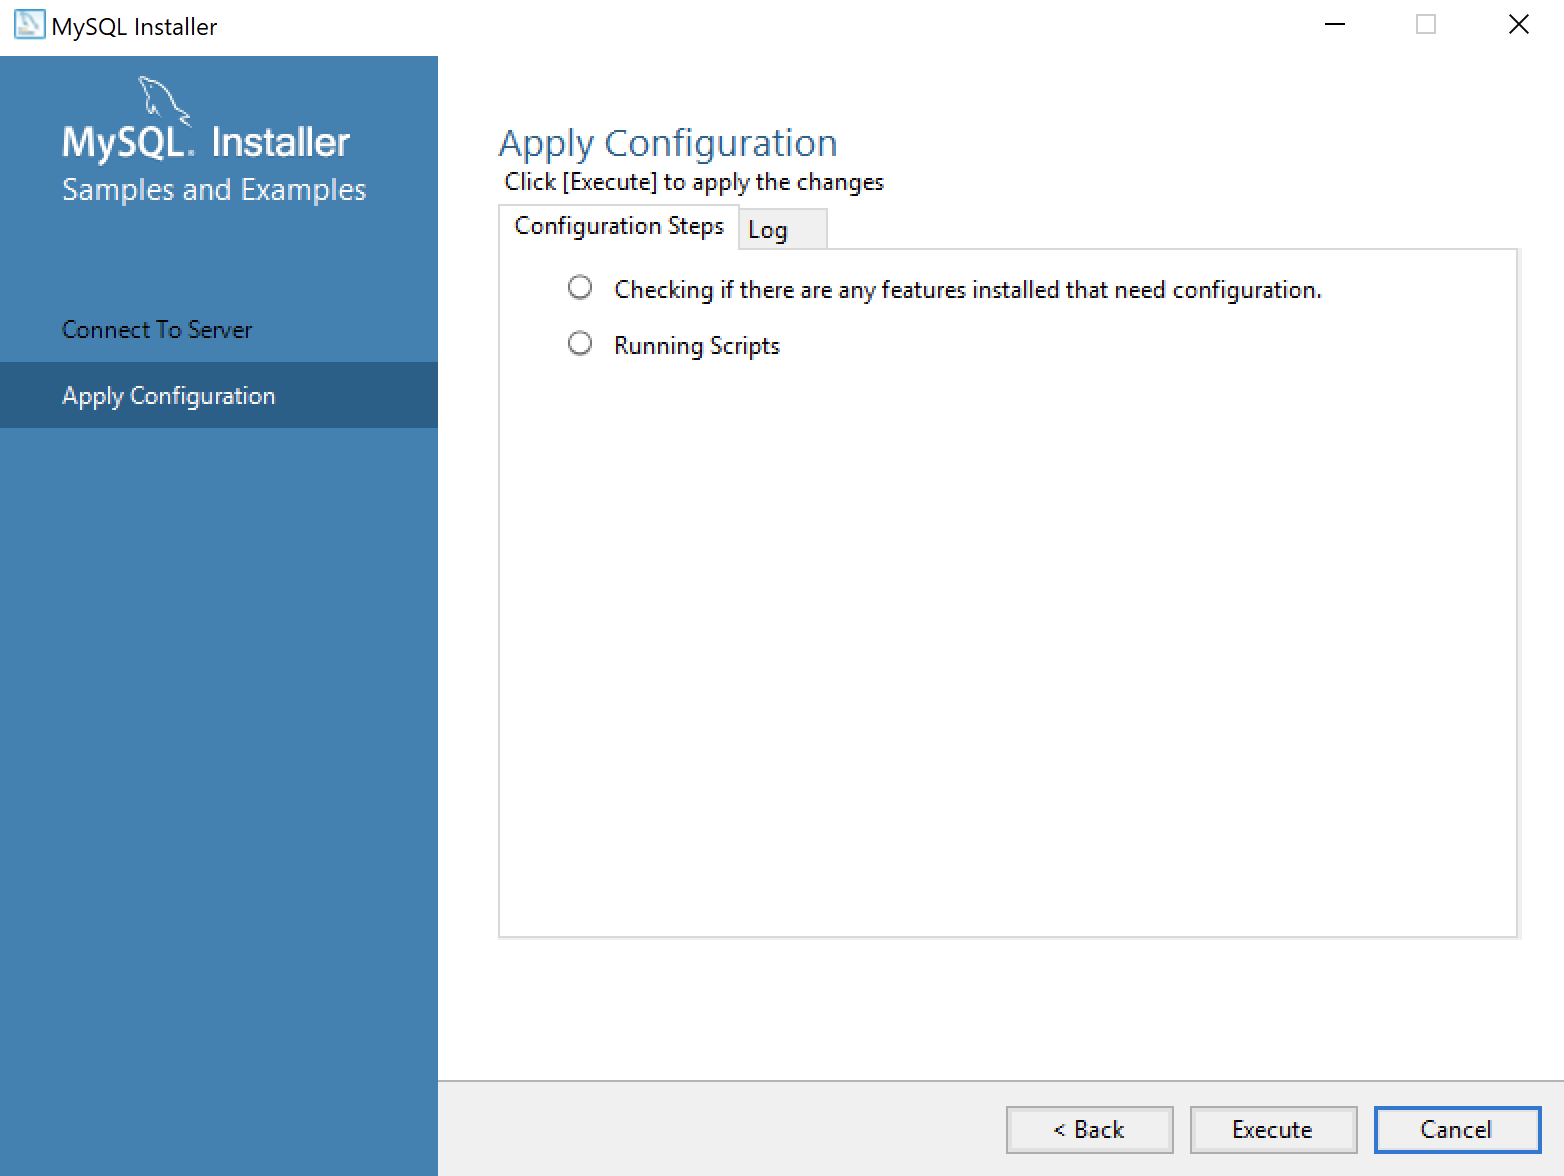
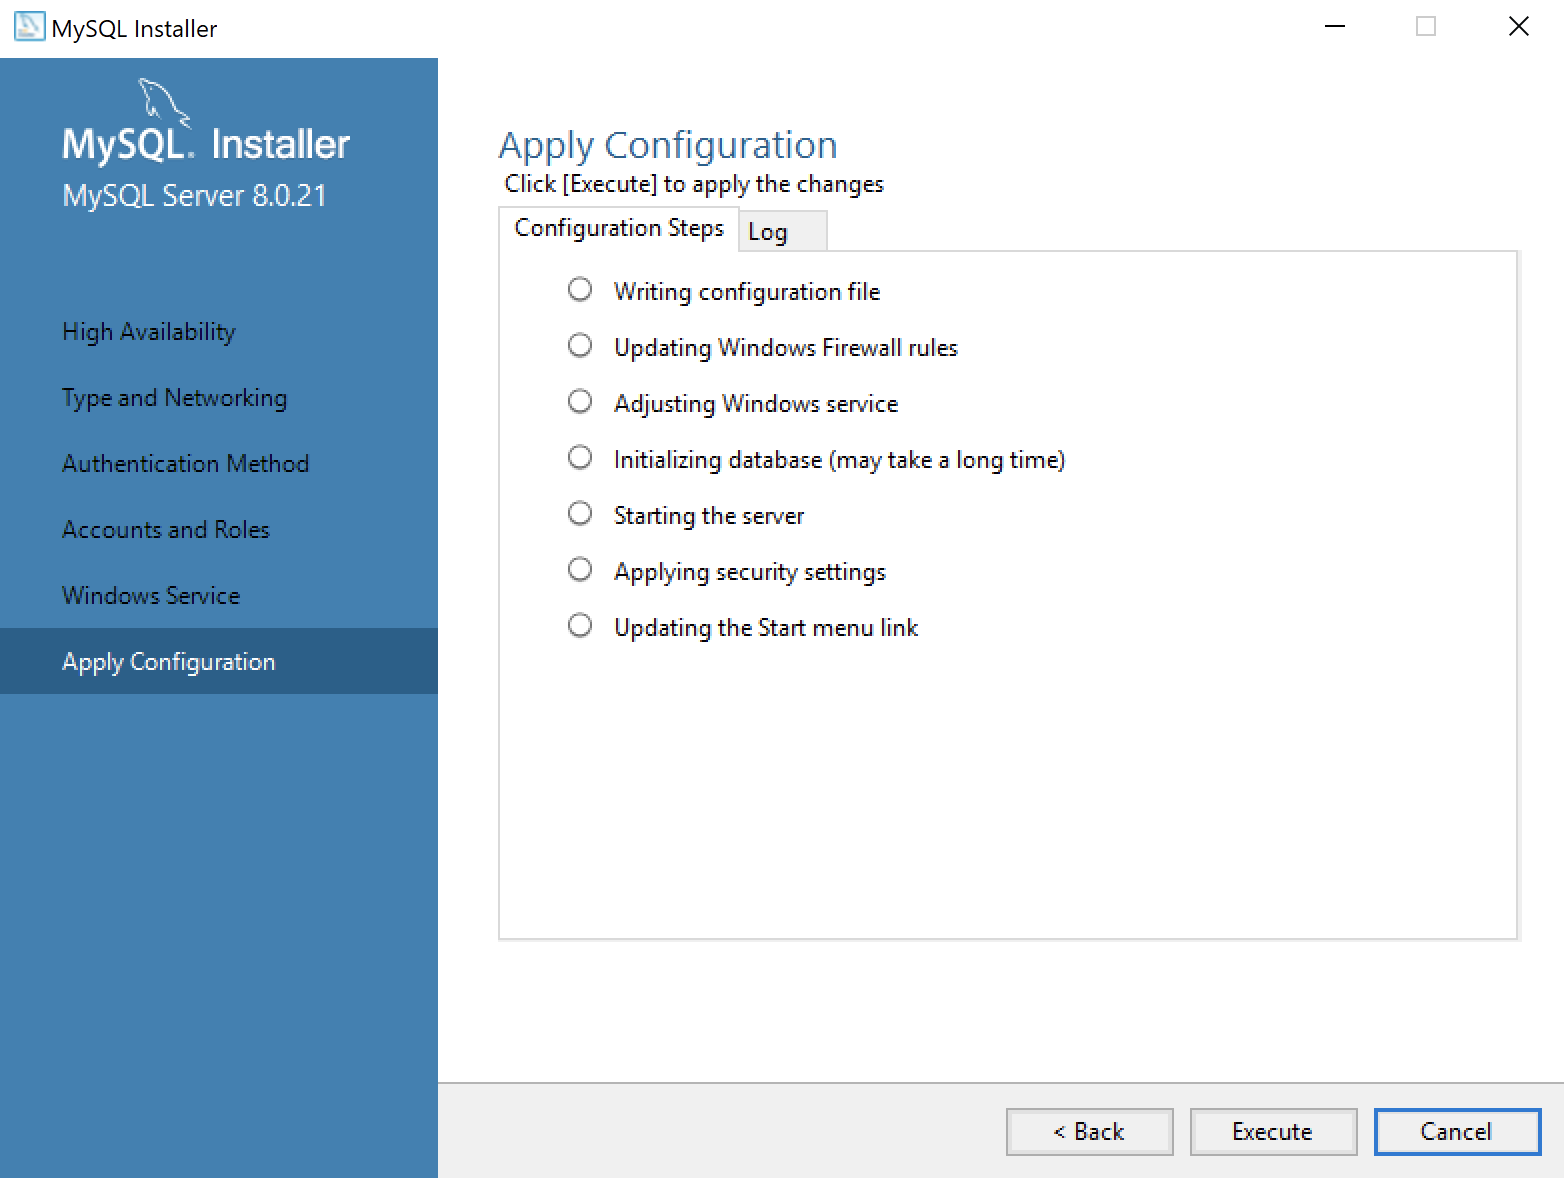
- This dialog applies all the configurations selected. Click the Execute button to proceed with the configuration.
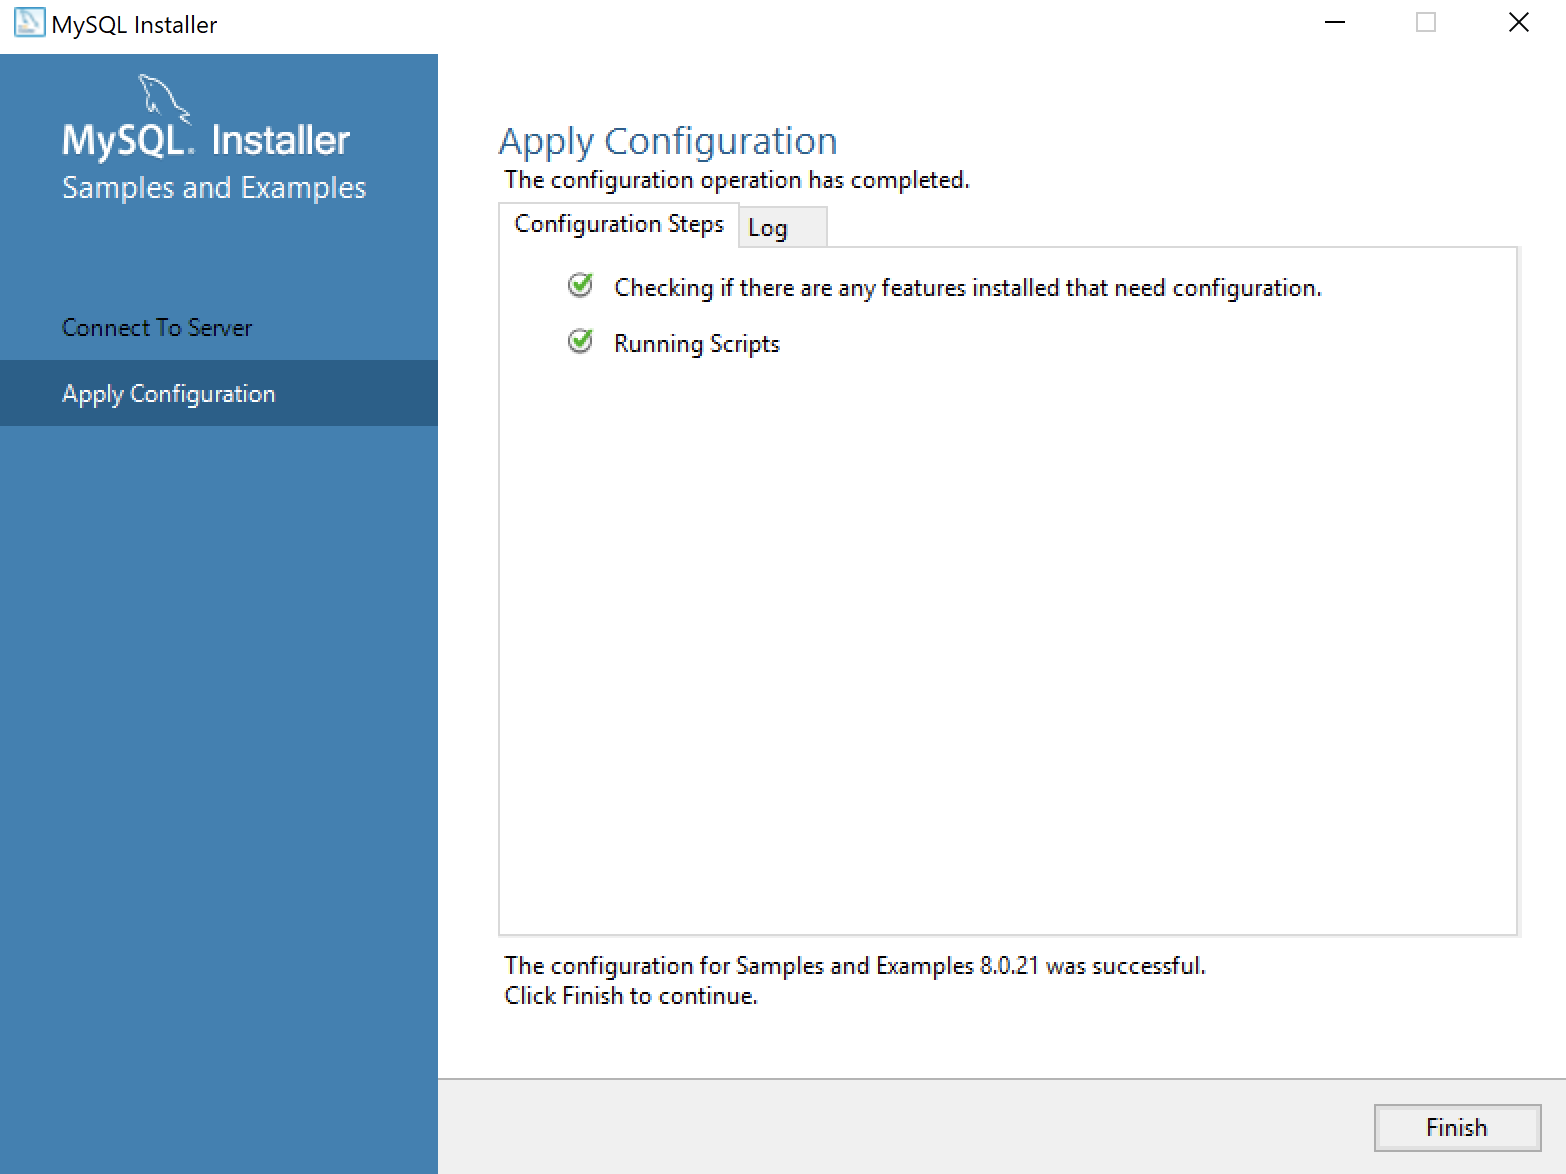
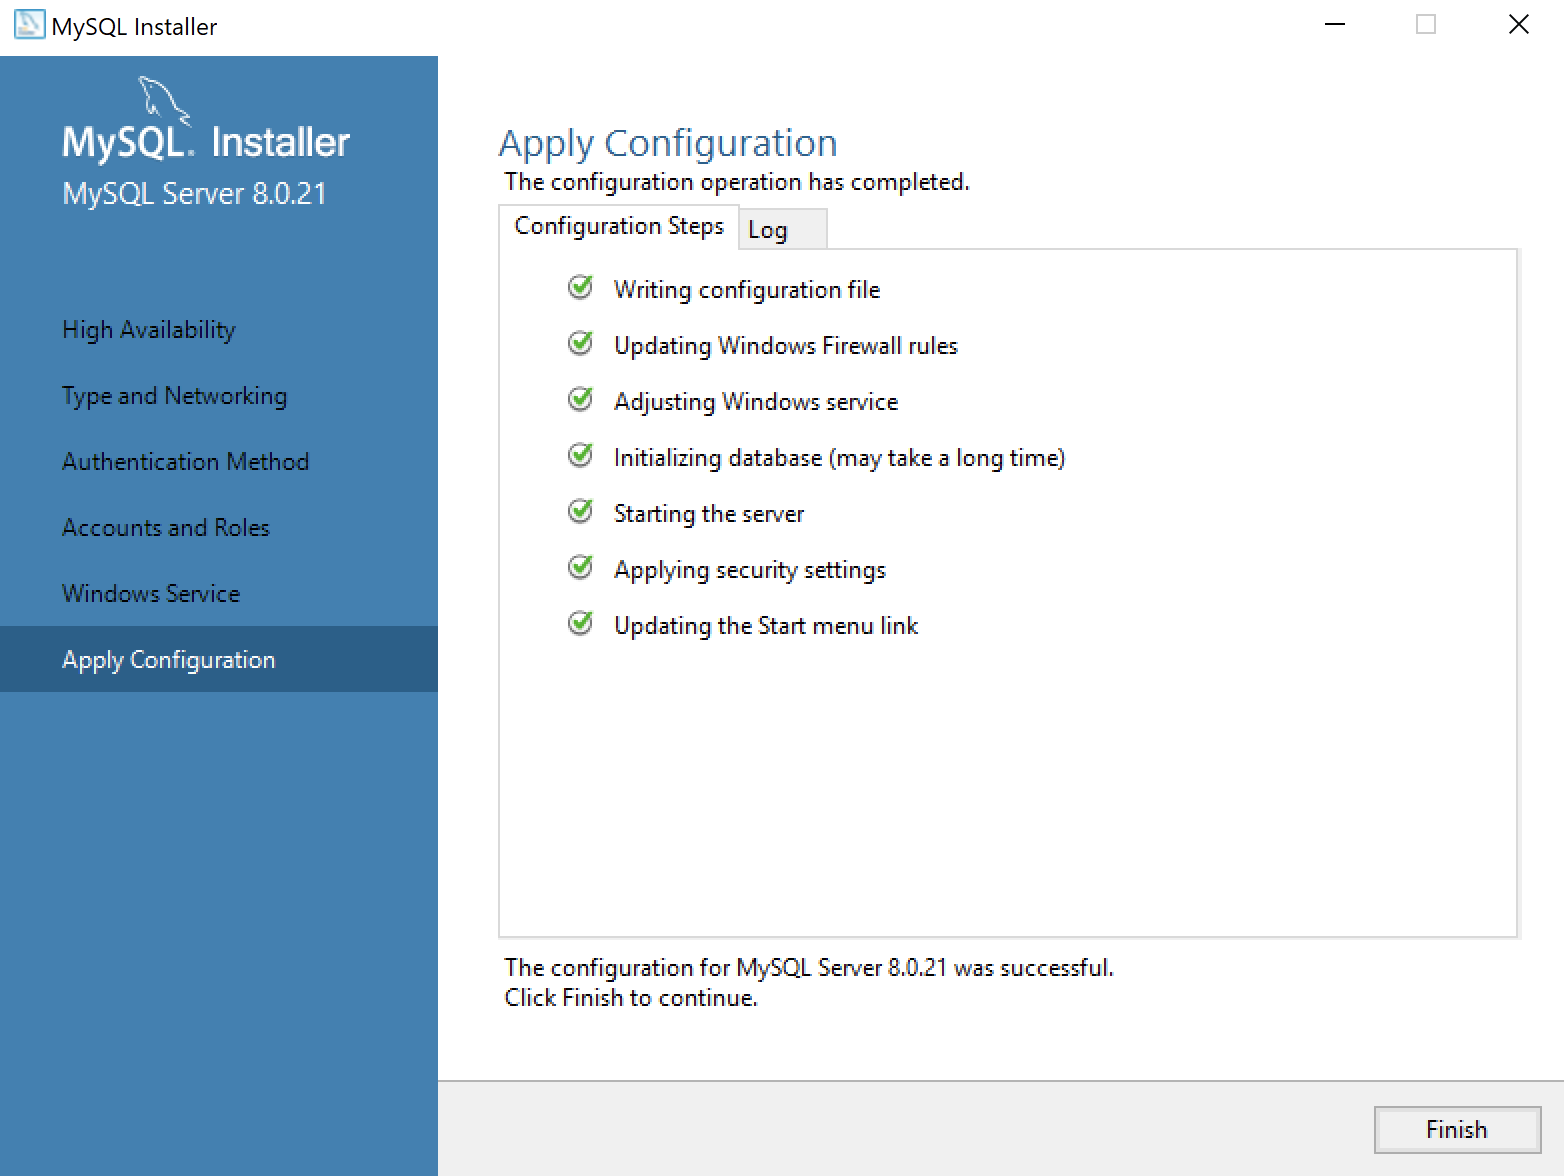
- This dialog lets you watch the progress of the configuration. Click the Finish button to complete the product configurations.

- This dialog the product configurations. You should note that the MySQL Router was not configured or needed. Click the Next button to complete the installation.
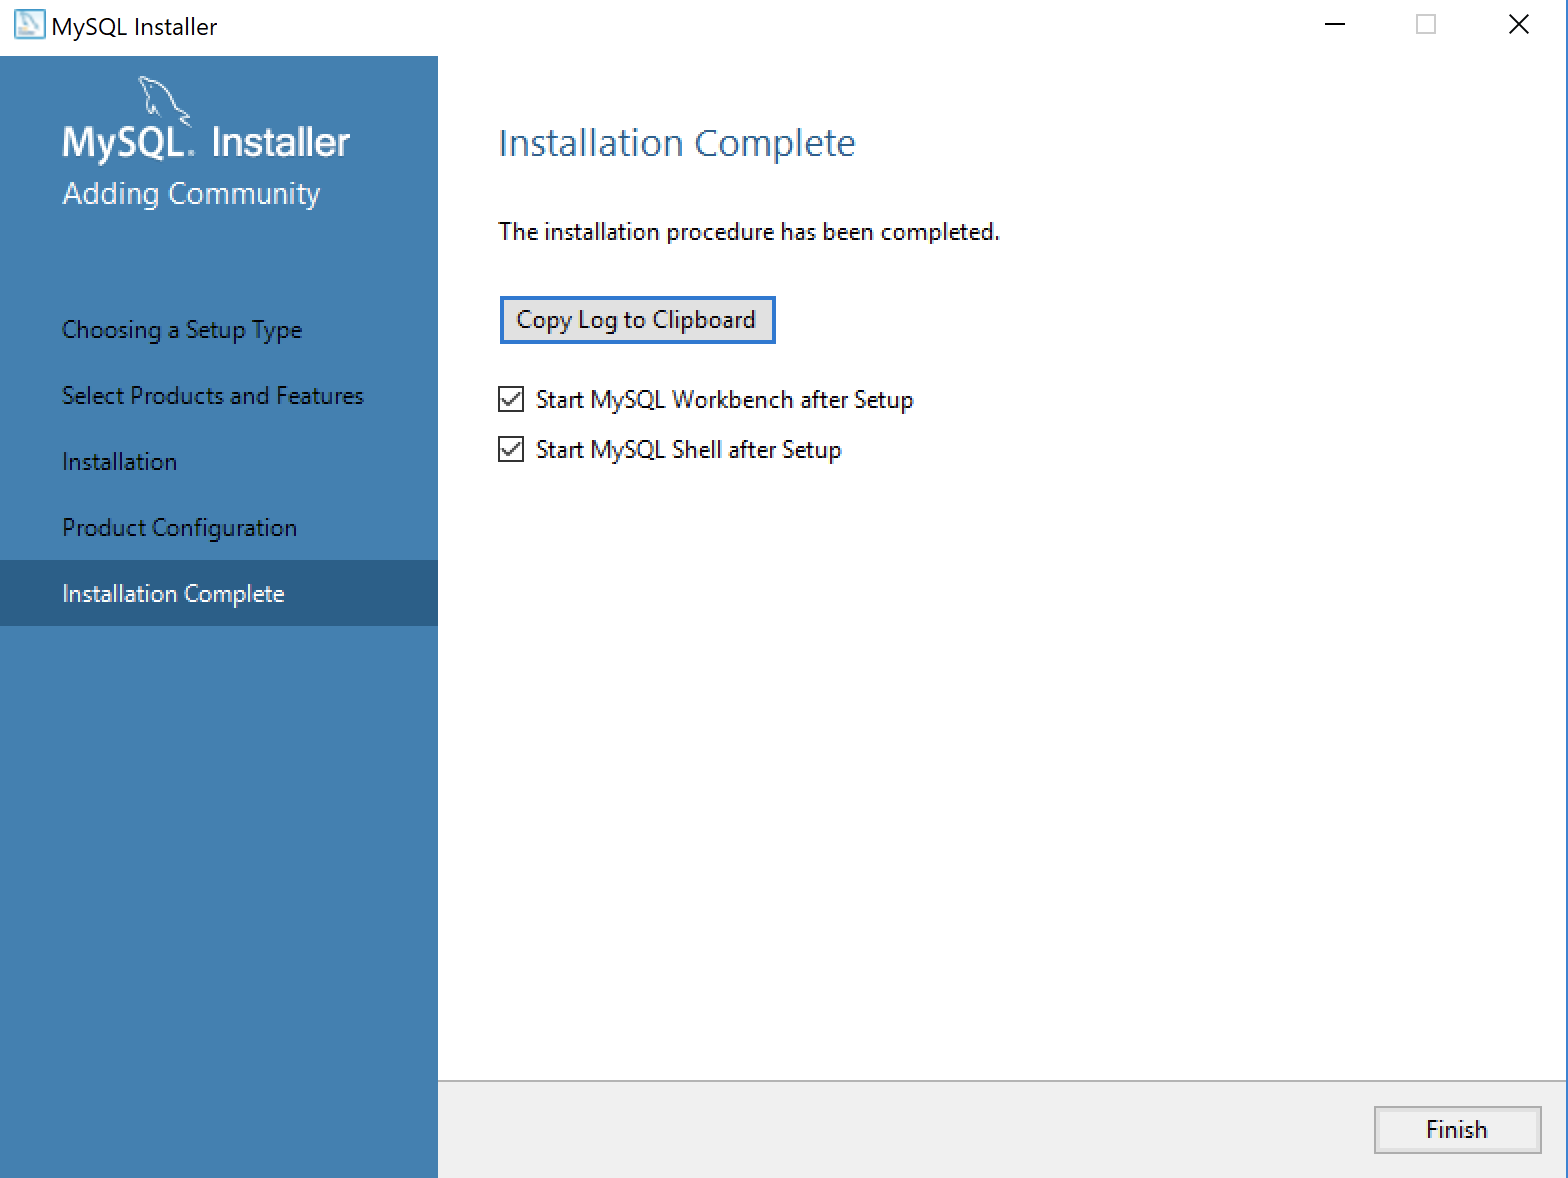
- This dialog completes the workflow and launches MySQL Workbench and Shell. Click the Finish button to complete the installation and configuration processes.
After you install MySQL, the following shows you how to provision a studentdb database. It also shows you how to enable the global file privilege and how to read data from an external comma-separated values (CSV) file.
mysqli Strict Standards
Six years ago I wrote a common lookup post to illustrate the effectiveness of things used throughout your applications. Now, I’m updating my student image with a more complete solution to show how to avoid update anomalies.
In the prior post, I used a while loop in PHP, like the following:
do { ... } while($stmt->next_result()); |
Using PHP Version 7.3.8 and MySQL 8.0.16, that now raises the following error message:
Strict Standards: mysqli_stmt::next_result(): There is no next result set. Please, call mysqli_stmt_more_results()/mysqli_stmt::more_results() to check whether to call this function/method in /var/www/html/app/library.inc on line 81 |
You can see this type of error when you set the following parameters in your file during testing:
ini_set('display_errors',1); ini_set('display_startup_errors',1); error_reporting(E_ALL); |
You can read more about error handling at this web page. The new and strict compliance standard for mysqli managing rows is:
do { ... } while($stmt->more_result()); |
As always, I hope this helps those looking for an answer.
MySQL Update in mysqli
Somebody didn’t like the MySQLi Update Query example on the tutorialspoint.com website because it use the procedure mysqli_query style. Here’s a simple example of using the object-oriented method version. More or less, instead of query it uses the more intuitive execute() method.
The update_member function contains the logic and below it is a call to the test the function. It relies on a MySQLCredentials.inc file that contains the hostname, user name, password, and database name. You can create create member table, like my example in MySQL 8, or any other table in your MySQL database.
<?php /* || Function Name: update_member */ function update_member($account_number, $member_type, $credit_card_number, $credit_card_type) { // Include the credentials file if omitted. include_once("MySQLCredentials.inc"); // Assign credentials to connection. $mysqli = new mysqli(HOSTNAME, USERNAME, PASSWORD, DATABASE); // Check for connection error and print message. if ($mysqli->connect_errno) { print $mysqli->connect_error."<br />"; print "Connection not established ...<br />"; } else { // Initial statement. $stmt = $mysqli->stmt_init(); /* Disabling auto commit when you want two or more statements executed as a set. || ------------------------------------------------------------ || You would add the following command to disable the default || of auto commit. || ------------------------------ || $mysqli->autocommit(FALSE); || ------------------------------------------------------------ */ // Declare a static query. $sql = "UPDATE member\n" . "SET member_type = ?\n" . ", credit_card_number = ?\n" . ", credit_card_type = ?\n" . "WHERE account_number = ?\n"; /* Prepare statement. || ------------------------------------------------------------ || Please note that the bind_param method is a position || rather than named notation, which means you must provide || the variables in the same order as they are found in || the defined $sql variable as "?". || ------------------------------------------------------------ || print($sql); || print("Member Type: [1][".$member_type."]\n"); || print("Credit Card No: [2][".$credit_card_number."]\n"); || print("Credit Card Type: [3][".$credit_card_type."]\n"); || print("Account Number: [4][".$account_number."]\n"); || ------------------------------------------------------------ */ if ($stmt->prepare($sql)) { $stmt->bind_param("ssss",$member_type,$credit_card_number,$credit_card_type,$account_number); } // Attempt query and exit with failure before processing. if (!$stmt->execute()) { // Print failure to resolve query message. print $mysqli->error."<br />"; print "Failed to resolve query ...<br />"; } else { /* Manually commiting writes when you have disabled the || default auto commit setting, explained above. || ------------------------------------------------------------ || You would add the following command to commit the || transaction. || ------------------------------ || $mysqli->commit(); || ------------------------------------------------------------ */ } } } // Test case update_member('US00011', '1006', '6011-0000-0000-0078', '1007'); ?> |
I put this logic in a function.php file. If you do the same, you can run the test case like this from the command line:
php function.sql |
As always, I hope this helps.
Fedora LAMP Steps
I posted earlier in the year how to configure a Fedora instance to test PHP code on a local VM. However, I’ve got a few questions on how to find those posts. Here’s a consolidation with links on those steps:
- Go to this blog post and install the
httpdandphplibraries with theyuminstaller. - In the same blog post as step 1 (you can put the sample PHP code into the
/var/www/htmldirectory for testing), connect to theyumshell and remove thephp-mysqllibrary and then install themysqlndlibrary. - Go to this blog post and install the
php-gdlibraries, which enable you to render PNG images stored as binary streams in MySQL.
As always, I hope that helps.
LAMP php-gd Libraries
Everything seemed complete after configuring my standalone MySQL instance to a LAMP installation, but last night I started playing with the image files. It turns out that I failed to install the php-gd library.
There’s very little feedback when you try to troubleshoot why you can’t read an image. In fact, the error message for reading the BLOB from MySQL was only available on the local Firefox browser:
The image "http://localhost/ConvertMySQLBlobToImage.php" cannot be displayed because it contains errors. |
The fix requires root to install the php-gd library with the yum utility:
yum install php-gd |
You’ll need to answer y to one question during the installation:
Loaded plugins: langpacks, refresh-packagekit mysql-connectors-community | 2.5 kB 00:00 mysql-tools-community | 2.5 kB 00:00 mysql56-community | 2.5 kB 00:00 pgdg93 | 3.6 kB 00:00 updates/20/x86_64/metalink | 16 kB 00:00 Resolving Dependencies --> Running transaction check ---> Package php-gd.x86_64 0:5.5.22-1.fc20 will be installed --> Processing Dependency: libt1.so.5()(64bit) for package: php-gd-5.5.22-1.fc20.x86_64 --> Running transaction check ---> Package t1lib.x86_64 0:5.1.2-14.fc20 will be installed --> Finished Dependency Resolution Dependencies Resolved ================================================================================ Package Arch Version Repository Size ================================================================================ Installing: php-gd x86_64 5.5.22-1.fc20 updates 89 k Installing for dependencies: t1lib x86_64 5.1.2-14.fc20 updates 164 k Transaction Summary ================================================================================ Install 1 Package (+1 Dependent package) Total download size: 252 k Installed size: 629 k Is this ok [y/d/N]: y Downloading packages: (1/2): php-gd-5.5.22-1.fc20.x86_64.rpm | 89 kB 00:00 (2/2): t1lib-5.1.2-14.fc20.x86_64.rpm | 164 kB 00:01 -------------------------------------------------------------------------------- Total 157 kB/s | 252 kB 00:01 Running transaction check Running transaction test Transaction test succeeded Running transaction (shutdown inhibited) Installing : t1lib-5.1.2-14.fc20.x86_64 1/2 Installing : php-gd-5.5.22-1.fc20.x86_64 2/2 Verifying : php-gd-5.5.22-1.fc20.x86_64 1/2 Verifying : t1lib-5.1.2-14.fc20.x86_64 2/2 Installed: php-gd.x86_64 0:5.5.22-1.fc20 Dependency Installed: t1lib.x86_64 0:5.1.2-14.fc20 Complete! |
After the installation, you can run the info.php program, which contains the following:
1 2 3 | <?php phpinfo(); ?> |
You’ll find the following gd library display in the result from the info.php program:

After retesting, we get both large text and blob files displayed in the web page:

As always, I hope this helps others. Especially, those who are working with your LAMP stack implementation of images.
Fedora Install LAMP
My students wanted an extra credit assignment, so I thought a LAMP configuration and test would be appropriate. The only problem was I hadn’t added it to their course VMware instance. So, here are the instructions to install Apache2, PHP, and MySQLi for a complete LAMP stack when MySQL is already installed.
The post builds on my Fedora Install of MySQL and MySQL Workbench on Fedora posts from last year. It also presumes that you’ve installed a studentdb database but you need to know how to do that let me know (but it hasn’t changed much from the example at the bottom of this old MySQL 5.1 blog post).
You install Apache2 with the following command as the root user, or with the sudo command as a sudoer-list user:
yum install httpd |
The following displays the results of starting the yum utility to install httpd, and you need to reply with a y to complete the installation:
Loaded plugins: langpacks, refresh-packagekit mysql-connectors-community | 2.5 kB 00:00 mysql-tools-community | 2.5 kB 00:00 mysql56-community | 2.5 kB 00:00 pgdg93 | 3.6 kB 00:00 updates/20/x86_64/metalink | 16 kB 00:00 updates | 4.9 kB 00:00 updates/20/x86_64/primary_db | 13 MB 00:04 (1/2): updates/20/x86_64/updateinfo | 1.9 MB 00:02 (2/2): updates/20/x86_64/pkgtags | 1.4 MB 00:01 Resolving Dependencies --> Running transaction check ---> Package httpd.x86_64 0:2.4.10-2.fc20 will be installed --> Processing Dependency: httpd-tools = 2.4.10-2.fc20 for package: httpd-2.4.10-2.fc20.x86_64 --> Processing Dependency: system-logos-httpd for package: httpd-2.4.10-2.fc20.x86_64 --> Running transaction check ---> Package fedora-logos-httpd.noarch 0:21.0.1-1.fc20 will be installed ---> Package httpd-tools.x86_64 0:2.4.10-2.fc20 will be installed --> Finished Dependency Resolution Dependencies Resolved ================================================================================ Package Arch Version Repository Size ================================================================================ Installing: httpd x86_64 2.4.10-2.fc20 updates 1.2 M Installing for dependencies: fedora-logos-httpd noarch 21.0.1-1.fc20 fedora 28 k httpd-tools x86_64 2.4.10-2.fc20 updates 79 k Transaction Summary ================================================================================ Install 1 Package (+2 Dependent packages) Total download size: 1.3 M Installed size: 4.0 M Is this ok [y/d/N]: y Downloading packages: (1/3): fedora-logos-httpd-21.0.1-1.fc20.noarch.rpm | 28 kB 00:00 (2/3): httpd-2.4.10-2.fc20.x86_64.rpm | 1.2 MB 00:01 (3/3): httpd-tools-2.4.10-2.fc20.x86_64.rpm | 79 kB 00:00 -------------------------------------------------------------------------------- Total 815 kB/s | 1.3 MB 00:01 Running transaction check Running transaction test Transaction test succeeded Running transaction (shutdown inhibited) Installing : httpd-tools-2.4.10-2.fc20.x86_64 1/3 Installing : fedora-logos-httpd-21.0.1-1.fc20.noarch 2/3 Installing : httpd-2.4.10-2.fc20.x86_64 3/3 Verifying : httpd-2.4.10-2.fc20.x86_64 1/3 Verifying : fedora-logos-httpd-21.0.1-1.fc20.noarch 2/3 Verifying : httpd-tools-2.4.10-2.fc20.x86_64 3/3 Installed: httpd.x86_64 0:2.4.10-2.fc20 Dependency Installed: fedora-logos-httpd.noarch 0:21.0.1-1.fc20 httpd-tools.x86_64 0:2.4.10-2.fc20 Complete! |
Next, you install php as the root user with the following command:
yum install php |
The following displays when you install php, and you need to reply with a y to complete the installation:
Loaded plugins: langpacks, refresh-packagekit Resolving Dependencies --> Running transaction check ---> Package php.x86_64 0:5.5.22-1.fc20 will be installed --> Processing Dependency: php-common(x86-64) = 5.5.22-1.fc20 for package: php-5.5.22-1.fc20.x86_64 --> Processing Dependency: php-cli(x86-64) = 5.5.22-1.fc20 for package: php-5.5.22-1.fc20.x86_64 --> Running transaction check ---> Package php-cli.x86_64 0:5.5.22-1.fc20 will be installed ---> Package php-common.x86_64 0:5.5.22-1.fc20 will be installed --> Processing Dependency: php-pecl-jsonc(x86-64) for package: php-common-5.5.22-1.fc20.x86_64 --> Running transaction check ---> Package php-pecl-jsonc.x86_64 0:1.3.6-1.fc20 will be installed --> Processing Dependency: /usr/bin/pecl for package: php-pecl-jsonc-1.3.6-1.fc20.x86_64 --> Processing Dependency: /usr/bin/pecl for package: php-pecl-jsonc-1.3.6-1.fc20.x86_64 --> Running transaction check ---> Package php-pear.noarch 1:1.9.5-6.fc20 will be installed --> Processing Dependency: php-xml for package: 1:php-pear-1.9.5-6.fc20.noarch --> Processing Dependency: php-posix for package: 1:php-pear-1.9.5-6.fc20.noarch --> Running transaction check ---> Package php-process.x86_64 0:5.5.22-1.fc20 will be installed ---> Package php-xml.x86_64 0:5.5.22-1.fc20 will be installed --> Finished Dependency Resolution Dependencies Resolved ================================================================================ Package Arch Version Repository Size ================================================================================ Installing: php x86_64 5.5.22-1.fc20 updates 2.6 M Installing for dependencies: php-cli x86_64 5.5.22-1.fc20 updates 3.9 M php-common x86_64 5.5.22-1.fc20 updates 1.0 M php-pear noarch 1:1.9.5-6.fc20 updates 343 k php-pecl-jsonc x86_64 1.3.6-1.fc20 updates 34 k php-process x86_64 5.5.22-1.fc20 updates 77 k php-xml x86_64 5.5.22-1.fc20 updates 247 k Transaction Summary ================================================================================ Install 1 Package (+6 Dependent packages) Total download size: 8.2 M Installed size: 32 M Is this ok [y/d/N]: y Downloading packages: (1/7): php-5.5.22-1.fc20.x86_64.rpm | 2.6 MB 00:03 (2/7): php-cli-5.5.22-1.fc20.x86_64.rpm | 3.9 MB 00:03 (3/7): php-common-5.5.22-1.fc20.x86_64.rpm | 1.0 MB 00:00 (4/7): php-pear-1.9.5-6.fc20.noarch.rpm | 343 kB 00:00 (5/7): php-pecl-jsonc-1.3.6-1.fc20.x86_64.rpm | 34 kB 00:00 (6/7): php-process-5.5.22-1.fc20.x86_64.rpm | 77 kB 00:00 (7/7): php-xml-5.5.22-1.fc20.x86_64.rpm | 247 kB 00:00 -------------------------------------------------------------------------------- Total 1.1 MB/s | 8.2 MB 00:07 Running transaction check Running transaction test Transaction test succeeded Running transaction (shutdown inhibited) Installing : php-cli-5.5.22-1.fc20.x86_64 1/7 Installing : php-process-5.5.22-1.fc20.x86_64 2/7 Installing : php-xml-5.5.22-1.fc20.x86_64 3/7 Installing : 1:php-pear-1.9.5-6.fc20.noarch 4/7 Installing : php-common-5.5.22-1.fc20.x86_64 5/7 Installing : php-pecl-jsonc-1.3.6-1.fc20.x86_64 6/7 Installing : php-5.5.22-1.fc20.x86_64 7/7 Verifying : php-5.5.22-1.fc20.x86_64 1/7 Verifying : php-common-5.5.22-1.fc20.x86_64 2/7 Verifying : php-cli-5.5.22-1.fc20.x86_64 3/7 Verifying : 1:php-pear-1.9.5-6.fc20.noarch 4/7 Verifying : php-process-5.5.22-1.fc20.x86_64 5/7 Verifying : php-xml-5.5.22-1.fc20.x86_64 6/7 Verifying : php-pecl-jsonc-1.3.6-1.fc20.x86_64 7/7 Installed: php.x86_64 0:5.5.22-1.fc20 Dependency Installed: php-cli.x86_64 0:5.5.22-1.fc20 php-common.x86_64 0:5.5.22-1.fc20 php-pear.noarch 1:1.9.5-6.fc20 php-pecl-jsonc.x86_64 0:1.3.6-1.fc20 php-process.x86_64 0:5.5.22-1.fc20 php-xml.x86_64 0:5.5.22-1.fc20 Complete! |
After installing the software, you can set the Apache server to start automatically with the following command:
chkconfig httpd on |
However, that command only starts the Apache server the next time you boot the server. You use the following command as the root user to start the Apache server:
apachectl start |
You can verify the installation with the following command as the root user:
ps -ef | grep httpd | grep -v grep |
It should return:
root 5433 1 0 17:03 ? 00:00:00 /usr/sbin/httpd -DFOREGROUND apache 5434 5433 0 17:03 ? 00:00:00 /usr/sbin/httpd -DFOREGROUND apache 5435 5433 0 17:03 ? 00:00:00 /usr/sbin/httpd -DFOREGROUND apache 5436 5433 0 17:03 ? 00:00:00 /usr/sbin/httpd -DFOREGROUND apache 5437 5433 0 17:03 ? 00:00:00 /usr/sbin/httpd -DFOREGROUND apache 5438 5433 0 17:03 ? 00:00:00 /usr/sbin/httpd -DFOREGROUND apache 5442 5433 0 17:03 ? 00:00:00 /usr/sbin/httpd -DFOREGROUND |
and, then verify the listening port with the following command as the root user:
netstat -tulpn | grep :80 |
It should return the following when both the Apache server is listening on port 80 and the Oracle multi-protocol server is listening on port 8080:
tcp6 0 0 :::80 :::* LISTEN 5433/httpd tcp6 0 0 :::8080 :::* LISTEN 1505/tnslsnr |
After verifying the connection, you can test it by creating the traditional info.php program file in the /var/www/http directory. The file should contain the following:
1 2 3 | <?php phpinfo(); ?> |
You can test it by opening the Firefox browser and entering the following URL from the Fedora Linux image:
http://localhost/info.php |
It should display the typical diagnostic page. This verifies the configuration of the Apache and PHP servers. The next step verifies whether you have the mysqli library to connect to the MySQL database.
You create a mysqli_check.php script, like this:
1 2 3 4 5 6 7 8 9 10 11 12 13 14 15 16 17 18 19 20 21 22 23 24 | <html>
<header>
<title>Static Query Object Sample</title>
<style type="text/css">
/* HTML element styles. */
table {background:white;border-style:solid;border-width:3px;border-color:black;border-collapse:collapse;}
th {text-align:center;font-style:bold;background:lightgray;border:solid 1px gray;}
td {border:solid 1px gray;}
/* Class tag element styles. */
.ID {min-width:50px;text-align:right;}
.Label {min-width:200px;text-align:left;}
</style>
</header>
<body>
<?php
if (!function_exists('mysqli_init') && !extension_loaded('mysqli')) {
print 'mysqli not installed.'; }
else {
print 'mysqli installed.'; }
?>
</script>
</body>
</html> |
You can test it with the following URL from the local browser:
http://localhost/mysqli_check.php |
If it’s installed you can skip the next step, but if not you need to run yum in expert mode as follows (the check for php-mysql isn’t really necessary because it’s too old a version but good practice):
[root@localhost etc]# yum shell Loaded plugins: langpacks, refresh-packagekit > remove php-mysql No Match for argument: php-mysql > install php-mysqlnd > run --> Running transaction check ---> Package php-mysqlnd.x86_64 0:5.5.22-1.fc20 will be installed --> Processing Dependency: php-pdo(x86-64) = 5.5.22-1.fc20 for package: php-mysqlnd-5.5.22-1.fc20.x86_64 --> Running transaction check ---> Package php-pdo.x86_64 0:5.5.22-1.fc20 will be installed --> Finished Dependency Resolution ================================================================================ Package Arch Version Repository Size ================================================================================ Installing: php-mysqlnd x86_64 5.5.22-1.fc20 updates 293 k Installing for dependencies: php-pdo x86_64 5.5.22-1.fc20 updates 141 k Transaction Summary ================================================================================ Install 1 Package (+1 Dependent package) Total download size: 433 k Installed size: 1.4 M Is this ok [y/d/N]: y Downloading packages: (1/2): php-mysqlnd-5.5.22-1.fc20.x86_64.rpm | 293 kB 00:00 (2/2): php-pdo-5.5.22-1.fc20.x86_64.rpm | 141 kB 00:00 -------------------------------------------------------------------------------- Total 427 kB/s | 433 kB 00:01 Running transaction check Running transaction test Transaction test succeeded Running transaction (shutdown inhibited) Installing : php-pdo-5.5.22-1.fc20.x86_64 1/2 Installing : php-mysqlnd-5.5.22-1.fc20.x86_64 2/2 Verifying : php-pdo-5.5.22-1.fc20.x86_64 1/2 Verifying : php-mysqlnd-5.5.22-1.fc20.x86_64 2/2 Installed: php-mysqlnd.x86_64 0:5.5.22-1.fc20 Dependency Installed: php-pdo.x86_64 0:5.5.22-1.fc20 Finished Transaction > quit |
You should note that this also installed PDO. One caveat, before you rerun the mysqli_check.php script from a browser, you need to restart the Apache server. You can do that as the root user with the following syntax:
apachectl restart |
You can retest it with the following URL from the local browser:
http://localhost/mysqli_check.php |
At this point you should have everything installed to test your connection the MySQL database. As mentioned, this example extends my instructions for installing MySQL on the Fedora instance.
The following query.php file tests your ability to connect to the MySQL database with the mysqli driver, and it uses the studentdb and video store example from my Oracle Database 11g and MySQL 5.6 Developer Handbook:
1 2 3 4 5 6 7 8 9 10 11 12 13 14 15 16 17 18 19 20 21 22 23 24 25 26 27 28 29 30 31 32 33 34 35 36 37 38 39 40 41 42 43 44 45 46 47 48 49 50 51 52 53 54 55 56 57 58 59 60 61 62 63 64 65 66 67 68 69 70 71 72 73 | <html>
<header>
<title>Static Query Object Sample</title>
<style type="text/css">
/* HTML element styles. */
table {background:white;border-style:solid;border-width:3px;border-color:black;border-collapse:collapse;}
th {text-align:center;font-style:bold;background:lightgray;border:solid 1px gray;}
td {border:solid 1px gray;}
/* Class tag element styles. */
.ID {min-width:50px;text-align:right;}
.Label {min-width:200px;text-align:left;}
</style>
</header>
<body>
<?php
// Assign credentials to connection.
$mysqli = new mysqli("localhost", "student", "student", "studentdb");
// Check for connection error and print message.
if ($mysqli->connect_errno) {
print $mysqli->connect_error."<br />";
print "Connection not established ...<br />";
}
else {
// Declare a static query.
$query = "SELECT au.system_user_id, au.system_user_name FROM system_user au" ;
// Loop through a result set until completed.
do {
// Attempt query and exit with failure before processing.
if (!$stmt = $mysqli->query($query)) {
// Print failure to resolve query message.
print $mysqli->error."<br />";
print "Failed to resolve query ...<br />";
}
else {
// Print the opening HTML table tag.
print '<table><tr><th class="ID">ID</th><th class="Label">User Role Name</th></tr>';
// Fetch a row for processing.
while( $row = $stmt->fetch_row() ) {
// Print the opening HTML row tag.
print "<tr>";
// Loop through the row's columns.
for ($i = 0;$i < $mysqli->field_count;$i++) {
// Handle column one differently.
if ($i == 0)
print '<td class="ID">'.$row[$i]."</td>";
else
print '<td class="Label">'.$row[$i]."</td>";
}
// Print the closing HTML row tag.
print "</tr>";
}
}
} while( $mysqli->next_result());
// Print the closing HTML table tag.
print "</table>";
// Release connection resource.
$mysqli->close(); }
?>
</script>
</body>
</html> |
This should display the following in the browser:

You can see how to open port 80 for the Apache server in this blog post. If you want to work with blob data types, you’ll also need to use yum to install the php-gd library. You can read my LAMP php-gd library blog post to learn how to install the libraries. As always, I hope a step-by-step approach without assumptions helps those learning MySQL.
Popular PHP Frameworks
My students often ask me about popular PHP frameworks and MySQL approaches. I wish a PHP framework choice was as clear as a JavaScript framework, like AngularJS. Unfortunately, PHP frameworks aren’t that clear cut.
It seems that the most popular PHP frameworks are: Laravel (1st), Phalcon (2nd), and Symphony2 (3rd). I found the following graphic (from December 2013) that highlights popularity by percentage of the market (though I can’t guarantee its accuracy). As far as jobs go, on Dice.com only Laravel had more than 3 positions referring to the framework by name. There were actually 42 PHP developer positions that mention Laravel out of 2,115 PHP developer positions. So, it seems learning a specific framework for PHP doesn’t yet have much market appeal.

While learning the basics of PHP are generic, frameworks expedite process and control pattern implementation. My suggestion to students is to target three to five employers that use a specific framework and start learning how to use the framework. I’d like to get opinions from those in the field whether this is the best advice.
As to MySQL, I suggest they learn native Mysqli and MySQL PDO. Any other suggestions on that from readers? Thanks as always.
Deprecated mysqli Functions

mysqli functions web page. There weren’t any deprecated by 5.5. Unfortuantely, there were six mysqli functions deprecated in 5.3 and removed in 5.4. Unfortunately, many of my posted code examples use 5.2 or 5.3 where they would have worked. The deprecated mysqli functions are:
mysqli_bind_parammysqli_bind_resultmysqli_client_encodingmysqli_fetchmysqli_param_countmysqli_send_long_data
Unfortunately, that puts a lot of updates on my queue of things to do. I imagine it likewise imposes limits on those running commercially on PHP 5.3 or older that plan an upgrade.
It does remind me that I need to pay close attention to the deprecation of mysqli functions with each release. These are actually the largest change since PHP 5.0.
