Archive for the ‘macOS’ Category
Ubuntu Desktop 22.04
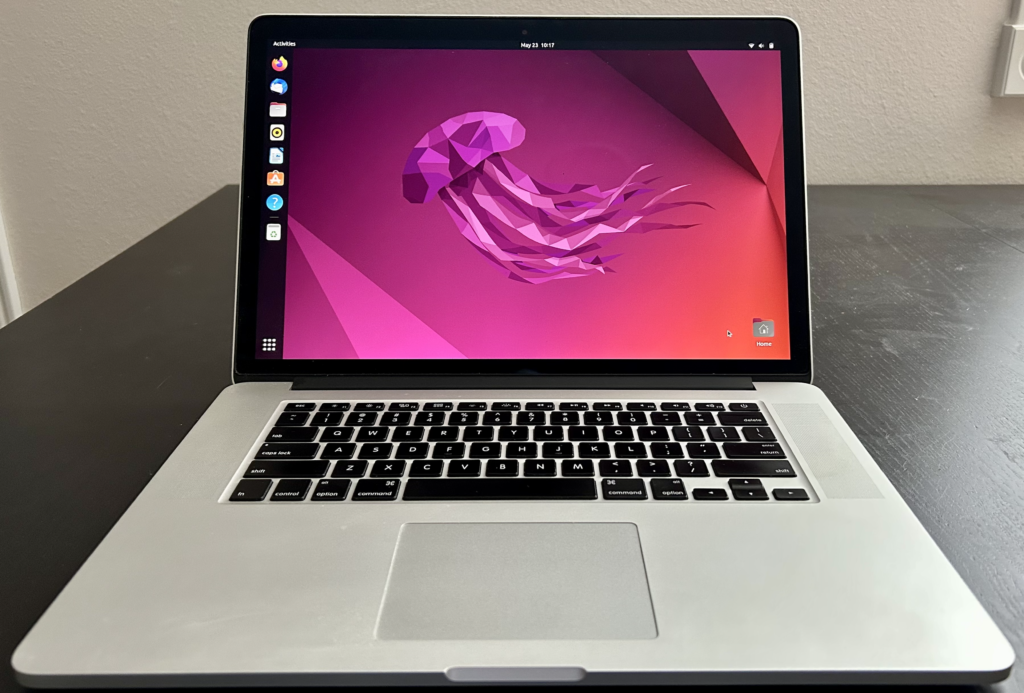
I finally got around to installing Ubuntu Desktop, Version 22.04, on my MacBook Pro 2014 since OS X stopped allowing upgrades on the device in 2021. While I replaced it in 2021 with a new MacBook Pro with an i9 Intel Chip. The Ubuntu documentation gave clear instructions on how to create a bootable USB drive before replacing the Mac OS software..
Unfortunately, networking was not well covered. It left me with two questions:
- How to configure Ubuntu Desktop 22.04 to the network?
You need to use an RJ45 network cable (in this case also an RJ45 to Thunderbolt adapter) and reboot the OS. It will automatically configure your DCHP connection.
- How to configure Wifi for Ubuntu Desktop 22.04?
You need to download and install a library, which is covered below.
After the Ubuntu Desktop installation, I noticed it didn’t provide any opportunity to update the software or configure the network. It also was not connected to the network. I connected the MacBook Pro to a physical Internet cable and rebooted the Ubuntu OS. It recognized the wired network. Then, I upgraded the installed libraries, which is almost always the best choice.
At this point, I noticed that the libraries to enable a WiFi connection were not installed. So, I installed the missing Wifi libraries with this command:
sudo apt-get install dbms bcmwl-kernel-source |
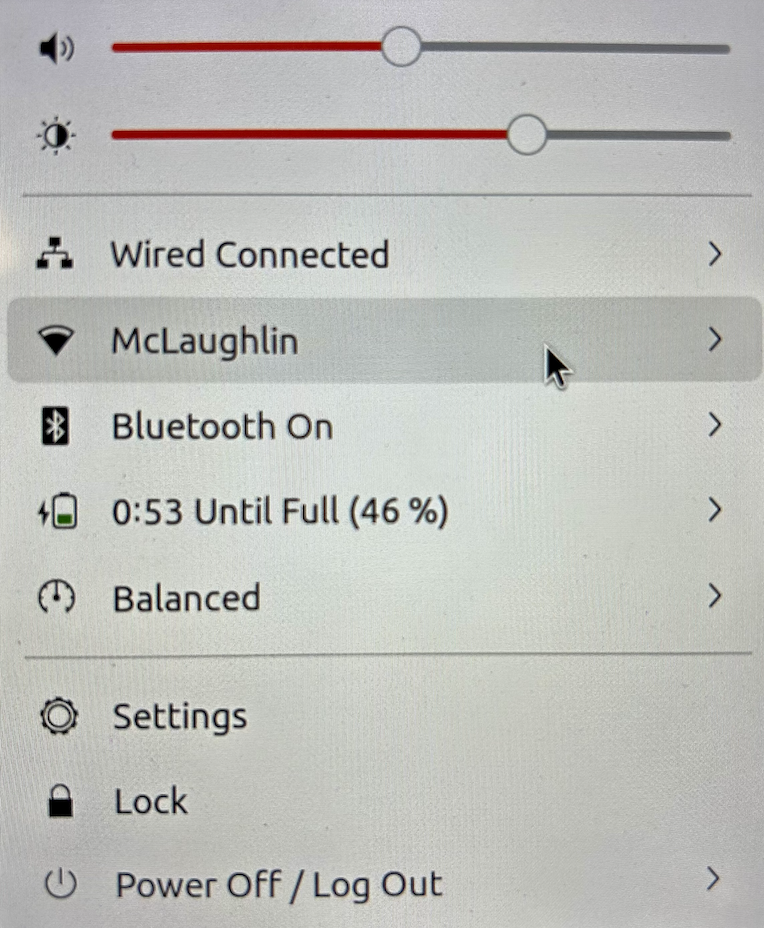
After you’ve installed the bcmwl-kernel-source libraries, navigate to the top right where you’ll find a small network icon. Click on the network icon and you’ll see the following dialog. Click on your designated Wifi, enter the password and you’ll have a Wifi connection.
As always, I hope this note helps those trying to solve a real world problem.
Fedora for macOS ARM64
I’m always updating VMs, and I was gratified to notice that there’s a Fedora arm64 ISO. If you’re interested in it, you can download the Live Workstation from here or the Fedora Server from here.
Unfortunately, I only have macOS running on i7 and i9 Intel Processors. It would be great to hear back how it goes for somebody one of the new Apple M1 chip.
I typically install the workstation version because it meets my needs to run MySQL and other native Linux development tools. However, the server version is also available. Fedora is a wonderful option, as a small footprint for testing things on my MacBookPro.
Docker on macOS
I finally got on the current release of macOS, Monterey, and found that my tedious Docker error still existed. When the computer boots, I get the following Fatal Error message:

Open a Terminal session and issue the following command:
killall Docker |
Then, restart Docker and everything is fine.
MongoDB on macOS
It’s important to document things before I ask my students to do them. This walks through a native installation of MongoDB on the macOS. At least, it does when you’ve already installed Xcode. If you installed Xcode sometime ago, you should update it otherwise you may get an installation error like the following:
==> Installing mongodb-community from mongodb/brew Error: Your Xcode (11.1) is too outdated. Please update to Xcode 13.1 (or delete it). Xcode can be updated from the App Store. |
The core MongoDB installation document is in the MongoDB 5.0 installation manual. The following is a step-by-step set of instructions for those new to installing something like MongoDB without using the macOS standard package management software.
- The first step requires you install Home Brew, as qualified by the Home Brew Installation page. Before you can install Home Brew, you need to install Xcode on your macOS. After installing Xcode, you need to launch a Terminal session on your macOS and run the following command from the macOS command-line interface (CLI):
/bin/bash -c "$(curl -fsSL https://raw.githubusercontent.com/Homebrew/install/HEAD/install.sh)"
After the installation, which may take several minutes, you should see this final message on the console:
==> Next steps: - Run brew help to get started - Further documentation: https://docs.brew.sh - Now that Home Brew is installed, the next step requires you to update the Homebrew formulat for MongoDB. You use the following command to do that for MongoDB 5:
brew tap mongodb/brewYou should see something like the following on your console when you update the Homebrew formula:
Running `brew update --preinstall`...
==> Homebrew is run entirely by unpaid volunteers. Please consider donating:
  https://github.com/Homebrew/brew#donations
==> Auto-updated Homebrew!
Updated 1 tap (homebrew/core).
==> Updated Formulae
Updated 5 formulae.

==> Tapping mongodb/brew
Cloning into '/usr/local/Homebrew/Library/Taps/mongodb/homebrew-brew'...
remote: Enumerating objects: 825, done.
remote: Counting objects: 100% (322/322), done.
remote: Compressing objects: 100% (236/236), done.
remote: Total 825 (delta 165), reused 140 (delta 83), pack-reused 503
Receiving objects: 100% (825/825), 180.91 KiB | 0 bytes/s, done.
Resolving deltas: 100% (403/403), done.
Tapped 14 formulae (30 files, 246.8KB).
- Assuming your Xcode is curent, you now install MongoDB with the necessary supporting packages:
brew install mongodb-community@5.0
You should see something like the following on your console after you install MongoDB 5:
==> Summary
  /usr/local/Cellar/mongodb-community/5.0.5: 11 files, 181.5MB, built in 6 seconds
==> Running `brew cleanup mongodb-community`...
Disable this behaviour by setting HOMEBREW_NO_INSTALL_CLEANUP.
Hide these hints with HOMEBREW_NO_ENV_HINTS (see `man brew`).
==> Caveats
==> mongodb-community
To start mongodb/brew/mongodb-community now and restart at login:
  brew services start mongodb/brew/mongodb-community
Or, if you don't want/need a background service you can just run:
  mongod --config /usr/local/etc/mongod.conf
- MongoDB really requires a background service, so I suggest you use the following to create the service:
brew services start mongodb/brew/mongodb-community
You should see something like the following on your console after you install MongoDB 5:
==> Successfully started `mongodb-community` (label: homebrew.mxcl.mongodb-community)
The installation gave you three key binaries:
- The MongoDB Server Daemon – mongod
- The MongoDB sharded cluster query router – mongos
- The MongoDB Shell – mongosh
The installation also creates configuration, data, and log files based on physical CPU-Chip hardware:
- Intel Processor
- Configuration File: /usr/local/etc/mongodb.conf
- Log Directory: /usr/local/var/log/mongodb
- Data Directory: /usr/local/var/mongodb
- Apple M1 Processor
- Configuration File: /opt/homebrew/etc/mongodb.conf
- Log Directory: /opt/homebrew/var/log/mongodb
- Data Directory: /opt/homebrew/var/mongodb
- You can now start the MongoDB Shell with the following command in a Terminal window:
mongosh
You should see the following when you connect to the MongoDB Shell
Current Mongosh Log ID:	61e4e2c98f023c2b5fc5a905
Connecting to:		mongodb://127.0.0.1:27017/?directConnection=true&serverSelectionTimeoutMS=2000
Using MongoDB:		5.0.5
Using Mongosh:		1.1.8

For mongosh info see: https://docs.mongodb.com/mongodb-shell/


To help improve our products, anonymous usage data is collected and sent to MongoDB periodically (https://www.mongodb.com/legal/privacy-policy).
You can opt-out by running the disableTelemetry() command.

------
   The server generated these startup warnings when booting:
   2022-01-16T20:26:18.320-07:00: Access control is not enabled for the database. Read and write access to data and configuration is unrestricted
------

test>
As always, I hope the instructions are helpful and clear. If you find an issue let em know about it.
macOS 2021+ DirectX
Obsolescence is always a factor with the macOS. After all, it does keep the revenue flow stable in hardware sales. Last October, Apple released macOS Monterey (12). It gets problematic for me when helping my students setup MySQL on their Apple computers. Some students come with very old machines. Take for example my wonderfully maintained MacBook Pro (mid 2014), which became obsolete with the terminal release of macOS Big Sur (11.6.2). When I did finally upgrade to that terminal release, I found my VMware (11.5.*) failed to load with a “Not enough physical memory is available …” error dialog.

The pretty Apple Dialog box is quite misleading unless you place it in context of a VMware application problem that occurs when you upgrade from one to another version of the macOS. You might go down any of three provided generalized rat holes, like paring running applications or the other nonsense on the Apple Discussion Board. While these three suggestions are useful when you’re macOS is truly running short of memory, it appears the same error can simply mean the Application isn’t supported on the new macOS release. It strikes me that this error message may be linked to a VMware virtualization issue with Hyper-V memory management with a combination of VMware (11.5.*) and macOs Big Sur (11.6).
For that reason, you can’t believe discussion threads unreservedly whether they’re from Apple or other vendors because they’re targeted to a universal context. Often users are looking for a specific fix, which means an answer to a specific use-case or problem context. The VMware Fusion 11 Release Notes clearly state that it only supports macOS Mojave (10.14) and macOS Catalina (10.15), which narrows the context, or use-case, for the error.
The error message, in this context, is most likely raised because the product is incompatible with how VMware Fusion manages memory at some level in the macOS Big Sur (11.6.*) version. As I speculated earlier, the out of memory error may be linked to how VMware uses Hyper-V but that’s a shot in the dark (or a random guess not the Peter Sellers movie of the same name that reprises his role as Inspector Jacques Clouseau).
How VMware works on the macOS is important to my students because we give them two alternatives for setting up MySQL on osMac: one is inside a Linux VM and the other uses Docker (my notes from January this year for creating a Docker instance on the macOS). My students reported errors like this earlier in the year and I suggested they upgrade to VMware Fusion 12. It seemed to work for everybody but now I can report the exact error message and verify the fix with a qualified reason.
While I’m on this topic, it’s probably best to deal with DirectX support on Apple Hardware. The Apple hardware requirements for support DirectX 11 3D Acceleration in a virtual machine is currently:
- Mac Pro 2013 and later
- iMac 27-inch 2014 and later
- MacBook Pro 13-inch 2015 and later
- MacBook Pro 15-inch 2015 with dual graphics and later
- MacBook Air 2015 and later
- MacBook 2015 and later
- iMac 21-inch 2015 and later
- iMac Pro 2017 and later
- MacMini 2018 and later
It looks like everybody must upgrade any older Apple machines because we can probably assume most 2015 hardware will become obsolete with the new macOS in October 2022. If it’s not in your budget, you should plan for that cost now.
Fortunately, I also have a MacBook Pro (Mid 2021), the last of the Intel 9 chip models. I bought it the week before the announcement of the new tech. A little birdie told me it would be only the M1 after the announcement. The newer MacBook Pro is awesome and the 16″ screen is better than the older 15″ screen. I just hate the lack of a magnetic power cord. Alas, that’s the price of ensuring I had an Intel chip set.
As always, I hope this helps those looking for an answer.
MySQL & macOS Silicon
It’s a problem for my students who purchased the new Apple hardware that uses Apple Silicon because they can’t install a Docker MySQL instance. However, there is Homebrew formula that works on macOS Big Sur and the new Apple silicon. It supports:
- Intel Silicon: macOS Big Sur, Catalina, and Mojave
- Apple Silicon: macOS Big Sur
The Homebrew Formula does have conflicts that you may need to avoid. It is a solution for those with the new Apple silicon.
As always, I hope this helps those looking for a solution.
MySQL Membership
MySQL membership conditions are in the MySQL 8 Documentation. They’re found in the 13.2.11.3 Subqueries with ANY, IN, or SOME section. The IN and =ANY operators both perform equality matches with one twist. The IN operator works with a set of values or a subquery but the =ANY operator only works with a subquery.
I created the digits, letters, and words tables for this example. They hold the following values respectively:
- The
numberstable holds the values of1,2,3, and4 - The
letterstable holds the values of'a','b','c', and'd' - The
wordstable holds the values of'Captain America','Iron Man','Thor', andAnt-Man
The following examples show the IN and =ANY membership comparison operators:
The IN membership operator:
IN operator with a set of values and the second example shows you how to use the IN operator with a subquery:
SELECT 'True Statement' AS result WHERE 'a' IN ('a','b','c','d'); |
SELECT 'True Statement' AS result WHERE 'a' IN (SELECT letter FROM letters); |
The previous evaluations are case insensitive membership comparisons against a set of values and a return set from a subquery. You can make a case sensitive membership comparison by putting the BINARY keyword before one of the strings in a comparison. The BINARY keyword converts the string to a binary string and forces a binary string comparison of the two strings (MySQL 8.0 Reference Manual: 12.8.1 – String Comparison Operators and Functions).
SELECT 'True Statement' AS result WHERE BINARY 'a' IN (SELECT letter FROM letters); |
The =ANY membership operator:
SELECT 'True Statement' AS result WHERE 'a' =ANY ('a','b','c','d'); |
It returns the following error because the ANY, SOME, and ALL membership operators only work with subqueries. They all fail when you try to have them work with sets:
ERROR 1064 (42000): You have an error in your SQL syntax; check the manual that corresponds to your MySQL server version for the right syntax to use near ''a','b','c','d')' at line 2 |
The following math operators work with the ANY, SOME, and ALL membership operators:
- >
- >=
- <
- <=
- <>
- !=
While the ANY and SOME membership operators work alike, the AND operator works differently. The ANY and SOME membership operators work like an OR logical operator in the WHERE clause.
For example, the following <ANY comparison works when the right operand is in the set but not the largest element returned by the subquery.
SELECT 'True Statement' AS result WHERE 2 <SOME (SELECT digit FROM numbers); |
You can use a <=ANY or <=SOME when the left operand is equal to the highest digit in the subquery’s result set. The <ALL comparison only works when the left operand is a digit lower than the smallest element returned by the subquery.
SELECT 'True Statement' AS result WHERE 0 <ALL (SELECT digit FROM numbers); |
Here’s a set of SQL commands to setup the test cases for membership operators:
DROP TABLE letters; CREATE TABLE letters (letter VARCHAR(10)); DROP TABLE numbers; CREATE TABLE numbers (digit int); DROP TABLE words; CREATE TABLE words (word VARCHAR(20)); INSERT INTO letters VALUES ('a'),('b'),('c'),('d'),('e'); INSERT INTO numbers VALUES (1),(2),(3),(4),(5); INSERT INTO words VALUES ('Captain America'),('Thor'),('Iron Man'),('Ant-Man'); |
As always, I hope this helps those looking for more examples and good solutions.
MySQL macOS Docker
While you can download MySQL as a DMG package, a number of users would prefer to install it as a Docker instance. You won’t find the macOS downloads on the same web site as other downloads. You can use the following macOS download site.

After installing Docker on your macOS, you can pull a copy of the current MySQL Server with the following command:
docker pull mysql/mysql-server |
You should create a mysql directory inside your ~/Documents directory with this command:
mkdir ~/Documents/mysql |
Then, you should use the cd command to change into the ~/Documents/mysql directory and run this command:
pwd |
It should return the following directory:
/Users/<user_name>/Documents/mysql |
Use the /Users/<user_name>/Documents/mysql as the
docker run --name=mysql1 --volume=<path_to_folder>:/var/lib/mysql -p 33060:3306/tcp -d mysql/mysql-server |
The --name option value is mysql1 and it becomes the container value. Docker mounts the column in the ~/Documents/mysql folder. All data from the Docker container under the /var/lib/mysql directory will persist in this directory. This directory will still contain the database when the container is shut down.
The docker run command maps the localhost’s 33060 port to the 3306 port on the Docker container. You will use the 33060 port to connect to the Docker instance of MySQL. It raises a dialog box asking for permission to access the directory. You need to allow Docker to write to the ~/Documents/mysql directory.
You can verify that the Docker container is running with the following command:
docker ps |
It should return:
CONTAINER ID IMAGE COMMAND CREATED STATUS PORTS NAMES 142b5c491cd8 mysql/mysql-server "/entrypoint.sh mysq…" 7 minutes ago Up 6 minutes (healthy) 33060-33061/tcp, 0.0.0.0:33060->3306/tcp mysql1 |
You can get the MySQL generated root password with this Docker command:
docker logs mysql1 2>&1 | grep GENERATED |
It returns something like the following:
[Entrypoint] GENERATED ROOT PASSWORD: vop#3GNYqK3nC@S@N3haf3nox5E |
Use the following Docker command to connect to the Docker container:
docker exec -it mysql1 /bin/bash |
It launches a Bash shell inside the Docker container:
bash-4.2# |
Start the mysql Command-Line Interface (CLI):
mysql -uroot -p |
You are then prompted for a password:
Enter password: |
After successfully entering the password, you’ll see the following:
Welcome to the MySQL monitor. Commands end with ; or \g. Your MySQL connection id is 55 Server version: 8.0.22 Copyright (c) 2000, 2020, Oracle and/or its affiliates. All rights reserved. Oracle is a registered trademark of Oracle Corporation and/or its affiliates. Other names may be trademarks of their respective owners. Type 'help;' or '\h' for help. Type '\c' to clear the current input statement. mysql> |
Unless you want to remember that hugely complex root password, you should consider changing it to something simple like, 'cangetin' with the following command:
ALTER USER 'root'@'localhost' IDENTIFIED WITH MYSQL_NATIVE_PASSWORD BY 'cangetin'; |
Next, you should check for the installed databases with this command:
show databases; |
It will return:
+--------------------+ | Database | +--------------------+ | information_schema | | mysql | | performance_schema | | sys | +--------------------+ 4 rows in set (0.01 sec) |
Exiting mysql, you can see the contents of the root user’s directory with this list command:
ls -al |
It should return:
total 84 drwxr-xr-x 1 root root 4096 Jan 12 03:41 . drwxr-xr-x 1 root root 4096 Jan 12 03:41 .. -rwxr-xr-x 1 root root 0 Jan 12 03:41 .dockerenv lrwxrwxrwx 1 root root 7 Oct 12 22:06 bin -> usr/bin dr-xr-xr-x 2 root root 4096 Apr 11 2018 boot drwxr-xr-x 5 root root 340 Jan 12 03:41 dev drwxr-xr-x 2 root root 4096 Oct 19 05:47 docker-entrypoint-initdb.d -rwxr-xr-x 1 root root 7496 Oct 19 05:37 entrypoint.sh drwxr-xr-x 1 root root 4096 Jan 12 03:41 etc -rw-r--r-- 1 root root 86 Jan 12 03:41 healthcheck.cnf -rwxr-xr-x 1 root root 1073 Oct 19 05:37 healthcheck.sh drwxr-xr-x 2 root root 4096 Apr 11 2018 home lrwxrwxrwx 1 root root 7 Oct 12 22:06 lib -> usr/lib lrwxrwxrwx 1 root root 9 Oct 12 22:06 lib64 -> usr/lib64 drwxr-xr-x 2 root root 4096 Apr 11 2018 media drwxr-xr-x 2 root root 4096 Apr 11 2018 mnt -rw-r--r-- 1 root root 0 Jan 12 03:41 mysql-init-complete drwxr-xr-x 2 root root 4096 Apr 11 2018 opt dr-xr-xr-x 127 root root 0 Jan 12 03:41 proc dr-xr-x--- 1 root root 4096 Jan 12 04:21 root drwxr-xr-x 1 root root 4096 Oct 19 05:47 run lrwxrwxrwx 1 root root 8 Oct 12 22:06 sbin -> usr/sbin drwxr-xr-x 2 root root 4096 Apr 11 2018 srv dr-xr-xr-x 13 root root 0 Jan 12 03:41 sys drwxrwxrwt 1 root root 4096 Jan 12 03:41 tmp drwxr-xr-x 1 root root 4096 Oct 12 22:06 usr drwxr-xr-x 1 root root 4096 Oct 12 22:06 var |
At this point, you have to make a choice about how you will access the MySQL database. You have a couple options:
- Create an individual
studentuser that can access the MySQL-Server as a micro-service, which would only be a MySQL user connecting through MySQL workbench. At least, that’s the only connection option unless you likewise install themysqlclient on your host macOS. Themysqlclient lets you connect from the host operating system through the Command-Line Interface (CLI). - Create a local
studentuser account inside the Docker container. It will have access to the container file system and mimic the behavior of a non-rootuser on a server.
Let’s create both for this demonstration. Reconnect as the root user and issue the following two commands:
CREATE USER 'student'@'localhost' IDENTIFIED WITH MYSQL_NATIVE_PASSWORD BY 'student'; CREATE USER 'student'@'%.%.%.%' IDENTIFIED WITH MYSQL_NATIVE_PASSWORD BY 'student'; |
The first version of the student user lets you access the database from inside the Docker container. The second version of the student user lets you access the database from MySQL Workbench deployed on your base macOS.
You can add a sakila database and grant all privileges to the student user with the following command as the root user:
CREATE DATABASE sakila; GRANT ALL ON sakila.* TO 'student'@'localhost'; GRANT ALL ON sakila.* TO 'student'@'%.%.%.%'; |
You need to get the sakila database from the Internet within the Docker container. Exit the mysql client with the following command:
quit; |
As the root user, install the wget and tar Linux utilities with this command:
yum install -y wget tar |
As the student user, you can use the wget command to grab a copy of the sakila database and store the database locally. Use the cd command to get to your ${HOME} directory, like:
cd |
Use this syntax to get a copy of the sakila database:
wget http://downloads.mysql.com/docs/sakila-db.tar.gz |
Use the ls command to verify the download, then run the following set of Linux commands from the Linux CLI:
tar -xzf sakila-db.tar.gz cd sakila-db |
Run the following two commands from the sakila-db directory:
mysql -ustudent -p < sakila-schema.sql mysql -ustudent -p < sakila-data.sql |
or, you can connect as the student user to the MySQL client and run them there:
source sakila-schema.sql source sakila-data.sql |
You create a non-root student user for the Docker container from the macOS host opearting system. Which means you need to quit; the mysql client, and exit the root user’s session with the Docker container.
At the terminal in your macOS, issue the following Docker command to create a student account in the mysql1 container:
docker exec mysql1 bash -c "useradd -u 501 -g mysql -G users \ > -d /home/student -s /bin/bash -c "Student" -n student" |
Now, you can connect as the student user to the mysql1 container, with the following Docker command:
docker exec -it --user student mysql1 bash |
The first time you connect, you will be a the / (root) directory. Use the following cd command to go to the student user’s home directory:
cd |
Then, type the following command to set the student user’s home directory as the default. You need to use this command because vim isn’t installed in the default Docker container, which would let you interactively edit files. It appends the necessary Bash shell command to the end of the .bashrc file.
echo 'cd ${HOME}' >> .bashrc |
With this change, the student user will always be available form its home directory next time you connect to the mysql1 container. You can use scp to move files into the student user’s home (/home/student) directory. However, you can create a quick test.sql file like this:
echo "select user();" > test.sql |
Connect to the mysql CLI with as the student user:
mysql -ustudent -p |
Call your test.sql file from the Linux CLI, like:
mysql -ustudent -p < test.sql |
or, you can run the test.sql program as follows form the MySQL command-line:
source test.sql |
It will return:
+-------------------+ | user() | +-------------------+ | student@localhost | +-------------------+ 1 row in set (0.00 sec) |
That’s the basic setup of the Docker MySQL Container on the macOS. You can do much more once you’ve configured it like this. For example, you can add vim to your library repository as the root user with the following command:
yum install -y vim |
It just takes a minute or a bit more. Adding vim opens up so much flexibility for you inside the Docker container, it’s impossible for me to resist. 😉
MySQL Self-Join
I’m switching to MySQL and leveraging Alan Beaulieu’s Learning SQL as a supporting reference for my Database Design and Development course. While reviewing Alan’s Chapter 5: Querying Multiple Tables, I found his coverage of using self-joins minimal.
In fact, he adds a prequel_film_id column to the film table in the sakila database and then a single row to demonstrate a minimal self-join query. I wanted to show them how to view a series of rows interconnected by a self-join, like the following:
SELECT f.title AS film , fp.title AS prequel FROM film f LEFT JOIN film fp ON f.prequel_id = fp.film_id WHERE f.series_name = 'Harry Potter' ORDER BY f.series_number; |
It returns the following result set:
+----------------------------------------------+----------------------------------------------+ | film | prequel | +----------------------------------------------+----------------------------------------------+ | Harry Potter and the Chamber of Secrets | Harry Potter and the Sorcerer's Stone | | Harry Potter and the Prisoner of Azkaban | Harry Potter and the Chamber of Secrets | | Harry Potter and the Goblet of Fire | Harry Potter and the Prisoner of Azkaban | | Harry Potter and the Order of the Phoenix | Harry Potter and the Goblet of Fire | | Harry Potter and the Half Blood Prince | Harry Potter and the Order of the Phoenix | | Harry Potter and the Deathly Hallows: Part 1 | Harry Potter and the Half Blood Prince | | Harry Potter and the Deathly Hallows: Part 2 | Harry Potter and the Deathly Hallows: Part 1 | +----------------------------------------------+----------------------------------------------+ 7 rows in set (0.00 sec) |
Then, I thought about what questions the students might ask. For example, why doesn’t the query return the first film that doesn’t have a prequel. So, I took the self-join to the next level to display the first film having no prequel, like this:
SELECT f.title AS film , IFNULL( CASE WHEN NOT f.film_id = fp.film_id AND f.prequel_id = fp.film_id THEN fp.title END,'None') AS prequel FROM film f LEFT JOIN film fp ON f.prequel_id = fp.film_id WHERE f.series_name = 'Harry Potter' ORDER BY f.series_number; |
The CASE operator in the SELECT-list filters the result set by eliminating rows erroneously returned. Without the CASE filter, the query would return the original Harry Potter and the Sorcerer’s Stone film matched agains a NULL and all of the other sequels. The CASE operator effectively limits the result set for the LEFT JOIN to only the following data:
+----------------------------------------------+----------------------------------------------+ | film | prequel | +----------------------------------------------+----------------------------------------------+ | Harry Potter and the Sorcerer's Stone | NULL | +----------------------------------------------+----------------------------------------------+ |
The IFNULL() built-in function lets you replace the NULL value returned as the prequel’s title value. The IFNULL() function substitutes a 'None' string literal for a NULL value. The query returns the following result set:
+----------------------------------------------+----------------------------------------------+ | film | prequel | +----------------------------------------------+----------------------------------------------+ | Harry Potter and the Sorcerer's Stone | None | | Harry Potter and the Chamber of Secrets | Harry Potter and the Sorcerer's Stone | | Harry Potter and the Prisoner of Azkaban | Harry Potter and the Chamber of Secrets | | Harry Potter and the Goblet of Fire | Harry Potter and the Prisoner of Azkaban | | Harry Potter and the Order of the Phoenix | Harry Potter and the Goblet of Fire | | Harry Potter and the Half Blood Prince | Harry Potter and the Order of the Phoenix | | Harry Potter and the Deathly Hallows: Part 1 | Harry Potter and the Half Blood Prince | | Harry Potter and the Deathly Hallows: Part 2 | Harry Potter and the Deathly Hallows: Part 1 | +----------------------------------------------+----------------------------------------------+ 8 rows in set (0.01 sec) |
Alan’s modification of the sakila.film table had the following two related design flaws:
- It didn’t provide a way to guarantee the ordering of films with prequels because relational databases don’t guarantee ordered result sets unless you use an
ORDER BYclause, which typically requires a column to order. - It didn’t provide a way to isolate a series of films.
I modified the film table differently by adding the series_name, series_number, and prequel_id columns. The series_name column lets you group results and the series_number column lets you order by a preserved sequence that you store as part of the data The prequel_id column lets you connect to the prequel film, much like the backward portion of a doubly linked list.
The new sakila.film table is:
+----------------------+---------------------------------------------------------------------+------+-----+-------------------+-----------------------------------------------+ | Field | Type | Null | Key | Default | Extra | +----------------------+---------------------------------------------------------------------+------+-----+-------------------+-----------------------------------------------+ | film_id | smallint unsigned | NO | PRI | NULL | auto_increment | | title | varchar(255) | NO | MUL | NULL | | | description | text | YES | | NULL | | | release_year | year | YES | | NULL | | | language_id | tinyint unsigned | NO | MUL | NULL | | | original_language_id | tinyint unsigned | YES | MUL | NULL | | | rental_duration | tinyint unsigned | NO | | 3 | | | rental_rate | decimal(4,2) | NO | | 4.99 | | | length | smallint unsigned | YES | | NULL | | | replacement_cost | decimal(5,2) | NO | | 19.99 | | | rating | enum('G','PG','PG-13','R','NC-17') | YES | | G | | | special_features | set('Trailers','Commentaries','Deleted Scenes','Behind the Scenes') | YES | | NULL | | | last_update | timestamp | NO | | CURRENT_TIMESTAMP | DEFAULT_GENERATED on update CURRENT_TIMESTAMP | | series_name | varchar(20) | YES | | NULL | | | series_number | int unsigned | YES | | NULL | | | prequel | int unsigned | YES | | NULL | | +----------------------+---------------------------------------------------------------------+------+-----+-------------------+-----------------------------------------------+ 16 rows in set (0.21 sec) |
After adding the three new columns, I inserted eight rows for the original Harry Potter films. You can use the following script in the MySQL client (mysql) to add the columns and insert the data to test the preceding queries:
-- Use sakila database. USE sakila; -- Add a prequel_id column to the sakila.film table. ALTER TABLE film ADD (series_name varchar(20)), ADD (series_number int unsigned), ADD (prequel_id int unsigned); -- Set primary to foreign key local variable. SET @sv_film_id = 0; -- Insert Harry Potter films in sakila.film table with classic values clause. INSERT INTO film ( title , description , release_year , language_id , original_language_id , rental_duration , rental_rate , length , replacement_cost , rating , special_features , last_update , series_name , series_number , prequel_id ) VALUES ('Harry Potter and the Sorcerer''s Stone' ,'A film about a young boy who on his eleventh birthday discovers, he is the orphaned boy of two powerful wizards and has unique magical powers.' , 2001 , 1 , NULL , 3 , 0.99 , 152 , 19.99 ,'PG' ,'Trailers' ,'2001-11-04' ,'Harry Potter' , 1 , NULL ); -- Assign the last generated primary key value to the local variable. SET @sv_film_id := last_insert_id(); -- Insert 2nd film in sakila.film table with classic values clause. INSERT INTO film ( title , description , release_year , language_id , original_language_id , rental_duration , rental_rate , length , replacement_cost , rating , special_features , last_update , series_name , series_number , prequel_id ) VALUES ('Harry Potter and the Chamber of Secrets' ,'A film where Harry returning to Hogwarts, still famous and a hero, when strange things start to happen ... people are turning to stone and no-one knows what, or who, is doing it.' , 2002 , 1 , NULL , 3 , 0.99 , 160 , 19.99 ,'PG' ,'Trailers' ,'2002-11-15' ,'Harry Potter' , 2 , @sv_film_id ); -- Assign the last generated primary key value to the local variable. SET @sv_film_id := last_insert_id(); -- Insert 3rd film in sakila.film table with classic values clause. INSERT INTO film ( title , description , release_year , language_id , original_language_id , rental_duration , rental_rate , length , replacement_cost , rating , special_features , last_update , series_name , series_number , prequel_id ) VALUES ('Harry Potter and the Prisoner of Azkaban' ,'A film where Harry, Ron, and Hermione return for their third year at Hogwarts and are forced to face escaped prisoner, Sirius Black.' , 2004 , 1 , NULL , 3 , 0.99 , 141 , 19.99 ,'PG' ,'Trailers' ,'2004-06-04' ,'Harry Potter' , 3 , @sv_film_id ); -- Assign the last generated primary key value to the local variable. SET @sv_film_id := last_insert_id(); -- Insert 4th film in sakila.film table with classic values clause. INSERT INTO film ( title , description , release_year , language_id , original_language_id , rental_duration , rental_rate , length , replacement_cost , rating , special_features , last_update , series_name , series_number , prequel_id ) VALUES ('Harry Potter and the Goblet of Fire' ,'A film where where Harry Potter''s name emerges from the Goblet of Fire, and he becomes a competitor in a grueling battle for glory among three wizarding schools - the Triwizard Tournament.' , 2005 , 1 , NULL , 3 , 0.99 , 157 , 19.99 ,'PG' ,'Trailers' ,'2005-11-18' ,'Harry Potter' , 4 , @sv_film_id ); -- Assign the last generated primary key value to the local variable. SET @sv_film_id := last_insert_id(); -- Insert 5th film in sakila.film table with classic values clause. INSERT INTO film ( title , description , release_year , language_id , original_language_id , rental_duration , rental_rate , length , replacement_cost , rating , special_features , last_update , series_name , series_number , prequel_id ) VALUES ('Harry Potter and the Order of the Phoenix' ,'A film where Lord Voldemort has returned, but the Ministry of Magic is doing everything it can to keep the wizarding world from knowing the truth.' , 2007 , 1 , NULL , 3 , 0.99 , 138 , 19.99 ,'PG-13' ,'Trailers' ,'2007-07-12' ,'Harry Potter' , 5 , @sv_film_id ); -- Assign the last generated primary key value to the local variable. SET @sv_film_id := last_insert_id(); -- Insert 6th film in sakila.film table with classic values clause. INSERT INTO film ( title , description , release_year , language_id , original_language_id , rental_duration , rental_rate , length , replacement_cost , rating , special_features , last_update , series_name , series_number , prequel_id ) VALUES ('Harry Potter and the Half Blood Prince' ,'A film where Voldemort is tightening his grip on Hogwarts and it is no longer the safe haven it once was. Harry and Dumbledore work to find the key to unlock the Dark Lord''s defenses.' , 2009 , 1 , NULL , 3 , 0.99 , 153 , 19.99 ,'PG' ,'Trailers' ,'2009-07-15' ,'Harry Potter' , 6 , @sv_film_id ); -- Assign the last generated primary key value to the local variable. SET @sv_film_id := last_insert_id(); -- Insert 7th film in sakila.film table with classic values clause. INSERT INTO film ( title , description , release_year , language_id , original_language_id , rental_duration , rental_rate , length , replacement_cost , rating , special_features , last_update , series_name , series_number , prequel_id ) VALUES ('Harry Potter and the Deathly Hallows: Part 1' ,'A film where Harry, Ron and Hermione set out on their perilous mission to track down and destroy the Horcruxes - the keys to Voldemort''s immortality.' , 2010 , 1 , NULL , 3 , 0.99 , 146 , 19.99 ,'PG-13' ,'Trailers' ,'2010-11-19' ,'Harry Potter' , 7 , @sv_film_id ); -- Assign the last generated primary key value to the local variable. SET @sv_film_id := last_insert_id(); -- Insert 8th film in sakila.film table with classic values clause. INSERT INTO film ( title , description , release_year , language_id , original_language_id , rental_duration , rental_rate , length , replacement_cost , rating , special_features , last_update , series_name , series_number , prequel_id ) VALUES ('Harry Potter and the Deathly Hallows: Part 2' ,'A film where Harry, Ron and Hermione set out on their perilous mission to track down and destroy the Horcruxes - the keys to Voldemort''s immortality.' , 2011 , 1 , NULL , 3 , 0.99 , 130 , 19.99 ,'PG-13' ,'Trailers' ,'2011-07-15' ,'Harry Potter' , 8 , @sv_film_id ); |
You can put the following commands into a SQL script file to revert the sakila.film table to its base configuration:
DELETE FROM film WHERE film_id > 1000; ALTER TABLE film DROP COLUMN series_name; ALTER TABLE film DROP COLUMN series_number; ALTER TABLE film DROP COLUMN prequel_id; ALTER TABLE film AUTO_INCREMENT = 1000; |
As always, I hope this helps those looking for how to solve a new problem.
Oracle External Table
Supporting my student labs requires the ability to use external tables. I didn’t have a chance to test external tables when I adopted Oracle’s 18c Docker installations. The following are the instructions for the macOS version, which work. Unfortunately, I couldn’t sort out a way to implement external tables in the Windows version of Oracle’s 18c Docker installation. If somebody knows the way to do that, feel free to drop me a note or a URL to where the information may be found.
These two blog posts explain Oracle’s external tables:
External Tables
External Tables with Preprocessing
These instructions build on my base macOS instructions, which you can find in this earlier Install, configure, and use an Oracle Docker Container blog post. You can find the existing Oracle virtual directories when you connect as the system user and query the dba_directories view. I used the following SQL*Plus formatting commands for the query:
SET PAGESIZE 99 COL directory_name FORMAT A24 COL directory_path FORMAT A54 |
and the following SQL query:
SELECT directory_name , directory_path FROM dba_directories; |
It returns the following results:
DIRECTORY_NAME DIRECTORY_PATH ------------------------ ------------------------------------------------------ ORA_DBMS_FCP_LOGDIR /opt/oracle/product/18c/dbhomeXE/cfgtoollogs SDO_DIR_WORK /ade/b/2794046351/oracle/work SDO_DIR_ADMIN /ade/b/2794046351/oracle/md/admin ORA_DBMS_FCP_ADMINDIR /opt/oracle/product/18c/dbhomeXE/rdbms/admin XMLDIR /opt/oracle/product/18c/dbhomeXE/rdbms/xml XSDDIR /opt/oracle/product/18c/dbhomeXE/rdbms/xml/schema ORACLE_OCM_CONFIG_DIR2 /opt/oracle/product/18c/dbhomeXE/ccr/state ORACLE_OCM_CONFIG_DIR /opt/oracle/product/18c/dbhomeXE/ccr/state OPATCH_INST_DIR /opt/oracle/product/18c/dbhomeXE/OPatch DATA_PUMP_DIR /opt/oracle/admin/XE/dpdump/ OPATCH_SCRIPT_DIR /opt/oracle/product/18c/dbhomeXE/QOpatch OPATCH_LOG_DIR /opt/oracle/product/18c/dbhomeXE/rdbms/log ORACLE_BASE /opt/oracle ORACLE_HOME /opt/oracle/product/18c/dbhomeXE 14 rows selected. |
In that prior post, you will find instructions for creating an environment file. The following instructions leverage the $ORACLE_BASE environment variable, which points to the /opt/oracle directory in the Docker environment.
Here are the steps to complete the external file setup, including how to position the physical comma-separated value (CSV) files in the available but otherwise hidden Docker directories. Hidden might be the wrong word choice but they’re not visible from the host macOS operating system. You have to connect to the Docker instance as the root user.
The following Docker command, used in the prior blog post, connects as the root user:
docker exec -it videodb bash |
The instructions start before connecting to and after connecting to the Docker instance:
- Put the
transaction_upload.csvandtransaction_upload2.csvfiles into the following macOS host directory:/Users/<installuser>/oracle/student
which matches to the following internal Docker directory:
/home/student
- As the connected
rootuser, change directory to the$ORACLE_BASE(/opt/oracle) directory with the following command:cd $ORACLE_BASE
- As the connected
rootuser, make anuploaddirectory inside the$ORACLE_BASE(/opt/oracle) directory with the following command:mkdir uploadAs the
rootuser, change the ownership of theuploaddirector fromrootas the owner and primary group tooracleas the owner andoinstallas the primary group with the following command:chown oracle:oinstall upload - As the connected
rootuser, copy thetransaction_upload.csvandtransaction_upload2.csvfiles from the/home/studentdirectory to the$ORACLE_BASE(/opt/oracle) directory with the following command:cp ~student/transaction_upload*.csv $ORACLE_BASE/upload/.
- As the connected
rootuser, change from the$ORACLE_BASE(/opt/oracle) directory to theuploadsubdirectory with the following command:cd uploadAs the
rootuser, change the ownership of thetransaction_upload.csvandtransaction_upload2.csvfiles fromrootas the owner and primary group tooracleas the owner andoinstallas the primary group with the following command:chown oracle:oinstall transaction_upload*.csv - As the connected Oracle
systemuser, create theuploadvirtual directory with the following command:CREATE DIRECTORY upload AS '/opt/oracle/upload';
As the connected Oracle
systemuser, grantreadandwriteprivileges to the Oraclec##studentuser with the following command:GRANT READ, WRITE ON DIRECTORY upload TO c##student;
- As the connected Oracle
c##studentuser, create thetransaction_uploadexternally managed table with the following command:CREATE TABLE transaction_upload ( account_number VARCHAR2(10) , first_name VARCHAR2(20) , middle_name VARCHAR2(20) , last_name VARCHAR2(20) , check_out_date DATE , return_date DATE , rental_item_type VARCHAR2(12) , transaction_type VARCHAR2(14) , transaction_amount NUMBER , transaction_date DATE , item_id NUMBER , payment_method_type VARCHAR2(14) , payment_account_number VARCHAR2(19)) ORGANIZATION EXTERNAL ( TYPE oracle_loader DEFAULT DIRECTORY upload ACCESS PARAMETERS ( RECORDS DELIMITED BY NEWLINE CHARACTERSET US7ASCII BADFILE 'UPLOAD':'transaction_upload.bad' DISCARDFILE 'UPLOAD':'transaction_upload.dis' LOGFILE 'UPLOAD':'transaction_upload.log' FIELDS TERMINATED BY ',' OPTIONALLY ENCLOSED BY "'" MISSING FIELD VALUES ARE NULL ) LOCATION ('transaction_upload.csv')) REJECT LIMIT UNLIMITED;
As the connected Oracle
c##studentuser, query thetransaction_uploadtable to verify that you can read the external file source through the virtualuploaddirectory.COL record FORMAT 99,999 HEADING "Record|Count" SELECT TO_CHAR(COUNT(*),'99,999') AS record FROM transaction_upload;
It should return the following value:
Record
Count
-------
 11,520
- As the connected Oracle
c##studentuser, create thetransaction_reversalexternally managed table with the following command:CREATE TABLE transaction_reversal ( transaction_id NUMBER , transaction_account VARCHAR2(15) , transaction_type VARCHAR2(30) , transaction_date DATE , transaction_amount NUMBER , rental_id NUMBER , payment_method_type NUMBER , payment_account_number VARCHAR2(20) , created_by NUMBER , creation_date DATE , last_updated_by NUMBER , last_update_date DATE) ORGANIZATION EXTERNAL ( TYPE oracle_loader DEFAULT DIRECTORY upload ACCESS PARAMETERS ( RECORDS DELIMITED BY NEWLINE CHARACTERSET US7ASCII BADFILE 'UPLOAD':'transaction_upload2.bad' DISCARDFILE 'UPLOAD':'transaction_upload2.dis' LOGFILE 'UPLOAD':'transaction_upload2.log' FIELDS TERMINATED BY ',' OPTIONALLY ENCLOSED BY "'" MISSING FIELD VALUES ARE NULL ) LOCATION ('transaction_upload2.csv')) REJECT LIMIT UNLIMITED;
As the connected Oracle
c##studentuser, query thetransaction_reversaltable to verify that you can read the external file source through the virtualuploaddirectory.COL record FORMAT 99,999 HEADING "Record|Count" SELECT TO_CHAR(COUNT(*),'99,999') AS record FROM transaction_reversal;
It should return the following value:
Record
Count
-------
  1,170
Unfortunately, the file permission on the Windows version of the Oracle Docker 18c installation make it more difficult to install.
