Archive for the ‘Ubuntu’ Category
Install Docker Ubuntu
Contrary to the instructions, you should do the following as a sudoer user:
sudo apt install -y docker.io |
Install all dependency packages using the following command:
sudo snap install docker |
You should see the following:
docker 20.10.24 from Canonical✓ installed |
You can verify the Docker install with the following command:
sudo docker --version |
It should show something like this:
Docker version 24.0.5, build 24.0.5-0ubuntu1~22.04.1 |
You can check the pulled containers with the following command but at this point there should be no pulled containers.
sudo docker images |
At this point, a docker group already exists but you need to add your user to the docker group with the following command:
sudo usermod -aG docker $USER |
Using the Docker Commands:
- To activate the logging, utilize the -f parameter.
- To divide JSON, use Docker by default; to extract individual keys, use JQ.
- In your Container file, there are quite a few areas where commands may be specified.
- Posting to the volumes could be more effective while the picture is being built.
- Docker offers a highly efficient way to create an alias for its own built-in commands. This makes it easier to set up and handle lengthy and enormous orders. These alias values are stored in the directories /.bashrc or and /.bash_aliases.
- Docker offers further assistance to remove unused code fragments from the installation of the container.
- Docker always favors reading statements from the container file that have not changed. Therefore, time savings may be realized by arranging what is shown in the container file in a way that ensures the elements that are susceptible to change are shown towards the end of the document and those that are most likely to undergo change are shown at the top.
As always, I hope this helps.
MySQL on Ubuntu
Working with my students to create an Ubuntu virtual environment for Python development with the MySQL database. After completing the general provisioning covered in this older post, I’d recommend you create a python symbolic link before installing the MySQL-Python driver.
sudo ln -s /usr/bin/python3 /usr/bin/python |
You install the Python development driver with the following:
sudo apt-get -y install python3-mysql.connector |
Create a python_connect.py file to test your Python deployment’s ability to connect to the MySQL database:
#!/usr/bin/python # Import the library. import mysql.connector from mysql.connector import errorcode try: # Open connection. cnx = mysql.connector.connect(user='student', password='student', host='localhost', database='sakila') # Print the value. print("Database connection resolved.") # Handle exception and close connection. except mysql.connector.Error as e: if e.errno == errorcode.ER_ACCESS_DENIED_ERROR: print("Something is wrong with your user name or password") elif e.errno == errorcode.ER_BAD_DB_ERROR: print("Database does not exist") else: print(e) # Close the connection when the try block completes. else: cnx.close() |
You should change the file permissions of the python_connect.py to read-write-execute as owner, and read-execute as group and other with the following command:
chmod 755 python_connect.py |
Then, you can test your python_connect.py program from the local directory with the following command:
./python_connect.py |
You see the following output if it works:
Database connection resolved. |
As alway, I hope those looking for a code complete solutionk
Ubuntu Desktop 22.04
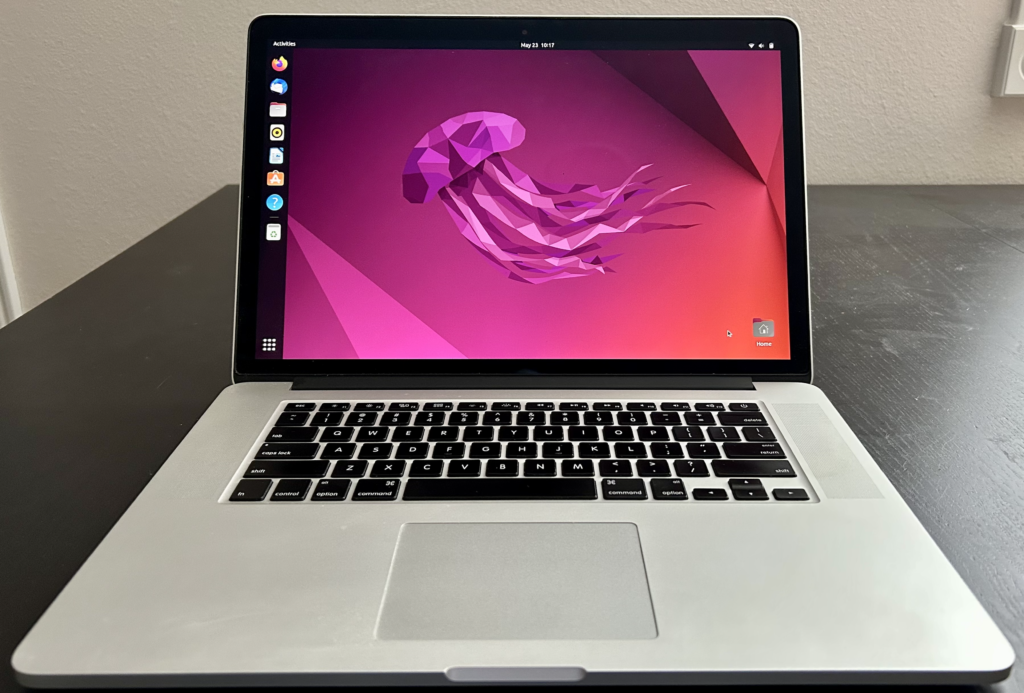
I finally got around to installing Ubuntu Desktop, Version 22.04, on my MacBook Pro 2014 since OS X stopped allowing upgrades on the device in 2021. While I replaced it in 2021 with a new MacBook Pro with an i9 Intel Chip. The Ubuntu documentation gave clear instructions on how to create a bootable USB drive before replacing the Mac OS software..
Unfortunately, networking was not well covered. It left me with two questions:
- How to configure Ubuntu Desktop 22.04 to the network?
You need to use an RJ45 network cable (in this case also an RJ45 to Thunderbolt adapter) and reboot the OS. It will automatically configure your DCHP connection.
- How to configure Wifi for Ubuntu Desktop 22.04?
You need to download and install a library, which is covered below.
After the Ubuntu Desktop installation, I noticed it didn’t provide any opportunity to update the software or configure the network. It also was not connected to the network. I connected the MacBook Pro to a physical Internet cable and rebooted the Ubuntu OS. It recognized the wired network. Then, I upgraded the installed libraries, which is almost always the best choice.
At this point, I noticed that the libraries to enable a WiFi connection were not installed. So, I installed the missing Wifi libraries with this command:
sudo apt-get install dbms bcmwl-kernel-source |
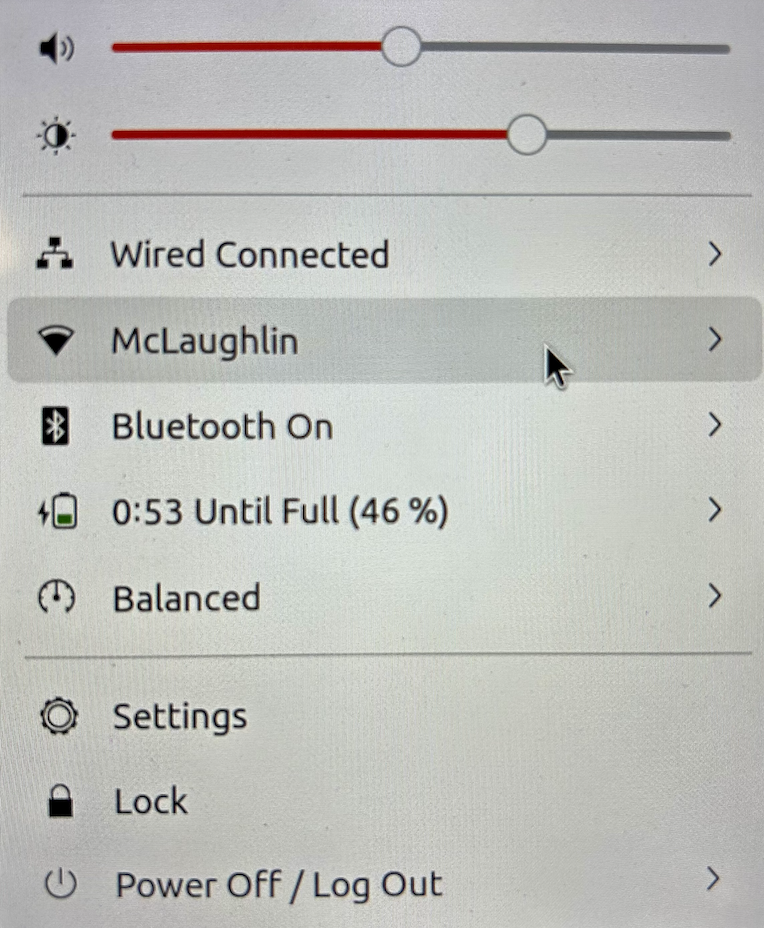
After you’ve installed the bcmwl-kernel-source libraries, navigate to the top right where you’ll find a small network icon. Click on the network icon and you’ll see the following dialog. Click on your designated Wifi, enter the password and you’ll have a Wifi connection.
As always, I hope this note helps those trying to solve a real world problem.
Find a string in files
From time to time, folks ask questions about how to solve common problems in Linux or Unix. Today, the question is: “How do I find a list of files that contain a specific string?” There are two alternatives with the find command, and the following sample searches look for files that contain a sqlite3 string literal.
- Search for only the file names:
find . -type f | xargs grep -li sqlite3 |
Or, the more verbose:
find . -type f -exec grep -li sqlite3 /dev/null {} + |
- Search for the file names and text line:
find . -type f | xargs grep -i sqlite3 |
Or, the more verbose:
find . -type f -exec grep -i sqlite3 /dev/null {} + |
Don’t exclude the /dev/null from the verbose syntax or you’ll get the things you lack permissions to inspect or that raise other errors. I don’t post a lot of Linux or Unix tips and techniques, and you may find this site more useful to answer these types of questions:
Unix & Linux Stack Exchange web site
As always, I hope this helps those you land on the blog page.
Handling Bash Parameters
Bash shell or shells in general hang on details. An ex-student was trying to sort something out in Learning the bash Shell, 3rd Edition, which isn’t on my short list of good shell scripting books. I concur more or less with the comment on Amazon.com that there are too few examples in the book. I think the free examples here may serve folks in lieu of a book.
Anyway, the student’s problem involved processing multiple word parameters in an array. They were confused about how to handle ${*}, ${@} "${*}" and "${@}" when assigning them into an array for subsequent processing. By the way, I did find a decent explanation of the concept on Page 89 in my copy of the book. Though my copy is a 2nd Edition.
Here’s a dressed up sample of what they were attempting to do:
1 2 3 4 5 6 7 8 9 10 11 12 13 14 15 16 17 18 19 20 21 22 23 24 25 26 27 28 29 30 31 32 33 34 | #!/bin/bash # Print header information. echo "Begin Program!" echo "" # Count the call parameters. echo "Count call parameters [" ${#} "]" echo "" # Declare an array of delimited parameters. ARRAY=(${@}) # Declare a numeric constant of array elements. ELEMENTS=${#ARRAY[@]} # Does the parameter account agree with array elements. if [[ ${#} = ${#ARRAY[@]} ]]; then echo "Parameters match exploded array elements." else echo "Parameters ["${#}"] don't match exploded array elements ["${ELEMENTS}"]." fi # Echo line break. echo "" # Echo the parameter list. for (( i = 0; i < ${ELEMENTS}; i++ )); do echo " ARRAY["${i}"]=["${ARRAY[${i}]}"]" done # Print footer information. echo "" echo "End Program!" |
With the ARRAY=(${@}) assignment on line #12, they exploded the elements into individual words. They thought that the IFS (Internal Field Separator) environment variable was defined wrong but it wasn’t.
They called the program like this from the command-line:
sample.sh "Me too" "You too" |
Then, they got this syntax and were surprised.
Begin Program! Count call parameters [ 2 ] Parameters [2] don't match exploded array elements [4]. ARRAY[0]=[Me] ARRAY[1]=[too] ARRAY[2]=[You] ARRAY[3]=[too] End Program! |
They were close. The ARRAY=(${@}) assignment on line #12. There attempt to fix it with ARRAY=(${*}) led nowhere because it’s more or less the same and explodes into 4 words. To their credit, they put quotes around it like this ARRAY=("${*}") and got two parameters but one array element, as shown below:
Begin Program! Count call parameters [ 2 ] Parameters [2] don't match exploded array elements [1]. ARRAY[0]=[Me too You too] End Program! |
What they needed was ARRAY=("${@}") on line #12 to explode quote delimited parameters. Here’s a complete working example of the final code.
1 2 3 4 5 6 7 8 9 10 11 12 13 14 15 16 17 18 19 20 21 22 23 24 25 26 27 28 29 30 31 32 33 34 | #!/bin/bash # Print header information. echo "Begin Program!" echo "" # Count the call parameters. echo "Count call parameters [" ${#} "]" echo "" # Declare an array of delimited parameters. ARRAY=("${@}") # Declare a numeric constant of array elements. ELEMENTS=${#ARRAY[@]} # Does the parameter account agree with array elements. if [[ ${#} = ${#ARRAY[@]} ]]; then echo "Parameters match exploded array elements." else echo "Parameters ["${#}"] don't match exploded array elements ["${ELEMENTS}"]." fi # Echo line break. echo "" # Echo the parameter list. for (( i = 0; i < ${ELEMENTS}; i++ )); do echo " ARRAY["${i}"]=["${ARRAY[${i}]}"]" done # Print footer information. echo "" echo "End Program!" |
Changing that one element yields their desired output:
Begin Program! Count call parameters [ 2 ] Parameters match exploded array elements. ARRAY[0]=[Me too] ARRAY[1]=[You too] End Program! |
As always, I hope this helps some folks.
Ubuntu VMWare Tools Install
Rebuilding new reference environments on my MacPro, I started with Ubuntu 10.04.01 LTS (64 bit), I had to recall the step to install VMWare Tools. It’s quite simple but I know my students may need the steps to configure a VMWare virtual machine and it may benefit others. While this Ubuntu help page is a good start it isn’t a step-by-step configuration guide.
- Navigate to the VMWare Menu, choose Virtual Machine and in the drop down menu Install VMWare Tools. This will mount a virtual CD in the Ubuntu virtual machine.
- Open a terminal session by choosing Applications, within the drop down choose Accessories, and in the subsequent drop down choose Terminal. It will launch a terminal session for command-line entry. The screen shot will look like the following.

- From the command-line perform the following tasks:
cd /media/VM* cp VMwareTools*.gz /tmp cd /tmp gunzip VMwareTools*.gz tar -xvf VMwareTools*.tar cd vmware-tools-distrib sudo ./vmware-install.pl |
- After starting the
vmware-install.pl, accept all the default prompts. Alternatively, as Josh points out enter the following to skip the prompts:
sudo ./vmware-install.pl --default |
- After the configuration completes, you’re prompted to restart the X-Windows. The easiest way is to reboot. You click on the upper right corner to get the drop down menu to restart Ubuntu. A screen shot follows.

This completes the VMWare Tools installation on Ubuntu but unfortunately, you may need to setup the network connection. In a couple instances, the Ubuntu installation appears to have corrupted the VMWare networking process. The result is that the DNS setup on Ubuntu didn’t work.
When the Ubuntu /etc/resolv.conf file is empty. You should first restart the VMWare network. This can be done without rebooting your native Mac OS X. Open a Terminal session, and navigate to the following directory and restart the VMWare network or use this command with backquoting.
sudo /Library/Application\ Support/VMware\ Fusion/boot.sh --restart |
If your Ubuntu /etc/resolv.conf file is empty, you can manually edit it. The last line in this sample depends on your IP subnet. I’ve entered it by assuming that you’re on 192.168.75.0 to 192.168.75.255 with a 255.255.255.0 network mask. You can refer to this prior post for the details on how you find your VMWare NAT subnet.
When your Ubuntu /etc/resolv.conf file is empty, add these values:
# Generated by NetworkManager
domain localdomain
search localdomain
nameserver 192.168.75.2 |
Hope this helps some folks.
What a VMWare Thrill …
I’d upgraded from VMWare Fusion 2 to 3 and taken care of most instances. A NASTY surprise awaited me when I tried to upgrade my Linux installations this morning.
You MUST to uninstall VMWare tools from your repository of Linux operating systems before upgrading your VMWare Fusion or ESX server. If you don’t, you can’t access the console because the drivers make the console look like this:

Perhaps I missed this note when, as an early adopted I opted to move straight to VMWare Fusion 3. I would have complied with these instructions to avoid this headache.
All that’s required now, is that: (a) I export 500 GBs worth of virtual machines to another machine running VMWare Fusion 2; (b) Individually start each machine and run the uninstall VMWare Tools command individually; and, (c) Shutdown and reposition all virtual machines on the original server.
As stated in the note, the command to remove it is:
/usr/bin/vmware-tools-uninstall.pl |
Click on the note in the event the link fails to resolve, which would mean the note vanishes into oblivion some day in the future …

While I’ve another machine that’s not yet upgraded, this is a major inconvenience. It’s a shame that the Linux components don’t install automatically. It’s a shame that the install didn’t say something like, “Don’t do this if you’ve Linux virtual machines, unless you’ve removed their VMWare Tools installation.”
Another word to the wise, you don’t get the Linux Tools automatically when you download the product. The software prompts you to download the additional components when you attempt to launch a Linux environment. A cruel irony since by the time you see the prompt, you can’t! This is a change from the prior upgrade process.
Yes, haste makes waste but now I know. In the future, treat all VMWare upgrades like those from Microsoft test, re-test, re-authenticate in a small way before upgrading. Do you think VMWare really want to send that message to its customer base?
![]() I got back to this tonight, and thanks to Red Hat’s Session Manager I was able to fix the Red Hat VMs. Launching it, I simply switched to the Failsafe Terminal and ran the following command, as per the note:
I got back to this tonight, and thanks to Red Hat’s Session Manager I was able to fix the Red Hat VMs. Launching it, I simply switched to the Failsafe Terminal and ran the following command, as per the note:
# /usr/bin/vmware-uninstall.pl |

After that, I rebooted. Then, installed (mounted the VMWare Tools disk) from the VMWare Fusion menu. Opening a terminal as root, I then re-installed and configured VMWare Fusion. Those are done. As more time allows, I’ll update about the others.
I’m now reconfiguring the network since the VMWare Fusion 2 bridged at a 172.16.153 subdomain and VMWare Fusion 3 bridges at a 172.16.123 subdomain.
sudo conferred powers
Coming from Solaris Unix and Red Hat Linux to Ubuntu, Mac OS X and other distributions of Linux was interesting a couple years ago. The fact that you couldn’t su to the root account was tedious. It didn’t take too long (a couple momentes) to recall that I could assume those privileges in a shell, like:
admin_user@machine_name:~$ sudo sh # |
Naturally, this avoids entering sudo before a series of commands and makes administering any box simpler. It should work on all distributions but I’ve not checked ALL of them because they’re too numerous anymore. I know it works on the Mac OS X, Ubuntu, and now Fedora distributions.
Today, I got a kick from the message provided by Fedora 10 when you assume root permissions. It’s been over 20 years since I got that lecture on an AT&T box at First Interstate Bank. I imagine that any equivalent box to that is in a museum, while that bank was acquired by Wells Fargo in the early 1990s. The message from Fedora is just too funny to pass on making a comment. Here’s the screen shot:

Hope it brought a smile to some faces …
Aborting hung VMWare
Customizing the toolbar is one of the things that I’ve found important in using VMWare Fusion to test various Linux distributions. It’s nice they put Suspend by default on the toolbar but it would be nicer still if they put Shut Down. I got tired of looking for the PID to manually kill the virtualization from the Terminal command line. It is so much easier to add a Shut Down widget before trying to install VMWare Tools because that’s where some distributions hang.
Here are the steps to customize the toolbar:
1. Right click on the toolbar before running the VMWare instance, and you’ll see this context menu. Choose the Customize Toolbar… choice from the list.

2. The prior step lets you customize the toolbar though the following menu option dialog. Just click on the icon you want and drag it on to the toolbar. I’d suggest dragging Shut Down and Full Screen on to the toolbar.

I prefer putting the Shut Down to the left of the Suspend button, like this:

Hope this helps somebody.
Overriding SQL*Plus ed
I was looking for a cool post to point my students to about overriding the ed tool in SQL*Plus but couldn’t find one. A number of posts showed how to set vi as the default editor in Linux or Unix but none showed how to replace Microsoft Notepad with something else. Instructions for both operating environments are here.
Linux or Unix:
This is simple because all you need to do is open a terminal session and type the following command:
# which -a vi |
vi is typically a symbolic link to /usr/bin/vi, and it points to /usr/bin/vim in many cases, like Linux or Mac OS X. You can now add that to your SQL*Plus session interactively by typing:
SQL> define _editor=vi |
You can set this in your Oracle Database 10g or 11g home, or in the Oracle Database Instant Client. It is found in the $ORACLE_HOME/sqlplus/admin/glogin.sql file, and example is noted at the end of this blog.
Windows:
This is actually quite easy but different releases of Windows provide different behaviors. Some of those behaviors provide alternatives that don’t work in all Windows releases. The off-beat approaches let you launch the alternate editor but they don’t always edit the active buffer. The ones I’ve chosen to show you should work in all Windows releases, but let me know if they don’t in your environment.
1. Install the editor(s) you want to use. I’ve installed and tested GVIM (a vi editor) and Notepad++ on Windows XP and Vista with Oracle Database 10g and 11g.
2. Add the directory path to these products to your system path. This takes four steps. First, you open your System Properties dialog box. Click the Environment Variables button to set an environment variable.

In the Environment Variables dialog box, you should select the PATH variable from the System variables list. Click the Edit button to change the PATH variable.

Add the following in the Edit System Variable dialog box. You should note that you use a semi-colon to separate path elements in Windows (not a colon like Linux or Unix). After you add the editor path, click the OK button. You can append any number of editors if you’ve got a bunch that you like to use.

You should now click the OK button on the Environment Variables and System Properties dialog boxes in turn. Now you can open any command prompt and type the executable name to run the program, like gvim72.exe.
3. The Oracle Database 10g and 11g expect the executable for the default or override ed (editor) utility exists in the %SystemRoot%\System32 directory, which is the C:\WINDOWS\System32 directory. Copy only the executable, like GVIM.EXE, to the C:\WINDOWS\System32 directory.
4. You can now interactively type the following each time you log into the database at the SQL command prompt:
SQL> define _editor=gvim |
Alternatively, you can place that command in the following file:
%ORACLE_HOME%\sqlplus\admin\glogin.sql |
It is run each time you login to the database. The file would look like this if you wanted to run gvim as your override editor, which means when you type ed to change the SQL buffer file. The SQL buffer file contains the last SQL statement executed. That file is named afiedt.buf, which stands for A File Eidtor Buffer (debunked by Niall in the comment, the AFI stands for AFI Advanced Friendly Interface). As pointed to by Laurent’s comment, you should change the file extension to take advantage of GeSHi (Generic Syntax Highlighter) for your code.
5. After you’ve done all that. If you’d like to include your USER name and TNS alias, you can run the following command interactively or put it in your glogin.sql script. Caution, this only works for Oracle 10g forward.
SQL> SET sqlprompt _user"@"_connect_identifier> |
This sets the SQLPROMPT to the following for a user account named STUDENT at the standard orcl TNS alias:
STUDENT@orcl> |
The rules for setting the SQLPROMPT aren’t intuitive. You can only use one set of double quotes. In the preceding example, the quotes surround the @ symbol between two SQL*Plus macros, which are the _USER and _CONNECT_IDENTIFIER. There’s no magic in that symbol and you can replace it with another. When you want text before, in between, and after a macro or two, you surround the whole thing with double quotes, and allow a white space before macros or use single quotes around string literals.
The white space example works like this:
SQL> SET sqlprompt "SQL: _user at _connect_identifier>" |
This sets the SQLPROMPT to the following for a user account named STUDENT at the standard orcl TNS alias:
SQL: STUDENT at orcl> |
The nested single quotes example works like this:
SQL> SET sqlprompt "'SQL:'_user at _connect_identifier>" |
This sets the SQLPROMPT to the following for a user account named STUDENT at the standard orcl TNS alias:
SQL:STUDENT at orcl> |
The single quotes around the SQL: lets you remove the space between the colon and user name. I’ve never seen a way to control case for the macro return values but there may be one. Perhaps somebody will add a comment about it. If you put more than two double quotes in the descriptor passed to SQLPROMPT environment variable, SQL*Plus raises an SP2-0735 error.
6. Here is a sample of the glogin.sql file:
-- -- Copyright (c) 1988, 2005, Oracle. All Rights Reserved. -- -- NAME -- glogin.sql -- -- DESCRIPTION -- SQL*Plus global login "site profile" file -- -- Add any SQL*Plus commands here that are to be executed when a -- user starts SQL*Plus, or uses the SQL*Plus CONNECT command. -- -- USAGE -- This script is automatically run -- -- Define the override or default editor. define _editor=gvim -- Set the edit file to allow GeSHI highlighting. SET editfile=afiedt.sql -- Set the SQL*Plus prompt to show user and TNS Alias. SET sqlprompt "'SQL:'_user at _connect_identifier>" |
Hope this helps a few folks stuck with Windows as the operating system for Oracle.
