Archive for the ‘PostgreSQL DBA’ tag
PostgreSQL 14 Install
This post is a step-by-step install guide to PostgreSQL 14 on Windows 10. It sometimes makes me curious that folks want a summary of screen shots from a Microsoftw Software Installer (MSI) because they always appear to me as straightforward.
This walks you through installing PostgreSQL 14, EDS’s version of Apache, supplemental connection libraries, and pgAdmin4. You can find the post-installation steps in my earlier Configure PostgreSQL 14 post.
PostgreSQL Database 14 Installation Steps
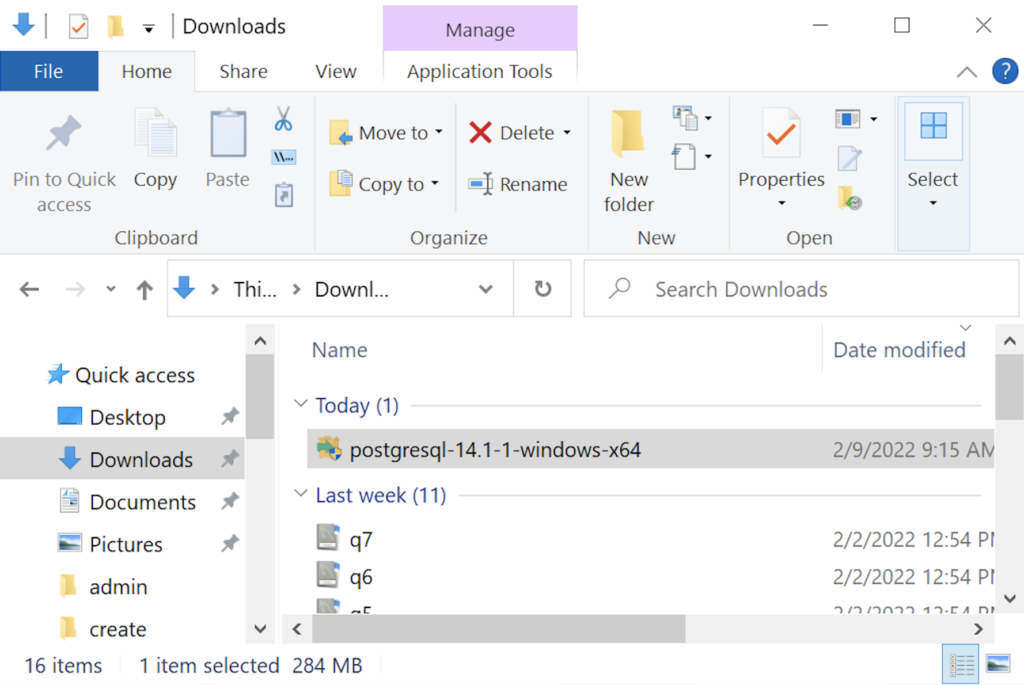
- The first thing you need to do is download the PostgreSQL MSI file, which should be in your C:\Users\username\Downloads directory. You can double-click on the MSI file.
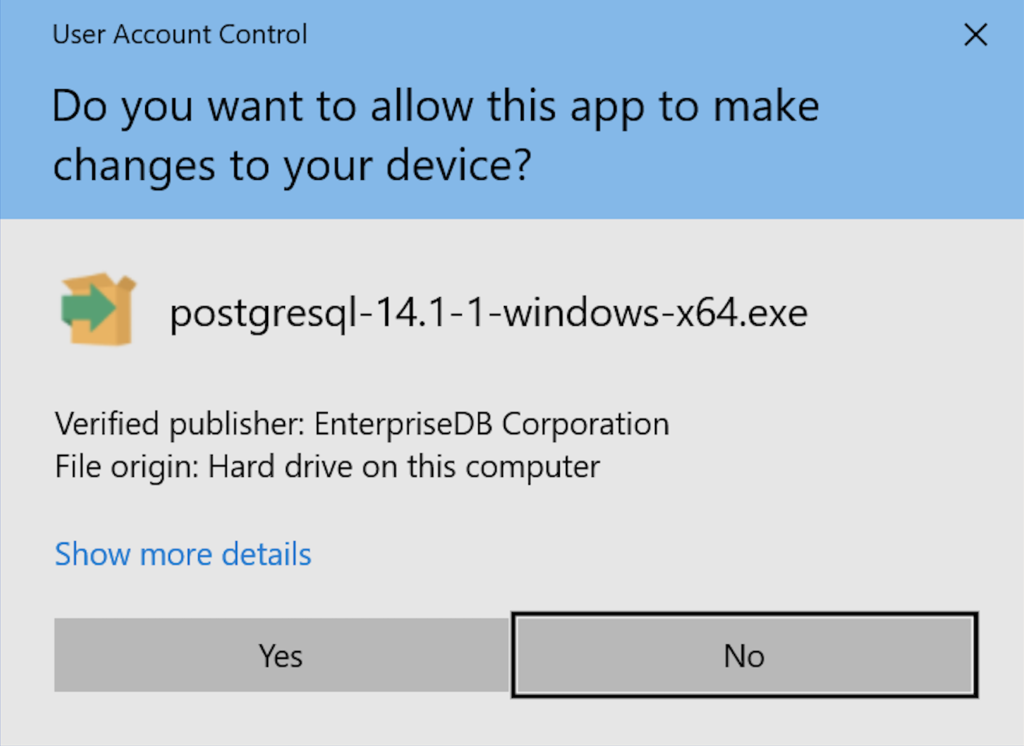
- After double-clicking on the MSI file, you are prompted by User Account Control to allow the PostgreSQL MSI to make changes to your device. Clicking the Yes button is the only way forward.
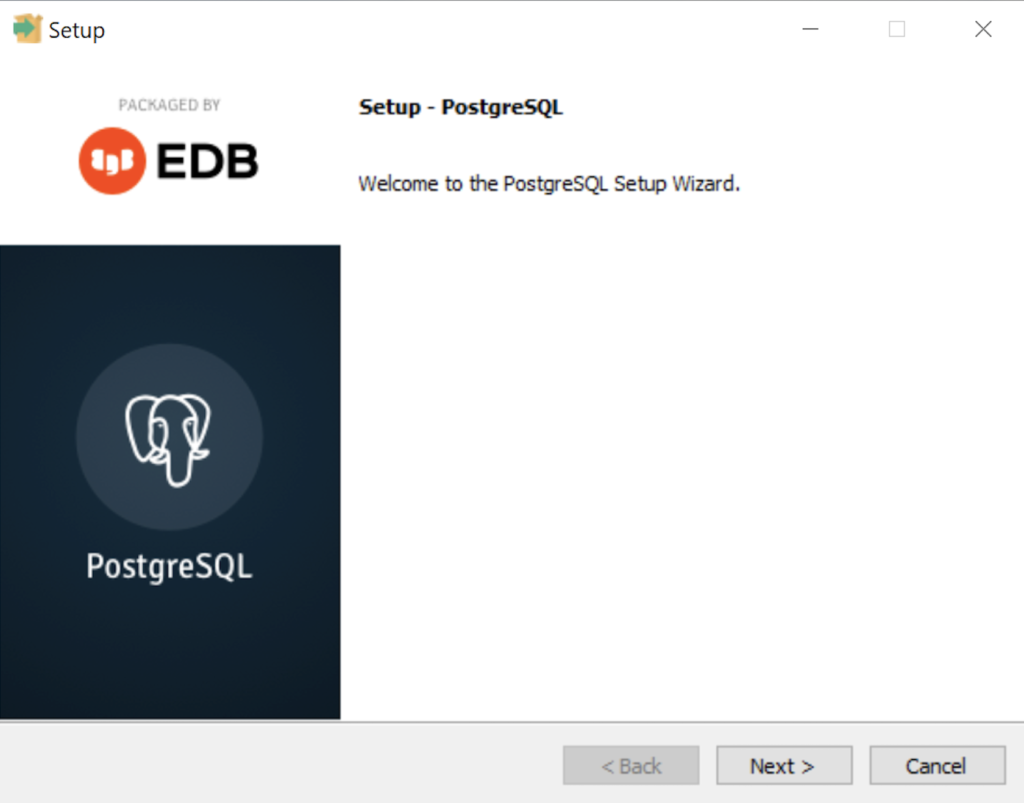
- The Setup – PostgreSQL dialog requires you click the Next button to proceed.
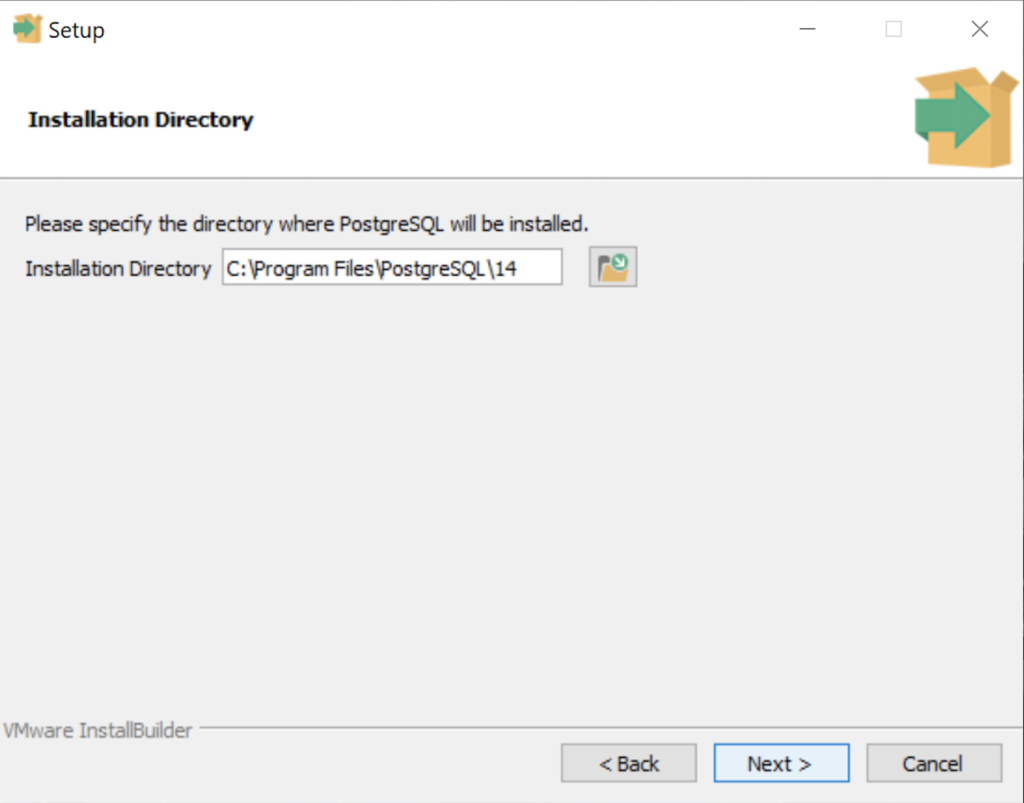
- The Installation Directory dialog prompts you for an installation directory. The default directory is C:\Program Files\PostgreSQL\14 and you should use it. Click the Next button to continue.
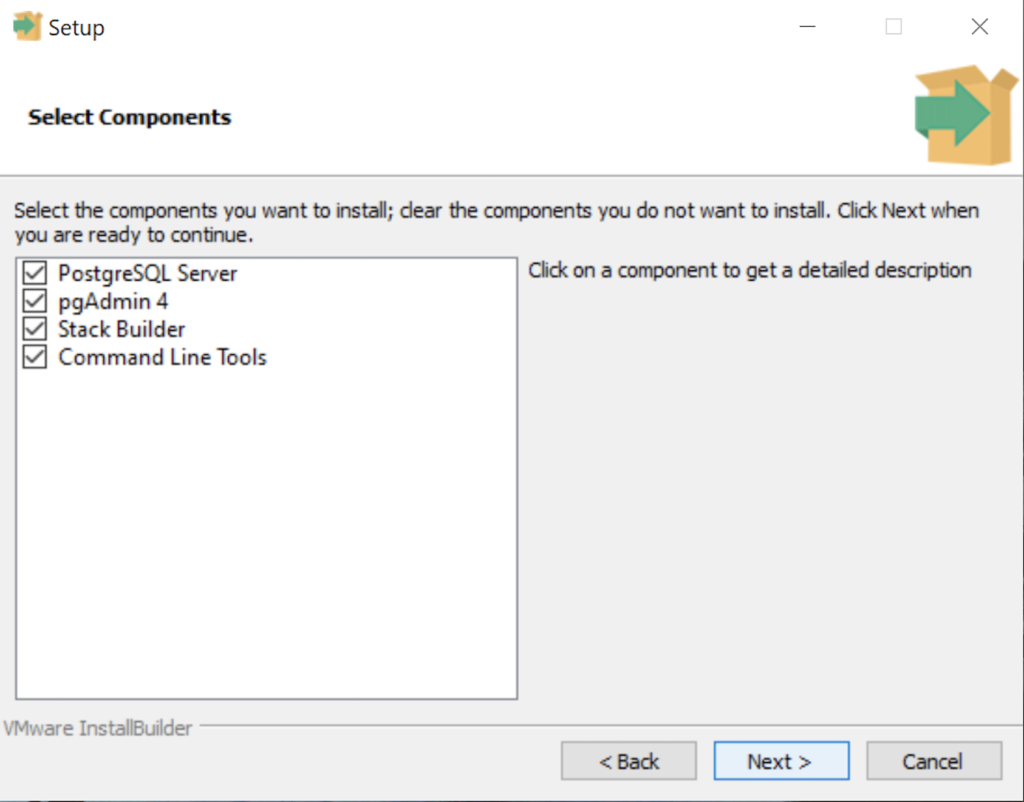
- The Select Components dialog prompts you to choose the products to install. You should choose all four – PostgreSQL Server, pgAdmin 4, Stack Builder, and Command Line Tools. Click the Next button to continue.
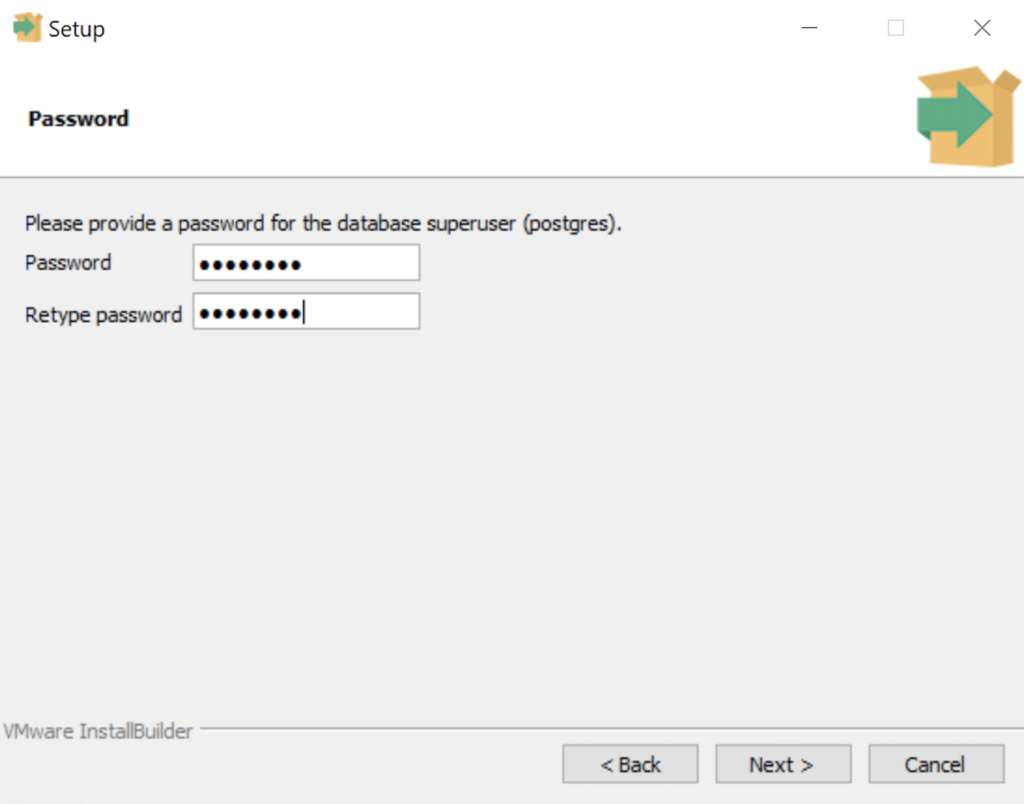
- The Password dialog prompts you for the PostgreSQL superuser password. In a development system for your local computer, you may want to use something straightforward like cangetin. Click the Next button to continue.
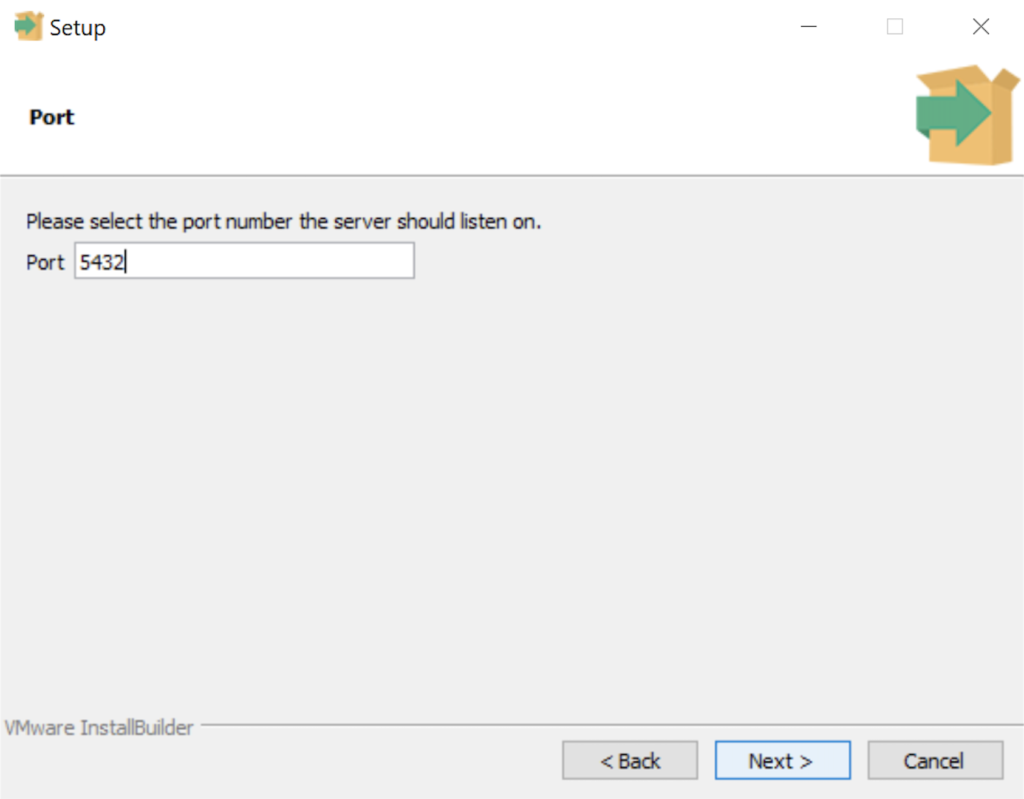
- The Setup dialog lets you select the port number for the PostgreSQL listener. Port 5432 is the standard port for a PostgreSQL database, and ports 5433 and 5434 are used sometimes. Click the Next button to continue.
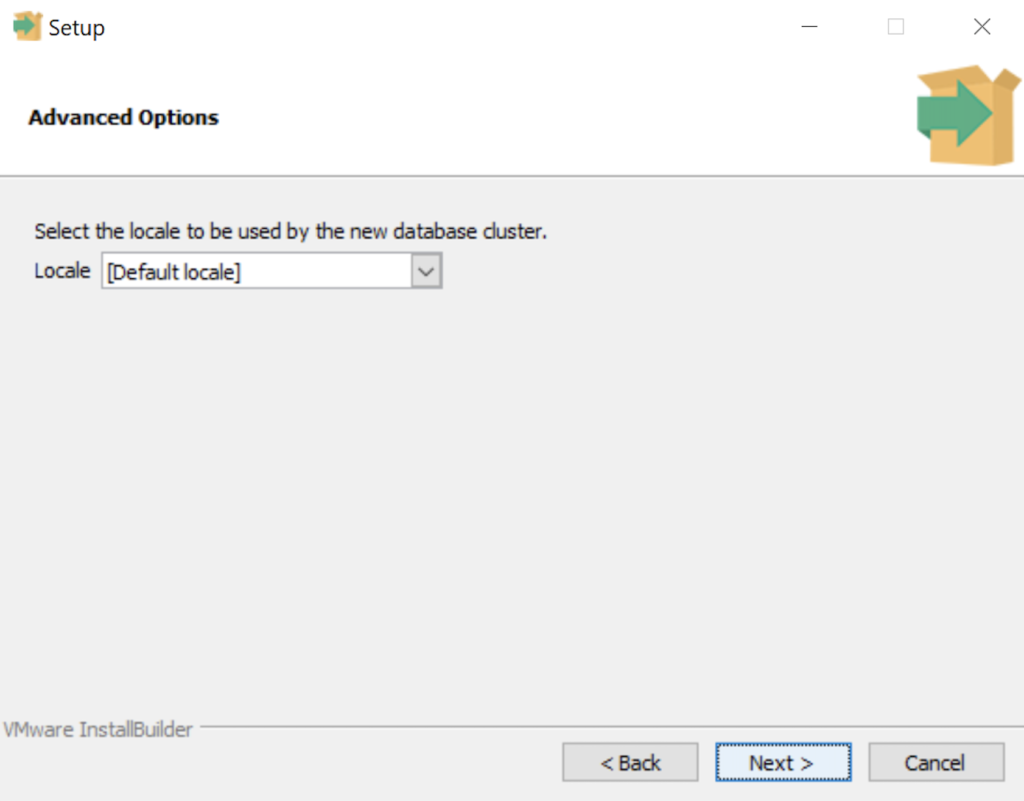
- The Advanced Options dialog lets you select the Locale for the database. As a rule for a development instance you should chose the Default locale. Click the Next button to continue.
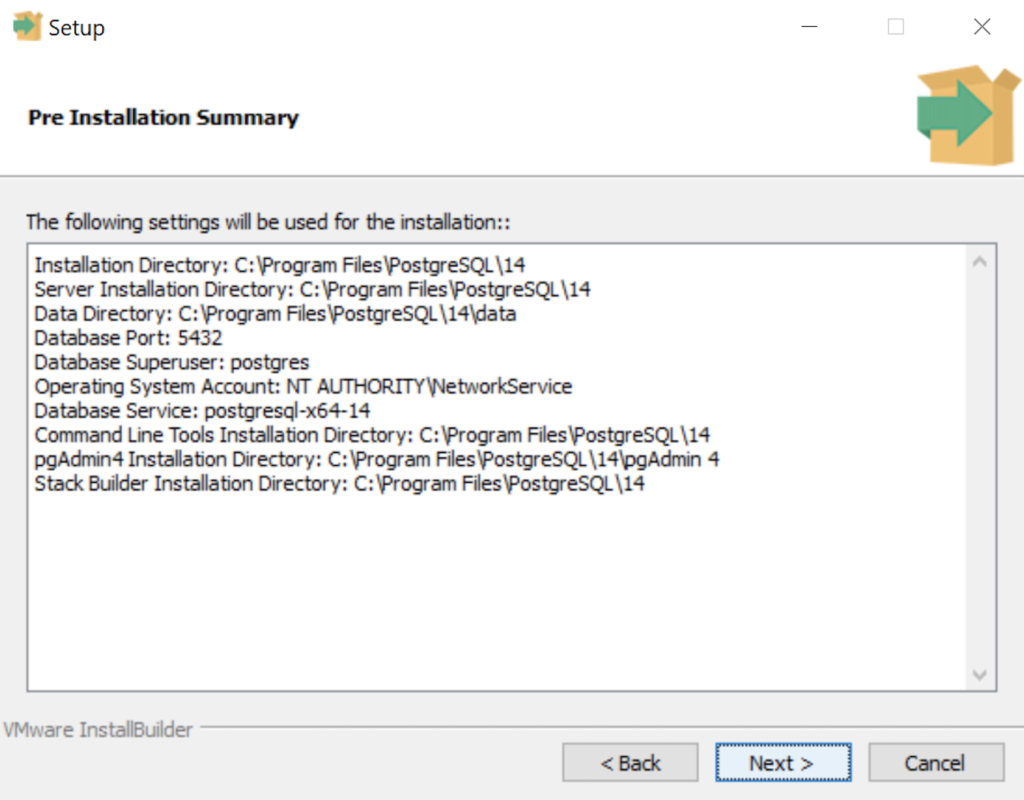
- The Pre Installation Summary dialog tells you what you’ve chosen to install. It gives you a chance to verify what you are installing. Click the Next button to continue.
- The Ready to Install dialog lets you pause before you install the software. Click the Next button to continue.
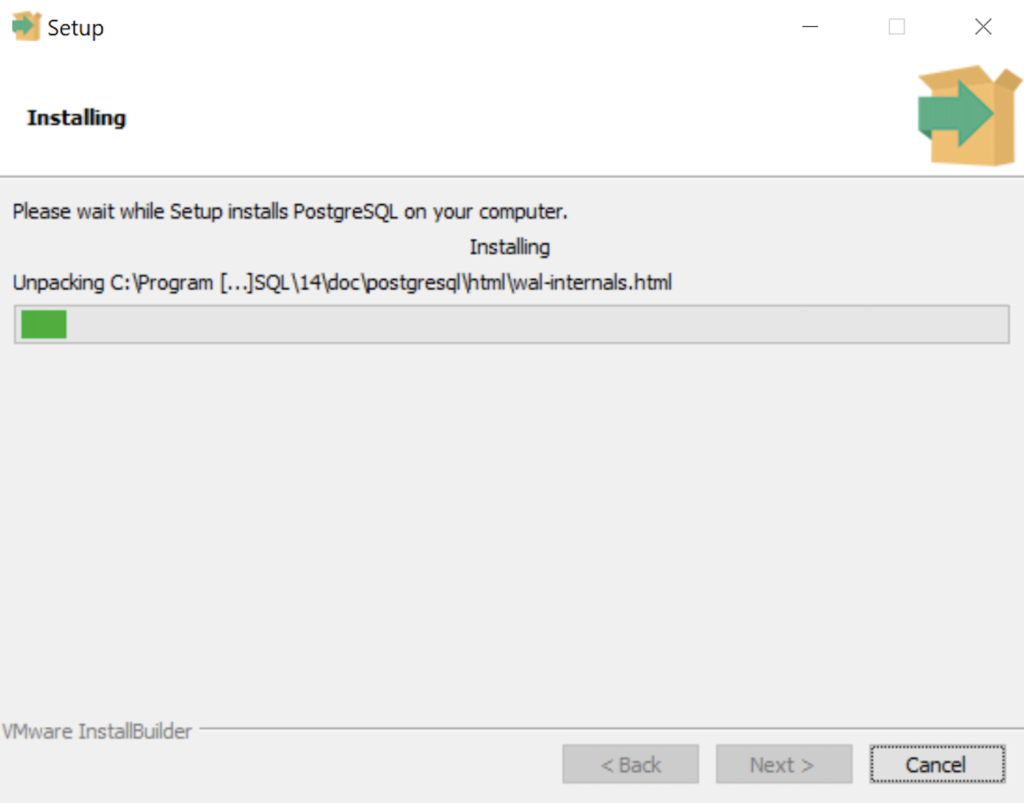
- The Installing dialog is a progress bar that will take several minutes to complete. When the progress bar completes, click the Next button to continue.
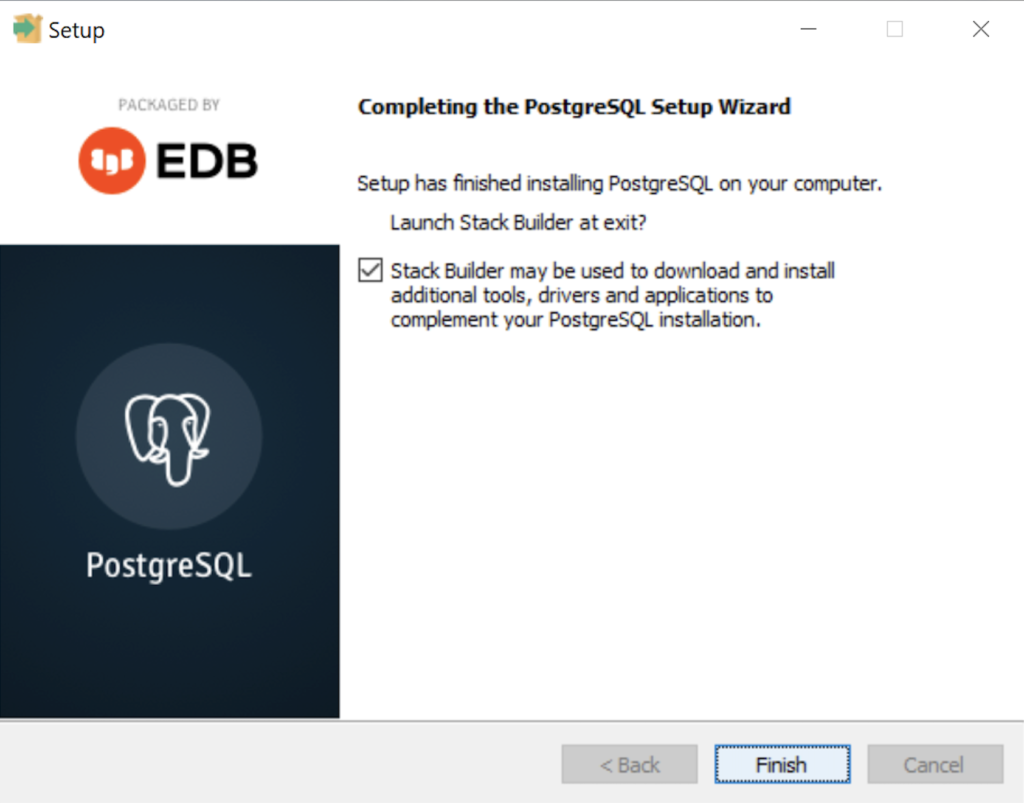
- The Completing the PostgreSQL Setup Wizard dialog tells you that the installation is complete. Click the Finish button to complete the PostgreSQL installation.
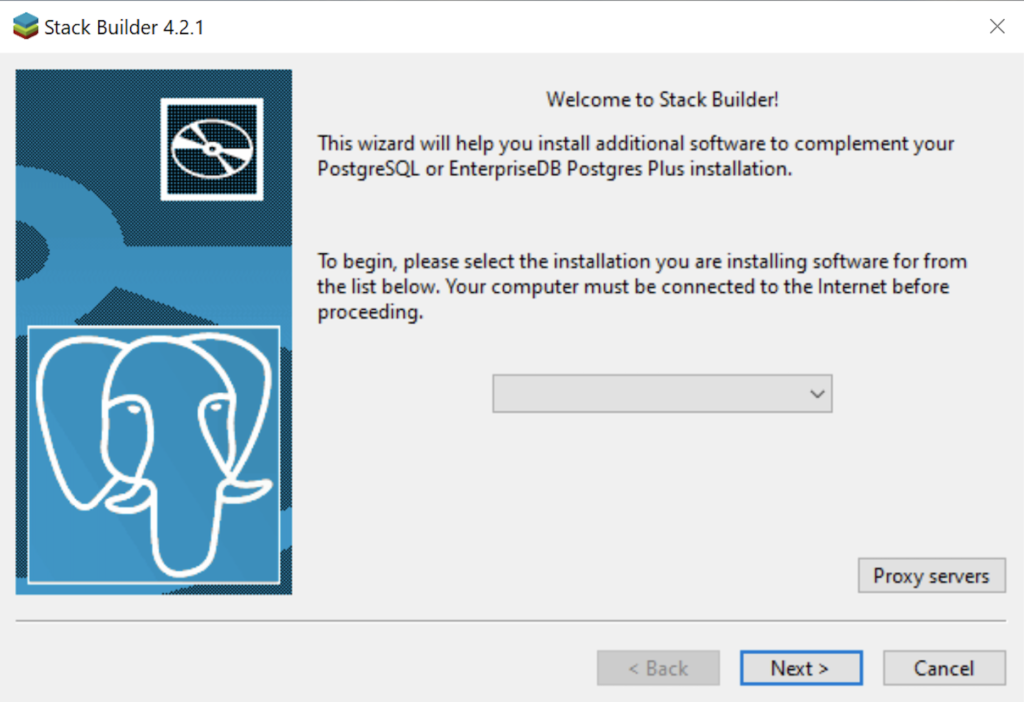
- The Welcome to Stack Builder! dialog lets you choose an installation from those on your computer to build a software stack. Click the drop down box to chose an installation.
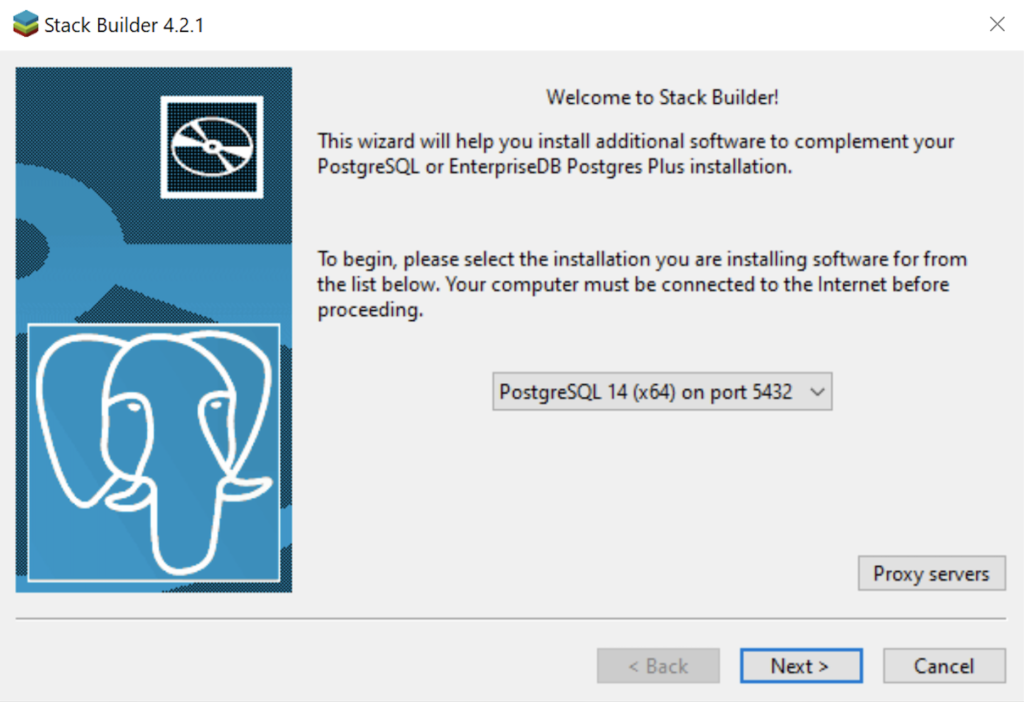
- The second copy of the Welcome to Stack Builder! dialog shows the choice of the PostgreSQL installation you just completed. Click on the Next button to continue.
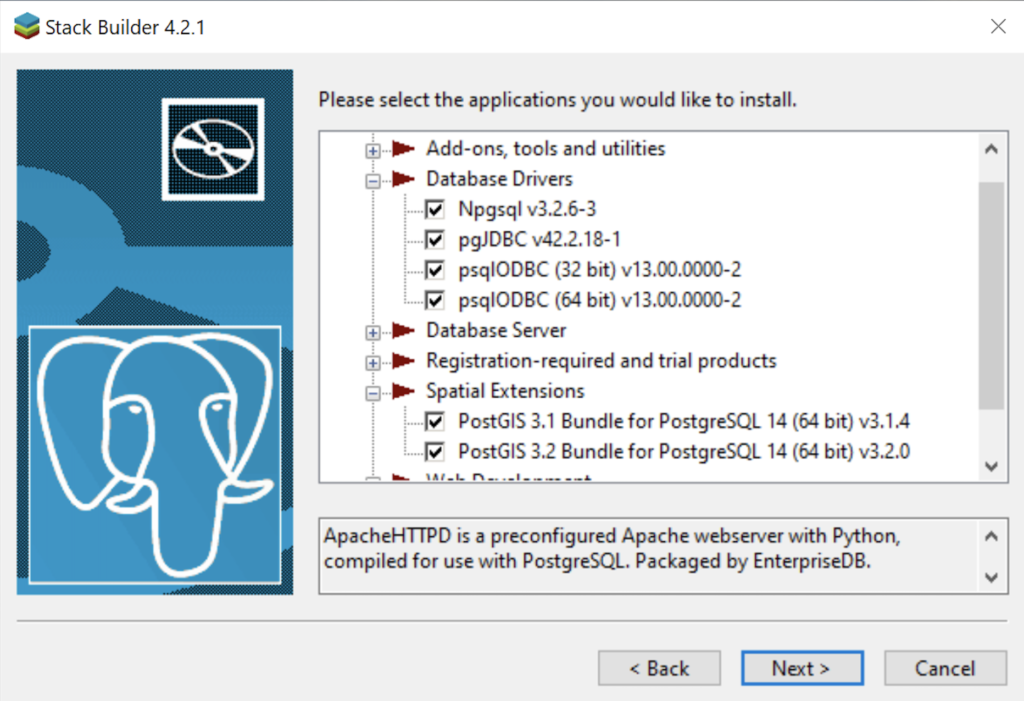
- The Stack Builder dialog prompts you to choose the products to install. You should choose all four database drivers – Npgsql, pgJDBC, psqlODBC, psqlODBC; and the PostGIS 3.1 and PostGIS 3.2 Bundles for PostgreSQL. Then, click the Next button to continue.
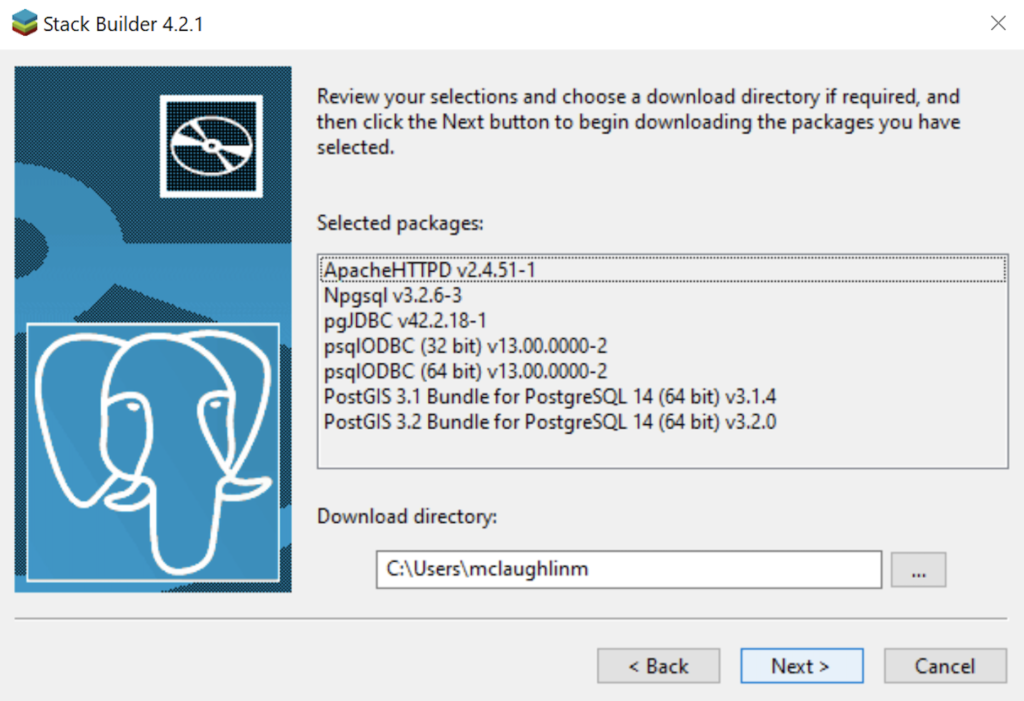
- The Stack Builder dialog shows you the products you will install. You should choose all four database drivers – Npgsql, pgJDBC, psqlODBC, psqlODBC; and the PostGIS 3.1 and PostGIS 3.2 Bundles for PostgreSQL. Click the Next button to continue.
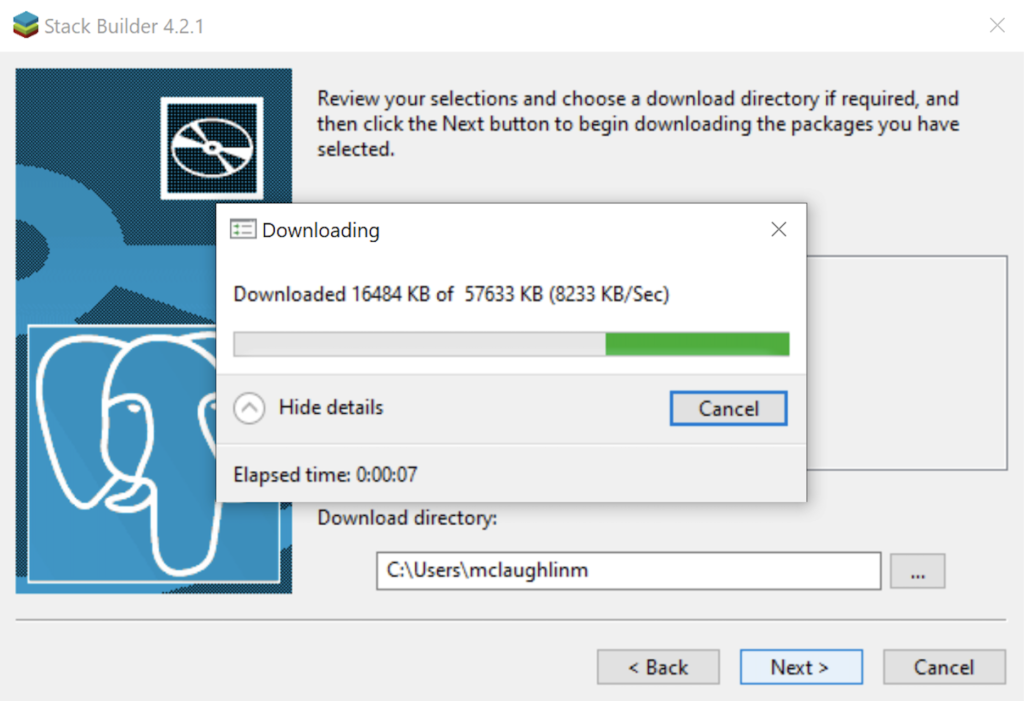
- The Stack Builder dialog shows a download progress bar subdialog, which may take some time to complete. The Stack Builder dialog’s Progress Bar automatically advances to the next dialog box.
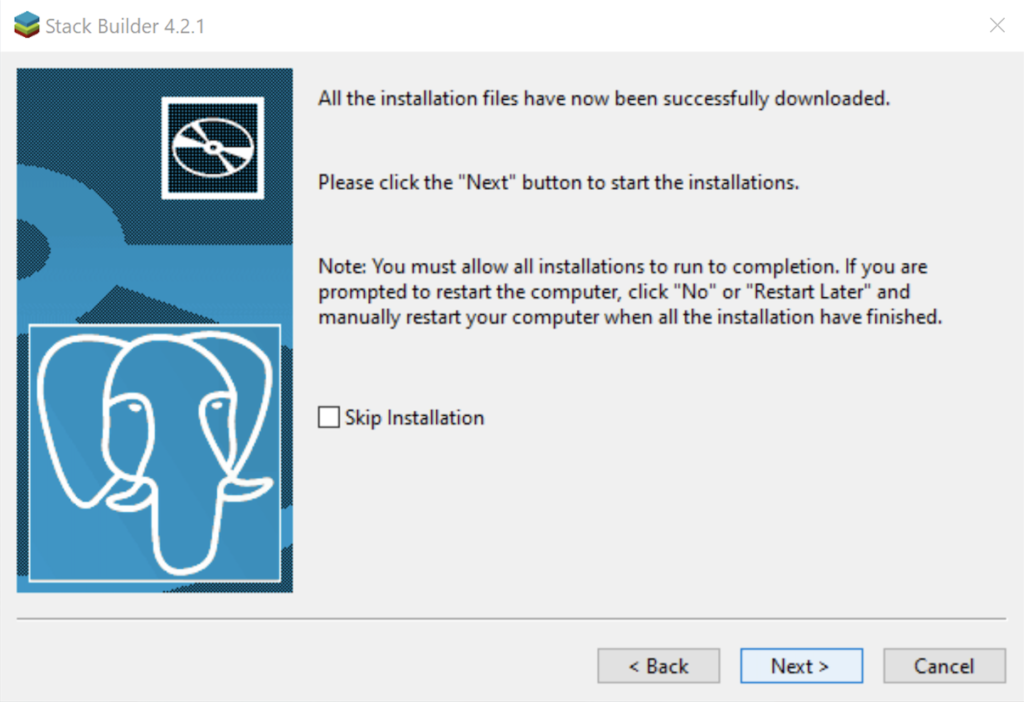
- The Stack Builder dialog tells you the products you downloaded. Click the Next button to continue the developer stack.
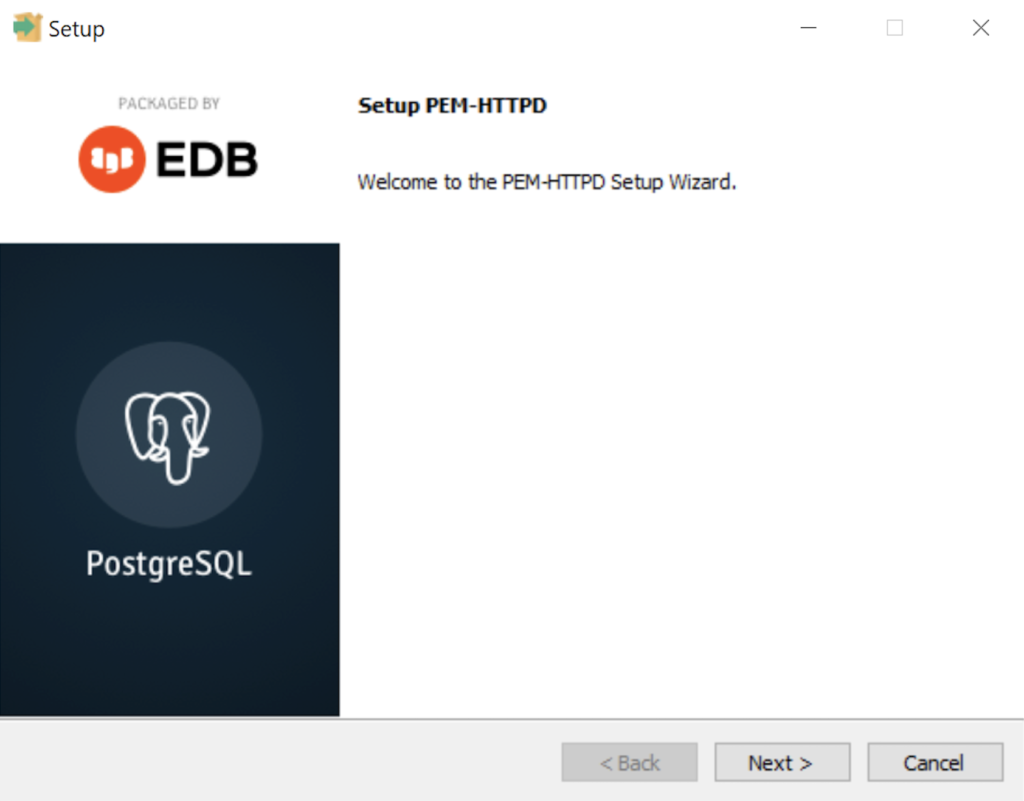
- The Setup dialog advises that you are installing the PEM-HTTPD Setup Wizard. Click the Next button to continue.
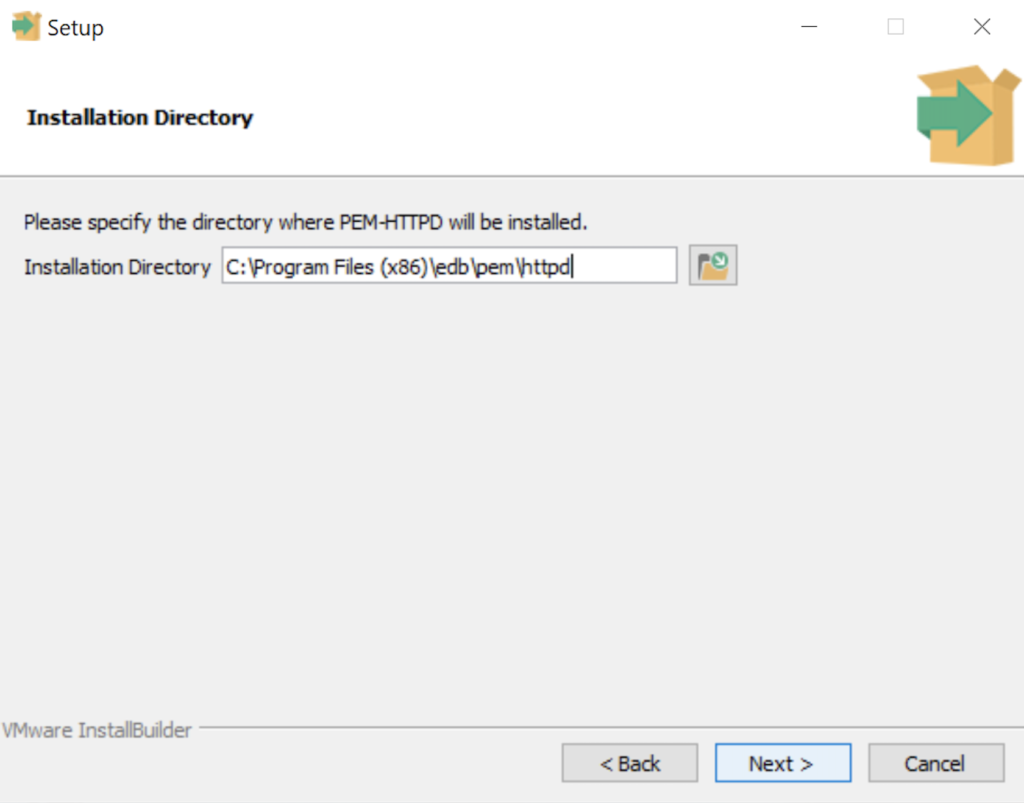
- The Installation Directory dialog prompts you for an installation directory. The default directory is C:\Program Files (x86)\edb\pem\httpd and you should use it because that’s where Windows 10 puts 64-bit libraries. Click the Next button to continue.
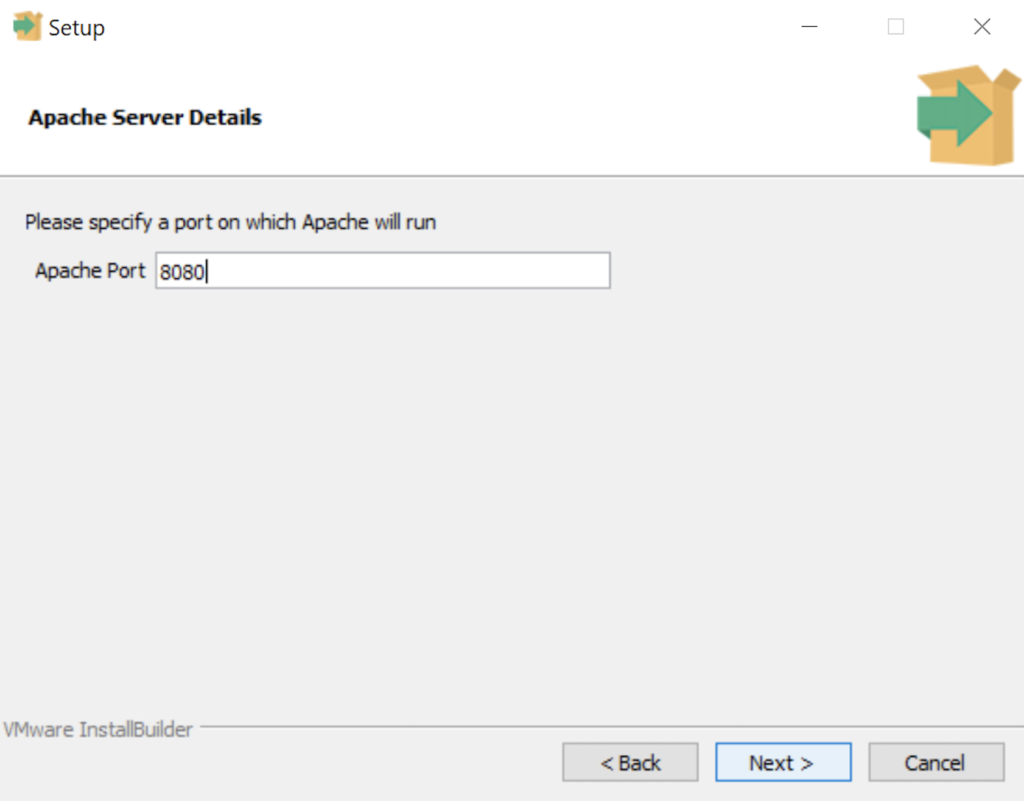
- The Setup dialog lets you select the port number for the HTTP listener. Port 8080 is the standard port for an HTTP listener, and ports 8081, 8082, and so forth are used when you have more than one HTTP listener on a single server or workstation. Click the Next button to continue.
- The Ready to Install dialog lets you pause before you install the software. Click the Next button to continue.
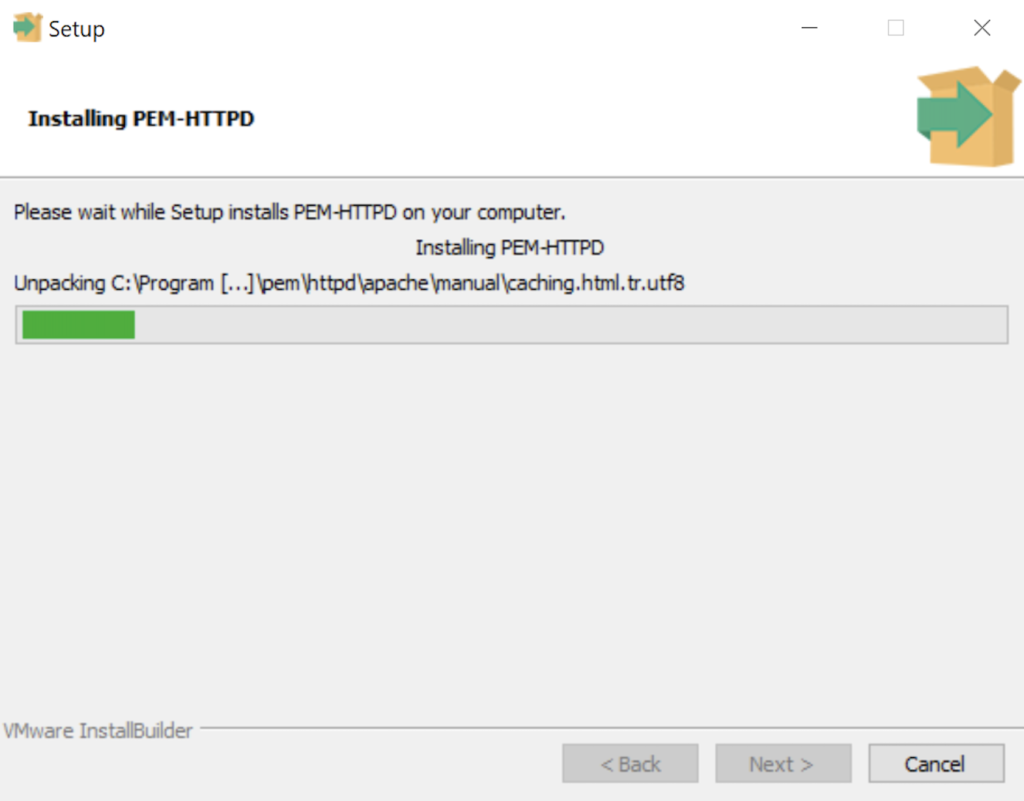
- The Installing dialog is a progress bar that will take several minutes to complete. When the progress bar completes, click the Next button when it becomes available to continue.
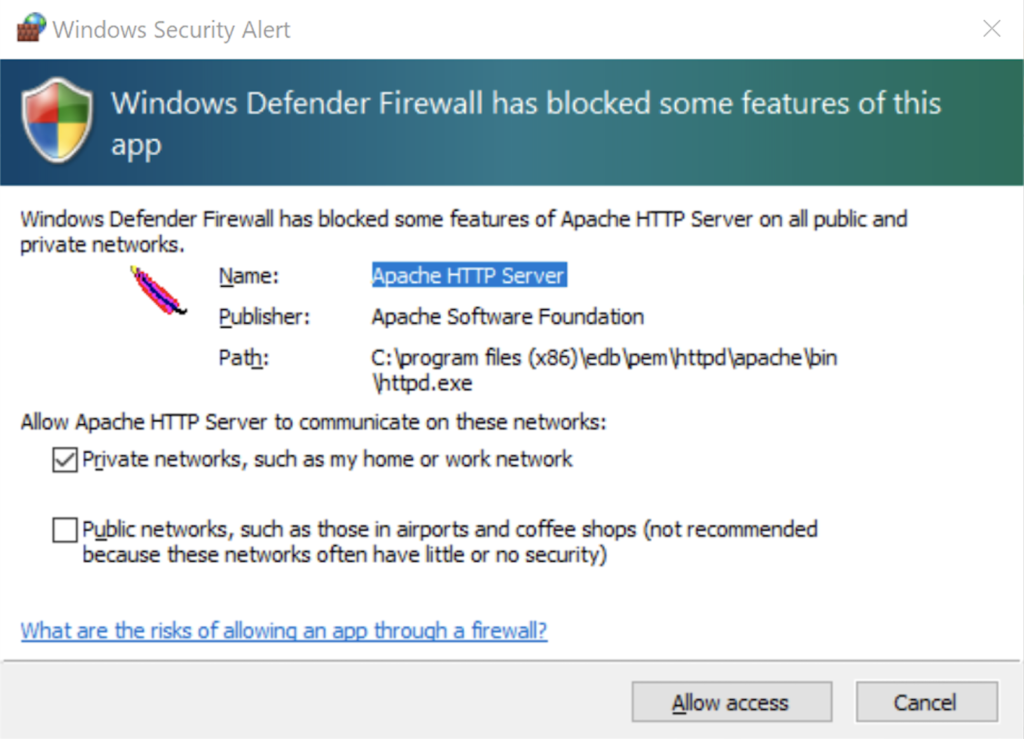
- The Windows Security Alert dialog asks you to allow the Apache HTTP Server to use port 8080. Click the Private networks, such as my home or work network checkbox and then the Allow access button to continue.
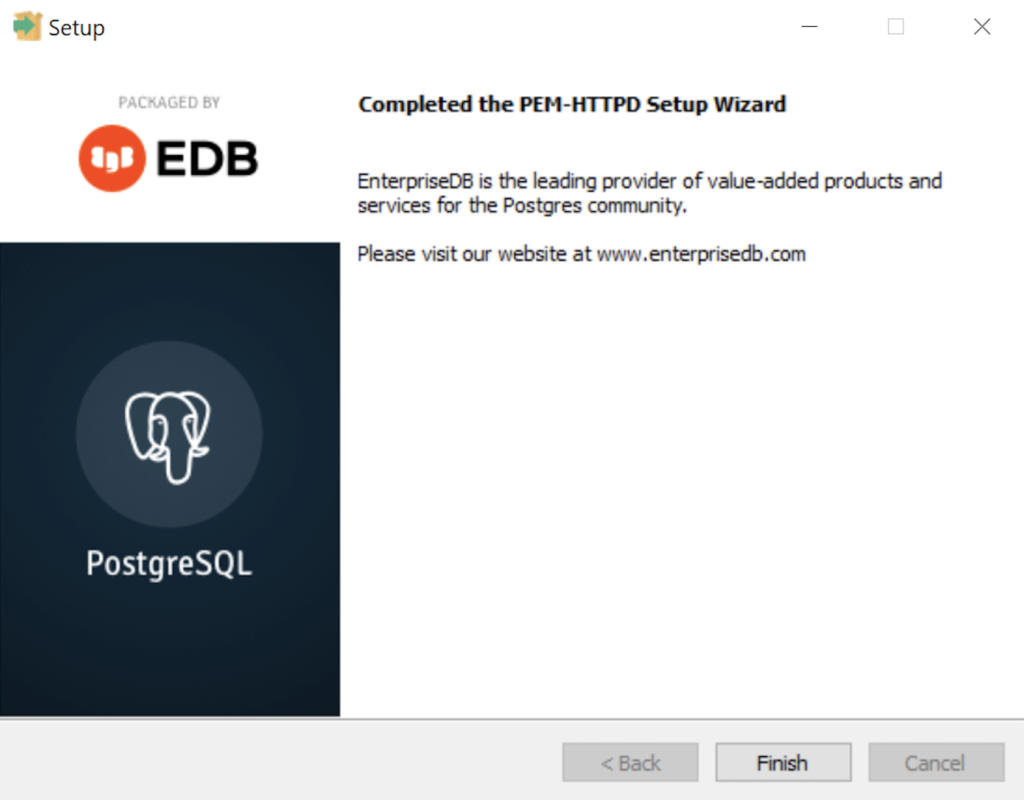
- The Setup dialog advises that you have completed the installation of the PEM-HTTPD Setup Wizard. Click the Finish button to continue.
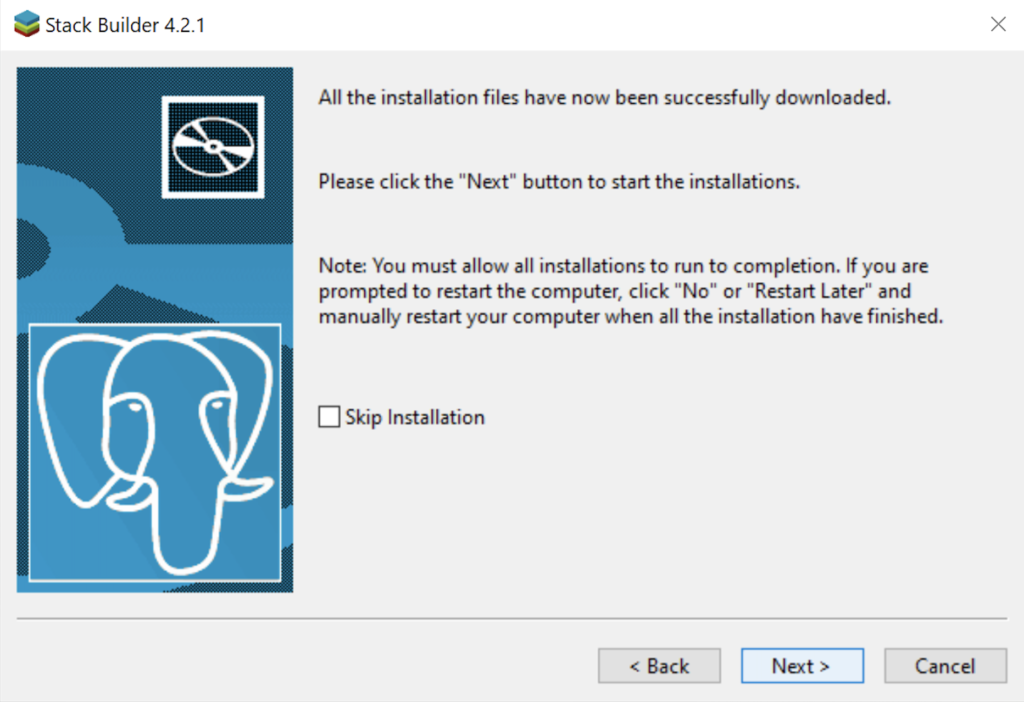
- The Stack Builder dialog advises you that all four database drivers – Npgsql, pgJDBC, psqlODBC, psqlODBC are downloaded and ready to install. Click the Next button to continue.
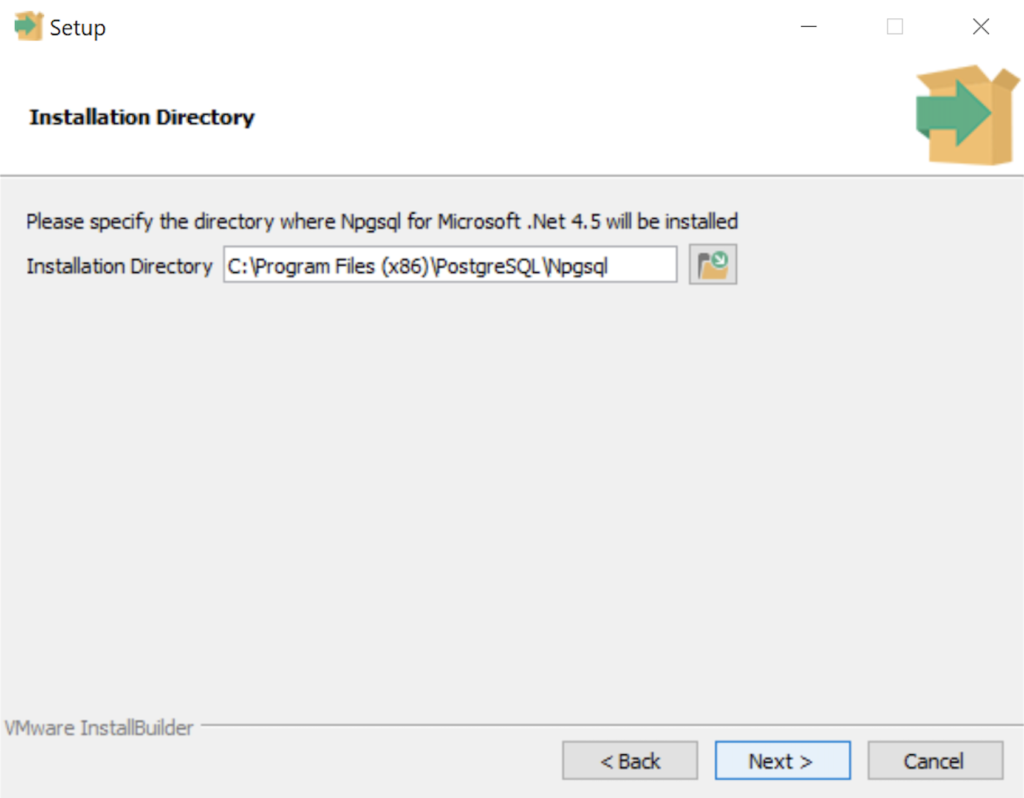
- The Installation Directory dialog prompts you for an installation directory. The default directory is C:\Program Files (x86)\PostgreSQL\Npgsql and you should use it because that’s where Windows 10 puts 64-bit libraries and the subdirectory meets the standard installation convention for Microsoft .Net libraries. Click the Next button to continue.
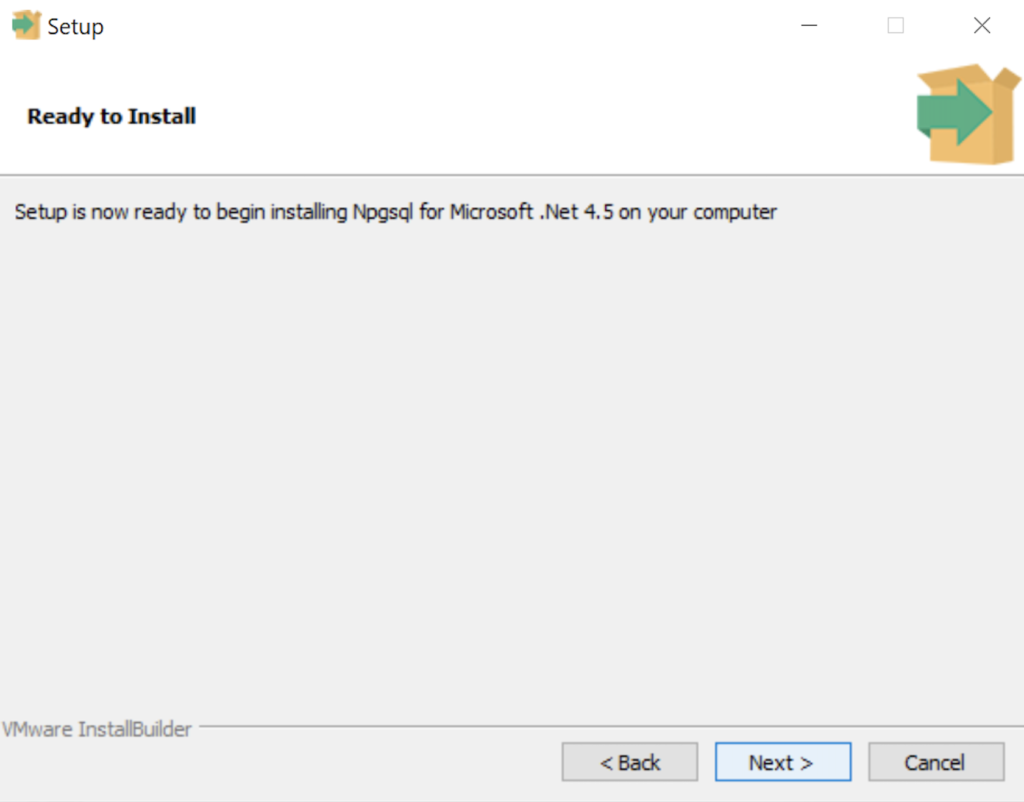
- The Ready to Install dialog lets you pause before you install the Npgsql software for Microsoft .Net. Click the Next button to continue.
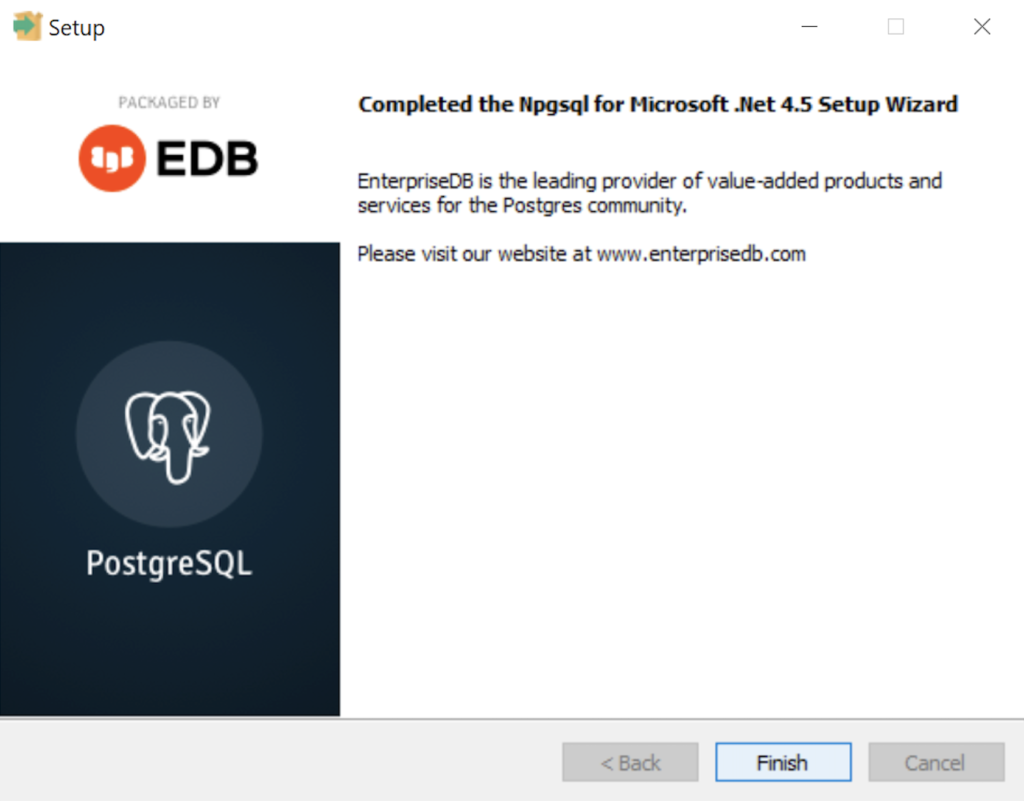
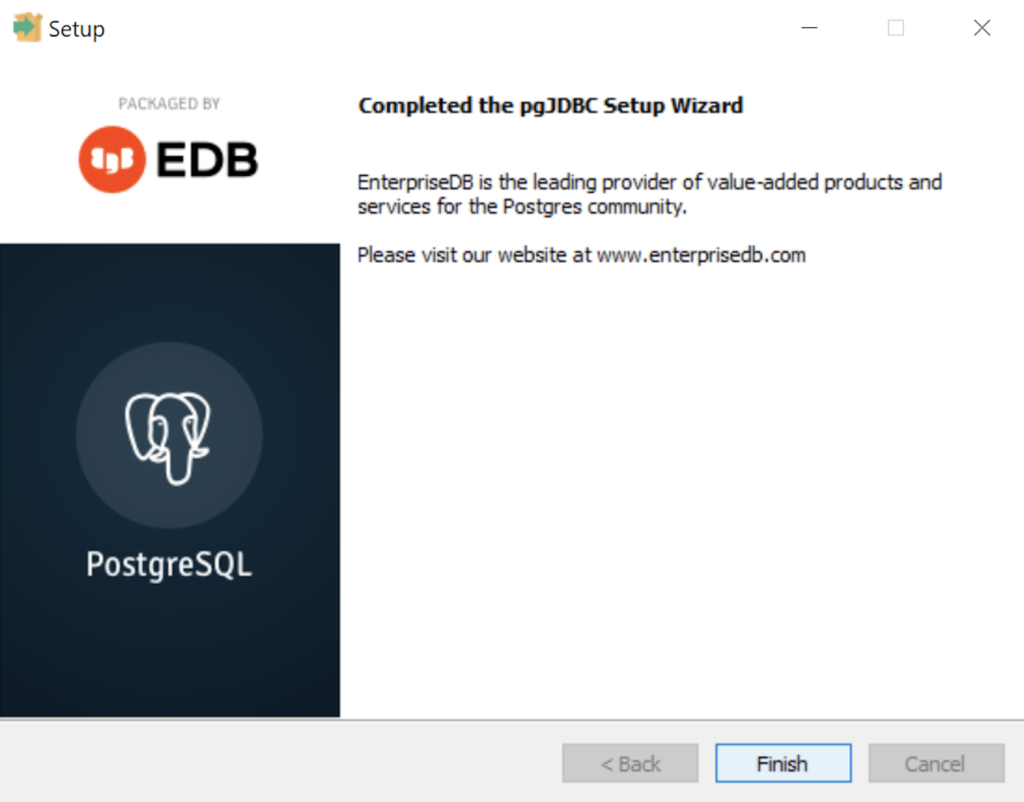
- The Setup dialog advises that you have completed the installation of npgsql driver for Microsoft .Net. Click the Finish button to continue.
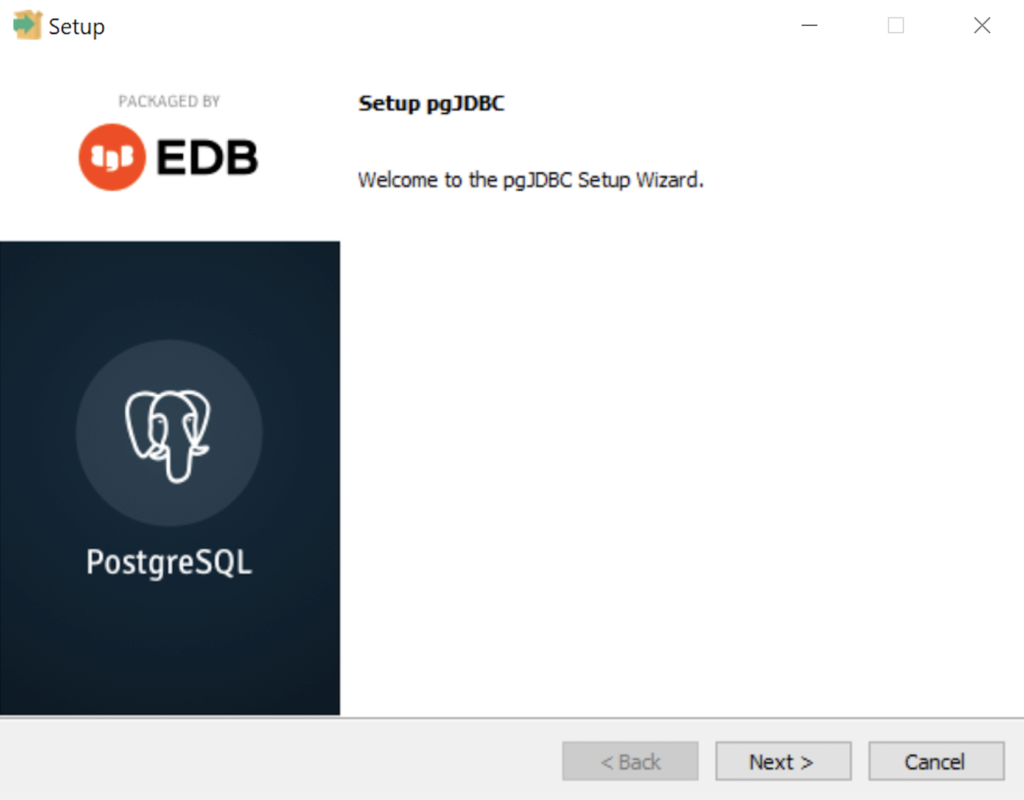
- The Setup dialog advises that you are installing the pgJDBC diver Setup Wizard. Click the Next button to continue.
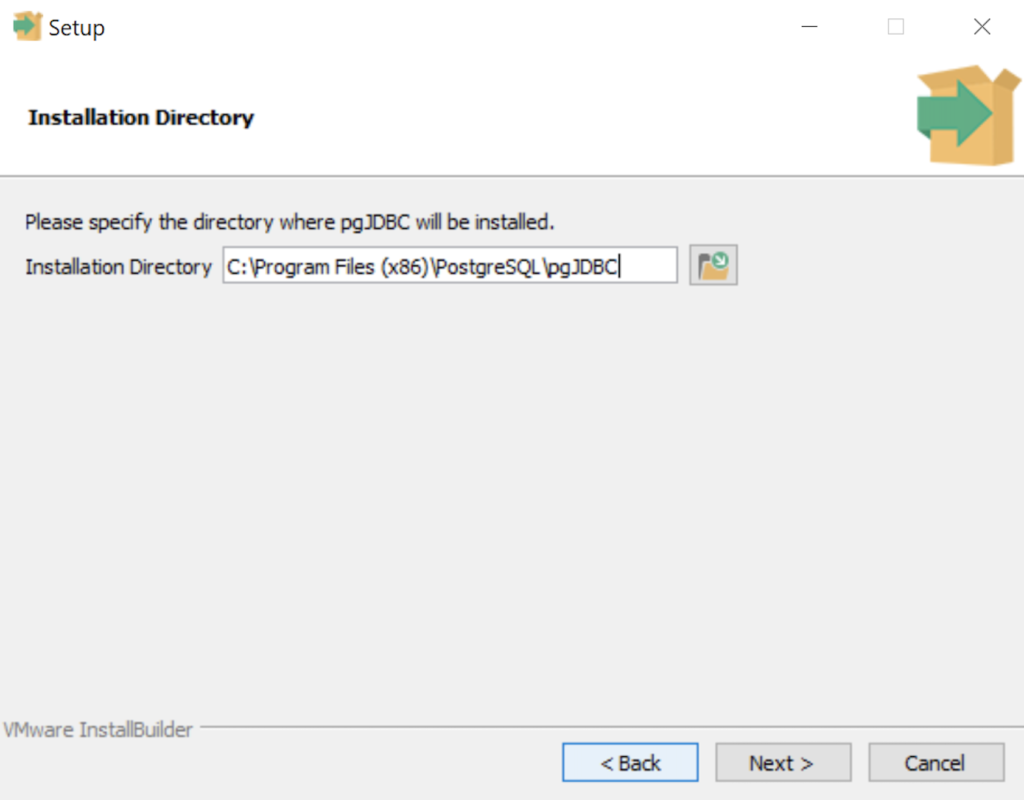
- The Installation Directory dialog prompts you for an installation directory. The default directory is C:\Program Files (x86)\PostgreSQL\pgJDBC and you should use it because that’s where Windows 10 puts 64-bit libraries and the subdirectory meets the standard installation convention for libraries. Click the Next button to continue.
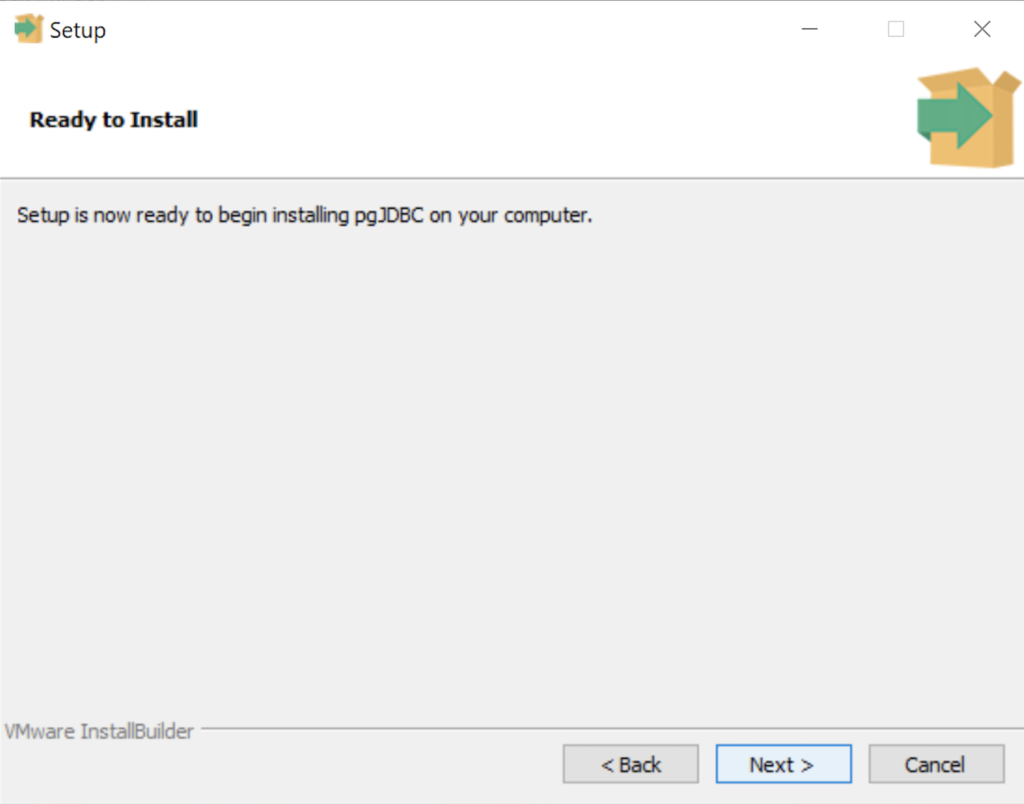
- The Ready to Install dialog lets you pause before you install the pgJDBC software. Click the Next button to continue.
- The Setup dialog advises that you have completed the installation of pgJDBC driver. Click the Finish button to continue.
- The Advisory Message pgAdmin is Starting dialog is really telling you to be patient. It can take a couple minutes to launch pgAdmin.
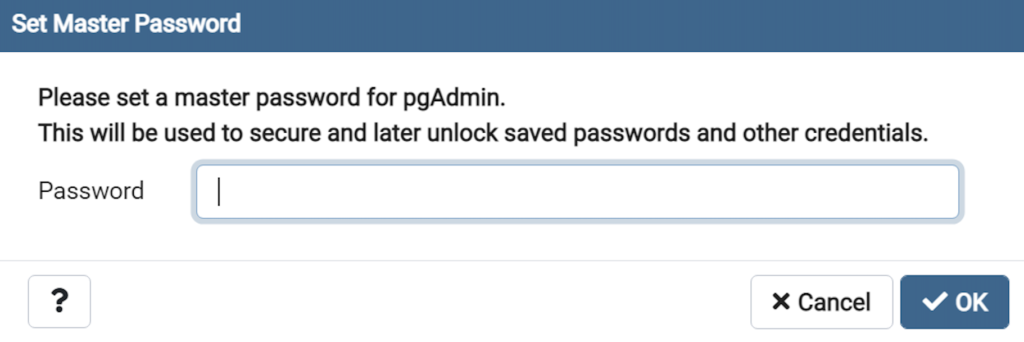
- The Password dialog prompts you for the pgAdmin superuser password. In a development system for your local computer, you may want to use something straightforward like cangetin. Click the Next button to continue.
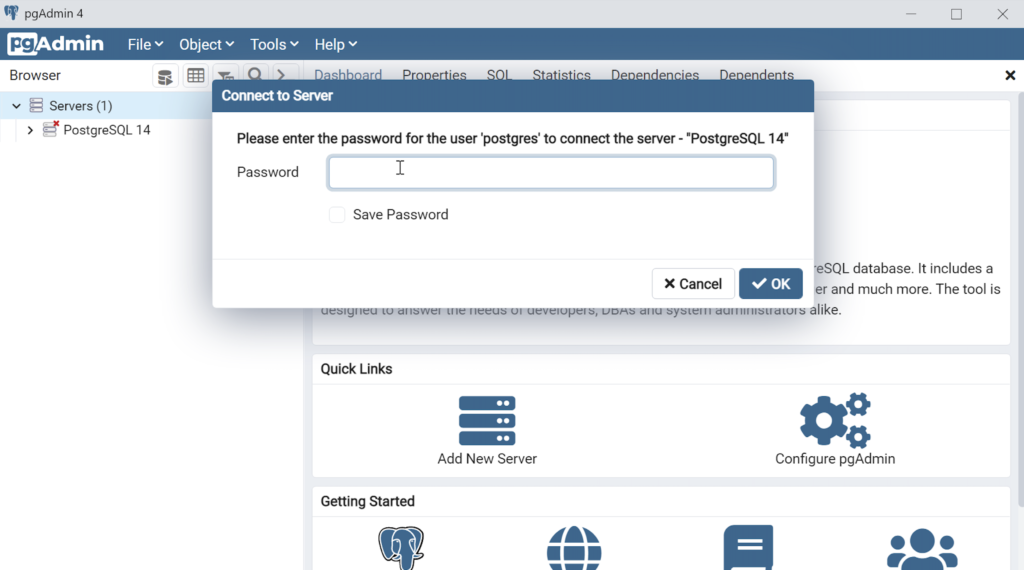
- Enter your password from the earlier step and click the OK button.
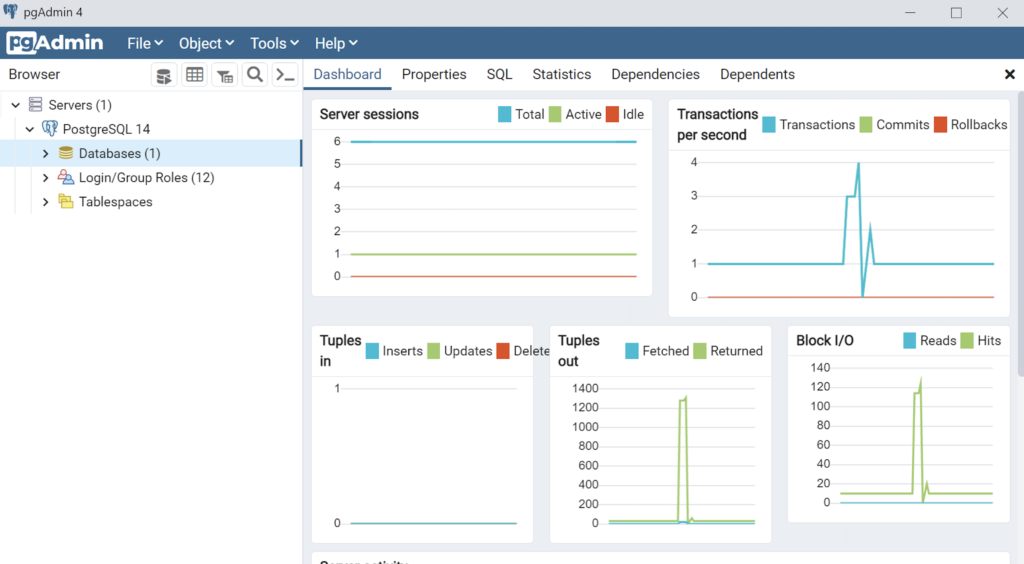
- This is the pgAdmin console. You should see one database and tweleve login/group roles.
The foregoing walked you through the installation of PostgreSQL, the connector libraries and pgAdmin utility. Next, you have to make it real with configuration, which sets up the tablespace, database, and connectivity. I hope it helps those who would like to see the installation steps.
Configure PostgreSQL 14
After you install PostgreSQL 14 on Windows, there are a few steps to create a sandbox database. This post shows you those steps, including a couple Windows OS tasks you’ll need to complete. You should note that these instructions are for the PostgreSQL psql Command Line Interface (CLI).
Open a Command Prompt with Administrator privileges. It should give you a command prompt like the following:
Microsoft Windows [Version 10.0.19042.1466] (c) Microsoft Corporation. All rights reserved. C:\Users\username> |
Type psql to launch the PostgreSQL CLI and then the return or enter key:
C:\Users\username>psql |
Most likely, you’ll get the following error message. It means that your System Path environment variable doesn’t include the directory where the psql executable is found, and that’s why the command is not recognized.
'psql' is not recognized as an internal or external command, operable program or batch file. |
You can set it temporarily in your current Windows CLI with the following command:
set PATH=%PATH%;C:\Program Files\PostgreSQL\14\bin; |
For those familiar with Windows CLI navigation in prior releases, the convention is to append a semicolon at the end of the item added to the %PATH% environment variable. If you were to put the semicolon between the %PATH% and new directory path there would be two semicolons together. While it won’t do any harm, it’s best to follow the new convention or style.
CRITICAL NOTE: The rest of the post assumes you have set the correct %PATH% environment variable or added it to your System’s Path environment variable and restarted the Windows CLI after adding it through the GUI tool. The reason you need to restart the Windows CLI is that the %PATH% environment variable is inherited at startup and doesn’t change in an open Windows CLI shell.
Another common mistake some users make, at least those who have used an older version of the psql utility on a Linux distribution (or “distro”), is to type psql without any arguments to become the superuser. This error doesn’t occur in Linux because you most likely connected as the postgres user before trying to connect to the PostgreSQL database. A quick demonstration should illustrate the error and support explaining why it occurs on the Windows OS.
Attempting to connect to the PostgreSQL database as a non-postgres user:
C:\Users\username>psql |
You should get the following error:
psql: error: connection to server at "localhost" (::1), port 5432 failed: fe_sendauth: no password supplied |
This error occurs because you’re not the postgres user, and all other users must designate that they’re connecting to the superuser account. The correct syntax is:
C:\Users\username>psql -U postgres |
Then, you’ll be prompted for the password that you set when you installed PostreSQL database. Enter that password from the installation at the prompt.
Password for user postgres:
psql (14.1)
WARNING: Console code page (437) differs from Windows code page (1252)
         8-bit characters might not work correctly. See psql reference
         page "Notes for Windows users" for details.
Type "help" for help.

postgres=# |
The warning message is telling you that the character set collation differs between your Windows OS and the PostgreSQL database. We’ll discuss this more later but for the sake of almost all your work, it won’t matter. If the warning message bothers you, you can run the chcp command before launching PostgreSQL when you open your Windows CLI:
chcp 1252 |
The chcp command changes your terminal character set to align with the Latin 1 character set, which enables you to use things like non-English accent characters (the umlaut over an o, or ö). After running the You will see this when you connect after running that command:
psql (14.2) Type "help" for help. postgres# |
INFO: The chcp command is used to supplement the international keyboard and character set information, allowing MS-DOS to be used in other countries and with different languages. Before the chcp command can be used, the nlsfunc must be loaded, and the country.sys must be loaded into the OS configuration.
If you are an experienced Windows OS user, you may want to edit your Windows Registry to change this behavior automatically for each Windows CLI session. You can do that by opening the Windows Registry with the regedit command as an Administrator. In regedit, add an Autorun element with a value of chcp 1252 to this part of the registry:
Computer\HKEY_LOCAL_MACHINE\SOFTWARE\Microsoft\Command Processor |
This value automatically sets your Windows CLI to a Latin 1 character set everytime you launch a terminal shell with the cmd.exe utility. You should only do this if you understand it completely.
Now that you’re connected as the superuser, let’s examine the steps to configure your playground or videodb database. There are five steps to configure your database and one step to connect and use the videodb database as the student user
- Create Physical Directory
The directory for the data dictionary changes with PostgreSQL installations. You can find it with the following psql CLI command:
postgres=# show data_directory; |
This will return the following:
data_directory ------------------------------------- C:/Program Files/PostgreSQL/14/data (1 row) |
While it is possible to store your subdirectory in the data dictionary, it will raise a warning message. It’s actually a better practice to install your local databases in another location on your file system.
Open a new Windows OS CLI to create a subdirectory (or in Windows parlance folder) where you will store your videoDB database. Each new Windows OS CLI opens in your home directory. You need to create a physical video_db subdirectory in your home directory.
HINT: The name of the database inside PostgreSQL should map to the tablespace name and differ from the physical directory. Otherwise there is a chance you might get confused and make an error in the future.
In a new command line shell, you can use the following syntax to create videoDB subdirectory:
md video_db |
- Create Tablespace
Returning to the original Windows CLI shell where you are connected as the postgres superuser, you can create a video_db tablespace with the following syntax:
CREATE TABLESPACE video_db OWNER postgres LOCATION 'C:\Users\username\video_db'; |
This will return the following:
CREATE TABLESPACE |
You can query whether you successfully create the video_db tablespace with the following:
SELECT * FROM pg_tablespace; |
It should return the following:
oid | spcname | spcowner | spcacl | spcoptions -------+------------+----------+--------+------------ 1663 | pg_default | 10 | | 1664 | pg_global | 10 | | 16395 | video_db | 10 | | (3 rows) |
- Create a Database
You need to know the PostgreSQL default collation before you create a new database. You can write the following query to determine the default correlation:
postgres=# SELECT datname, datcollate FROM pg_database WHERE datname = 'postgres'; |
It should return something like this:
datname | datcollate -----------+---------------------------- postgres | English_United States.1252 (1 row) |
The datcollate value of the postgres database needs to the same value for the LC_COLLATE and LC_CTYPE parameters when you create a database. You can create a videodb database with the following syntax provided you’ve made appropriate substitutions for the LC_COLLATE and LC_CTYPE values below:
CREATE DATABASE videodb WITH OWNER = postgres ENCODING = 'UTF8' TABLESPACE = video_db LC_COLLATE = 'English_United States.1252' LC_CTYPE = 'English_United States.1252' CONNECTION LIMIT = -1; |
You can verify the creation of the videodb with the following command:
postgres# \l |
It should show you a display like the following:
                                                 List of databases
   Name    |  Owner   | Encoding |          Collate           |           Ctype            |   Access privileges
-----------+----------+----------+----------------------------+----------------------------+-----------------------
 postgres  | postgres | UTF8     | English_United States.1252 | English_United States.1252 |
 template0 | postgres | UTF8     | English_United States.1252 | English_United States.1252 | =c/postgres          +
           |          |          |                            |                            | postgres=CTc/postgres
 template1 | postgres | UTF8     | English_United States.1252 | English_United States.1252 | =c/postgres          +
           |          |          |                            |                            | postgres=CTc/postgres
 videodb   | postgres | UTF8     | English_United States.1252 | English_United States.1252 |
(4 rows) |
Then, you can assign comment to the database with the following syntax:
COMMENT ON DATABASE videodb IS 'Video Store Database'; |
- Create a Role, Grant, and User
In this section you create a dba role, grant privileges on a videodb database to a role, and create a user with the role that you created previously with the following three statements. There are three steps in this sections.
- The first step creates a dba role:
CREATE ROLE dba WITH SUPERUSER;
- The second step grants all privileges on the videodb database to both the postgres superuser and the dba role:
GRANT ALL PRIVILEGES ON DATABASE videodb TO postgres;
GRANT ALL PRIVILEGES ON DATABASE videodb TO dba;
Any work in pgAdmin4 requires a grant on the videodb database to the postgres superuser. The grant enables visibility of the videodb database in the pgAdmin4 console as shown in the following image.
- The third step creates a student user with the dba role:
CREATE USER student
  WITH ROLE dba
       ENCRYPTED PASSWORD 'student';
After this step, you need to disconnect as the postgres superuser with the following command:
QUIT;
- It is possible that you may (and should if this is a new instance you are building) encounter an error when you try to connect as a sandboxed user. The syntax to connect as the student user is:
psql -d videodb -U student -W
All the options, which are preceded with a single dash (–) are case sensitive. The -d option sets the database for the connection. The -U option set user for the connection and the -W option instructs the psql CLI to prompt for the password.
While you shouldn’t encounter the following error during a Windows OS installation,
psql: FATAL: Peer authentication failed for user "student"
You can fix this in PostgreSQL 14 by changing the user access parameters in the pg_hba.conf configuration file. The file is found in the C:\Program Files\PostgreSQL\14\data directory. These are the correct out of the box settings you should see.
# TYPE  DATABASE        USER            ADDRESS                 METHOD

# "local" is for Unix domain socket connections only
local   all             all                                     scram-sha-256
# IPv4 local connections:
host    all             all             127.0.0.1/32            scram-sha-256
# IPv6 local connections:
host    all             all             ::1/128                 scram-sha-256
# Allow replication connections from localhost, by a user with the
# replication privilege.
local   replication     all                                     scram-sha-256
host    replication     all             127.0.0.1/32            scram-sha-256
host    replication     all             ::1/128                 scram-sha-256
If you find something that’s broken, fix it. The values above should ensure you make the changes successfully. You will need to restart the postgres service if you make changes.
If you plan on using the copy command to read external CSV (Comma Separated Value) files, you need to grant as the postgres superuser another privilege to the student user. This grants the pg_read_server_files role to the student user.
GRANT pg_read_server_files TO student;
- Create a Schema
The PostgreSQL database supports multiple schemas inside databases. The default schema for any database is the public schema. You must create separate schemas and refer to them explicitly when accessing them unless you alter the default search path. This section demonstrates how to:
- Create an app schema.
- Create a revision_history table in the app schema.
- Modify the standard search path to include other schemas
The process of creating a schema requires you grant the CREATE ON DATABASE privilege to the user as the postgres user. The initial grant of the create privilege requires the postgres superuser’s privileges. That means you must connect as the postgres user, like:
psql -U postgres -W |
Then, as the postgres superuser, you use the following syntax to grant the create privilege to the student user on the videodb database:
GRANT CREATE ON DATABASE videodb TO student; |
After granting the create privilege, you should exit the postgres superuser’s account, like
QUIT; |
Now, you should connect as the student user to the videodb database (syntax introduced earlier but provided again below).
psql -U postgres -W |
As the student user, create the app schema with the following syntax:
CREATE SCHEMA app; |
Then, you can query the result as follows:
SELECT * FROM pg_catalog.pg_namespace ORDER BY nspname; |
You should see the following:
  oid  |      nspname       | nspowner |               nspacl
-------+--------------------+----------+-------------------------------------
 16399 | app                |    16398 |
 13388 | information_schema |       10 | {postgres=UC/postgres,=U/postgres}
    11 | pg_catalog         |       10 | {postgres=UC/postgres,=U/postgres}
    99 | pg_toast           |       10 |
  2200 | public             |       10 | {postgres=UC/postgres,=UC/postgres}
(5 rows) |
If you create a table without a schema name, it is automatically placed in the public schema. That means any attempt to describe the table with the \d command line option returns without prepending the schema name returns an error, however, this is only true when you are using the default search parameter.
Let’s create a revision_history table in the app schema with a script file. A script file is a set of related SQL commands, like the following example that suppresses notices, drops any pre-existing revision_history table, and create the revision_history table.
-- Set client messages to warning or error, which means any -- notice associated with the if exists clause is suppressed. SET client_min_messages TO warning; -- Conditionally drop an existing revision_history table in -- the app schema. DROP TABLE IF EXISTS revision_history; -- Create a revision_history table. CREATE TABLE app.revision_history ( revision_history_id serial , session_id VARCHAR , table_name VARCHAR , revision_id INTEGER ); |
You can run a script file by using a relative or absolute file name. An absolute file name includes a full path from a Windows logical driver letter, like C:\ or a Linux mount point. A relative file name is simply the file name.
If you want to use a relative file name, you must first navigate to the directory where you have saved the file first. This directory becomes your local drive and allows you call any file in it from the psql command prompt by using only its file name.
You should connect as the student user to the videodb database. The \i command lets you run a file, assuming you put the preceding script file into a revision_history file in your local directory.
\I revision_history.sql |
If you try to describe the revision_history table with the \d command line option, like
\d revision_history |
It will show the following:
Did not find any relation named "revision_history". |
That’s because there is no revision_history table in the public schema and the default search path only includes the public schema.
You can show the search path with the following:
show search_path; |
It should return the following, which is a schema that shares the user’s name and public.
search_path ----------------- "$user", public (1 row) |
You reset the search path as follows:
SET search_path TO app, "$user", public; |
After you set the search_path, an attempt to describe the table will work because it searches for the table in the app and public schema. That means the following command:
\d revision_history |
Shows:
                                                  Table "app.revision_history"
       Column        |       Type        | Collation | Nullable |                            Default
---------------------+-------------------+-----------+----------+---------------------------------------------------------------
 revision_history_id | integer           |           | not null | nextval('revision_history_revision_history_id_seq'::regclass)
 session_id          | character varying |           |          |
 table_name          | character varying |           |          |
revision_id | integer | | | |
- Connect as student to videodb:
As shown in Step #4 above, you can now connect and use to the videodb as the student user with the following syntax:
psql -d videodb -U student -W |
If you did everything correctly, you should see the following after correctly providing the student password for the student user:
Password:
psql (14.1)
WARNING: Console code page (437) differs from Windows code page (1252)
         8-bit characters might not work correctly. See psql reference
         page "Notes for Windows users" for details.
Type "help" for help.

videodb=> |
After connecting to the videodb database, you can query the current database, like
SELECT current_database(); |
It should return the following:
current_database ------------------ videodb (1 row) |
This has shown you how to create a videodb tablespace, a videodb database, a dba role, a student user, an app schema, and connect to your new videodb database as the student user. As always, I hope it lets you get a lot down with little effort and avoiding pages and pages of documentation.
PL/pgSQL OUT Mode
A friend asked me a question about using the OUT mode parameter versus INOUT mode parameters in functions. He formed an opinion that they didn’t work in PostgreSQL PL/pgSQL.
Unfortunately, there’s not a lot of material written about how to use the OUT mode parameter in functions. I thought an article showing the standard example with a call to the function might help. The standard example function from the PostgreSQL documentation is:
1 2 3 4 5 6 7 8 9 | CREATE OR REPLACE FUNCTION sales_tax( IN amount real , OUT tax real ) AS $$ BEGIN /* Calculate the tax at 6%. */ tax := amount * 0.06; END; $$ LANGUAGE plpgsql; |
The RETURNS clause is optional but here’s how you can include it. The following example works exactly like the former.
1 2 3 4 5 6 7 8 9 10 | CREATE OR REPLACE FUNCTION sales_tax( IN amount real , OUT tax real ) RETURNS real AS $$ BEGIN /* Calculate the tax at 6%. */ tax := amount * 0.06; END; $$ LANGUAGE plpgsql; |
You call the PostgreSQL sales_tax() function like this:
SELECT 'Sales Tax ['|| sales_tax(200) ||']' AS "Return Value"; |
It should return the following:
Return Value ---------------- Sales Tax [12] (1 row) |
You can also call it in an inline code block (e.g., what Oracle documentation calls an anonymous block), like:
1 2 3 4 5 6 7 8 9 10 11 12 13 | DO $$ DECLARE /* Declare a local variable. */ tax_paid real := 0; BEGIN /* Query the results into a local variable. */ SELECT sales_tax(100) INTO tax_paid; /* Print the taxes paid. */ RAISE NOTICE 'Tax Paid [%]',tax_paid; END; $$; |
You can replace the sales_tax function with its OUT mode tax parameter with the following classic sales_tax function, which adds a tax_rate parameter.
1 2 3 4 5 6 7 8 9 10 11 12 13 14 15 | CREATE OR REPLACE FUNCTION sales_tax( IN amount real , IN tax_rate real ) RETURNS real AS $$ DECLARE /* Declare a local variable. */ tax real; BEGIN /* Calculate the tax at 6%. */ tax := amount * (tax_rate / 100); /* Return the tax. */ RETURN tax; END; $$ LANGUAGE plpgsql; |
Let’s return the original approach with the OUT parameter. Then, let’s expand the list of parameters to include an INOUT mode state variable, like:
1 2 3 4 5 6 7 8 9 10 11 12 | CREATE OR REPLACE FUNCTION sales_tax( IN amount real , IN tax_rate real , INOUT state VARCHAR(14) , OUT tax real ) RETURNS RECORD AS $$ BEGIN /* Calculate the tax at 6%. */ tax := amount * (tax_rate / 100); END; $$ LANGUAGE plpgsql; |
You don’t need to include the RETURNS RECORD phrase because PL/pgSQL implements a very mature adapter pattern and it adjusts the return type automatically to the parameter list. On the other hand, many beginning programmers and support staff won’t know that. That’s why I recommend you include it for clarity.
You can call this in a query with a column alias, like:
SELECT 'Sales Tax ['|| sales_tax(100,8.25,'California') ||']' AS "Return Value"; |
It will return a tuple:
Return Value ------------------------------- Sales Tax [(California,8.25)] (1 row) |
You can implement it inside an inline block by adding a local variable of the RECORD data type, like:
1 2 3 4 5 6 7 8 9 10 11 12 13 14 15 | DO $$ DECLARE /* Declare a local variable. */ state varchar(14) := 'California'; tax_paid real := 0; result RECORD; BEGIN /* Query the results into a local variable. */ SELECT sales_tax(100,8.25,state) INTO result; /* Print the taxes paid. */ RAISE NOTICE 'Tax Paid [%]', result; END; $$; |
It prints the following:
NOTICE: Tax Paid [("(California,8.25)")] |
You can actually return the individual members of the tuple by putting the function call inside the FROM clause, like:
SELECT * FROM sales_tax(100,8.25,'California'); |
It now returns the members of the tuple in separate columns:
state | tax ------------+------ California | 8.25 (1 row) |
Alternatively, you can call it from inside an inline block, like:
1 2 3 4 5 6 7 8 9 10 11 12 13 14 | DO $$ DECLARE /* Declare a local variable. */ state varchar(14) := 'California'; tax_paid real := 0; BEGIN /* Query the results into a local variable. */ SELECT * INTO state, tax_paid FROM sales_tax(100,8.25,state); /* Print the taxes paid. */ RAISE NOTICE 'Tax Paid [%] [%]', state, tax_paid; END; $$; |
It prints:
NOTICE: Tax Paid [California] [8.25] |
Now, let’s rewrite the function into a traditional function with all IN mode variables that returns a RECORD structure with additional values. Just one quick caveat (the big but), you can only assign values to dynamically constructed RECORD structures by using the SELECT-INTO or FOR statements. Below is the refactored sales_tax() function:
1 2 3 4 5 6 7 8 9 10 11 12 13 14 15 16 17 18 19 20 21 | CREATE OR REPLACE FUNCTION sales_tax( IN subtotal REAL , IN tax_rate REAL , IN state VARCHAR(14)) RETURNS RECORD AS $$ DECLARE /* Declare a local variable. */ tax REAL; tax_record RECORD; BEGIN /* Calculate the tax at 6%. */ tax := subtotal * (tax_rate / 100); /* Assign state to record. */ SELECT state, tax INTO tax_record; /* Return the tax. */ RETURN tax_record; END; $$ LANGUAGE plpgsql; |
It returns the same set of values as the early version with the four parameter example above but you only need three IN-only mode variables to get the result. Other than the parameter lists, the biggest change appears to be the assignment line, which is required in the explicit and traditional function that has only IN mode parameters:
16 | SELECT state, tax INTO tax_record; |
Given you can return any RECORD structure you want, why use INOUT and OUT mode parameters? Don’t you loose clarity about what your stored function does? Or, at least, don’t you make understanding the program logic more difficult when you use INOUT and OUT mode variables? The only benefit appears to be when you shift your input variables from the SELECT clause to the INTO clause.
Hopefully, this shows folks how to use the OUT mode parameter; and how closely related it is to a classic function.
Installing PL/Python Extension
While PL/Python is an untrusted language inside PostgreSQL, I was installing it to test some of its features. First, we check to see if PL/Python is installed by attempting to create a PL/Python function:
CREATE FUNCTION pima(a integer, b integer) RETURNS integer AS $$ if a > b: return a return b $$ LANGUAGE plpython3u; |
It likely should raise an error like this because PL/Python is an untrusted language. It’s untrusted because it runs with root privileges rather than a restricted user’s privilege. More or less, with PL/Python you can access the entire database. This makes PL/Python more of a threat than tool beyond experimentation in a test database.
ERROR: language "plpython3u" does not exist HINT: Use CREATE EXTENSION to load the language into the database. |
A quick query as the postgres user tells you whether or not PL/Python is installed:
SELECT * FROM pg_language; |
It returns the following:
lanname | lanowner | lanispl | lanpltrusted | lanplcallfoid | laninline | lanvalidator | lanacl ----------+----------+---------+--------------+---------------+-----------+--------------+-------- internal | 10 | f | f | 0 | 0 | 2246 | c | 10 | f | f | 0 | 0 | 2247 | sql | 10 | f | t | 0 | 0 | 2248 | plpgsql | 10 | t | t | 14088 | 14089 | 14090 | (4 rows) |
I attempted to add PL/Python with the following command:
CREATE EXTENSION plpython3u; |
It raised the following error:
ERROR: could not open extension control file "/usr/pgsql-11/share/extension/plpython3u.control": No such file or directory |
The error basically appeared to occur because there’s a missing Python 3 package from what I could find on the web. I installed the missing postgresql-plpython3 package as the root superuser, which you also could install as a member of the sudoer list. The following shows how to install it as a sudoer member:
sudo yum install -y postgresql-plpython3 |
You should see something close to the following console output:
Last metadata expiration check: 0:43:53 ago on Fri 06 Nov 2020 10:42:28 AM MST. Dependencies resolved. ============================================================================================================ Package Architecture Version Repository Size ============================================================================================================ Installing: postgresql-plpython3 x86_64 11.7-2.fc30 updates 86 k Installing dependencies: postgresql-server x86_64 11.7-2.fc30 updates 5.3 M Transaction Summary ============================================================================================================ Install 2 Packages Total download size: 5.3 M Installed size: 23 M Downloading Packages: (1/2): postgresql-plpython3-11.7-2.fc30.x86_64.rpm 218 kB/s | 86 kB 00:00 (2/2): postgresql-server-11.7-2.fc30.x86_64.rpm 3.0 MB/s | 5.3 MB 00:01 ------------------------------------------------------------------------------------------------------------ Total 2.1 MB/s | 5.3 MB 00:02 Running transaction check Transaction check succeeded. Running transaction test Transaction test succeeded. Running transaction Preparing : 1/1 Running scriptlet: postgresql-server-11.7-2.fc30.x86_64 1/2 Installing : postgresql-server-11.7-2.fc30.x86_64 1/2 warning: /var/lib/pgsql/.bash_profile created as /var/lib/pgsql/.bash_profile.rpmnew Running scriptlet: postgresql-server-11.7-2.fc30.x86_64 1/2 Installing : postgresql-plpython3-11.7-2.fc30.x86_64 2/2 Running scriptlet: postgresql-plpython3-11.7-2.fc30.x86_64 2/2 Verifying : postgresql-plpython3-11.7-2.fc30.x86_64 1/2 Verifying : postgresql-server-11.7-2.fc30.x86_64 2/2 Installed: postgresql-plpython3-11.7-2.fc30.x86_64 postgresql-server-11.7-2.fc30.x86_64 Complete! |
While I thought this might fix the problem, it didn’t and raised the following error:
ERROR: could not open extension control file "/usr/pgsql-11/share/extension/plpython3u.control": No such file or directory |
I found the plpython3u.control file on GitHub and put the following plpython3u.control file, after comparing it against the plpgsql.control file, into the /usr/pgsql-11/share/extension directory. At this point, I began wondering why it’s looking in the /usr/pgsql-11/share/extension directory instead of a /usr/plpython3u/share/extension directory (does not exist).
# plpython3u extension comment = 'PL/Python3U untrusted procedural language' default_version = '1.0' module_pathname = '$libdir/plpython3' relocatable = false schema = pg_catalog superuser = true |
I retried creating the plpython3u extension:
CREATE EXTENSION plpython3u; |
It raised the following error:
ERROR: extension "plpython3u" has no installation script nor update path for version "1.0" |
At this point, I could find no further help on the Internet. I did notice that there were these two *.sql files in the /usr/pgsql-11/share/extension directory:
- plpgsql–1.0.sql
- plpgsql–unpackaged–1.0.sql
I found this plpython3u--1.0.sql file on GitHub:
/* src/pl/plpython/plpython3u--1.0.sql */ CREATE FUNCTION plpython3_call_handler() RETURNS language_handler LANGUAGE c AS 'MODULE_PATHNAME'; CREATE FUNCTION plpython3_inline_handler(internal) RETURNS void STRICT LANGUAGE c AS 'MODULE_PATHNAME'; CREATE FUNCTION plpython3_validator(oid) RETURNS void STRICT LANGUAGE c AS 'MODULE_PATHNAME'; CREATE LANGUAGE plpython3u HANDLER plpython3_call_handler INLINE plpython3_inline_handler VALIDATOR plpython3_validator; COMMENT ON LANGUAGE plpython3u IS 'PL/Python3U untrusted procedural language'; |
I retried creating the plpython3u extension, as a member of the sudoer list and got a new error:
ERROR: permission denied to create extension "plpython3u" HINT: Must be superuser to create this extension. |
I retried creating the plpython3u extension as the postgres user, who is the owning user:
CREATE EXTENSION plpython3u; |
It raised the following error:
ERROR: could not access file "$libdir/plpython3": No such file or directory |
While I intend to finish this, that’s as far as I got. It appears from some of the things I’ve read I need to recompile or configure items that would destabilize what I have working at the moment. Finishing this will need to wait for me to build another test environment from scratch. If you catch this post and know the remaining steps, I invite you to add them in the comments.
Fedora 30 pgAdmin4 Install
Last September, the pgAdmin4 installation stymied me. I wasn’t sure what was I had done wrong in the installation but I was on a deadline to release my Fedora 30 Linux virtualization. That meant I had to move on and leave it for later. Today, I’m building the new image and returned to the task.
I installed pgadmin4 with the following command:
dnf -y install pgadmin4 |
The pgadmin4 configuration instructions can be found for several Linux versions at Josphat Mutai’s Computing for Geeks web page. On Fedora 30, you need to do the following:
- Install, start, and enable Apache as the
httpdservice unless you already have done that. - Copy the
/etc/httpd/conf.d/pgadmin4.conf.samplefile to/etc/httpd/conf.d/pgadmin4.conf, which is a new file. - Restart the
httpdservice to incorporate thepgadmin4configuration file.
After that, my instructions vary from the original web page because they didn’t work. You actually need to create four directories as the sudo or root user:
/var/lib/pgadmin4/var/lib/pgadmin4/sessions/var/lib/pgadmin4/storage/var/log/pgadmin4
You can make both directories with a single mkdir command, like:
mkdir -p /var/lib/pgadmin4 /var/lib/pgadmin4/sessions /var/lib/pgadmin4/storage /var/log/pgadmin4 |
As the root or sudo user, change the ownership of these two directories to the apache user with the following syntax:
chown -R apache:apache /var/lib/pgadmin4 /var/lib/pgadmin4/sessions /var/lib/pgadmin4/storage /var/log/pgadmin4 |
You add the following four statements to the config_distro.py file in the /usr/lib/python3.7/site-packages/pgadmin4-web directory as the root or sudo user:
LOG_FILE = '/var/log/pgadmin4/pgadmin4.log' SQLITE_PATH = '/var/lib/pgadmin4/pgadmin4.db' SESSION_DB_PATH = '/var/lib/pgadmin4/sessions' STORAGE_DIR = '/var/lib/pgadmin4/storage' |
You need to setup the pgadmin user with the following python3 command:
python3 /usr/lib/python3.7/site-packages/pgadmin4-web/setup.py |
Enter the following values, a real email address and a password twice:
NOTE: Configuring authentication for SERVER mode. Enter the email address and password to use for the initial pgAdmin user account: Email address: admin@example.com Password: your_password Retype password: your_password pgAdmin 4 - Application Initialisation ====================================== |
Before you move on, you should check ownership of the pgadmin4 directories in the /var/lib and /var/log directories and their files by long listing them as follows:
- Check the
/var/libdirectory:ll /var/lib/pgadmin4
It should display:
total 148
-rw-r--r--. 1 root   root     1296 Apr 11 12:12 my-httpd.pp
-rw-r--r--. 1 root   root      332 Apr 11 12:12 my-httpd.te
-rw-------. 1 apache apache 131072 Apr 11 12:16 pgadmin4.db
drwx------. 2 apache apache   4096 Apr 11 12:15 sessions
drwxr-xr-x. 2 apache apache   4096 Apr 10 17:33 storage
- Check the
/var/logdirectory:ll /var/log/pgadmin4
It should display:
total 4
-rw-r--r--. 1 apache apache 1174 Apr 11 12:15 pgadmin4.log
Assuming you have an enabled firewall, you need to issue the following two commands as the root or sudo user:
firewall-cmd --permanent --add-service=http firewall-cmd --reload |
You invoke pgAdmin4 from within a browser window with the following URL for a stand alone workstation (for a workstation on a DNS network you would enter pgadmin.domain.domain_type in lieu of localhost):
pgadmin/localhost/pgadmin4 |
You most likely will encounter an Internal Server Error, the recommended fix is reputed to be:
ausearch -c 'httpd' --raw | audit2allow -M my-httpd semodule -i my-httpd.pp |
After completing the installation, you should be able to run pgadmin4, by typing in the following URL into a web browser:
http://localhost/pgadmin4 |
You should see the pgAmin4 web page if everything works. If it fails to launch, you should check the Apache error log. The error_log file is found in the /var/log/httpd directory. This is a type of error you may get if the ownership privileges aren’t assigned to the apache user and apache group.
Display sample log →
[Sat Apr 11 12:06:25.433570 2020] [wsgi:error] [pid 16086:tid 139914869880576] [remote ::1:39136] mod_wsgi (pid=16086): Failed to exec Python script file '/usr/lib/python3.7/site-packages/pgadmin4-web/pgAdmin4.wsgi'. [Sat Apr 11 12:06:25.433611 2020] [wsgi:error] [pid 16086:tid 139914869880576] [remote ::1:39136] mod_wsgi (pid=16086): Exception occurred processing WSGI script '/usr/lib/python3.7/site-packages/pgadmin4-web/pgAdmin4.wsgi'. [Sat Apr 11 12:06:25.433720 2020] [wsgi:error] [pid 16086:tid 139914869880576] [remote ::1:39136] Traceback (most recent call last): [Sat Apr 11 12:06:25.433741 2020] [wsgi:error] [pid 16086:tid 139914869880576] [remote ::1:39136] File "/usr/lib/python3.7/site-packages/pgadmin4-web/pgAdmin4.wsgi", line 36, in <module> [Sat Apr 11 12:06:25.433745 2020] [wsgi:error] [pid 16086:tid 139914869880576] [remote ::1:39136] from pgAdmin4 import app as application [Sat Apr 11 12:06:25.433749 2020] [wsgi:error] [pid 16086:tid 139914869880576] [remote ::1:39136] File "/usr/lib/python3.7/site-packages/pgadmin4-web/pgAdmin4.py", line 109, in <module> [Sat Apr 11 12:06:25.433752 2020] [wsgi:error] [pid 16086:tid 139914869880576] [remote ::1:39136] app = create_app() [Sat Apr 11 12:06:25.433756 2020] [wsgi:error] [pid 16086:tid 139914869880576] [remote ::1:39136] File "/usr/lib/python3.7/site-packages/pgadmin4-web/pgadmin/__init__.py", line 345, in create_app [Sat Apr 11 12:06:25.433759 2020] [wsgi:error] [pid 16086:tid 139914869880576] [remote ::1:39136] os.chmod(config.SQLITE_PATH, 0o600) [Sat Apr 11 12:06:25.433768 2020] [wsgi:error] [pid 16086:tid 139914869880576] [remote ::1:39136] PermissionError: [Errno 13] Permission denied: '/var/lib/pgadmin4/pgadmin4.db' [Sat Apr 11 12:06:28.234643 2020] [wsgi:error] [pid 16086:tid 139914945414912] [remote ::1:39138] mod_wsgi (pid=16086): Failed to exec Python script file '/usr/lib/python3.7/site-packages/pgadmin4-web/pgAdmin4.wsgi'. [Sat Apr 11 12:06:28.234694 2020] [wsgi:error] [pid 16086:tid 139914945414912] [remote ::1:39138] mod_wsgi (pid=16086): Exception occurred processing WSGI script '/usr/lib/python3.7/site-packages/pgadmin4-web/pgAdmin4.wsgi'. [Sat Apr 11 12:06:28.234781 2020] [wsgi:error] [pid 16086:tid 139914945414912] [remote ::1:39138] Traceback (most recent call last): [Sat Apr 11 12:06:28.234816 2020] [wsgi:error] [pid 16086:tid 139914945414912] [remote ::1:39138] File "/usr/lib/python3.7/site-packages/pgadmin4-web/pgAdmin4.wsgi", line 36, in <module> [Sat Apr 11 12:06:28.234820 2020] [wsgi:error] [pid 16086:tid 139914945414912] [remote ::1:39138] from pgAdmin4 import app as application [Sat Apr 11 12:06:28.234824 2020] [wsgi:error] [pid 16086:tid 139914945414912] [remote ::1:39138] File "/usr/lib/python3.7/site-packages/pgadmin4-web/pgAdmin4.py", line 109, in <module> [Sat Apr 11 12:06:28.234826 2020] [wsgi:error] [pid 16086:tid 139914945414912] [remote ::1:39138] app = create_app() [Sat Apr 11 12:06:28.234830 2020] [wsgi:error] [pid 16086:tid 139914945414912] [remote ::1:39138] File "/usr/lib/python3.7/site-packages/pgadmin4-web/pgadmin/__init__.py", line 345, in create_app [Sat Apr 11 12:06:28.234832 2020] [wsgi:error] [pid 16086:tid 139914945414912] [remote ::1:39138] os.chmod(config.SQLITE_PATH, 0o600) [Sat Apr 11 12:06:28.234841 2020] [wsgi:error] [pid 16086:tid 139914945414912] [remote ::1:39138] PermissionError: [Errno 13] Permission denied: '/var/lib/pgadmin4/pgadmin4.db' |
As always, I hope my notes are helpful to those who want to work with pgadmin4 and the PostgreSQL database.
PostgreSQL Write JSON File
In the process of working through issues to support ETL transformations from JSON with Python. The first step was extracting a the data from a PostgreSQL table into a JSON file. The syntax wasn’t exactly clear and the PostgreSQL Tutorial was a bit misleading but I worked it out. My initial sample deals with writing the data from the item table of my videodb database to a item.json file in the /tmp directory.
The query retrieves the data but casts the creation_date and last_update_date timestamp data types into date data types, as follows:
SELECT row_to_json( (SELECT ROW FROM (SELECT item_id , item_barcode , item_type , item_title , item_subtitle , item_rating , item_release_date , created_by , creation_date::DATE , last_updated_by , last_update_date::DATE) ROW)) AS DATA FROM item; |
The internal SELECT-list creates the name element of name:value pairs in the JSON structure. Naturally, it does exclude the type casting ::date portion of the query from the name elements. The row_to_json() maps the name list to the list of value results from in each row, and returns a result set.
The query returns the following 21 JSON objects:
{"item_id":1001,"item_barcode":"9736-05640-4","item_type":1016,"item_title":"The Hunt for Red October","item_subtitle":"Special Collector's Edition","item_rating":"PG","item_release_date":"1990-03-02","created_by":1001,"creation_date":"2019-12-13","last_updated_by":1001,"last_update_date":"2019-12-13"}
{"item_id":1002,"item_barcode":"24543-02392","item_type":1016,"item_title":"Star Wars I","item_subtitle":"Phantom Menace","item_rating":"PG","item_release_date":"1999-05-04","created_by":1001,"creation_date":"2019-12-13","last_updated_by":1001,"last_update_date":"2019-12-13"}
{"item_id":1003,"item_barcode":"24543-5615","item_type":1015,"item_title":"Star Wars II","item_subtitle":"Attack of the Clones","item_rating":"PG","item_release_date":"2002-05-16","created_by":1001,"creation_date":"2019-12-13","last_updated_by":1001,"last_update_date":"2019-12-13"}
{"item_id":1004,"item_barcode":"24543-05539","item_type":1016,"item_title":"Star Wars II","item_subtitle":"Attack of the Clones","item_rating":"PG","item_release_date":"2002-05-16","created_by":1001,"creation_date":"2019-12-13","last_updated_by":1001,"last_update_date":"2019-12-13"}
{"item_id":1005,"item_barcode":"24543-20309","item_type":1016,"item_title":"Star Wars III","item_subtitle":"Revenge of the Sith","item_rating":"PG13","item_release_date":"2005-05-19","created_by":1001,"creation_date":"2019-12-13","last_updated_by":1001,"last_update_date":"2019-12-13"}
{"item_id":1006,"item_barcode":"86936-70380","item_type":1016,"item_title":"The Chronicles of Narnia","item_subtitle":"The Lion, the Witch and the Wardrobe","item_rating":"PG","item_release_date":"2002-05-16","created_by":1001,"creation_date":"2019-12-13","last_updated_by":1001,"last_update_date":"2019-12-13"}
{"item_id":1007,"item_barcode":"91493-06475","item_type":1019,"item_title":"RoboCop","item_subtitle":"","item_rating":"Mature","item_release_date":"2003-07-24","created_by":1001,"creation_date":"2019-12-13","last_updated_by":1001,"last_update_date":"2019-12-13"}
{"item_id":1008,"item_barcode":"93155-11810","item_type":1019,"item_title":"Pirates of the Caribbean","item_subtitle":"","item_rating":"Teen","item_release_date":"2003-06-30","created_by":1001,"creation_date":"2019-12-13","last_updated_by":1001,"last_update_date":"2019-12-13"}
{"item_id":1009,"item_barcode":"12725-00173","item_type":1019,"item_title":"The Chronicles of Narnia","item_subtitle":"The Lion, the Witch and the Wardrobe","item_rating":"Everyone","item_release_date":"2003-06-30","created_by":1001,"creation_date":"2019-12-13","last_updated_by":1001,"last_update_date":"2019-12-13"}
{"item_id":1010,"item_barcode":"45496-96128","item_type":1017,"item_title":"MarioKart","item_subtitle":"Double Dash","item_rating":"Everyone","item_release_date":"2003-11-17","created_by":1001,"creation_date":"2019-12-13","last_updated_by":1001,"last_update_date":"2019-12-13"}
{"item_id":1011,"item_barcode":"08888-32214","item_type":1018,"item_title":"Splinter Cell","item_subtitle":"Chaos Theory","item_rating":"Teen","item_release_date":"2003-04-08","created_by":1001,"creation_date":"2019-12-13","last_updated_by":1001,"last_update_date":"2019-12-13"}
{"item_id":1012,"item_barcode":"14633-14821","item_type":1018,"item_title":"Need for Speed","item_subtitle":"Most Wanted","item_rating":"Everyone","item_release_date":"2004-11-15","created_by":1001,"creation_date":"2019-12-13","last_updated_by":1001,"last_update_date":"2019-12-13"}
{"item_id":1013,"item_barcode":"10425-29944","item_type":1019,"item_title":"The DaVinci Code","item_subtitle":"","item_rating":"Teen","item_release_date":"2006-05-19","created_by":1001,"creation_date":"2019-12-13","last_updated_by":1001,"last_update_date":"2019-12-13"}
{"item_id":1014,"item_barcode":"52919-52057","item_type":1019,"item_title":"Cars","item_subtitle":"","item_rating":"Everyone","item_release_date":"2006-04-28","created_by":1001,"creation_date":"2019-12-13","last_updated_by":1001,"last_update_date":"2019-12-13"}
{"item_id":1015,"item_barcode":"9689-80547-3","item_type":1020,"item_title":"Beau Geste","item_subtitle":"","item_rating":"PG","item_release_date":"1992-03-01","created_by":1001,"creation_date":"2019-12-13","last_updated_by":1001,"last_update_date":"2019-12-13"}
{"item_id":1016,"item_barcode":"53939-64103","item_type":1020,"item_title":"I Remember Mama","item_subtitle":"","item_rating":"NR","item_release_date":"1998-01-05","created_by":1001,"creation_date":"2019-12-13","last_updated_by":1001,"last_update_date":"2019-12-13"}
{"item_id":1017,"item_barcode":"24543-01292","item_type":1020,"item_title":"Tora! Tora! Tora!","item_subtitle":"The Attack on Pearl Harbor","item_rating":"G","item_release_date":"1999-11-02","created_by":1001,"creation_date":"2019-12-13","last_updated_by":1001,"last_update_date":"2019-12-13"}
{"item_id":1018,"item_barcode":"43396-60047","item_type":1020,"item_title":"A Man for All Seasons","item_subtitle":"","item_rating":"G","item_release_date":"1994-06-28","created_by":1001,"creation_date":"2019-12-13","last_updated_by":1001,"last_update_date":"2019-12-13"}
{"item_id":1019,"item_barcode":"43396-70603","item_type":1020,"item_title":"Hook","item_subtitle":"","item_rating":"PG","item_release_date":"1991-12-11","created_by":1001,"creation_date":"2019-12-13","last_updated_by":1001,"last_update_date":"2019-12-13"}
{"item_id":1020,"item_barcode":"85391-13213","item_type":1020,"item_title":"Around the World in 80 Days","item_subtitle":"","item_rating":"G","item_release_date":"1992-12-04","created_by":1001,"creation_date":"2019-12-13","last_updated_by":1001,"last_update_date":"2019-12-13"}
{"item_id":1021,"item_barcode":"85391-10843","item_type":1020,"item_title":"Camelot","item_subtitle":"","item_rating":"G","item_release_date":"1998-05-15","created_by":1001,"creation_date":"2019-12-13","last_updated_by":1001,"last_update_date":"2019-12-13"} |
Moving on to the next step you enclose the query in the copy command syntax, like:
COPY (SELECT row_to_json( (SELECT ROW FROM (SELECT item_id , item_barcode , item_type , item_title , item_subtitle , item_rating , item_release_date , created_by , creation_date::DATE , last_updated_by , last_update_date::DATE) ROW)) AS DATA FROM item) TO '/tmp/sample.json'; |
When you run it, it will fail with the following error message:
ERROR: must be superuser or a member of the pg_write_server_files role to COPY to a file HINT: Anyone can COPY to stdout or from stdin. psql's \copy command also works for anyone. |
You can fix this problem by connecting as the postgres user and granting the privilege to the student user:
GRANT pg_write_server_files TO student; |
It then runs successfully as the student user and creates the sample.json file in the /tmp directory. As always, I hope this helps those looking for a solution.
PostgreSQL Creating Schema
The process of creating a schema requires you grant the CREATE ON DATABASE privilege to the user as the postgres user. You use the following syntax:
GRANT CREATE ON DATABASE videodb TO student; |
As the student user, you create the app schema with the following syntax:
CREATE SCHEMA app; |
Then, you can query the result as follows:
SELECT * FROM pg_catalog.pg_namespace ORDER BY nspname; |
You should see the following:
      nspname       | nspowner |               nspacl
--------------------+----------+-------------------------------------
 app                |    16390 |
 information_schema |       10 | {postgres=UC/postgres,=U/postgres}
 pg_catalog         |       10 | {postgres=UC/postgres,=U/postgres}
 pg_temp_1          |       10 |
 pg_toast           |       10 |
 pg_toast_temp_1    |       10 |
 public             |       10 | {postgres=UC/postgres,=UC/postgres}
(7 rows) |
If you create a revision_history table without a schema name, it is automatically placed in the public schema, which means an attempt to describe the table will return an error. For example, you create a revision_history table with the following command:
CREATE TABLE app.revision_history ( revision_history_id serial , session_id VARCHAR , TABLE_NAME VARCHAR , revision_id INTEGER ); |
You describe the revision_history table with the following command:
\d revision_history |
It will show the following because there is no revision_history table in the public schema and the default search path only include a schema that shares the name with the student user and the public schema.
Did not find any relation named "revision_history". |
You can show the search path with the following:
show search_path; |
It should return the following, which is a schema that shares the user’s name and public.
search_path ----------------- "$user", public (1 row) |
You set the search path as follows:
SET search_path TO app, "$user", public; |
After you set the search_path, a standard attempt to describe the table will find the table whether it is in the app or public schema. That means the following command:
\d revision_history |
Shows:
                                                  Table "app.revision_history"
       Column        |       Type        | Collation | Nullable |                            Default
---------------------+-------------------+-----------+----------+---------------------------------------------------------------
 revision_history_id | integer           |           | not null | nextval('revision_history_revision_history_id_seq'::regclass)
 session_id          | character varying |           |          |
 table_name          | character varying |           |          |
revision_id | integer | | | |
As always, I hope this helps somebody looking for an answer.
PostgreSQL WITH to INSERT
This demonstrates how you insert results from a common table expression (CTE) in a leading WITH clause. I thought it would be a nice add since the existing tutorials didn’t have an example.
Create the message table, like this:
CREATE TABLE message ( message_id SERIAL , message_text VARCHAR ); |
Now, here’s a CTE with a two fabricated rows:
WITH cte AS ( SELECT 'x-ray' AS msg UNION ALL SELECT 'MRI' AS msg ) INSERT INTO message ( message_text ) ( SELECT msg FROM cte ); |
Then, you can query the results from the message table, like this:
SELECT * FROM message; |
You should get the following results:
 message_id | message_text
------------+--------------
          1 | x-ray
          2 | MRI
(2 rows) |
Unfortunately, if you re-ran that it would insert a duplicate set of rows. You can avoid that behavior by using correlation between the subquery in the WITH clause and target table of the INSERT statement.
The following only allows you to INSERT new rows in the table.
WITH cte AS ( SELECT 'x-ray' AS msg UNION ALL SELECT 'MRI' AS msg ) INSERT INTO message ( message_text ) ( SELECT msg FROM cte WHERE NOT EXISTS (SELECT NULL FROM message WHERE message.message_text = cte.msg )); |
You can add revision control column to the message table to verify there’s no change with subsequent attempts. The first step requires you create an independent message_rev_id_seq sequence, like this:
CREATE SEQUENCE message_rev_id_seq INCREMENT 1 MINVALUE -9223372036854775807 MAXVALUE 9223372036854775806 START -9223372036854765807; |
You can alter the table by using the standard rev_id column name:
ALTER TABLE message ADD COLUMN rev_id BIGINT NOT NULL DEFAULT NEXTVAL('public.message_rev_id_seq'); |
The ALTER statement will automatically add the first two values of the message_rev_id_seq to the existing rows. The ALTER statement is an immediate action because all Data Definition Language (DDL) commands are 1-Phase Commit operations.
The next step is to create an update_message_rev_id function that return a trigger. You do this using PL/pgSQL but you must specify the language value explicitly when returning a trigger data type, like:
1 2 3 4 5 6 7 8 | CREATE OR REPLACE FUNCTION update_message_rev_id() RETURNS TRIGGER AS $$ BEGIN NEW.rev_id = NEXTVAL(‘public.message_rev_id_seq’); RETURN NEW; END; $$ LANGUAGE plpgsql; |
The last step requires you create an update_message_revision trigger that calls the update_message_rev_id function, like:
CREATE TRIGGER update_message_revision BEFORE UPDATE ON message FOR EACH ROW EXECUTE PROCEDURE update_message_rev_id(); |
You can test it by running the correlated INSERT statement again. You’ll find that no rows are touched by the INSERT statement because the revision numbers are unchanged. You should see these two rows:
 message_id | message_text |        rev_id
------------+--------------+----------------------
          1 | x-ray        | -9223372036854765807
          2 | MRI          | -9223372036854765806
(2 rows) |
As always, I hope this helps those looking for a example of how to solve a problem.
PostgreSQL Upsert Advanced
Nine years after writing how to use the MERGE statement in Oracle, I am writing how you implement an UPSERT statement in PostgreSQL. I wrote an initial post going over the basics of PostgreSQL’s upsert implementation of the INSERT statement with an DO UPDATE clause and a DO NOTHING clause.
I thought it was interesting that the PostgreSQL Upsert Using INSERT ON CONFLICT Statement web page didn’t cover using a subquery as the source for an INSERT statement.
Demonstration
Here are the steps to accomplish an import/upload with the COPY statement and the INSERT statement with DO UPDATE and DO NOTHING clauses.
Step #1 : Position your CSV file in the physical directory
The example uses the following upload directory:
/u01/app/postgres/upload |
Put the following text in to the kingdom_import.csv file.
Narnia,77600,Peter the Magnificent,1272-03-20,1292-06-19 Narnia,77600,Edmund the Just,1272-03-20,1292-06-19 Narnia,77600,Susan the Gentle,1272-03-20,1292-06-19 Narnia,77600,Lucy the Valiant,1272-03-20,1292-06-19 Narnia,42100,Peter the Magnificent,1531-04-12,1531-05-31 Narnia,42100,Edmund the Just,1531-04-12,1531-05-31 Narnia,42100,Susan the Gentle,1531-04-12,1531-05-31 Narnia,42100,Lucy the Valiant,1531-04-12,1531-05-31 Camelot,15200,King Arthur,0631-03-10,0686-12-12 Camelot,15200,Sir Lionel,0631-03-10,0686-12-12 Camelot,15200,Sir Bors,0631-03-10,0635-12-12 Camelot,15200,Sir Bors,0640-03-10,0686-12-12 Camelot,15200,Sir Galahad,0631-03-10,0686-12-12 Camelot,15200,Sir Gawain,0631-03-10,0686-12-12 Camelot,15200,Sir Tristram,0631-03-10,0686-12-12 Camelot,15200,Sir Percival,0631-03-10,0686-12-12 Camelot,15200,Sir Lancelot,0670-09-30,0682-12-12 Camelot,15200,Modred,0681-09-30,0682-12-12 |
Step #2 : Run the script that creates tables and sequences
Copy the following code into a create_kingdom_knight_tables.sql file within a directory of your choice. Then, you run it as the student user. Assuming you put the code in the create_kingdom_knight_tables.sql script, you can call it like so
\i create_kingdom_knight_tables.sql |
1 2 3 4 5 6 7 8 9 10 11 12 13 14 15 16 17 18 19 20 21 22 23 24 25 26 27 28 29 30 31 32 33 34 35 36 37 38 39 40 41 42 43 44 45 46 47 48 49 50 51 52 53 54 55 56 57 58 59 60 61 62 63 64 65 | -- Conditionally drop three tables and sequences. DO $$ DECLARE /* Declare an indefinite length string and record variable. */ SQL VARCHAR; ROW RECORD; /* Declare a cursor. */ table_cursor CURSOR FOR SELECT TABLE_NAME FROM information_schema.tables WHERE table_catalog = 'videodb' AND table_schema = 'public' AND TABLE_NAME IN ('kingdom','knight','kingdom_knight_import'); BEGIN /* Open the cursor. */ OPEN table_cursor; LOOP /* Fetch table names. */ FETCH table_cursor INTO ROW; /* Exit when no more records are found. */ EXIT WHEN NOT FOUND; /* Concatenate together a DDL to drop the table with prejudice. */ SQL := 'DROP TABLE IF EXISTS '||ROW.table_name||' CASCADE'; /* Execute the DDL statement. */ EXECUTE SQL; END LOOP; /* Close the cursor. */ CLOSE table_cursor; END; $$; -- Create normalized kingdom table. CREATE TABLE kingdom ( kingdom_id SERIAL , kingdom_name VARCHAR(20) , population INTEGER , CONSTRAINT kingdom_uq_key UNIQUE ( kingdom_name , population )); -- Create normalized knight table. CREATE TABLE knight ( knight_id SERIAL , knight_name VARCHAR(24) , kingdom_allegiance_id INTEGER , allegiance_start_date DATE , allegiance_end_date DATE , CONSTRAINT knight_uq_key UNIQUE ( knight_name , kingdom_allegiance_id , allegiance_start_date , allegiance_end_date )); -- Create external import table. CREATE TABLE kingdom_knight_import ( kingdom_name VARCHAR(20) , population INTEGER , knight_name VARCHAR(24) , allegiance_start_date DATE , allegiance_end_date DATE); |
Step #3 : Run the COPY command.
Run the COPY command to move the data from the Comma Separated Values (CSV) file to the kingdom_knight_import table. Then, run it as the student account.
1 2 | COPY kingdom_knight_import FROM '/u01/app/postgres/upload/kingdom_import1.csv' DELIMITERS ',' CSV; |
Step #4 : Create the upload_kingdom procedure
Copy the following code into a create_kingdom_knight_procedure.sql file within a directory of your choice. Assuming you put the code in the create_kingdom_knight_procedure.sql script, you can call it like so
\i create_kingdom_knight_procedure.sql |
1 2 3 4 5 6 7 8 9 10 11 12 13 14 15 16 17 18 19 20 21 22 23 24 25 26 27 28 29 30 31 32 33 34 35 36 37 38 39 40 41 42 43 44 45 46 47 48 49 50 51 52 | CREATE PROCEDURE upload_kingdom() AS $$ DECLARE /* Declare error handling variables. */ err_num TEXT; err_msg INTEGER; BEGIN /* Insert only unique rows. The DISTINCT operator compresses the result set to a unique set and avoids consuming sequence values for non-unique result sets. */ INSERT INTO kingdom ( kingdom_name , population ) ( SELECT DISTINCT kki.kingdom_name , kki.population FROM kingdom_knight_import kki LEFT JOIN kingdom k ON kki.kingdom_name = k.kingdom_name AND kki.population = k.population) ON CONFLICT ON CONSTRAINT kingdom_uq_key DO NOTHING; /* Insert only unique rows. */ INSERT INTO knight ( knight_name , kingdom_allegiance_id , allegiance_start_date , allegiance_end_date ) (SELECT kki.knight_name , k.kingdom_id , kki.allegiance_start_date AS start_date , kki.allegiance_end_date AS end_date FROM kingdom_knight_import kki INNER JOIN kingdom k ON kki.kingdom_name = k.kingdom_name AND kki.population = k.population LEFT JOIN knight kn ON k.kingdom_id = kn.kingdom_allegiance_id AND kki.knight_name = kn.knight_name AND kki.allegiance_start_date = kn.allegiance_start_date AND kki.allegiance_end_date = kn.allegiance_end_date) ON CONFLICT ON CONSTRAINT knight_uq_key DO NOTHING; EXCEPTION WHEN OTHERS THEN err_num := SQLSTATE; err_msg := SUBSTR(SQLERRM,1,100); RAISE NOTICE 'Trapped Error: %', err_msg; END $$ LANGUAGE plpgsql; |
Step #5 : Run the upload_kingdom procedure and query the results
You run the upload_kingdom procedure with the CALL statement and then query the results. Assuming you put the code in the call_kingdom_knight_procedure.sql script, you can call it like so
\i call_kingdom_knight_procedure.sql |
/* Call the upload_kingdom procedure. */ CALL upload_kingdom(); /* Query the kingdom_knight_import table. */ SELECT kingdom_name , population , knight_name , date_trunc('second',allegiance_start_date AT TIME ZONE 'MST') AS allegiance_start_date , date_trunc('second',allegiance_end_date AT TIME ZONE 'MST') AS allegiance_end_date FROM kingdom_knight_import; /* Query the kingdom table. */ SELECT * FROM kingdom; /* Query the knight table. */ SELECT kn.knight_id , kki.knight_name , k.kingdom_id , date_trunc('second',kki.allegiance_start_date AT TIME ZONE 'MST') AS start_date , date_trunc('second',kki.allegiance_end_date AT TIME ZONE 'MST') AS end_date FROM kingdom_knight_import kki INNER JOIN kingdom k ON kki.kingdom_name = k.kingdom_name AND kki.population = k.population LEFT JOIN knight kn ON k.kingdom_id = kn.kingdom_allegiance_id AND kki.knight_name = kn.knight_name AND kki.allegiance_start_date = kn.allegiance_start_date AND kki.allegiance_end_date = kn.allegiance_end_date; |
It prints the following results:
CALL
 kingdom_name | population |      knight_name      | allegiance_start_date | allegiance_end_date
--------------+------------+-----------------------+-----------------------+---------------------
 Narnia       |      77600 | Peter the Magnificent | 1272-03-19 23:59:56   | 1292-06-18 23:59:56
 Narnia       |      77600 | Edmund the Just       | 1272-03-19 23:59:56   | 1292-06-18 23:59:56
 Narnia       |      77600 | Susan the Gentle      | 1272-03-19 23:59:56   | 1292-06-18 23:59:56
 Narnia       |      77600 | Lucy the Valiant      | 1272-03-19 23:59:56   | 1292-06-18 23:59:56
 Narnia       |      42100 | Peter the Magnificent | 1531-04-11 23:59:56   | 1531-05-30 23:59:56
 Narnia       |      42100 | Edmund the Just       | 1531-04-11 23:59:56   | 1531-05-30 23:59:56
 Narnia       |      42100 | Susan the Gentle      | 1531-04-11 23:59:56   | 1531-05-30 23:59:56
 Narnia       |      42100 | Lucy the Valiant      | 1531-04-11 23:59:56   | 1531-05-30 23:59:56
 Camelot      |      15200 | King Arthur           | 0631-03-09 23:59:56   | 0686-12-11 23:59:56
 Camelot      |      15200 | Sir Lionel            | 0631-03-09 23:59:56   | 0686-12-11 23:59:56
 Camelot      |      15200 | Sir Bors              | 0631-03-09 23:59:56   | 0635-12-11 23:59:56
 Camelot      |      15200 | Sir Bors              | 0640-03-09 23:59:56   | 0686-12-11 23:59:56
 Camelot      |      15200 | Sir Galahad           | 0631-03-09 23:59:56   | 0686-12-11 23:59:56
 Camelot      |      15200 | Sir Gawain            | 0631-03-09 23:59:56   | 0686-12-11 23:59:56
 Camelot      |      15200 | Sir Tristram          | 0631-03-09 23:59:56   | 0686-12-11 23:59:56
 Camelot      |      15200 | Sir Percival          | 0631-03-09 23:59:56   | 0686-12-11 23:59:56
 Camelot      |      15200 | Sir Lancelot          | 0670-09-29 23:59:56   | 0682-12-11 23:59:56
(18 rows)

 kingdom_id | kingdom_name | population
------------+--------------+------------
          1 | Narnia       |      42100
          2 | Narnia       |      77600
          3 | Camelot      |      15200
(3 rows)

 knight_id |      knight_name      | kingdom_id |     start_date      |      end_date
-----------+-----------------------+------------+---------------------+---------------------
         1 | Peter the Magnificent |          2 | 1272-03-19 23:59:56 | 1292-06-18 23:59:56
         2 | Edmund the Just       |          2 | 1272-03-19 23:59:56 | 1292-06-18 23:59:56
         3 | Susan the Gentle      |          2 | 1272-03-19 23:59:56 | 1292-06-18 23:59:56
         4 | Lucy the Valiant      |          2 | 1272-03-19 23:59:56 | 1292-06-18 23:59:56
         5 | Peter the Magnificent |          1 | 1531-04-11 23:59:56 | 1531-05-30 23:59:56
         6 | Edmund the Just       |          1 | 1531-04-11 23:59:56 | 1531-05-30 23:59:56
         7 | Susan the Gentle      |          1 | 1531-04-11 23:59:56 | 1531-05-30 23:59:56
         8 | Lucy the Valiant      |          1 | 1531-04-11 23:59:56 | 1531-05-30 23:59:56
         9 | King Arthur           |          3 | 0631-03-09 23:59:56 | 0686-12-11 23:59:56
        10 | Sir Lionel            |          3 | 0631-03-09 23:59:56 | 0686-12-11 23:59:56
        11 | Sir Bors              |          3 | 0631-03-09 23:59:56 | 0635-12-11 23:59:56
        12 | Sir Bors              |          3 | 0640-03-09 23:59:56 | 0686-12-11 23:59:56
        13 | Sir Galahad           |          3 | 0631-03-09 23:59:56 | 0686-12-11 23:59:56
        14 | Sir Gawain            |          3 | 0631-03-09 23:59:56 | 0686-12-11 23:59:56
        15 | Sir Tristram          |          3 | 0631-03-09 23:59:56 | 0686-12-11 23:59:56
        16 | Sir Percival          |          3 | 0631-03-09 23:59:56 | 0686-12-11 23:59:56
        17 | Sir Lancelot          |          3 | 0670-09-29 23:59:56 | 0682-12-11 23:59:56
        69 | Modred                |          3 | 0681-09-29 23:59:56 | 0682-12-11 23:59:56
(18 rows) |
As always, I hope this works to help those trying to solve a similar problem.
PostgreSQL Upsert Intro
Oracle and SQL Server use the MERGE statement, MySQL uses the REPLACE INTO statement or ON DUPLICATE KEY, but PostgreSQL uses an upsert. The upsert isn’t a statement per se. It is like MySQL’s INSERT statement with the ON DUPLICATE KEY clause. PostgreSQL uses an ON CONFLICT clause in the INSERT statement and there anonymous block without the $$ delimiters.
The general behaviors of upserts is covered in the PostgreSQL Tutorial. It has the following prototype:
INSERT INTO TABLE_NAME(column_list) VALUES(value_list) ON CONFLICT target action; |
The target can be a column name, an ON CONSTRAINT constraint name, or a WHERE predicate, while the action can be DO NOTHING (or ignore) or a DO UPDATE statement. I wrote the following example to show how to leverage a unique constraint with a DO NOTHING and DO UPDATE behavior.
My example conditionally drops a table, creates a table with a unique constraint, inserts a few rows, updates with a DO UPDATE clause, updates with DO NOTHING clause, and queries the results with a bit of formatting.
- Conditionally drop the
testtable./* Suppress warnings from the log file. */ SET client_min_messages = 'error'; /* Conditionally drop table. */ DROP TABLE IF EXISTS test;
- Create the
testtable./* Create a test table. */ CREATE TABLE test ( test_id SERIAL , first_name VARCHAR(20) , middle_name VARCHAR(20) , last_name VARCHAR(20) , updated INTEGER DEFAULT 0 , update_time TIMESTAMP WITH TIME ZONE NOT NULL DEFAULT CURRENT_TIMESTAMP , CONSTRAINT test_uq_key UNIQUE (first_name,middle_name,last_name));
- Insert six rows into the
testtable./* Insert six rows. */ INSERT INTO test ( first_name, middle_name, last_name ) VALUES ('Harry','James','Potter') ,('Ginerva','Molly','Potter') ,('Lily','Luna','Potter') ,('Albus','Severus','Potter') ,('James',NULL,'Potter') ,('Lily',NULL,'Potter');
- Create a five second delay.
/* Sleep for 5 seconds. */
DO $$
BEGIN
  PERFORM pg_sleep(5);
END;
$$;
- Use the
INSERTstatement with aDO UPDATEclause that increments theupdatedcolumn of thetesttable./* Upsert on unique key constraint conflict. */ INSERT INTO test ( first_name , middle_name , last_name ) VALUES ('Harry' ,'James' ,'Potter') ON CONFLICT ON CONSTRAINT test_uq_key DO UPDATE SET updated = excluded.updated + 1 , update_time = CURRENT_TIMESTAMP;
- Use the
INSERTstatement with aDO NOTHINGclause./* Upsert on unique key constraint ignore update. */ INSERT INTO test ( first_name , middle_name , last_name ) VALUES ('Harry' ,'James' ,'Potter') ON CONFLICT ON CONSTRAINT test_uq_key DO NOTHING;
- Query the
testtable./* Formatted query to demonstrate result of UPSERT statement. */ SELECT test_id , last_name || ', ' || CASE WHEN middle_name IS NOT NULL THEN first_name || ' ' || middle_name ELSE first_name END AS full_name , updated , date_trunc('second',update_time AT TIME ZONE 'MST') AS "timestamp" FROM test ORDER BY last_name , first_name , CASE WHEN middle_name IS NOT NULL THEN middle_name ELSE 'A' END;
Display results:
 test_id |       full_name       | updated |      timestamp
---------+-----------------------+---------+---------------------
       4 | Potter, Albus Severus |       0 | 2019-11-24 19:23:10
       2 | Potter, Ginerva Molly |       0 | 2019-11-24 19:23:10
       1 | Potter, Harry James   |       1 | 2019-11-24 19:23:15
       5 | Potter, James         |       0 | 2019-11-24 19:23:10
       6 | Potter, Lily          |       0 | 2019-11-24 19:23:10
       3 | Potter, Lily Luna     |       0 | 2019-11-24 19:23:10
(6 rows)
As always, I hope this helps those looking for clear examples to solve problems.
