Archive for the ‘PostgreSQL 11’ Category
AlmaLinux+PostgreSQL
This installs PostgreSQL 15 on AlmaLinux 9 (don’t forget the PostgreSQL 15 Documentation site). The executable is available in the script that the postgresql.org provides; however, it seems appropriate to show how to find that script for any platform.
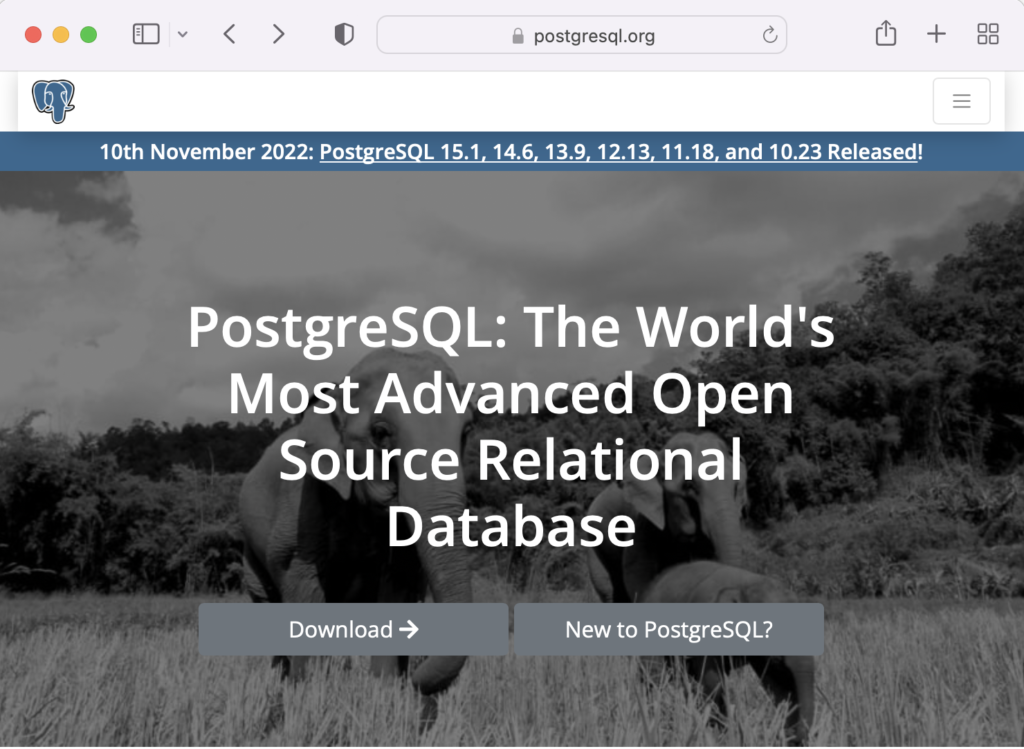
When you launch the postgres.org web site, you will see the following dialog. Click the Download-> button to choose an operating system.
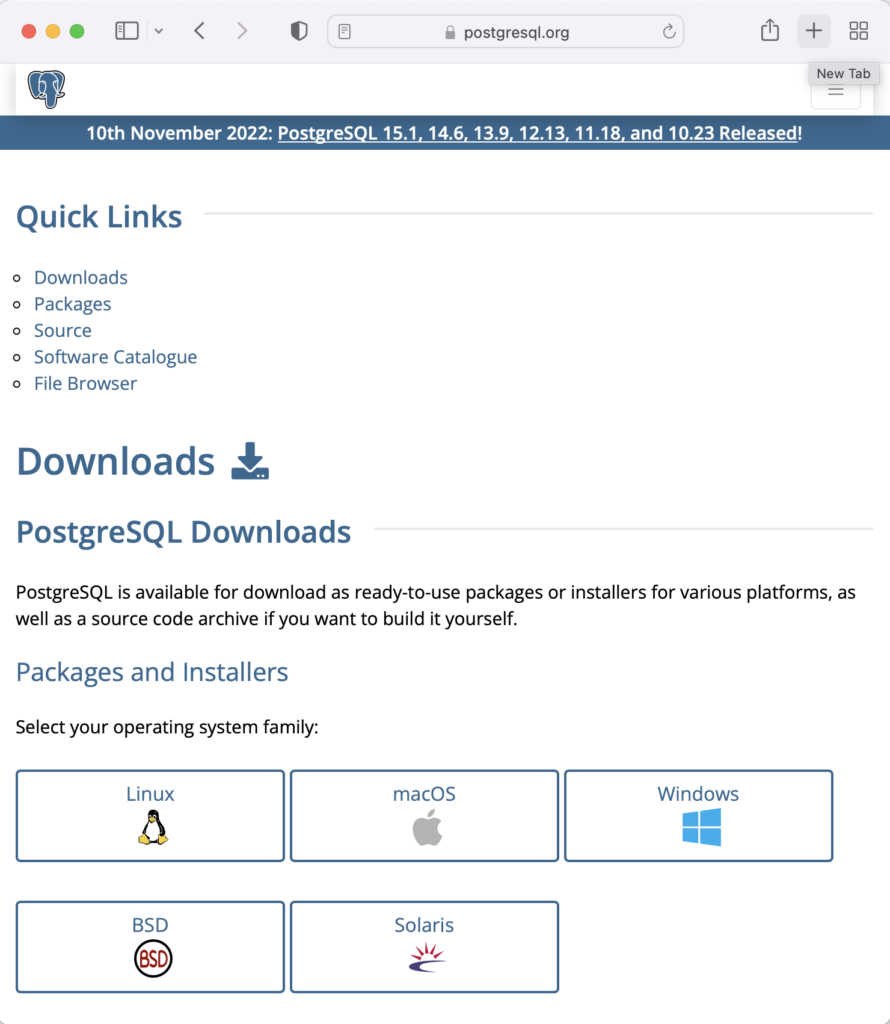
On the next webpage, click on the Linux icon button to proceed.
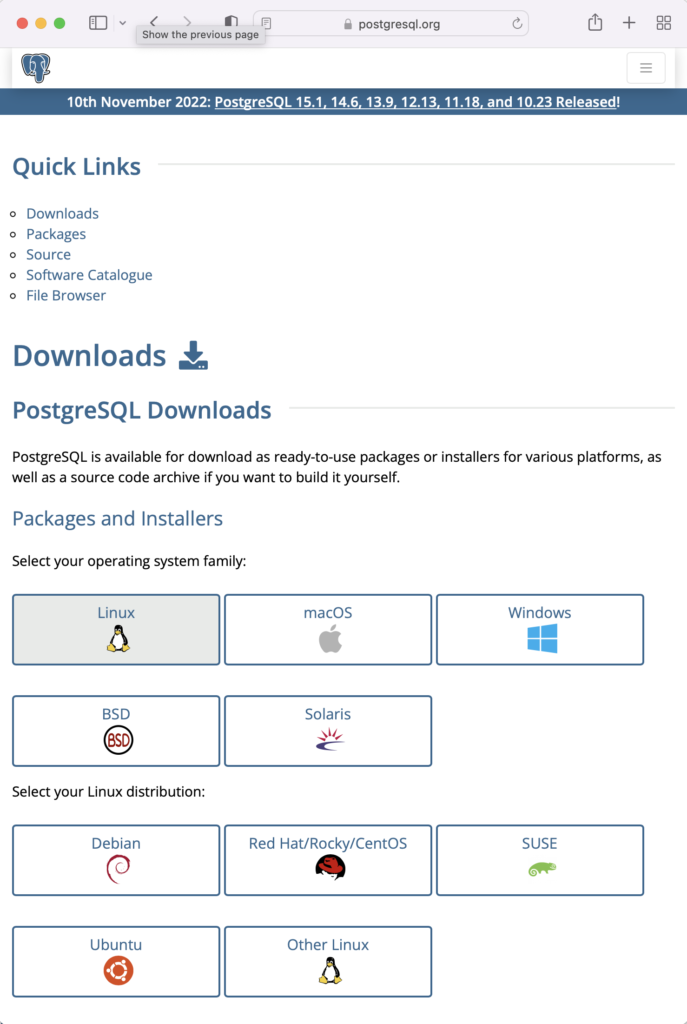
This page expands for you to choose a Linux distribution. Click on the Red Hat/Rocky/CentOS button to proceed.
This web page lets you choose a platform, which should be Red Hat Enterprise, Rocky, or Oracle version 9.
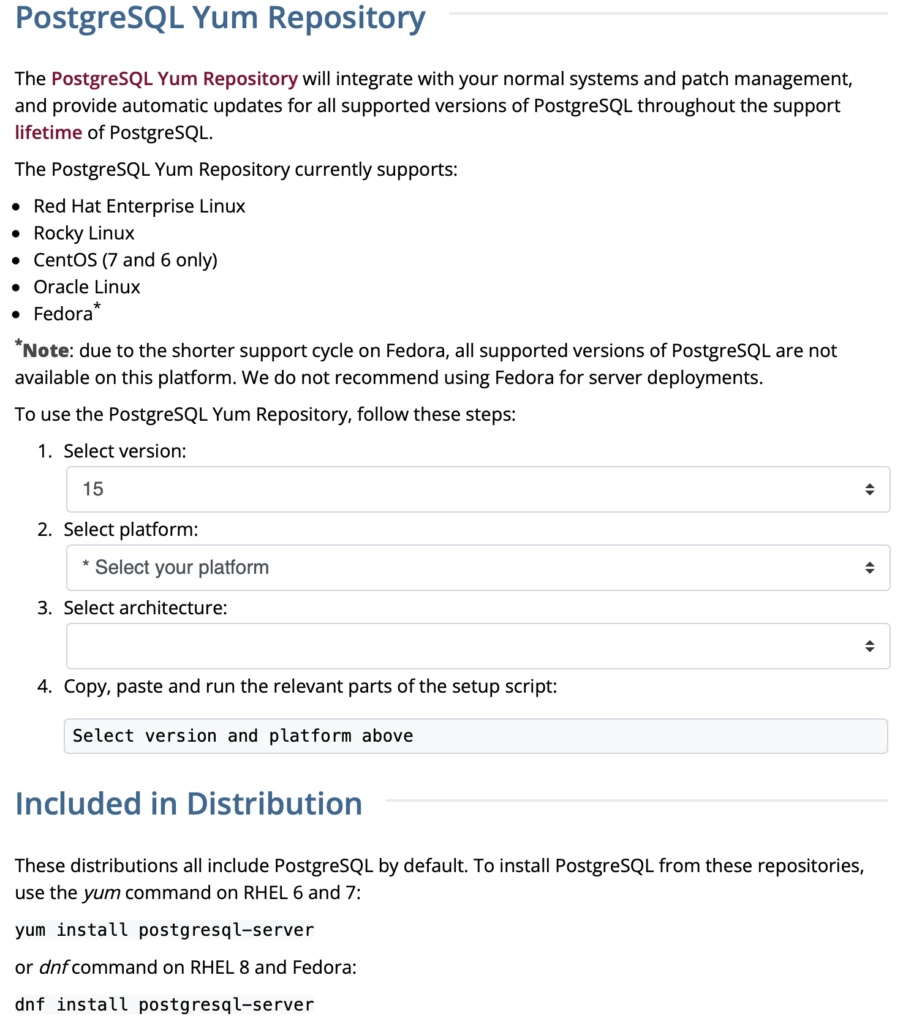
The selection fills out the web page and provides a setup script. The script installs the PostgreSQL packages, disables the built-in PostgreSQL module, installs PostgreSQL 15 Server, initialize, enable, and start PostgreSQL Server.
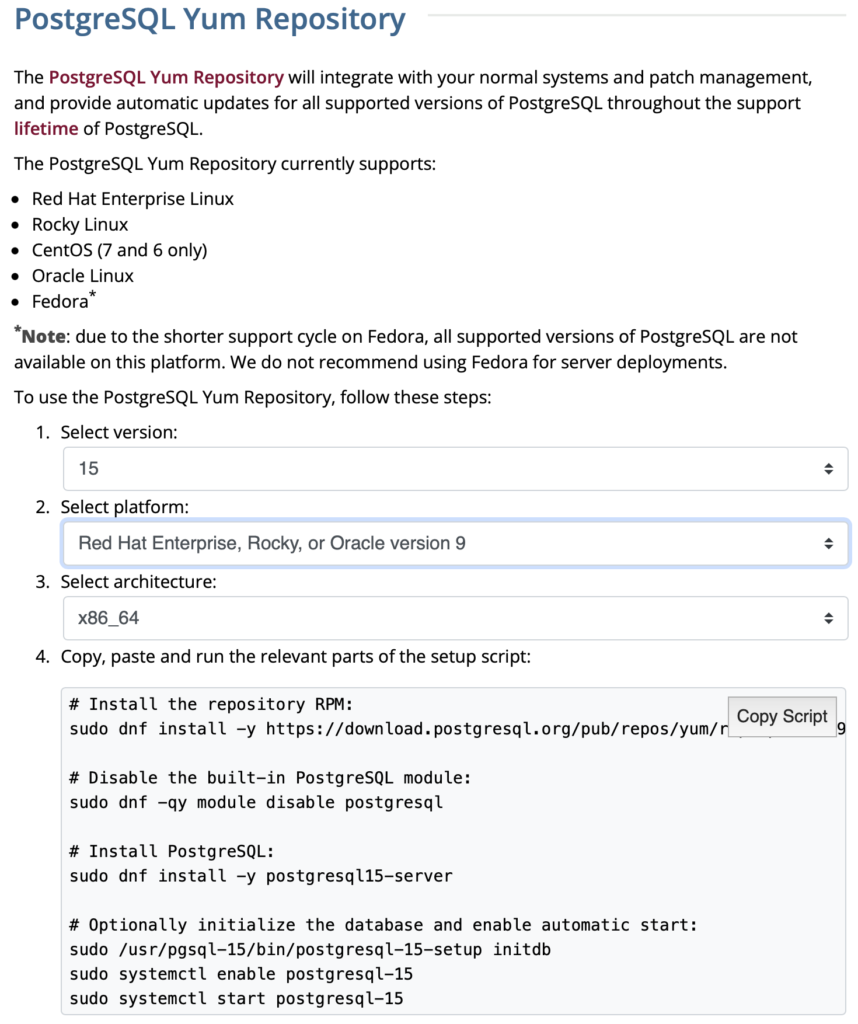
Here are the detailed steps:
- Install the PostgreSQL by updating dependent packages before installing it with the script provided by the PostgreSQL download web site:
# Install the repository RPM:
sudo dnf install -y https://download.postgresql.org/pub/repos/yum/reporpms/EL-9-x86_64/pgdg-redhat-repo-latest.noarch.rpm

# Disable the built-in PostgreSQL module:
sudo dnf -qy module disable postgresql

# Install PostgreSQL:
sudo dnf install -y postgresql15-server

# Optionally initialize the database and enable automatic start:
sudo /usr/pgsql-15/bin/postgresql-15-setup initdb
sudo systemctl enable postgresql-15
sudo systemctl start postgresql-15
Display detailed console log →
Last metadata expiration check: 20:38:10 ago on Mon 21 Nov 2022 02:07:25 AM EST.
pgdg-redhat-repo-latest.noarch.rpm              3.6 kB/s |  12 kB     00:03
Dependencies resolved.
================================================================================
 Package                 Architecture  Version        Repository           Size
================================================================================
Installing:
 pgdg-redhat-repo        noarch        42.0-28        @commandline         12 k

Transaction Summary
================================================================================
Install  1 Package

Total size: 12 k
Installed size: 14 k
Downloading Packages:
Running transaction check
Transaction check succeeded.
Running transaction test
Transaction test succeeded.
Running transaction
Regex version mismatch, expected: 10.40 2022-04-14 actual: 10.37 2021-05-26
Regex version mismatch, expected: 10.40 2022-04-14 actual: 10.37 2021-05-26
  Preparing        :                                                        1/1
  Installing       : pgdg-redhat-repo-42.0-28.noarch                        1/1
  Verifying        : pgdg-redhat-repo-42.0-28.noarch                        1/1

Installed:
  pgdg-redhat-repo-42.0-28.noarch

Complete!
Importing GPG key 0x442DF0F8:
 Userid     : "PostgreSQL RPM Building Project <pgsql-pkg-yum@postgresql.org>"
 Fingerprint: 68C9 E2B9 1A37 D136 FE74 D176 1F16 D2E1 442D F0F8
 From       : /etc/pki/rpm-gpg/RPM-GPG-KEY-PGDG
Importing GPG key 0x442DF0F8:
 Userid     : "PostgreSQL RPM Building Project <pgsql-pkg-yum@postgresql.org>"
 Fingerprint: 68C9 E2B9 1A37 D136 FE74 D176 1F16 D2E1 442D F0F8
 From       : /etc/pki/rpm-gpg/RPM-GPG-KEY-PGDG
Importing GPG key 0x442DF0F8:
 Userid     : "PostgreSQL RPM Building Project <pgsql-pkg-yum@postgresql.org>"
 Fingerprint: 68C9 E2B9 1A37 D136 FE74 D176 1F16 D2E1 442D F0F8
 From       : /etc/pki/rpm-gpg/RPM-GPG-KEY-PGDG
Importing GPG key 0x442DF0F8:
 Userid     : "PostgreSQL RPM Building Project <pgsql-pkg-yum@postgresql.org>"
 Fingerprint: 68C9 E2B9 1A37 D136 FE74 D176 1F16 D2E1 442D F0F8
 From       : /etc/pki/rpm-gpg/RPM-GPG-KEY-PGDG
Importing GPG key 0x442DF0F8:
 Userid     : "PostgreSQL RPM Building Project <pgsql-pkg-yum@postgresql.org>"
 Fingerprint: 68C9 E2B9 1A37 D136 FE74 D176 1F16 D2E1 442D F0F8
 From       : /etc/pki/rpm-gpg/RPM-GPG-KEY-PGDG
Importing GPG key 0x442DF0F8:
 Userid     : "PostgreSQL RPM Building Project <pgsql-pkg-yum@postgresql.org>"
 Fingerprint: 68C9 E2B9 1A37 D136 FE74 D176 1F16 D2E1 442D F0F8
 From       : /etc/pki/rpm-gpg/RPM-GPG-KEY-PGDG
Importing GPG key 0x442DF0F8:
 Userid     : "PostgreSQL RPM Building Project <pgsql-pkg-yum@postgresql.org>"
 Fingerprint: 68C9 E2B9 1A37 D136 FE74 D176 1F16 D2E1 442D F0F8
 From       : /etc/pki/rpm-gpg/RPM-GPG-KEY-PGDG
Unable to resolve argument postgresql
Error: Problems in request:
missing groups or modules: postgresql
Last metadata expiration check: 0:00:02 ago on Mon 21 Nov 2022 10:46:16 PM EST.
Dependencies resolved.
================================================================================
 Package                  Arch        Version                 Repository   Size
================================================================================
Installing:
 postgresql15-server      x86_64      15.1-1PGDG.rhel9        pgdg15      6.0 M
Installing dependencies:
 lz4                      x86_64      1.9.3-5.el9             baseos       58 k
 postgresql15             x86_64      15.1-1PGDG.rhel9        pgdg15      1.5 M
 postgresql15-libs        x86_64      15.1-1PGDG.rhel9        pgdg15      296 k

Transaction Summary
================================================================================
Install  4 Packages

Total download size: 7.8 M
Installed size: 33 M
Downloading Packages:
(1/4): lz4-1.9.3-5.el9.x86_64.rpm                91 kB/s |  58 kB     00:00
(2/4): postgresql15-libs-15.1-1PGDG.rhel9.x86_6  97 kB/s | 296 kB     00:03
(3/4): postgresql15-15.1-1PGDG.rhel9.x86_64.rpm 214 kB/s | 1.5 MB     00:07
(4/4): postgresql15-server-15.1-1PGDG.rhel9.x86 371 kB/s | 6.0 MB     00:16
--------------------------------------------------------------------------------
Total                                           446 kB/s | 7.8 MB     00:17
PostgreSQL 15 for RHEL / Rocky 9 - x86_64       1.4 MB/s | 1.7 kB     00:00
Importing GPG key 0x442DF0F8:
 Userid     : "PostgreSQL RPM Building Project <pgsql-pkg-yum@postgresql.org>"
 Fingerprint: 68C9 E2B9 1A37 D136 FE74 D176 1F16 D2E1 442D F0F8
 From       : /etc/pki/rpm-gpg/RPM-GPG-KEY-PGDG
Key imported successfully
Running transaction check
Transaction check succeeded.
Running transaction test
Transaction test succeeded.
Running transaction
Regex version mismatch, expected: 10.40 2022-04-14 actual: 10.37 2021-05-26
Regex version mismatch, expected: 10.40 2022-04-14 actual: 10.37 2021-05-26
  Preparing        :                                                        1/1
  Installing       : postgresql15-libs-15.1-1PGDG.rhel9.x86_64              1/4
  Running scriptlet: postgresql15-libs-15.1-1PGDG.rhel9.x86_64              1/4
  Installing       : lz4-1.9.3-5.el9.x86_64                                 2/4
  Installing       : postgresql15-15.1-1PGDG.rhel9.x86_64                   3/4
  Running scriptlet: postgresql15-15.1-1PGDG.rhel9.x86_64                   3/4
  Running scriptlet: postgresql15-server-15.1-1PGDG.rhel9.x86_64            4/4
  Installing       : postgresql15-server-15.1-1PGDG.rhel9.x86_64            4/4
  Running scriptlet: postgresql15-server-15.1-1PGDG.rhel9.x86_64            4/4
Regex version mismatch, expected: 10.40 2022-04-14 actual: 10.37 2021-05-26
Regex version mismatch, expected: 10.40 2022-04-14 actual: 10.37 2021-05-26

  Verifying        : lz4-1.9.3-5.el9.x86_64                                 1/4
  Verifying        : postgresql15-15.1-1PGDG.rhel9.x86_64                   2/4
  Verifying        : postgresql15-libs-15.1-1PGDG.rhel9.x86_64              3/4
  Verifying        : postgresql15-server-15.1-1PGDG.rhel9.x86_64            4/4

Installed:
  lz4-1.9.3-5.el9.x86_64
  postgresql15-15.1-1PGDG.rhel9.x86_64
  postgresql15-libs-15.1-1PGDG.rhel9.x86_64
  postgresql15-server-15.1-1PGDG.rhel9.x86_64

Complete!
Initializing database ... /sbin/restorecon: Regex version mismatch, expected: 10.40 2022-04-14 actual: 10.37 2021-05-26
/sbin/restorecon: Regex version mismatch, expected: 10.40 2022-04-14 actual: 10.37 2021-05-26
/sbin/restorecon: Regex version mismatch, expected: 10.40 2022-04-14 actual: 10.37 2021-05-26
/sbin/restorecon: Regex version mismatch, expected: 10.40 2022-04-14 actual: 10.37 2021-05-26
/sbin/restorecon: Regex version mismatch, expected: 10.40 2022-04-14 actual: 10.37 2021-05-26
/sbin/restorecon: Regex version mismatch, expected: 10.40 2022-04-14 actual: 10.37 2021-05-26
OK

Created symlink /etc/systemd/system/multi-user.target.wants/postgresql-15.service → /usr/lib/systemd/system/postgresql-15.service.
- The simpmlest way to verify the installation is to check for the psql executable. You can do that with this command:
which psqlIt should return:
/usr/bin/psql
- Attempt to login with the following command-line interface (CLI) syntax:
psql -U postgres -W
It should fail and return the following:
psql: error: connection to server on socket "/var/run/postgresql/.s.PGSQL.5432" failed: FATAL: Peer authentication failed for user "postgres"
This error occurs because you’re not the postgres user, and all other users must designate that they’re connecting to an account with a password. The following steps let you configure the Operating System (OS).
-
You must shell out to the root superuser’s account, and then shell out to the postgres user’s account to test your connection because postgres user’s account disallows direct connection.
su - root
su - postgres
You can verify the current postgres user with this command:
whoamiIt should return the following:
postgres
As the postgres user, you connect to the database without a password. You use the following syntax:
psql -U postgresIt should display the following:
psql (15.1)
Type "help" for help.
-
At this point, you have some operating system (OS) stuff to setup before configuring a PostgreSQL sandboxed videodb database and student user. Exit psql with the following command:
postgres=# \q
Navigate to the PostgreSQL home database directory as the postgres user with this command:
cd /var/lib/pgsql/15/data
Edit the pg_hba.conf file to add lines for the postgres and student users:
# TYPE  DATABASE        USER            ADDRESS                 METHOD

# "local" is for Unix domain socket connections only
local   all             all                                     peer
local   all             postgres                                peer
local   all             student                                 peer

# IPv4 local connections:
host    all             all             127.0.0.1/32            scram-sha-256
# IPv6 local connections:
host    all             all             ::1/128                 scram-sha-256
# Allow replication connections from localhost, by a user with the
# replication privilege.
local   replication     all                                     scram-sha-256
host    replication     all             127.0.0.1/32            scram-sha-256
host    replication     all             ::1/128                 scram-sha-256
Navigate up the directory tree from the /var/lib/pgsql/15/data directory, which is also the data dictionary, to the following /var/lib/pgsql/15 base directory:
cd /var/lib/pgsql/15
Create a new video_db directory. This is where you will deploy the video_db tablespace. You create this directory with the following command:
mkdir video_dbChange the video_db permissions to read, write, and execute for only the owner with this syntax as the postgres user:
chmod 700 video_db
-
Exit the postgres user with the exit command and open PostgreSQL’s 5432 listener port as the root user. You can use the following command, as the root user:
firewall-cmd --zone=public --add-port 5432/tcp --permanent
-
You must shell out from the root user to the postgres user with the following command:
su - postgres
-
You must shell out to the root superuser’s account, and then shell out to the postgres user’s account to test your connection because postgres user’s account disallows direct connection.
- Connect to the postgres account and perform the following commands:
- After connecting as the postgres superuser, you can create a video_db tablespace with the following syntax:
CREATE TABLESPACE video_db
  OWNER postgres
  LOCATION 'C:\Users\username\video_db';
This will return the following:
CREATE TABLESPACE
You can query whether you successfully create the video_db tablespace with the following:
SELECT * FROM pg_tablespace;
It should return the following:
  oid  |  spcname   | spcowner | spcacl | spcoptions
-------+------------+----------+--------+------------
  1663 | pg_default |       10 |        |
  1664 | pg_global  |       10 |        |
 16389 | video_db   |       10 |        |
(3 rows)
-
You need to know the PostgreSQL default collation before you create a new database. You can write the following query to determine the default correlation:
postgres=# SELECT datname, datcollate FROM pg_database WHERE datname = 'postgres';
It should return something like this:
 datname  | datcollate
----------+-------------
 postgres | en_US.UTF-8
(1 row)
The datcollate value of the postgres database needs to the same value for the LC_COLLATE and LC_CTYPE parameters when you create a database. You can create a videodb database with the following syntax provided you’ve made appropriate substitutions for the LC_COLLATE and LC_CTYPE values below:
CREATE DATABASE videodb
  WITH OWNER = postgres
  ENCODING = 'UTF8'
  TABLESPACE = video_db
  LC_COLLATE = 'en_US.UTF-8'
  LC_CTYPE = 'en_US.UTF-8'
  CONNECTION LIMIT = -1;
You can verify the creation of the videodb with the following command:
postgres# \l
It should show you a display like the following:
List of databases Name | Owner | Encoding | Collate | Ctype | ICU Locale | Locale Provider | Access privileges -----------+----------+----------+-------------+-------------+------------+-----------------+----------------------- postgres | postgres | UTF8 | en_US.UTF-8 | en_US.UTF-8 | | libc | template0 | postgres | UTF8 | en_US.UTF-8 | en_US.UTF-8 | | libc | =c/postgres + | | | | | | | postgres=CTc/postgres template1 | postgres | UTF8 | en_US.UTF-8 | en_US.UTF-8 | | libc | =c/postgres + | | | | | | | postgres=CTc/postgres videodb | postgres | UTF8 | en_US.UTF-8 | en_US.UTF-8 | | libc | (4 rows)Then, you can assign comment to the database with the following syntax:
COMMENT ON DATABASE videodb IS 'Video Store Database';
- After connecting as the postgres superuser, you can create a video_db tablespace with the following syntax:
- Create a Role, Grant, and User:
In this section you create a dba role, grant privileges on a videodb database to a role, and create a user with the role that you created previously with the following three statements. There are three steps in this sections.
- The first step creates a dba role:
CREATE ROLE dba WITH SUPERUSER;
- The second step grants all privileges on the videodb database to both the postgres superuser and the dba role:
GRANT TEMPORARY, CONNECT ON DATABASE videodb TO PUBLIC;
GRANT ALL PRIVILEGES ON DATABASE videodb TO postgres;
GRANT ALL PRIVILEGES ON DATABASE videodb TO dba;
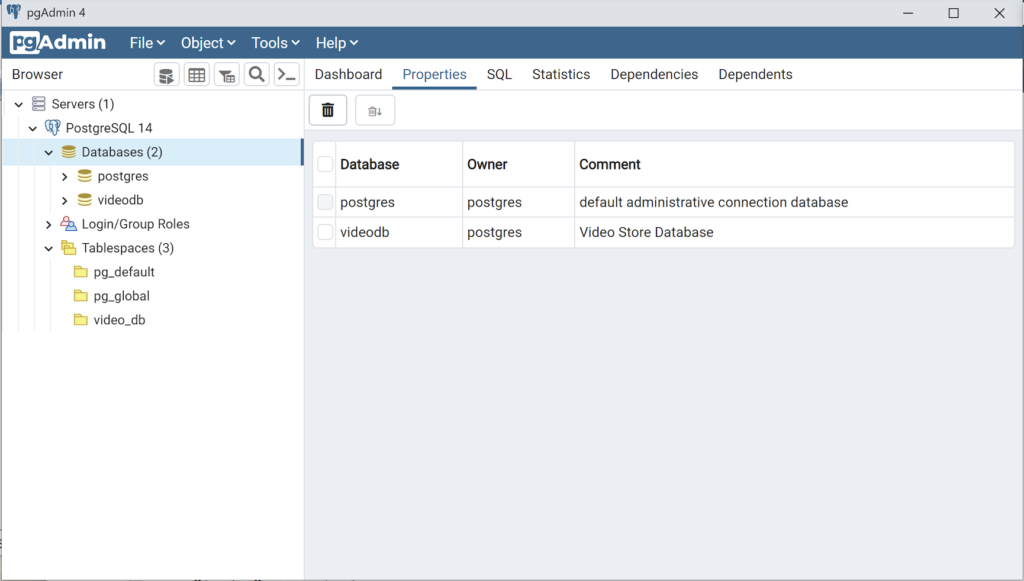
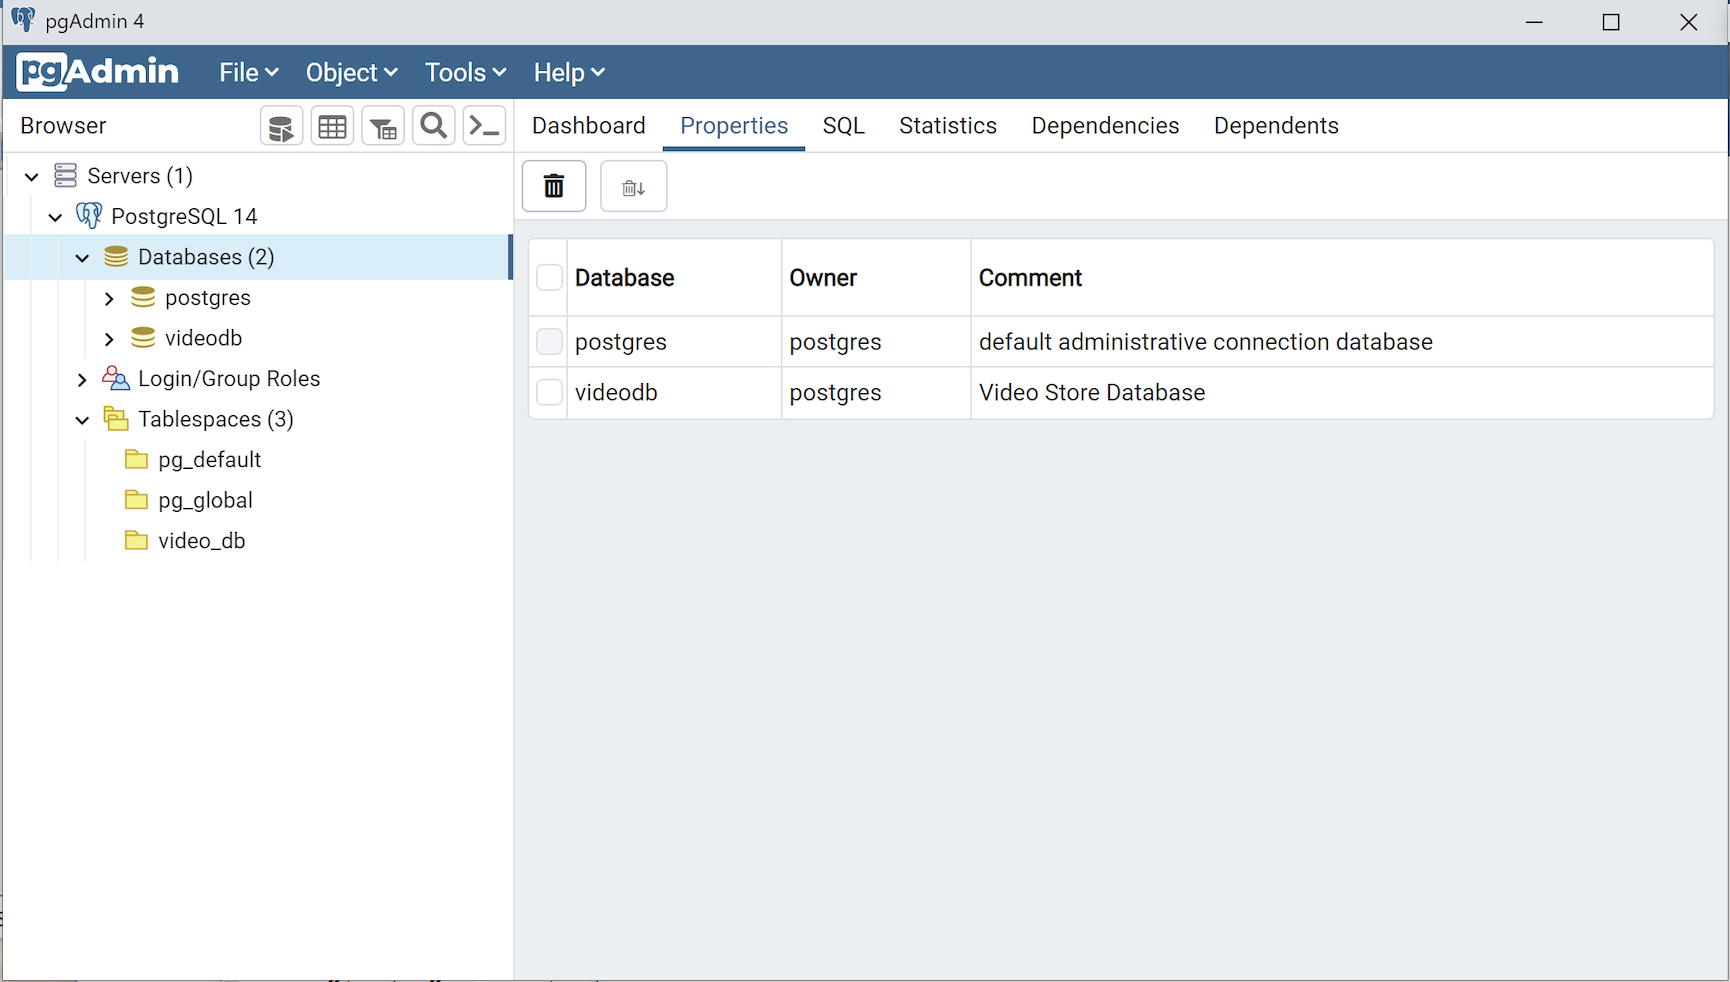
Any work in pgAdmin4 requires a grant on the videodb database to the postgres superuser. The grant enables visibility of the videodb database in the pgAdmin4 console as shown in the following image.
- The third step changes the ownership of the videodb database to the student user:
ALTER DATABASE videodb OWNER TO student;
You can verify the change of ownership for the videodb from the postgres user to student user with the following command:
postgres# \l
It should show you a display like the following:
List of databases Name | Owner | Encoding | Collate | Ctype | ICU Locale | Locale Provider | Access privileges -----------+----------+----------+-------------+-------------+------------+-----------------+----------------------- postgres | postgres | UTF8 | en_US.UTF-8 | en_US.UTF-8 | | libc | template0 | postgres | UTF8 | en_US.UTF-8 | en_US.UTF-8 | | libc | =c/postgres + | | | | | | | postgres=CTc/postgres template1 | postgres | UTF8 | en_US.UTF-8 | en_US.UTF-8 | | libc | =c/postgres + | | | | | | | postgres=CTc/postgres videodb | student | UTF8 | en_US.UTF-8 | en_US.UTF-8 | | libc | =Tc/student + | | | | | | | student=CTc/student + | | | | | | | dba=CTc/student (4 rows) - The fourth step creates a student user with the dba role:
CREATE USER student
  WITH ROLE dba
       ENCRYPTED PASSWORD 'student';
After this step, you need to disconnect as the postgres superuser with the following command:
\q
- The first step creates a dba role:
- Connect to the videodb database as the student user with the PostgreSQL CLI, create a new_hire table and quit the database.
The following syntax lets you connect to a videodb database as the student user. You should note that the Linux OS student user name should match the database user name.
psql -Ustudent -W -dvideodb
You create the new_hire table in the public schema of the videodb database with the following syntax:
CREATE TABLE new_hire
( new_hire_id  SERIAL        CONSTRAINT new_hire_pk PRIMARY KEY
, first_name   VARCHAR(20)   NOT NULL
, middle_name  VARCHAR(20)
, last_name    VARCHAR(20)   NOT NULL
, hire_date    DATE          NOT NULL
, UNIQUE(first_name, middle_name, hire_date));
You can describe the new_hire table with the following command:
\d new_hire
You quit the psql connection with a quit; or \q, like so
quit;
- Installing, configuring, and launching pgadmin4 (don’t forget the pgAdmin 4 Documentation site):
- You need to install three sets of packages. They’re the pgadmin-server, policycoreutils-python-utils, and pgadmin4-desktop.
- Apply the pgadmin-server package:
sudo yum install https://ftp.postgresql.org/pub/pgadmin/pgadmin4/yum/redhat/rhel-9Server-x86_64/pgadmin4-server-6.16-1.el9.x86_64.rpm
Display detailed console log →
Last metadata expiration check: 0:36:13 ago on Mon 28 Nov 2022 12:59:07 AM EST.
pgadmin4-server-6.16-1.el9.x86_64.rpm                                                           1.9 MB/s |  73 MB     00:38
Dependencies resolved.
================================================================================================================================
 Package                           Architecture             Version                        Repository                      Size
================================================================================================================================
Installing:
 pgadmin4-server                   x86_64                   6.16-1.el9                     @commandline                    73 M

Transaction Summary
================================================================================================================================
Install  1 Package

Total size: 73 M
Installed size: 265 M
Is this ok [y/N]: y
Downloading Packages:
Running transaction check
Transaction check succeeded.
Running transaction test
Transaction test succeeded.
Running transaction
Regex version mismatch, expected: 10.40 2022-04-14 actual: 10.37 2021-05-26
Regex version mismatch, expected: 10.40 2022-04-14 actual: 10.37 2021-05-26
  Preparing        :                                                                                                        1/1
  Installing       : pgadmin4-server-6.16-1.el9.x86_64                                                                      1/1
  Verifying        : pgadmin4-server-6.16-1.el9.x86_64                                                                      1/1

Installed:
  pgadmin4-server-6.16-1.el9.x86_64

Complete!
- Apply or upgrade (which is the default at this point) the policycoreutils-python-utils package:
sudo dnf install policycoreutils-python-utils
Display detailed console log →
Last metadata expiration check: 0:50:44 ago on Mon 28 Nov 2022 12:59:07 AM EST.
Package policycoreutils-python-utils-3.3-6.el9_0.noarch is already installed.
Dependencies resolved.
================================================================================================================================
 Package                                      Architecture           Version                    Repository                 Size
================================================================================================================================
Upgrading:
 libsemanage                                  x86_64                 3.4-2.el9                  baseos                    118 k
 policycoreutils                              x86_64                 3.4-4.el9                  baseos                    202 k
 policycoreutils-devel                        x86_64                 3.4-4.el9                  appstream                 139 k
 policycoreutils-python-utils                 noarch                 3.4-4.el9                  appstream                  69 k
 python3-libsemanage                          x86_64                 3.4-2.el9                  appstream                  80 k
 python3-policycoreutils                      noarch                 3.4-4.el9                  appstream                 2.0 M

Transaction Summary
================================================================================================================================
Upgrade  6 Packages

Total download size: 2.6 M
Is this ok [y/N]: y
Downloading Packages:
(1/6): policycoreutils-python-utils-3.4-4.el9.noarch.rpm                                         28 kB/s |  69 kB     00:02
(2/6): python3-libsemanage-3.4-2.el9.x86_64.rpm                                                  32 kB/s |  80 kB     00:02
(3/6): policycoreutils-devel-3.4-4.el9.x86_64.rpm                                                55 kB/s | 139 kB     00:02
(4/6): libsemanage-3.4-2.el9.x86_64.rpm                                                         189 kB/s | 118 kB     00:00
(5/6): python3-policycoreutils-3.4-4.el9.noarch.rpm                                             2.8 MB/s | 2.0 MB     00:00
(6/6): policycoreutils-3.4-4.el9.x86_64.rpm                                                     302 kB/s | 202 kB     00:00
--------------------------------------------------------------------------------------------------------------------------------
Total                                                                                           521 kB/s | 2.6 MB     00:05
Running transaction check
Transaction check succeeded.
Running transaction test
Transaction test succeeded.
Running transaction
Regex version mismatch, expected: 10.40 2022-04-14 actual: 10.37 2021-05-26
Regex version mismatch, expected: 10.40 2022-04-14 actual: 10.37 2021-05-26
  Preparing        :                                                                                                        1/1
  Upgrading        : libsemanage-3.4-2.el9.x86_64                                                                          1/12
  Upgrading        : python3-libsemanage-3.4-2.el9.x86_64                                                                  2/12
  Upgrading        : policycoreutils-3.4-4.el9.x86_64                                                                      3/12
  Running scriptlet: policycoreutils-3.4-4.el9.x86_64                                                                      3/12
  Upgrading        : python3-policycoreutils-3.4-4.el9.noarch                                                              4/12
  Upgrading        : policycoreutils-python-utils-3.4-4.el9.noarch                                                         5/12
  Upgrading        : policycoreutils-devel-3.4-4.el9.x86_64                                                                6/12
  Cleanup          : policycoreutils-devel-3.3-6.el9_0.x86_64                                                              7/12
  Cleanup          : policycoreutils-python-utils-3.3-6.el9_0.noarch                                                       8/12
  Cleanup          : python3-policycoreutils-3.3-6.el9_0.noarch                                                            9/12
  Cleanup          : python3-libsemanage-3.3-2.el9.x86_64                                                                 10/12
  Running scriptlet: policycoreutils-3.3-6.el9_0.x86_64                                                                   11/12
  Cleanup          : policycoreutils-3.3-6.el9_0.x86_64                                                                   11/12
  Cleanup          : libsemanage-3.3-2.el9.x86_64                                                                         12/12
  Running scriptlet: libsemanage-3.3-2.el9.x86_64                                                                         12/12
  Verifying        : policycoreutils-devel-3.4-4.el9.x86_64                                                                1/12
  Verifying        : policycoreutils-devel-3.3-6.el9_0.x86_64                                                              2/12
  Verifying        : policycoreutils-python-utils-3.4-4.el9.noarch                                                         3/12
  Verifying        : policycoreutils-python-utils-3.3-6.el9_0.noarch                                                       4/12
  Verifying        : python3-libsemanage-3.4-2.el9.x86_64                                                                  5/12
  Verifying        : python3-libsemanage-3.3-2.el9.x86_64                                                                  6/12
  Verifying        : python3-policycoreutils-3.4-4.el9.noarch                                                              7/12
  Verifying        : python3-policycoreutils-3.3-6.el9_0.noarch                                                            8/12
  Verifying        : libsemanage-3.4-2.el9.x86_64                                                                          9/12
  Verifying        : libsemanage-3.3-2.el9.x86_64                                                                         10/12
  Verifying        : policycoreutils-3.4-4.el9.x86_64                                                                     11/12
  Verifying        : policycoreutils-3.3-6.el9_0.x86_64                                                                   12/12

Upgraded:
  libsemanage-3.4-2.el9.x86_64                   policycoreutils-3.4-4.el9.x86_64      policycoreutils-devel-3.4-4.el9.x86_64
  policycoreutils-python-utils-3.4-4.el9.noarch  python3-libsemanage-3.4-2.el9.x86_64  python3-policycoreutils-3.4-4.el9.noarch

Complete!
- Apply the pgadmin4-desktop package:
sudo dnf install -y https://ftp.postgresql.org/pub/pgadmin/pgadmin4/yum/redhat/rhel-9Server-x86_64/pgadmin4-desktop-6.16-1.el9.x86_64.rpm
Display detailed console log →
Last metadata expiration check: 1:14:02 ago on Mon 28 Nov 2022 12:59:07 AM EST.
pgadmin4-desktop-6.16-1.el9.x86_64.rpm                                                          3.1 MB/s |  88 MB     00:28
Dependencies resolved.
================================================================================================================================
 Package                          Architecture           Version                             Repository                    Size
================================================================================================================================
Installing:
 pgadmin4-desktop                 x86_64                 6.16-1.el9                          @commandline                  88 M
Installing dependencies:
 libatomic                        x86_64                 11.3.1-2.1.el9.alma                 baseos                        56 k

Transaction Summary
================================================================================================================================
Install  2 Packages

Total size: 88 M
Total download size: 56 k
Installed size: 341 M
Downloading Packages:
libatomic-11.3.1-2.1.el9.alma.x86_64.rpm                                                         83 kB/s |  56 kB     00:00
--------------------------------------------------------------------------------------------------------------------------------
Total                                                                                            39 kB/s |  56 kB     00:01
Running transaction check
Transaction check succeeded.
Running transaction test
Transaction test succeeded.
Running transaction
Regex version mismatch, expected: 10.40 2022-04-14 actual: 10.37 2021-05-26
Regex version mismatch, expected: 10.40 2022-04-14 actual: 10.37 2021-05-26
  Preparing        :                                                                                                        1/1
  Installing       : libatomic-11.3.1-2.1.el9.alma.x86_64                                                                   1/2
  Installing       : pgadmin4-desktop-6.16-1.el9.x86_64                                                                     2/2
  Running scriptlet: pgadmin4-desktop-6.16-1.el9.x86_64                                                                     2/2
  Verifying        : libatomic-11.3.1-2.1.el9.alma.x86_64                                                                   1/2
  Verifying        : pgadmin4-desktop-6.16-1.el9.x86_64                                                                     2/2

Installed:
  libatomic-11.3.1-2.1.el9.alma.x86_64                            pgadmin4-desktop-6.16-1.el9.x86_64

Complete!
- Apply the pgadmin-server package:
- You configure your .bashrc file to add the pgadmin4 directory to your $PATH environment variable.
# Add the pgadmin4 executable to the $PATH.
export set PATH=$PATH:/usr/pgadmin4/bin
You also configure your .bashrc file to add a pgadmin4 function, which simplifies how you call the pgadmin4 executable.
# Function to ensure pgadmin4 call is simplified and without warnings.
pgadmin4 ()
{
  # Call the pgadmin4 executable.
  if [[ `type -t pgadmin4` = 'function' ]]; then
    if [ -f "/usr/pgadmin4/bin/pgadmin4" ]; then
      /usr/pgadmin4/bin/pgadmin4 2>/dev/null &
    else
      echo "[/usr/pgadmin4/bin/pgadmin4] is not found."
    fi
  else
    echo "[pgadmin4] is not a function"
  fi
}
You can launch your pgadmin4 program file now with the following syntax as the student user:
pgadmin4
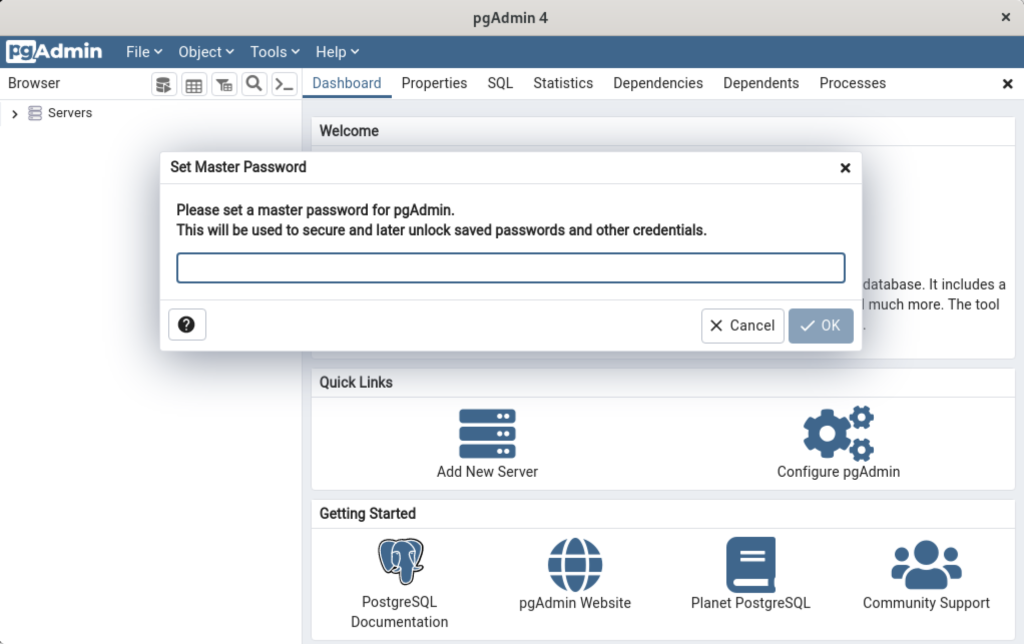
It takes a couple moments to launch the pgadmin4 desktop. The initial screen will look like:

After pgadmin4 launches, you’re prompted for a master password. Enter the password and click the OK button to proceed.
After entering the password, you arrive at the base dialog, as shown.
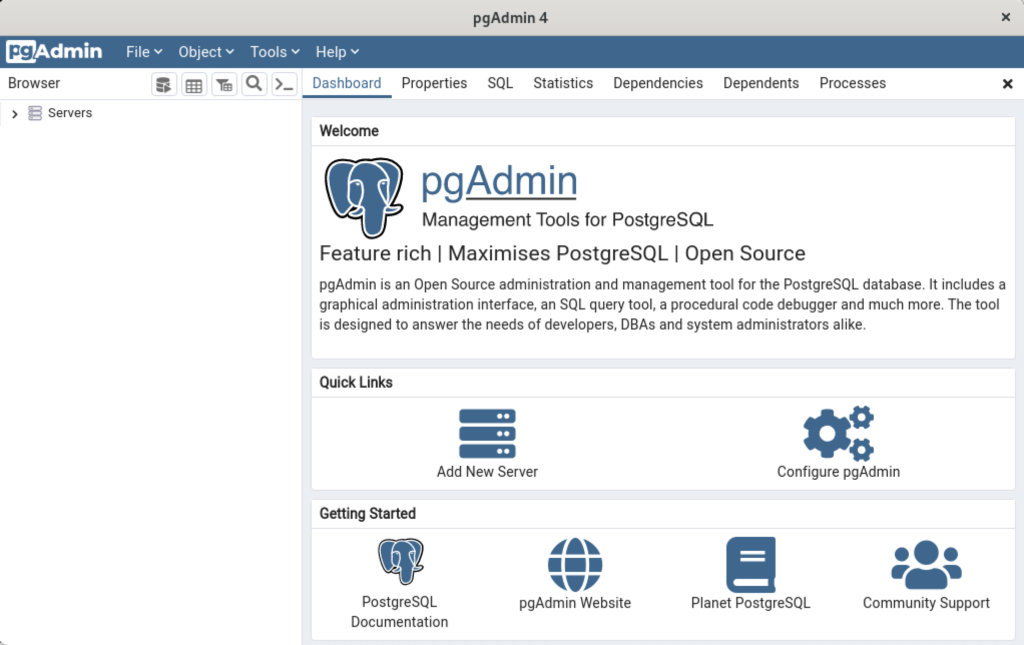
Click the Add New Server link, which prompts you to register your database. Enter videodb in the Name field and click the Connection tab to the right of the General tab.
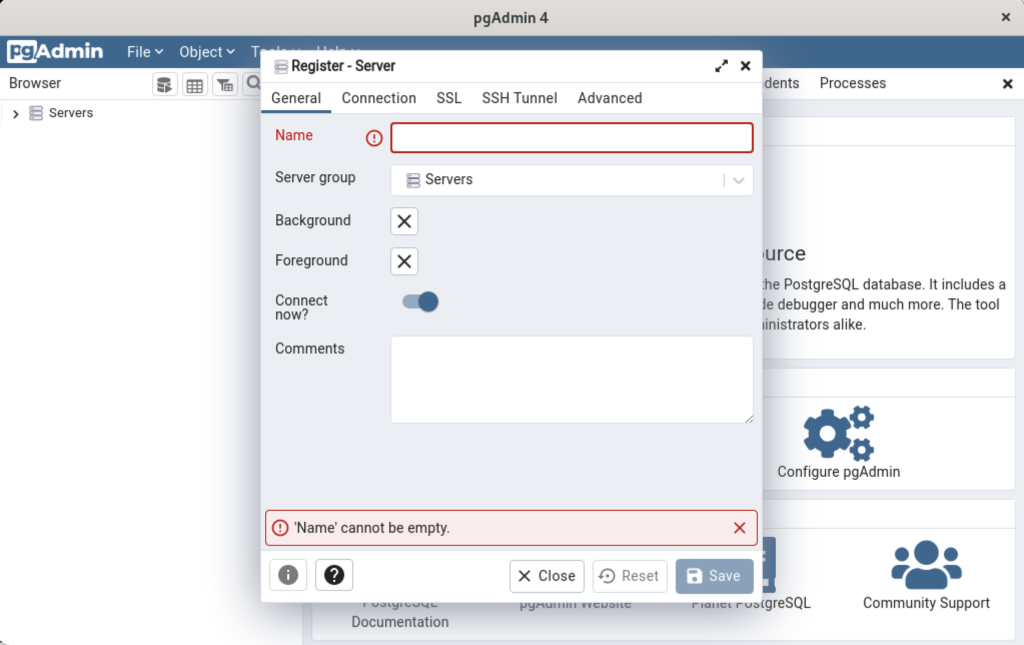
In the Connection dialog, enter the following values:
- Host name/address: localhost
- Port: 5432
- Maintenance database: postgres
- Username: student
- Password: student

Enter a name for your database. In this example, videodb is the Server Name. Click the Save button to proceed.

- You need to install three sets of packages. They’re the pgadmin-server, policycoreutils-python-utils, and pgadmin4-desktop.
This completes the instructions for installing, configuring, and using PostgreSQL on AlmaLinux. As always, I hope it helps those looking for instructions.
Multidimension Arrays
Picking up where I left off on yesterday’s post on PostgreSQL arrays, you can also write multidimensional arrays provided all the nested arrays are equal in size. You can’t use the CARDINALITY function to determine the length of nested arrays, you must use the ARRAY_LENGTH to determine the length of subordinate arrays.
Here’s an example file with a multidimensional array of integers:
DO $$ DECLARE /* Declare an array of integers with a subordinate array of integers. */ list int[][] = array[array[1,2,3,4] ,array[1,2,3,4] ,array[1,2,3,4] ,array[1,2,3,4] ,array[1,2,3,4]]; row varchar(20) = ''; BEGIN /* Loop through the first dimension of integers. */ <<Outer>> FOR i IN 1..ARRAY_LENGTH(list,1) LOOP row = ''; /* Loop through the second dimension of integers. */ <<Inner>> FOR j IN 1..ARRAY_LENGTH(list,2) LOOP IF LENGTH(row) = 0 THEN row = row || list[i][j]; ELSE row = row || ',' || list[i][j]; END IF; END LOOP; /* Exit outer loop. */ RAISE NOTICE 'Row [%][%]', i, row; END LOOP; END; $$; |
It prints:
NOTICE: Row [1][1,2,3,4] NOTICE: Row [2][1,2,3,4] NOTICE: Row [3][1,2,3,4] NOTICE: Row [4][1,2,3,4] NOTICE: Row [5][1,2,3,4] DO |
Multidimensional arrays are unique to PostgreSQL but you can have nested lists of tables or varrays inside an Oracle database. Oracle also supports nested lists that are asynchronous.
As always, I hope this helps those trying sort out the syntax.
PL/pgSQL Array Listing
Somebody asked me how to navigate a collection in PostgreSQL’s PL/pgSQL and whether they supported table and varray data types, like Oracle’s PL/SQL. The most important thing to correct was that PostgreSQL supports only array types.
The only example that I found with a google search used a FOREACH-loop, like this:
1 2 3 4 5 6 7 8 9 10 11 12 13 14 | DO $$ DECLARE /* An array of integers. */ list int[] = array[1,2,3,4,5]; /* Define a local variable for array members. */ i int; BEGIN /* Loop through the integers. */ FOREACH i IN ARRAY list LOOP RAISE NOTICE '[%]', i; END LOOP; END; $$; |
It prints:
NOTICE: [1] NOTICE: [2] NOTICE: [3] NOTICE: [4] NOTICE: [5] |
As I suspected the student didn’t want to use a FOREACH-loop. The student wanted to use a for-loop, which was much closer to the Oracle PL/SQL syntax with which they were most familiar. That example is:
1 2 3 4 5 6 7 8 9 10 11 12 | DO $$ DECLARE /* An array of integers. */ list int[] = array[1,2,3,4,5]; BEGIN /* Loop through the integers. */ FOR i IN 1..5 LOOP RAISE NOTICE '[%]', list[i]; END LOOP; END; $$; |
However, it’s bad form to use a literal for the upper number in a range for-loop, and you should use the CARDINALITY function in PostgreSQL because there is no collection API, like Oracle’s COUNT method. There is an ARRAY_LENGTH function but it’s really only necessary when you use a multidimensional array.
The modified code is:
1 2 3 4 5 6 7 8 9 10 11 12 | DO $$ DECLARE -- An array of integers. list int[] = array[1,2,3,4,5]; BEGIN /* Loop through the integers. */ FOR i IN 1..CARDINALITY(list) LOOP RAISE NOTICE '[%]', list[i]; END LOOP; END; $$; |
If you use the ARRAY_LENGTH function, line #8 would look like:
7 8 | /* Loop through the integers, and determines the length of the first dimension. */ FOR i IN 1..ARRAY_LENGTH(list,1) LOOP |
As always, I hope this helps those looking for a clear solution to basic activities.
Python on PostgreSQL
The ODBC library you use when connecting Python to PostgreSQL is the psycopg2 Python library. This blog post will show use how to use it in Python and install it on your Fedora Linux installation. It leverages a videodb database that I show you how to build in this earlier post on configuring PostgreSQL 14.
You would import psycopg2 as follows in your Python code:
import psycopg2 |
Unfortunately, that only works on Linux servers when you’ve installed the library. That library isn’t installed with generic Python libraries. You get the following error when the psycopg2 library isn’t installed on your server.
Traceback (most recent call last):
  File "python_new_hire.sql", line 1, in <module>
    import psycopg2
ModuleNotFoundError: No module named 'psycopg2' |
You can install it on Fedora Linux with the following command:
yum install python3-psycopg2 |
It will install:
==================================================================================== Package Architecture Version Repository Size ==================================================================================== Installing: python3-psycopg2 x86_64 2.7.7-1.fc30 fedora 160 k Transaction Summary ==================================================================================== Install 1 Package Total download size: 160 k Installed size: 593 k Is this ok [y/N]: y Downloading Packages: python3-psycopg2-2.7.7-1.fc30.x86_64.rpm 364 kB/s | 160 kB 00:00 ------------------------------------------------------------------------------------ Total 167 kB/s | 160 kB 00:00 Running transaction check Transaction check succeeded. Running transaction test Transaction test succeeded. Running transaction Preparing : 1/1 Installing : python3-psycopg2-2.7.7-1.fc30.x86_64 1/1 Running scriptlet: python3-psycopg2-2.7.7-1.fc30.x86_64 1/1 Verifying : python3-psycopg2-2.7.7-1.fc30.x86_64 1/1 Installed: python3-psycopg2-2.7.7-1.fc30.x86_64 Complete! |
Here’s a quick test case that you can run in PostgreSQL and Python to test all the pieces. The first SQL script creates a new_hire table and inserts two rows, and the Python program queries data from the new_hire table.
The new_hire.sql file creates the new_hire table and inserts two rows:
-- Environment settings for the script. SET SESSION "videodb.table_name" = 'new_hire'; SET CLIENT_MIN_MESSAGES TO ERROR; -- Verify table name. SELECT current_setting('videodb.table_name'); -- ------------------------------------------------------------------ -- Conditionally drop table. -- ------------------------------------------------------------------ DROP TABLE IF EXISTS new_hire CASCADE; -- ------------------------------------------------------------------ -- Create table. -- ------------------------------------------------------------------- CREATE TABLE new_hire ( new_hire_id SERIAL , first_name VARCHAR(20) NOT NULL , middle_name VARCHAR(20) , last_name VARCHAR(20) NOT NULL , hire_date TIMESTAMP WITH TIME ZONE NOT NULL DEFAULT CURRENT_TIMESTAMP , PRIMARY KEY (new_hire_id)); -- Alter the sequence by restarting it at 1001. ALTER SEQUENCE new_hire_new_hire_id_seq RESTART WITH 1001; -- Display the table organization. SELECT tc.table_catalog || '.' || tc.constraint_name AS constraint_name , tc.table_catalog || '.' || tc.table_name AS table_name , kcu.column_name , ccu.table_catalog || '.' || ccu.table_name AS foreign_table_name , ccu.column_name AS foreign_column_name FROM information_schema.table_constraints AS tc JOIN information_schema.key_column_usage AS kcu ON tc.constraint_name = kcu.constraint_name AND tc.table_schema = kcu.table_schema JOIN information_schema.constraint_column_usage AS ccu ON ccu.constraint_name = tc.constraint_name AND ccu.table_schema = tc.table_schema WHERE tc.constraint_type = 'FOREIGN KEY' AND tc.table_name = current_setting('videodb.table_name') ORDER BY 1; SELECT c1.table_name , c1.ordinal_position , c1.column_name , CASE WHEN c1.is_nullable = 'NO' AND c2.column_name IS NOT NULL THEN 'PRIMARY KEY' WHEN c1.is_nullable = 'NO' AND c2.column_name IS NULL THEN 'NOT NULL' END AS is_nullable , CASE WHEN data_type = 'character varying' THEN data_type||'('||character_maximum_length||')' WHEN data_type = 'numeric' THEN CASE WHEN numeric_scale != 0 AND numeric_scale IS NOT NULL THEN data_type||'('||numeric_precision||','||numeric_scale||')' ELSE data_type||'('||numeric_precision||')' END ELSE data_type END AS data_type FROM information_schema.columns c1 LEFT JOIN (SELECT trim(regexp_matches(column_default,current_setting('videodb.table_name'))::text,'{}')||'_id' column_name FROM information_schema.columns) c2 ON c1.column_name = c2.column_name WHERE c1.table_name = current_setting('videodb.table_name') ORDER BY c1.ordinal_position; -- Display primary key and unique constraints. SELECT constraint_name , lower(constraint_type) AS constraint_type FROM information_schema.table_constraints WHERE table_name = current_setting('videodb.table_name') AND constraint_type IN ('PRIMARY KEY','UNIQUE'); -- Insert two test records. INSERT INTO new_hire ( first_name, middle_name, last_name, hire_date ) VALUES ('Malcolm','Jacob','Lewis','2018-2-14') ,('Henry',null,'Chabot','1990-07-31'); |
You can put it into a local directory, connect as the student user to a videodb database, and run the following command (or any database you’ve created).
\i new_hire.sql |
The new_hire.py file creates the new_hire table and inserts two rows:
# Import the PostgreSQL connector library. import psycopg2 try: # Open a connection to the database. connection = psycopg2.connect( user="student" , password="student" , port="5432" , dbname="videodb") # Open a cursor. cursor = connection.cursor() # Assign a static query. query = "SELECT new_hire_id, first_name, last_name " \ "FROM new_hire" # Parse and execute the query. cursor.execute(query) # Fetch all rows from a table. records = cursor.fetchall() # Read through and print the rows as tuples. for row in range(0, len(records)): print(records[row]) except (Exception, psycopg2.Error) as error : print("Error while fetching data from PostgreSQL", error) finally: # Close the database connection. if (connection): cursor.close() connection.close() |
You run it from the command line, like:
python3 ./new_hire.py |
It should print:
(1001, 'Malcolm', 'Lewis') (1002, 'Henry', 'Chabot') |
As always, I hope this helps those trying to sort out how to connect Python to PostgreSQL.
