Archive for the ‘Windows 10’ Category
MySQL Shell Parsing
I’ve been experimenting with the mysqlsh since installing it last week. It’s been interesting. Overall, I’m totally impressed but I did find a problem with how it parses stored procedures.
First thought is always, is it my code? I checked the file by running it as a script file through MySQL Workbench. It ran perfectly in MySQL Workbench but failed repeatedly when run from the mysqlsh utility. Next step, reduce the code to a small test case, retest it, and log a bug if it is replicated. My test case in a test.sql file generates the following errors when run from the mysqlsh utility:
MySQL localhost:33060+ ssl studentdb SQL > source test.sql Query OK, 0 rows affected (0.0003 sec) ERROR: 1064: You have an error in your SQL syntax; check the manual that corresponds to your MySQL server version for the right syntax to use near 'CREATE PROCEDURE test ( pv_input1 CHAR(12) , pv_input2 CHAR(19)) MODIFIES SQL ' at line 2 Query OK, 0 rows affected (0.0002 sec) Query OK, 0 rows affected (0.0003 sec) ERROR: 1305: PROCEDURE studentdb.test does not exist |
The same file generates this series of successful messages when run as a script file from MySQL Workbench:
Preparing... Importing test.sql... Finished executing script Statement CREATE PROCEDURE test pv_input1 One Operation completed successfully |
For those who are curious enough to review the test case, here it is:
-- Reset the delimiter so that a semicolon can be used as a statement and block terminator. DELIMITER $$ SELECT 'CREATE PROCEDURE test' AS "Statement"; CREATE PROCEDURE test ( pv_input1 CHAR(12) , pv_input2 CHAR(19)) MODIFIES SQL DATA BEGIN SELECT CONCAT(pv_input1,', ',pv_input2) AS message; END; $$ -- Reset the standard delimiter to let the semicolon work as an execution command. DELIMITER ; -- Call the test procedure. CALL test('One','Two'); |
The reply in the bug explained the behavior difference between MySQL Workbench and the MySQL Shell (mysqlsh) environments. MySQL Workbench uses the MySQL client, which supports multiple client statements with the CLIENT_MULTI_STATEMENTS option. Recognizing that, the logging entry SELECT statement should move to a position before setting the DELIMITER, like:
-- Set a label for the log file. SELECT 'CREATE PROCEDURE test' AS "Statement"; -- Reset the delimiter so that a semicolon can be used as a statement and block terminator. DELIMITER $$ CREATE PROCEDURE test ( pv_input1 CHAR(12) , pv_input2 CHAR(19)) MODIFIES SQL DATA BEGIN SELECT CONCAT(pv_input1,', ',pv_input2) AS message; END; $$ -- Reset the standard delimiter to let the semicolon work as an execution command. DELIMITER ; -- Call the test procedure. CALL test('One','Two'); |
The new test case only submits one statement at a time. The logging query is submitted by the semicolon, and the test procedure by the double dollar ($$) symbol set.
So, I was correct identifying a parsing behavior difference between MySQL Workbench and MySQL Shell. It appears to be a difference by design but the MySQL Shell documentation fails to explain it can’t manage multiple statements. I hope identifying this saves others time.
It’s also true that the MySQL client software supports TEE and NOTEE to write log files. Unfortunately, MySQL Shell (mysqlsh) doesn’t support the TEE and NOTEE syntax. You can only do minimal logging with the control of standard error (stderr) by using the application and AdminAPI log utilities, which are covered in Chapter 8 of the MySQL Shell 8.0 documentation.
MySQL Provisioning
I’ve been using MySQL 8 on Linux for a couple years but the Linux repository version didn’t install the new MySQL Shell. So, I discovered the new MySQL Shell when I installed MySQL 8 (8.0.21) on Windows to teach my student how to use it to learn SQL commands. I encourage you to read the full MySQL Shell document.
The following is a tutorial to provision a student user and studentdb database in MySQL. It uses the MySQL Shell (mysqlsh) and stages for uploads of comma-separated values files.
After installing MySQL on the Windows 10 OS, open the Window OS Command Line Interface (CLI) shell by entering the following in the search field at the bottom left:
cmd |
It launches a CLI interface to the Windows OS. The cmd (command) utility opens the CLI in the following directory (where you substitute your user’s name for the username placeholder below):
C:\Users\username |
At the command prompt, you would enter mysql to launch the old MySQL CLI. Instead of that, you enter mysqlsh to launch the new MySQL CLI as the root user. The command to launch the MySQL Shell as the root user is:
mysqlsh -uroot -p |
It should return the following and prompt you for a single character entry to save the password for the Operating System user. As a rule, in a development instance that’s a good idea and practice.
MySQL Shell 8.0.21 Copyright (c) 2016, 2020, Oracle and/or its affiliates. All rights reserved. Oracle is a registered trademark of Oracle Corporation and/or its affiliates. Other names may be trademarks of their respective owners. Type '\help' or '\?' for help; '\quit' to exit. Creating a session to 'root@localhost' Please provide the password for 'root@localhost:33060': ******** Save password for 'root@localhost:33060'? [Y]es/[N]o/Ne[v]er (default No): y Fetching schema names for autocompletion... Press ^C to stop. Your MySQL connection id is 9 (X protocol) Server version: 8.0.21 MySQL Community Server - GPL No default schema selected; type \use <schema> to set one. MySQL localhost:33060+ ssl JS > |
The prompt will not accept SQL commands because it always initializes in the JavaScript (JS) context. The MySQL Shell supports three interactive interfaces: JavaScript, Python, and SQL.
You can verify the integrity of the shell from the JavaScript (JS) context as the root user with the following command:
MySQL localhost:33060+ ssl JS > shell.status() |
As the root user, it should return something like this:
MySQL Shell version 8.0.21 Connection Id: 9 Default schema: Current schema: Current user: root@localhost SSL: Cipher in use: TLS_AES_256_GCM_SHA384 TLSv1.3 Using delimiter: ; Server version: 8.0.21 MySQL Community Server - GPL Protocol version: X protocol Client library: 8.0.21 Connection: localhost via TCP/IP TCP port: 33060 Server characterset: utf8mb4 Schema characterset: utf8mb4 Client characterset: utf8mb4 Conn. characterset: utf8mb4 Result characterset: utf8mb4 Compression: Enabled (DEFLATE_STREAM) Uptime: 20 hours 4 min 19.0000 sec |
You can switch to the SQL context as the root or any other user with this command. The switch only changes your form of interaction with the server and you remain connected as the root user:
MySQL localhost:33060+ ssl JS > \sql |
You can verify that your session is still owned by the root user with the following SELECT statement:
MySQL localhost:33060+ ssl SQL > SELECT user(); |
It returns:
+----------------+ | user() | +----------------+ | root@localhost | +----------------+ 1 row in set (0.0005 sec) |
The next step shows you how to setup a sample studentdb database. Some syntax has changed from prior MySQL releases. Here are the three steps:
- Create the
studentdbdatabase with the following command as the MySQLrootuser:MySQL localhost:33060+ ssl SQL > CREATE DATABASE studentdb;
- Grant the
rootuser the privilege to grant to others, which root does not have by default. You use the following syntax as the MySQLrootuser:MySQL localhost:33060+ ssl SQL > GRANT ALL ON *.* TO 'root'@'localhost';
- Create the user with a clear English password and grant the user
studentfull privileges on thestudentdbdatabase:MySQL localhost:33060+ ssl SQL > CREATE USER 'student'@'localhost' IDENTIFIED WITH mysql_native_password BY 'student'; MySQL localhost:33060+ ssl SQL > GRANT ALL ON studentdb.* TO 'student'@'localhost';
- Our sample database uses large file uploads with MySQL’s LOAD command, which means you need to grant one additional global privilege:
MySQL localhost:33060+ ssl SQL > GRANT FILE ON *.* TO 'student'@'localhost';
The MySQL FILE privilege is a global privilege to read and write files on the local server. MySQL 8 installation on Windows 10 sets the following directory as the target for uploading files in the my.ini file:
# Secure File Priv. secure-file-priv="C:/ProgramData/MySQL/MySQL Server 8.0/Uploads" |
You can find the setting in the C:\ProgramData\MySQL\MySQL Server 8.0\my.ini file. You can find this value without referencing the my.ini file by querying the data:
show variables like 'secure_file_priv'; |
A new installation should return:
+------------------+------------------------------------------------+ | Variable_name | Value | +------------------+------------------------------------------------+ | secure_file_priv | C:\ProgramData\MySQL\MySQL Server 8.0\Uploads\ | +------------------+------------------------------------------------+ 1 row in set (0.2253 sec) |
You can test the ability to use the LOAD command with the following avenger.csv test file. Copy it into the C:\ProgramData\MySQL\MySQL Server 8.0\Uploads directory and make sure the directory permissions are set to read-only for Everyone (check the Microsoft OS documentation if these concepts are new to you).
1,'Anthony','Stark','Iron Man' 2,'Thor','Odinson','God of Thunder' 3,'Steven','Rogers','Captain America' 4,'Bruce','Banner','Hulk' 5,'Clinton','Barton','Hawkeye' 6,'Natasha','Romanoff','Black Widow' |
Open another cmd (command) CLI and put the following code into a file that you save as avenger.sql in the C:\Users\username directory.
-- Conditionally drop objects. SELECT 'AVENGER' AS "Drop Table"; DROP TABLE IF EXISTS avenger; -- Create an avenger table. CREATE TABLE avenger ( avenger_id INT UNSIGNED PRIMARY KEY AUTO_INCREMENT , first_name VARCHAR(20) , last_name VARCHAR(20) , character_name VARCHAR(20)) ENGINE=InnoDB DEFAULT=utf8; -- Load the data from a file, don't forget the \n after the \r on Windows or it won't work. LOAD DATA INFILE 'C:/ProgramData/MySQL/MySQL Server 8.0/Uploads/avenger.csv' -- LOAD DATA INFILE 'avenger.csv' INTO TABLE avenger FIELDS TERMINATED BY ',' ENCLOSED BY '"' ESCAPED BY '/' LINES TERMINATED BY '\r\n'; -- Select the uploaded records. SELECT * FROM avenger; |
From the cmd (command) shell, launch the MySQL Shell as the student user with the following syntax:
mysqlsh -ustudent -p -Dstudentdb |
At the MySQL Shell (mysqlsh) prompt switch from the default JavaScript (JS) context to SQL context and run the following query:
MySQL localhost:33060+ ssl studentdb SQL > \sql MySQL localhost:33060+ ssl studentdb SQL > SELECT user(), database(); |
If you did everything above correctly, it should return:
+-------------------+------------+ | user() | database() | +-------------------+------------+ | student@localhost | studentdb | +-------------------+------------+ 1 row in set (0.0003 sec) |
Again, assuming you did everything above correctly, you should be able to run your avenger.sql script file from the MySQL Shell (mysqlsh) prompt, like:
MySQL localhost:33060+ ssl studentdb SQL > source avenger.sql |
It should return output like the following:
Query OK, 0 rows affected (0.0003 sec) +------------+ | Drop Table | +------------+ | AVENGER | +------------+ 1 row in set (0.0003 sec) Query OK, 0 rows affected (0.0595 sec) Query OK, 0 rows affected (0.0002 sec) Query OK, 0 rows affected (0.1293 sec) Query OK, 0 rows affected (0.0002 sec) Query OK, 6 rows affected (0.0046 sec) Records: 6 Deleted: 0 Skipped: 0 Warnings: 0 Query OK, 0 rows affected (0.0004 sec) +------------+------------+------------+-------------------+ | avenger_id | first_name | last_name | character_name | +------------+------------+------------+-------------------+ | 1 | 'Anthony' | 'Stark' | 'Iron Man' | | 2 | 'Thor' | 'Odinson' | 'God of Thunder' | | 3 | 'Steven' | 'Rogers' | 'Captain America' | | 4 | 'Bruce' | 'Banner' | 'Hulk' | | 5 | 'Clinton' | 'Barton' | 'Hawkeye' | | 6 | 'Natasha' | 'Romanoff' | 'Black Widow' | +------------+------------+------------+-------------------+ 6 rows in set (0.0005 sec) |
You now have a student user and studentdb database like my students. I hope it was fun to build.
You can find the my.ini file in the C:\ProgramData\MySQL\MySQL Server 8.0 directory of a standard Windows 10 file system. Its a good idea not to change anything unless you know what you’re doing, and remember you need to restart the Microsoft MySQL80 Service for any change to be made effective in your database operations.
MySQL File Privilege
While preparing a set of student instructions to create a MySQL 8 (8.0.21) Windows 10 instance I found an error with LOAD command and the --secure-file_priv variable set in the my.ini file. After granting the global FILE permission to the previously provisioned student user:
GRANT FILE ON *.* TO 'student'@'localhost'; |
Any attempt to run the following command failed:
LOAD DATA INFILE 'C:\ProgramData\MySQL\MySQL Server 8.0\Uploads\avenger.csv' INTO TABLE avenger FIELDS TERMINATED BY ',' ENCLOSED BY '"' ESCAPED BY '\\' LINES TERMINATED BY '\r\n'; |
and, raise this error message:
ERROR: 1290: The MySQL server is running with the --secure-file-priv option so it cannot execute this statement |
The following covers my exploration to try and fix this error without removing a designated directory for secure file uploads. While MySQL 5.7 contains the request for he server-file-priv variable, there is nothing in the MySQL System Server Variables document on how to troubleshoot the server-file-priv variable when set. Somehow, I think there should be some mention of how to resolve this error without unsetting the server-file-privy variable.
I checked and fixed all Windows 10 sharing and read-write privileges on the secure-file-priv designated directory. They Windows 10 settings allowed for global sharing and both read and write privileges, but the LOAD command failed to load the file contents from the authorized Uploads directory.
The MySQL FILE privilege is a global privilege to read and write files on the local server. MySQL 8 installation on Windows 10 sets the following directory as the target for uploading files in the my.ini file:
# Secure File Priv. secure-file-priv="C:/ProgramData/MySQL/MySQL Server 8.0/Uploads" |
You can find the setting in the C:\ProgramData\MySQL\MySQL Server 8.0\my.ini file. You can find this value without referencing the my.ini file by querying the data:
show variables like 'secure_file_priv'; |
A new installation should return:
+------------------+------------------------------------------------+ | Variable_name | Value | +------------------+------------------------------------------------+ | secure_file_priv | C:\ProgramData\MySQL\MySQL Server 8.0\Uploads\ | +------------------+------------------------------------------------+ 1 row in set (0.2253 sec) |
You can find the my.ini file in the C:\ProgramData\MySQL\MySQL Server 8.0 directory of a standard Windows 10 file system.
- Using the Windows’ File Explorer, I checked the
Uploadsdirectory’s privileges by right clicking theUploadsdirectory to check the Properties of the directory in the File Explorer dialog box:

- The General tab indicates that the files are Read-only, as shown:

I unchecked the Read-only checkbox. Then, I retested it with the same negative results.

- The Sharing tab indicates that the files are Shared, as shown:


- Clicking the Share … button, the files in this directory are shared with Read/Write permissions to Everyone, as shown below.


- The Security tab indicates that the files Everyone has Full control of the files in this directory, as shown:


Unfortunately, with all these set appropriately the secure-file-priv variable appears to block reading files from the designated secure directory. It appeared that I may have to remove the secure-file-priv setting from the my.ini file and reboot the server. Then, I found my error in the SQL LOAD command. I wasn’t backquoting the backslashes.
The only way that the LOAD command would work required the following steps:
- I put the
avenger.csvfile in the following directory pointed to by thesecure-file-privsvalue in themy.ini.C:\ProgramData\MySQL\MySQL Server 8.0\Uploads - Updated the SQL
LOADstatement to backquote the backslashes:LOAD DATA INFILE 'C:\\ProgramData\\MySQL\\MySQL Server 8.0\\Uploads\\avenger.csv' INTO TABLE avenger FIELDS TERMINATED BY ',' ENCLOSED BY '"' ESCAPED BY '\\' LINES TERMINATED BY '\r\n';
The
LOADcommand worked and put the CSV file contents into theavengertable, as shown in the query results below:+------------+------------+------------+-------------------+ | avenger_id | first_name | last_name | character_name | +------------+------------+------------+-------------------+ | 1 | 'Anthony' | 'Stark' | 'Iron Man' | | 2 | 'Thor' | 'Odinson' | 'God of Thunder' | | 3 | 'Steven' | 'Rogers' | 'Captain America' | | 4 | 'Bruce' | 'Banner' | 'Hulk' | | 5 | 'Clinton' | 'Barton' | 'Hawkeye' | | 6 | 'Natasha' | 'Romanoff' | 'Black Widow' | +------------+------------+------------+-------------------+ 6 rows in set (0.0005 sec)
I got in a rush and over thought it. However, this is how you make it work. Naturally, you can point the secure-file-privs variable to another location of your choice.
I should also note that MySQL is smart enough to change forward slashes to backslashes in the Windows OS. That means you could also use the following SQL LOAD statement:
LOAD DATA INFILE 'C:/ProgramData/MySQL/MySQL Server 8.0/Uploads/avenger.csv' INTO TABLE avenger FIELDS TERMINATED BY ',' ENCLOSED BY '"' ESCAPED BY '/' LINES TERMINATED BY '\r\n'; |
As always, I hope this helps those looking for a solution.
MySQL 8.0 Install
MySQL will be used for our online sections because the VMware instance and Docker configurations where too large to effectively download this term.
MySQL 8.0.21 Installation Steps
After you download the MySQL 8 MSI file, you will perform the following 24 steps to install MySQL on Windows 10. If you want a full developer install you must install Microsoft Excel and Visual Studio first.
- The first thing you need to do is grant privileges to allow the MySQL Installer application to work in Windows 10. Click the Yes button to authorize the MySQL Installer to run.
- The next thing you need to do is grant privileges to allow the MySQL Installer Launcher application to work in Windows 10. Click the Yes button to authorize the MySQL Installer to run.

- Now you start the install by choosing a setup type. As a rule, I recommend you install the Developer Default. It is the default selection and preselected for you. Click the Next button to verify that you can install what you’ve selected.
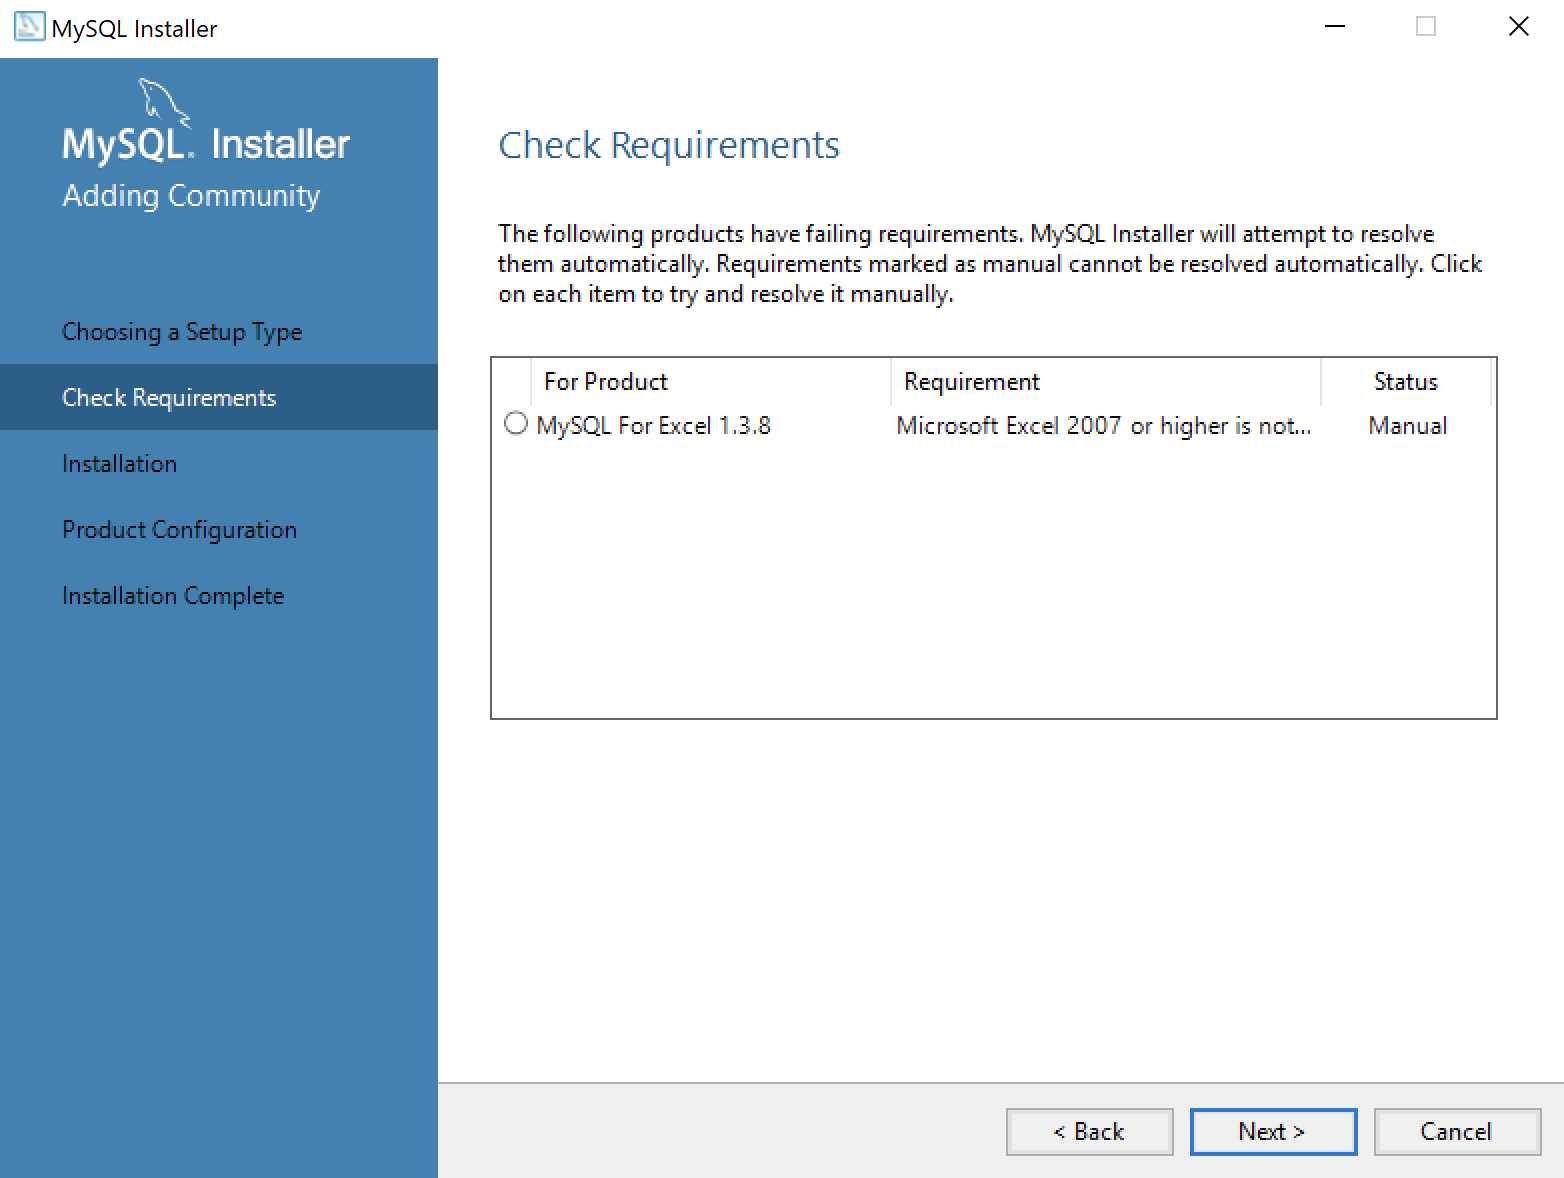
- The next workflow step checks requirements and lists any unmet requirements. The workflow lists the requirements for MySQL for Excel 1.3.8 as unmet because Microsoft Excel is not installed. Click the Next button when there are no unmet requirements in the list. Click the Back button to remove MySQL for Excel 1.3.8 from the setup selection.

- Returning to the setup type workflow, you should select the Custom radio button. Click the Next button to view the list of selected types.
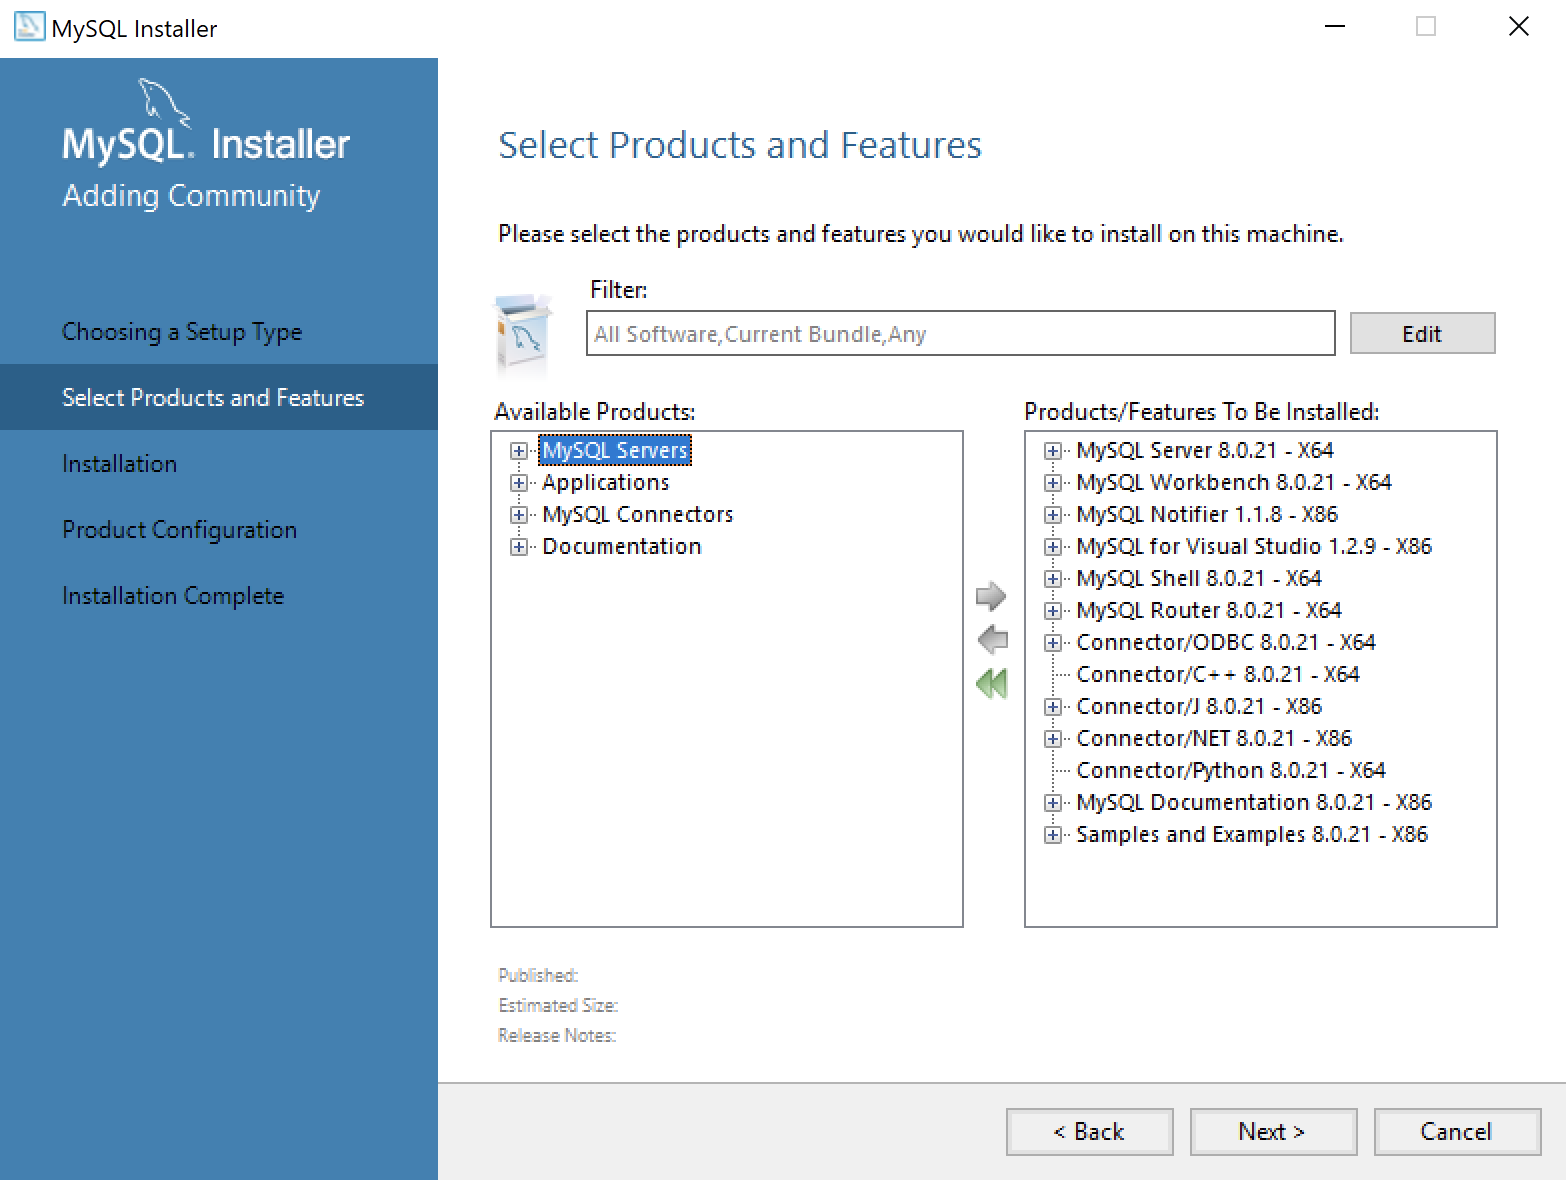
- Use the green arrow pointing to the left to remove MySQL for Excel 1.3.8 from the list. Click the Next button to continue the MySQL Installer to install the selected MySQL libraries.
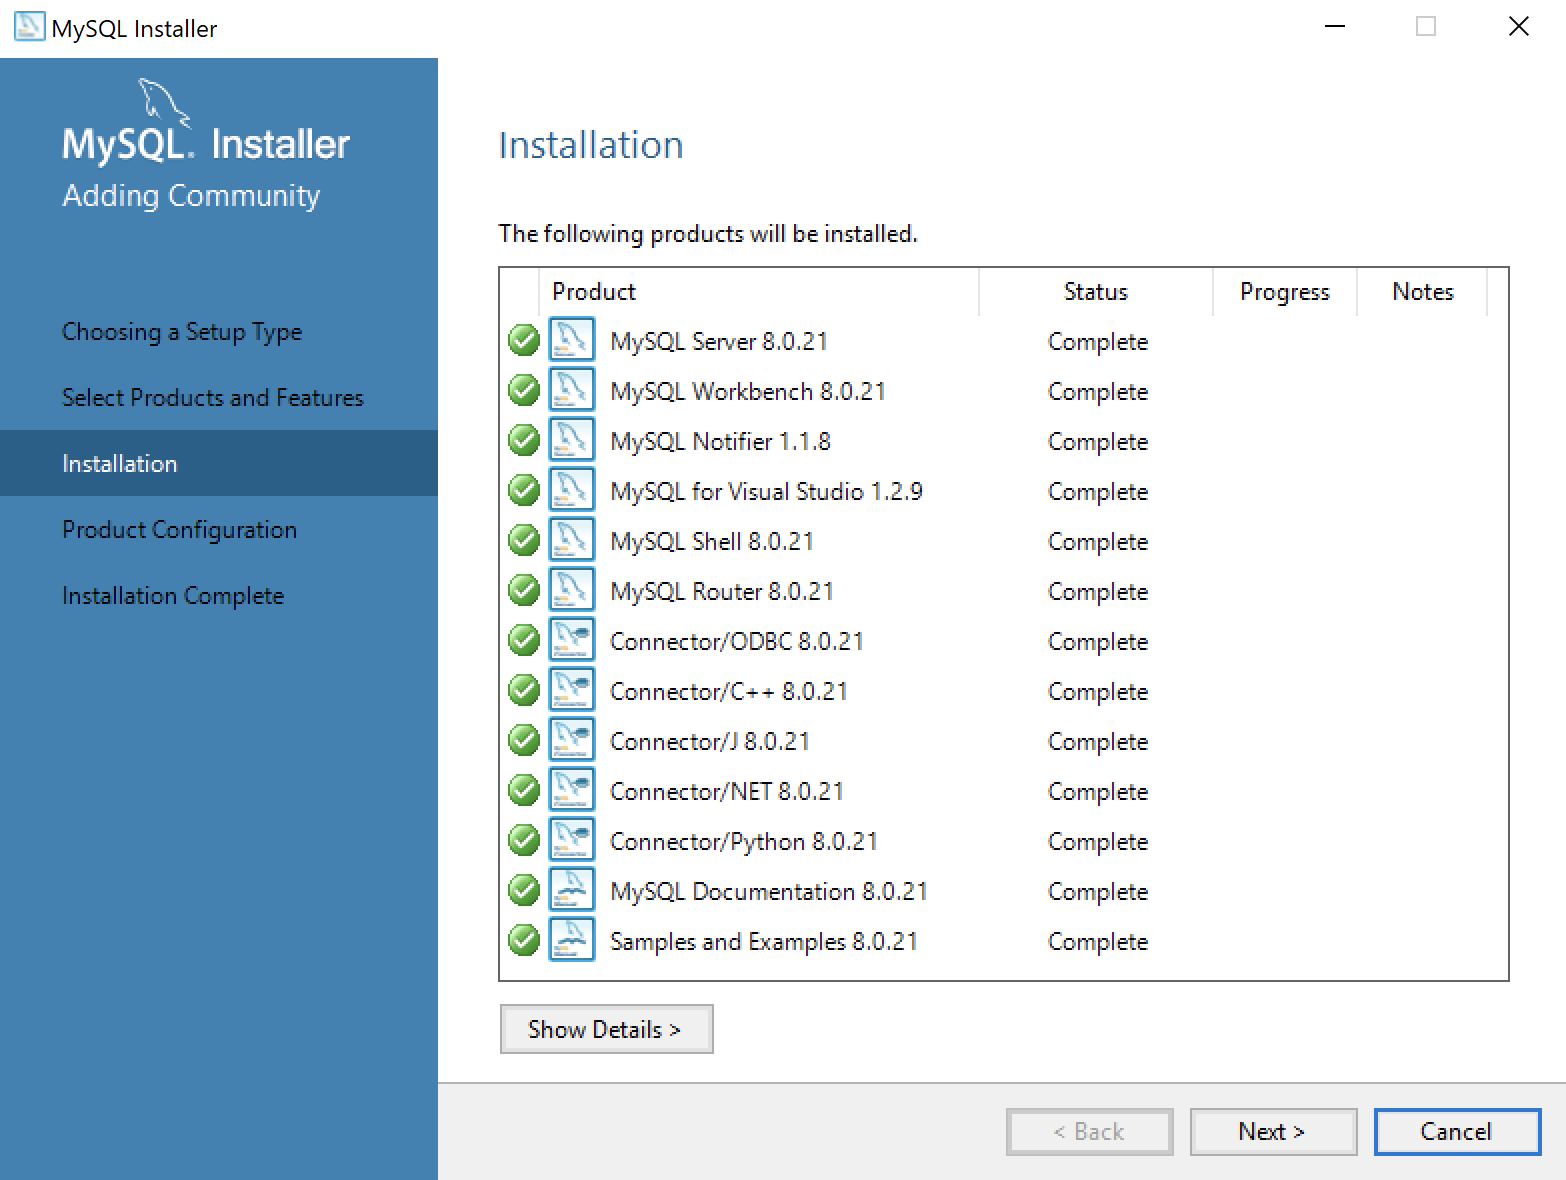
- This dialog will display for several minutes as each of the MySQL Installer modules is. Click the Next button to move forward in the MySQL Installer workflow.
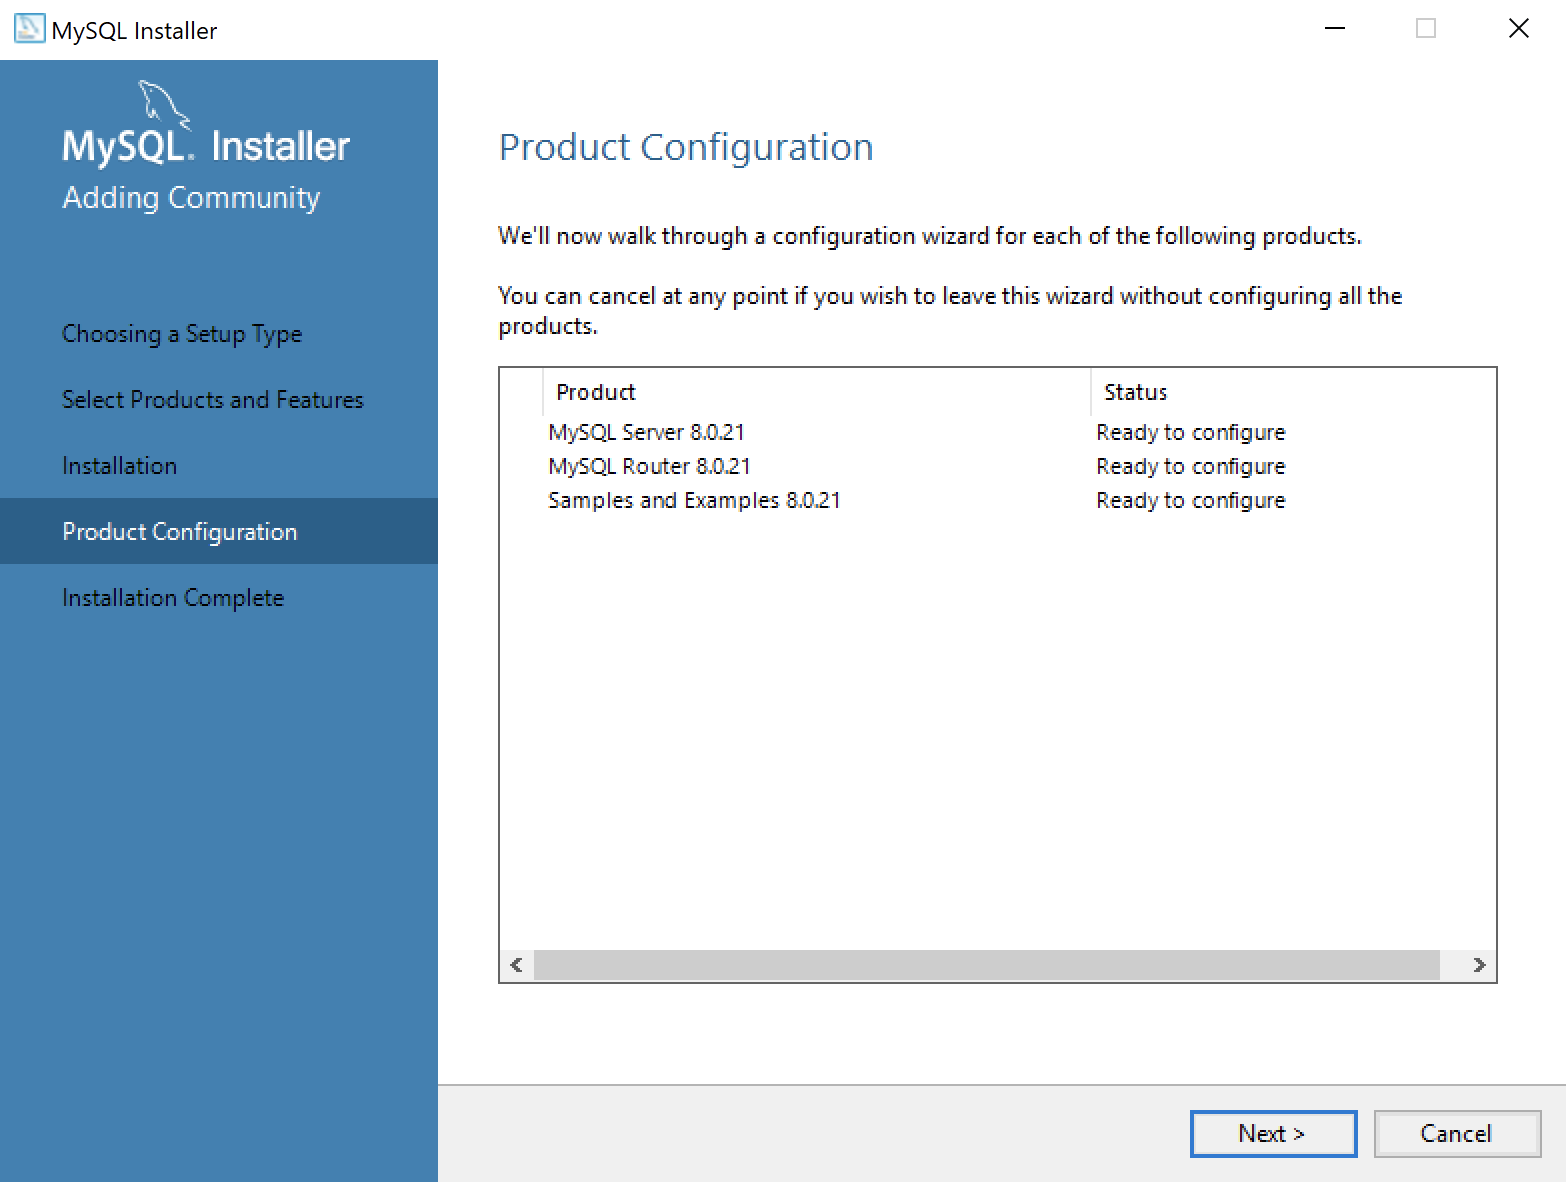
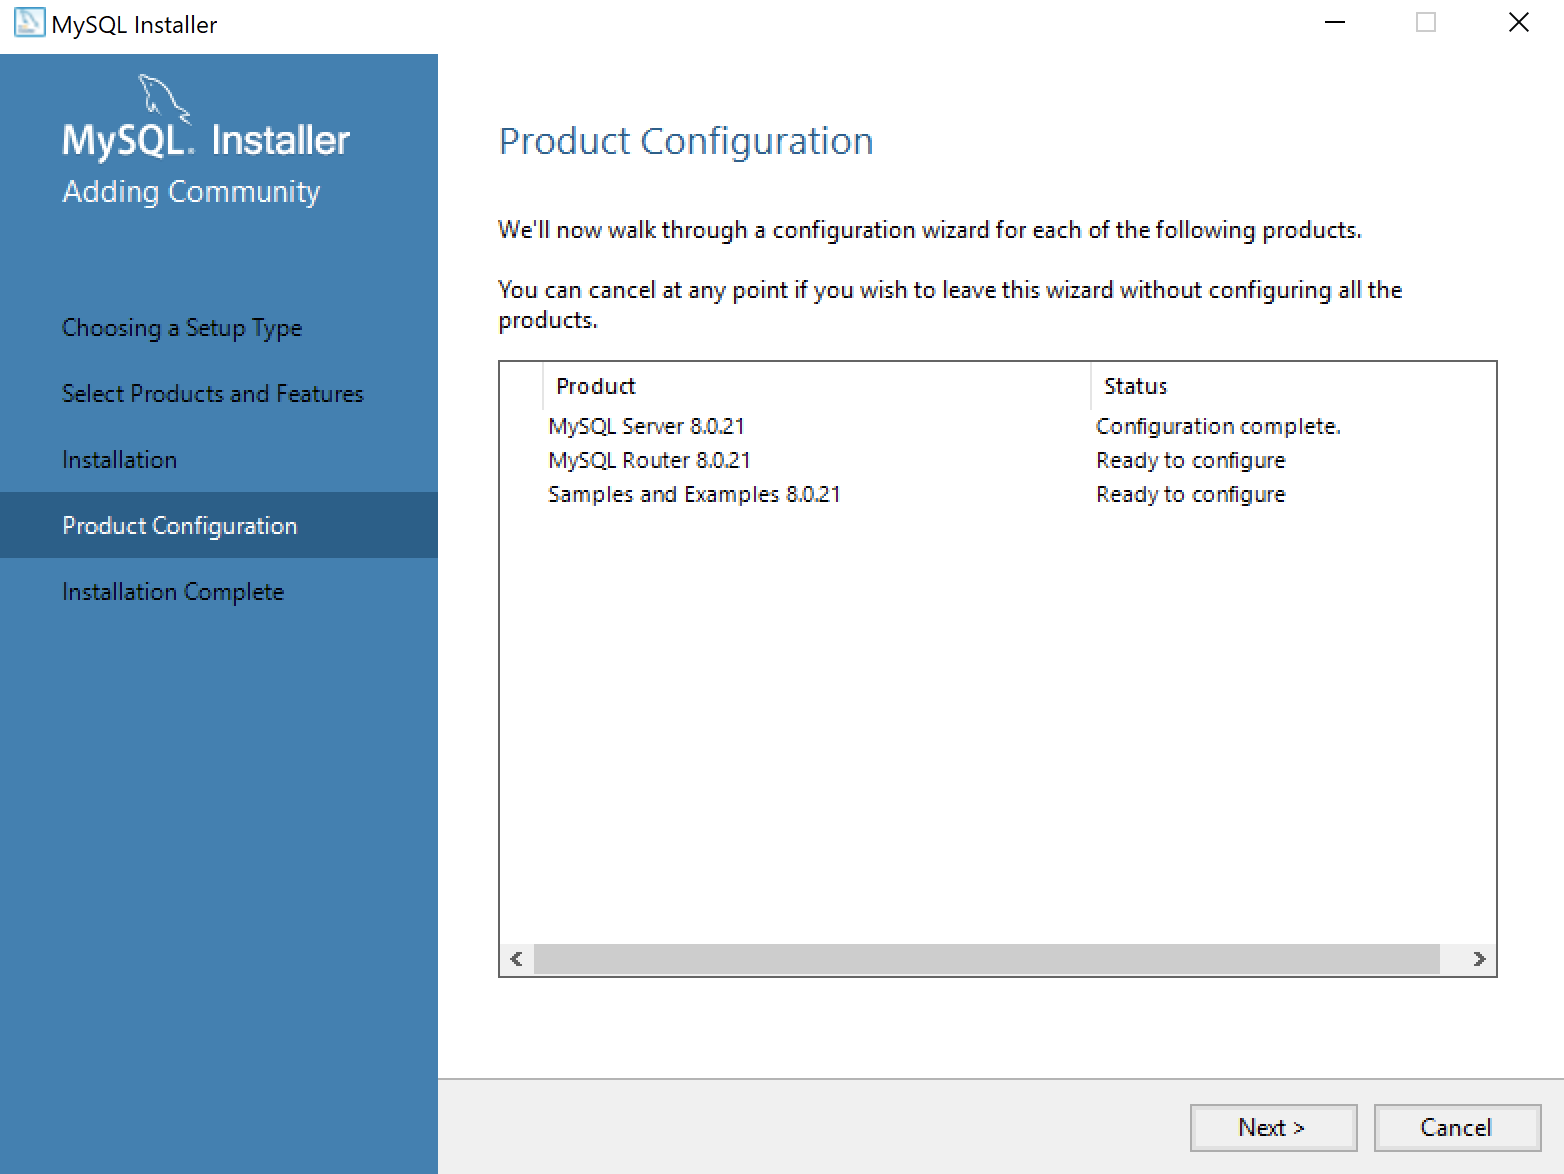
- This dialog qualifies that there are three products to configure. Click the Next button to begin configuration of these products.
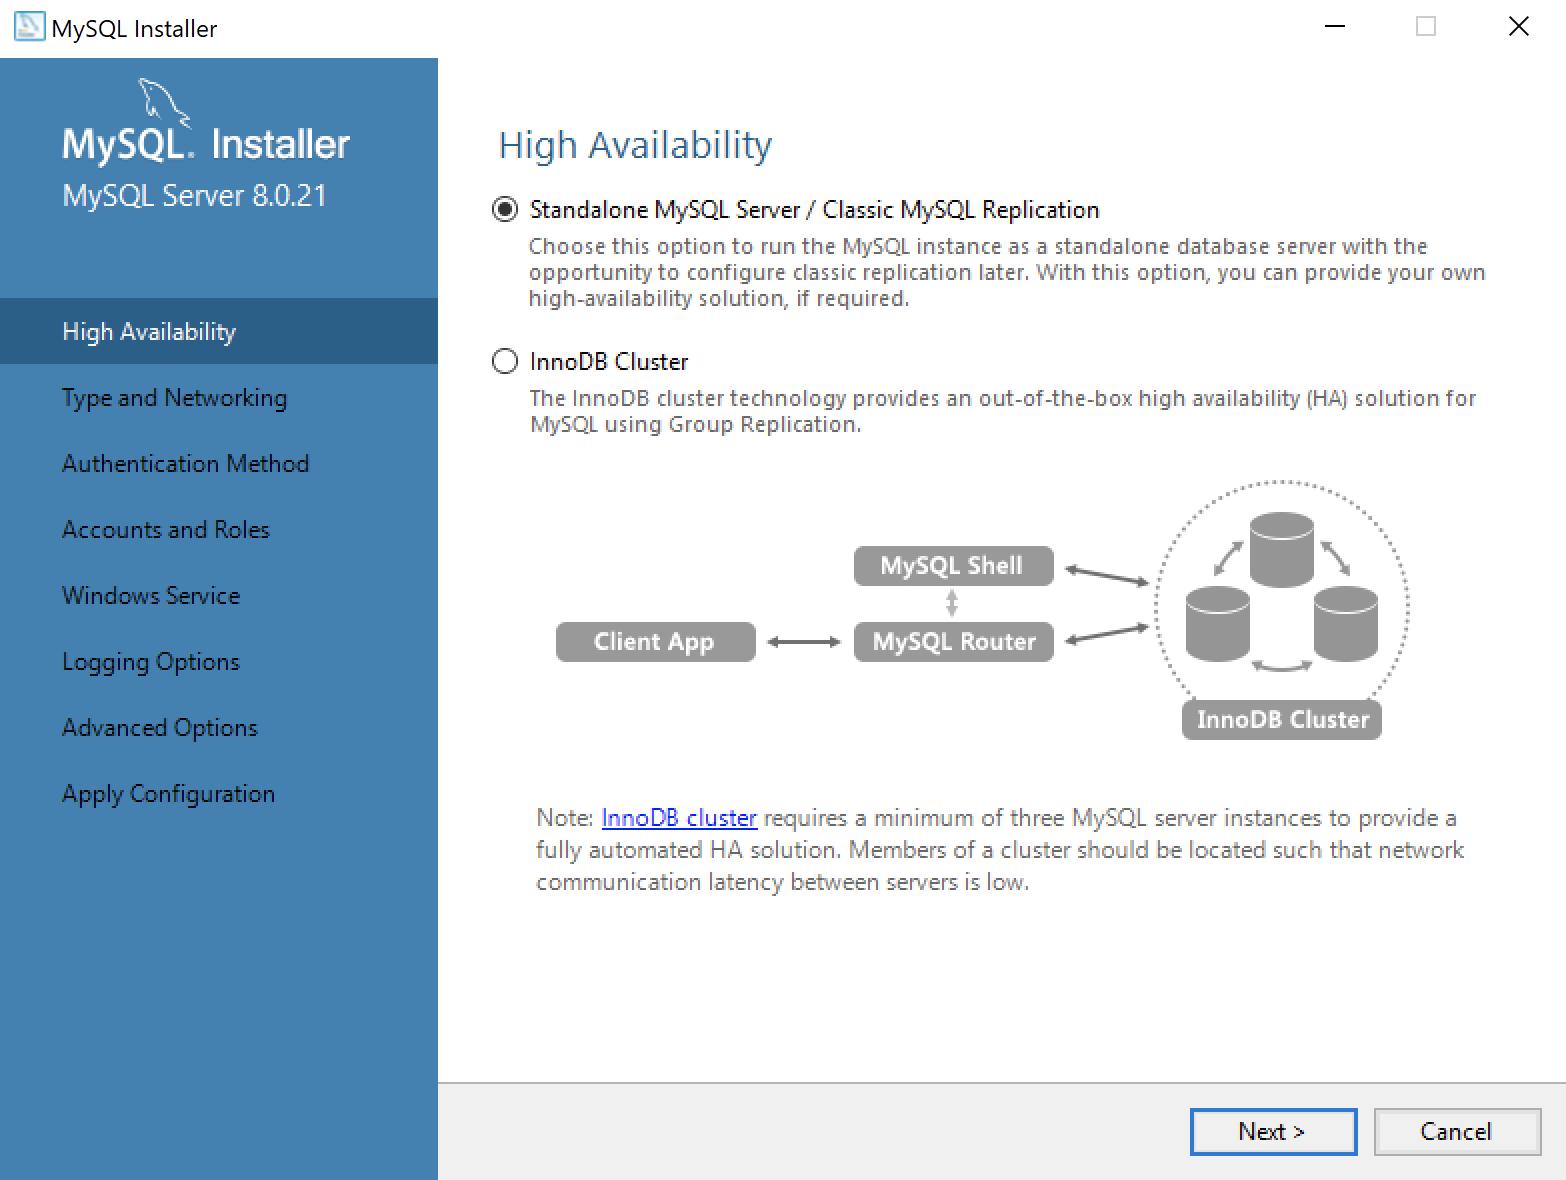
- This dialog lets you choose between a Standalone MySQL Server / Classic MySQL Replication and InnoDB Cluster. You should choose the Standalone MySQL Server for a developer installation on a laptop or desktop. Click the Next button to continue the MySQL Installer configuration.
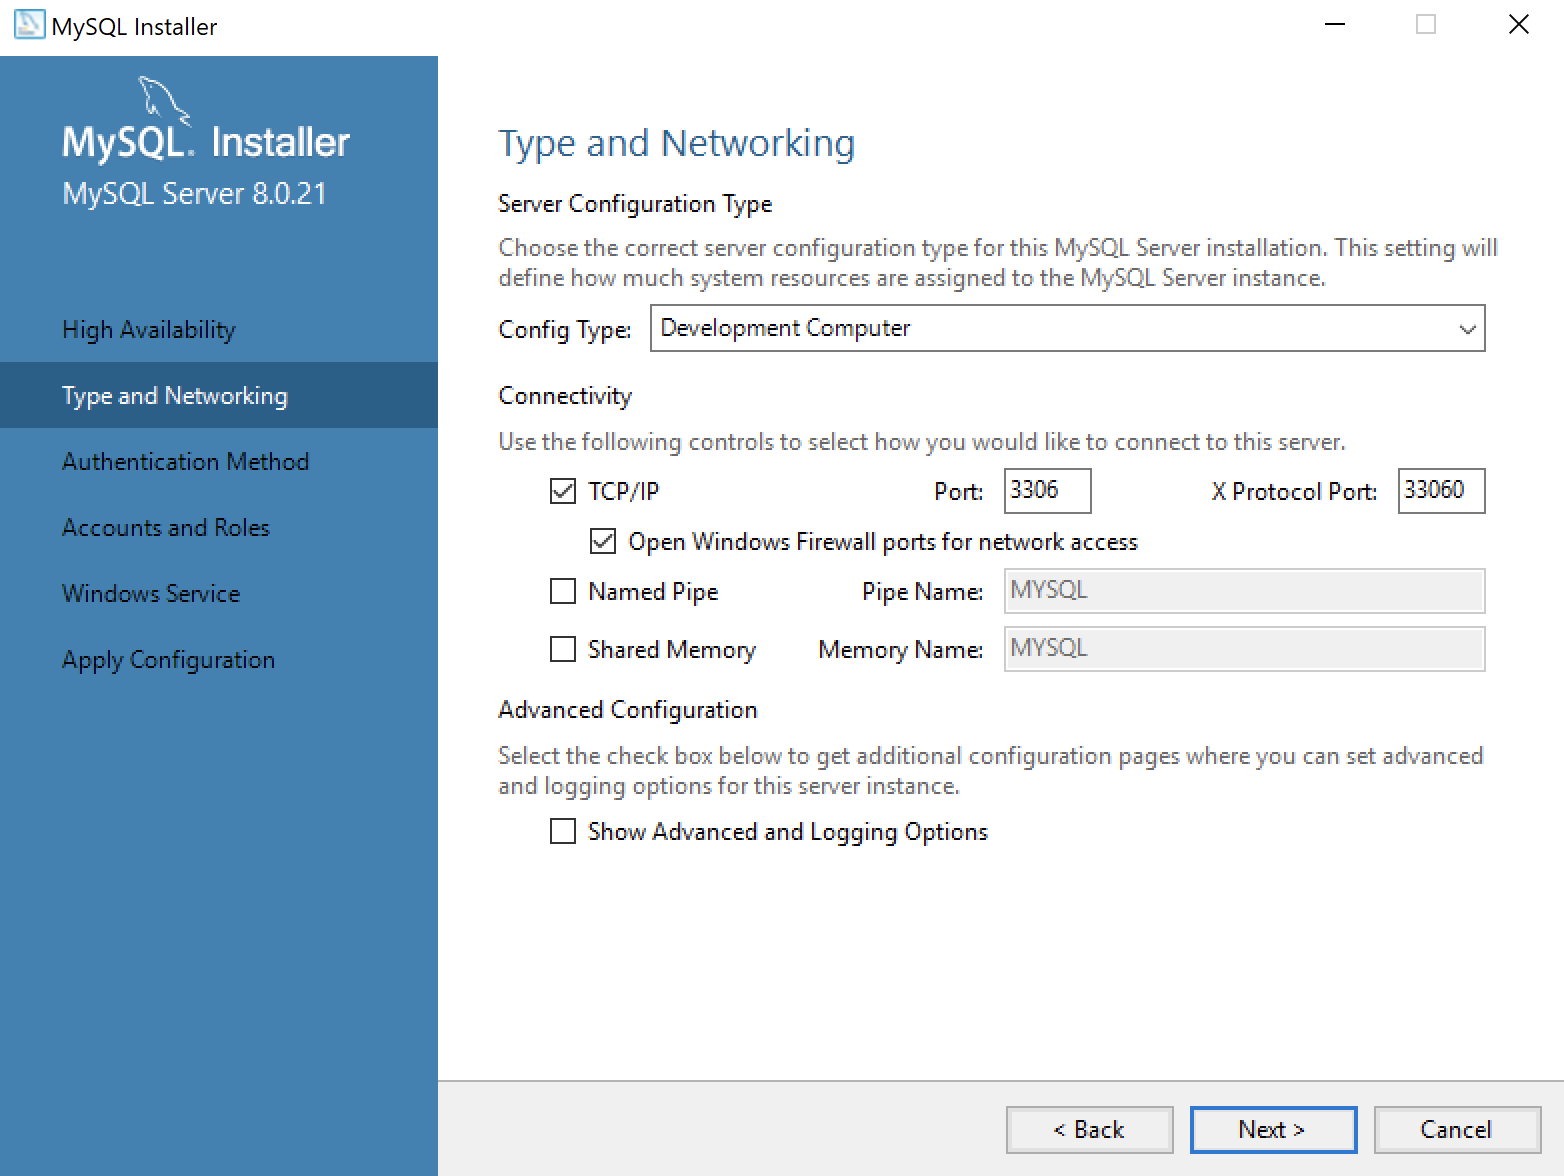
- This dialog lets you choose set the type and networking values. They should be preselected as they are in the screen image. Click the Next button to continue the MySQL Installer configuration.
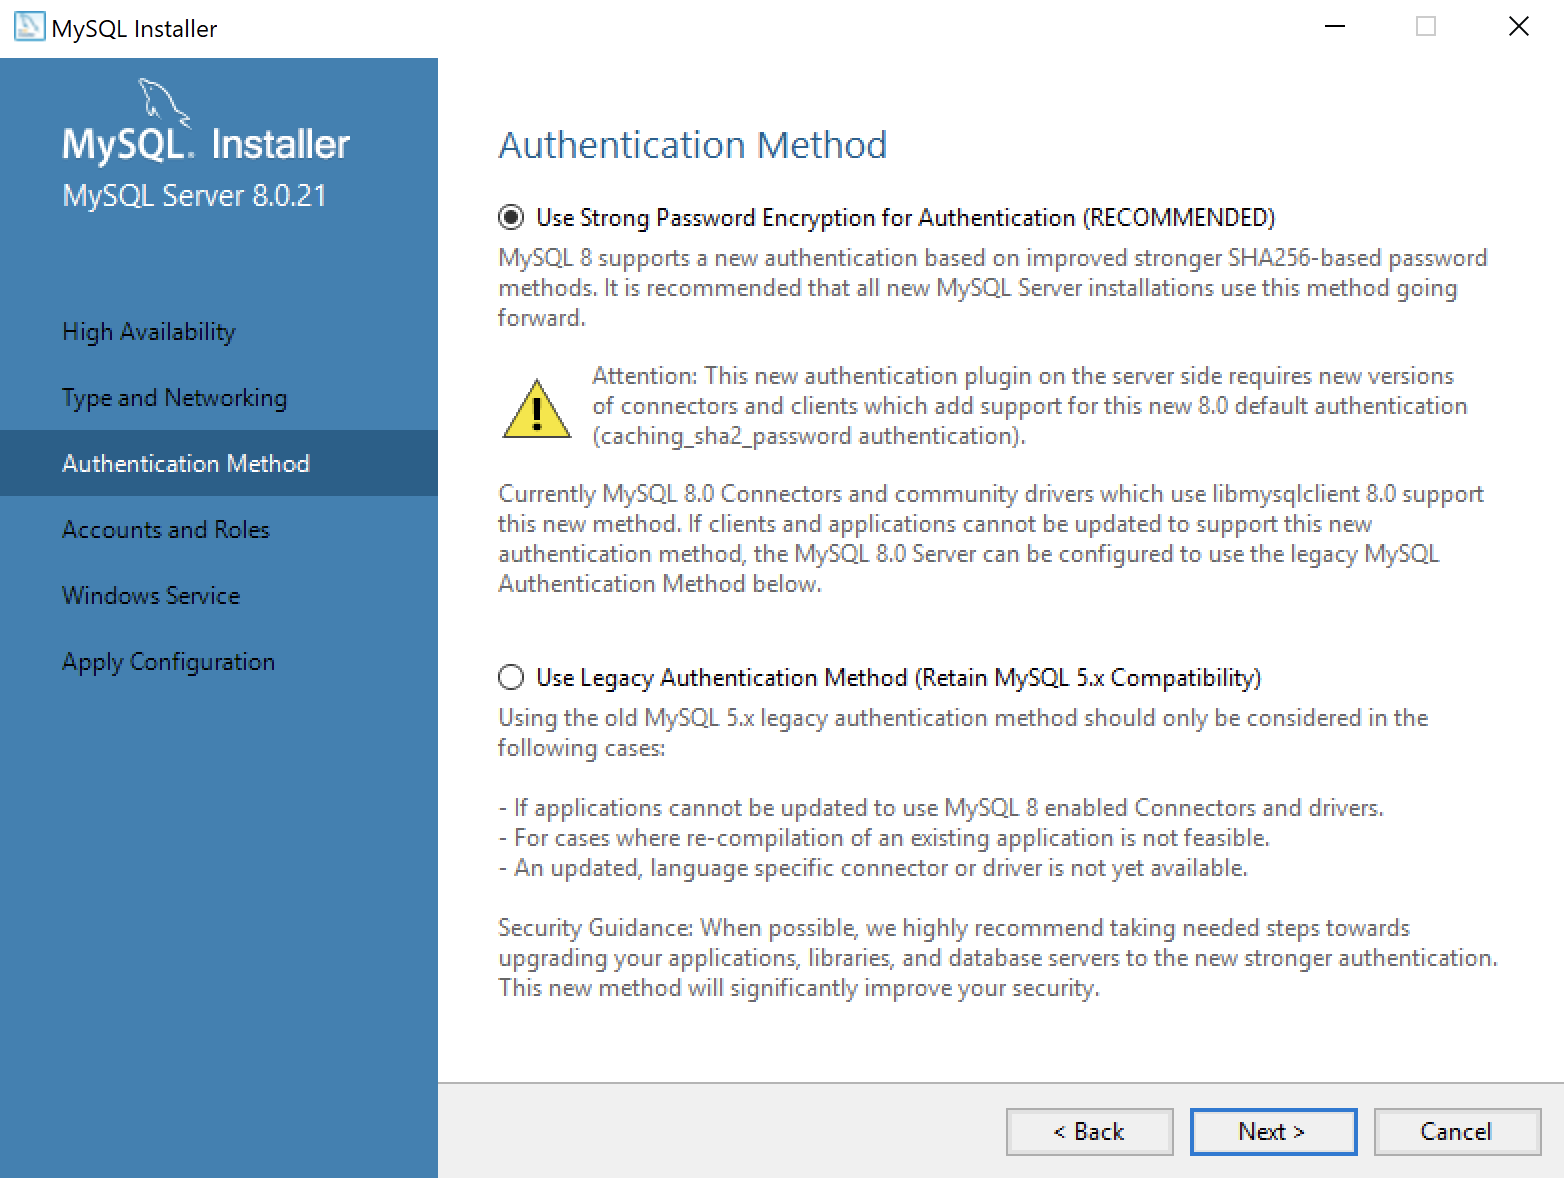
- This dialog lets you choose between SHA256-based and the older MD5 encryption. Click Use Strong Password Encryption for Authentication (RECOMMENDED) radio button. Click the Next button to continue the MySQL Installer configuration.
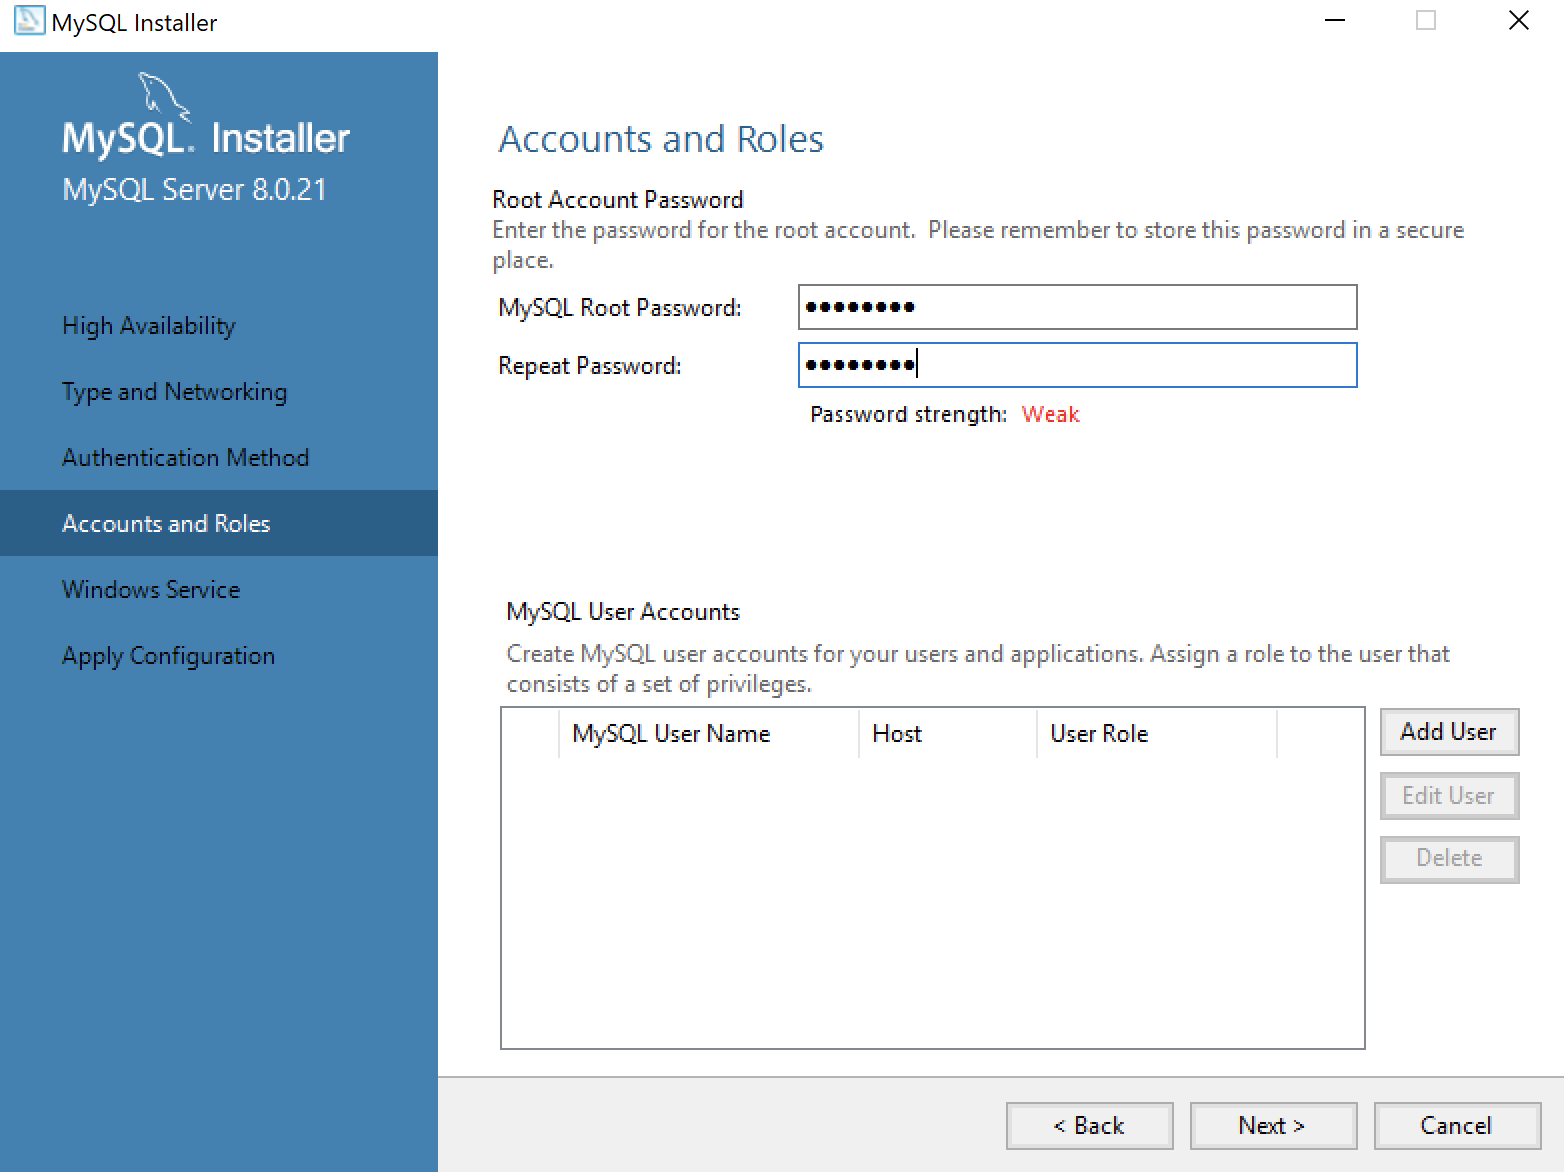
- This dialog lets you enter the MySQL Root Password. Click the Next button to continue the MySQL Installer configuration.
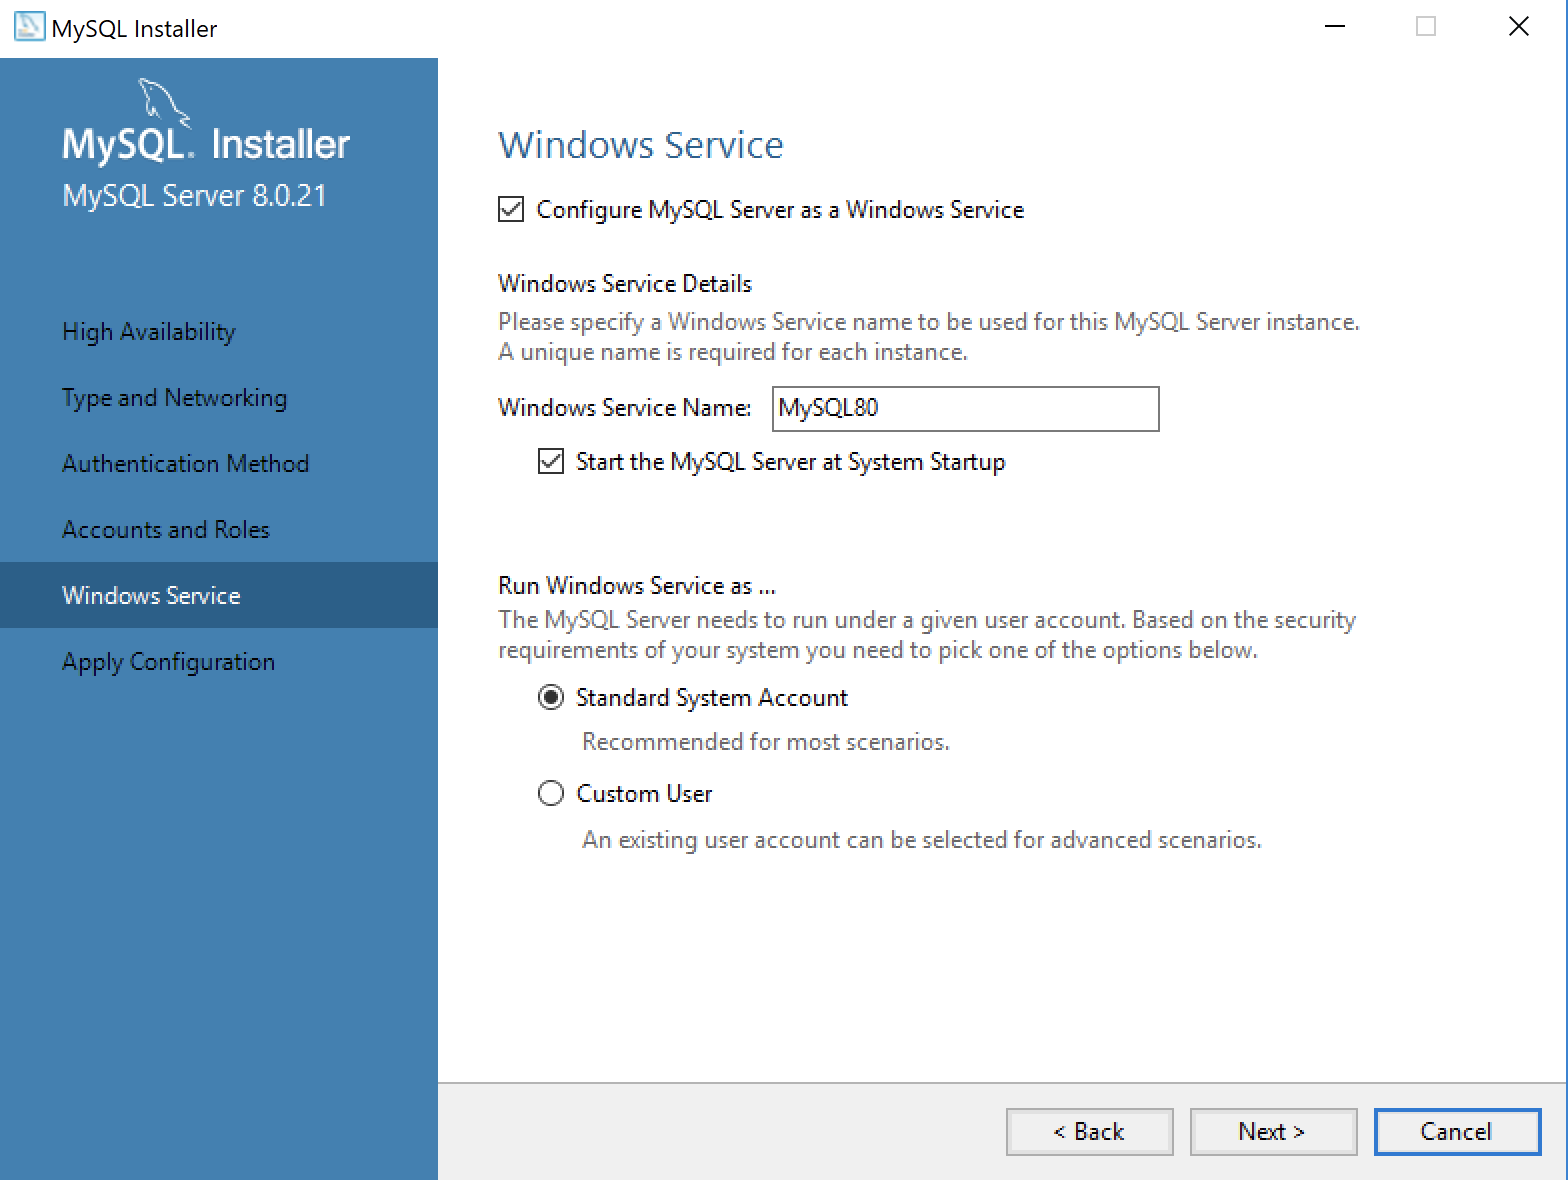
- This dialog lets you enter a Windows Service Name and install a Standard System Account or Custom User account. Click the Next button to continue the MySQL Installer configuration.
- This dialog lets you apply the configuration of the MySQL Server or Custom User product. Click the Next button to continue the MySQL Server configuration.
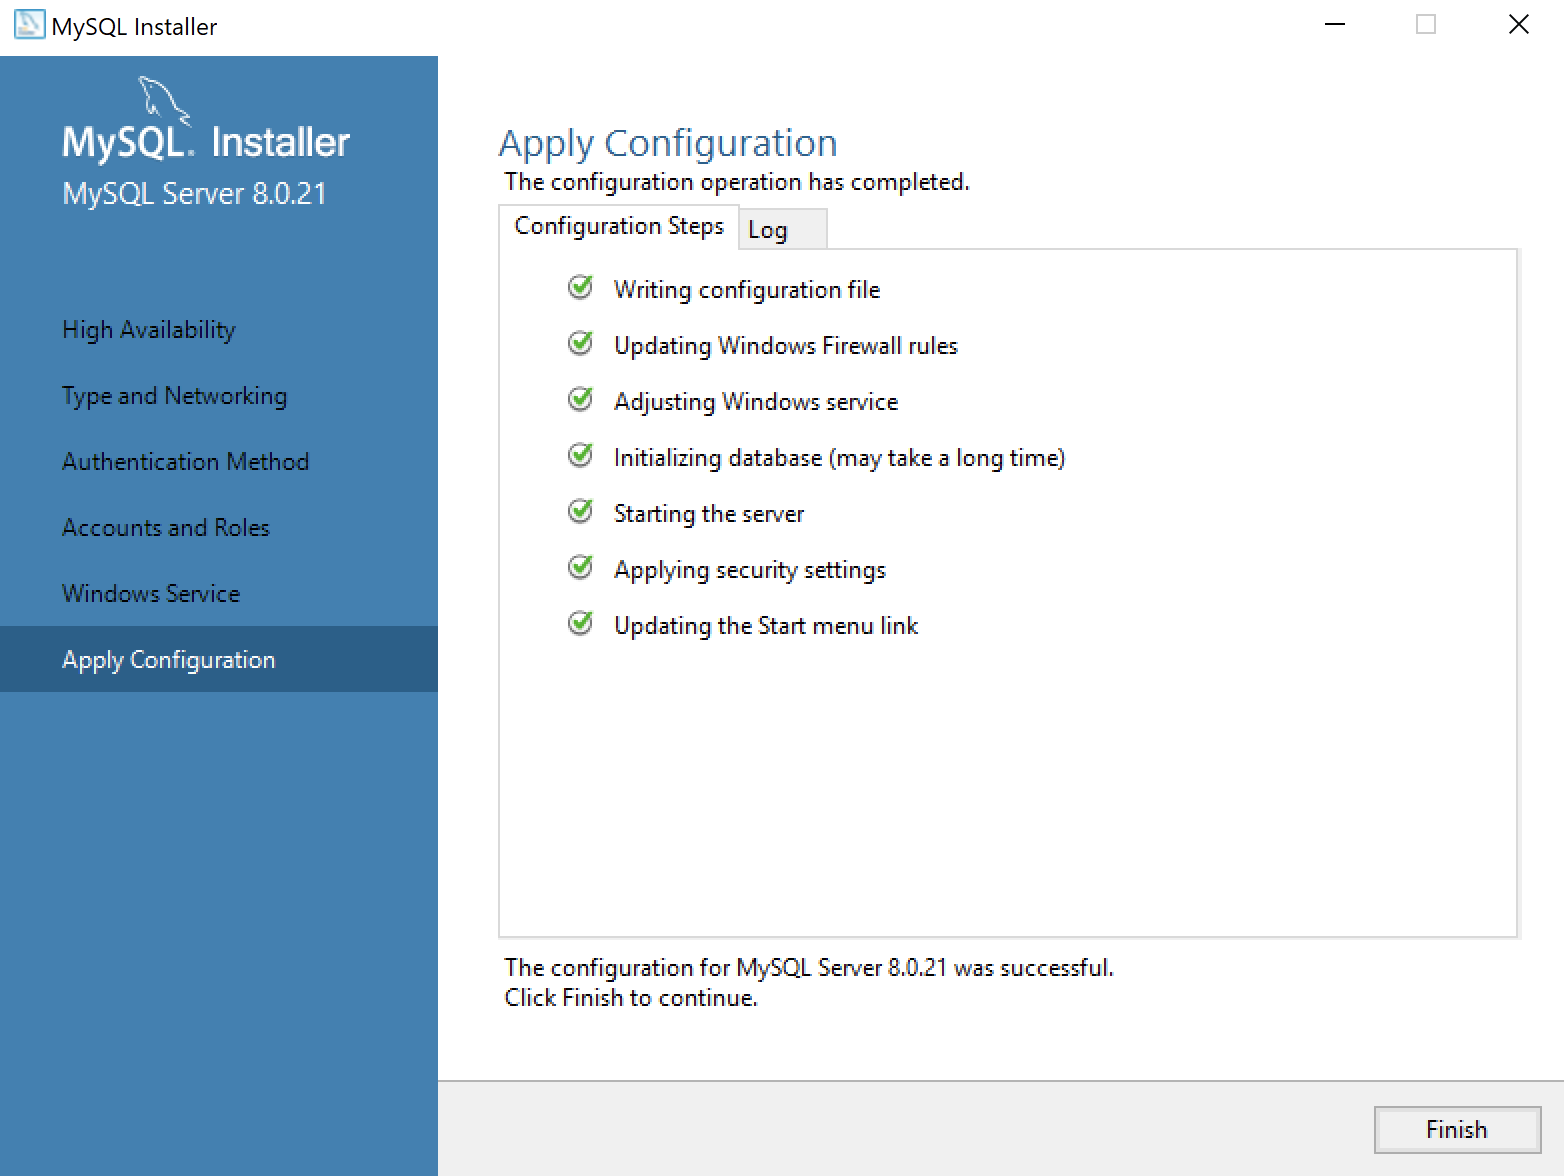
- This dialog lets you watch the progress of the MySQL Server or Custom User configuration. Click the Finish button to complete the MySQL Server configuration.
- This dialog lets you choose the next MySQL Router product for configuration. Click the Next button to begin the MySQL Router configuration.
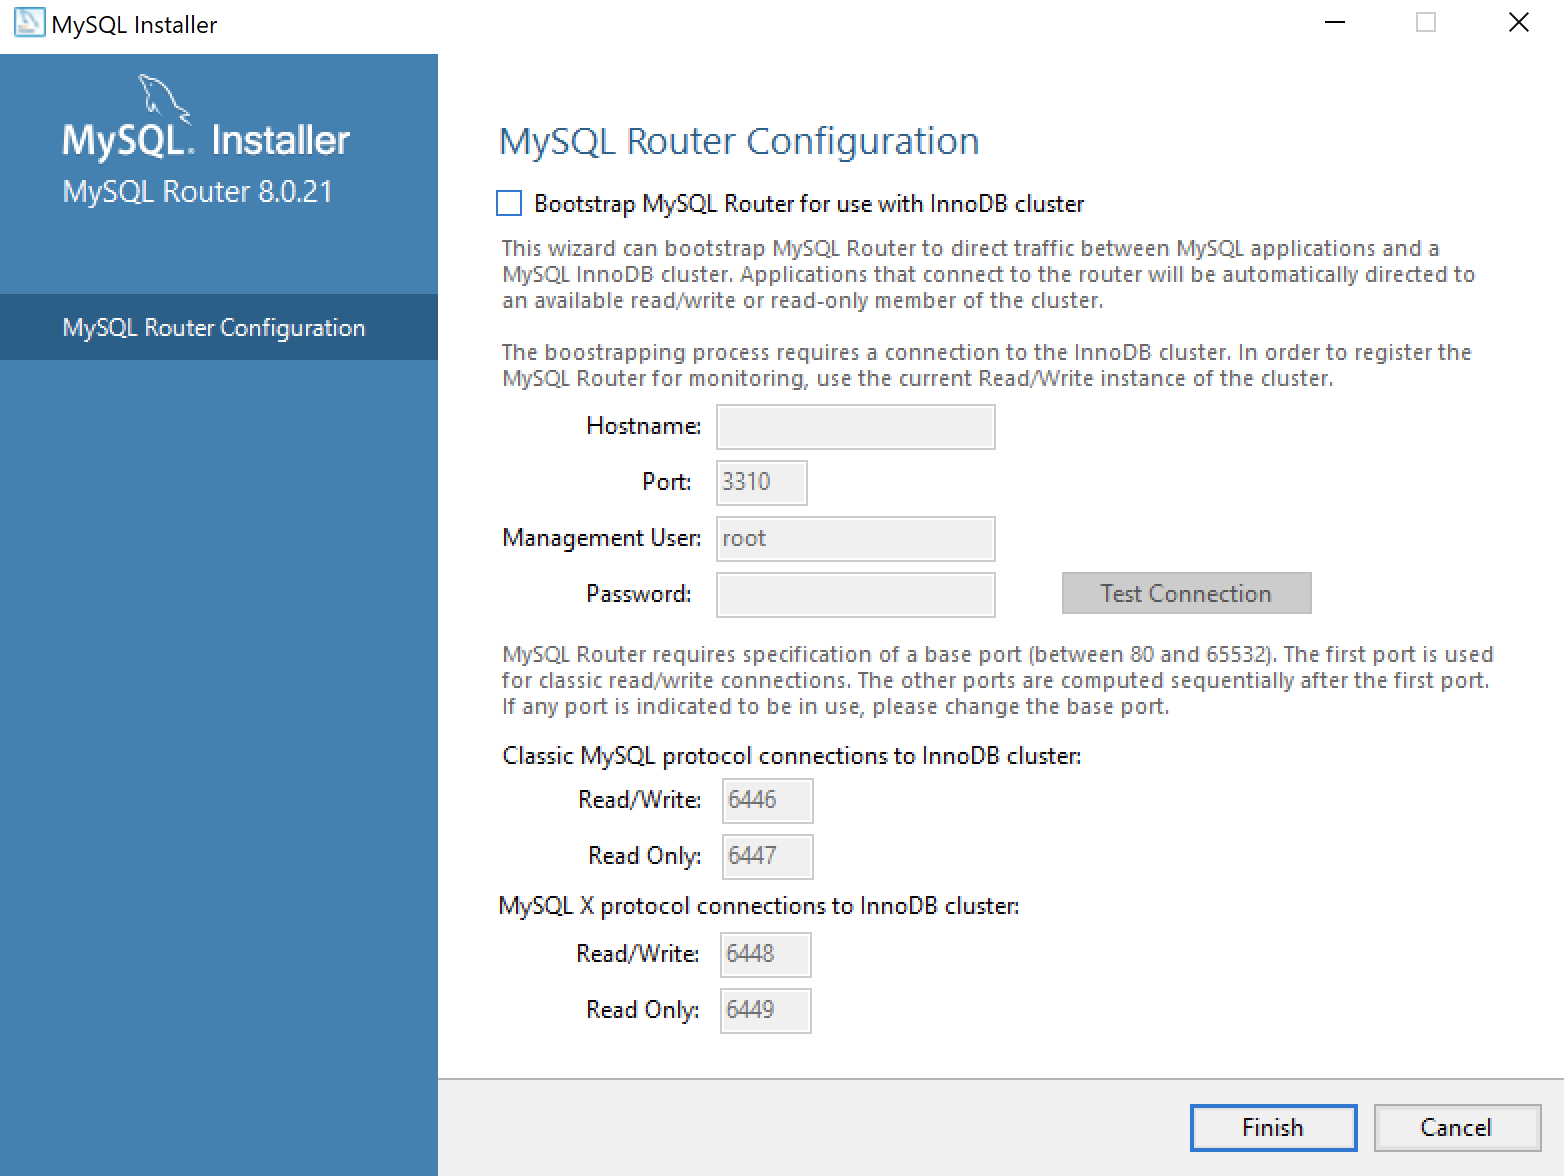
- This dialog allows you to configure the MySQL Router Configuration product. Leave the
HostnameandPasswordfields blank when you do not want to configure the MySQL Router Configuration product. Click the Finish button to complete the MySQL Router workflow.

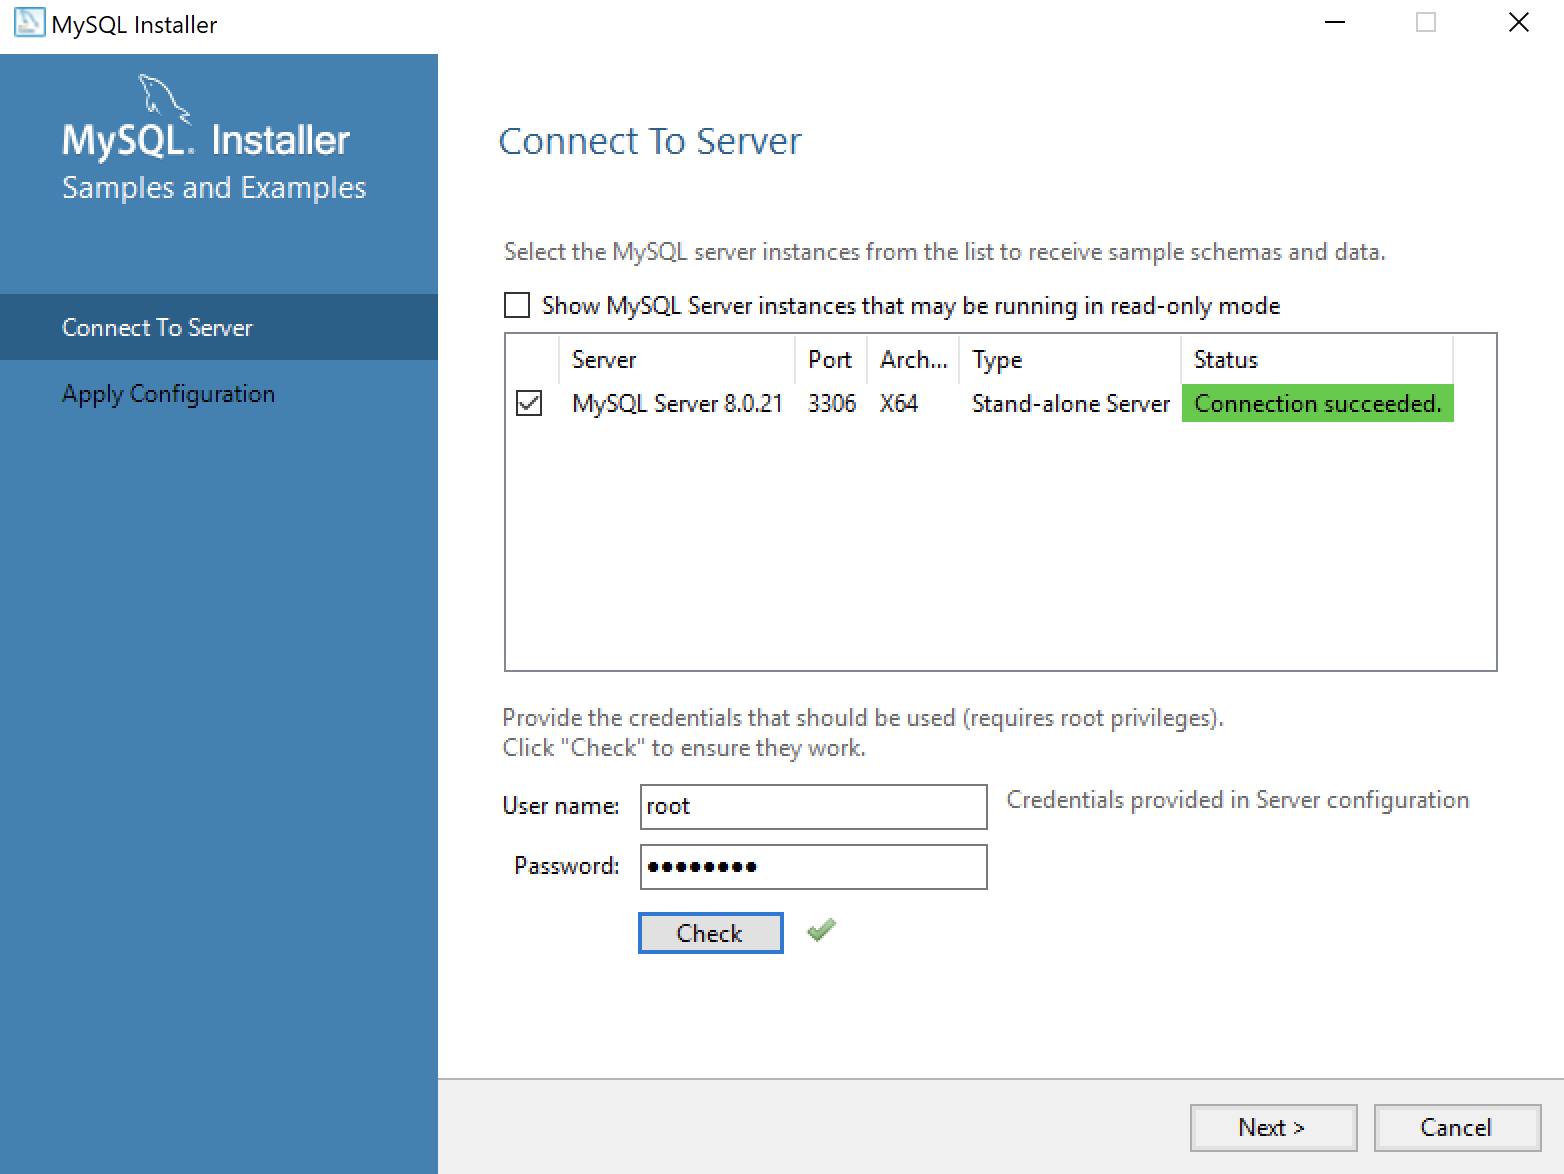
- This dialog lets you choose the next Samples and Examples product for configuration. Click the Next button to begin the Samples and Examples configuration.

- This dialog lets you create a Windows 10 MySQL Service. You enter the
rootpassword that you entered in Step #12. After you enterrootpassword, click the Check button to verify therootpassword. The Check button enables the Next button when therootaccount’s password is validated. Click the now enabled Next button to create the MySQL Service.
- This dialog lets you create a Windows 10 MySQL Service. Click the now enabled Next button to create the MySQL Service.
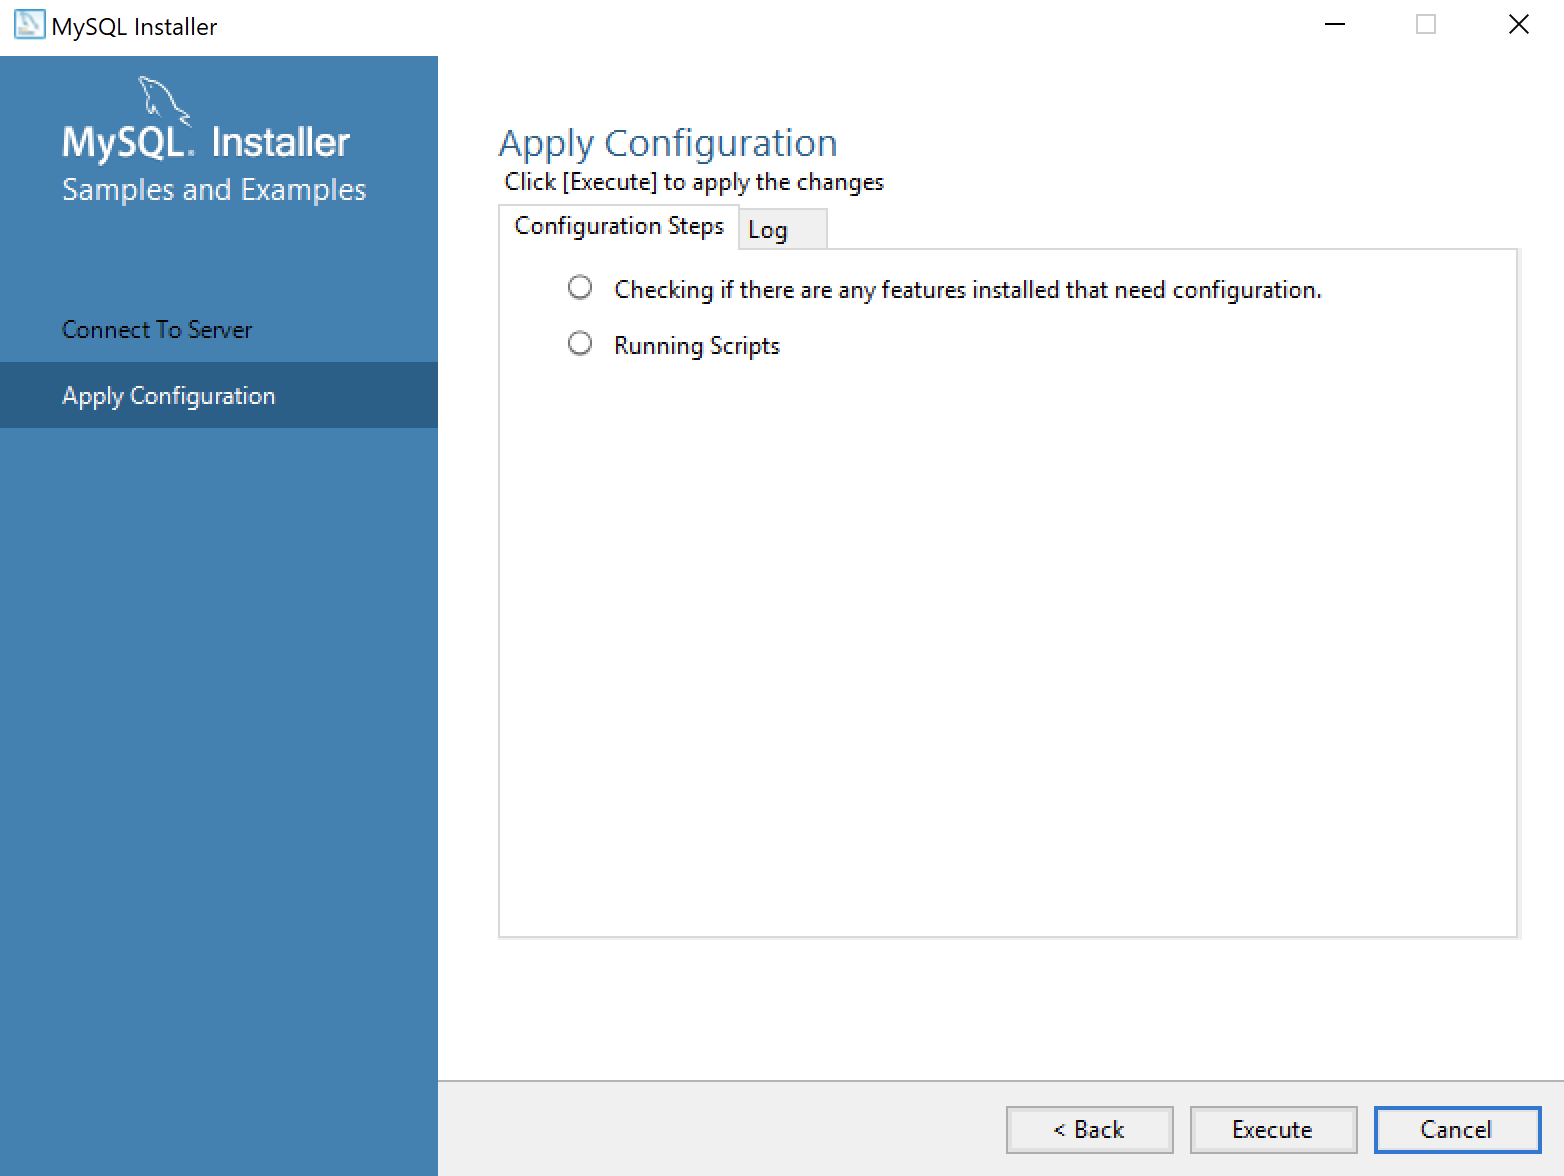
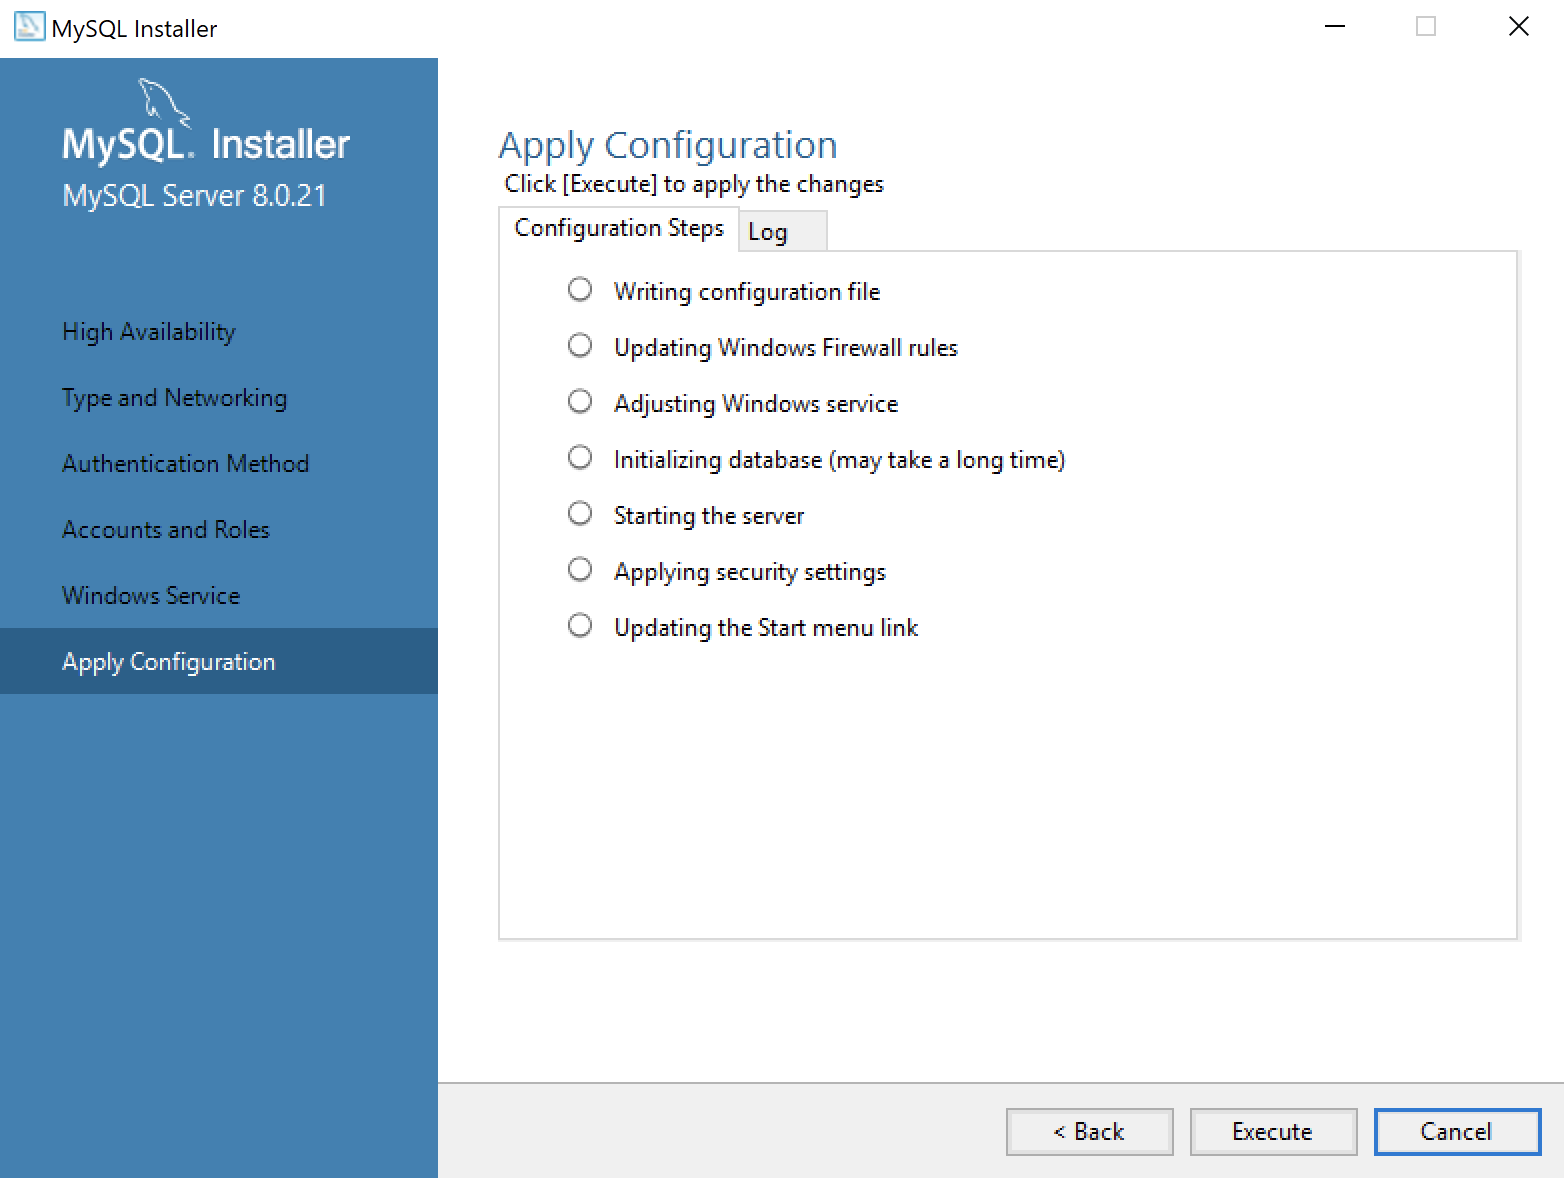
- This dialog applies all the configurations selected. Click the Execute button to proceed with the configuration.
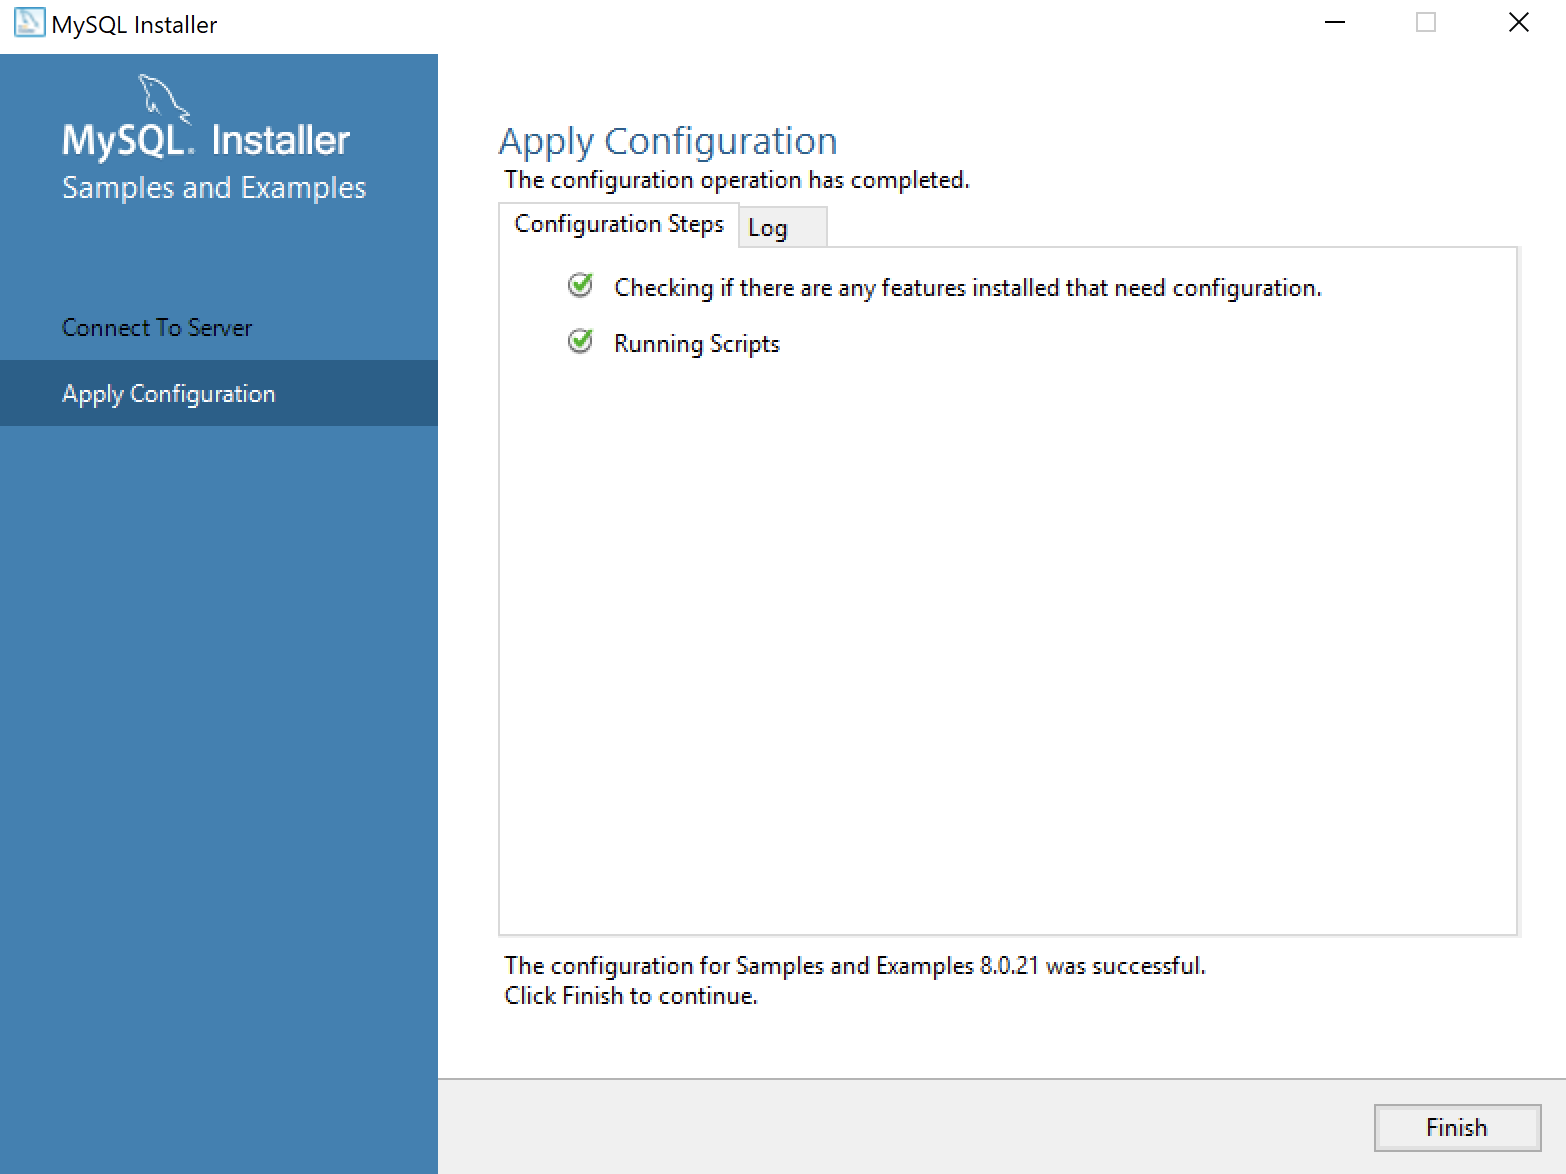
- This dialog lets you watch the progress of the configuration. Click the Finish button to complete the product configurations.

- This dialog the product configurations. You should note that the MySQL Router was not configured or needed. Click the Next button to complete the installation.
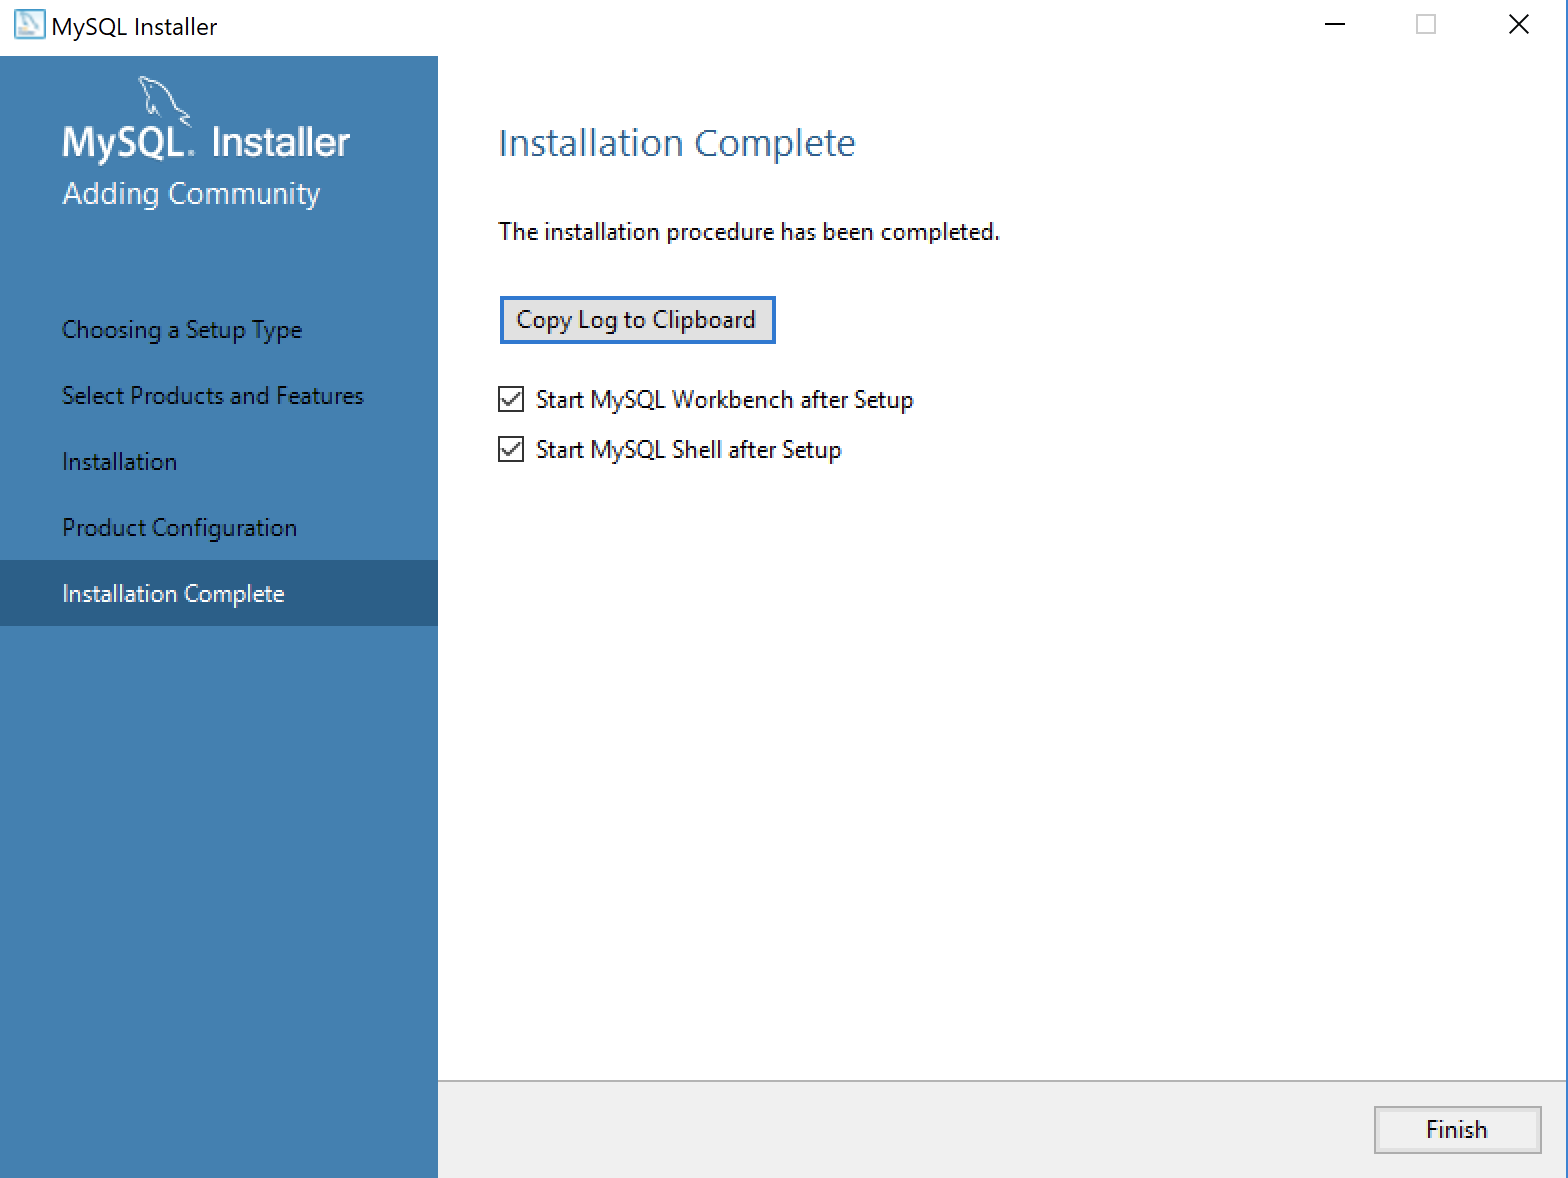
- This dialog completes the workflow and launches MySQL Workbench and Shell. Click the Finish button to complete the installation and configuration processes.
After you install MySQL, the following shows you how to provision a studentdb database. It also shows you how to enable the global file privilege and how to read data from an external comma-separated values (CSV) file.
MySQL Linux to Windows
My students want to transfer their course setup MySQL files from the Linux VM that I provide to Microsoft Windows 10. This post explains how because I found a couple small errors in the Google’d posts they would most likely see.
The first step is required because when I didn’t assign a name or domain to the the Fedora VM, which allows it to run as localhost on any student machine. In tandem, I didn’t assign a static IP address but opted for dynamic IP assignment. That means, the first step to securely copy the files requires you to find the assigned IP address. You can do that with the following Linux command:
ifconfig -a | grep 'inet[[:blank:]]' | head -1 | cut -c 14-30 |
It would return something like:
192.168.147.198 |
After you have discovered the IP address, you need to download PuTTy from their web site because includes the pscp (PuTTy Secure Copy) utility. I recommend you click on the MSI (Microsoft Installer Package) file, and install it on your Windows machine. As a rule, you should accept the default location, which is C:\Program Files\PuTTy.
While you could alter your system-level %PATH% environment variable after you install the software, I recommend you only include it in the %PATH% within the scope of a Command (cmd) shell. Navigate to your Windows Start and enter cmd in the search field. It should launch the Command Prompt terminal, which is a terminal emulator.
In the terminal editor, type the following case sensitive command to add the PuTTy directory to your path (yes, it’s case sensitive):
SET PATH=%PATH%;%ProgramFiles%\PuTTy |
Now, you can securely copy the files and directory structure from Linux to Windows with the following command (where you replace the traditional server name with the dynamically assigned IP address). You should also be in the target directory where you want the files and directories copied:
C:\Data\cit225>pscp -r student@192.168.147.198:/home/student/Data/cit225/mysql . |
After entering the password for the student on the Linux VM, you should see the following copy over:
Raiders2.png | 99 kB | 99.5 kB/s | ETA: 00:00:00 | 100% LordOfTheRings3.png | 119 kB | 119.8 kB/s | ETA: 00:00:00 | 100% HarryPotter4.png | 103 kB | 103.9 kB/s | ETA: 00:00:00 | 100% Raiders1.png | 92 kB | 92.4 kB/s | ETA: 00:00:00 | 100% Raiders3.png | 123 kB | 123.9 kB/s | ETA: 00:00:00 | 100% LordOfTheRings2.png | 111 kB | 111.7 kB/s | ETA: 00:00:00 | 100% LordOfTheRings1.png | 103 kB | 104.0 kB/s | ETA: 00:00:00 | 100% HarryPotter2.png | 118 kB | 118.7 kB/s | ETA: 00:00:00 | 100% HarryPotter7.png | 150 kB | 150.2 kB/s | ETA: 00:00:00 | 100% HarryPotter3.png | 106 kB | 106.1 kB/s | ETA: 00:00:00 | 100% HarryPotter5.png | 82 kB | 82.5 kB/s | ETA: 00:00:00 | 100% HarryPotter6.png | 129 kB | 129.9 kB/s | ETA: 00:00:00 | 100% HarryPotter1.png | 118 kB | 118.8 kB/s | ETA: 00:00:00 | 100% HarryPotter8.png | 150 kB | 150.9 kB/s | ETA: 00:00:00 | 100% HarryPotter8.txt | 8 kB | 8.5 kB/s | ETA: 00:00:00 | 100% HarryPotter3.txt | 5 kB | 5.8 kB/s | ETA: 00:00:00 | 100% HarryPotter5.txt | 7 kB | 7.9 kB/s | ETA: 00:00:00 | 100% HarryPotter1.txt | 6 kB | 6.6 kB/s | ETA: 00:00:00 | 100% HarryPotter2.txt | 7 kB | 7.8 kB/s | ETA: 00:00:00 | 100% Raiders3.txt | 5 kB | 5.6 kB/s | ETA: 00:00:00 | 100% HarryPotter4.txt | 7 kB | 7.5 kB/s | ETA: 00:00:00 | 100% HarryPotter7.txt | 5 kB | 5.4 kB/s | ETA: 00:00:00 | 100% HarryPotter6.txt | 7 kB | 7.4 kB/s | ETA: 00:00:00 | 100% LOTRFellowship.txt | 4 kB | 5.0 kB/s | ETA: 00:00:00 | 100% apply_store_base.sql | 1 kB | 1.6 kB/s | ETA: 00:00:00 | 100% query_membership.sql | 0 kB | 0.3 kB/s | ETA: 00:00:00 | 100% apply_mysql_lab1.sql | 1 kB | 1.9 kB/s | ETA: 00:00:00 | 100% configure_mysql_web.sql | 37 kB | 37.1 kB/s | ETA: 00:00:00 | 100% seed_mysql_store_ri2.sql | 58 kB | 58.5 kB/s | ETA: 00:00:00 | 100% cleanup_mysql_store.sql | 5 kB | 5.4 kB/s | ETA: 00:00:00 | 100% create_mysql_store_ri2.sq | 21 kB | 21.1 kB/s | ETA: 00:00:00 | 100% |
My students will need to repeat this step to transfer all of the sample PHP files that demonstrate web application patterns. They also need to inspect individual files to ensure any path referencing commands are manually converted to their new Windows equivalent.
They can move the physical files as the root superuser with the following pscp command provide you haven’t stored the files somewhere other than the default location:
C:\Data\temp>pscp -r root@192.168.147.198:/var/lib/mysql . |
As always, I hope this helps those trying to sort things out.
Windows 10 Laptops
Teaching Oracle technology always has challenges. They’re generally large challenges because we ask students to run 4 GB Linux VM with Oracle Database 11g XE pre-configured for them. A number of the student computers aren’t up to the task of running the virtualization.
Installing VMware Workstation or Player and a 64-bit Linux operating system is the easiest way to discover a laptop that advertises itself as 64-bit when it truly isn’t. Most of the computers raise an exception that says they’re unable to run hyperthreading, and naturally two BIOS settings are disabled by the manufacturers.
As a result, I get a lot of questions from students on computers. Some of the questions are simple and driven by a desire to maximize their investment. Other questions aren’t quite as simple. The harder questions are typically driven by a need to accomplish something they can’t do with their computer.
I can’t help but feel too many students see laptops as commodities, like televisions. They purchase their laptops thinking they’ve bought the right computer because it provides features like a touch screen. Unfortunately, they don’t notice things like the operating system because many of them purchase computers that run the Microsoft Windows.
They believe Microsoft Windows is simply a single operating system. They don’t know that there are seven versions of Windows 10 with different features. More importantly, they don’t know there are two key versions of Windows 10 when they purchase a laptop – the Windows 10 Home and Windows 10 Pro. The student seem to never find a simple Windows 10 Buyers Guide.
Windows 10 Home Edition is designed for end-user computing that includes using application software, whereas Windows 10 Pro Edition is designed for computing that runs both application and server software. The choice of one over the other determines what you can or can’t do with your Windows software.
Changing between Windows 10 Home and Windows 10 Pro comes at a cost to most consumers. That’s because they purchase machines with OEM versions of the Windows operating system. Vendors provide OEM versions of Windows 10 because they customize boards and chip-sets; and sometimes they purchase and install chips that fail to meet manufacturing standards. In these cases, the OEM Windows 10 comes with modifications and custom drivers. Moving from an OEM Windows 10 Home to a Windows 10 Pro can be very complicated.
Also, it’s all too common for OEM Windows 10 to disable 64-bit operations while advertising their product as 64-bit. The reasons for this can be complex and hard to identify sometimes. When a manufacturer purchases defective CPUs, they tend to disable some of the chips features. Manufacturers often disable 64-bit features to work around a defective CPU, one or more chip-sets, or their own customizations to the Windows 10 operating system.
I wrote all this to help focus purchases for those who want to run an Oracle Database on a Windows 10 operating system. You have two choices. One uses the native Windows 10 Pro operating system to run Oracle Database 11g XE natively, and the other uses Windows 10 to run VMware or Virtual Box to support a Linux operating system and Oracle Database 11g XE instance.
Best of luck, and always check the laptop specifications. As a rule, don’t buy Windows 10 Home machines if you want to run an Oracle Database.
PostgreSQL Install-Windows
A number of folks have asked me to create a post of a PostgreSQL installation on Windows. So, here is my step-by-step PostgreSQL 9.3 installation, and you can go further and learn how to setup your own PostgreSQL database schema.
Download PostgreSQL Database
You can start the download of PostgreSQL from this site. It leads you to the EnterpriseDB site, where you can download the prepackaged software.
Install PostgreSQL 9.3 on Windows
These steps walk you through installing PostgreSQL and the the pgJDBC v9.3, psqlODBC (32 bit), and psqlODBC (64 bit) packages.
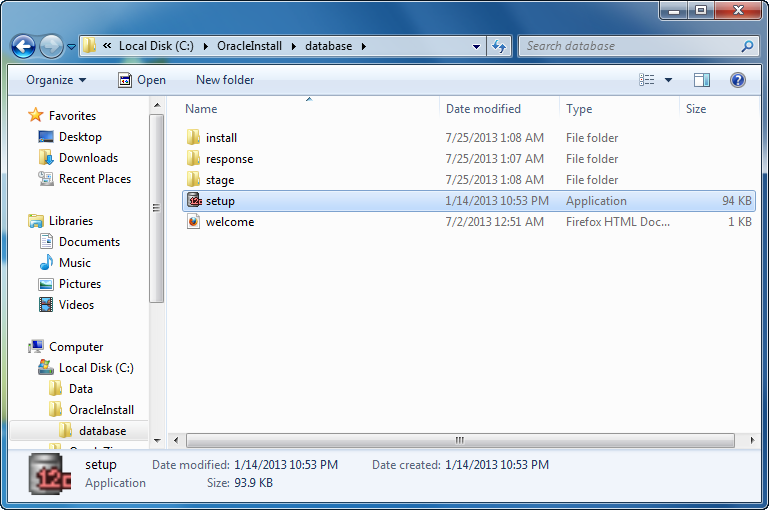
- The first thing you need to do is launch the PostgreSQL file from download folder.

- After launching the downloaded file, you see an Open File – Security Warning dialog message. Click the Run button to run the PostgreSQL executable file.

- The first dialog screen is the Setup – PostgreSQL dialog, which welcomes you and prompts you to start the installtion of PostgreSQL. Click the Next button to continue.

- The Installation Directory dialog sets the location for the PostgreSQL server. Click the Next button to continue.

- The Data Directory dialog sets the location for the PostgreSQL server’s data repository. Click the Next button to continue.

- The first Setup dialog sets the database’s superuser password. Click the Next button to continue.

- The second Setup dialog sets the database’s listener port, which is Port
5432by default. Click the Next button to continue.

- The third Setup dialog sets the database’s default Locale. Click the Next button to continue.

- The Ready to Install dialog lets you start the installation. Click the Next button to continue.

- The Installing dialog lets you montor the unpacking of programs for the installation. You need not click any buttons to continue.

- The Completing the PostgreSQL Setup Wizard dialog advises you that you’ve completed the setup. Checking the Stack Builder check box lets you download and install additional tools, drivers, and applications. Click the Next button to continue.

- This is Welcome dialog to the Stack Builder. Click the Next button to continue.

- This is dialog lets you select applications that you would like to install. Click the plus symbol for the Database Drivers option to continue.

- In the modified dialog, click the pgJDBC v9.3, psqlODBC (32 bit), and psqlODBC (64 bit) check boxes. Then, click the Next button to continue.

- This dialog tells you the pgJDBC v9.3, psqlODBC (32 bit), and psqlODBC (64 bit) installed packages. Click the Next button to continue.

- This dialog lays a downloading progress bar while loading the additional packages. You don’t need to do anything to continue.

- This dialog lays a downloading progress bar while loading the additional packages. Click the Next button to continue.

- The Setup pgJDBC dialog welcomes you to the setup wizard. Click the Next button to continue.

- The Installation Directory dialog lets you set the pgJDBC installation directory. Click the Next button to continue.

- The Ready to Install dialog lets you install the pgJDBC package. Click the Next button to install it.

- The Setup dialog confirms you’ve installed the add-on packages. Click the Finish button to complete the installation.
Configure psqlODBC on Windows
These steps walk you through configuring the psqlODBC packages.
- The Setup dialog helps you configure the psqlODBC package. Click the Next button to install it.

- The Installation Directory dialog lets you set the psqlODBC installation directory. Click the Next button to continue.

- The Ready to Install dialog lets you install the psqlODBC package. Click the Next button to install it.
- The Ready to Install dialog lets you install the psqlODBC package. Click the Next button to install it.

- The Installing psqlODBC dialog displays a dialog while installing the psqlODBC package(s). You need not click anything, the dialog dismisses itself when complete.

- The Installing psqlODBC dialog displays a dialog while installing the psqlODBC package(s). You need not click anything, the dialog dismisses itself when complete.

- The Stack Builder dialog displays a message that everything is installed. Click the Finish button when complete.
Connect to the Default PostgreSQL database
You have two options for connecting to the PostgreSQL database. One uses the GUI pgAdmin III console and the other uses the command line.
Connect through pgAdmin III to the PostgreSQL Database

- In Windows, navigate to through the Start to the pgAdmin III menu option.

- After launching pgAdmin III, you’ll see the pgAdmin II console, displayed at left.
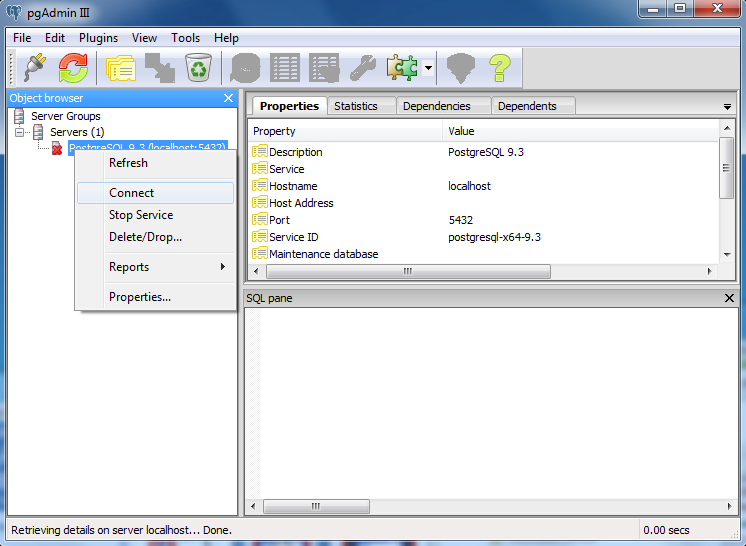
- Right click on the PostgreSQL 9.3 (localhost:5432) item in the Object browser and click the Connect menu choice from the floating menu.

- Enter the password you chose when installing the PostgreSQL Server, and click the OK button.
Connect through the Command-line to the PostgreSQL Database
These steps show you how to connect through the PostgreSQL Command Line Interface (CLI) – psql. psql is like Oracle’s sqlplus, MySQL’s mysql, and Microsoft SQL Server’s sqlcmd CLI interfaces. By default, the PostgreSQL binary directory is not in your default %PATH% environment variable, so you need to add it. I recommend an environment file because in a test situation you may not want to use it all the time.
Create the following directory for the environment file:
C:\Data\PostgreSQL\env |
You can create an environment file with any text editor or do it at the command line, like this:
COPY CON postgresqlenv.bat SET PATH=%PATH%;C:\Program Files\PostgreSQL\9.3\bin;. ^Z |
Then, you can source the environment file like this:
C:\> postgresql.bat |
Now, you can connect to the default database provided you understand that PostgreSQL Stack Builder set some values that differ from the defaults if you installed it manually. Specifically, they set the default value of the database to postgres and default value of the user to postgres.
That means you can connect with the following, provided you remember the password you used during installation:
C:\> psql -d postgres -U postgres |
You should see the following when you connect:
C:\> psql -d postgres -U postgres Password for user postgres: psql (9.3.3) WARNING: Console code page (437) differs from Windows code page (1252) 8-bit characters might not work correctly. See psql reference page "Notes for Windows users" for details. Type "help" for help. |
You can now submit interactive SQL statements or run batch files, like:
postgres=# SELECT 'Hello World!'; |
It displays:
?COLUMN? -------------- Hello World! (1 ROW) |
Adding a column alias to the string literal gives a more readable formatted output:
postgres=# SELECT 'Hello World!' AS "String Literal"; |
It displays:
String Literal ---------------- Hello World! (1 ROW) |
PostgreSQL’s CLI Help
You have the ability to do a lot with the PostgreSQL psql CLI. The general command to discover help is help, and it displays the following:
postgres=# help You are USING psql, the command-line interface TO PostgreSQL. TYPE: \copyright FOR distribution terms \h FOR help WITH SQL commands \? FOR help WITH psql commands \g OR terminate WITH semicolon TO EXECUTE query \q TO quit |
You quit PostgreSQL with a \q command:
postgres=# \q |
You can find more help with the \HELP or the \? commands:
\HELP |
It displays the following:
Available help: ABORT CLUSTER DEALLOCATE END ALTER AGGREGATE COMMENT DECLARE EXECUTE ALTER COLLATION COMMIT DELETE EXPLAIN ALTER CONVERSION COMMIT PREPARED DISCARD FETCH ALTER DATABASE COPY DO GRANT ALTER DEFAULT PRIVILEGES CREATE AGGREGATE DROP AGGREGATE INSERT ALTER DOMAIN CREATE CAST DROP CAST LISTEN ALTER EVENT TRIGGER CREATE COLLATION DROP COLLATION LOAD ALTER EXTENSION CREATE CONVERSION DROP CONVERSION LOCK ALTER FOREIGN DATA WRAPPER CREATE DATABASE DROP DATABASE MOVE ALTER FOREIGN TABLE CREATE DOMAIN DROP DOMAIN NOTIFY ALTER FUNCTION CREATE EVENT TRIGGER DROP EVENT TRIGGER PREPARE ALTER GROUP CREATE EXTENSION DROP EXTENSION PREPARE TRANSACTION ALTER INDEX CREATE FOREIGN DATA WRAPPER DROP FOREIGN DATA WRAPPER REASSIGN OWNED ALTER LANGUAGE CREATE FOREIGN TABLE DROP FOREIGN TABLE REFRESH MATERIALIZED VIEW ALTER LARGE OBJECT CREATE FUNCTION DROP FUNCTION REINDEX ALTER MATERIALIZED VIEW CREATE GROUP DROP GROUP RELEASE SAVEPOINT ALTER OPERATOR CREATE INDEX DROP INDEX RESET ALTER OPERATOR CLASS CREATE LANGUAGE DROP LANGUAGE REVOKE ALTER OPERATOR FAMILY CREATE MATERIALIZED VIEW DROP MATERIALIZED VIEW ROLLBACK ALTER ROLE CREATE OPERATOR DROP OPERATOR ROLLBACK PREPARED ALTER RULE CREATE OPERATOR CLASS DROP OPERATOR CLASS ROLLBACK TO SAVEPOINT ALTER OPERATOR CREATE INDEX DROP INDEX RESET ALTER OPERATOR CLASS CREATE LANGUAGE DROP LANGUAGE REVOKE ALTER OPERATOR FAMILY CREATE MATERIALIZED VIEW DROP MATERIALIZED VIEW ROLLBACK ALTER ROLE CREATE OPERATOR DROP OPERATOR ROLLBACK PREPARED ALTER RULE CREATE OPERATOR CLASS DROP OPERATOR CLASS ROLLBACK TO SAVEPOINT ALTER SCHEMA CREATE OPERATOR FAMILY DROP OPERATOR FAMILY SAVEPOINT ALTER SEQUENCE CREATE ROLE DROP OWNED SECURITY LABEL ALTER SERVER CREATE RULE DROP ROLE SELECT ALTER TABLE CREATE SCHEMA DROP RULE SELECT INTO ALTER TABLESPACE CREATE SEQUENCE DROP SCHEMA SET ALTER TEXT SEARCH CONFIGURATION CREATE SERVER DROP SEQUENCE SET CONSTRAINTS ALTER TEXT SEARCH DICTIONARY CREATE TABLE DROP SERVER SET ROLE ALTER TEXT SEARCH PARSER CREATE TABLE AS DROP TABLE SET SESSION AUTHORIZATION ALTER TEXT SEARCH TEMPLATE CREATE TABLESPACE DROP TABLESPACE SET TRANSACTION ALTER TRIGGER CREATE TEXT SEARCH CONFIGURATION DROP TEXT SEARCH CONFIGURATION SHOW ALTER TYPE CREATE TEXT SEARCH DICTIONARY DROP TEXT SEARCH DICTIONARY START TRANSACTION ALTER USER CREATE TEXT SEARCH PARSER DROP TEXT SEARCH PARSER TABLE ALTER USER MAPPING CREATE TEXT SEARCH TEMPLATE DROP TEXT SEARCH TEMPLATE TRUNCATE ALTER VIEW CREATE TRIGGER DROP TRIGGER UNLISTEN ANALYZE CREATE TYPE DROP TYPE UPDATE BEGIN CREATE USER DROP USER VACUUM CHECKPOINT CREATE USER MAPPING DROP USER MAPPING VALUES CLOSE CREATE VIEW DROP VIEW WITH |
You can find more help with the \HELP or the \? commands:
\? |
It displays the following:
General
  \copyright             show PostgreSQL usage and distribution terms
  \g [FILE] or ;         execute query (and send results to file or |pipe)
  \gset [PREFIX]         execute query and store results in psql variables
  \h [NAME]              help on syntax of SQL commands, * for all commands
  \q                     quit psql
  \watch [SEC]           execute query every SEC seconds

Query Buffer
  \e [FILE] [LINE]       edit the query buffer (or file) with external editor
  \ef [FUNCNAME [LINE]]  edit function definition with external editor
  \p                     show the contents of the query buffer
  \r                     reset (clear) the query buffer
  \s [FILE]              display history or save it to file
  \w FILE                write query buffer to file

Input/Output
  \copy ...              perform SQL COPY with data stream to the client host
  \echo [STRING]         write string to standard output
  \i FILE                execute commands from file
  \ir FILE               as \i, but relative to location of current script
  \o [FILE]              send all query results to file or |pipe
  \qecho [STRING]        write string to query output stream (see \o)

Informational
  (options: S = show system objects, + = additional detail)
  \d[S+]                 list tables, views, and sequences
  \d[S+]  NAME           describe table, view, sequence, or index
  \da[S]  [PATTERN]      list aggregates
  \db[+]  [PATTERN]      list tablespaces
  \dc[S+] [PATTERN]      list conversions
  \dC[+]  [PATTERN]      list casts
  \dd[S]  [PATTERN]      show object descriptions not displayed elsewhere
  \ddp    [PATTERN]      list default privileges
  \dD[S+] [PATTERN]      list domains
  \det[+] [PATTERN]      list foreign tables
  \des[+] [PATTERN]      list foreign servers
  \deu[+] [PATTERN]      list user mappings
  \dew[+] [PATTERN]      list foreign-data wrappers
  \df[antw][S+] [PATRN]  list [only agg/normal/trigger/window] functions
  \dF[+]  [PATTERN]      list text search configurations
  \dFd[+] [PATTERN]      list text search dictionaries
  \dFp[+] [PATTERN]      list text search parsers
  \dFt[+] [PATTERN]      list text search templates
  \dg[+]  [PATTERN]      list roles
  \di[S+] [PATTERN]      list indexes
  \dl                    list large objects, same as \lo_list
  \dL[S+] [PATTERN]      list procedural languages
  \dm[S+] [PATTERN]      list materialized views
  \dn[S+] [PATTERN]      list schemas
  \do[S]  [PATTERN]      list operators
  \dO[S+] [PATTERN]      list collations
  \dp     [PATTERN]      list table, view, and sequence access privileges
  \drds [PATRN1 [PATRN2]] list per-database role settings
  \ds[S+] [PATTERN]      list sequences
  \dt[S+] [PATTERN]      list tables
  \dT[S+] [PATTERN]      list data types
  \du[+]  [PATTERN]      list roles
  \dv[S+] [PATTERN]      list views
  \dE[S+] [PATTERN]      list foreign tables
  \dx[+]  [PATTERN]      list extensions
  \dy     [PATTERN]      list event triggers
  \l[+]   [PATTERN]      list databases
  \sf[+] FUNCNAME        show a function's definition
  \z      [PATTERN]      same as \dp

Formatting
  \a                     toggle between unaligned and aligned output mode
  \C [STRING]            set table title, or unset if none
  \f [STRING]            show or set field separator for unaligned query output
  \H                     toggle HTML output mode (currently off)
  \pset NAME [VALUE]     set table output option
                         (NAME := {format|border|expanded|fieldsep|fieldsep_zero|footer|null|
                         numericlocale|recordsep|recordsep_zero|tuples_only|title|tableattr|pager})
  \t [on|off]            show only rows (currently off)
  \T [STRING]            set HTML <table> tag attributes, or unset if none
  \x [on|off|auto]       toggle expanded output (currently off)

Connection
  \c[onnect] {[DBNAME|- USER|- HOST|- PORT|-] | conninfo}
                         connect to new database (currently "studentdb")
  \encoding [ENCODING]   show or set client encoding
  \password [USERNAME]   securely change the password for a user
  \conninfo              display information about current connection

Operating System
  \cd [DIR]              change the current working directory
  \setenv NAME [VALUE]   set or unset environment variable
  \timing [on|off]       toggle timing of commands (currently off)
  \! [COMMAND]           execute command in shell or start interactive shell

Variables
  \prompt [TEXT] NAME    prompt user to set internal variable
  \set [NAME [VALUE]]    set internal variable, or list all if no parameters
  \unset NAME            unset (delete) internal variable

Large Objects
  \lo_export LOBOID FILE
  \lo_import FILE [COMMENT]
  \lo_list
\lo_unlink LOBOID large object operations |
Have fun exploring PostgreSQL. You can click here to learn how to setup your own tablespace, database, and user. As always, I hope this helps those looking to discover how to install and use PostgreSQL.
