Archive for the ‘Database’ Category
PostgreSQL+PowerShell
This post explains and demonstrates how to install, configure, and use the psqlODBC (32-bit) and psqlODBC (64-bit) libraries to connect your Microsoft PowerShell programs to a locally installed PostgreSQL 14 database. It relies on you previously installing and configuring a PostgreSQL 14 database. This post is a step-by-step guide to installing PostgreSQL 14 on Windows 10, and this post shows you how to configure the PostgreSQL 14 database.
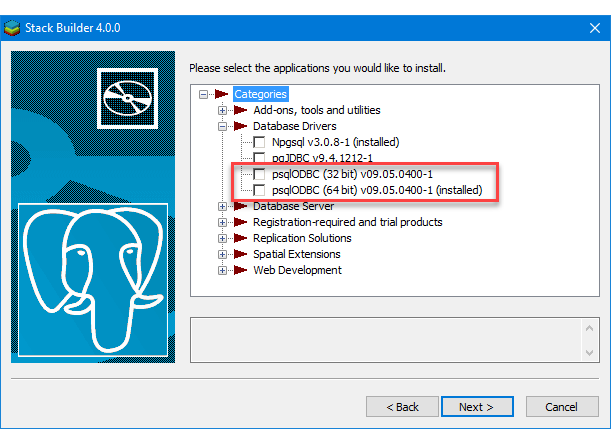
If you didn’t follow the instructions to get the psqlODBC libraries in the installation blog post, you will need to get those libraries, as qualified by Microsoft with the PostgreSQL Stack Builder.
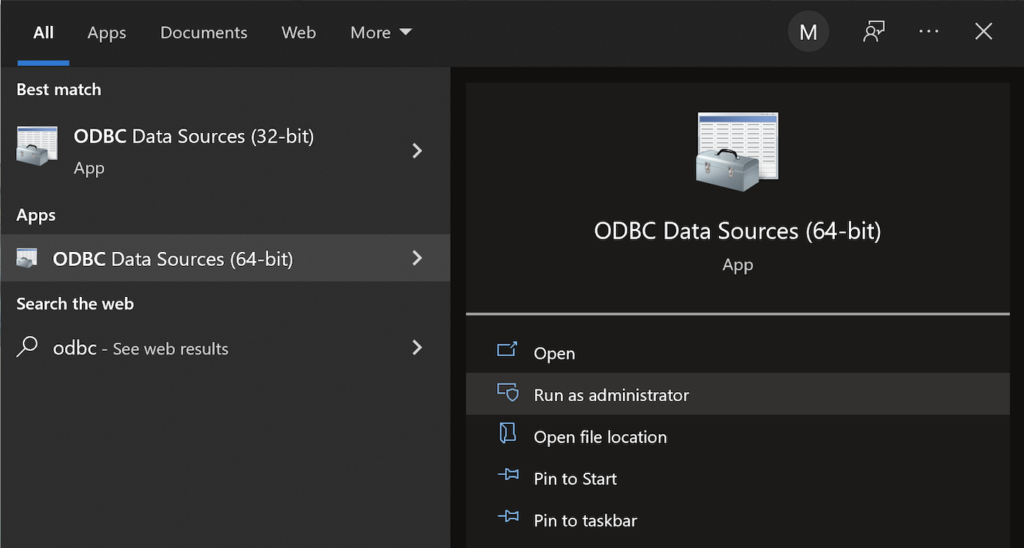
You can launch PostgreSQL Stack Builder after the install by clicking on Start -> PostgreSQL -> Stack Builder. Choose to enable Stack Builder to change your system and install the psqlODBC libraries. After you’ve installed the psqlODBC library, use Windows search field to find the ODBC Data Sources dialog and run it as administrator.
There are six steps to setup, test, and save your ODBC Data Source Name (DSN). You can click on the images on the right to launch them in a more readable format or simply read the instructions.
PostgreSQL ODBC Setup Steps
- The Microsoft DSN (Data Source Name) dialog automatically elects the User DSN tab. Click on the System DSN tab.
- The view under the System DSN is exactly like the User DSN tab. Click the Add button to start the workflow.
- The Create New Data Source dialog requires you select the PostgreSQL ODBC Driver(UNICODE) option from the list and click the Finish button to proceed.
- The PostgreSQL Unicode ODBC Driver Setup dialog should complete the prompts as follows below and consistent with the PostgreSQL 14 Configuration blog. If you opt for localhost as the server value because you have a DCHP IP address, make sure you’ve configured your hosts file in the C:\Windows\System32\drivers\etc directory. You should enter the following two lines in the hosts file:
127.0.0.1  localhost
::1        localhost
These are the string values you should enter in the PostgreSQL Unicode ODBC Driver Setup dialog:
Data Source: PostgreSQL35W
Database:    videodb
Server:      localhost
User Name:   student
Description: PostgreSQL
SSL Mode:    disable
Port:        5432
Password:    student
After you complete the entry, click the Test button.
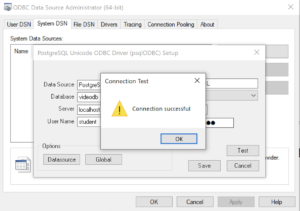
- The Connection Test dialog should return a “Connection successful” message. Click the OK button to continue.
- The ODBC Data Source Administrator dialog should show the PostgreSQL35W System Data Source. Click the OK button to continue.
After you have created the System PostgreSQL ODBC Setup, it’s time to build a PowerShell Cmdlet (or, Commandlet). Some documentation and blog notes incorrectly suggest you need to write a connection string with a UID and password, like:
$ConnectionString = 'DSN=PostgreSQL35W;Uid=student;Pwd=student' |
The UID and password is unnecessary in the connection string. As a rule, the UID and password are only necessary in the ODBC DSN, like:
$ConnectionString = 'DSN=PostgreSQL35W' |
You can create a readcursor.ps1 Cmdlet like the following:
1 2 3 4 5 6 7 8 9 10 11 12 13 14 15 16 17 18 19 20 21 22 23 24 25 26 27 28 29 30 31 32 33 34 35 36 37 | # Define a ODBC DSN connection string. $ConnectionString = 'DSN=PostgreSQL35W' # Define a MySQL Command Object for a non-query. $Connection = New-Object System.Data.Odbc.OdbcConnection; $Connection.ConnectionString = $ConnectionString # Attempt connection. try { $Connection.Open() # Create a SQL command. $Command = $Connection.CreateCommand(); $Command.CommandText = "SELECT current_database();"; # Attempt to read SQL command. try { $Reader = $Command.ExecuteReader(); # Read while records are found. while ($Reader.Read()) { Write-Host "Current Database [" $Reader[0] "]"} } catch { Write-Error "Message: $($_.Exception.Message)" Write-Error "StackTrace: $($_.Exception.StackTrace)" Write-Error "LoaderExceptions: $($_.Exception.LoaderExceptions)" } finally { # Close the reader. $Reader.Close() } } catch { Write-Error "Message: $($_.Exception.Message)" Write-Error "StackTrace: $($_.Exception.StackTrace)" Write-Error "LoaderExceptions: $($_.Exception.LoaderExceptions)" } finally { $Connection.Close() } |
Line 14 assigns a SQL query that returns a single row with one column as the CommandText of a Command object. Line 22 reads the zero position of a row or record set with only one column.
You call the readcursor.ps1 Cmdlet with the following syntax:
powershell .\readcursor.ps1 |
It returns:
Current Database [ videodb ] |
A more realistic way to write a query would return multiple rows with a set of two or more columns. The following program queries a table with multiple rows of two columns, but the program logic can manage any number of columns.
# Define a ODBC DSN connection string. $ConnectionString = 'DSN=PostgreSQL35W' # Define a MySQL Command Object for a non-query. $Connection = New-Object System.Data.Odbc.OdbcConnection; $Connection.ConnectionString = $ConnectionString # Attempt connection. try { $Connection.Open() # Create a SQL command. $Command = $Connection.CreateCommand(); $Command.CommandText = "SELECT last_name, first_name FROM contact ORDER BY 1, 2"; # Attempt to read SQL command. try { $row = $Command.ExecuteReader(); # Read while records are found. while ($row.Read()) { # Initialize output for each row. $output = "" # Navigate across all columns (only two in this example). for ($column = 0; $column -lt $row.FieldCount; $column += 1) { # Mechanic for comma-delimit between last and first name. if ($output.length -eq 0) { $output += $row[$column] } else { $output += ", " + $row[$column] } } # Write the output from the database. Write-Host $output } } catch { Write-Error "Message: $($_.Exception.Message)" Write-Error "StackTrace: $($_.Exception.StackTrace)" Write-Error "LoaderExceptions: $($_.Exception.LoaderExceptions)" } finally { # Close the reader. $row.Close() } } catch { Write-Error "Message: $($_.Exception.Message)" Write-Error "StackTrace: $($_.Exception.StackTrace)" Write-Error "LoaderExceptions: $($_.Exception.LoaderExceptions)" } finally { $Connection.Close() } |
You call the readcontact.ps1 Cmdlet with the following syntax:
powershell .\readcontact.ps1 |
It returns an ordered set of comma-separated values, like
Clinton, Goeffrey Gretelz, Simon Moss, Wendy Royal, Elizabeth Smith, Brian Sweeney, Ian Sweeney, Matthew Sweeney, Meaghan Vizquel, Doreen Vizquel, Oscar Winn, Brian Winn, Randi |
As always, I hope this helps those looking for a complete concrete example of how to make Microsoft Powershell connect and query results from a PostgreSQL database.
PostgreSQL Arrays
If you’re wondering about this post, it shows the basic array of a set of integers and strings before showing you how to create nested tables of data in PostgreSQL. By the way, they’re not called nested tables in PostgreSQL, like they are in Oracle but perform like their Oracle cousins.
Let’s create a table with an auto-incrementing column and two arrays, one array of integers and another of strings:
-- Conditionally drop the demo table. DROP TABLE IF EXISTS demo; -- Create the test table. CREATE TABLE demo ( demo_id serial , demo_number integer[5] , demo_string varchar(5)[7]); |
You can insert test values like this:
INSERT INTO demo (demo_number, demo_string) VALUES ( array[1,2,3,4,5] , array['One','Two','Three','Four','Five','Six','Seven']); |
Then, you can query them with this unnest function, like:
SELECT unnest(demo_number) AS numbers , unnest(demo_string) AS strings FROM demo; |
It returns:
 numbers | strings
---------+---------
 1       | One
 2       | Two
 3       | Three
 4       | Four
 5       | Five
         | Six
         | Seven
(7 rows) |
You may note that the two arrays are asymmetrical. It only becomes an issue when you navigate the result in a PL/pgSQL cursor or imperative programming language, like Python.
Now, let’s do something more interesting like work with a composite user-defined type, like the player structure. You would create the composite user-defined type with this syntax:
-- Conditionally drop the player type. DROP TYPE IF EXISTS player; -- Create the player type. CREATE TYPE player AS ( player_no integer , player_name varchar(24) , player_position varchar(14) , ab integer , r integer , h integer , bb integer , rbi integer ); |
You can create a world_series table that include a players column that uses an array of player type, like
-- Conditionally drop the world_series table. DROP TABLE IF EXISTS world_series; -- Create the player type. CREATE TABLE world_series ( world_series_id serial , team varchar(24) , players player[30] , game_no integer , year integer ); |
If you’re familiar with the Oracle Database, you’d have to specify a tested table in the syntax. Fortunately, PostgreSQL doesn’t require that.
Insert two rows with the following statement:
INSERT INTO world_series ( team , players , game_no , year ) VALUES ('San Francisco Giants' , array[(24,'Willie Mayes','Center Fielder',5,0,1,0,0)::player ,(5,'Tom Haller','Catcher',4,1,2,0,2)::player] , 4 , 1962 ); |
You can append to the array with the following syntax. A former student and I have a disagreement on whether this is shown in the PostgreSQL 8.15.4 Modifying Array documentation. I believe it can be inferred from the document and he doesn’t believe so. Anyway, here’s how you add an element to an existing array in a table with the UPDATE statement:
UPDATE world_series SET players = (SELECT array_append(players,(7,'Henry Kuenn','Right Fielder',3,0,0,1,0)::player) FROM world_series) WHERE team = 'San Francisco Giants' AND year = 1962 AND game_no = 4; |
Like Oracle’s nested tables, PostgreSQL’s arrays of composite user-defined types requires writing a PL/pgSQL function. I’ll try to add one of those shortly in another blog entry to show you how to edit and replace entries in stored arrays of composite user-defined types.
You can query the unnested rows and get a return set like a Python tuple with the following query:
SELECT unnest(players) AS player_list FROM world_series WHERE team = 'San Francisco Giants' AND year = 1962 AND game_no = 4; |
It returns the three rows from the players array:
player_list ---------------------------------------------- (24,"Willie Mayes","Center Field",5,0,1,0,0) (5,"Tom Haller",Catcher,4,1,2,0,2) (7,"Henry Kuenn","Right Fielde",3,0,0,1,0) (3 rows) |
It returns the data set in entry-order. If we step outside of the standard 8.15 Arrays PostgreSQL Documentation, you can do much more with arrays (or nested tables). The balance of this example demonstrates some new syntax that helps you achieve constructive outcomes in PostgreSQL.
You can use a Common Table Expression (CTE) to get the columnar display of the player composite user-defined type. This type of solution is beyond the standard , like:
WITH list AS (SELECT unnest(players) AS row_result FROM world_series WHERE team = 'San Francisco Giants' AND year = 1962 AND game_no = 4) SELECT (row_result).player_name , (row_result).player_no , (row_result).player_position FROM list; |
If you’re unfamiliar with accessing composite user-defined types, I wrote a post on that 7 years ago. You can find the older blog entry PostgreSQL Composites on my blog.
It returns only the three requested columns of the player composite user-defined type:
player_name | player_no | player_position --------------+-----------+----------------- Willie Mayes | 24 | Center Fielder Tom Haller | 5 | Catcher Henry Kuenn | 7 | Right Fielder (3 rows) |
You should note that the data is presented in an entry-ordered manner when unnested alone in the SELECT-list. That behavior changes when the SELECT-list includes non-array data.
The easiest way to display data from the non-array and array columns is to list them inside the SELECT-list of the CTE, like:
WITH list AS (SELECT game_no AS game , year , unnest(players) AS row_result FROM world_series WHERE team = 'San Francisco Giants' AND year = 1962 AND game_no = 4) SELECT game , year , (row_result).player_name , (row_result).player_no , (row_result).player_position FROM list; |
It returns an ordered set of unnested rows when you include non-array columns, like:
 game | year | player_name  | player_no | player_position
------+------+--------------+-----------+-----------------
    4 | 1962 | Henry Kuenn  |         7 | Right Fielder
    4 | 1962 | Tom Haller   |         5 | Catcher
    4 | 1962 | Willie Mayes |        24 | Center Fielder
(3 rows) |
While you can join the world_series table to the unnested array rows (returned as a derived table, its a bad idea. The mechanics to do it require you to return the primary key column in the same SELECT-list of the CTE. Then, you join the CTE list to the world_series table by using the world_series_id primary key.
However, there is no advantage to an inner join approach and it imposes unnecessary processing on the database server. The odd rationale that I heard when I noticed somebody was using a CTE to base-table join was: “That’s necessary so they could use column aliases for the non-array columns.” That’s not true because you can use the aliases inside the CTE, as shown above when game is an alias to the game_no column.
As always, I hope this helps those looking to solve a problem in PostgreSQL.
Setting SQL_MODE
In MySQL, the @@sql_mode parameter should generally use ONLY_FULL_GROUP_BY. If it doesn’t include it and you don’t have the ability to change the database parameters, you can use a MySQL PSM (Persistent Stored Module), like:
Create the set_full_group_by procedure:
1 2 3 4 5 6 7 8 9 10 11 12 13 14 15 16 17 18 19 20 21 22 23 24 25 26 27 | -- Drop procedure conditionally on whether it exists already. DROP PROCEDURE IF EXISTS set_full_group_by; -- Reset delimter to allow semicolons to terminate statements. DELIMITER $$ -- Create a procedure to verify and set connection parameter. CREATE PROCEDURE set_full_group_by() LANGUAGE SQL NOT DETERMINISTIC SQL SECURITY DEFINER COMMENT 'Set connection parameter when not set.' BEGIN /* Check whether full group by is set in the connection and if unset, set it in the scope of the connection. */ IF NOT EXISTS (SELECT NULL WHERE REGEXP_LIKE(@@SQL_MODE,'ONLY_FULL_GROUP_BY')) THEN SET SQL_MODE=(SELECT CONCAT(@@sql_mode,',ONLY_FULL_GROUP_BY')); END IF; END; $$ -- Reset the default delimiter. DELIMITER ; |
Run the following SQL command before you attempt the exercises in the same session scope:
CALL set_full_group_by(); |
As always, I hope this helps those looking for a solution. Naturally, you can simply use the SET command on line #21 above.
Python on PostgreSQL
The ODBC library you use when connecting Python to PostgreSQL is the psycopg2 Python library. This blog post will show use how to use it in Python and install it on your Fedora Linux installation. It leverages a videodb database that I show you how to build in this earlier post on configuring PostgreSQL 14.
You would import psycopg2 as follows in your Python code:
import psycopg2 |
Unfortunately, that only works on Linux servers when you’ve installed the library. That library isn’t installed with generic Python libraries. You get the following error when the psycopg2 library isn’t installed on your server.
Traceback (most recent call last):
  File "python_new_hire.sql", line 1, in <module>
    import psycopg2
ModuleNotFoundError: No module named 'psycopg2' |
You can install it on Fedora Linux with the following command:
yum install python3-psycopg2 |
It will install:
==================================================================================== Package Architecture Version Repository Size ==================================================================================== Installing: python3-psycopg2 x86_64 2.7.7-1.fc30 fedora 160 k Transaction Summary ==================================================================================== Install 1 Package Total download size: 160 k Installed size: 593 k Is this ok [y/N]: y Downloading Packages: python3-psycopg2-2.7.7-1.fc30.x86_64.rpm 364 kB/s | 160 kB 00:00 ------------------------------------------------------------------------------------ Total 167 kB/s | 160 kB 00:00 Running transaction check Transaction check succeeded. Running transaction test Transaction test succeeded. Running transaction Preparing : 1/1 Installing : python3-psycopg2-2.7.7-1.fc30.x86_64 1/1 Running scriptlet: python3-psycopg2-2.7.7-1.fc30.x86_64 1/1 Verifying : python3-psycopg2-2.7.7-1.fc30.x86_64 1/1 Installed: python3-psycopg2-2.7.7-1.fc30.x86_64 Complete! |
Here’s a quick test case that you can run in PostgreSQL and Python to test all the pieces. The first SQL script creates a new_hire table and inserts two rows, and the Python program queries data from the new_hire table.
The new_hire.sql file creates the new_hire table and inserts two rows:
-- Environment settings for the script. SET SESSION "videodb.table_name" = 'new_hire'; SET CLIENT_MIN_MESSAGES TO ERROR; -- Verify table name. SELECT current_setting('videodb.table_name'); -- ------------------------------------------------------------------ -- Conditionally drop table. -- ------------------------------------------------------------------ DROP TABLE IF EXISTS new_hire CASCADE; -- ------------------------------------------------------------------ -- Create table. -- ------------------------------------------------------------------- CREATE TABLE new_hire ( new_hire_id SERIAL , first_name VARCHAR(20) NOT NULL , middle_name VARCHAR(20) , last_name VARCHAR(20) NOT NULL , hire_date TIMESTAMP WITH TIME ZONE NOT NULL DEFAULT CURRENT_TIMESTAMP , PRIMARY KEY (new_hire_id)); -- Alter the sequence by restarting it at 1001. ALTER SEQUENCE new_hire_new_hire_id_seq RESTART WITH 1001; -- Display the table organization. SELECT tc.table_catalog || '.' || tc.constraint_name AS constraint_name , tc.table_catalog || '.' || tc.table_name AS table_name , kcu.column_name , ccu.table_catalog || '.' || ccu.table_name AS foreign_table_name , ccu.column_name AS foreign_column_name FROM information_schema.table_constraints AS tc JOIN information_schema.key_column_usage AS kcu ON tc.constraint_name = kcu.constraint_name AND tc.table_schema = kcu.table_schema JOIN information_schema.constraint_column_usage AS ccu ON ccu.constraint_name = tc.constraint_name AND ccu.table_schema = tc.table_schema WHERE tc.constraint_type = 'FOREIGN KEY' AND tc.table_name = current_setting('videodb.table_name') ORDER BY 1; SELECT c1.table_name , c1.ordinal_position , c1.column_name , CASE WHEN c1.is_nullable = 'NO' AND c2.column_name IS NOT NULL THEN 'PRIMARY KEY' WHEN c1.is_nullable = 'NO' AND c2.column_name IS NULL THEN 'NOT NULL' END AS is_nullable , CASE WHEN data_type = 'character varying' THEN data_type||'('||character_maximum_length||')' WHEN data_type = 'numeric' THEN CASE WHEN numeric_scale != 0 AND numeric_scale IS NOT NULL THEN data_type||'('||numeric_precision||','||numeric_scale||')' ELSE data_type||'('||numeric_precision||')' END ELSE data_type END AS data_type FROM information_schema.columns c1 LEFT JOIN (SELECT trim(regexp_matches(column_default,current_setting('videodb.table_name'))::text,'{}')||'_id' column_name FROM information_schema.columns) c2 ON c1.column_name = c2.column_name WHERE c1.table_name = current_setting('videodb.table_name') ORDER BY c1.ordinal_position; -- Display primary key and unique constraints. SELECT constraint_name , lower(constraint_type) AS constraint_type FROM information_schema.table_constraints WHERE table_name = current_setting('videodb.table_name') AND constraint_type IN ('PRIMARY KEY','UNIQUE'); -- Insert two test records. INSERT INTO new_hire ( first_name, middle_name, last_name, hire_date ) VALUES ('Malcolm','Jacob','Lewis','2018-2-14') ,('Henry',null,'Chabot','1990-07-31'); |
You can put it into a local directory, connect as the student user to a videodb database, and run the following command (or any database you’ve created).
\i new_hire.sql |
The new_hire.py file creates the new_hire table and inserts two rows:
# Import the PostgreSQL connector library. import psycopg2 try: # Open a connection to the database. connection = psycopg2.connect( user="student" , password="student" , port="5432" , dbname="videodb") # Open a cursor. cursor = connection.cursor() # Assign a static query. query = "SELECT new_hire_id, first_name, last_name " \ "FROM new_hire" # Parse and execute the query. cursor.execute(query) # Fetch all rows from a table. records = cursor.fetchall() # Read through and print the rows as tuples. for row in range(0, len(records)): print(records[row]) except (Exception, psycopg2.Error) as error : print("Error while fetching data from PostgreSQL", error) finally: # Close the database connection. if (connection): cursor.close() connection.close() |
You run it from the command line, like:
python3 ./new_hire.py |
It should print:
(1001, 'Malcolm', 'Lewis') (1002, 'Henry', 'Chabot') |
As always, I hope this helps those trying to sort out how to connect Python to PostgreSQL.
PostgreSQL CLI Error
Problems get reported to me all the time on installations for my students, this one was interesting. They got an error complaining about a missing libpq.so.5 library.
psql: /usr/pgsql-11/lib/libpq.so.5: no version information available (required by psql) psql: /usr/pgsql-11/lib/libpq.so.5: no version information available (required by psql) could not change directory to "/root": Permission denied psql (11.7, server 11.8) Type "help" for help. postgres=# |
It appeared as a mismatch of libraries but it’s not that. For reference, this was a Fedora instance. I ran the rpm utility:
rpm -qa | grep postgres |
It returned:
postgresql11-libs-11.8-1PGDG.f30.x86_64 postgresql-11.7-2.fc30.x86_64 postgresql-server-11.7-2.fc30.x86_64 |
Then, I had them run the rpm utility again looking for the Python driver for PostgreSQL:
rpm -qa | grep psycopg2 |
It returned:
python3-psycopg2-2.7.7-1.fc30.x86_64 |
Then, it was easy to explain. The Python psycopg2 library uses both PostgreSQL 11.7 and 11.8 dependent libraries and the libpq.so.5 library is missing version information. You must ignore the error, which is really only a warning message, when you want to work on Fedora, PostgreSQL 11, and Python 3.
PostgreSQL Tables
The most straightforward way to view the description of a PostgreSQL table is the \d command. For example, this lets you display an account_list table:
\d account_list |
Unfortunately, this shows you the table, indexes, and foreign key constraints. Often, you only want to see the list of columns in positional order. So, I wrote a little function to let me display only the table and columns.
There are a few techniques in the script that might seem new to some developers. For example, the data types of the return parameter values of a function that returns values from the data dictionary are specific to types used by the data dictionary. These specialized types are required because the SQL cursor gathers the information from the data dictionary in the information_schema, and most of these types can’t be cast as variable length strings.
A simple assumption that the data dictionary strings would implicitly cast to variable length strings is incorrect. That’s because while you can query them like VARCHAR variables they don’t cast to variable length string. If you wrote a wrapper function that returned VARCHAR variables, you would probably get a result like this when you call your function:
ERROR: structure of query does not match function result type DETAIL: Returned type information_schema.sql_identifier does not match expected type character varying in column 1. |
The “character varying” is another name for a VARCHAR data type. Some notes will advise you to fix this type of error by using the column name and a %TYPE. The %TYPE anchors the data type in the function’s parameter list to the actual data type of the data dictionary’s table. You would implement that suggestion with code like:
RETURNS TABLE ( table_schema      information_schema.columns.table_schema%TYPE
              , table_name        information_schema.columns.table_name%TYPE
              , ordinal_position  information_schema.columns.ordinal_position%TYPE
              , column_name       information_schema.columns.column_name%TYPE
              , data_type         information_schema.columns.data_type%TYPE
, is_nullable information_schema.columns.is_nullable%TYPE ) AS |
Unfortunately, your function would raise a NOTICE for every dynamically anchored column at runtime. The NOTICE messages would appear as follows for the describe_table function with anchored parameter values:
psql:describe_table.sql:34: NOTICE: type reference information_schema.columns.table_schema%TYPE converted to information_schema.sql_identifier psql:describe_table.sql:35: NOTICE: type reference information_schema.columns.table_name%TYPE converted to information_schema.sql_identifier psql:describe_table.sql:36: NOTICE: type reference information_schema.columns.ordinal_position%TYPE converted to information_schema.cardinal_number psql:describe_table.sql:37: NOTICE: type reference information_schema.columns.column_name%TYPE converted to information_schema.sql_identifier psql:describe_table.sql:38: NOTICE: type reference information_schema.columns.data_type%TYPE converted to information_schema.character_data psql:describe_table.sql:39: NOTICE: type reference information_schema.columns.is_nullable%TYPE converted to information_schema.yes_or_no |
As a rule, there’s a better solution when you know how to discover the underlying data types. You can discover the required data types with the following query of the pg_attribute table in the information_schema:
SELECT attname
,      atttypid::regtype
FROM   pg_attribute
WHERE  attrelid = 'information_schema.columns'::regclass
AND    attname IN ('table_schema','table_name','ordinal_position','column_name','data_type','is_nullable')
ORDER BY attnum; |
It returns:
attname | atttypid ------------------+------------------------------------ table_schema | information_schema.sql_identifier table_name | information_schema.sql_identifier ordinal_position | information_schema.cardinal_number column_name | information_schema.sql_identifier is_nullable | information_schema.yes_or_no data_type | information_schema.character_data (6 rows) |
Only the character_data type can be replaced with a VARCHAR data type, the others should be typed as shown above. Here’s the modified describe_table function.
CREATE OR REPLACE FUNCTION describe_table (table_name_in VARCHAR) RETURNS TABLE ( table_schema information_schema.sql_identifier , table_name information_schema.sql_identifier , ordinal_position information_schema.cardinal_number , column_name information_schema.sql_identifier , data_type VARCHAR , is_nullable information_schema.yes_or_no ) AS $$ BEGIN RETURN QUERY SELECT c.table_schema , c.table_name , c.ordinal_position , c.column_name , CASE WHEN c.character_maximum_length IS NOT NULL THEN CONCAT(c.data_type, '(', c.character_maximum_length, ')') ELSE CASE WHEN c.data_type NOT IN ('date','timestamp','timestamp with time zone') THEN CONCAT(c.data_type, '(', numeric_precision::text, ')') ELSE c.data_type END END AS modified_type , c.is_nullable FROM information_schema.columns c WHERE c.table_schema NOT IN ('information_schema', 'pg_catalog') AND c.table_name = table_name_in ORDER BY c.table_schema , c.table_name , c.ordinal_position; END; $$ LANGUAGE plpgsql; |
If you’re new to PL/pgSQL table functions, you can check my basic tutorial on table functions. You call the describe_table table function with the following syntax:
SELECT * FROM describe_table('account_list'); |
It returns:
table_schema | table_name | ordinal_position | column_name | data_type | is_nullable --------------+--------------+------------------+------------------+--------------------------+------------- public | account_list | 1 | account_list_id | integer(32) | NO public | account_list | 2 | account_number | character varying(10) | NO public | account_list | 3 | consumed_date | date | YES public | account_list | 4 | consumed_by | integer(32) | YES public | account_list | 5 | created_by | integer(32) | NO public | account_list | 6 | creation_date | timestamp with time zone | NO public | account_list | 7 | last_updated_by | integer(32) | NO public | account_list | 8 | last_update_date | timestamp with time zone | NO (8 rows) |
As always, I hope this helps those looking for a solution to functions that wrap the data dictionary and display table data from the PostgreSQL data dictionary.
PL/pgSQL Function
How to write an overloaded set of hello_world functions in PostgreSQL PL/pgSQL. The following code lets you write and test overloaded functions and the concepts of null, zero-length string, and string values.
-- Drop the overloaded functions. DROP FUNCTION IF EXISTS hello_world(), hello_world(whom VARCHAR); -- Create the function. CREATE FUNCTION hello_world() RETURNS text AS $$ DECLARE output VARCHAR(20); BEGIN /* Query the string into a local variable. */ SELECT 'Hello World!' INTO output; /* Return the output text variable. */ RETURN output; END $$ LANGUAGE plpgsql; -- Create the function. CREATE FUNCTION hello_world(whom VARCHAR) RETURNS text AS $$ DECLARE output VARCHAR(20); BEGIN /* Query the string into a local variable. */ IF whom IS NULL OR LENGTH(whom) = 0 THEN SELECT 'Hello World!' INTO output; ELSE SELECT CONCAT('Hello ', whom, '!') INTO output; END IF; /* Return the output text variable. */ RETURN output; END $$ LANGUAGE plpgsql; -- Call the function. SELECT hello_world(); SELECT hello_world(Null) AS output; SELECT hello_world('') AS output; SELECT hello_world('Harry') AS output; |
It should print:
    output
--------------
 Hello World!
(1 row)

    output
--------------
 Hello World!
(1 row)

    output
--------------
 Hello World!
(1 row)

    output
--------------
 Hello Harry!
(1 row) |
As always, I hope this helps those looking for the basics and how to solve problems.
PostgreSQL 14 Install
This post is a step-by-step install guide to PostgreSQL 14 on Windows 10. It sometimes makes me curious that folks want a summary of screen shots from a Microsoftw Software Installer (MSI) because they always appear to me as straightforward.
This walks you through installing PostgreSQL 14, EDS’s version of Apache, supplemental connection libraries, and pgAdmin4. You can find the post-installation steps in my earlier Configure PostgreSQL 14 post.
PostgreSQL Database 14 Installation Steps
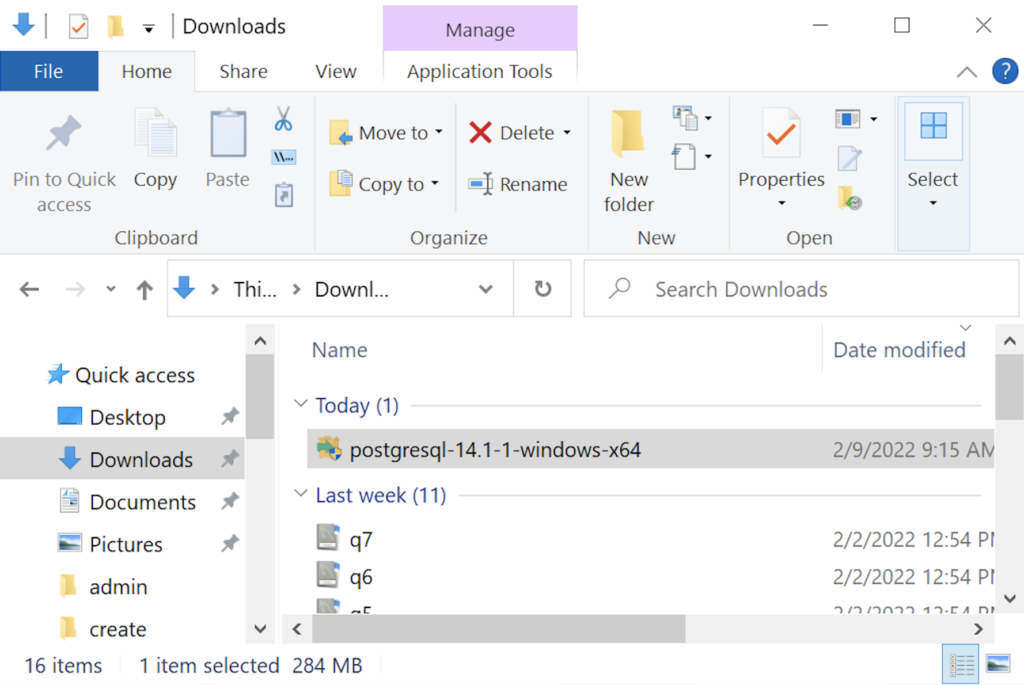
- The first thing you need to do is download the PostgreSQL MSI file, which should be in your C:\Users\username\Downloads directory. You can double-click on the MSI file.
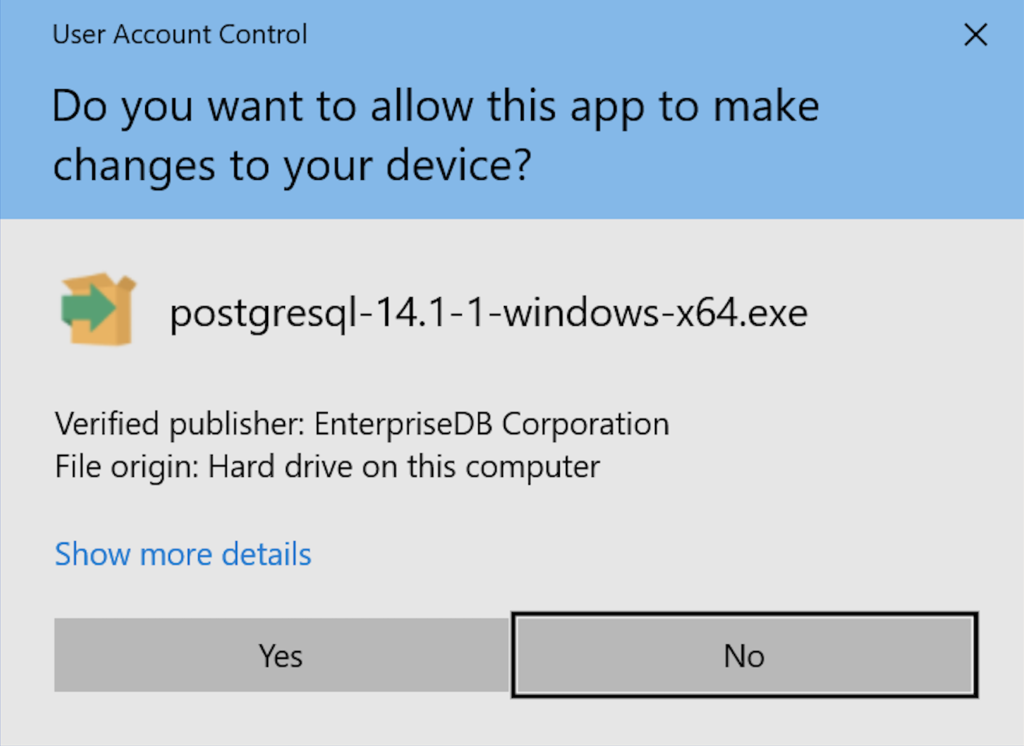
- After double-clicking on the MSI file, you are prompted by User Account Control to allow the PostgreSQL MSI to make changes to your device. Clicking the Yes button is the only way forward.
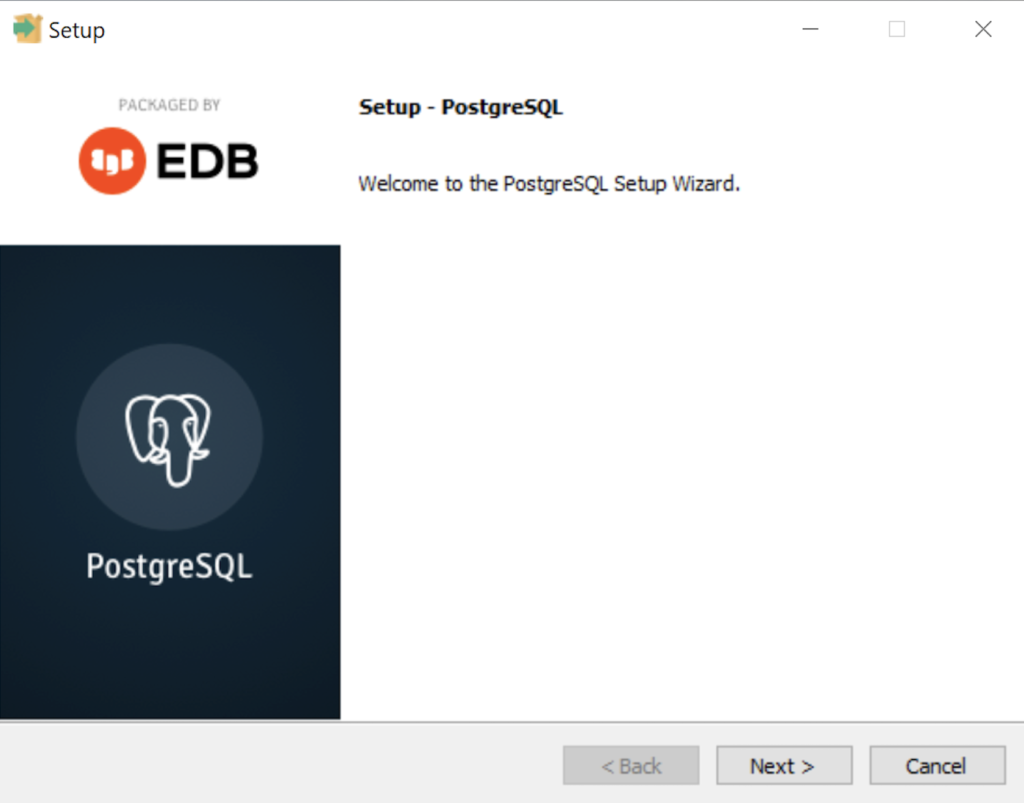
- The Setup – PostgreSQL dialog requires you click the Next button to proceed.
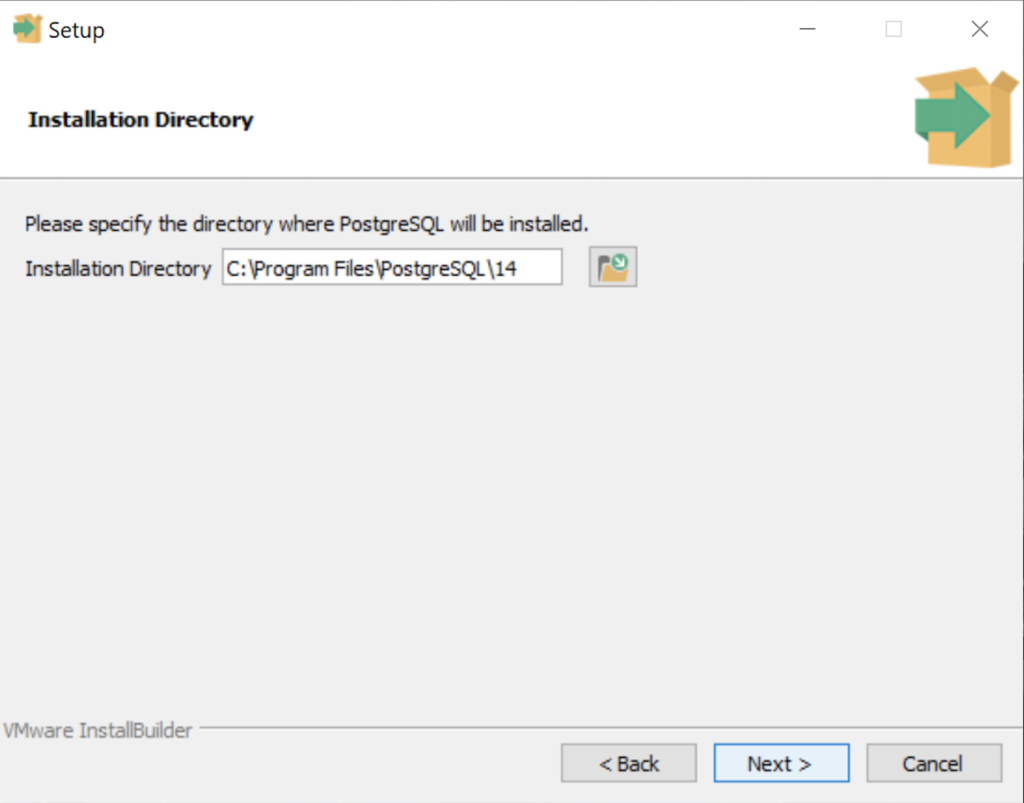
- The Installation Directory dialog prompts you for an installation directory. The default directory is C:\Program Files\PostgreSQL\14 and you should use it. Click the Next button to continue.
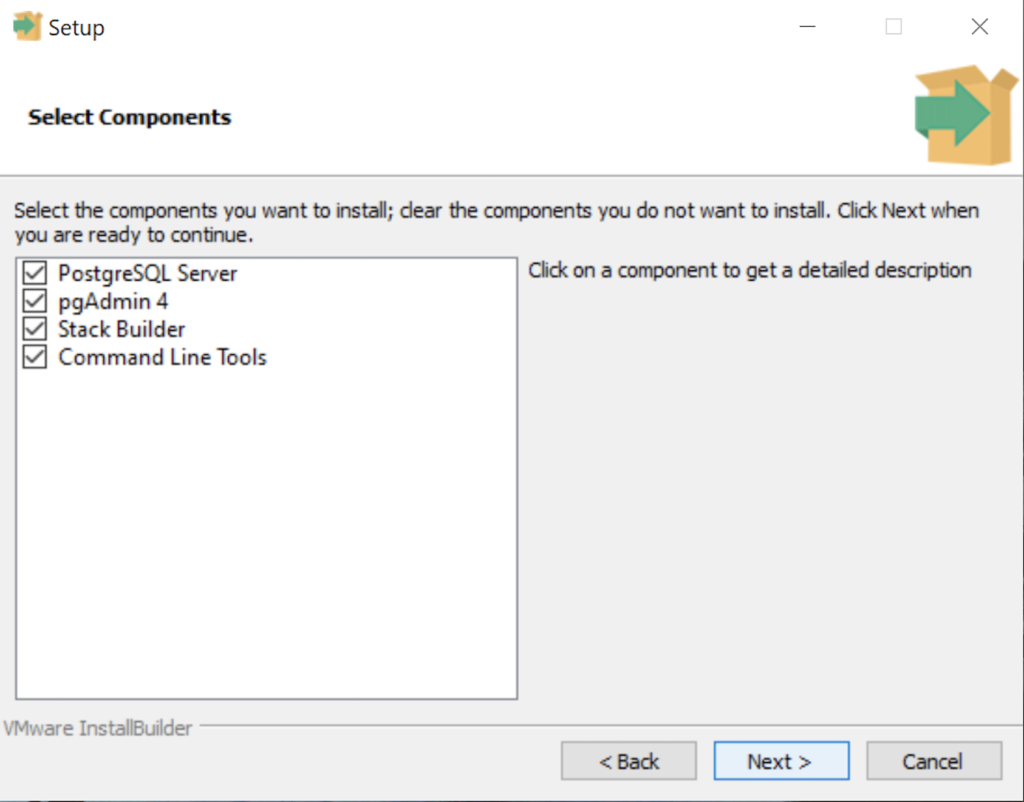
- The Select Components dialog prompts you to choose the products to install. You should choose all four – PostgreSQL Server, pgAdmin 4, Stack Builder, and Command Line Tools. Click the Next button to continue.
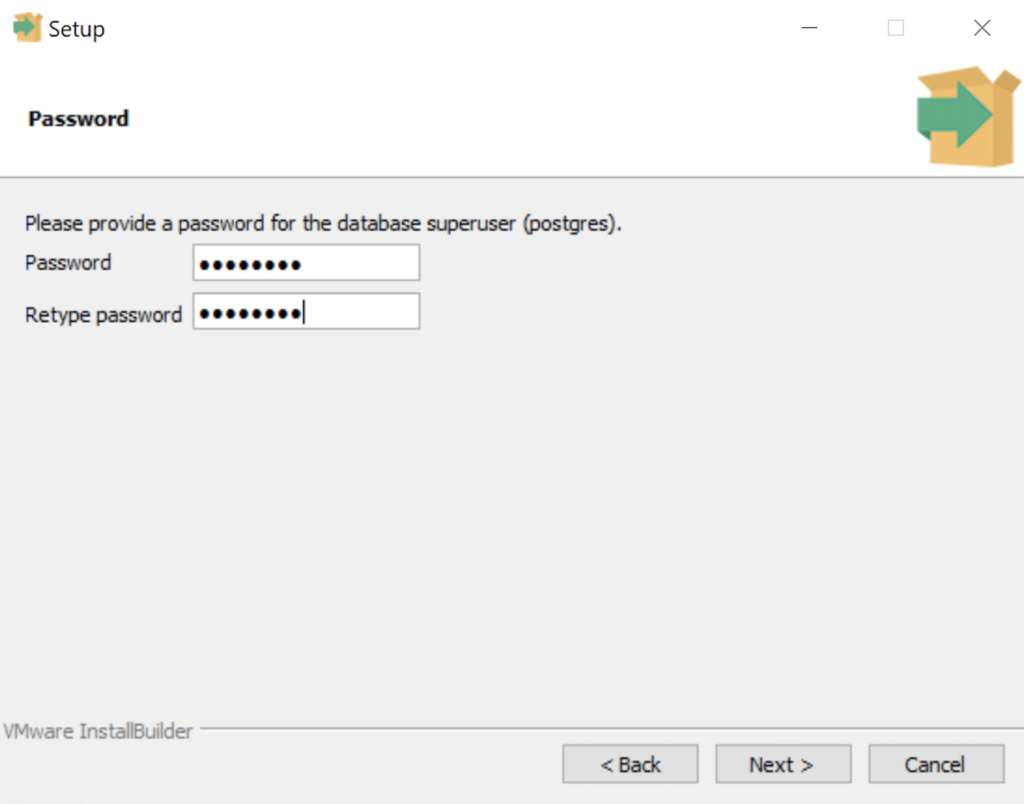
- The Password dialog prompts you for the PostgreSQL superuser password. In a development system for your local computer, you may want to use something straightforward like cangetin. Click the Next button to continue.
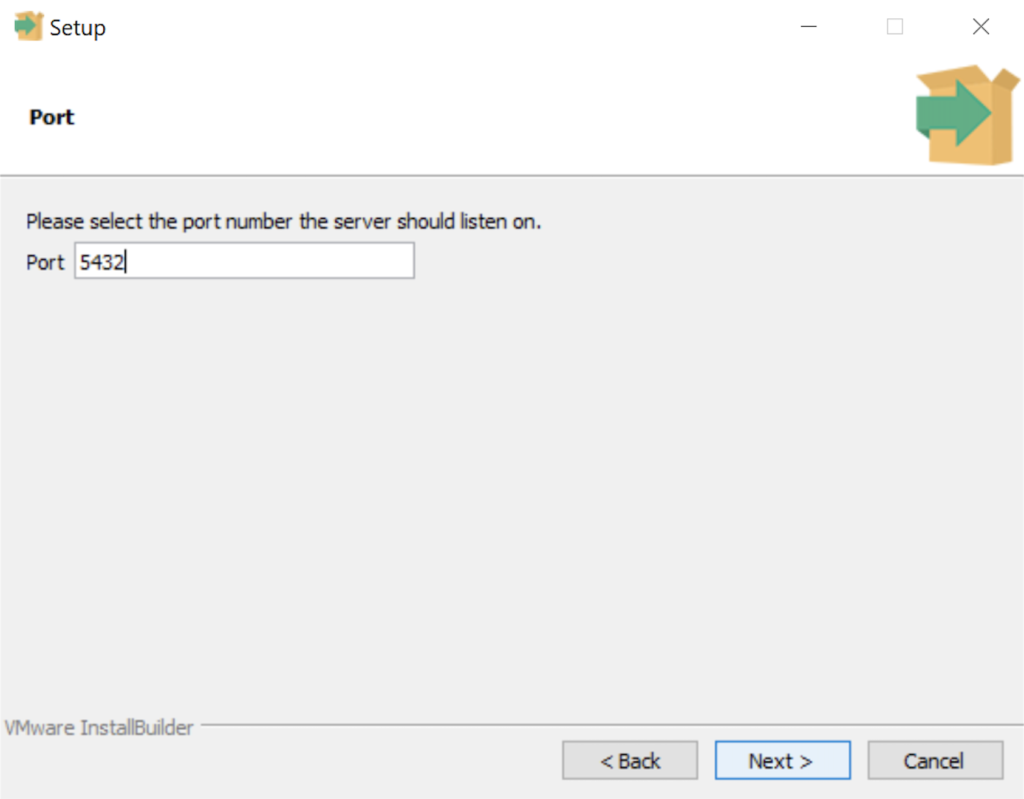
- The Setup dialog lets you select the port number for the PostgreSQL listener. Port 5432 is the standard port for a PostgreSQL database, and ports 5433 and 5434 are used sometimes. Click the Next button to continue.
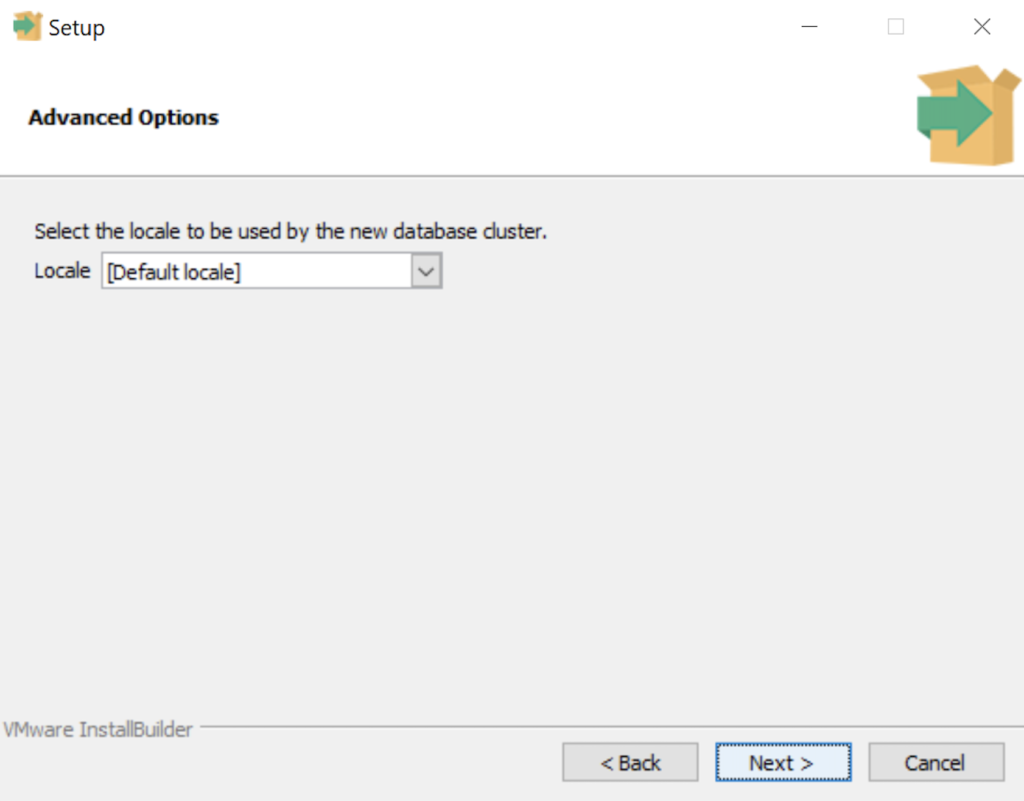
- The Advanced Options dialog lets you select the Locale for the database. As a rule for a development instance you should chose the Default locale. Click the Next button to continue.
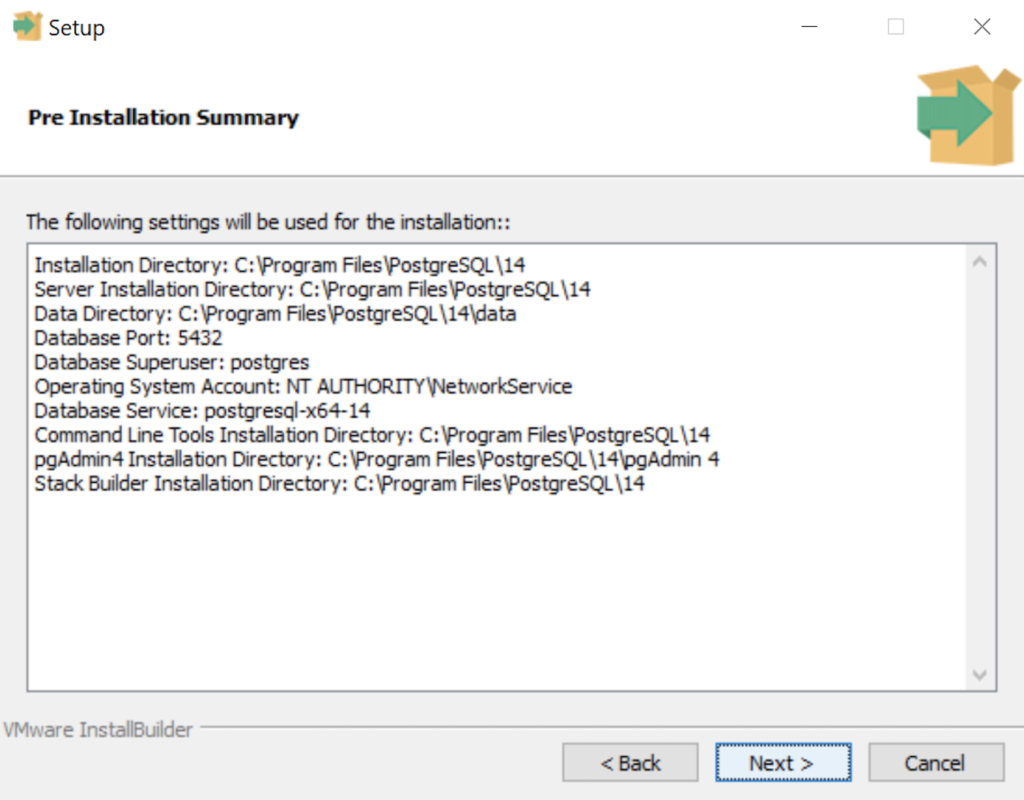
- The Pre Installation Summary dialog tells you what you’ve chosen to install. It gives you a chance to verify what you are installing. Click the Next button to continue.
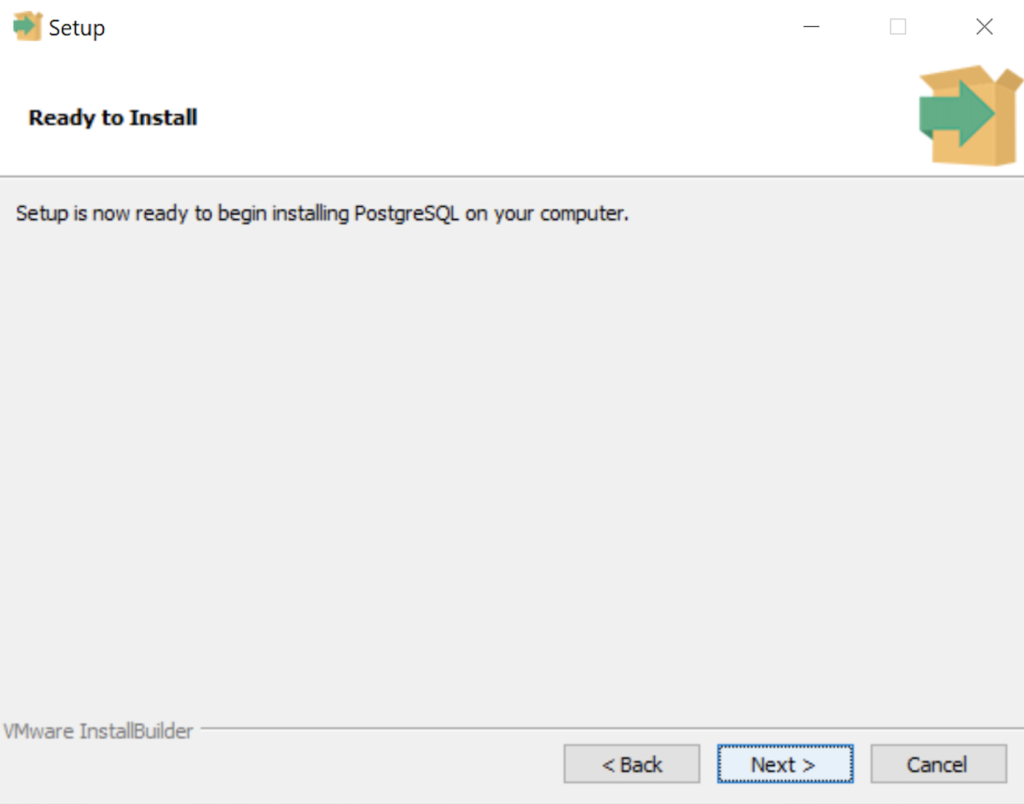
- The Ready to Install dialog lets you pause before you install the software. Click the Next button to continue.
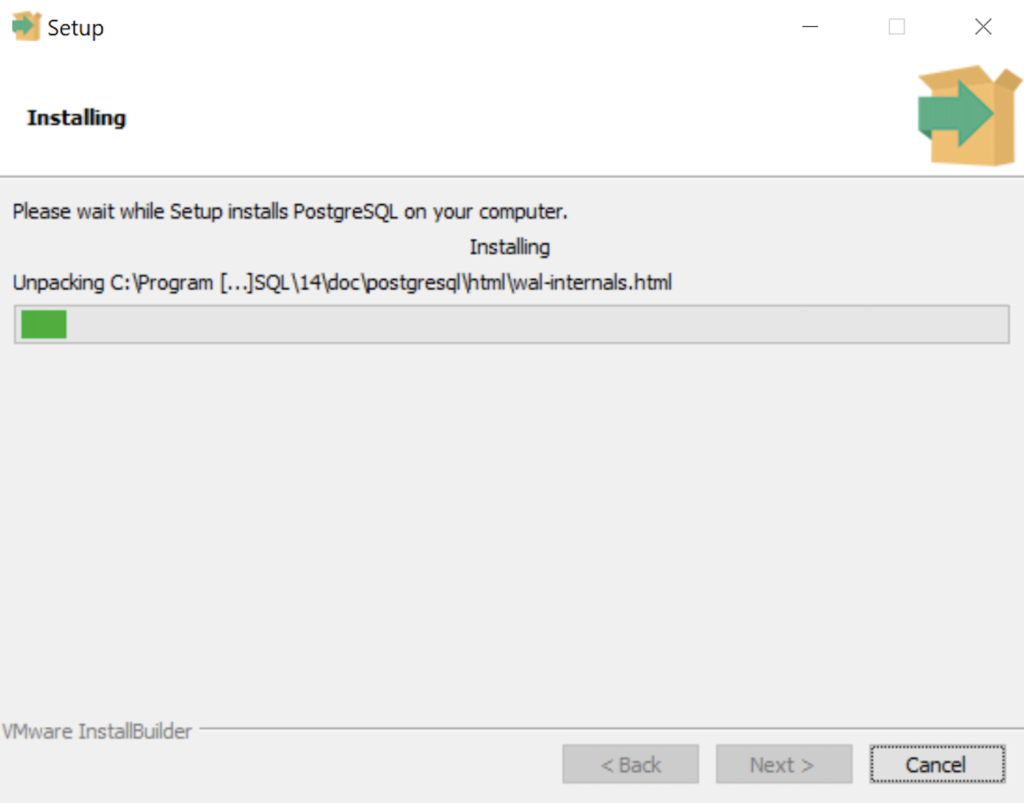
- The Installing dialog is a progress bar that will take several minutes to complete. When the progress bar completes, click the Next button to continue.
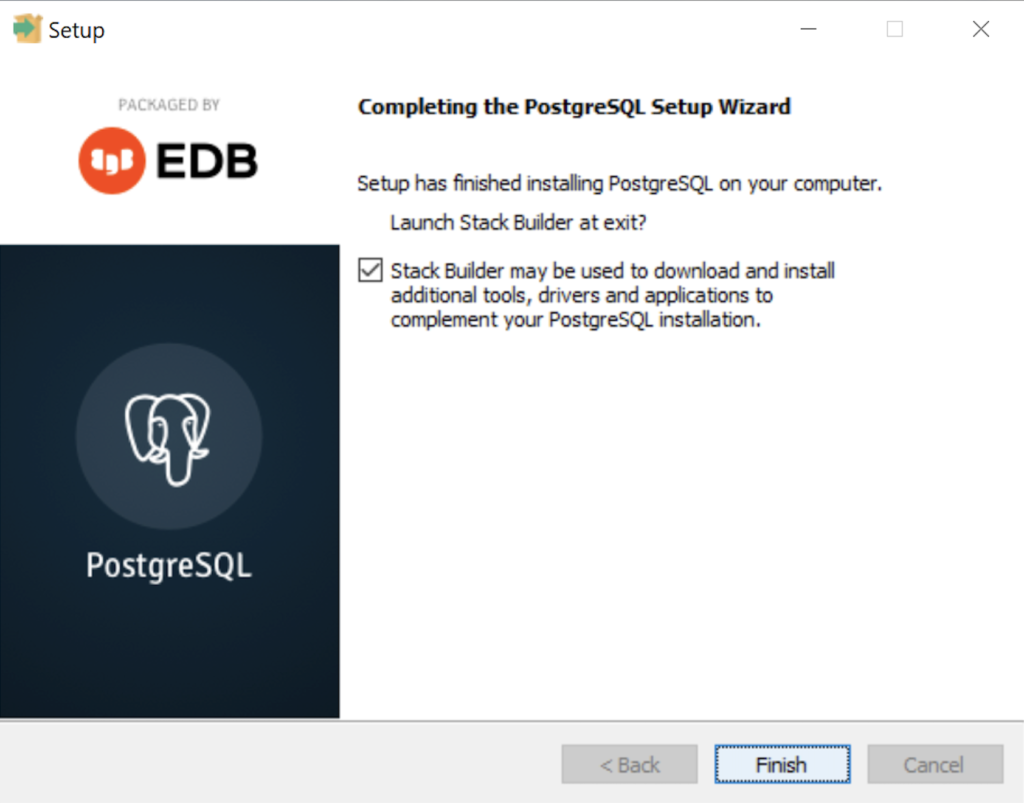
- The Completing the PostgreSQL Setup Wizard dialog tells you that the installation is complete. Click the Finish button to complete the PostgreSQL installation.
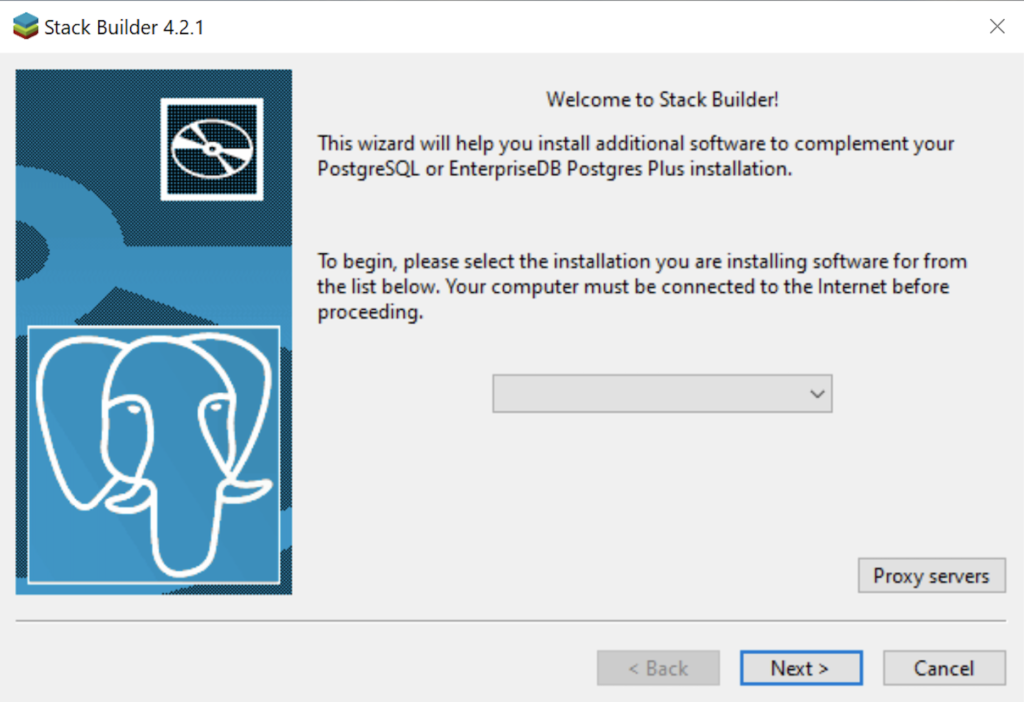
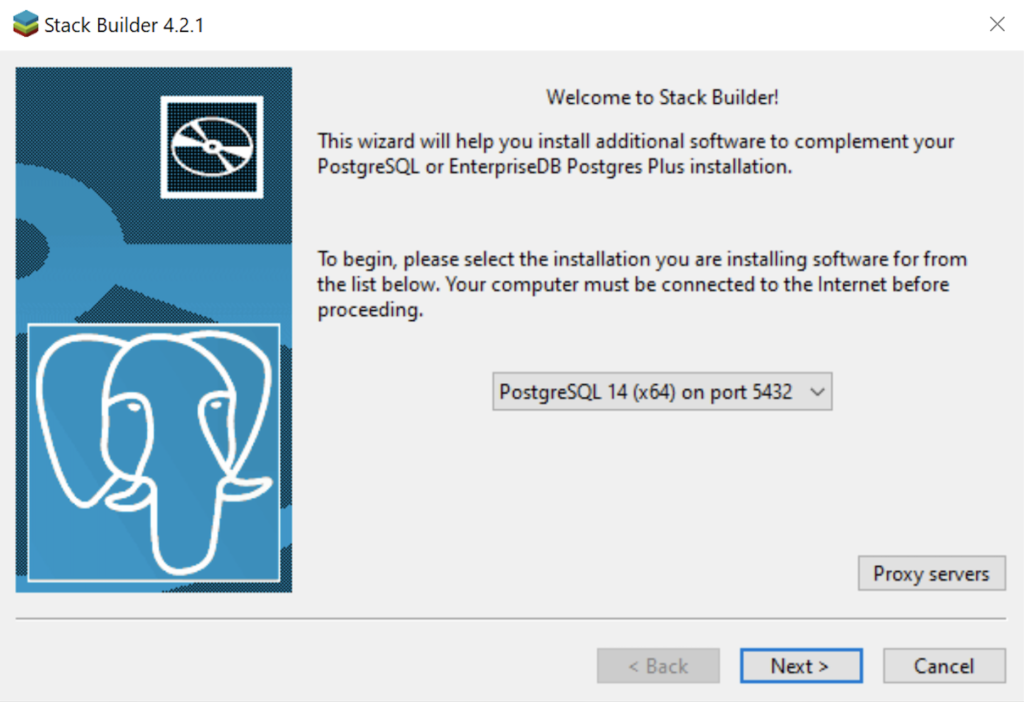
- The Welcome to Stack Builder! dialog lets you choose an installation from those on your computer to build a software stack. Click the drop down box to chose an installation.
- The second copy of the Welcome to Stack Builder! dialog shows the choice of the PostgreSQL installation you just completed. Click on the Next button to continue.
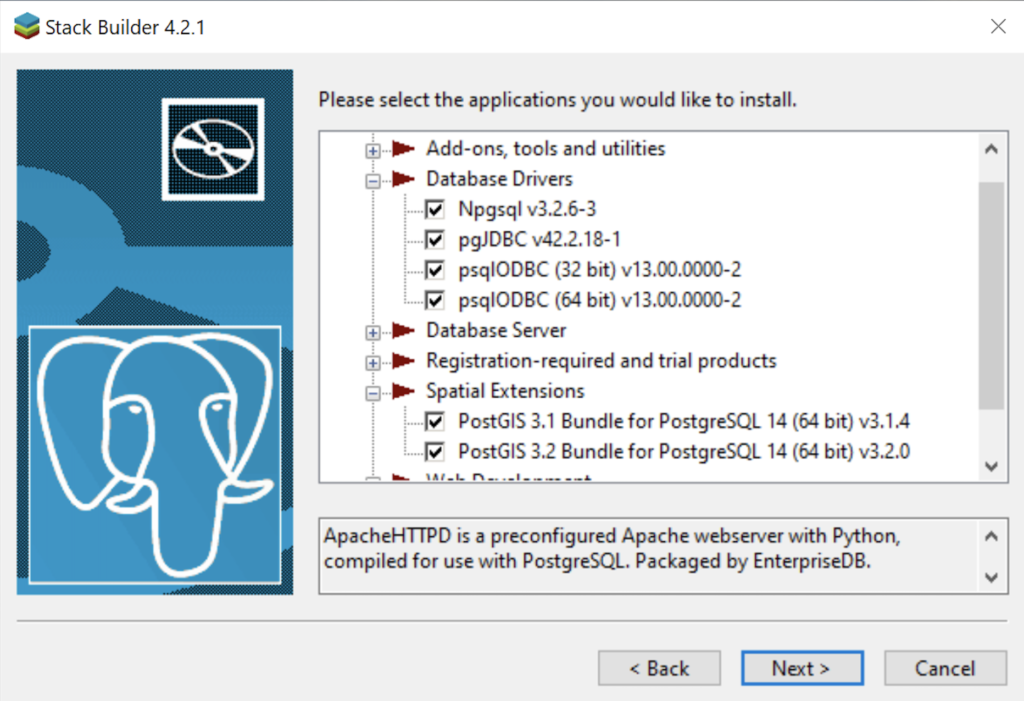
- The Stack Builder dialog prompts you to choose the products to install. You should choose all four database drivers – Npgsql, pgJDBC, psqlODBC, psqlODBC; and the PostGIS 3.1 and PostGIS 3.2 Bundles for PostgreSQL. Then, click the Next button to continue.
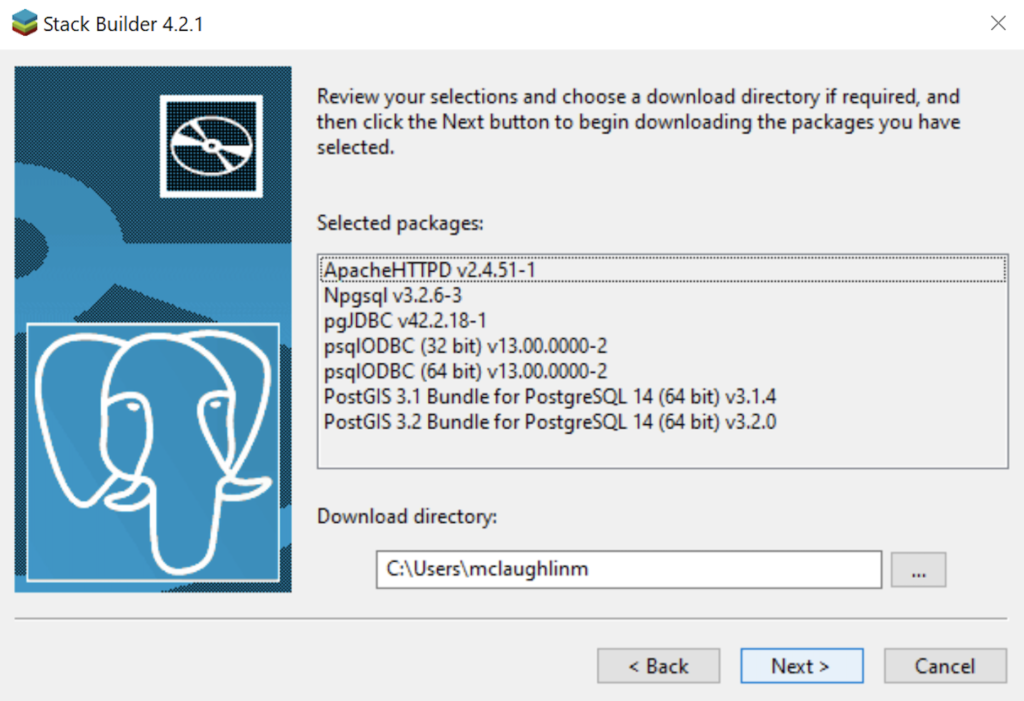
- The Stack Builder dialog shows you the products you will install. You should choose all four database drivers – Npgsql, pgJDBC, psqlODBC, psqlODBC; and the PostGIS 3.1 and PostGIS 3.2 Bundles for PostgreSQL. Click the Next button to continue.
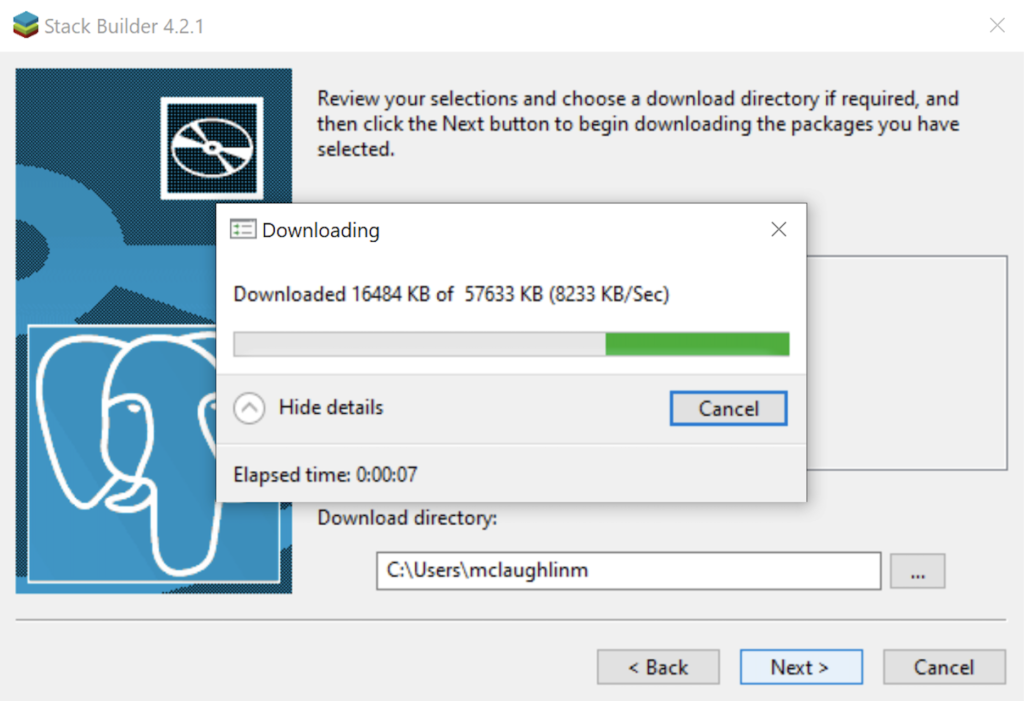
- The Stack Builder dialog shows a download progress bar subdialog, which may take some time to complete. The Stack Builder dialog’s Progress Bar automatically advances to the next dialog box.
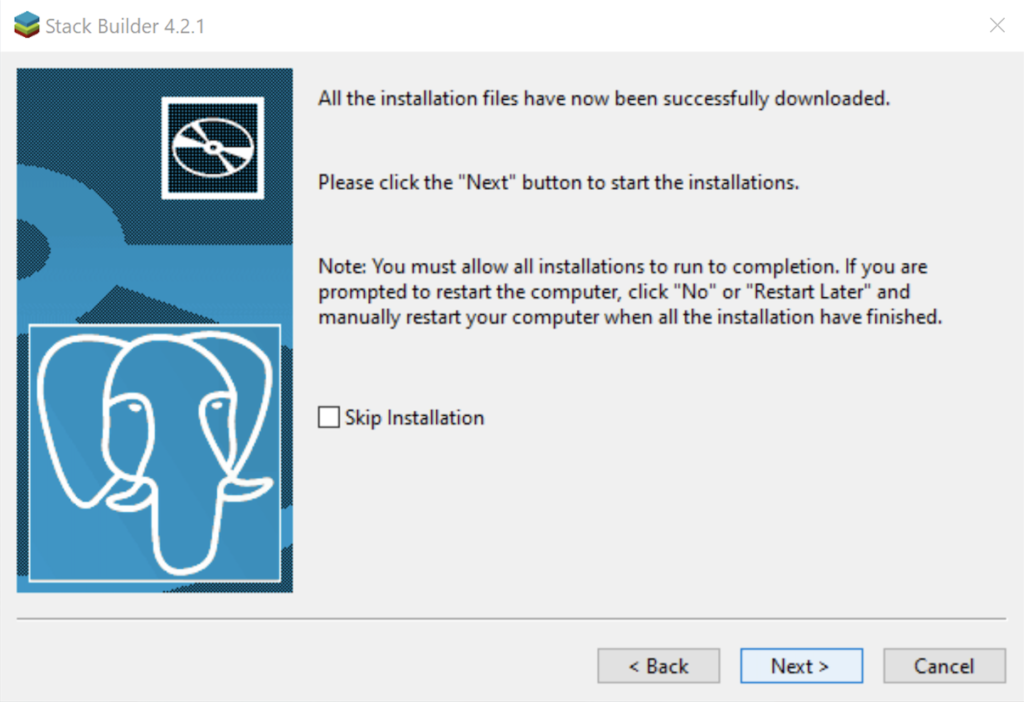
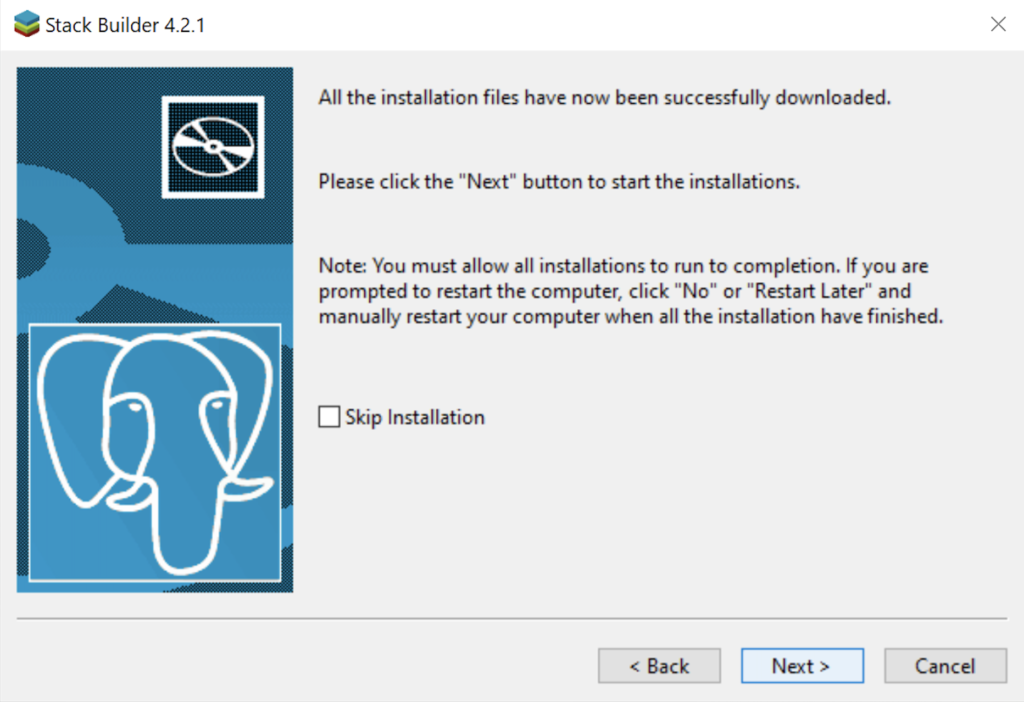
- The Stack Builder dialog tells you the products you downloaded. Click the Next button to continue the developer stack.
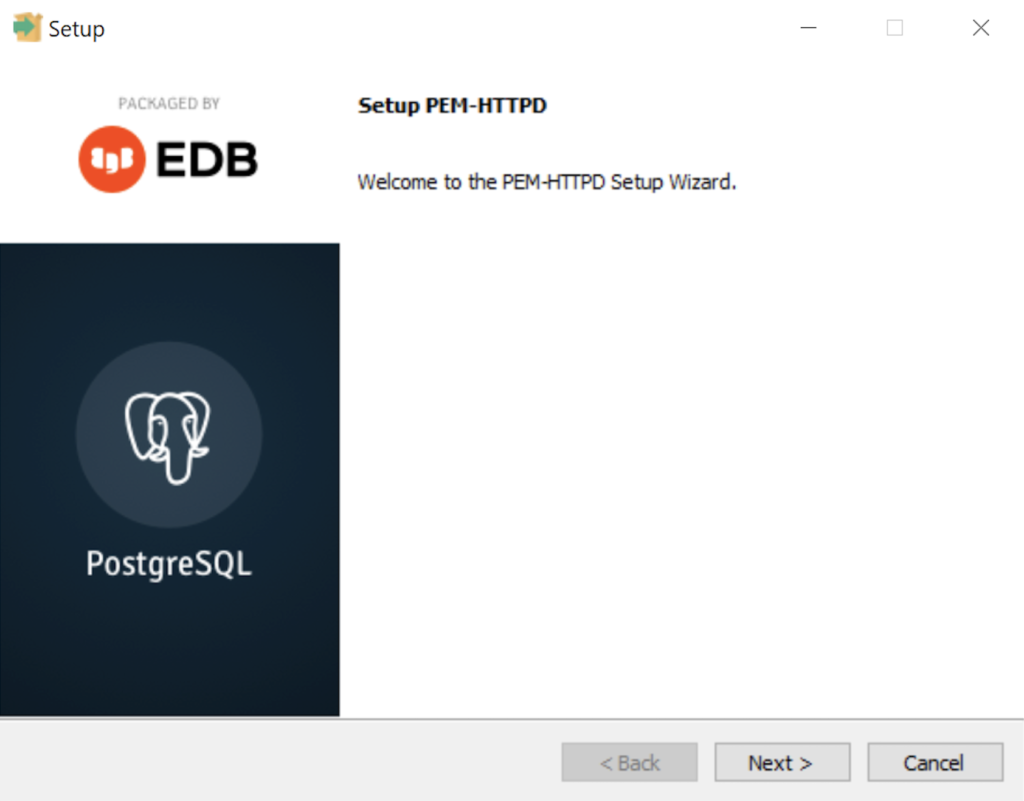
- The Setup dialog advises that you are installing the PEM-HTTPD Setup Wizard. Click the Next button to continue.
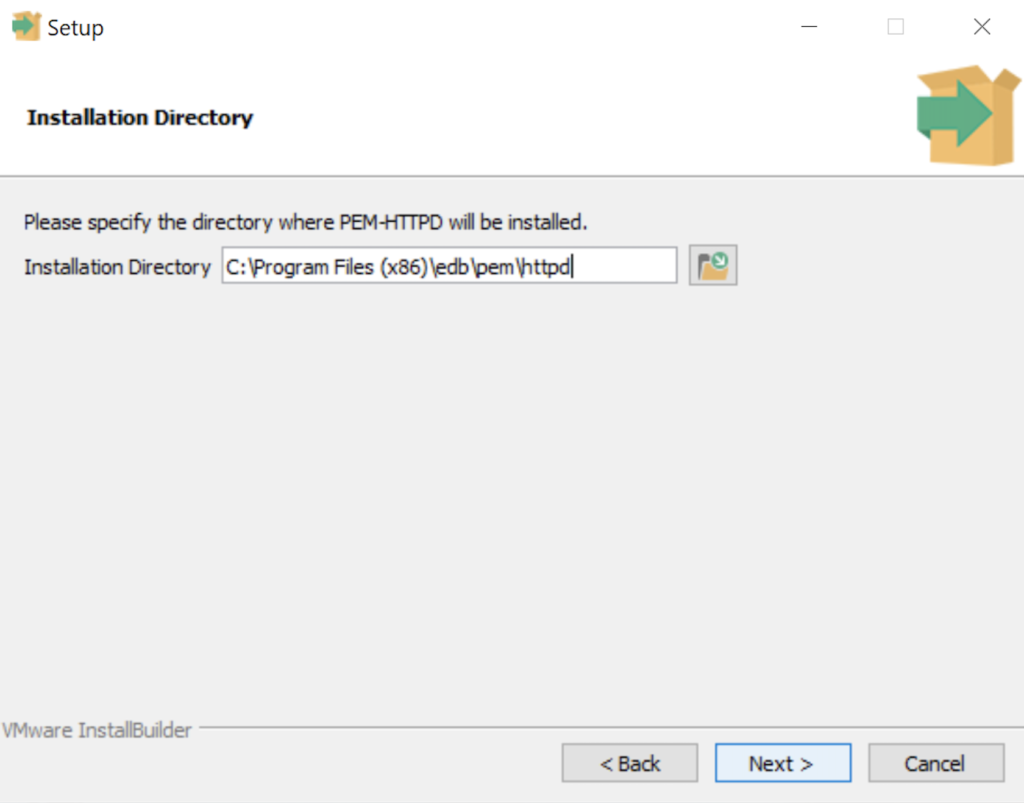
- The Installation Directory dialog prompts you for an installation directory. The default directory is C:\Program Files (x86)\edb\pem\httpd and you should use it because that’s where Windows 10 puts 64-bit libraries. Click the Next button to continue.
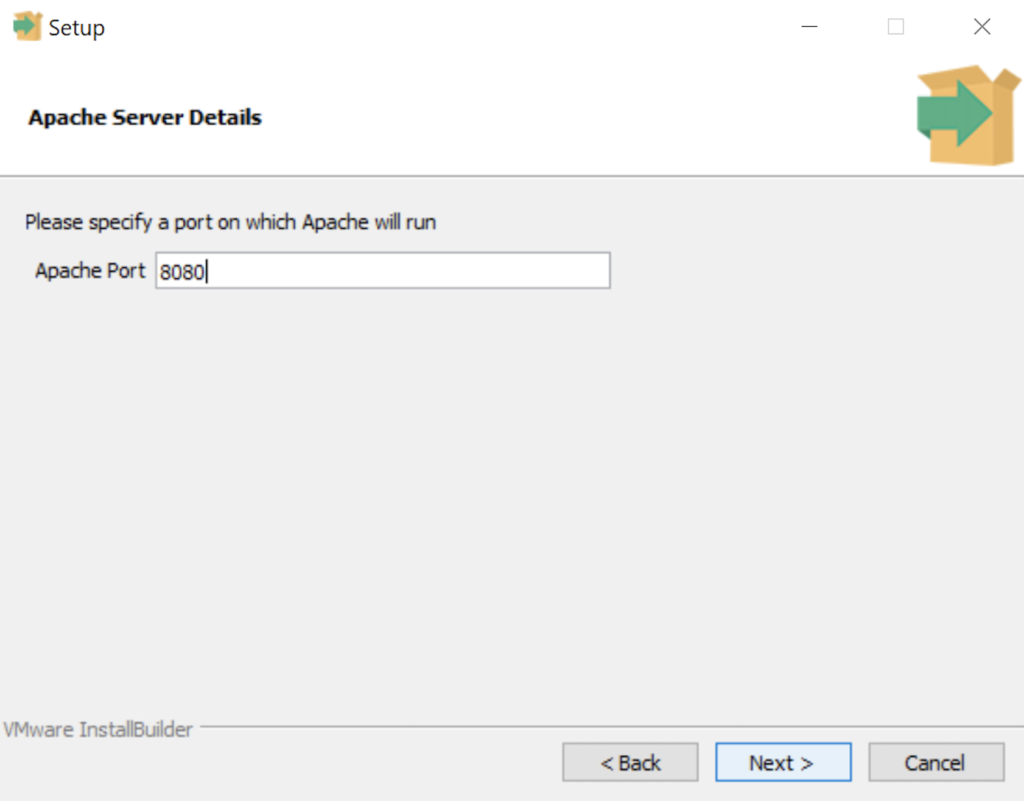
- The Setup dialog lets you select the port number for the HTTP listener. Port 8080 is the standard port for an HTTP listener, and ports 8081, 8082, and so forth are used when you have more than one HTTP listener on a single server or workstation. Click the Next button to continue.
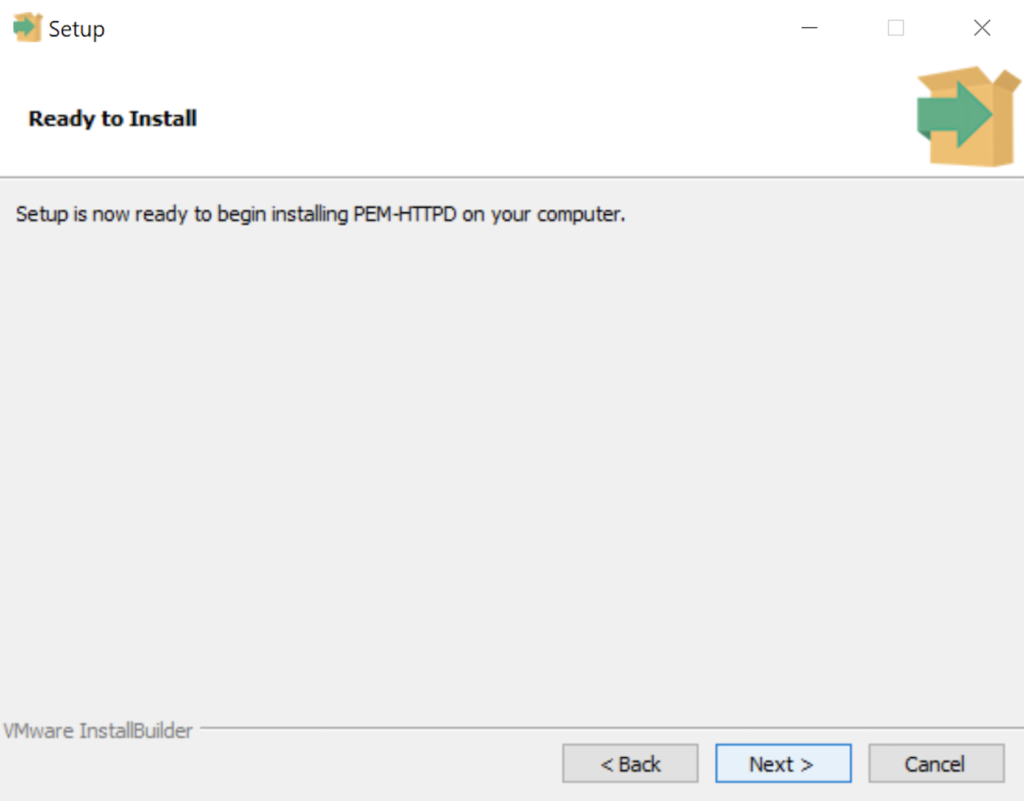
- The Ready to Install dialog lets you pause before you install the software. Click the Next button to continue.
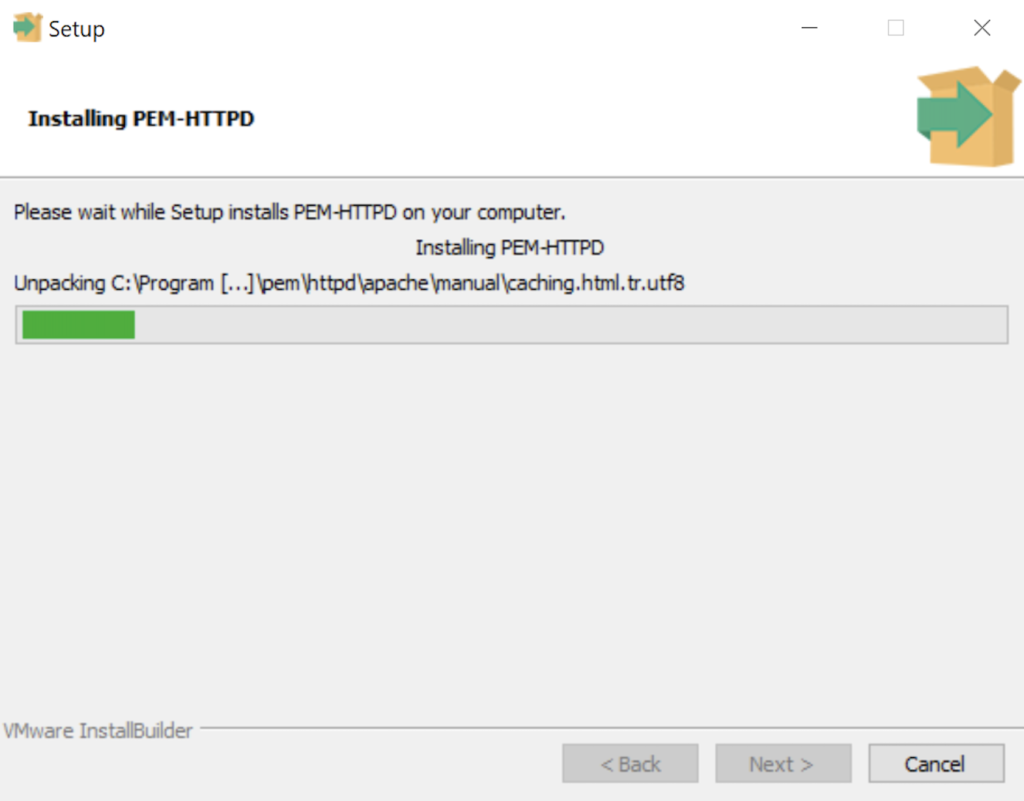
- The Installing dialog is a progress bar that will take several minutes to complete. When the progress bar completes, click the Next button when it becomes available to continue.
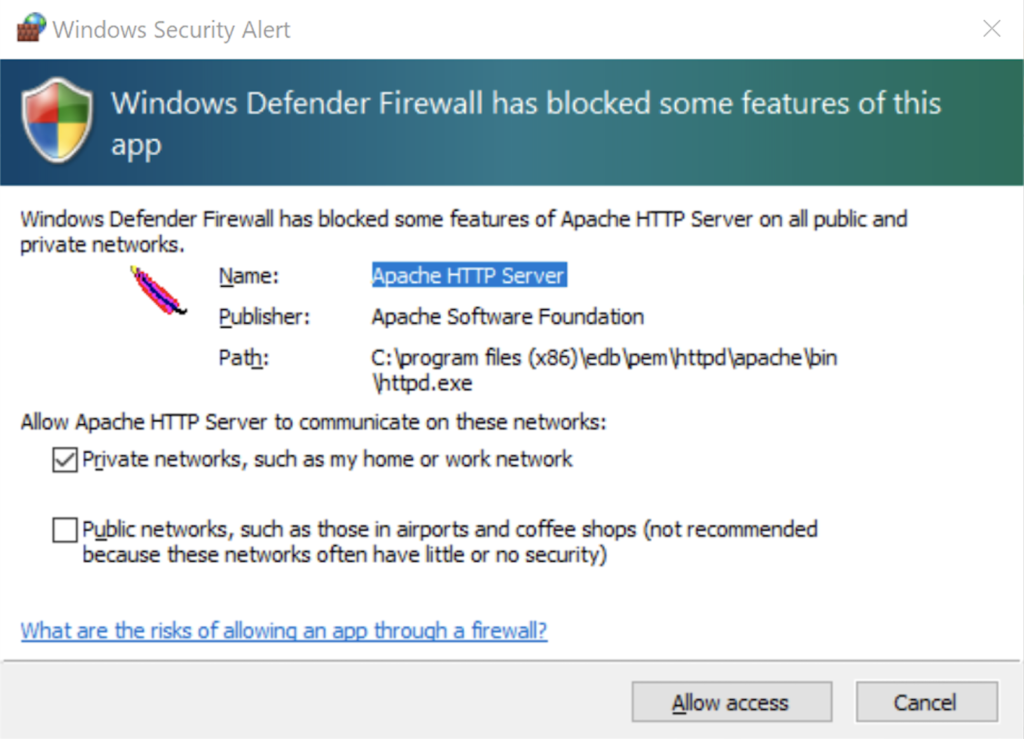
- The Windows Security Alert dialog asks you to allow the Apache HTTP Server to use port 8080. Click the Private networks, such as my home or work network checkbox and then the Allow access button to continue.
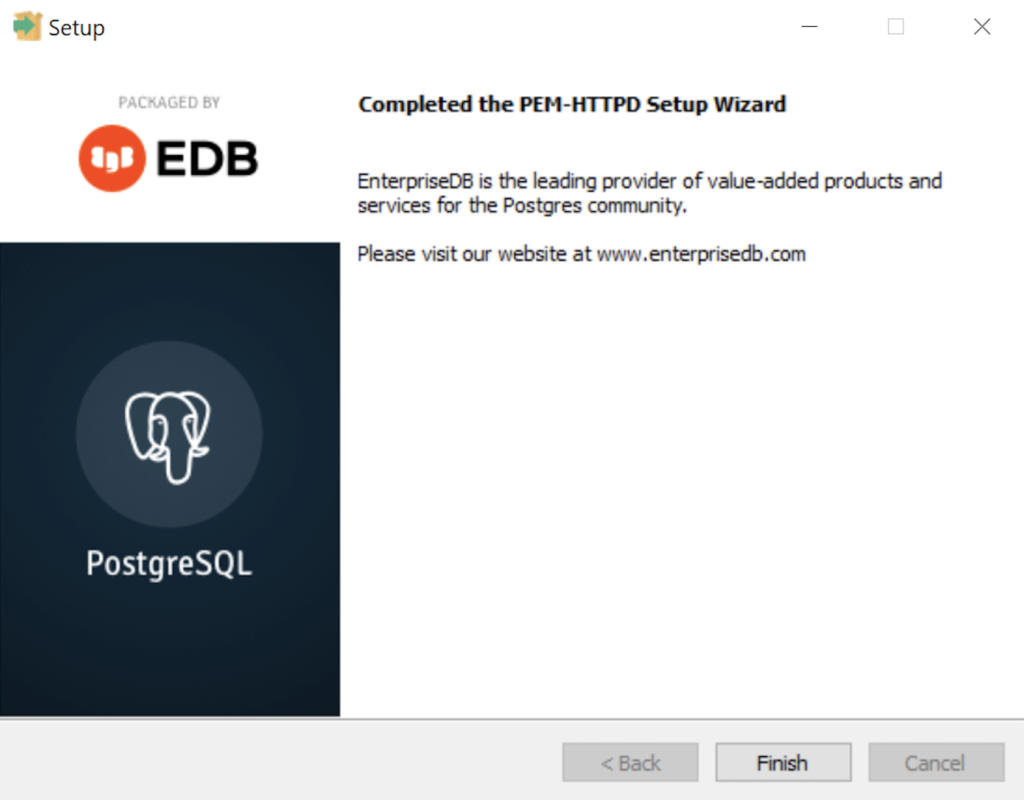
- The Setup dialog advises that you have completed the installation of the PEM-HTTPD Setup Wizard. Click the Finish button to continue.
- The Stack Builder dialog advises you that all four database drivers – Npgsql, pgJDBC, psqlODBC, psqlODBC are downloaded and ready to install. Click the Next button to continue.
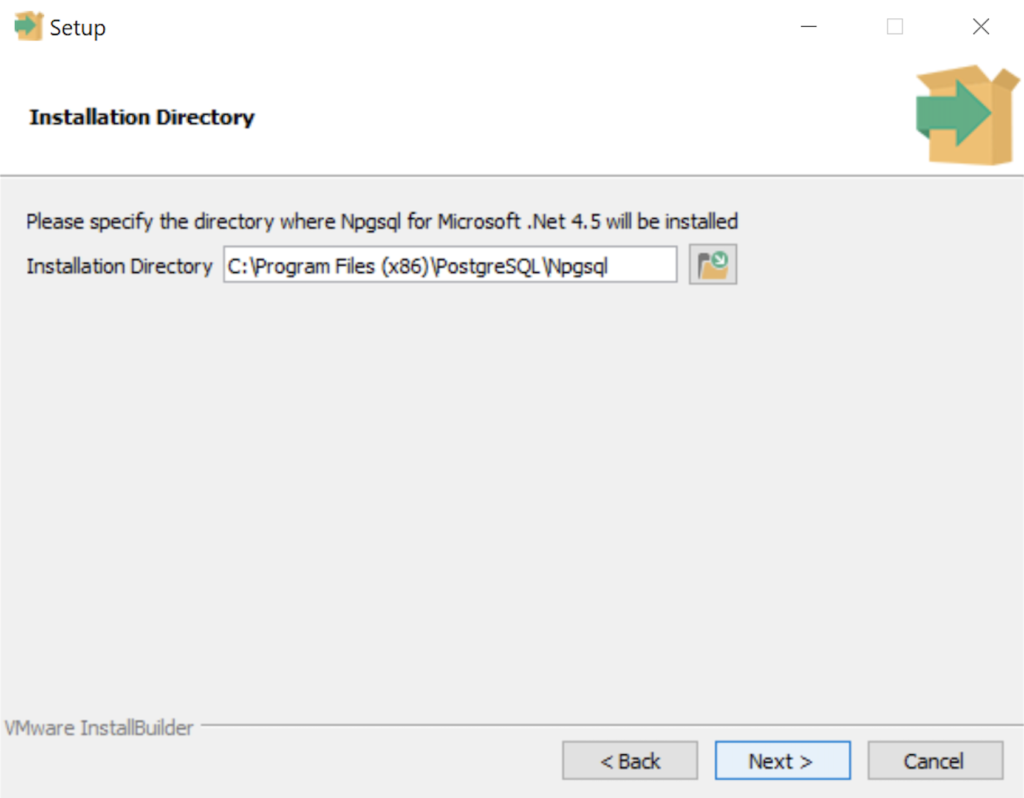
- The Installation Directory dialog prompts you for an installation directory. The default directory is C:\Program Files (x86)\PostgreSQL\Npgsql and you should use it because that’s where Windows 10 puts 64-bit libraries and the subdirectory meets the standard installation convention for Microsoft .Net libraries. Click the Next button to continue.
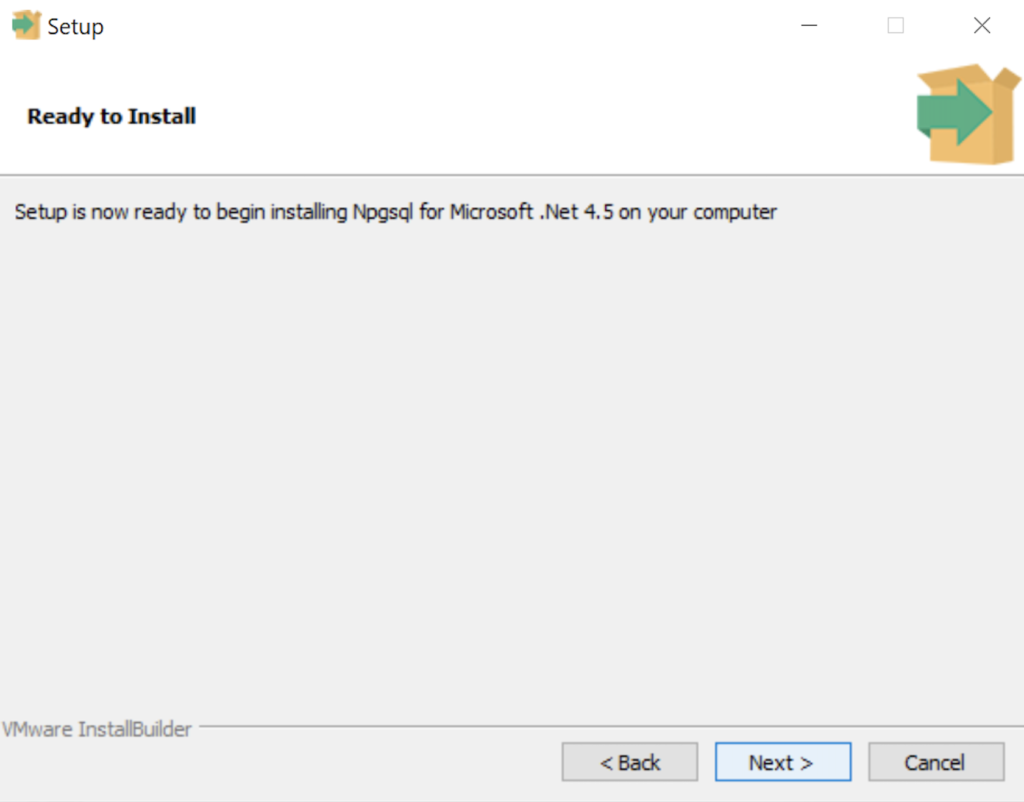
- The Ready to Install dialog lets you pause before you install the Npgsql software for Microsoft .Net. Click the Next button to continue.
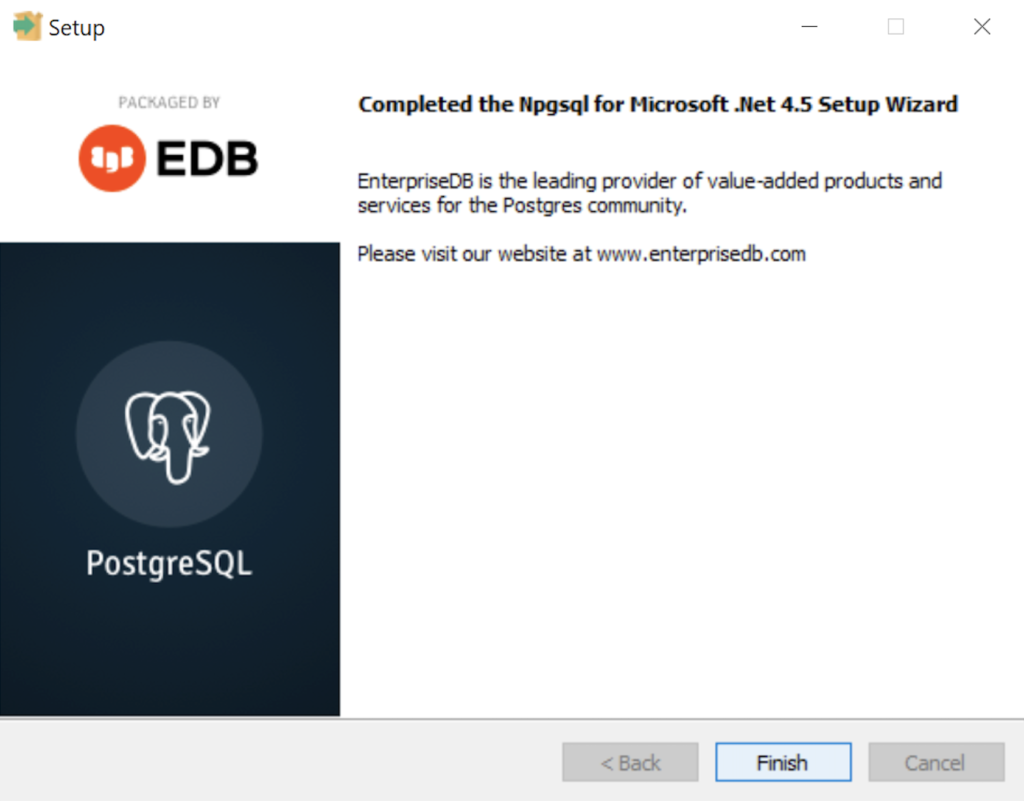
- The Setup dialog advises that you have completed the installation of npgsql driver for Microsoft .Net. Click the Finish button to continue.
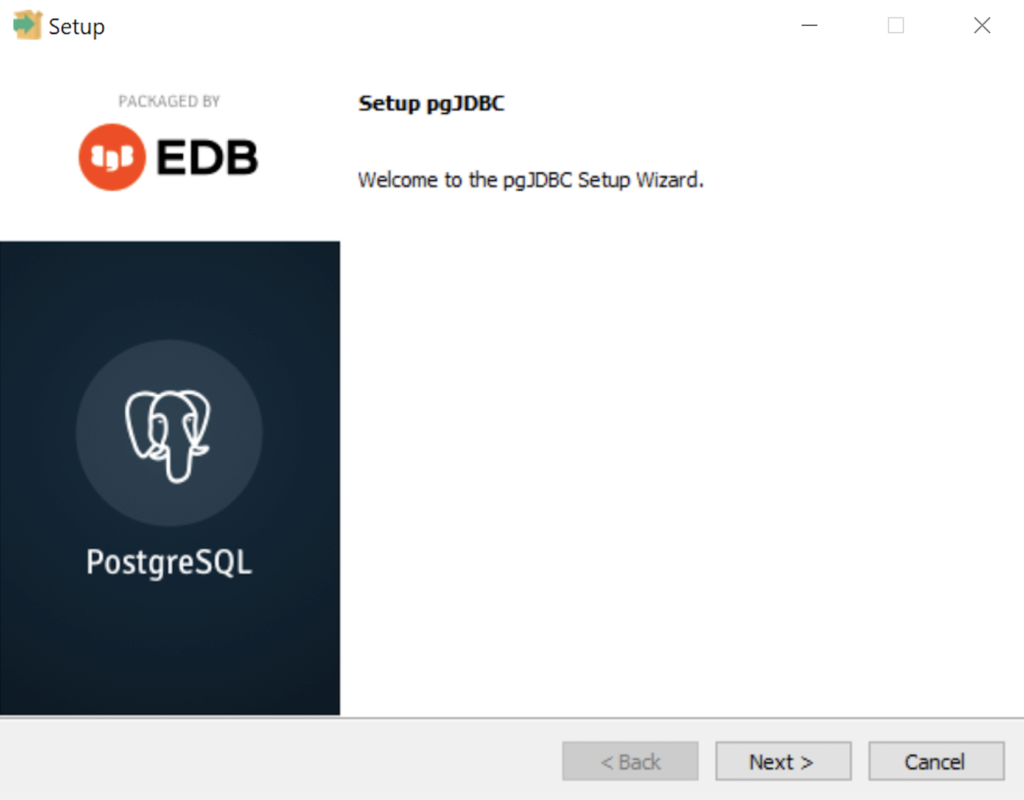
- The Setup dialog advises that you are installing the pgJDBC diver Setup Wizard. Click the Next button to continue.
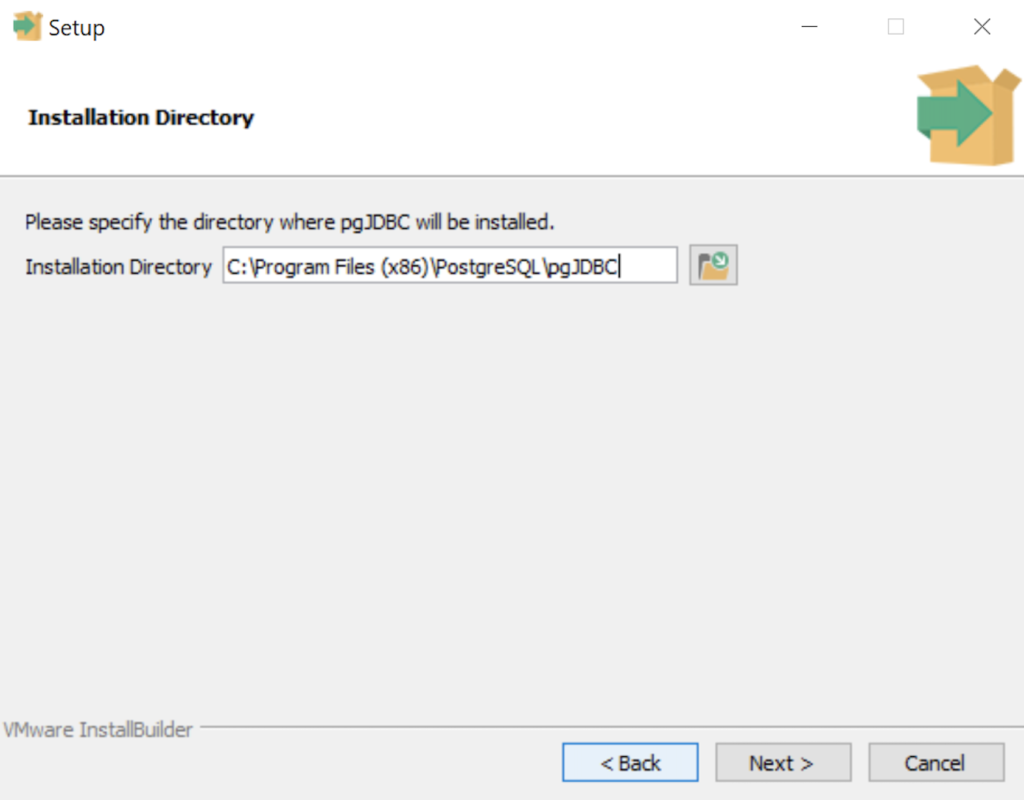
- The Installation Directory dialog prompts you for an installation directory. The default directory is C:\Program Files (x86)\PostgreSQL\pgJDBC and you should use it because that’s where Windows 10 puts 64-bit libraries and the subdirectory meets the standard installation convention for libraries. Click the Next button to continue.
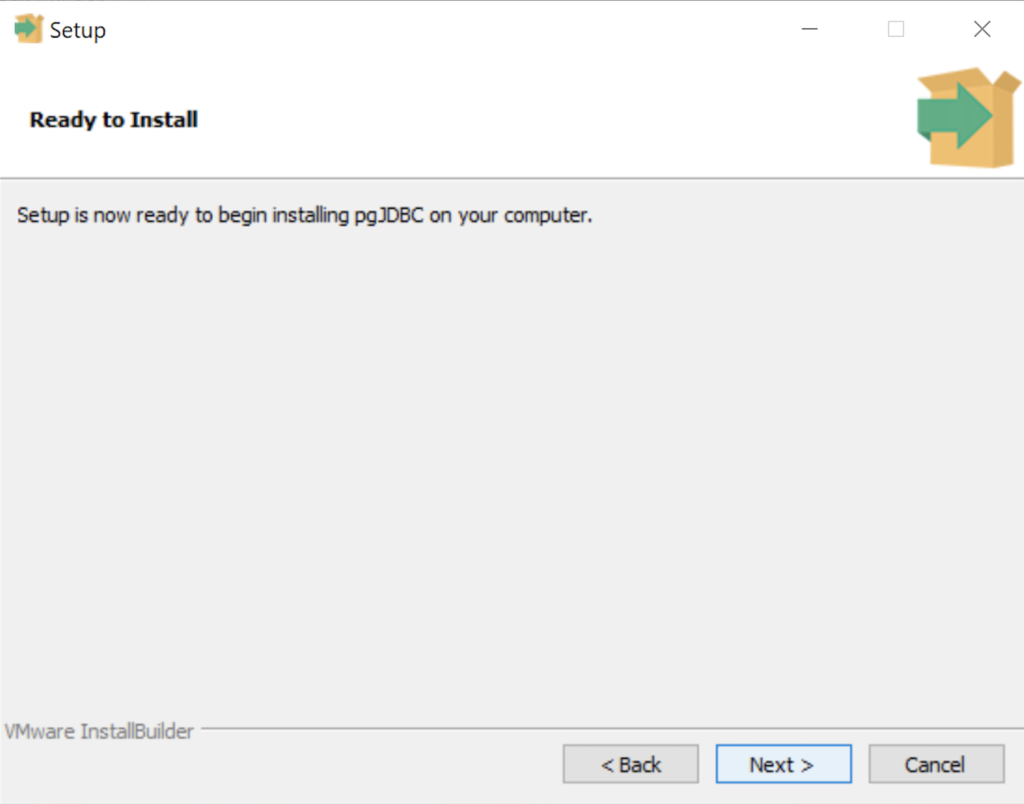
- The Ready to Install dialog lets you pause before you install the pgJDBC software. Click the Next button to continue.
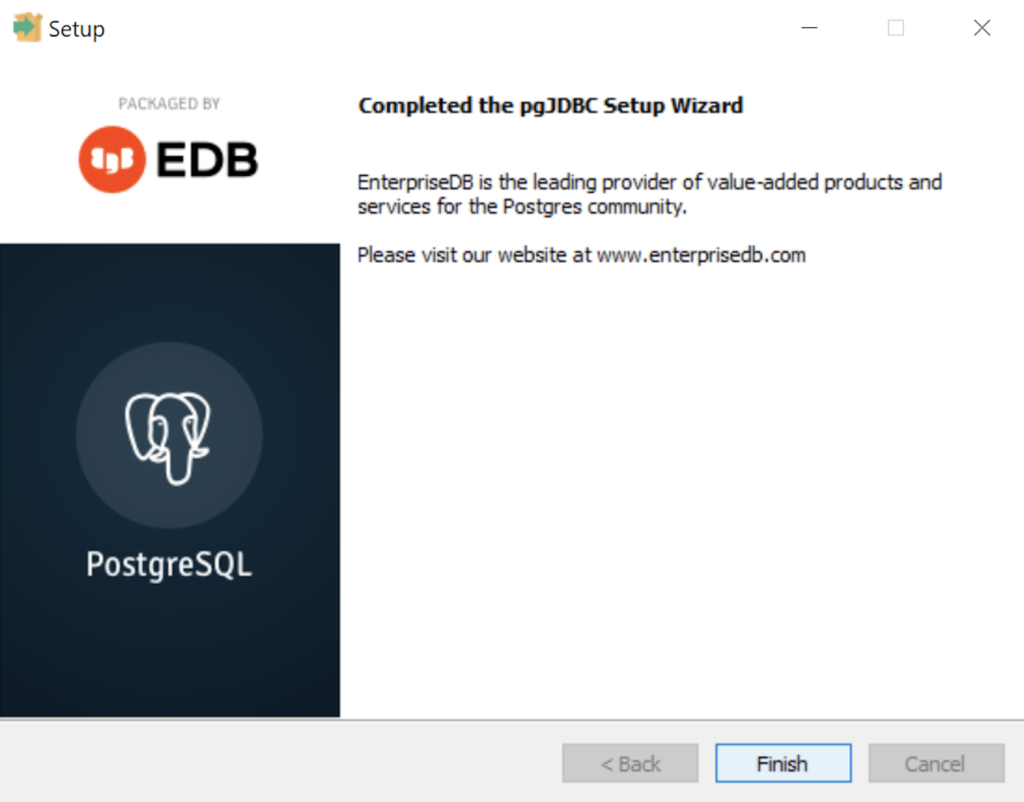
- The Setup dialog advises that you have completed the installation of pgJDBC driver. Click the Finish button to continue.
- The Advisory Message pgAdmin is Starting dialog is really telling you to be patient. It can take a couple minutes to launch pgAdmin.
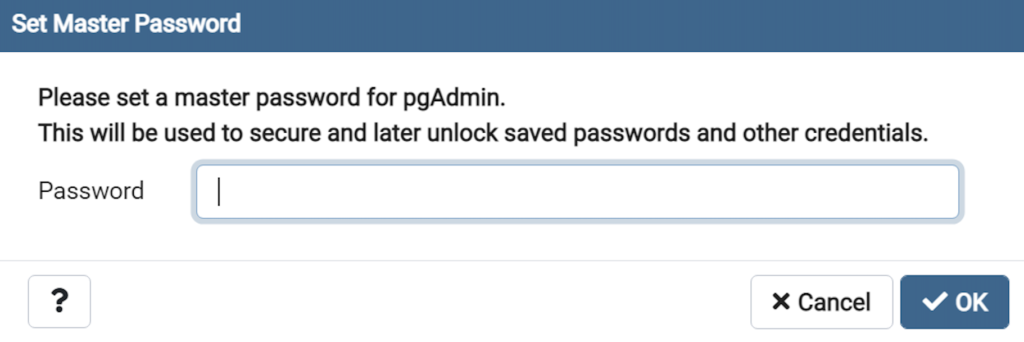
- The Password dialog prompts you for the pgAdmin superuser password. In a development system for your local computer, you may want to use something straightforward like cangetin. Click the Next button to continue.
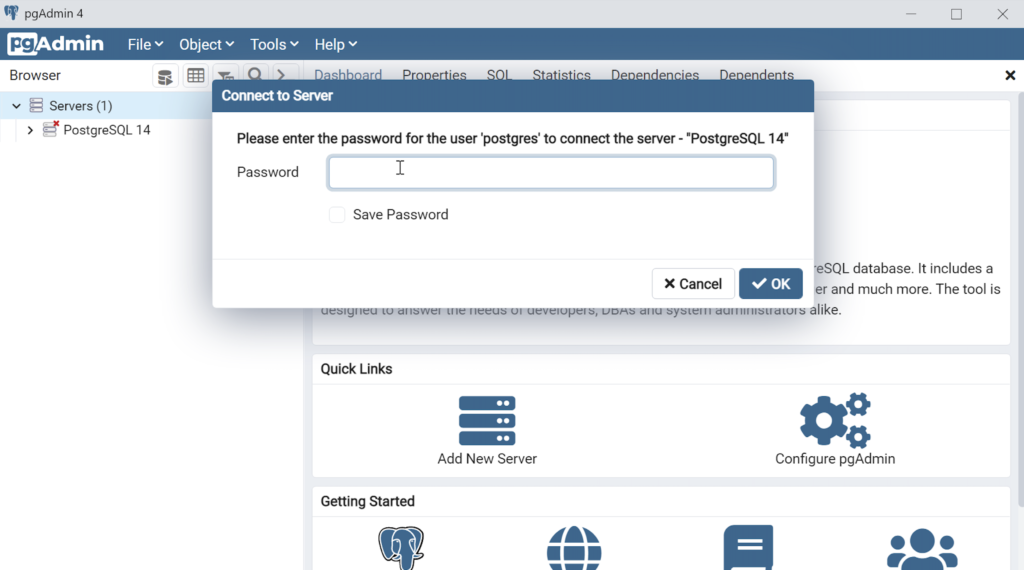
- Enter your password from the earlier step and click the OK button.
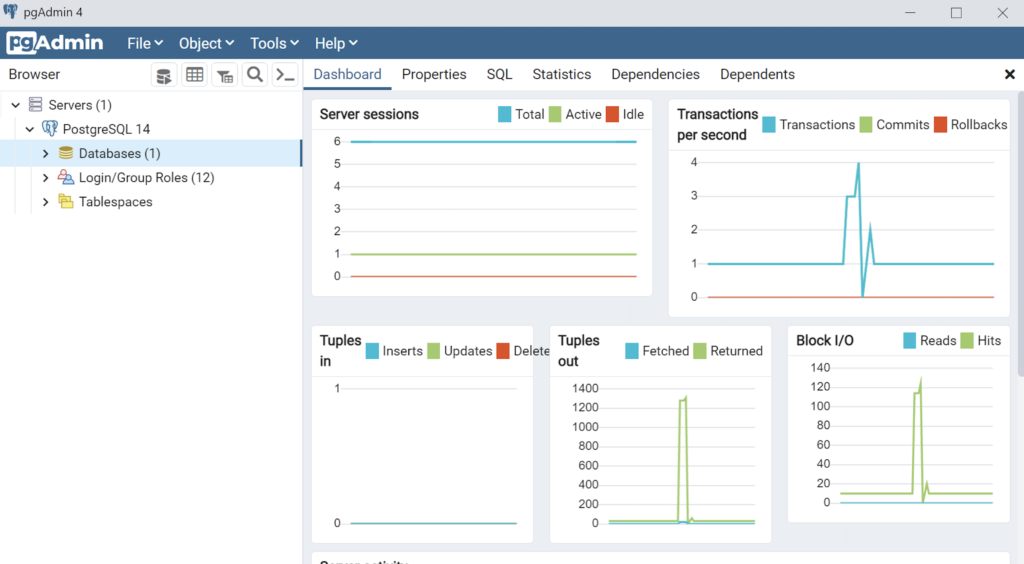
- This is the pgAdmin console. You should see one database and tweleve login/group roles.
The foregoing walked you through the installation of PostgreSQL, the connector libraries and pgAdmin utility. Next, you have to make it real with configuration, which sets up the tablespace, database, and connectivity. I hope it helps those who would like to see the installation steps.
Oracle Container User
After you create and provision the Oracle Database 21c Express Edition (XE), you can create a c##student container user with the following two step process.
- Create a c##student Oracle user account with the following command:
CREATE USER c##student IDENTIFIED BY student
DEFAULT TABLESPACE users QUOTA 200M ON users
TEMPORARY TABLESPACE temp;
- Grant necessary privileges to the newly created c##student user:
GRANT CREATE CLUSTER, CREATE INDEXTYPE, CREATE OPERATOR
,     CREATE PROCEDURE, CREATE SEQUENCE, CREATE SESSION
,     CREATE TABLE, CREATE TRIGGER, CREATE TYPE
,     CREATE VIEW TO c##student;
As always, I hope this helps those looking for how to do something that’s less than clear because everybody uses tools.
Tiny SQL Developer
The first time you launch SQL Developer, you may see a very small or tiny display on the screen. With some high resolution screens the text is unreadable. Unless you manually configure the sqldeveloper shortcut, you generally can’t use it.
On my virtualization on a 27″ screen it looks like:
As an Administrator user, you right click the SQLDeveloper icon and click the Compatibility tab, which should look like the following dialog. You need to check the Compatibility Mode, which by default is unchecked with Windows 8 displayed in the select list.
Check the Compatibility Mode box and the select list will no longer be gray scaled. Click on the select list box and choose Windows 7. After the change you should see the following:
After that change, you need to click on the Change high DPI settings gray scaled button, which will display the following dialog box.
Click the Override high DPI scaling behavior check box. It will change the gray highlighted Scaling Performed by select box to white. Then, you click the Scaling Performed by select box and choose the System option.
Click the OK button on the nested SQLDeveloper Properties dialog box. Then, click the Apply button on the SQLDeveloper Properties button and the OK button. You will see a workable SQL Developer interface when you launch the program through your modified shortcut.
