Archive for the ‘LAMP’ Category
Apache2 on Ubuntu
It’s always interesting when I build new instances. Ubuntu 22.0.4 was no different but I ran into an issue with installing Apache2 and eventually loading the mysqli module.
The Apache2 error was an issue with an unsupported module or hidden prerequisite. The MySQLi required an Apache reload after installation. Contrary to some erroneous posts the mysqli driver is supported on PHP 8.1.
Apache2 installation starts first and the mysqli module reload and verification script follows. On Ubuntu, you install Apache2 if you’re unaware of the hidden pre-requisite, otherwise install the pre-requisite first and avoid the error.
This is the command to install the apache2 module:
sudo apt-get install -y apache2 |
It generated the following error message:
apache2: Syntax error on line 146 of /etc/apache2/apache2.conf: Syntax error on line 1 of /etc/apache2/mods-enabled/wsgi.load: Cannot load /usr/lib/apache2/modules/mod_wsgi.so into server: /usr/lib/apache2/modules/mod_wsgi.so: cannot open shared object file: No such file or directory Action 'start' failed. The Apache error log may have more information. |
Line 146 in the /etc/apache2/apache2.conf file contains the instruction to load modules. The error says it can’t find the mod_wsgi.so library, which was originally part of the deprecated Python 2.7 release.
IncludeOptional mods-enabled/*.load |
The first step I pursued was finding the missing library, which appeared to be in the libapache2-mod-wsgi package. However, it became clear there is no installation candidate for that module, which supported Python 3.x. A little more research led me to find the appropriate library version for Python 3, which is found in the libapache2-mod-wsgi-py3 package.
I installed the libapache2-mod-wsgi-py3 package with the following syntax:
sudo apt-get install -y libapache2-mod-wsgi-py3 |
Display detailed console log →
Reading package lists... Done Building dependency tree... Done Reading state information... Done The following NEW packages will be installed: libapache2-mod-wsgi-py3 0 upgraded, 1 newly installed, 0 to remove and 10 not upgraded. Need to get 106 kB of archives. After this operation, 304 kB of additional disk space will be used. Get:1 http://us.archive.ubuntu.com/ubuntu jammy-updates/main amd64 libapache2-mod-wsgi-py3 amd64 4.9.0-1ubuntu0.1 [106 kB] Fetched 106 kB in 1s (135 kB/s) Selecting previously unselected package libapache2-mod-wsgi-py3. (Reading database ... 228859 files and directories currently installed.) Preparing to unpack .../libapache2-mod-wsgi-py3_4.9.0-1ubuntu0.1_amd64.deb ... Unpacking libapache2-mod-wsgi-py3 (4.9.0-1ubuntu0.1) ... Setting up libapache2-mod-wsgi-py3 (4.9.0-1ubuntu0.1) ... apache2_invoke wsgi: already enabled |
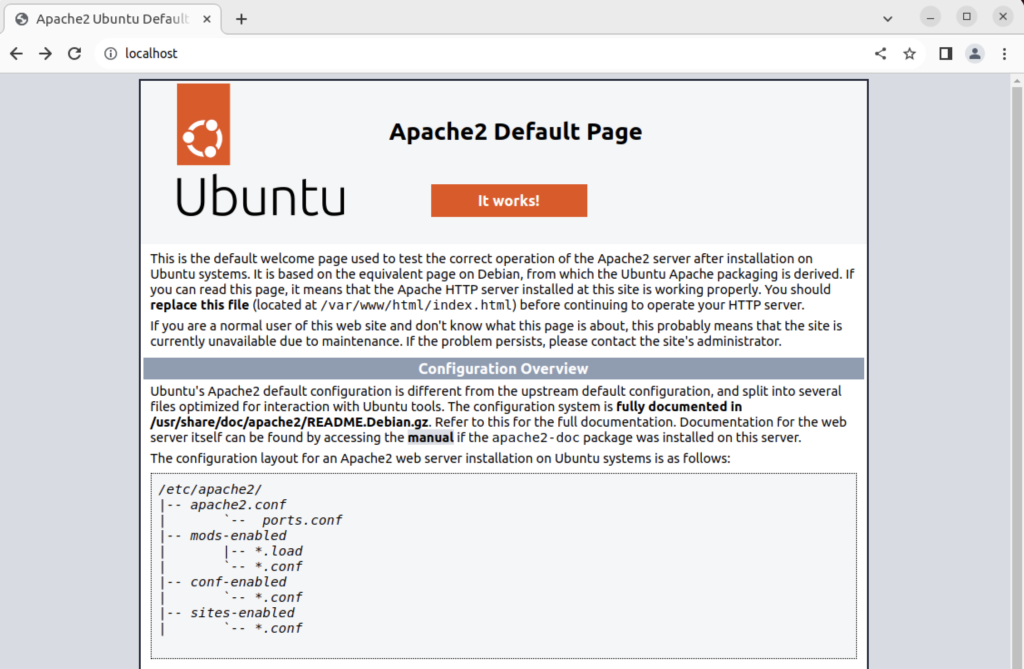
After applying it, I was able to start Apache2. Then, typing in localhost returns the Apache2 index.htm page, like:
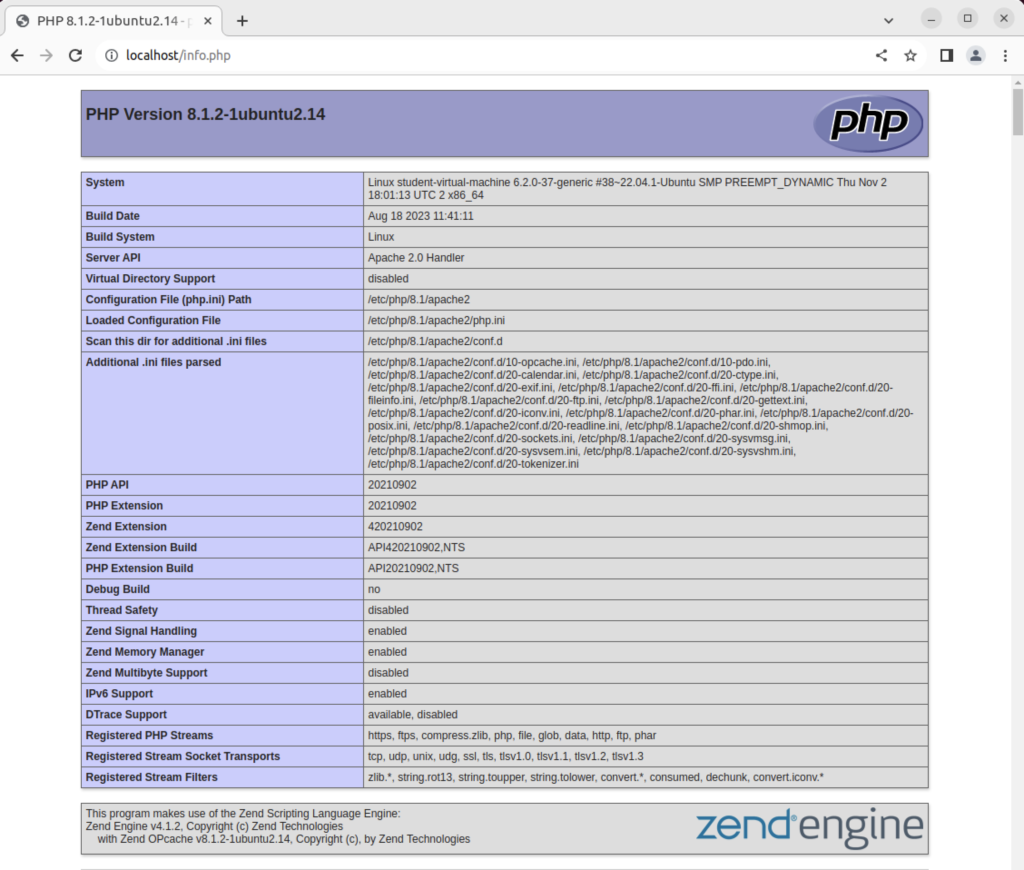
After creating the following file in the default directory:
<?php phpinfo(); ?> |
Typing in localhost/infophp returns the Apache2 info.php page, like:
After the basics for PHP, the next step is the mysqli module for the MySQL database. This can be done in two steps on Ubuntu.
- Install the MySQLi software with the following syntax on Ubuntu:
sudo apt-get install -y php8.1-mysql
If you forget and use the old php-mysqli, it will redirect to the new PHP 8.1 MySQL module.
- You need to reload the Apache configuration with the following syntax:
sudo systemctl reload apache2
Now, you can use the following PHP program to verify that the mysqli and pdo drivers are installed:
<html>
<header>
<title>Module Verification</title>
</header>
<body>
<?php
  if (!function_exists('mysqli_init') && !extension_loaded('mysqli')) {
    print 'mysqli not installed.'; }
  else {
    print 'mysqli installed.'; }
  if (!function_exists('pdo_init') && !extension_loaded('pdo')) {
    print '<p>pdo not installed.</p>'; }
  else {
    print '<p>pdo installed.</p>'; }
?>
</script>
</body>
</html> |
If everything is correct, it should return the following in a browser when you query it from localhost/the-file-name and the file is in the /var/www/html directory:
mysqli installed. pdo installed. |
This means you can now write PHP applications, like the following example for my students:
I also have some demonstration programs that upload PNG files. As usual, I forgot about that while building the Ubuntu installation with MySQL 8, PHP 8.1 and Apache2. Fortunately, I solved it back in the day when moving from PHP 5.7 to 7.1 and here are the equivalent steps for Ubuntu:
I installed the libapache2-mod-wsgi-py3 package with the following syntax:
sudo apt-get install -y php-gd |
Display detailed console log →
Reading package lists... Done Building dependency tree... Done Reading state information... Done The following additional packages will be installed: php8.1-gd The following NEW packages will be installed: php-gd php8.1-gd 0 upgraded, 2 newly installed, 0 to remove and 13 not upgraded. Need to get 34.7 kB of archives. After this operation, 158 kB of additional disk space will be used. Get:1 http://us.archive.ubuntu.com/ubuntu jammy-updates/main amd64 php8.1-gd amd64 8.1.2-1ubuntu2.14 [32.9 kB] Get:2 http://us.archive.ubuntu.com/ubuntu jammy/main amd64 php-gd all 2:8.1+92ubuntu1 [1,828 B] Fetched 34.7 kB in 1s (39.3 kB/s) sh: 0: getcwd() failed: No such file or directory sh: 0: getcwd() failed: No such file or directory sh: 0: getcwd() failed: No such file or directory sh: 0: getcwd() failed: No such file or directory Selecting previously unselected package php8.1-gd. (Reading database ... 228928 files and directories currently installed.) Preparing to unpack .../php8.1-gd_8.1.2-1ubuntu2.14_amd64.deb ... Unpacking php8.1-gd (8.1.2-1ubuntu2.14) ... Selecting previously unselected package php-gd. Preparing to unpack .../php-gd_2%3a8.1+92ubuntu1_all.deb ... Unpacking php-gd (2:8.1+92ubuntu1) ... Setting up php8.1-gd (8.1.2-1ubuntu2.14) ... Creating config file /etc/php/8.1/mods-available/gd.ini with new version Setting up php-gd (2:8.1+92ubuntu1) ... Processing triggers for libapache2-mod-php8.1 (8.1.2-1ubuntu2.14) ... Processing triggers for php8.1-cli (8.1.2-1ubuntu2.14) ... |
Then, I restarted the Apache2 server to incorporate the php-gd library in my PHP module with this syntax:
sudo systemctl restart apache2.service |
Retesting the PHP form to upload and render a PNG image file with this code (note that the only thing you can display is the html header and converted image, as shown on lines 64 and 65):
1 2 3 4 5 6 7 8 9 10 11 12 13 14 15 16 17 18 19 20 21 22 23 24 25 26 27 28 29 30 31 32 33 34 35 36 37 38 39 40 41 42 43 44 45 46 47 48 49 50 51 52 53 54 55 56 57 58 59 60 61 62 63 64 65 66 67 | <?php /* ConvertBlobToImage.php * by Michael McLaughlin * * This script queries an image from a BLOB column and * converts it to a PNG image. * * ALERT: * * The header must be inside the PHP script tag because nothing * can be rendered before the header() function call that signals * this is a PNG file. */ // Database credentials must be set manually because an include_once() function // call puts something ahead of the header, which causes a failure when rendering // an image. // Include the credential library. include_once("MySQLCredentials.inc"); // Return successful attempt to connect to the database. if (!$c = @mysqli_connect(HOSTNAME,USERNAME,PASSWORD,DATABASE)) { // Print user message. print "Sorry! The connection to the database failed. Please try again later."; // Assign the OCI error and format double and single quotes. print mysqli_error(); // Kill the resource. die(); } else { // Declare input variables. $id = (isset($_GET['id'])) ? (int) $_GET['id'] : 1023; // Initialize a statement in the scope of the connection. $stmt = mysqli_stmt_init($c); // Declare a SQL SELECT statement returning a MediumBLOB. $sql = "SELECT item_blob FROM item WHERE item_id = ?"; // Prepare statement and link it to a connection. if (mysqli_stmt_prepare($stmt,$sql)) { mysqli_stmt_bind_param($stmt,"i",$id); // Execute the PL/SQL statement. if (mysqli_stmt_execute($stmt)) { // Bind result to local variable. mysqli_stmt_bind_result($stmt, $image); // Read result. mysqli_stmt_fetch($stmt); } } // Disconnect from database. mysqli_close($c); // Print the header first. header('Content-type: image/png'); imagepng(imagecreatefromstring($image)); } ?> |
The call to the ConvertMySQLBlobToImage.php is handled in an image tag, as shown:
<img src="ConvertMySQLBlobToImage.php?id='.$id.'"> |
Rendering a web page, like:
As always, I hope this explains something worthwhile.
MySQL on Ubuntu

Fresh install of Ubuntu on my MacBook Pro i7 because Apple said the OS X was no longer upgradable. Time to install and configure MySQL Server. These are the steps to install MySQL on the Ubuntu Desktop.
Installation
- Update the Ubuntu OS by checking for, inspecting, and upgrading any available updates with the following commands:
sudo apt update
sudo apt list
sudo apt upgrade
- Check for available MySQL Server packages with this command:
apt-cache search binariesIt should return:
mysql-server - MySQL database server binaries and system database setup
mysql-server-8.0 - MySQL database server binaries and system database setup
mysql-server-core-8.0 - MySQL database server binaries
default-mysql-server - MySQL database server binaries and system database setup (metapackage)
default-mysql-server-core - MySQL database server binaries (metapackage)
mariadb-server-10.6 - MariaDB database core server binaries
mariadb-server-core-10.6 - MariaDB database core server files
- Check for more details on the MySQL packages with this command:
apt info -a mysql-server-8.0
- Install MySQL Server packages with this command:
sudo apt install mysql-server-8.0
- Start the MySQL Server service with this command:
sudo systemctl start mysql.service - Before you can run the mysql_secure_installation script, you must set the root password. If you skip this step the mysql_secure_installation script will enter an infinite loop and lock your terminal session. Log in to the mysql monitor with the following command:
sudo mysqlEnter a password with the following command (password is an insecure example):
ALTER USER 'root'@'localhost' IDENTIFIED WITH mysql_native_password BY 'C4nGet1n!';
Quit the mysql monitor session:
quit; - Run the mysql_secure_installation script with this command:
sudo mysql_secure_installationHere’s the typical output from running the mysql_secure_installation script:
Securing the MySQL server deployment.

Enter password for user root:

VALIDATE PASSWORD COMPONENT can be used to test passwords
and improve security. It checks the strength of password
and allows the users to set only those passwords which are
secure enough. Would you like to setup VALIDATE PASSWORD component?

Press y|Y for Yes, any other key for No: Y

There are three levels of password validation policy:

LOW    Length >= 8
MEDIUM Length >= 8, numeric, mixed case, and special characters
STRONG Length >= 8, numeric, mixed case, special characters and dictionary file

Please enter 0 = LOW, 1 = MEDIUM and 2 = STRONG: 2
Using existing password for root.

Estimated strength of the password: 100
Change the password for root ? ((Press y|Y for Yes, any other key for No) : N

 ... skipping.
By default, a MySQL installation has an anonymous user,
allowing anyone to log into MySQL without having to have
a user account created for them. This is intended only for
testing, and to make the installation go a bit smoother.
You should remove them before moving into a production
environment.

Remove anonymous users? (Press y|Y for Yes, any other key for No) : Y
Success.

Normally, root should only be allowed to connect from
'localhost'. This ensures that someone cannot guess at
the root password from the network.

Disallow root login remotely? (Press y|Y for Yes, any other key for No) : Y
Success.

By default, MySQL comes with a database named 'test' that
anyone can access. This is also intended only for testing,
and should be removed before moving into a production
environment.


Remove test database and access to it? (Press y|Y for Yes, any other key for No) : Y
 - Dropping test database...
Success.

 - Removing privileges on test database...
Success.

Reloading the privilege tables will ensure that all changes
made so far will take effect immediately.

Reload privilege tables now? (Press y|Y for Yes, any other key for No) : Y
Success.

All done!
Configuration
The next step is configuration. It requires setting up the sample sakila and studentdb database. The syntax has changed from prior releases. Here are the new three steps:
- Grant the root user the privilege to grant to others, which root does not have by default. You use the following syntax as the MySQL root user:
mysql> GRANT ALL ON *.* TO 'root'@'localhost';
- Download the sakila database, which you can download from this site. Click on the sakila database’s TGZ download.

When you download the sakila zip file it creates a sakila-db folder in the /home/student/Downloads directory. Copy the sakila-db folder into the /home/student/Data/sakila directory. Then, change to the /home/student/Data/sakila/sakila-db directory, connect to mysql as the root user, and run the following command:
mysql> SOURCE /home/student/Data/sakila/sakila-db/sakila-schema.sql
mysql> SOURCE /home/student/Data/sakila/sakila-db/sakila-data.sql
- Create the studentdb database with the following command as the MySQL root user:
mysql> CREATE DATABASE studentdb; - Create the user with a clear English password and grant the user student full privileges on the sakila and studentdb databases:
mysql> CREATE USER 'student'@'localhost' IDENTIFIED WITH mysql_native_password BY 'Stud3nt!';
mysql> GRANT ALL ON studentdb.* TO 'student'@'localhost';
mysql> GRANT ALL ON sakila.* TO 'student'@'localhost';
You can now connect to a sandboxed sakila database with the student user’s credentials, like:
mysql -ustudent -p -Dsakila |
or, you can now connect to a sandboxed studentdb database with the student user’s credentials, like:
mysql -ustudent -p -Dstudentdb |
MySQL Workbench Installation
sudo snap install mysql-workbench-community |
You have now configure the MySQL Server 8.0.
MySQL PNG Files
LAMP (Linux, Apache, MySQL, Perl/PHP/Python) Architecture is very flexible. All the components can be positioned on the same server or different servers. The servers are divided into two types. The types are known as the Application or database tiers. Generally, the application tier holds the Apache Server, any Apache Modules, and local copies of Server Side Includes (SSI) programs.
In many development environments, you also deploy the client to the same machine. This means a single machine runs the database server, the application server, and the browser. The lab for this section assumes these configurations.
Before you test an installation, you should make sure that you’ve started the database and Apache server. In an Oracle LAMP configuration (known as an OLAP – Oracle, Linux, Apache, Perl/PHP/Python), you must start both the Oracle Listener and database. MySQL starts the listener when you start the database. You must also start the Apache Server. The Apache Server also starts an Apache Listener, which listens for incoming HTTP/HTTPS requests. It listens on Port 80 unless you override that setting in the httpd.conf file.

The URI reaches the server and is redirected to an Apache Module based on configuration information found in the httpd.conf file. Spawned or child processes of the Apache Module then read programs into memory from the file system and run them. If you’ve uploaded a file the locally stored program can move it from a secure cache location to another local area for processing. The started programs can run independently or include other files as libraries, and they can communicate to the database server.
Working though PHP test cases against the MySQL database for my AlmaLinux installation and configuration, I discovered that the php-gd library weren’t installed by default. I had to add it to get my PHP programs to upload and display PNG files.
The log file for applying the php-gd packages:
Display detailed console log →
Last metadata expiration check: 3:59:15 ago on Wed 28 Dec 2022 08:17:58 PM EST. Dependencies resolved. ================================================================================ Package Architecture Version Repository Size ================================================================================ Installing: php-gd x86_64 8.0.20-3.el9 appstream 43 k Transaction Summary ================================================================================ Install 1 Package Total download size: 43 k Installed size: 110 k Downloading Packages: php-gd-8.0.20-3.el9.x86_64.rpm 196 kB/s | 43 kB 00:00 -------------------------------------------------------------------------------- Total 39 kB/s | 43 kB 00:01 Running transaction check Transaction check succeeded. Running transaction test Transaction test succeeded. Running transaction Preparing : 1/1 Installing : php-gd-8.0.20-3.el9.x86_64 1/1 Running scriptlet: php-gd-8.0.20-3.el9.x86_64 1/1 Verifying : php-gd-8.0.20-3.el9.x86_64 1/1 Installed: php-gd-8.0.20-3.el9.x86_64 Complete! |
The balance of this page demonstrates how to upload, store, and manage Text (Character Large Data Streams) and BLOBs (Binary Large Objects). It provides MySQL equivalent instructions to those for manaing LOBs in an Oracle database. As covered in Chapter 8 in my Oracle Database 11g PL/SQL Programming book.
Before you begin these steps, you should have already installed Zend Server Community Edition. If you haven’t done so, please click here for instructions.
Create directories or folders, and position code →
This section provides you with instructions on how to position the code components in Windows, at least for the newbie. If you’re on Linux, you probably know how to do most if not all of this already. Likewise, if you already know how to put things in the right place, please choose your own locations.
- Create a
LOB(Large Object) directory for the PHP files inside thehtdocsdirectory.
![]()
- You can down the MySQL PHP Upload LOB Web Code zip file and unzip it into the directory you just created. It can co-exist with the Oracle equivalent if you’ve done that already.
Load a TEXT (like an Oracle CLOB) column to the MySQL database →
This is a copy of the three files required to load a large string to a MySQL database into a mediumtext data type. The code is in clear text because somebody asked for it. They’re nervous about zip files. Click the title above to expand all the code text.
MySQLCredentials.inc
1 2 3 4 5 6 7 | <?php // Connection variables. define('HOSTNAME',"localhost"); define('USERNAME',"student"); define('PASSWORD',"student"); define('DATABASE',"sampledb"); ?> |
UploadItemDescMySQLForm.htm
1 2 3 4 5 6 7 8 9 10 11 12 13 14 15 16 17 18 19 20 21 22 23 24 25 26 27 28 29 30 31 32 33 34 35 36 37 38 | <html>
<head>
<title>
UploadItemDescMySQLForm.htm
</title>
</head>
<body>
<form id="uploadForm"
action="UploadItemDescMySQL.php"
enctype="multipart/form-data"
method="post">
<table border=0 cellpadding=0 cellspacing=0>
<tr>
<td width=125>Item Number</td>
<td>
<input id="id" name="id" type="text">
</td>
</tr>
<tr>
<td width=125>Item Title</td>
<td>
<input id="title" name="title" type="text">
</td>
</tr>
<tr>
<td width=125>Select File</td>
<td>
<input id="uploadfilename" name="userfile" type="file">
</td>
</tr>
<tr>
<td width=125>Click Button to</td>
<td><input type="submit" value="Upload File"></td>
</tr>
</table>
</form>
</body>
</html> |
UploadItemDescMySQL.php
1 2 3 4 5 6 7 8 9 10 11 12 13 14 15 16 17 18 19 20 21 22 23 24 25 26 27 28 29 30 31 32 33 34 35 36 37 38 39 40 41 42 43 44 45 46 47 48 49 50 51 52 53 54 55 56 57 58 59 60 61 62 63 64 65 66 67 68 69 70 71 72 73 74 75 76 77 78 79 80 81 82 83 84 85 86 87 88 89 90 91 92 93 94 95 96 97 98 99 100 101 102 103 104 105 106 107 108 109 110 111 112 113 114 115 116 117 118 119 120 121 122 123 124 125 126 127 128 129 | <?php // Set database credentials. include_once("MySQLCredentials.inc"); // Displayed moved file in web page. $item_desc = process_uploaded_file(); // Return successful attempt to connect to the database. if (!$c = @mysqli_connect(HOSTNAME,USERNAME,PASSWORD,DATABASE)) { // Print user message. print "Sorry! The connection to the database failed. Please try again later."; // Assign the mysqli_error() and format double and single quotes. print mysqli_error(); // Kill the resource. die(); } else { // Declare input variables. $id = (isset($_POST['id'])) ? (int) $_POST['id'] : $id = 21; $title = (isset($_POST['title'])) ? $_POST['title'] : $title = "Harry #1"; // Initialize a statement in the scope of the connection. $stmt = mysqli_stmt_init($c); // Declare a PL/SQL execution command. $sql = "Update item set item_desc = ? where item_id = ?"; // Prepate statement and link it to a connection. if (mysqli_stmt_prepare($stmt,$sql)) { mysqli_stmt_bind_param($stmt,"si",$item_desc,$id); // Execute it and print success or failure message. if (mysqli_stmt_execute($stmt)) { query_insert($id,$title); } else { print "You're target row doesn't exist."; } } // Disconnect from database. mysqli_close($c); } // Query results afret an insert. function query_insert($id,$title) { // Return successful attempt to connect to the database. if (!$c = @mysqli_connect(HOSTNAME,USERNAME,PASSWORD,DATABASE)) { // Print user message. print "Sorry! The connection to the database failed. Please try again later."; // Assign the OCI error and format double and single quotes. print mysqli_error(); // Kill the resource. die(); } else { // Initialize a statement in the scope of the connection. $stmt = mysqli_stmt_init($c); // Declare a SQL SELECT statement returning a CLOB. $sql = "SELECT item_desc FROM item WHERE item_id = ?"; // Prepare statement. if (mysqli_stmt_prepare($stmt,$sql)) { mysqli_stmt_bind_param($stmt,"i",$id); // Execute it and print success or failure message. if (mysqli_stmt_execute($stmt)) { // Bind result to local variable. mysqli_stmt_bind_result($stmt, $desc); // Read result. mysqli_stmt_fetch($stmt); // Format HTML table to display biography. $out = '<table border="1" cellpadding="3" cellspacing="0">'; $out .= '<tr>'; $out .= '<td align="center" class="e">'.$title.'</td>'; $out .= '</tr>'; $out .= '<tr>'; $out .= '<td class="v">'.$desc.'</td>'; $out .= '</tr>'; $out .= '</table>'; // Print the HTML table. print $out; } } // Disconnect from database. mysqli_close($c); } } // Manage file upload and return file as string. function process_uploaded_file() { // Declare a variable for file contents. $contents = ""; // Define the upload file name for Windows or Linux. if (preg_match(".Win32.",$_SERVER["SERVER_SOFTWARE"])) $upload_file = "C:\\temp\\".$_FILES['userfile']['name']; else $upload_file = "/tmp/".$_FILES['userfile']['name']; // Check for and move uploaded file. if (is_uploaded_file($_FILES['userfile']['tmp_name'])) move_uploaded_file($_FILES['userfile']['tmp_name'],$upload_file); // Open a file handle and suppress an error for a missing file. if ($fp = @fopen($upload_file,"r")) { // Read until the end-of-file marker. while (!feof($fp)) $contents .= fgetc($fp); // Close an open file handle. fclose($fp); } // Return file content as string. return $contents; } ?> |
Load a BLOB column to the MySQL database →
This is a copy of the four files required to load a large image to a MySQL database into a MEDIUMBLOB data type. The fourth file reads the binary image and translates it into an HTML header and image that can be read through a call to the src attribute of an img tag. You can find the call to the forth file in the UploadItemBlobMySQL.php.
The code is in clear text because somebody asked for it. They’re nervous about zip files. Click the title above to expand all the code text.
MySQLCredentials.inc
1 2 3 4 5 6 7 | <?php // Connection variables. define('HOSTNAME',"localhost"); define('USERNAME',"student"); define('PASSWORD',"student"); define('DATABASE',"sampledb"); ?> |
UploadItemBlobMySQLForm.htm
1 2 3 4 5 6 7 8 9 10 11 12 13 14 15 16 17 18 19 20 21 22 23 24 25 26 27 28 29 30 31 32 33 34 35 36 37 38 | <html>
<head>
<title>
UploadItemBlobMySQLForm.htm
</title>
</head>
<body>
<form id="uploadForm"
action="UploadItemBlobMySQL.php"
enctype="multipart/form-data"
method="post">
<table border=0 cellpadding=0 cellspacing=0>
<tr>
<td width=125>Item Number</td>
<td>
<input id="id" name="id" type="text">
</td>
</tr>
<tr>
<td width=125>Item Title</td>
<td>
<input id="title" name="title" type="text">
</td>
</tr>
<tr>
<td width=125>Select File</td>
<td>
<input id="uploadfilename" name="userfile" type="file">
</td>
</tr>
<tr>
<td width=125>Click Button to</td>
<td><input type="submit" value="Upload File"></td>
</tr>
</table>
</form>
</body>
</html> |
UploadItemBlobMySQL.php
1 2 3 4 5 6 7 8 9 10 11 12 13 14 15 16 17 18 19 20 21 22 23 24 25 26 27 28 29 30 31 32 33 34 35 36 37 38 39 40 41 42 43 44 45 46 47 48 49 50 51 52 53 54 55 56 57 58 59 60 61 62 63 64 65 66 67 68 69 70 71 72 73 74 75 76 77 78 79 80 81 82 83 84 85 86 87 88 89 90 91 92 93 94 95 96 97 98 99 100 101 102 103 104 105 106 107 108 109 110 111 112 113 114 115 116 117 118 119 120 121 122 123 124 125 126 127 128 129 130 131 132 133 134 135 136 137 138 139 140 141 142 143 144 145 146 147 | <?php // Set database credentials. include_once("MySQLCredentials.inc"); // Displayed moved file in web page. $item_blob = process_uploaded_file(); // Return successful attempt to connect to the database. if (!$c = @mysqli_connect(HOSTNAME,USERNAME,PASSWORD,DATABASE)) { // Print user message. print "Sorry! The connection to the database failed. Please try again later."; // Assign the mysqli_error() error and format double and single quotes. print mysqli_error(); // Kill the resource. die(); } else { // Declare input variables. $id = (isset($_POST['id'])) ? (int) $_POST['id'] : 1021; $title = (isset($_POST['title'])) ? $_POST['title'] : "Harry #1"; // Initialize a statement in the scope of the connection. $stmt = mysqli_stmt_init($c); // Declare a PL/SQL execution command. $sql = "UPDATE item SET item_blob = ? WHERE item_id = ?"; // Prepare statement and link it to a connection. if (mysqli_stmt_prepare($stmt,$sql)) { mysqli_stmt_bind_param($stmt,"bi",$item_blob,$id); $start = 0; $chunk = 8192; while ($start < strlen($item_blob)) { mysqli_stmt_send_long_data($stmt,0,substr($item_blob,$start,$chunk)); $start += $chunk; } // Execute the PL/SQL statement. if (mysqli_stmt_execute($stmt)) { query_insert($id,$title); } else { print "Your target row doesn't exist."; } } else { print "mysqli_stmt_prepare() failed."; } // Disconnect from database. mysqli_close($c); } // Query results afret an insert. function query_insert($id,$title) { // Return successful attempt to connect to the database. if (!$c = @mysqli_connect(HOSTNAME,USERNAME,PASSWORD,DATABASE)) { // Print user message. print "Sorry! The connection to the database failed. Please try again later."; // Assign the OCI error and format double and single quotes. print mysqli_error(); // Kill the resource. die(); } else { // Initialize a statement in the scope of the connection. $stmt = mysqli_stmt_init($c); // Declare a SQL SELECT statement returning a CLOB. $sql = "SELECT item_desc FROM item WHERE item_id = ?"; // Prepare statement and link it to a connection. if (mysqli_stmt_prepare($stmt,$sql)) { mysqli_stmt_bind_param($stmt,"i",$id); // Execute the PL/SQL statement. if (mysqli_stmt_execute($stmt)) { // Bind result to local variable. mysqli_stmt_bind_result($stmt, $data); // Read result. mysqli_stmt_fetch($stmt); // Format HTML table to display BLOB photo and CLOB description. $out = '<table border="1" cellpadding="5" cellspacing="0">'; $out .= '<tr>'; $out .= '<td align="center" class="e">'.$title.'</td>'; $out .= '</tr>'; $out .= '<tr><td class="v">'; $out .= '<div>'; $out .= '<div style="margin-right:5px;float:left">'; $out .= '<img src="ConvertMySQLBlobToImage.php?id='.$id.'">'; $out .= '</div>'; $out .= '<div style="position=relative;">'.$data.'</div>'; $out .= '</div>'; $out .= '</td></tr>'; $out .= '</table>'; // Print the HTML table. print $out; } else { print "You're target row doesn't exist."; } } // Disconnect from database. mysqli_close($c); } } // Manage file upload and return file as string. function process_uploaded_file() { // Declare a variable for file contents. $contents = ""; // Define the upload file name for Windows or Linux. if (preg_match(".Win32.",$_SERVER["SERVER_SOFTWARE"])) $upload_file = "C:\\TEMP\\".$_FILES['userfile']['name']; else $upload_file = "/tmp/".$_FILES['userfile']['name']; // Check for and move uploaded file. if (is_uploaded_file($_FILES['userfile']['tmp_name'])) move_uploaded_file($_FILES['userfile']['tmp_name'],$upload_file); // Open a file handle and suppress an error for a missing file. if ($fp = @fopen($upload_file,"r")) { // Read until the end-of-file marker. while (!feof($fp)) $contents .= fgetc($fp); // Close an open file handle. fclose($fp); } // Return file content as string. return $contents; } ?> |
ConvertMySQLBlobToImage.php
1 2 3 4 5 6 7 8 9 10 11 12 13 14 15 16 17 18 19 20 21 22 23 24 25 26 27 28 29 30 31 32 33 34 35 36 37 38 39 40 41 42 43 44 45 46 47 48 49 50 51 | <?php // Database credentials must be set manually because an include_once() function // call puts something ahead of the header, which causes a failure when rendering // an image. // Return successful attempt to connect to the database. if (!$c = @mysqli_connect("localhost","student","student","sampledb")) { // Print user message. print "Sorry! The connection to the database failed. Please try again later."; // Assign the OCI error and format double and single quotes. print mysqli_error(); // Kill the resource. die(); } else { // Declare input variables. $id = (isset($_GET['id'])) ? (int) $_GET['id'] : 1023; // Initialize a statement in the scope of the connection. $stmt = mysqli_stmt_init($c); // Declare a SQL SELECT statement returning a MediumBLOB. $sql = "SELECT item_blob FROM item WHERE item_id = ?"; // Prepare statement and link it to a connection. if (mysqli_stmt_prepare($stmt,$sql)) { mysqli_stmt_bind_param($stmt,"i",$id); // Execute the PL/SQL statement. if (mysqli_stmt_execute($stmt)) { // Bind result to local variable. mysqli_stmt_bind_result($stmt, $image); // Read result. mysqli_stmt_fetch($stmt); } } // Disconnect from database. mysqli_close($c); // Print the header first. header('Content-type: image/x-png'); imagepng(imagecreatefromstring($image)); } ?> |
- Create a
tempdirectory for the upload target location, as qualified in the PHP code. The PHP code works regardless of whether you’re on Windows or Linux, but it does depend on the creation of this directory.
![]()
- Create a directory or folder for the large file source directories. This directory is probably on your test machine (laptop) but it mimics a client laptop and would work if your server was on a different machine.
![]()
- Inside the Upload directory, you should create the following two directories:

- You should download the CLOB Text File zip file and unzip it into the
textfiles directory; then download the BLOB Image File zip file and unzip it into the imagefiles directory.Assuming you’ve downloaded the zip files and extracted them into the correct locations, this section is done.
Prepare the MySQL database →
This section provides you with instructions on how to ensure everything will work once the PHP programs call the database. Even if you have one of my sample Video Store databases, you should verify and add appropriate columns. This post assumes you’ve downloaded the one of my basic Video Store models
- Navigate to the directory that you created for SQL scripts, which should be
/home/student/Data/mysql. In that directory at the command prompt, connect as thestudentuser, which should be student. You connect to the MySQL database, with the following syntax as student (if you need more help, check this blog post on configuring MySQL).
mysql -ustudent -pstudent |
Once connected to the database, you run the files to create the database, like:
mysql> source /Data/mysql/create_mysql_store.sql mysql> source /Data/mysql/seed_mysql_store.sql |
- Navigate to the directory that you created for SQL scripts, which should be
/home/student/Data/mysql. In that directory at the command prompt, connect as thestudentuser, or whichever account you’re using. You should confirm that you have aitem_desccolumn ofTEXTdata type, and anitem_blobcolumn ofMEDIUMBLOBtype in theitemtable. If you don’t have those columns, you can add them with the following statement:
ALTER TABLE item ADD (item_desc TEXT, item_blob MEDIUMBLOB); |
After ensuring that you have those two columns, you’ve completed this section.
Test the Configuration →
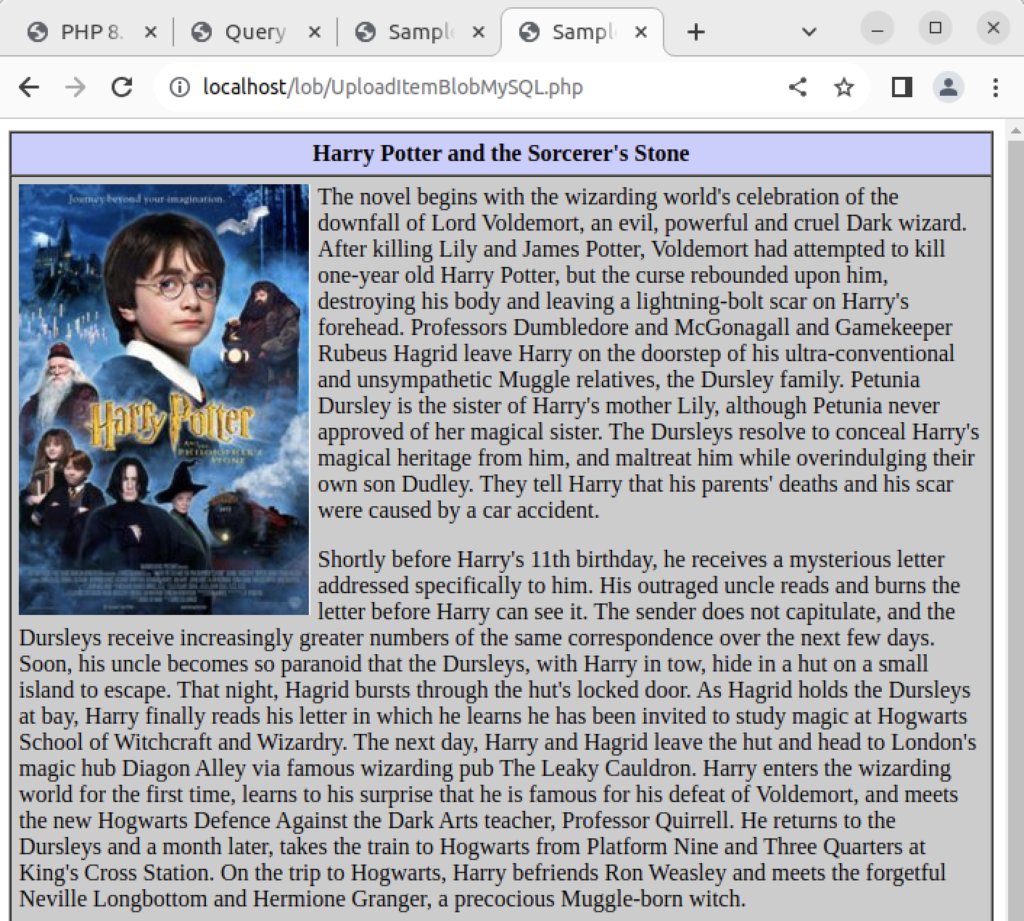
This section shows you how to test all that you’ve done. It works provided you created the directories and extracted the zip file contents to their respective directories. The virtual URL actually maps to the /var/www/html/lob directory.
- Enter the
http://localhost/lob/UploadItemDescMySQLForm.htmURL, and complete the form by choosing a validitem_idcolumn value and text file from your/home/student/Upload/TextFilesdirectory. Then, click the Upload File button (you can see a larger version of the image by clicking on it).

- This page displays after you successfully upload the text file to the database.

- Enter the
http://localhost/lob/UploadItemBlobFormMySQL.htmURL, and complete the form by choosing a validitem_idcolumn value and image file from your/home/student/Upload/ImageFilesdirectory. Then, click the Upload File button (you can see a larger version of the image by clicking on it).

- This page displays after you successfully upload the image file to the database.

Troubleshooting the Configuration →
This section shows you how to check why something isn’t working.
- The first thing to check are the credentials. They’re in the
MySQLCredentials.incfile. They’re posted with alocalhostmachine name,studentusername,studentpassword, andsampledbdatabase.
- Not to be funny, but the second thing to check are credentials. Specifically, you need to check the credentials in the
ConvertBlobToImage.phpfile. They’re individually entered in the connect string of this file because otherwise they put something in front of the header, which is disallowed to render the image.
- Check to see if the text or image file made it to the
/var/www/html/lob/tempdirectory. If they made it that far but no further, check to see if you have valid procedures in thestudentschema.
- Check whether the
TEXTandMEDIUMBLOBare loaded into the database. You use theLENGTHfunction, like this:
SELECT i.item_id , length(i.item_desc) , length(i.item_blob) FROM item i WHERE i.item_desc IS NOT NULL OR i.item_blob IS NOT NULL; |
- Check if the
item_idvalue is found in the list of values.
- If you’re stumped, add a comment and explain what’s up.
If you find any problems, please let me know. I’ll be happy to fix them.
AlmaLinux Install & Configuration

This is a collection of blog posts for installing and configuring AlmaLinux with the Oracle, PostgreSQL, MySQL databases and several programming languages. Sample programs show how to connect PHP and Python to the MySQL database.
- Installing AlmaLinux operating system
- Installing and configuring MySQL
- Installing Python-MySQL connector and provide sample programs
- Configuring Flask for Python on AlmaLinux with a complete software router instruction set.
- Installing Rust programming language and writing a sample program
- Installing and configuring LAMP stack with PHP and MySQL and a self-signed security key
- MySQL PNG Images in LAMP with PHP Programming
- Demonstration of how to write Perl that connects to MySQL
- Installing and configuring MySQL Workbench
- Installing and configuring PostgreSQL and pgAdmin4
- Identifying the required libnsl2-devel packages for SQL*Plus
- Writing and deploying a sqlplus function to use a read line wrapper
- Installing and configuring Visual Studio Code Editor
- Installing and configuring Java with connectivity to MySQL
- Installing and configuring Oracle SQL Developer
I used Oracle Database 11g XE in this instance to keep the footprint as small as possible. It required a few tricks and discovering the missing library that caused folks grief eleven years ago. I build another with a current Oracle Database XE after the new year.
If you see something that I missed or you’d like me to add, let me know. As time allows, I’ll try to do that. Naturally, the post will get updates as things are added later.
Bash Debug Function
My students working in Linux would have a series of labs to negotiate and I’d have them log the activities of their Oracle SQL scripts. Many of them would suffer quite a bit because they didn’t know how to find the errors in the log files.
I wrote this SQL function for them to put in their .bashrc files. It searches all the .txt files for errors and organizes them by log file, line number, and descriptive error message.
errors () { label="File Name:Line Number:Error Code"; list=`ls ./*.$1 | wc -l`; if [[ ${list} -eq 1 ]]; then echo ${label}; echo "----------------------------------------"; filename=`ls *.txt`; echo ${filename}:`find . -type f | grep -in *.txt -e ora\- -e pls\- -e sp2\-`; else if [[ ${list} -gt 1 ]]; then echo ${label}; echo "----------------------------------------"; find . -type f | grep --color=auto -in *.txt -e ora\- -e pls\- -e sp2\-; fi; fi } |
I hope it helps others now too.
Python on PostgreSQL
The ODBC library you use when connecting Python to PostgreSQL is the psycopg2 Python library. This blog post will show use how to use it in Python and install it on your Fedora Linux installation. It leverages a videodb database that I show you how to build in this earlier post on configuring PostgreSQL 14.
You would import psycopg2 as follows in your Python code:
import psycopg2 |
Unfortunately, that only works on Linux servers when you’ve installed the library. That library isn’t installed with generic Python libraries. You get the following error when the psycopg2 library isn’t installed on your server.
Traceback (most recent call last):
  File "python_new_hire.sql", line 1, in <module>
    import psycopg2
ModuleNotFoundError: No module named 'psycopg2' |
You can install it on Fedora Linux with the following command:
yum install python3-psycopg2 |
It will install:
==================================================================================== Package Architecture Version Repository Size ==================================================================================== Installing: python3-psycopg2 x86_64 2.7.7-1.fc30 fedora 160 k Transaction Summary ==================================================================================== Install 1 Package Total download size: 160 k Installed size: 593 k Is this ok [y/N]: y Downloading Packages: python3-psycopg2-2.7.7-1.fc30.x86_64.rpm 364 kB/s | 160 kB 00:00 ------------------------------------------------------------------------------------ Total 167 kB/s | 160 kB 00:00 Running transaction check Transaction check succeeded. Running transaction test Transaction test succeeded. Running transaction Preparing : 1/1 Installing : python3-psycopg2-2.7.7-1.fc30.x86_64 1/1 Running scriptlet: python3-psycopg2-2.7.7-1.fc30.x86_64 1/1 Verifying : python3-psycopg2-2.7.7-1.fc30.x86_64 1/1 Installed: python3-psycopg2-2.7.7-1.fc30.x86_64 Complete! |
Here’s a quick test case that you can run in PostgreSQL and Python to test all the pieces. The first SQL script creates a new_hire table and inserts two rows, and the Python program queries data from the new_hire table.
The new_hire.sql file creates the new_hire table and inserts two rows:
-- Environment settings for the script. SET SESSION "videodb.table_name" = 'new_hire'; SET CLIENT_MIN_MESSAGES TO ERROR; -- Verify table name. SELECT current_setting('videodb.table_name'); -- ------------------------------------------------------------------ -- Conditionally drop table. -- ------------------------------------------------------------------ DROP TABLE IF EXISTS new_hire CASCADE; -- ------------------------------------------------------------------ -- Create table. -- ------------------------------------------------------------------- CREATE TABLE new_hire ( new_hire_id SERIAL , first_name VARCHAR(20) NOT NULL , middle_name VARCHAR(20) , last_name VARCHAR(20) NOT NULL , hire_date TIMESTAMP WITH TIME ZONE NOT NULL DEFAULT CURRENT_TIMESTAMP , PRIMARY KEY (new_hire_id)); -- Alter the sequence by restarting it at 1001. ALTER SEQUENCE new_hire_new_hire_id_seq RESTART WITH 1001; -- Display the table organization. SELECT tc.table_catalog || '.' || tc.constraint_name AS constraint_name , tc.table_catalog || '.' || tc.table_name AS table_name , kcu.column_name , ccu.table_catalog || '.' || ccu.table_name AS foreign_table_name , ccu.column_name AS foreign_column_name FROM information_schema.table_constraints AS tc JOIN information_schema.key_column_usage AS kcu ON tc.constraint_name = kcu.constraint_name AND tc.table_schema = kcu.table_schema JOIN information_schema.constraint_column_usage AS ccu ON ccu.constraint_name = tc.constraint_name AND ccu.table_schema = tc.table_schema WHERE tc.constraint_type = 'FOREIGN KEY' AND tc.table_name = current_setting('videodb.table_name') ORDER BY 1; SELECT c1.table_name , c1.ordinal_position , c1.column_name , CASE WHEN c1.is_nullable = 'NO' AND c2.column_name IS NOT NULL THEN 'PRIMARY KEY' WHEN c1.is_nullable = 'NO' AND c2.column_name IS NULL THEN 'NOT NULL' END AS is_nullable , CASE WHEN data_type = 'character varying' THEN data_type||'('||character_maximum_length||')' WHEN data_type = 'numeric' THEN CASE WHEN numeric_scale != 0 AND numeric_scale IS NOT NULL THEN data_type||'('||numeric_precision||','||numeric_scale||')' ELSE data_type||'('||numeric_precision||')' END ELSE data_type END AS data_type FROM information_schema.columns c1 LEFT JOIN (SELECT trim(regexp_matches(column_default,current_setting('videodb.table_name'))::text,'{}')||'_id' column_name FROM information_schema.columns) c2 ON c1.column_name = c2.column_name WHERE c1.table_name = current_setting('videodb.table_name') ORDER BY c1.ordinal_position; -- Display primary key and unique constraints. SELECT constraint_name , lower(constraint_type) AS constraint_type FROM information_schema.table_constraints WHERE table_name = current_setting('videodb.table_name') AND constraint_type IN ('PRIMARY KEY','UNIQUE'); -- Insert two test records. INSERT INTO new_hire ( first_name, middle_name, last_name, hire_date ) VALUES ('Malcolm','Jacob','Lewis','2018-2-14') ,('Henry',null,'Chabot','1990-07-31'); |
You can put it into a local directory, connect as the student user to a videodb database, and run the following command (or any database you’ve created).
\i new_hire.sql |
The new_hire.py file creates the new_hire table and inserts two rows:
# Import the PostgreSQL connector library. import psycopg2 try: # Open a connection to the database. connection = psycopg2.connect( user="student" , password="student" , port="5432" , dbname="videodb") # Open a cursor. cursor = connection.cursor() # Assign a static query. query = "SELECT new_hire_id, first_name, last_name " \ "FROM new_hire" # Parse and execute the query. cursor.execute(query) # Fetch all rows from a table. records = cursor.fetchall() # Read through and print the rows as tuples. for row in range(0, len(records)): print(records[row]) except (Exception, psycopg2.Error) as error : print("Error while fetching data from PostgreSQL", error) finally: # Close the database connection. if (connection): cursor.close() connection.close() |
You run it from the command line, like:
python3 ./new_hire.py |
It should print:
(1001, 'Malcolm', 'Lewis') (1002, 'Henry', 'Chabot') |
As always, I hope this helps those trying to sort out how to connect Python to PostgreSQL.
PostgreSQL CLI Error
Problems get reported to me all the time on installations for my students, this one was interesting. They got an error complaining about a missing libpq.so.5 library.
psql: /usr/pgsql-11/lib/libpq.so.5: no version information available (required by psql) psql: /usr/pgsql-11/lib/libpq.so.5: no version information available (required by psql) could not change directory to "/root": Permission denied psql (11.7, server 11.8) Type "help" for help. postgres=# |
It appeared as a mismatch of libraries but it’s not that. For reference, this was a Fedora instance. I ran the rpm utility:
rpm -qa | grep postgres |
It returned:
postgresql11-libs-11.8-1PGDG.f30.x86_64 postgresql-11.7-2.fc30.x86_64 postgresql-server-11.7-2.fc30.x86_64 |
Then, I had them run the rpm utility again looking for the Python driver for PostgreSQL:
rpm -qa | grep psycopg2 |
It returned:
python3-psycopg2-2.7.7-1.fc30.x86_64 |
Then, it was easy to explain. The Python psycopg2 library uses both PostgreSQL 11.7 and 11.8 dependent libraries and the libpq.so.5 library is missing version information. You must ignore the error, which is really only a warning message, when you want to work on Fedora, PostgreSQL 11, and Python 3.
MySQL PHP Transaction
My students liked the MySQL Transaction post but wanted one that showed how an external web application would interact with MySQL in the scope of a transaction. So, I put a little PHP function together that write across two related tables in the context of a transaction. It uses mysqli (MySQL Improved Extension) to connect PHP to the MySQL database.
The function is barebones and uses the oldest approach of hidden inputs to maintain context between rendered forms using an HTML POST method. The hidden inputs are preceded with “h_” and snake case is used for variable names.
The function only writes to two tables. It writes to the member table and when that completes successfully to the contact table. The function:
- Submits credentials from a file and raises an error when they don’t work.
- Initializes a SQL statement.
- Disables auto commit.
- Starts a transaction.
- Defines a first SQL statement with placeholders.
- Binds local variables to the first SQL statement’s placeholders.
- Rolls back the transaction when the first statement fails and continues to the next SQL statement when first statement succeeds.
- Defines a second SQL statement with placeholders.
- Binds local variables to the second SQL statement’s placeholders.
- Rolls back the transaction when the second statement fails and commits the work when the second statement succeeds.
- Closes a SQL statement.
The code for the PHP function is:
1 2 3 4 5 6 7 8 9 10 11 12 13 14 15 16 17 18 19 20 21 22 23 24 25 26 27 28 29 30 31 32 33 34 35 36 37 38 39 40 41 42 43 44 45 46 47 48 49 50 51 52 53 54 55 56 57 58 59 60 61 62 63 64 65 66 67 68 69 70 71 72 73 74 75 76 77 78 79 80 81 82 83 84 85 86 87 88 89 90 91 92 93 94 95 96 97 98 99 100 101 102 103 104 105 106 107 108 109 110 111 112 113 114 115 116 117 118 119 120 121 122 123 124 125 126 127 128 129 | /* || Function Name: update_membership || ---------------------------------------------------------------------- || No return, treated as a procedure, or method returning a void. || ---------------------------------------------------------------------- */ function update_membership( $h_account_number , $h_member_type , $h_credit_card_number , $h_credit_card_type , $account_number , $member_type , $credit_card_number , $credit_card_type , $h_first_name , $h_middle_name , $h_last_name , $h_contact_type , $first_name , $middle_name , $last_name , $contact_type) { // Include the credentials file if omitted. include_once("MySQLCredentials.inc"); // Assign credentials to connection. $mysqli = new mysqli(HOSTNAME, USERNAME, PASSWORD, DATABASE); // Check for connection error and print message. if ($mysqli->connect_errno) { print $mysqli->connect_error."<br />"; print "Connection not established ...<br />"; } else { // Initial statement. $stmt = $mysqli->stmt_init(); // Disable auto commit when you want two plus statements run. $mysqli->autocommit(FALSE); // Set the transaction guarantee. $mysqli->begin_transaction(MYSQLI_TRANS_START_READ_WRITE); // Declare a static query. $sql = "UPDATE member\n" . "SET member_type = ?\n" . ", credit_card_number = ?\n" . ", credit_card_type = ?\n" . "WHERE account_number = ?\n" . "AND member_type = ?\n" . "AND credit_card_number = ?\n" . "AND credit_card_type = ?\n"; // Prepare statement. if ($stmt->prepare($sql)) { $stmt->bind_param( "sssssss" , $member_type , $credit_card_number , $credit_card_type , $account_number , $h_member_type , $h_credit_card_number , $h_credit_card_type); } // Attempt query and exit with failure before processing. if (!$stmt->execute()) { // Rollback or undo the transaction. $mysqli->rollback(); // Print failure to resolve query message. print $mysqli->error."<br />\n"; print "Failed to resolve query ...<br />\n"; } // Declare a static query. $sql = "UPDATE contact\n" . "SET first_name = ?\n" . ", middle_name = ?\n" . ", last_name = ?\n" . ", contact_type = ?\n" . "WHERE first_name = ?\n" . "AND middle_name = ?\n" . "AND last_name = ?\n" . "AND contact_type = ?\n"; // Prepare statement. if ($stmt->prepare($sql)) { $stmt->bind_param( "ssssssss" , $first_name , $middle_name , $last_name , $contact_type , $h_first_name , $h_middle_name , $h_last_name , $h_contact_type); } // Attempt query and exit with failure before processing. if (!$stmt->execute()) { // Rollback or undo the transaction. $mysqli->rollback(); // Print failure to resolve query message. print $mysqli->error."<br />"; print "Failed to resolve query ...<br />"; } else { /* Manually commiting writes when you have disabled the || default auto commit setting, explained above. || ------------------------------------------------------------ || You would add the following command to commit the || transaction. || ------------------------------ || $mysqli->commit(); || ------------------------------------------------------------ */ $mysqli->commit(); // Close the transaction. $mysqli->close(); } } } |
Line 41 disables auto commit and line 44 starts the transaction. Each statement is managed with the subsequent statement nested inside a block of code that is only reachable when the prior statement succeeds. While this only uses the member and contact table, it could use any number of tables. The natural alternative is building an updatable view.
As always, I hope this helps anybody looking for a code complete example.
MySQL Transaction Scope
The idea of ACID transactions are a basic feature of SQL’s individual Data Manipulation Language (DML) commands, like the INSERT, UPDATE, and DELETE statements. Transactions across two or more tables are a natural extension of ACID compliance features provided by DML commands. However, they require a structured programming approach, like a store procedure or like API implemented in an imperative language.
Surprisingly, transaction management wasn’t covered well in Alan Beaulieu’s Learning SQL because he only provided pseudo code logic. While I thought troubleshoot some broken MySQL SQL/PSM logic would be a good learning experience for students, it wasn’t. So, I wrote this sample code to show how to achieve an all or nothing transaction across four tables.
The code for this example on transaction management lets you perform the important tasks necessary to effect transaction management:
- You must disable autocommit in the scope of the session.
- You must use an imperative programming language like SQL/PSM or Python, et cetera.
- You must identify an error thrown in a series of DML transactions, rollback all completed work, and exit the scope of the program unit.
This SQL defines the four tables:
/* Drop and create four tables. */ DROP TABLE IF EXISTS one, two, three, four; CREATE TABLE one ( id int primary key auto_increment, msg varchar(10)); CREATE TABLE two ( id int primary key auto_increment, msg varchar(10)); CREATE TABLE three ( id int primary key auto_increment, msg varchar(10)); CREATE TABLE four ( id int primary key auto_increment, msg varchar(10)); |
Unfortunately, there’s no way to simply transaction management from the MySQL Command-Line Interface (CLI) because you need to build the logic that manages success and failure. It requires that you create a procedure using MySQL’s SQL/PSM (Persistent Stored Module) or another imperative programming language. You might think why can’t you just write an anonymous block program, like you can do in other stored procedural languages. The answer is simple. You can’t write anonymous blocks in MySQL’s SQL/PSM because they adhere to ANSI SQL-2003 (or more accurately ISO/IEC 9075-4:2003).
The following code block does:
- Conditionally drops the locking() procedure.
- Sets the default semicolon (
;) delimiter to a double-dollar ($$), which lets you use the semicolon as statement and block terminators. - Declares a
locking()procedure with the following:- Sets a parameter list with four IN-mode parameters.
- Declares an
EXIThandler that undoes any writes before an error in a sequence of DDL commands, like theINSERT,UPDATE, orDELETEstatements. TheEXIThandler then aborts completion of the rest of the procedure. (MySQL 13.6.7.2 Declare … Handler Statement) - Disables autocommit in the scope of the session.
- Starts a transaction context and inserts data into four tables as a transaction. The continue handler picks up processing when one of the
INSERTstatements fails with a 1406 error code. The 1406 error code represents an error that occurs because the data is too long for a column’s width. - When all elements of the procedure complete, you commit the work.
/* Conditionally drop procedure. */ DROP PROCEDURE IF EXISTS locking; /* Set delimiter to $$ to allow ; inside the procedure. */ DELIMITER $$ /* Create a transaction procedure. */ CREATE PROCEDURE locking(IN pv_one varchar(10) ,IN pv_two varchar(10) ,IN pv_three varchar(10) ,IN pv_four varchar(10)) BEGIN /* Declare an EXIT Handler when a string is too long for a column. Undo all prior writes with a ROLLBACK statement. */ DECLARE EXIT HANDLER FOR 1406 BEGIN ROLLBACK; END; /* Disable autocommit. */ SET AUTOCOMMIT=0; /* Start transaction scope. */ START TRANSACTION; /* A series of INSERT statement. */ INSERT INTO one (msg) VALUES (pv_one); INSERT INTO two (msg) VALUES (pv_two); INSERT INTO three (msg) VALUES (pv_three); INSERT INTO four (msg) VALUES (pv_four); /* Commit transaction set. */ COMMIT; END; $$ /* Reset delimiter to ; for SQL statements. */ DELIMITER ; |
The next block tests the locking() procedure. The first and third calls are successful but the second one fails because the third parameter is too long for the msg column in the three table. The error triggers the EXIT handler in the locking() procedure.
/* Call locking procedure. */ CALL locking('Donald','Goofy','Mickey','Pluto'); CALL locking('Squirrel','Chipmunk','Monkey business','Raccoon'); CALL locking('Curly','Larry','Moe','Shemp'); |
The query block below:
/* Select from tables, which should be empty. */ SELECT * FROM one; SELECT * FROM two; SELECT * FROM three; SELECT * FROM four; |
Returns the following, which shows only the first and third test cases succeed:
+----+--------+ | id | msg | +----+--------+ | 1 | Donald | | 2 | Curly | +----+--------+ 2 rows in set (0.01 sec) +----+-------+ | id | msg | +----+-------+ | 1 | Goofy | | 2 | Larry | +----+-------+ 2 rows in set (0.00 sec) +----+--------+ | id | msg | +----+--------+ | 1 | Mickey | | 2 | Moe | +----+--------+ 2 rows in set (0.00 sec) +----+-------+ | id | msg | +----+-------+ | 1 | Pluto | | 2 | Shemp | +----+-------+ 2 rows in set (0.00 sec) |
As always, I hope this helps those trying to write transactions across multiple tables.
MySQL Self-Join
I’m switching to MySQL and leveraging Alan Beaulieu’s Learning SQL as a supporting reference for my Database Design and Development course. While reviewing Alan’s Chapter 5: Querying Multiple Tables, I found his coverage of using self-joins minimal.
In fact, he adds a prequel_film_id column to the film table in the sakila database and then a single row to demonstrate a minimal self-join query. I wanted to show them how to view a series of rows interconnected by a self-join, like the following:
SELECT f.title AS film , fp.title AS prequel FROM film f LEFT JOIN film fp ON f.prequel_id = fp.film_id WHERE f.series_name = 'Harry Potter' ORDER BY f.series_number; |
It returns the following result set:
+----------------------------------------------+----------------------------------------------+ | film | prequel | +----------------------------------------------+----------------------------------------------+ | Harry Potter and the Chamber of Secrets | Harry Potter and the Sorcerer's Stone | | Harry Potter and the Prisoner of Azkaban | Harry Potter and the Chamber of Secrets | | Harry Potter and the Goblet of Fire | Harry Potter and the Prisoner of Azkaban | | Harry Potter and the Order of the Phoenix | Harry Potter and the Goblet of Fire | | Harry Potter and the Half Blood Prince | Harry Potter and the Order of the Phoenix | | Harry Potter and the Deathly Hallows: Part 1 | Harry Potter and the Half Blood Prince | | Harry Potter and the Deathly Hallows: Part 2 | Harry Potter and the Deathly Hallows: Part 1 | +----------------------------------------------+----------------------------------------------+ 7 rows in set (0.00 sec) |
Then, I thought about what questions the students might ask. For example, why doesn’t the query return the first film that doesn’t have a prequel. So, I took the self-join to the next level to display the first film having no prequel, like this:
SELECT f.title AS film , IFNULL( CASE WHEN NOT f.film_id = fp.film_id AND f.prequel_id = fp.film_id THEN fp.title END,'None') AS prequel FROM film f LEFT JOIN film fp ON f.prequel_id = fp.film_id WHERE f.series_name = 'Harry Potter' ORDER BY f.series_number; |
The CASE operator in the SELECT-list filters the result set by eliminating rows erroneously returned. Without the CASE filter, the query would return the original Harry Potter and the Sorcerer’s Stone film matched agains a NULL and all of the other sequels. The CASE operator effectively limits the result set for the LEFT JOIN to only the following data:
+----------------------------------------------+----------------------------------------------+ | film | prequel | +----------------------------------------------+----------------------------------------------+ | Harry Potter and the Sorcerer's Stone | NULL | +----------------------------------------------+----------------------------------------------+ |
The IFNULL() built-in function lets you replace the NULL value returned as the prequel’s title value. The IFNULL() function substitutes a 'None' string literal for a NULL value. The query returns the following result set:
+----------------------------------------------+----------------------------------------------+ | film | prequel | +----------------------------------------------+----------------------------------------------+ | Harry Potter and the Sorcerer's Stone | None | | Harry Potter and the Chamber of Secrets | Harry Potter and the Sorcerer's Stone | | Harry Potter and the Prisoner of Azkaban | Harry Potter and the Chamber of Secrets | | Harry Potter and the Goblet of Fire | Harry Potter and the Prisoner of Azkaban | | Harry Potter and the Order of the Phoenix | Harry Potter and the Goblet of Fire | | Harry Potter and the Half Blood Prince | Harry Potter and the Order of the Phoenix | | Harry Potter and the Deathly Hallows: Part 1 | Harry Potter and the Half Blood Prince | | Harry Potter and the Deathly Hallows: Part 2 | Harry Potter and the Deathly Hallows: Part 1 | +----------------------------------------------+----------------------------------------------+ 8 rows in set (0.01 sec) |
Alan’s modification of the sakila.film table had the following two related design flaws:
- It didn’t provide a way to guarantee the ordering of films with prequels because relational databases don’t guarantee ordered result sets unless you use an
ORDER BYclause, which typically requires a column to order. - It didn’t provide a way to isolate a series of films.
I modified the film table differently by adding the series_name, series_number, and prequel_id columns. The series_name column lets you group results and the series_number column lets you order by a preserved sequence that you store as part of the data The prequel_id column lets you connect to the prequel film, much like the backward portion of a doubly linked list.
The new sakila.film table is:
+----------------------+---------------------------------------------------------------------+------+-----+-------------------+-----------------------------------------------+ | Field | Type | Null | Key | Default | Extra | +----------------------+---------------------------------------------------------------------+------+-----+-------------------+-----------------------------------------------+ | film_id | smallint unsigned | NO | PRI | NULL | auto_increment | | title | varchar(255) | NO | MUL | NULL | | | description | text | YES | | NULL | | | release_year | year | YES | | NULL | | | language_id | tinyint unsigned | NO | MUL | NULL | | | original_language_id | tinyint unsigned | YES | MUL | NULL | | | rental_duration | tinyint unsigned | NO | | 3 | | | rental_rate | decimal(4,2) | NO | | 4.99 | | | length | smallint unsigned | YES | | NULL | | | replacement_cost | decimal(5,2) | NO | | 19.99 | | | rating | enum('G','PG','PG-13','R','NC-17') | YES | | G | | | special_features | set('Trailers','Commentaries','Deleted Scenes','Behind the Scenes') | YES | | NULL | | | last_update | timestamp | NO | | CURRENT_TIMESTAMP | DEFAULT_GENERATED on update CURRENT_TIMESTAMP | | series_name | varchar(20) | YES | | NULL | | | series_number | int unsigned | YES | | NULL | | | prequel | int unsigned | YES | | NULL | | +----------------------+---------------------------------------------------------------------+------+-----+-------------------+-----------------------------------------------+ 16 rows in set (0.21 sec) |
After adding the three new columns, I inserted eight rows for the original Harry Potter films. You can use the following script in the MySQL client (mysql) to add the columns and insert the data to test the preceding queries:
-- Use sakila database. USE sakila; -- Add a prequel_id column to the sakila.film table. ALTER TABLE film ADD (series_name varchar(20)), ADD (series_number int unsigned), ADD (prequel_id int unsigned); -- Set primary to foreign key local variable. SET @sv_film_id = 0; -- Insert Harry Potter films in sakila.film table with classic values clause. INSERT INTO film ( title , description , release_year , language_id , original_language_id , rental_duration , rental_rate , length , replacement_cost , rating , special_features , last_update , series_name , series_number , prequel_id ) VALUES ('Harry Potter and the Sorcerer''s Stone' ,'A film about a young boy who on his eleventh birthday discovers, he is the orphaned boy of two powerful wizards and has unique magical powers.' , 2001 , 1 , NULL , 3 , 0.99 , 152 , 19.99 ,'PG' ,'Trailers' ,'2001-11-04' ,'Harry Potter' , 1 , NULL ); -- Assign the last generated primary key value to the local variable. SET @sv_film_id := last_insert_id(); -- Insert 2nd film in sakila.film table with classic values clause. INSERT INTO film ( title , description , release_year , language_id , original_language_id , rental_duration , rental_rate , length , replacement_cost , rating , special_features , last_update , series_name , series_number , prequel_id ) VALUES ('Harry Potter and the Chamber of Secrets' ,'A film where Harry returning to Hogwarts, still famous and a hero, when strange things start to happen ... people are turning to stone and no-one knows what, or who, is doing it.' , 2002 , 1 , NULL , 3 , 0.99 , 160 , 19.99 ,'PG' ,'Trailers' ,'2002-11-15' ,'Harry Potter' , 2 , @sv_film_id ); -- Assign the last generated primary key value to the local variable. SET @sv_film_id := last_insert_id(); -- Insert 3rd film in sakila.film table with classic values clause. INSERT INTO film ( title , description , release_year , language_id , original_language_id , rental_duration , rental_rate , length , replacement_cost , rating , special_features , last_update , series_name , series_number , prequel_id ) VALUES ('Harry Potter and the Prisoner of Azkaban' ,'A film where Harry, Ron, and Hermione return for their third year at Hogwarts and are forced to face escaped prisoner, Sirius Black.' , 2004 , 1 , NULL , 3 , 0.99 , 141 , 19.99 ,'PG' ,'Trailers' ,'2004-06-04' ,'Harry Potter' , 3 , @sv_film_id ); -- Assign the last generated primary key value to the local variable. SET @sv_film_id := last_insert_id(); -- Insert 4th film in sakila.film table with classic values clause. INSERT INTO film ( title , description , release_year , language_id , original_language_id , rental_duration , rental_rate , length , replacement_cost , rating , special_features , last_update , series_name , series_number , prequel_id ) VALUES ('Harry Potter and the Goblet of Fire' ,'A film where where Harry Potter''s name emerges from the Goblet of Fire, and he becomes a competitor in a grueling battle for glory among three wizarding schools - the Triwizard Tournament.' , 2005 , 1 , NULL , 3 , 0.99 , 157 , 19.99 ,'PG' ,'Trailers' ,'2005-11-18' ,'Harry Potter' , 4 , @sv_film_id ); -- Assign the last generated primary key value to the local variable. SET @sv_film_id := last_insert_id(); -- Insert 5th film in sakila.film table with classic values clause. INSERT INTO film ( title , description , release_year , language_id , original_language_id , rental_duration , rental_rate , length , replacement_cost , rating , special_features , last_update , series_name , series_number , prequel_id ) VALUES ('Harry Potter and the Order of the Phoenix' ,'A film where Lord Voldemort has returned, but the Ministry of Magic is doing everything it can to keep the wizarding world from knowing the truth.' , 2007 , 1 , NULL , 3 , 0.99 , 138 , 19.99 ,'PG-13' ,'Trailers' ,'2007-07-12' ,'Harry Potter' , 5 , @sv_film_id ); -- Assign the last generated primary key value to the local variable. SET @sv_film_id := last_insert_id(); -- Insert 6th film in sakila.film table with classic values clause. INSERT INTO film ( title , description , release_year , language_id , original_language_id , rental_duration , rental_rate , length , replacement_cost , rating , special_features , last_update , series_name , series_number , prequel_id ) VALUES ('Harry Potter and the Half Blood Prince' ,'A film where Voldemort is tightening his grip on Hogwarts and it is no longer the safe haven it once was. Harry and Dumbledore work to find the key to unlock the Dark Lord''s defenses.' , 2009 , 1 , NULL , 3 , 0.99 , 153 , 19.99 ,'PG' ,'Trailers' ,'2009-07-15' ,'Harry Potter' , 6 , @sv_film_id ); -- Assign the last generated primary key value to the local variable. SET @sv_film_id := last_insert_id(); -- Insert 7th film in sakila.film table with classic values clause. INSERT INTO film ( title , description , release_year , language_id , original_language_id , rental_duration , rental_rate , length , replacement_cost , rating , special_features , last_update , series_name , series_number , prequel_id ) VALUES ('Harry Potter and the Deathly Hallows: Part 1' ,'A film where Harry, Ron and Hermione set out on their perilous mission to track down and destroy the Horcruxes - the keys to Voldemort''s immortality.' , 2010 , 1 , NULL , 3 , 0.99 , 146 , 19.99 ,'PG-13' ,'Trailers' ,'2010-11-19' ,'Harry Potter' , 7 , @sv_film_id ); -- Assign the last generated primary key value to the local variable. SET @sv_film_id := last_insert_id(); -- Insert 8th film in sakila.film table with classic values clause. INSERT INTO film ( title , description , release_year , language_id , original_language_id , rental_duration , rental_rate , length , replacement_cost , rating , special_features , last_update , series_name , series_number , prequel_id ) VALUES ('Harry Potter and the Deathly Hallows: Part 2' ,'A film where Harry, Ron and Hermione set out on their perilous mission to track down and destroy the Horcruxes - the keys to Voldemort''s immortality.' , 2011 , 1 , NULL , 3 , 0.99 , 130 , 19.99 ,'PG-13' ,'Trailers' ,'2011-07-15' ,'Harry Potter' , 8 , @sv_film_id ); |
You can put the following commands into a SQL script file to revert the sakila.film table to its base configuration:
DELETE FROM film WHERE film_id > 1000; ALTER TABLE film DROP COLUMN series_name; ALTER TABLE film DROP COLUMN series_number; ALTER TABLE film DROP COLUMN prequel_id; ALTER TABLE film AUTO_INCREMENT = 1000; |
As always, I hope this helps those looking for how to solve a new problem.
