Archive for the ‘Linux’ Category
Ubuntu Desktop 22.04

I finally got around to installing Ubuntu Desktop, Version 22.04, on my MacBook Pro 2014 since OS X stopped allowing upgrades on the device in 2021. While I replaced it in 2021 with a new MacBook Pro with an i9 Intel Chip. The Ubuntu documentation gave clear instructions on how to create a bootable USB drive before replacing the Mac OS software..
Unfortunately, networking was not well covered. It left me with two questions:
- How to configure Ubuntu Desktop 22.04 to the network?
You need to use an RJ45 network cable (in this case also an RJ45 to Thunderbolt adapter) and reboot the OS. It will automatically configure your DCHP connection.
- How to configure Wifi for Ubuntu Desktop 22.04?
You need to download and install a library, which is covered below.
After the Ubuntu Desktop installation, I noticed it didn’t provide any opportunity to update the software or configure the network. It also was not connected to the network. I connected the MacBook Pro to a physical Internet cable and rebooted the Ubuntu OS. It recognized the wired network. Then, I upgraded the installed libraries, which is almost always the best choice.
At this point, I noticed that the libraries to enable a WiFi connection were not installed. So, I installed the missing Wifi libraries with this command:
sudo apt-get install dbms bcmwl-kernel-source |
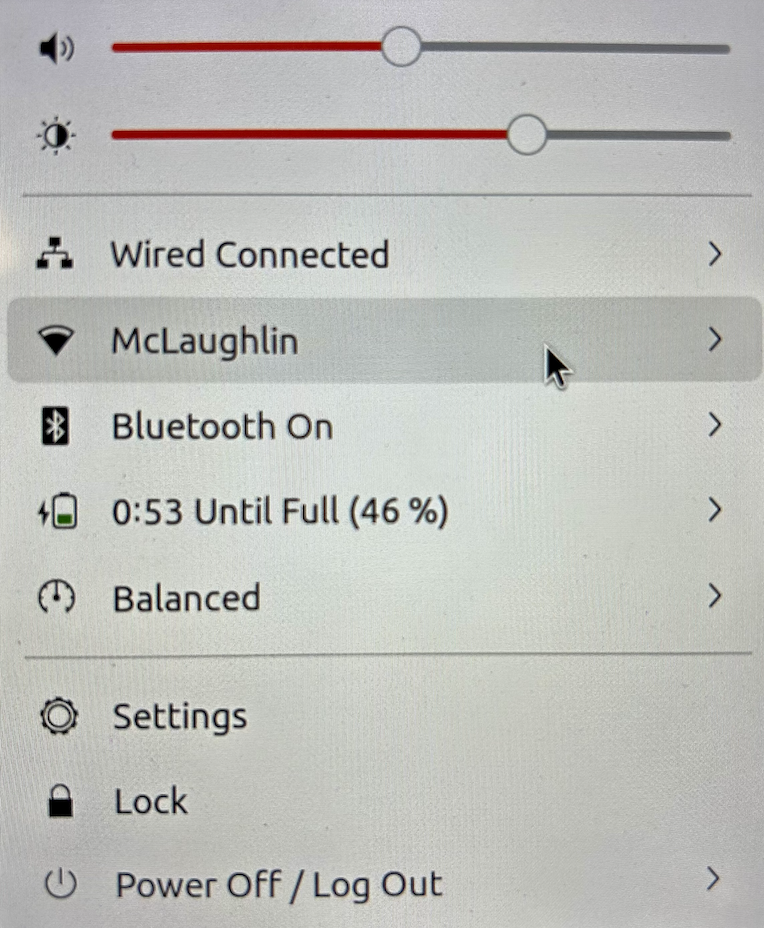
After you’ve installed the bcmwl-kernel-source libraries, navigate to the top right where you’ll find a small network icon. Click on the network icon and you’ll see the following dialog. Click on your designated Wifi, enter the password and you’ll have a Wifi connection.
As always, I hope this note helps those trying to solve a real world problem.
A tkprof Korn Shell
Reviewing old files, I thought posting my tkprof.ksh would be helpful. So, here’s the script that assumes you’re using Oracle e-Business Suite (Demo database, hence the APPS/APPS connection); and if I get a chance this summer I’ll convert it to Bash shell.
#!/bin/ksh
# -------------------------------------------------------------------------
# Author:   Michael McLaughlin
# Name:     tkprof.ksh

# Purpose:  The program takes the following arguments:
#           1. A directory
#           2. A search string
#           3. A target directory
#           It assumes raw trace files have an extension of ".trc".
#           The output file name follows this pattern (because it is
#           possible for multiple tracefiles to be written during the
#           same minute).
# -------------------------------------------------------------------------

# Function to find minimum field delimiter.
function min
{
  # Find the whitespace that preceeds the file date.
  until [[ $(ls -al $i | cut -c$minv-$minv) == " " ]]; do
    let minv=minv+1
  done
}

# Function to find maximum field delimiter.
function max
{
  # Find the whitespace that succeeds the file date.
  until [[ $(ls -al $i | cut -c$maxv-$maxv) == " " ]]; do
    let maxv=maxv+1
  done
}

# Debugging enabled by unremarking the "set -x"
# set -x

# Print header information
print =================================================================
print Running [tkprof.ksh] script ...

# Evaluate whether an argument is provide and if no argument
# is provided, then substitute the present working directory.
if   [[ $# == 0 ]]; then
  dir=${PWD}
  str="*"
  des=${PWD}
elif [[ $# == 1 ]]; then
  dir=${1}
  str="*"
  des=${1}
elif [[ $# == 2 ]]; then
  dir=${1}
  str=${2}
  des=${1}
elif [[ $# == 3 ]]; then
  dir=${1}
  str=${2}
  des=${3}
fi

# Evaluate whether the argument is a directory file.
if [[ -d ${dir} ]] && [[ -d ${des} ]]; then

  # Print what directory and search string are targets.
  print =================================================================
  print Run in tkprof from [${dir}] directory ...
  print The files contain a string of [${str}] ...
  print =================================================================

  # Evaluate whether the argument is the present working
  # directory and if not change directory to that target
  # directory so file type evaluation will work.
  if [[ ${dir} != ${PWD} ]]; then
    cd ${dir}
  fi

  # Set file counter.
  let fcnt=0

  # Submit compression to the background as a job.
  for i in $(grep -li "${str}" *.trc); do

    # Evaluate whether file is an ordinary file.
    if [[ -f ${i} ]]; then

      # Set default values each iteration.
      let minv=40
      let maxv=53

      # Increment counter.
      let fcnt=fcnt+1

      # Call functions to reset min and max values where necessary.
      min ${i}
      max ${i}

      # Parse date stamp from trace file without multiple IO calls.
      # Assumption that the file is from the current year.
      date=$(ls -al ${i} | cut -c${minv}-${maxv})
      mon=$(echo ${date} | cut -c1-3)
      yr=$(date          | cut -c25-28)

      # Validate month is 10 or greater to pad for reduced whitespace.
      if (( $(echo ${date} | cut -c5-6) < 10 )); then
        day=0$(echo ${date}| cut -c5-5)
        hr=$(echo ${date}  | cut -c7-8)
        min=$(echo ${date} | cut -c10-11)
      else
        day=$(echo ${date} | cut -c5-6)
        hr=$(echo ${date}  | cut -c8-9)
        min=$(echo ${date} | cut -c11-12)
      fi

      fn=file${fcnt}_${day}-${mon}-${yr}_${hr}:${min}:${day}

      print Old [$i] and new [$des/$fn]
      tkprof ${i} ${des}/${fn}.prf explain=APPS/APPS sort='(prsela,exeela,fchela)'

      # Print what directory and search string are targets.
      print =================================================================
    fi
  done

else
  # Print message that a directory argument was not provided.
  print You failed to provie a single valid directory argument.
fi |
I hope this helps those looking for a solution.
Listener for APEX
Unless dbca lets us build the listener.ora file, we often leave off some component. For example, running listener control program the following status indicates an incorrectly configured listener.ora file.
lsnrctl status |
It returns the following, which displays an endpoint for the XDB Server (I’m using Oracle Database 11g XE because it’s pre-containerized and has a small testing footprint):
LSNRCTL for Linux: Version 11.2.0.2.0 - Production on 24-MAR-2023 00:59:06 Copyright (c) 1991, 2011, Oracle. All rights reserved. Connecting to (DESCRIPTION=(ADDRESS=(PROTOCOL=IPC)(KEY=EXTPROC_FOR_XE))) STATUS of the LISTENER ------------------------ Alias LISTENER Version TNSLSNR for Linux: Version 11.2.0.2.0 - Production Start Date 21-MAR-2023 21:17:37 Uptime 2 days 3 hr. 41 min. 29 sec Trace Level off Security ON: Local OS Authentication SNMP OFF Default Service XE Listener Parameter File /u01/app/oracle/product/11.2.0/xe/network/admin/listener.ora Listener Log File /u01/app/oracle/diag/tnslsnr/localhost/listener/alert/log.xml Listening Endpoints Summary... (DESCRIPTION=(ADDRESS=(PROTOCOL=ipc)(KEY=EXTPROC_FOR_XE))) (DESCRIPTION=(ADDRESS=(PROTOCOL=tcp)(HOST=localhost)(PORT=1521))) (DESCRIPTION=(ADDRESS=(PROTOCOL=tcp)(HOST=localhost)(PORT=8080))(Presentation=HTTP)(Session=RAW)) Services Summary... Service "PLSExtProc" has 1 instance(s). Instance "PLSExtProc", status UNKNOWN, has 1 handler(s) for this service... Service "XE" has 1 instance(s). Instance "XE", status READY, has 1 handler(s) for this service... Service "XEXDB" has 1 instance(s). Instance "XE", status READY, has 1 handler(s) for this service... The command completed successfully |
The listener is missing the second SID_LIST_LISTENER value of CLRExtProc value. A complete listener.ora file should be as follows for the Oracle Database XE:
# listener.ora Network Configuration FILE: SID_LIST_LISTENER = (SID_LIST = (SID_DESC = (SID_NAME = PLSExtProc) (ORACLE_HOME = /u01/app/oracle/product/11.2.0/xe) (PROGRAM = extproc) ) (SID_DESC = (SID_NAME = CLRExtProc) (ORACLE_HOME = /u01/app/oracle/product/11.2.0/xe) (PROGRAM = extproc) ) ) LISTENER = (DESCRIPTION_LIST = (DESCRIPTION = (ADDRESS = (PROTOCOL = IPC)(KEY = EXTPROC_FOR_XE)) (ADDRESS = (PROTOCOL = TCP)(HOST = localhost.localdomain)(PORT = 1521)) ) ) DEFAULT_SERVICE_LISTENER = (XE) |
With this listener.ora file, the Oracle listener control utility will return the following correct status, which hides the XDB Server’s endpoint:
LSNRCTL for Linux: Version 11.2.0.2.0 - Production on 24-MAR-2023 02:38:57 Copyright (c) 1991, 2011, Oracle. All rights reserved. Connecting to (DESCRIPTION=(ADDRESS=(PROTOCOL=IPC)(KEY=EXTPROC_FOR_XE))) STATUS of the LISTENER ------------------------ Alias LISTENER Version TNSLSNR for Linux: Version 11.2.0.2.0 - Production Start Date 24-MAR-2023 02:38:15 Uptime 0 days 0 hr. 0 min. 42 sec Trace Level off Security ON: Local OS Authentication SNMP OFF Default Service XE Listener Parameter File /u01/app/oracle/product/11.2.0/xe/network/admin/listener.ora Listener Log File /u01/app/oracle/product/11.2.0/xe/log/diag/tnslsnr/localhost/listener/alert/log.xml Listening Endpoints Summary... (DESCRIPTION=(ADDRESS=(PROTOCOL=ipc)(KEY=EXTPROC_FOR_XE))) (DESCRIPTION=(ADDRESS=(PROTOCOL=tcp)(HOST=localhost)(PORT=1521))) Services Summary... Service "CLRExtProc" has 1 instance(s). Instance "CLRExtProc", status UNKNOWN, has 1 handler(s) for this service... Service "PLSExtProc" has 1 instance(s). Instance "PLSExtProc", status UNKNOWN, has 1 handler(s) for this service... The command completed successfully |
It seems a number of examples on the web left the SID_LIST_LISTENER value of CLRExtProc value out of the listener.ora file. As always, I hope this helps those looking for a complete solution rather than generic instructions without a concrete example.
AWS EC2 TNS Listener
Having configured an AlmaLinux 8.6 with Oracle Database 11g XE, MySQL 8.0.30, and PostgreSQL 15, we migrated it to AWS EC2 and provisioned it. We used the older and de-supported Oracle Database 11g XE because it didn’t require any kernel modifications and had a much smaller footprint.
I had to address why attempting to connect with the sqlplus utility raised the following error after provisioning a copy with a new static IP address:
ERROR: ORA-12514: TNS:listener does NOT currently know OF service requested IN CONNECT descriptor |
A connection from SQL Developer raises a more addressable error, like:
ORA-17069 |
I immediately tried to check the connection with the tnsping utility and found that tnsping worked fine. However, when I tried to connect with the sqlplus utility it raised an ORA-12514 connection error.
There were no diagnostic steps beyond checking the tnsping utility. So, I had to experiment with what might block communication.
I changed the host name from ip-172-58-65-82.us-west-2.compute.internal to a localhost string in both the listener.ora and tnsnames.ora. The listener.ora file:
# listener.ora Network Configuration FILE: SID_LIST_LISTENER = (SID_LIST = (SID_DESC = (SID_NAME = PLSExtProc) (ORACLE_HOME = /u01/app/oracle/product/11.2.0/xe) (PROGRAM = extproc) ) ) LISTENER = (DESCRIPTION_LIST = (DESCRIPTION = (ADDRESS = (PROTOCOL = IPC)(KEY = EXTPROC_FOR_XE)) (ADDRESS = (PROTOCOL = TCP)(HOST = localhost)(PORT = 1521)) ) ) DEFAULT_SERVICE_LISTENER = (XE) |
The tnsnames.ora file:
# tnsnames.ora Network Configuration FILE: XE = (DESCRIPTION = (ADDRESS = (PROTOCOL = TCP)(HOST = localhost)(PORT = 1521)) (CONNECT_DATA = (SERVER = DEDICATED) (SERVICE_NAME = XE) ) ) EXTPROC_CONNECTION_DATA = (DESCRIPTION = (ADDRESS_LIST = (ADDRESS = (PROTOCOL = IPC)(KEY = EXTPROC_FOR_XE)) ) (CONNECT_DATA = (SID = PLSExtProc) (PRESENTATION = RO) ) ) |
I suspected that it might be related to the localhost value. So, I checked the /etc/hostname and /etc/hosts files.
Then, I modified /etc/hostname file by removing the AWS EC2 damain address. I did it on a memory that Oracle’s TNS raises errors for dots or periods in some addresses.
The /etc/hostname file:
ip-172-58-65-82 |
The /etc/hosts file:
127.0.0.1 localhost localhost.localdomain localhost4 localhost4.localdomain4 ip-172-58-65-82 ::1 localhost localhost.localdomain localhost6 localhost6.localdomain6 ip-172-58-65-82 |
Now, we can connect to the Oracle Database 11g XE instance with the sqlplus utility. I believe this type of solution will work for other AWS EC2 provisioned Oracle databases.
MySQL PNG Files
LAMP (Linux, Apache, MySQL, Perl/PHP/Python) Architecture is very flexible. All the components can be positioned on the same server or different servers. The servers are divided into two types. The types are known as the Application or database tiers. Generally, the application tier holds the Apache Server, any Apache Modules, and local copies of Server Side Includes (SSI) programs.
In many development environments, you also deploy the client to the same machine. This means a single machine runs the database server, the application server, and the browser. The lab for this section assumes these configurations.
Before you test an installation, you should make sure that you’ve started the database and Apache server. In an Oracle LAMP configuration (known as an OLAP – Oracle, Linux, Apache, Perl/PHP/Python), you must start both the Oracle Listener and database. MySQL starts the listener when you start the database. You must also start the Apache Server. The Apache Server also starts an Apache Listener, which listens for incoming HTTP/HTTPS requests. It listens on Port 80 unless you override that setting in the httpd.conf file.

The URI reaches the server and is redirected to an Apache Module based on configuration information found in the httpd.conf file. Spawned or child processes of the Apache Module then read programs into memory from the file system and run them. If you’ve uploaded a file the locally stored program can move it from a secure cache location to another local area for processing. The started programs can run independently or include other files as libraries, and they can communicate to the database server.
Working though PHP test cases against the MySQL database for my AlmaLinux installation and configuration, I discovered that the php-gd library weren’t installed by default. I had to add it to get my PHP programs to upload and display PNG files.
The log file for applying the php-gd packages:
Display detailed console log →
Last metadata expiration check: 3:59:15 ago on Wed 28 Dec 2022 08:17:58 PM EST. Dependencies resolved. ================================================================================ Package Architecture Version Repository Size ================================================================================ Installing: php-gd x86_64 8.0.20-3.el9 appstream 43 k Transaction Summary ================================================================================ Install 1 Package Total download size: 43 k Installed size: 110 k Downloading Packages: php-gd-8.0.20-3.el9.x86_64.rpm 196 kB/s | 43 kB 00:00 -------------------------------------------------------------------------------- Total 39 kB/s | 43 kB 00:01 Running transaction check Transaction check succeeded. Running transaction test Transaction test succeeded. Running transaction Preparing : 1/1 Installing : php-gd-8.0.20-3.el9.x86_64 1/1 Running scriptlet: php-gd-8.0.20-3.el9.x86_64 1/1 Verifying : php-gd-8.0.20-3.el9.x86_64 1/1 Installed: php-gd-8.0.20-3.el9.x86_64 Complete! |
The balance of this page demonstrates how to upload, store, and manage Text (Character Large Data Streams) and BLOBs (Binary Large Objects). It provides MySQL equivalent instructions to those for manaing LOBs in an Oracle database. As covered in Chapter 8 in my Oracle Database 11g PL/SQL Programming book.
Before you begin these steps, you should have already installed Zend Server Community Edition. If you haven’t done so, please click here for instructions.
Create directories or folders, and position code →
This section provides you with instructions on how to position the code components in Windows, at least for the newbie. If you’re on Linux, you probably know how to do most if not all of this already. Likewise, if you already know how to put things in the right place, please choose your own locations.
- Create a
LOB(Large Object) directory for the PHP files inside thehtdocsdirectory.
![]()
- You can down the MySQL PHP Upload LOB Web Code zip file and unzip it into the directory you just created. It can co-exist with the Oracle equivalent if you’ve done that already.
Load a TEXT (like an Oracle CLOB) column to the MySQL database →
This is a copy of the three files required to load a large string to a MySQL database into a mediumtext data type. The code is in clear text because somebody asked for it. They’re nervous about zip files. Click the title above to expand all the code text.
MySQLCredentials.inc
1 2 3 4 5 6 7 | <?php // Connection variables. define('HOSTNAME',"localhost"); define('USERNAME',"student"); define('PASSWORD',"student"); define('DATABASE',"sampledb"); ?> |
UploadItemDescMySQLForm.htm
1 2 3 4 5 6 7 8 9 10 11 12 13 14 15 16 17 18 19 20 21 22 23 24 25 26 27 28 29 30 31 32 33 34 35 36 37 38 | <html>
<head>
<title>
UploadItemDescMySQLForm.htm
</title>
</head>
<body>
<form id="uploadForm"
action="UploadItemDescMySQL.php"
enctype="multipart/form-data"
method="post">
<table border=0 cellpadding=0 cellspacing=0>
<tr>
<td width=125>Item Number</td>
<td>
<input id="id" name="id" type="text">
</td>
</tr>
<tr>
<td width=125>Item Title</td>
<td>
<input id="title" name="title" type="text">
</td>
</tr>
<tr>
<td width=125>Select File</td>
<td>
<input id="uploadfilename" name="userfile" type="file">
</td>
</tr>
<tr>
<td width=125>Click Button to</td>
<td><input type="submit" value="Upload File"></td>
</tr>
</table>
</form>
</body>
</html> |
UploadItemDescMySQL.php
1 2 3 4 5 6 7 8 9 10 11 12 13 14 15 16 17 18 19 20 21 22 23 24 25 26 27 28 29 30 31 32 33 34 35 36 37 38 39 40 41 42 43 44 45 46 47 48 49 50 51 52 53 54 55 56 57 58 59 60 61 62 63 64 65 66 67 68 69 70 71 72 73 74 75 76 77 78 79 80 81 82 83 84 85 86 87 88 89 90 91 92 93 94 95 96 97 98 99 100 101 102 103 104 105 106 107 108 109 110 111 112 113 114 115 116 117 118 119 120 121 122 123 124 125 126 127 128 129 | <?php // Set database credentials. include_once("MySQLCredentials.inc"); // Displayed moved file in web page. $item_desc = process_uploaded_file(); // Return successful attempt to connect to the database. if (!$c = @mysqli_connect(HOSTNAME,USERNAME,PASSWORD,DATABASE)) { // Print user message. print "Sorry! The connection to the database failed. Please try again later."; // Assign the mysqli_error() and format double and single quotes. print mysqli_error(); // Kill the resource. die(); } else { // Declare input variables. $id = (isset($_POST['id'])) ? (int) $_POST['id'] : $id = 21; $title = (isset($_POST['title'])) ? $_POST['title'] : $title = "Harry #1"; // Initialize a statement in the scope of the connection. $stmt = mysqli_stmt_init($c); // Declare a PL/SQL execution command. $sql = "Update item set item_desc = ? where item_id = ?"; // Prepate statement and link it to a connection. if (mysqli_stmt_prepare($stmt,$sql)) { mysqli_stmt_bind_param($stmt,"si",$item_desc,$id); // Execute it and print success or failure message. if (mysqli_stmt_execute($stmt)) { query_insert($id,$title); } else { print "You're target row doesn't exist."; } } // Disconnect from database. mysqli_close($c); } // Query results afret an insert. function query_insert($id,$title) { // Return successful attempt to connect to the database. if (!$c = @mysqli_connect(HOSTNAME,USERNAME,PASSWORD,DATABASE)) { // Print user message. print "Sorry! The connection to the database failed. Please try again later."; // Assign the OCI error and format double and single quotes. print mysqli_error(); // Kill the resource. die(); } else { // Initialize a statement in the scope of the connection. $stmt = mysqli_stmt_init($c); // Declare a SQL SELECT statement returning a CLOB. $sql = "SELECT item_desc FROM item WHERE item_id = ?"; // Prepare statement. if (mysqli_stmt_prepare($stmt,$sql)) { mysqli_stmt_bind_param($stmt,"i",$id); // Execute it and print success or failure message. if (mysqli_stmt_execute($stmt)) { // Bind result to local variable. mysqli_stmt_bind_result($stmt, $desc); // Read result. mysqli_stmt_fetch($stmt); // Format HTML table to display biography. $out = '<table border="1" cellpadding="3" cellspacing="0">'; $out .= '<tr>'; $out .= '<td align="center" class="e">'.$title.'</td>'; $out .= '</tr>'; $out .= '<tr>'; $out .= '<td class="v">'.$desc.'</td>'; $out .= '</tr>'; $out .= '</table>'; // Print the HTML table. print $out; } } // Disconnect from database. mysqli_close($c); } } // Manage file upload and return file as string. function process_uploaded_file() { // Declare a variable for file contents. $contents = ""; // Define the upload file name for Windows or Linux. if (preg_match(".Win32.",$_SERVER["SERVER_SOFTWARE"])) $upload_file = "C:\\temp\\".$_FILES['userfile']['name']; else $upload_file = "/tmp/".$_FILES['userfile']['name']; // Check for and move uploaded file. if (is_uploaded_file($_FILES['userfile']['tmp_name'])) move_uploaded_file($_FILES['userfile']['tmp_name'],$upload_file); // Open a file handle and suppress an error for a missing file. if ($fp = @fopen($upload_file,"r")) { // Read until the end-of-file marker. while (!feof($fp)) $contents .= fgetc($fp); // Close an open file handle. fclose($fp); } // Return file content as string. return $contents; } ?> |
Load a BLOB column to the MySQL database →
This is a copy of the four files required to load a large image to a MySQL database into a MEDIUMBLOB data type. The fourth file reads the binary image and translates it into an HTML header and image that can be read through a call to the src attribute of an img tag. You can find the call to the forth file in the UploadItemBlobMySQL.php.
The code is in clear text because somebody asked for it. They’re nervous about zip files. Click the title above to expand all the code text.
MySQLCredentials.inc
1 2 3 4 5 6 7 | <?php // Connection variables. define('HOSTNAME',"localhost"); define('USERNAME',"student"); define('PASSWORD',"student"); define('DATABASE',"sampledb"); ?> |
UploadItemBlobMySQLForm.htm
1 2 3 4 5 6 7 8 9 10 11 12 13 14 15 16 17 18 19 20 21 22 23 24 25 26 27 28 29 30 31 32 33 34 35 36 37 38 | <html>
<head>
<title>
UploadItemBlobMySQLForm.htm
</title>
</head>
<body>
<form id="uploadForm"
action="UploadItemBlobMySQL.php"
enctype="multipart/form-data"
method="post">
<table border=0 cellpadding=0 cellspacing=0>
<tr>
<td width=125>Item Number</td>
<td>
<input id="id" name="id" type="text">
</td>
</tr>
<tr>
<td width=125>Item Title</td>
<td>
<input id="title" name="title" type="text">
</td>
</tr>
<tr>
<td width=125>Select File</td>
<td>
<input id="uploadfilename" name="userfile" type="file">
</td>
</tr>
<tr>
<td width=125>Click Button to</td>
<td><input type="submit" value="Upload File"></td>
</tr>
</table>
</form>
</body>
</html> |
UploadItemBlobMySQL.php
1 2 3 4 5 6 7 8 9 10 11 12 13 14 15 16 17 18 19 20 21 22 23 24 25 26 27 28 29 30 31 32 33 34 35 36 37 38 39 40 41 42 43 44 45 46 47 48 49 50 51 52 53 54 55 56 57 58 59 60 61 62 63 64 65 66 67 68 69 70 71 72 73 74 75 76 77 78 79 80 81 82 83 84 85 86 87 88 89 90 91 92 93 94 95 96 97 98 99 100 101 102 103 104 105 106 107 108 109 110 111 112 113 114 115 116 117 118 119 120 121 122 123 124 125 126 127 128 129 130 131 132 133 134 135 136 137 138 139 140 141 142 143 144 145 146 147 | <?php // Set database credentials. include_once("MySQLCredentials.inc"); // Displayed moved file in web page. $item_blob = process_uploaded_file(); // Return successful attempt to connect to the database. if (!$c = @mysqli_connect(HOSTNAME,USERNAME,PASSWORD,DATABASE)) { // Print user message. print "Sorry! The connection to the database failed. Please try again later."; // Assign the mysqli_error() error and format double and single quotes. print mysqli_error(); // Kill the resource. die(); } else { // Declare input variables. $id = (isset($_POST['id'])) ? (int) $_POST['id'] : 1021; $title = (isset($_POST['title'])) ? $_POST['title'] : "Harry #1"; // Initialize a statement in the scope of the connection. $stmt = mysqli_stmt_init($c); // Declare a PL/SQL execution command. $sql = "UPDATE item SET item_blob = ? WHERE item_id = ?"; // Prepare statement and link it to a connection. if (mysqli_stmt_prepare($stmt,$sql)) { mysqli_stmt_bind_param($stmt,"bi",$item_blob,$id); $start = 0; $chunk = 8192; while ($start < strlen($item_blob)) { mysqli_stmt_send_long_data($stmt,0,substr($item_blob,$start,$chunk)); $start += $chunk; } // Execute the PL/SQL statement. if (mysqli_stmt_execute($stmt)) { query_insert($id,$title); } else { print "Your target row doesn't exist."; } } else { print "mysqli_stmt_prepare() failed."; } // Disconnect from database. mysqli_close($c); } // Query results afret an insert. function query_insert($id,$title) { // Return successful attempt to connect to the database. if (!$c = @mysqli_connect(HOSTNAME,USERNAME,PASSWORD,DATABASE)) { // Print user message. print "Sorry! The connection to the database failed. Please try again later."; // Assign the OCI error and format double and single quotes. print mysqli_error(); // Kill the resource. die(); } else { // Initialize a statement in the scope of the connection. $stmt = mysqli_stmt_init($c); // Declare a SQL SELECT statement returning a CLOB. $sql = "SELECT item_desc FROM item WHERE item_id = ?"; // Prepare statement and link it to a connection. if (mysqli_stmt_prepare($stmt,$sql)) { mysqli_stmt_bind_param($stmt,"i",$id); // Execute the PL/SQL statement. if (mysqli_stmt_execute($stmt)) { // Bind result to local variable. mysqli_stmt_bind_result($stmt, $data); // Read result. mysqli_stmt_fetch($stmt); // Format HTML table to display BLOB photo and CLOB description. $out = '<table border="1" cellpadding="5" cellspacing="0">'; $out .= '<tr>'; $out .= '<td align="center" class="e">'.$title.'</td>'; $out .= '</tr>'; $out .= '<tr><td class="v">'; $out .= '<div>'; $out .= '<div style="margin-right:5px;float:left">'; $out .= '<img src="ConvertMySQLBlobToImage.php?id='.$id.'">'; $out .= '</div>'; $out .= '<div style="position=relative;">'.$data.'</div>'; $out .= '</div>'; $out .= '</td></tr>'; $out .= '</table>'; // Print the HTML table. print $out; } else { print "You're target row doesn't exist."; } } // Disconnect from database. mysqli_close($c); } } // Manage file upload and return file as string. function process_uploaded_file() { // Declare a variable for file contents. $contents = ""; // Define the upload file name for Windows or Linux. if (preg_match(".Win32.",$_SERVER["SERVER_SOFTWARE"])) $upload_file = "C:\\TEMP\\".$_FILES['userfile']['name']; else $upload_file = "/tmp/".$_FILES['userfile']['name']; // Check for and move uploaded file. if (is_uploaded_file($_FILES['userfile']['tmp_name'])) move_uploaded_file($_FILES['userfile']['tmp_name'],$upload_file); // Open a file handle and suppress an error for a missing file. if ($fp = @fopen($upload_file,"r")) { // Read until the end-of-file marker. while (!feof($fp)) $contents .= fgetc($fp); // Close an open file handle. fclose($fp); } // Return file content as string. return $contents; } ?> |
ConvertMySQLBlobToImage.php
1 2 3 4 5 6 7 8 9 10 11 12 13 14 15 16 17 18 19 20 21 22 23 24 25 26 27 28 29 30 31 32 33 34 35 36 37 38 39 40 41 42 43 44 45 46 47 48 49 50 51 | <?php // Database credentials must be set manually because an include_once() function // call puts something ahead of the header, which causes a failure when rendering // an image. // Return successful attempt to connect to the database. if (!$c = @mysqli_connect("localhost","student","student","sampledb")) { // Print user message. print "Sorry! The connection to the database failed. Please try again later."; // Assign the OCI error and format double and single quotes. print mysqli_error(); // Kill the resource. die(); } else { // Declare input variables. $id = (isset($_GET['id'])) ? (int) $_GET['id'] : 1023; // Initialize a statement in the scope of the connection. $stmt = mysqli_stmt_init($c); // Declare a SQL SELECT statement returning a MediumBLOB. $sql = "SELECT item_blob FROM item WHERE item_id = ?"; // Prepare statement and link it to a connection. if (mysqli_stmt_prepare($stmt,$sql)) { mysqli_stmt_bind_param($stmt,"i",$id); // Execute the PL/SQL statement. if (mysqli_stmt_execute($stmt)) { // Bind result to local variable. mysqli_stmt_bind_result($stmt, $image); // Read result. mysqli_stmt_fetch($stmt); } } // Disconnect from database. mysqli_close($c); // Print the header first. header('Content-type: image/x-png'); imagepng(imagecreatefromstring($image)); } ?> |
- Create a
tempdirectory for the upload target location, as qualified in the PHP code. The PHP code works regardless of whether you’re on Windows or Linux, but it does depend on the creation of this directory.
![]()
- Create a directory or folder for the large file source directories. This directory is probably on your test machine (laptop) but it mimics a client laptop and would work if your server was on a different machine.
![]()
- Inside the Upload directory, you should create the following two directories:

- You should download the CLOB Text File zip file and unzip it into the
textfiles directory; then download the BLOB Image File zip file and unzip it into the imagefiles directory.Assuming you’ve downloaded the zip files and extracted them into the correct locations, this section is done.
Prepare the MySQL database →
This section provides you with instructions on how to ensure everything will work once the PHP programs call the database. Even if you have one of my sample Video Store databases, you should verify and add appropriate columns. This post assumes you’ve downloaded the one of my basic Video Store models
- Navigate to the directory that you created for SQL scripts, which should be
/home/student/Data/mysql. In that directory at the command prompt, connect as thestudentuser, which should be student. You connect to the MySQL database, with the following syntax as student (if you need more help, check this blog post on configuring MySQL).
mysql -ustudent -pstudent |
Once connected to the database, you run the files to create the database, like:
mysql> source /Data/mysql/create_mysql_store.sql mysql> source /Data/mysql/seed_mysql_store.sql |
- Navigate to the directory that you created for SQL scripts, which should be
/home/student/Data/mysql. In that directory at the command prompt, connect as thestudentuser, or whichever account you’re using. You should confirm that you have aitem_desccolumn ofTEXTdata type, and anitem_blobcolumn ofMEDIUMBLOBtype in theitemtable. If you don’t have those columns, you can add them with the following statement:
ALTER TABLE item ADD (item_desc TEXT, item_blob MEDIUMBLOB); |
After ensuring that you have those two columns, you’ve completed this section.
Test the Configuration →
This section shows you how to test all that you’ve done. It works provided you created the directories and extracted the zip file contents to their respective directories. The virtual URL actually maps to the /var/www/html/lob directory.
- Enter the
http://localhost/lob/UploadItemDescMySQLForm.htmURL, and complete the form by choosing a validitem_idcolumn value and text file from your/home/student/Upload/TextFilesdirectory. Then, click the Upload File button (you can see a larger version of the image by clicking on it).

- This page displays after you successfully upload the text file to the database.

- Enter the
http://localhost/lob/UploadItemBlobFormMySQL.htmURL, and complete the form by choosing a validitem_idcolumn value and image file from your/home/student/Upload/ImageFilesdirectory. Then, click the Upload File button (you can see a larger version of the image by clicking on it).

- This page displays after you successfully upload the image file to the database.

Troubleshooting the Configuration →
This section shows you how to check why something isn’t working.
- The first thing to check are the credentials. They’re in the
MySQLCredentials.incfile. They’re posted with alocalhostmachine name,studentusername,studentpassword, andsampledbdatabase.
- Not to be funny, but the second thing to check are credentials. Specifically, you need to check the credentials in the
ConvertBlobToImage.phpfile. They’re individually entered in the connect string of this file because otherwise they put something in front of the header, which is disallowed to render the image.
- Check to see if the text or image file made it to the
/var/www/html/lob/tempdirectory. If they made it that far but no further, check to see if you have valid procedures in thestudentschema.
- Check whether the
TEXTandMEDIUMBLOBare loaded into the database. You use theLENGTHfunction, like this:
SELECT i.item_id , length(i.item_desc) , length(i.item_blob) FROM item i WHERE i.item_desc IS NOT NULL OR i.item_blob IS NOT NULL; |
- Check if the
item_idvalue is found in the list of values.
- If you’re stumped, add a comment and explain what’s up.
If you find any problems, please let me know. I’ll be happy to fix them.
AlmaLinux Install & Configuration

This is a collection of blog posts for installing and configuring AlmaLinux with the Oracle, PostgreSQL, MySQL databases and several programming languages. Sample programs show how to connect PHP and Python to the MySQL database.
- Installing AlmaLinux operating system
- Installing and configuring MySQL
- Installing Python-MySQL connector and provide sample programs
- Configuring Flask for Python on AlmaLinux with a complete software router instruction set.
- Installing Rust programming language and writing a sample program
- Installing and configuring LAMP stack with PHP and MySQL and a self-signed security key
- MySQL PNG Images in LAMP with PHP Programming
- Demonstration of how to write Perl that connects to MySQL
- Installing and configuring MySQL Workbench
- Installing and configuring PostgreSQL and pgAdmin4
- Identifying the required libnsl2-devel packages for SQL*Plus
- Writing and deploying a sqlplus function to use a read line wrapper
- Installing and configuring Visual Studio Code Editor
- Installing and configuring Java with connectivity to MySQL
- Installing and configuring Oracle SQL Developer
I used Oracle Database 11g XE in this instance to keep the footprint as small as possible. It required a few tricks and discovering the missing library that caused folks grief eleven years ago. I build another with a current Oracle Database XE after the new year.
If you see something that I missed or you’d like me to add, let me know. As time allows, I’ll try to do that. Naturally, the post will get updates as things are added later.
AlmaLinux+VSCode
How to install and configure VSCode on AlmaLinux (Red Hat Enterprise 9). This is a step-by-step version of the Visual Studio documentation. The first thing you do is download the Microsoft packages:
sudo rpm --import https://packages.microsoft.com/keys/microsoft.asc |
Next, create the yum repository with the following command:
sudo sh -c 'echo -e "[code]\nname=Visual Studio Code\nbaseurl=https://packages.microsoft.com/yumrepos/vscode\nenabled=1\ngpgcheck=1\ngpgkey=https://packages.microsoft.com/keys/microsoft.asc" > /etc/yum.repos.d/vscode.repo' |
It creates the following vscode.repo file in the /etc/yum.repos.d directory:
[code] name=Visual Studio Code baseurl=https://packages.microsoft.com/yumrepos/vscode enabled=1 gpgcheck=1 gpgkey=https://packages.microsoft.com/keys/microsoft.asc |
Then, update the package cache and install the package using dnf dnf, like this as the sudoer user:
sudo dnf check-update |
The log file for this is:
Display detailed console log →
AlmaLinux 9 - AppStream 2.9 MB/s | 7.0 MB 00:02
AlmaLinux 9 - BaseOS 1.6 MB/s | 2.0 MB 00:01
AlmaLinux 9 - Extras 19 kB/s | 17 kB 00:00
Extra Packages for Enterprise Linux 9 - x86_64 1.3 MB/s | 12 MB 00:09
PostgreSQL common RPMs for RHEL / Rocky 9 - x86 103 B/s | 195 B 00:01
PostgreSQL common RPMs for RHEL / Rocky 9 - x86 1.6 MB/s | 1.7 kB 00:00
Importing GPG key 0x442DF0F8:
Userid : "PostgreSQL RPM Building Project <pgsql-pkg-yum@postgresql.org>"
Fingerprint: 68C9 E2B9 1A37 D136 FE74 D176 1F16 D2E1 442D F0F8
From : /etc/pki/rpm-gpg/RPM-GPG-KEY-PGDG
Is this ok [y/N]: y
PostgreSQL common RPMs for RHEL / Rocky 9 - x86 114 kB/s | 341 kB 00:02
PostgreSQL 15 for RHEL / Rocky 9 - x86_64 159 B/s | 195 B 00:01
PostgreSQL 15 for RHEL / Rocky 9 - x86_64 1.6 MB/s | 1.7 kB 00:00
Importing GPG key 0x442DF0F8:
Userid : "PostgreSQL RPM Building Project <pgsql-pkg-yum@postgresql.org>"
Fingerprint: 68C9 E2B9 1A37 D136 FE74 D176 1F16 D2E1 442D F0F8
From : /etc/pki/rpm-gpg/RPM-GPG-KEY-PGDG
Is this ok [y/N]: y
PostgreSQL 15 for RHEL / Rocky 9 - x86_64 47 kB/s | 159 kB 00:03
PostgreSQL 14 for RHEL / Rocky 9 - x86_64 114 B/s | 195 B 00:01
PostgreSQL 14 for RHEL / Rocky 9 - x86_64 1.6 MB/s | 1.7 kB 00:00
Importing GPG key 0x442DF0F8:
Userid : "PostgreSQL RPM Building Project <pgsql-pkg-yum@postgresql.org>"
Fingerprint: 68C9 E2B9 1A37 D136 FE74 D176 1F16 D2E1 442D F0F8
From : /etc/pki/rpm-gpg/RPM-GPG-KEY-PGDG
Is this ok [y/N]: y
PostgreSQL 14 for RHEL / Rocky 9 - x86_64 129 kB/s | 406 kB 00:03
PostgreSQL 13 for RHEL / Rocky 9 - x86_64 103 B/s | 195 B 00:01
PostgreSQL 13 for RHEL / Rocky 9 - x86_64 1.6 MB/s | 1.7 kB 00:00
Importing GPG key 0x442DF0F8:
Userid : "PostgreSQL RPM Building Project <pgsql-pkg-yum@postgresql.org>"
Fingerprint: 68C9 E2B9 1A37 D136 FE74 D176 1F16 D2E1 442D F0F8
From : /etc/pki/rpm-gpg/RPM-GPG-KEY-PGDG
Is this ok [y/N]: y
PostgreSQL 13 for RHEL / Rocky 9 - x86_64 127 kB/s | 384 kB 00:03
PostgreSQL 12 for RHEL / Rocky 9 - x86_64 139 B/s | 195 B 00:01
PostgreSQL 12 for RHEL / Rocky 9 - x86_64 1.6 MB/s | 1.7 kB 00:00
Importing GPG key 0x442DF0F8:
Userid : "PostgreSQL RPM Building Project <pgsql-pkg-yum@postgresql.org>"
Fingerprint: 68C9 E2B9 1A37 D136 FE74 D176 1F16 D2E1 442D F0F8
From : /etc/pki/rpm-gpg/RPM-GPG-KEY-PGDG
Is this ok [y/N]: y
PostgreSQL 12 for RHEL / Rocky 9 - x86_64 137 kB/s | 349 kB 00:02
PostgreSQL 11 for RHEL / Rocky 9 - x86_64 159 B/s | 195 B 00:01
PostgreSQL 11 for RHEL / Rocky 9 - x86_64 1.6 MB/s | 1.7 kB 00:00
Importing GPG key 0x442DF0F8:
Userid : "PostgreSQL RPM Building Project <pgsql-pkg-yum@postgresql.org>"
Fingerprint: 68C9 E2B9 1A37 D136 FE74 D176 1F16 D2E1 442D F0F8
From : /etc/pki/rpm-gpg/RPM-GPG-KEY-PGDG
Is this ok [y/N]: y
PostgreSQL 11 for RHEL / Rocky 9 - x86_64 102 kB/s | 350 kB 00:03
PostgreSQL 10 for RHEL / Rocky 9 - x86_64 113 B/s | 195 B 00:01
PostgreSQL 10 for RHEL / Rocky 9 - x86_64 1.6 MB/s | 1.7 kB 00:00
Importing GPG key 0x442DF0F8:
Userid : "PostgreSQL RPM Building Project <pgsql-pkg-yum@postgresql.org>"
Fingerprint: 68C9 E2B9 1A37 D136 FE74 D176 1F16 D2E1 442D F0F8
From : /etc/pki/rpm-gpg/RPM-GPG-KEY-PGDG
Is this ok [y/N]: y
PostgreSQL 10 for RHEL / Rocky 9 - x86_64 66 kB/s | 197 kB 00:02
Visual Studio Code 7.5 MB/s | 31 MB 00:04
NetworkManager.x86_64 1:1.40.0-1.el9 baseos
NetworkManager-adsl.x86_64 1:1.40.0-1.el9 baseos
NetworkManager-bluetooth.x86_64 1:1.40.0-1.el9 baseos
NetworkManager-config-server.noarch 1:1.40.0-1.el9 baseos
NetworkManager-libnm.x86_64 1:1.40.0-1.el9 baseos
NetworkManager-team.x86_64 1:1.40.0-1.el9 baseos
NetworkManager-tui.x86_64 1:1.40.0-1.el9 baseos
NetworkManager-wifi.x86_64 1:1.40.0-1.el9 baseos
NetworkManager-wwan.x86_64 1:1.40.0-1.el9 baseos
aardvark-dns.x86_64 2:1.1.0-5.el9_1 appstream
almalinux-gpg-keys.x86_64 9.1-1.9.el9 baseos
almalinux-release.x86_64 9.1-1.9.el9 baseos
almalinux-repos.x86_64 9.1-1.9.el9 baseos
alsa-lib.x86_64 1.2.7.2-1.el9 appstream
alsa-ucm.noarch 1.2.7.2-1.el9 appstream
alsa-utils.x86_64 1.2.7-1.el9 appstream
annobin.x86_64 10.73-3.el9 appstream
ansible-core.x86_64 2.13.3-1.el9 appstream
at.x86_64 3.1.23-11.el9 baseos
audit.x86_64 3.0.7-103.el9 baseos
audit-libs.x86_64 3.0.7-103.el9 baseos
augeas-libs.x86_64 1.13.0-2.el9 appstream
authselect.x86_64 1.2.5-1.el9 baseos
authselect-libs.x86_64 1.2.5-1.el9 baseos
bash.x86_64 5.1.8-5.el9 baseos
bcc.x86_64 0.24.0-4.el9 appstream
bcc-tools.x86_64 0.24.0-4.el9 appstream
bind-libs.x86_64 32:9.16.23-5.el9_1 appstream
bind-license.noarch 32:9.16.23-5.el9_1 appstream
bind-utils.x86_64 32:9.16.23-5.el9_1 appstream
binutils.x86_64 2.35.2-24.el9 baseos
binutils-gold.x86_64 2.35.2-24.el9 baseos
bluez.x86_64 5.64-2.el9 baseos
bluez-libs.x86_64 5.64-2.el9 baseos
bluez-obexd.x86_64 5.64-2.el9 appstream
boost-filesystem.x86_64 1.75.0-8.el9 appstream
boost-regex.x86_64 1.75.0-8.el9 appstream
boost-system.x86_64 1.75.0-8.el9 appstream
boost-thread.x86_64 1.75.0-8.el9 appstream
bpftool.x86_64 5.14.0-162.6.1.el9_1 baseos
bpftrace.x86_64 0.13.1-1.el9 appstream
buildah.x86_64 1:1.27.2-2.el9_1 appstream
cargo.x86_64 1.62.1-1.el9 appstream
checkpolicy.x86_64 3.4-1.el9 appstream
chrony.x86_64 4.2-1.el9 baseos
clang-libs.x86_64 14.0.6-1.el9 appstream
clang-resource-filesystem.x86_64 14.0.6-1.el9 appstream
clevis.x86_64 18-106.el9 appstream
clevis-luks.x86_64 18-106.el9 appstream
cockpit.x86_64 276.1-1.el9 baseos
cockpit-bridge.x86_64 276.1-1.el9 baseos
cockpit-packagekit.noarch 276.1-1.el9 appstream
cockpit-podman.noarch 53-1.el9 appstream
cockpit-storaged.noarch 276.1-1.el9 appstream
cockpit-system.noarch 276.1-1.el9 baseos
cockpit-ws.x86_64 276.1-1.el9 baseos
compiler-rt.x86_64 14.0.6-1.el9 appstream
conmon.x86_64 2:2.1.4-1.el9 appstream
container-selinux.noarch 3:2.189.0-1.el9 appstream
containernetworking-plugins.x86_64 1:1.1.1-3.el9 appstream
containers-common.x86_64 2:1-45.el9_1 appstream
coreutils.x86_64 8.32-32.el9 baseos
coreutils-common.x86_64 8.32-32.el9 baseos
cpp.x86_64 11.3.1-2.1.el9.alma appstream
crash.x86_64 8.0.1-2.el9.alma appstream
criu.x86_64 3.17-4.el9 appstream
criu-libs.x86_64 3.17-4.el9 appstream
cronie.x86_64 1.5.7-8.el9 baseos
cronie-anacron.x86_64 1.5.7-8.el9 baseos
crun.x86_64 1.5-1.el9 appstream
crypto-policies.noarch 20220815-1.git0fbe86f.el9 baseos
crypto-policies-scripts.noarch 20220815-1.git0fbe86f.el9 baseos
cryptsetup.x86_64 2.4.3-5.el9 baseos
cryptsetup-libs.x86_64 2.4.3-5.el9 baseos
cups.x86_64 1:2.3.3op2-16.el9 appstream
cups-client.x86_64 1:2.3.3op2-16.el9 appstream
cups-filesystem.noarch 1:2.3.3op2-16.el9 appstream
cups-ipptool.x86_64 1:2.3.3op2-16.el9 appstream
cups-libs.x86_64 1:2.3.3op2-16.el9 baseos
curl.x86_64 7.76.1-19.el9 baseos
dbus.x86_64 1:1.12.20-6.el9 baseos
dbus-broker.x86_64 28-7.el9 baseos
desktop-file-utils.x86_64 0.26-6.el9 appstream
device-mapper.x86_64 9:1.02.185-3.el9 baseos
device-mapper-event.x86_64 9:1.02.185-3.el9 baseos
device-mapper-event-libs.x86_64 9:1.02.185-3.el9 baseos
device-mapper-libs.x86_64 9:1.02.185-3.el9 baseos
device-mapper-multipath.x86_64 0.8.7-12.el9_1.1 baseos
device-mapper-multipath-libs.x86_64 0.8.7-12.el9_1.1 baseos
device-mapper-persistent-data.x86_64 0.9.0-13.el9 baseos
dnf.noarch 4.12.0-4.el9.alma baseos
dnf-data.noarch 4.12.0-4.el9.alma baseos
dnf-plugins-core.noarch 4.1.0-3.el9 baseos
dnsmasq.x86_64 2.85-5.el9 appstream
dotnet-host.x86_64 7.0.1-1.el9_1 appstream
dotnet-hostfxr-7.0.x86_64 7.0.1-1.el9_1 appstream
dotnet-runtime-7.0.x86_64 7.0.1-1.el9_1 appstream
dracut.x86_64 057-13.git20220816.el9 baseos
dracut-config-rescue.x86_64 057-13.git20220816.el9 baseos
dracut-network.x86_64 057-13.git20220816.el9 baseos
dracut-squash.x86_64 057-13.git20220816.el9 baseos
dyninst.x86_64 12.1.0-1.el9 appstream
e2fsprogs.x86_64 1.46.5-3.el9 baseos
e2fsprogs-libs.x86_64 1.46.5-3.el9 baseos
elfutils.x86_64 0.187-5.el9 baseos
elfutils-debuginfod-client.x86_64 0.187-5.el9 baseos
elfutils-default-yama-scope.noarch 0.187-5.el9 baseos
elfutils-devel.x86_64 0.187-5.el9 appstream
elfutils-libelf.x86_64 0.187-5.el9 baseos
elfutils-libelf-devel.x86_64 0.187-5.el9 appstream
elfutils-libs.x86_64 0.187-5.el9 baseos
epel-release.noarch 9-4.el9 epel
evince.x86_64 40.5-2.el9 appstream
evince-libs.x86_64 40.5-2.el9 appstream
evince-nautilus.x86_64 40.5-2.el9 appstream
evince-previewer.x86_64 40.5-2.el9 appstream
evince-thumbnailer.x86_64 40.5-2.el9 appstream
evolution-data-server.x86_64 3.40.4-6.el9 appstream
evolution-data-server-langpacks.noarch 3.40.4-6.el9 appstream
expat.x86_64 2.4.9-1.el9_1 baseos
file.x86_64 5.39-10.el9 baseos
file-libs.x86_64 5.39-10.el9 baseos
firefox.x86_64 102.6.0-1.el9_1.alma appstream
firewalld.noarch 1.1.1-3.el9 baseos
firewalld-filesystem.noarch 1.1.1-3.el9 baseos
flac-libs.x86_64 1.3.3-10.el9 appstream
flatpak.x86_64 1.12.7-2.el9 appstream
flatpak-libs.x86_64 1.12.7-2.el9 appstream
flatpak-selinux.noarch 1.12.7-2.el9 appstream
flatpak-session-helper.x86_64 1.12.7-2.el9 appstream
fwupd.x86_64 1.7.9-1.el9.alma.1 baseos
fwupd-plugin-flashrom.x86_64 1.7.9-1.el9.alma.1 appstream
gcc.x86_64 11.3.1-2.1.el9.alma appstream
gcc-c++.x86_64 11.3.1-2.1.el9.alma appstream
gcc-plugin-annobin.x86_64 11.3.1-2.1.el9.alma appstream
gdb.x86_64 10.2-10.el9 appstream
gdb-headless.x86_64 10.2-10.el9 appstream
gdm.x86_64 1:40.1-17.el9_1 appstream
gjs.x86_64 1.68.6-1.el9 appstream
glibc.x86_64 2.34-40.el9 baseos
glibc-all-langpacks.x86_64 2.34-40.el9 baseos
glibc-common.x86_64 2.34-40.el9 baseos
glibc-devel.x86_64 2.34-40.el9 appstream
glibc-gconv-extra.x86_64 2.34-40.el9 baseos
glibc-headers.x86_64 2.34-40.el9 appstream
glibc-langpack-en.x86_64 2.34-40.el9 baseos
gnome-classic-session.noarch 40.7-2.el9 appstream
gnome-control-center.x86_64 40.0-27.el9 appstream
gnome-control-center-filesystem.noarch 40.0-27.el9 appstream
gnome-initial-setup.x86_64 40.4-3.el9 appstream
gnome-screenshot.x86_64 40.0-4.el9 appstream
gnome-settings-daemon.x86_64 40.0.1-8.el9 appstream
gnome-shell.x86_64 40.10-3.el9 appstream
gnome-shell-extension-apps-menu.noarch 40.7-2.el9 appstream
gnome-shell-extension-common.noarch 40.7-2.el9 appstream
gnome-shell-extension-launch-new-instance.noarch
40.7-2.el9 appstream
gnome-shell-extension-places-menu.noarch 40.7-2.el9 appstream
gnome-shell-extension-window-list.noarch 40.7-2.el9 appstream
gnome-software.x86_64 41.5-1.el9 appstream
gnome-system-monitor.x86_64 40.1-3.el9 appstream
gnome-tour.x86_64 40.1-2.el9 appstream
google-noto-fonts-common.noarch 20201206-4.el9 appstream
google-noto-sans-gurmukhi-fonts.noarch 20201206-4.el9 appstream
google-noto-sans-sinhala-vf-fonts.noarch 20201206-4.el9 appstream
grafana.x86_64 7.5.15-3.el9 appstream
grafana-pcp.x86_64 3.2.0-3.el9 appstream
grub2-common.noarch 1:2.06-46.el9.alma baseos
grub2-pc.x86_64 1:2.06-46.el9.alma baseos
grub2-pc-modules.noarch 1:2.06-46.el9.alma baseos
grub2-tools.x86_64 1:2.06-46.el9.alma baseos
grub2-tools-efi.x86_64 1:2.06-46.el9.alma baseos
grub2-tools-extra.x86_64 1:2.06-46.el9.alma baseos
grub2-tools-minimal.x86_64 1:2.06-46.el9.alma baseos
grubby.x86_64 8.40-61.el9 baseos
gtk4.x86_64 4.4.1-2.el9 appstream
gvfs.x86_64 1.48.1-4.el9 appstream
gvfs-client.x86_64 1.48.1-4.el9 appstream
gvfs-fuse.x86_64 1.48.1-4.el9 appstream
gvfs-goa.x86_64 1.48.1-4.el9 appstream
gvfs-gphoto2.x86_64 1.48.1-4.el9 appstream
gvfs-mtp.x86_64 1.48.1-4.el9 appstream
gvfs-smb.x86_64 1.48.1-4.el9 appstream
gzip.x86_64 1.12-1.el9 baseos
hicolor-icon-theme.noarch 0.17-13.el9 appstream
httpd.x86_64 2.4.53-7.el9 appstream
httpd-filesystem.noarch 2.4.53-7.el9 appstream
httpd-tools.x86_64 2.4.53-7.el9 appstream
hwdata.noarch 0.348-9.5.el9 baseos
hyperv-daemons.x86_64 0-0.40.20190303git.el9 appstream
hyperv-daemons-license.noarch 0-0.40.20190303git.el9 appstream
hypervfcopyd.x86_64 0-0.40.20190303git.el9 appstream
hypervkvpd.x86_64 0-0.40.20190303git.el9 appstream
hypervvssd.x86_64 0-0.40.20190303git.el9 appstream
infiniband-diags.x86_64 41.0-3.el9 appstream
inih.x86_64 49-6.el9 baseos
initscripts.x86_64 10.11.5-1.el9 baseos
initscripts-rename-device.x86_64 10.11.5-1.el9 baseos
initscripts-service.noarch 10.11.5-1.el9 baseos
iotop.noarch 0.6-30.el9 baseos
iproute.x86_64 5.18.0-1.el9 baseos
iproute-tc.x86_64 5.18.0-1.el9 baseos
iptables-libs.x86_64 1.8.8-4.el9 baseos
iptables-nft.x86_64 1.8.8-4.el9 baseos
irqbalance.x86_64 2:1.9.0-3.el9 baseos
iscsi-initiator-utils.x86_64 6.2.1.4-3.git2a8f9d8.el9 baseos
iscsi-initiator-utils-iscsiuio.x86_64 6.2.1.4-3.git2a8f9d8.el9 baseos
iwl100-firmware.noarch 39.31.5.1-127.el9 baseos
iwl1000-firmware.noarch 1:39.31.5.1-127.el9 baseos
iwl105-firmware.noarch 18.168.6.1-127.el9 baseos
iwl135-firmware.noarch 18.168.6.1-127.el9 baseos
iwl2000-firmware.noarch 18.168.6.1-127.el9 baseos
iwl2030-firmware.noarch 18.168.6.1-127.el9 baseos
iwl3160-firmware.noarch 1:25.30.13.0-127.el9 baseos
iwl5000-firmware.noarch 8.83.5.1_1-127.el9 baseos
iwl5150-firmware.noarch 8.24.2.2-127.el9 baseos
iwl6000g2a-firmware.noarch 18.168.6.1-127.el9 baseos
iwl6000g2b-firmware.noarch 18.168.6.1-127.el9 baseos
iwl6050-firmware.noarch 41.28.5.1-127.el9 baseos
iwl7260-firmware.noarch 1:25.30.13.0-127.el9 baseos
kernel.x86_64 5.14.0-162.6.1.el9_1 baseos
kernel-core.x86_64 5.14.0-162.6.1.el9_1 baseos
kernel-devel.x86_64 5.14.0-162.6.1.el9_1 appstream
kernel-headers.x86_64 5.14.0-162.6.1.el9_1 appstream
kernel-modules.x86_64 5.14.0-162.6.1.el9_1 baseos
kernel-tools.x86_64 5.14.0-162.6.1.el9_1 baseos
kernel-tools-libs.x86_64 5.14.0-162.6.1.el9_1 baseos
kexec-tools.x86_64 2.0.24-5.el9 baseos
kmod-kvdo.x86_64 8.2.0.21-47.el9_1 baseos
kpartx.x86_64 0.8.7-12.el9_1.1 baseos
kpatch.noarch 0.9.4-3.el9 baseos
kpatch-dnf.noarch 0.4-3.el9 baseos
krb5-libs.x86_64 1.19.1-24.el9_1 baseos
ldns.x86_64 1.7.1-11.el9 appstream
ledmon.x86_64 0.96-4.el9 baseos
libarchive.x86_64 3.5.3-3.el9 baseos
libbabeltrace.x86_64 1.5.8-10.el9 appstream
libbasicobjects.x86_64 0.1.1-53.el9 baseos
libblockdev.x86_64 2.25-14.el9 appstream
libblockdev-crypto.x86_64 2.25-14.el9 appstream
libblockdev-fs.x86_64 2.25-14.el9 appstream
libblockdev-loop.x86_64 2.25-14.el9 appstream
libblockdev-lvm.x86_64 2.25-14.el9 appstream
libblockdev-mdraid.x86_64 2.25-14.el9 appstream
libblockdev-part.x86_64 2.25-14.el9 appstream
libblockdev-swap.x86_64 2.25-14.el9 appstream
libblockdev-utils.x86_64 2.25-14.el9 appstream
libbpf.x86_64 2:0.6.0-1.el9 baseos
libcollection.x86_64 0.7.0-53.el9 baseos
libcom_err.x86_64 1.46.5-3.el9 baseos
libcurl.x86_64 7.76.1-19.el9 baseos
libdhash.x86_64 0.5.0-53.el9 baseos
libdnf.x86_64 0.67.0-3.el9.alma baseos
libdrm.x86_64 2.4.111-1.el9 appstream
libertas-sd8787-firmware.noarch 20220708-127.el9 baseos
libestr.x86_64 0.1.11-4.el9 appstream
libgcc.x86_64 11.3.1-2.1.el9.alma baseos
libgomp.x86_64 11.3.1-2.1.el9.alma baseos
libgtop2.x86_64 2.40.0-9.el9 appstream
libibumad.x86_64 41.0-3.el9 baseos
libibverbs.x86_64 41.0-3.el9 baseos
libini_config.x86_64 1.3.1-53.el9 baseos
libipa_hbac.x86_64 2.7.3-4.el9_1.1 baseos
libldb.x86_64 2.5.2-1.el9 baseos
libnftnl.x86_64 1.2.2-1.el9 baseos
libnl3.x86_64 3.7.0-1.el9 baseos
libnl3-cli.x86_64 3.7.0-1.el9 baseos
libnma.x86_64 1.8.40-1.el9 appstream
libomp.x86_64 14.0.6-1.el9 appstream
libomp-devel.x86_64 14.0.6-1.el9 appstream
libpath_utils.x86_64 0.2.1-53.el9 baseos
libref_array.x86_64 0.1.5-53.el9 baseos
librepo.x86_64 1.14.2-3.el9 baseos
libsmbclient.x86_64 4.16.4-101.el9 baseos
libsolv.x86_64 0.7.22-1.el9 baseos
libss.x86_64 1.46.5-3.el9 baseos
libsss_certmap.x86_64 2.7.3-4.el9_1.1 baseos
libsss_idmap.x86_64 2.7.3-4.el9_1.1 baseos
libsss_nss_idmap.x86_64 2.7.3-4.el9_1.1 baseos
libsss_sudo.x86_64 2.7.3-4.el9_1.1 baseos
libstdc++.x86_64 11.3.1-2.1.el9.alma baseos
libstdc++-devel.x86_64 11.3.1-2.1.el9.alma appstream
libtdb.x86_64 1.4.6-1.el9 baseos
libteam.x86_64 1.31-14.el9 baseos
libtevent.x86_64 0.12.0-0.el9 baseos
libtirpc.x86_64 1.3.3-0.el9 baseos
libusbx.x86_64 1.0.26-1.el9 baseos
libuser.x86_64 0.63-11.el9 baseos
libvirt-libs.x86_64 8.5.0-7.el9_1 appstream
libwbclient.x86_64 4.16.4-101.el9 baseos
libwpe.x86_64 1.10.0-4.el9 appstream
linux-firmware.noarch 20220708-127.el9 baseos
linux-firmware-whence.noarch 20220708-127.el9 baseos
lksctp-tools.x86_64 1.0.19-2.el9 baseos
llvm-libs.x86_64 14.0.6-1.el9 appstream
logrotate.x86_64 3.18.0-7.el9 baseos
lshw.x86_64 B.02.19.2-9.el9 baseos
lvm2.x86_64 9:2.03.16-3.el9 baseos
lvm2-libs.x86_64 9:2.03.16-3.el9 baseos
man-pages.noarch 5.10-5.el9 baseos
mcelog.x86_64 3:182-3.el9 baseos
mdadm.x86_64 4.2-6.el9 baseos
mesa-dri-drivers.x86_64 22.1.5-2.el9 appstream
mesa-filesystem.x86_64 22.1.5-2.el9 appstream
mesa-libEGL.x86_64 22.1.5-2.el9 appstream
mesa-libGL.x86_64 22.1.5-2.el9 appstream
mesa-libgbm.x86_64 22.1.5-2.el9 appstream
mesa-libglapi.x86_64 22.1.5-2.el9 appstream
mesa-libxatracker.x86_64 22.1.5-2.el9 appstream
mesa-vulkan-drivers.x86_64 22.1.5-2.el9 appstream
microcode_ctl.noarch 4:20220809-1.el9 baseos
mod_lua.x86_64 2.4.53-7.el9 appstream
mod_ssl.x86_64 1:2.4.53-7.el9 appstream
mokutil.x86_64 2:0.4.0-9.el9 baseos
mozilla-filesystem.x86_64 1.9-30.el9 appstream
mutter.x86_64 40.9-10.el9_1 appstream
nautilus.x86_64 40.2-9.el9_1 appstream
nautilus-extensions.x86_64 40.2-9.el9_1 appstream
netavark.x86_64 2:1.1.0-7.el9_1 appstream
netronome-firmware.noarch 20220708-127.el9 baseos
nftables.x86_64 1:1.0.4-2.el9 baseos
nginx-filesystem.noarch 1:1.20.1-13.el9.alma appstream
nm-connection-editor.x86_64 1.26.0-1.el9 appstream
nvme-cli.x86_64 2.0-4.el9 baseos
open-vm-tools.x86_64 12.0.5-2.el9 appstream
open-vm-tools-desktop.x86_64 12.0.5-2.el9 appstream
openjpeg2.x86_64 2.4.0-7.el9 appstream
openldap.x86_64 2.6.2-3.el9 baseos
openldap-clients.x86_64 2.6.2-3.el9 baseos
openldap-compat.x86_64 2.6.2-3.el9 baseos
openssh.x86_64 8.7p1-24.el9_1 baseos
openssh-clients.x86_64 8.7p1-24.el9_1 baseos
openssh-server.x86_64 8.7p1-24.el9_1 baseos
osinfo-db.noarch 20220727-3.el9 appstream
pam.x86_64 1.5.1-12.el9 baseos
parted.x86_64 3.5-2.el9 baseos
pcp.x86_64 5.3.7-7.el9 appstream
pcp-conf.x86_64 5.3.7-7.el9 appstream
pcp-devel.x86_64 5.3.7-7.el9 appstream
pcp-doc.noarch 5.3.7-7.el9 appstream
pcp-export-pcp2elasticsearch.x86_64 5.3.7-7.el9 appstream
pcp-export-pcp2graphite.x86_64 5.3.7-7.el9 appstream
pcp-export-pcp2influxdb.x86_64 5.3.7-7.el9 appstream
pcp-export-pcp2json.x86_64 5.3.7-7.el9 appstream
pcp-export-pcp2spark.x86_64 5.3.7-7.el9 appstream
pcp-export-pcp2xml.x86_64 5.3.7-7.el9 appstream
pcp-export-pcp2zabbix.x86_64 5.3.7-7.el9 appstream
pcp-export-zabbix-agent.x86_64 5.3.7-7.el9 appstream
pcp-gui.x86_64 5.3.7-7.el9 appstream
pcp-import-collectl2pcp.x86_64 5.3.7-7.el9 appstream
pcp-import-ganglia2pcp.x86_64 5.3.7-7.el9 appstream
pcp-import-iostat2pcp.x86_64 5.3.7-7.el9 appstream
pcp-import-mrtg2pcp.x86_64 5.3.7-7.el9 appstream
pcp-import-sar2pcp.x86_64 5.3.7-7.el9 appstream
pcp-libs.x86_64 5.3.7-7.el9 appstream
pcp-libs-devel.x86_64 5.3.7-7.el9 appstream
pcp-pmda-activemq.x86_64 5.3.7-7.el9 appstream
pcp-pmda-apache.x86_64 5.3.7-7.el9 appstream
pcp-pmda-bash.x86_64 5.3.7-7.el9 appstream
pcp-pmda-bcc.x86_64 5.3.7-7.el9 appstream
pcp-pmda-bind2.x86_64 5.3.7-7.el9 appstream
pcp-pmda-bonding.x86_64 5.3.7-7.el9 appstream
pcp-pmda-bpf.x86_64 5.3.7-7.el9 appstream
pcp-pmda-bpftrace.x86_64 5.3.7-7.el9 appstream
pcp-pmda-cifs.x86_64 5.3.7-7.el9 appstream
pcp-pmda-cisco.x86_64 5.3.7-7.el9 appstream
pcp-pmda-dbping.x86_64 5.3.7-7.el9 appstream
pcp-pmda-denki.x86_64 5.3.7-7.el9 appstream
pcp-pmda-dm.x86_64 5.3.7-7.el9 appstream
pcp-pmda-docker.x86_64 5.3.7-7.el9 appstream
pcp-pmda-ds389.x86_64 5.3.7-7.el9 appstream
pcp-pmda-ds389log.x86_64 5.3.7-7.el9 appstream
pcp-pmda-elasticsearch.x86_64 5.3.7-7.el9 appstream
pcp-pmda-gfs2.x86_64 5.3.7-7.el9 appstream
pcp-pmda-gluster.x86_64 5.3.7-7.el9 appstream
pcp-pmda-gpfs.x86_64 5.3.7-7.el9 appstream
pcp-pmda-gpsd.x86_64 5.3.7-7.el9 appstream
pcp-pmda-hacluster.x86_64 5.3.7-7.el9 appstream
pcp-pmda-haproxy.x86_64 5.3.7-7.el9 appstream
pcp-pmda-infiniband.x86_64 5.3.7-7.el9 appstream
pcp-pmda-json.x86_64 5.3.7-7.el9 appstream
pcp-pmda-libvirt.x86_64 5.3.7-7.el9 appstream
pcp-pmda-lio.x86_64 5.3.7-7.el9 appstream
pcp-pmda-lmsensors.x86_64 5.3.7-7.el9 appstream
pcp-pmda-logger.x86_64 5.3.7-7.el9 appstream
pcp-pmda-lustre.x86_64 5.3.7-7.el9 appstream
pcp-pmda-lustrecomm.x86_64 5.3.7-7.el9 appstream
pcp-pmda-mailq.x86_64 5.3.7-7.el9 appstream
pcp-pmda-memcache.x86_64 5.3.7-7.el9 appstream
pcp-pmda-mic.x86_64 5.3.7-7.el9 appstream
pcp-pmda-mongodb.x86_64 5.3.7-7.el9 appstream
pcp-pmda-mounts.x86_64 5.3.7-7.el9 appstream
pcp-pmda-mssql.x86_64 5.3.7-7.el9 appstream
pcp-pmda-mysql.x86_64 5.3.7-7.el9 appstream
pcp-pmda-named.x86_64 5.3.7-7.el9 appstream
pcp-pmda-netcheck.x86_64 5.3.7-7.el9 appstream
pcp-pmda-netfilter.x86_64 5.3.7-7.el9 appstream
pcp-pmda-news.x86_64 5.3.7-7.el9 appstream
pcp-pmda-nfsclient.x86_64 5.3.7-7.el9 appstream
pcp-pmda-nginx.x86_64 5.3.7-7.el9 appstream
pcp-pmda-nvidia-gpu.x86_64 5.3.7-7.el9 appstream
pcp-pmda-openmetrics.x86_64 5.3.7-7.el9 appstream
pcp-pmda-openvswitch.x86_64 5.3.7-7.el9 appstream
pcp-pmda-oracle.x86_64 5.3.7-7.el9 appstream
pcp-pmda-pdns.x86_64 5.3.7-7.el9 appstream
pcp-pmda-perfevent.x86_64 5.3.7-7.el9 appstream
pcp-pmda-podman.x86_64 5.3.7-7.el9 appstream
pcp-pmda-postfix.x86_64 5.3.7-7.el9 appstream
pcp-pmda-postgresql.x86_64 5.3.7-7.el9 appstream
pcp-pmda-rabbitmq.x86_64 5.3.7-7.el9 appstream
pcp-pmda-redis.x86_64 5.3.7-7.el9 appstream
pcp-pmda-roomtemp.x86_64 5.3.7-7.el9 appstream
pcp-pmda-rsyslog.x86_64 5.3.7-7.el9 appstream
pcp-pmda-samba.x86_64 5.3.7-7.el9 appstream
pcp-pmda-sendmail.x86_64 5.3.7-7.el9 appstream
pcp-pmda-shping.x86_64 5.3.7-7.el9 appstream
pcp-pmda-slurm.x86_64 5.3.7-7.el9 appstream
pcp-pmda-smart.x86_64 5.3.7-7.el9 appstream
pcp-pmda-snmp.x86_64 5.3.7-7.el9 appstream
pcp-pmda-sockets.x86_64 5.3.7-7.el9 appstream
pcp-pmda-statsd.x86_64 5.3.7-7.el9 appstream
pcp-pmda-summary.x86_64 5.3.7-7.el9 appstream
pcp-pmda-systemd.x86_64 5.3.7-7.el9 appstream
pcp-pmda-trace.x86_64 5.3.7-7.el9 appstream
pcp-pmda-unbound.x86_64 5.3.7-7.el9 appstream
pcp-pmda-weblog.x86_64 5.3.7-7.el9 appstream
pcp-pmda-zimbra.x86_64 5.3.7-7.el9 appstream
pcp-pmda-zswap.x86_64 5.3.7-7.el9 appstream
pcp-selinux.x86_64 5.3.7-7.el9 appstream
pcp-system-tools.x86_64 5.3.7-7.el9 appstream
pcp-testsuite.x86_64 5.3.7-7.el9 appstream
pcp-zeroconf.x86_64 5.3.7-7.el9 appstream
perf.x86_64 5.14.0-162.6.1.el9_1 appstream
perl-Net-SSLeay.x86_64 1.92-2.el9 appstream
perl-PCP-LogImport.x86_64 5.3.7-7.el9 appstream
perl-PCP-LogSummary.x86_64 5.3.7-7.el9 appstream
perl-PCP-MMV.x86_64 5.3.7-7.el9 appstream
perl-PCP-PMDA.x86_64 5.3.7-7.el9 appstream
pesign.x86_64 115-4.el9 appstream
php.x86_64 8.0.20-3.el9 appstream
php-cli.x86_64 8.0.20-3.el9 appstream
php-common.x86_64 8.0.20-3.el9 appstream
php-fpm.x86_64 8.0.20-3.el9 appstream
php-mbstring.x86_64 8.0.20-3.el9 appstream
php-mysqlnd.x86_64 8.0.20-3.el9 appstream
php-opcache.x86_64 8.0.20-3.el9 appstream
php-pdo.x86_64 8.0.20-3.el9 appstream
php-xml.x86_64 8.0.20-3.el9 appstream
podman.x86_64 2:4.2.0-7.el9_1 appstream
podman-catatonit.x86_64 2:4.2.0-7.el9_1 appstream
poppler.x86_64 21.01.0-13.el9 appstream
poppler-cpp.x86_64 21.01.0-13.el9 appstream
poppler-glib.x86_64 21.01.0-13.el9 appstream
poppler-utils.x86_64 21.01.0-13.el9 appstream
postfix.x86_64 2:3.5.9-19.el9 appstream
postfix-perl-scripts.x86_64 2:3.5.9-19.el9 appstream
power-profiles-daemon.x86_64 0.11.1-1.el9 appstream
procps-ng.x86_64 3.3.17-8.el9 baseos
protobuf-lite.x86_64 3.14.0-13.el9 appstream
python-unversioned-command.noarch 3.9.14-1.el9_1.1 appstream
python3.x86_64 3.9.14-1.el9_1.1 baseos
python3-audit.x86_64 3.0.7-103.el9 appstream
python3-bcc.noarch 0.24.0-4.el9 appstream
python3-cairo.x86_64 1.20.1-1.el9 appstream
python3-cryptography.x86_64 36.0.1-2.el9 appstream
python3-dnf.noarch 4.12.0-4.el9.alma baseos
python3-dnf-plugins-core.noarch 4.1.0-3.el9 baseos
python3-firewall.noarch 1.1.1-3.el9 baseos
python3-gobject.x86_64 3.40.1-6.el9 appstream
python3-gobject-base.x86_64 3.40.1-6.el9 baseos
python3-hawkey.x86_64 0.67.0-3.el9.alma baseos
python3-koji.noarch 1.31.0-1.el9 epel
python3-libdnf.x86_64 0.67.0-3.el9.alma baseos
python3-libs.x86_64 3.9.14-1.el9_1.1 baseos
python3-libvirt.x86_64 8.5.0-2.el9 appstream
python3-lxml.x86_64 4.6.5-3.el9 appstream
python3-nftables.x86_64 1:1.0.4-2.el9 baseos
python3-pcp.x86_64 5.3.7-7.el9 appstream
python3-psycopg2.x86_64 2.9.5-1.rhel9 pgdg-common
python3-rpm.x86_64 4.16.1.3-19.el9_1 baseos
python3-rtslib.noarch 2.1.75-1.el9 appstream
python3-setools.x86_64 4.4.0-5.el9 baseos
qemu-guest-agent.x86_64 17:7.0.0-13.el9 appstream
qpdf-libs.x86_64 10.3.1-6.el9 appstream
qt5-qtbase.x86_64 5.15.3-1.el9 appstream
qt5-qtbase-common.noarch 5.15.3-1.el9 appstream
qt5-qtbase-gui.x86_64 5.15.3-1.el9 appstream
qt5-qtsvg.x86_64 5.15.3-1.el9 appstream
qt5-srpm-macros.noarch 5.15.3-1.el9 appstream
rasdaemon.x86_64 0.6.7-8.el9 appstream
redhat-rpm-config.noarch 196-1.el9.alma appstream
rhel-system-roles.noarch 1.20.1-1.el9_1 appstream
rpm.x86_64 4.16.1.3-19.el9_1 baseos
rpm-build.x86_64 4.16.1.3-19.el9_1 appstream
rpm-build-libs.x86_64 4.16.1.3-19.el9_1 baseos
rpm-libs.x86_64 4.16.1.3-19.el9_1 baseos
rpm-plugin-audit.x86_64 4.16.1.3-19.el9_1 baseos
rpm-plugin-selinux.x86_64 4.16.1.3-19.el9_1 baseos
rpm-plugin-systemd-inhibit.x86_64 4.16.1.3-19.el9_1 appstream
rpm-sign.x86_64 4.16.1.3-19.el9_1 baseos
rpm-sign-libs.x86_64 4.16.1.3-19.el9_1 baseos
rsync.x86_64 3.2.3-18.el9 baseos
rsyslog.x86_64 8.2102.0-105.el9 appstream
rsyslog-gnutls.x86_64 8.2102.0-105.el9 appstream
rsyslog-gssapi.x86_64 8.2102.0-105.el9 appstream
rsyslog-logrotate.x86_64 8.2102.0-105.el9 appstream
rsyslog-relp.x86_64 8.2102.0-105.el9 appstream
runc.x86_64 4:1.1.4-1.el9_1 appstream
rust.x86_64 1.62.1-1.el9 appstream
rust-std-static.x86_64 1.62.1-1.el9 appstream
samba-client.x86_64 4.16.4-101.el9 appstream
samba-client-libs.x86_64 4.16.4-101.el9 baseos
samba-common.noarch 4.16.4-101.el9 baseos
samba-common-libs.x86_64 4.16.4-101.el9 baseos
sane-backends.x86_64 1.0.32-7.el9 appstream
sane-backends-drivers-cameras.x86_64 1.0.32-7.el9 appstream
sane-backends-drivers-scanners.x86_64 1.0.32-7.el9 appstream
sane-backends-libs.x86_64 1.0.32-7.el9 appstream
sdl12-compat.x86_64 1.2.52-1.el9 appstream
selinux-policy.noarch 34.1.43-1.el9 baseos
selinux-policy-devel.noarch 34.1.43-1.el9 appstream
selinux-policy-targeted.noarch 34.1.43-1.el9 baseos
setools-console.x86_64 4.4.0-5.el9 baseos
setroubleshoot-server.x86_64 3.3.28-4.el9 appstream
setup.noarch 2.13.7-7.el9 baseos
sg3_utils.x86_64 1.47-9.el9 baseos
sg3_utils-libs.x86_64 1.47-9.el9 baseos
shadow-utils.x86_64 2:4.9-5.el9 baseos
shadow-utils-subid.x86_64 2:4.9-5.el9 baseos
sos.noarch 4.3-5.el9_1.alma baseos
speex.x86_64 1.2.0-11.el9 appstream
sssd.x86_64 2.7.3-4.el9_1.1 baseos
sssd-ad.x86_64 2.7.3-4.el9_1.1 baseos
sssd-client.x86_64 2.7.3-4.el9_1.1 baseos
sssd-common.x86_64 2.7.3-4.el9_1.1 baseos
sssd-common-pac.x86_64 2.7.3-4.el9_1.1 baseos
sssd-ipa.x86_64 2.7.3-4.el9_1.1 baseos
sssd-kcm.x86_64 2.7.3-4.el9_1.1 baseos
sssd-krb5.x86_64 2.7.3-4.el9_1.1 baseos
sssd-krb5-common.x86_64 2.7.3-4.el9_1.1 baseos
sssd-ldap.x86_64 2.7.3-4.el9_1.1 baseos
sssd-proxy.x86_64 2.7.3-4.el9_1.1 baseos
strace.x86_64 5.18-2.el9 baseos
sushi.x86_64 3.38.1-2.el9 appstream
systemd.x86_64 250-12.el9_1 baseos
systemd-libs.x86_64 250-12.el9_1 baseos
systemd-pam.x86_64 250-12.el9_1 baseos
systemd-rpm-macros.noarch 250-12.el9_1 baseos
systemd-udev.x86_64 250-12.el9_1 baseos
systemtap.x86_64 4.7-2.el9 appstream
systemtap-client.x86_64 4.7-2.el9 appstream
systemtap-devel.x86_64 4.7-2.el9 appstream
systemtap-runtime.x86_64 4.7-2.el9 appstream
tar.x86_64 2:1.34-5.el9 baseos
tcl.x86_64 1:8.6.10-7.el9 baseos
teamd.x86_64 1.31-14.el9 baseos
tigervnc.x86_64 1.12.0-4.el9 appstream
tigervnc-icons.noarch 1.12.0-4.el9 appstream
tigervnc-license.noarch 1.12.0-4.el9 appstream
tpm2-tools.x86_64 5.2-2.el9_1 baseos
tpm2-tss.x86_64 3.0.3-8.el9 baseos
tzdata.noarch 2022g-1.el9_1 baseos
tzdata-java.noarch 2022g-1.el9_1 appstream
unbound-libs.x86_64 1.16.2-2.el9 appstream
valgrind.x86_64 1:3.19.0-3.el9 appstream
valgrind-devel.x86_64 1:3.19.0-3.el9 appstream
vdo.x86_64 8.2.0.2-1.el9 baseos
virt-what.x86_64 1.25-1.el9 baseos
vulkan-loader.x86_64 1.3.224.0-2.el9 appstream
wavpack.x86_64 5.4.0-5.el9 appstream
which.x86_64 2.21-28.el9 baseos
woff2.x86_64 1.0.2-15.el9 appstream
wpa_supplicant.x86_64 1:2.10-4.el9 baseos
wpebackend-fdo.x86_64 1.10.0-3.el9 appstream
xdg-dbus-proxy.x86_64 0.1.3-1.el9 appstream
xdg-desktop-portal.x86_64 1.12.4-1.el9 appstream
xdg-desktop-portal-gtk.x86_64 1.12.0-3.el9 appstream
xorg-x11-server-Xorg.x86_64 1.20.11-11.el9 appstream
xorg-x11-server-Xwayland.x86_64 21.1.3-3.el9 appstream
xorg-x11-server-common.x86_64 1.20.11-11.el9 appstream
yum.noarch 4.12.0-4.el9.alma baseos
zenity.x86_64 3.32.0-8.el9 appstream
zlib.x86_64 1.2.11-34.el9 baseos
zlib-devel.x86_64 1.2.11-34.el9 appstream
Obsoleting Packages
grub2-tools.x86_64 1:2.06-46.el9.alma baseos
grub2-tools.x86_64 1:2.06-27.el9_0.7.alma @baseos
grub2-tools-efi.x86_64 1:2.06-46.el9.alma baseos
grub2-tools.x86_64 1:2.06-27.el9_0.7.alma @baseos
grub2-tools-extra.x86_64 1:2.06-46.el9.alma baseos
grub2-tools.x86_64 1:2.06-27.el9_0.7.alma @baseos
grub2-tools-minimal.x86_64 1:2.06-46.el9.alma baseos
grub2-tools.x86_64 1:2.06-27.el9_0.7.alma @baseos
libpq5.x86_64 15.0-42.2PGDG.rhel9 pgdg-common
libpq.x86_64 13.5-1.el9 @AppStream
libpq5.x86_64 15.1-42PGDG.rhel9 pgdg-common
libpq.x86_64 13.5-1.el9 @AppStream |
You can install the VSCode package using dnf dnf, like this as the sudoer user:
sudo dnf install -y code |
The log file for this is:
Display detailed console log →
Visual Studio Code 6.9 MB/s | 31 MB 00:04 Last metadata expiration check: 0:00:09 ago on Mon 19 Dec 2022 10:52:28 PM EST. Dependencies resolved. ================================================================================ Package Architecture Version Repository Size ================================================================================ Installing: code x86_64 1.74.1-1671015385.el7 code 132 M Transaction Summary ================================================================================ Install 1 Package Total download size: 132 M Installed size: 384 M Downloading Packages: code-1.74.1-1671015385.el7.x86_64.rpm 7.6 MB/s | 132 MB 00:17 -------------------------------------------------------------------------------- Total 7.6 MB/s | 132 MB 00:17 Running transaction check Transaction check succeeded. Running transaction test Transaction test succeeded. Running transaction Regex version mismatch, expected: 10.40 2022-04-14 actual: 10.37 2021-05-26 Regex version mismatch, expected: 10.40 2022-04-14 actual: 10.37 2021-05-26 Preparing : 1/1 Installing : code-1.74.1-1671015385.el7.x86_64 1/1 Running scriptlet: code-1.74.1-1671015385.el7.x86_64 1/1 Verifying : code-1.74.1-1671015385.el7.x86_64 1/1 Installed: code-1.74.1-1671015385.el7.x86_64 Complete! |
Click on Activities in the upper left corner and then the clustered nine dots to view applications. Choose the Visual Studio and double click and you should see the following dialog:

Choose a color schema that works for you, then click the less than symbol in the top left hand corner to start working with Visual Studio Code:

As always, I hope this helps those looking for step-by-step instructions and clarity of complete examples.
Wrapping sqlplus
After sorting out the failures of Oracle Database 11g (11.2.0) on AlmaLinux, I grabbed the Enterprise Linux 9 rlwrap library. The rlwrap is a ‘readline wrapper’ that uses the GNU readline library to
allow the editing of keyboard input for any other command. Input history is remembered across invocations, separately for each command; history completion and search work as in bash and completion word
lists can be specified on the command line.
Installed it with the dnf utility:
dnf install -y rlwrap |
It gave me this log file:
Last metadata expiration check: 0:53:30 ago on Fri 02 Dec 2022 01:07:54 AM EST. Dependencies resolved. ================================================================================================================================ Package Architecture Version Repository Size ================================================================================================================================ Installing: rlwrap x86_64 0.45.2-3.el9 epel 132 k Transaction Summary ================================================================================================================================ Install 1 Package Total download size: 132 k Installed size: 323 k Downloading Packages: rlwrap-0.45.2-3.el9.x86_64.rpm 162 kB/s | 132 kB 00:00 -------------------------------------------------------------------------------------------------------------------------------- Total 117 kB/s | 132 kB 00:01 Running transaction check Transaction check succeeded. Running transaction test Transaction test succeeded. Running transaction Regex version mismatch, expected: 10.40 2022-04-14 actual: 10.37 2021-05-26 Regex version mismatch, expected: 10.40 2022-04-14 actual: 10.37 2021-05-26 Preparing : 1/1 Installing : rlwrap-0.45.2-3.el9.x86_64 1/1 Running scriptlet: rlwrap-0.45.2-3.el9.x86_64 1/1 Verifying : rlwrap-0.45.2-3.el9.x86_64 1/1 Installed: rlwrap-0.45.2-3.el9.x86_64 Complete! |
Then, I added this sqlplus function to the student account’s .bashrc file:
sqlplus () { # Discover the fully qualified program name. path=`which rlwrap 2>/dev/null` file='' # Parse the program name from the path. if [ -n ${path} ]; then file=${path##/*/} fi; # Wrap when there is a file and it is rewrap. if [ -n ${file} ] && [[ ${file} = "rlwrap" ]]; then rlwrap sqlplus "${@}" else echo "Command-line history unavailable: Install the rlwrap package." $ORACLE_HOME/bin/sqlplus "${@}" fi } |
Then, I connected to the old, but tiny, footprint of Oracle Database 11g XE for testing, which worked:

Yes, I couldn’t resist. After all Version 11 was the last non-pluggable release and it’s been 11 years since its release. A double lucky 11.
Naturally, you can always use vi (or vim) to edit the command history provided you include the following command in your .bashrc file:
set -o vi |
Next, I’ll build a new VM instance with the current version of Oracle Database XE for student testing.
As always, I hope this helps those working with Oracle’s database products.
Oracle Library Missing
It was always aware of a problem with Oracle 11g XE on various Linux platforms from 10 years ago. I knew it was misleading but never found the time to explain the error that occurred during the cloning of the instance.
While it would occur when you were on an unsupported version of Linux, it was easy to fix. For example, after downloading the old compressed oracle-xe-11.2.0-1.0.x86_64.rpm.zip file, you uncompress it. Then, you run the file with the following command:
rpm -ivh oracle-xe-11.2.0-1.0.x86_64.rpm |
This command will install the packages in verbose syntax and display the following messages:
[sudo] password for mclaughlinm: Preparing packages for installation... oracle-xe-11.2.0-1.0 Executing post-install steps... You must run '/etc/init.d/oracle-xe configure' as the root user to configure the database. |
Connect as the root user to another instance of the terminal and run the following command:
/etc/init.d/oracle-xe configure |
You will see the following control output:
Oracle Database 11g Express Edition Configuration ------------------------------------------------- This will configure on-boot properties of Oracle Database 11g Express Edition. The following questions will determine whether the database should be starting upon system boot, the ports it will use, and the passwords that will be used for database accounts. Press <Enter> to accept the defaults. Ctrl-C will abort. Specify the HTTP port that will be used for Oracle Application Express [8080]: Specify a port that will be used for the database listener [1521]: Specify a password to be used for database accounts. Note that the same password will be used for SYS and SYSTEM. Oracle recommends the use of different passwords for each database account. This can be done after initial configuration: Confirm the password: Do you want Oracle Database 11g Express Edition to be started on boot (y/n) [y]:y Starting Oracle Net Listener...Done Configuring database...grep: /u01/app/oracle/product/11.2.0/xe/config/log/*.log: No such file or directory grep: /u01/app/oracle/product/11.2.0/xe/config/log/*.log: No such file or directory Done /bin/chmod: cannot access '/u01/app/oracle/diag': No such file or directory Starting Oracle Database 11g Express Edition instance...Done Installation completed successfully. |
This looks like an unsolvable problem, and for many it was too hard to solve. Most never knew the next step to take to discover the missing library. The failure actually occurs when the configuration tries to launch SQL*Plus. You can test that by creating the following oracle_env.sh parameter script:
# Oracle Settings TMP=/tmp; export TMP TMPDIR=$TMP; export TMPDIR ORACLE_HOSTNAME=localhost.localdomain; export ORACLE_HOSTNAME ORACLE_UNQNAME=DB11G; export ORACLE_UNQNAME ORACLE_BASE=/u01/app/oracle; export ORACLE_BASE ORACLE_HOME=$ORACLE_BASE/product/11.2.0/xe; export ORACLE_HOME ORACLE_SID=XE; export ORACLE_SID NLS_LANG=`$ORACLE_HOME/bin/nls_lang.sh`; export NLS_LANG ORACLE_TERM=xterm; export ORACLE_TERM PATH=/usr/sbin:$PATH; export PATH PATH=$ORACLE_HOME/bin:$PATH; export PATH LD_LIBRARY_PATH=$ORACLE_HOME/lib:/lib:/usr/lib; export LD_LIBRARY_PATH CLASSPATH=$ORACLE_HOME/JRE:$ORACLE_HOME/jlib:$ORACLE_HOME/rdbms/jlib; export CLASSPATH if [ $USER = "oracle" ]; then if [ $SHELL = "/bin/ksh" ]; then ulimit -p 16384 ulimit -n 65536 else ulimit -u 16384 -n 65536 fi fi |
Then, source the oracle_env.sh file like this:
. ./oracle_env.sh |
As the oracle user, try to connect to the sqlplus executable with this command:
sqlplus / as sysdba |
It’ll raise the following error:
sqlplus: error while loading shared libraries: libnsl.so.1: cannot open shared object file: No such file or directory |
You won’t find the /usr/lib64/libnsl.so.1 because it’s a symbolic link to the /usr/lib64/libnsl-2.29.so shared library file, which you can find on older Fedora installations. AlmaLinux has libnsl2, which you can download from the pgks.org.
After finding the library and installing it in the /usr/lib64 directory, the balance of the fix is to run the cloning manually. This type of error can occur for newer version of the database but it’s easiest to highlight with the Oracle 11g XE installation.
You also can find it in the libnsl2-devel development libraries on the pkgs.org web site:

You may need to build the libnsl.so.1 symbolic link as the root user with the following command:
ln -s libnsl-2.29.so libnsl.so.1 |
Ensure the file permissions for these files are:
-rwxr-xr-x. 1 root root 218488 Dec 2 01:33 libnsl-2.29.so lrwxrwxrwx. 1 root root 14 Dec 2 01:39 libnsl.so.1 -> libnsl-2.29.so |
After you create the database, you can provision a student user and database, like so:
Oracle Database 11g (Pre-containerization)
After you create and provision the Oracle Database 11g XE, you create an instance with the following two step process.
- Create a
studentOracle user account with the following command:CREATE USER student IDENTIFIED BY student DEFAULT TABLESPACE users QUOTA 200M ON users TEMPORARY TABLESPACE temp;
- Grant necessary privileges to the newly created
studentuser:GRANT CREATE CLUSTER, CREATE INDEXTYPE, CREATE OPERATOR , CREATE PROCEDURE, CREATE SEQUENCE, CREATE SESSION , CREATE TABLE, CREATE TRIGGER, CREATE TYPE , CREATE VIEW TO student;
Oracle Database 21c (Post-containerization)
After you create and provision the Oracle Database 21c Express Edition (XE), you can create a c##student container user with the following two step process.
- Create a c##student Oracle user account with the following command:
CREATE USER c##student IDENTIFIED BY student
DEFAULT TABLESPACE users QUOTA 200M ON users
TEMPORARY TABLESPACE temp;
- Grant necessary privileges to the newly created c##student user:
GRANT CREATE CLUSTER, CREATE INDEXTYPE, CREATE OPERATOR
,     CREATE PROCEDURE, CREATE SEQUENCE, CREATE SESSION
,     CREATE TABLE, CREATE TRIGGER, CREATE TYPE
,     CREATE VIEW TO c##student;
As always, it should help you solve new problems.
AlmaLinux+PostgreSQL
This installs PostgreSQL 15 on AlmaLinux 9 (don’t forget the PostgreSQL 15 Documentation site). The executable is available in the script that the postgresql.org provides; however, it seems appropriate to show how to find that script for any platform.
When you launch the postgres.org web site, you will see the following dialog. Click the Download-> button to choose an operating system.
On the next webpage, click on the Linux icon button to proceed.
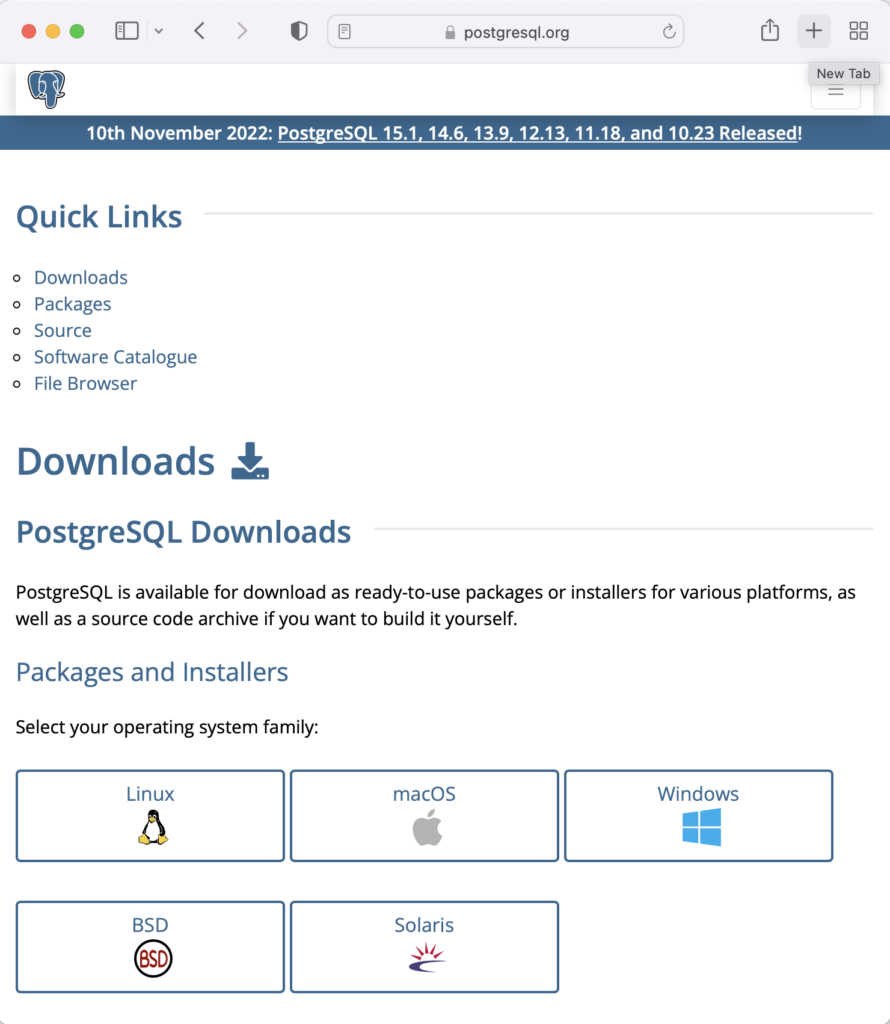
This page expands for you to choose a Linux distribution. Click on the Red Hat/Rocky/CentOS button to proceed.
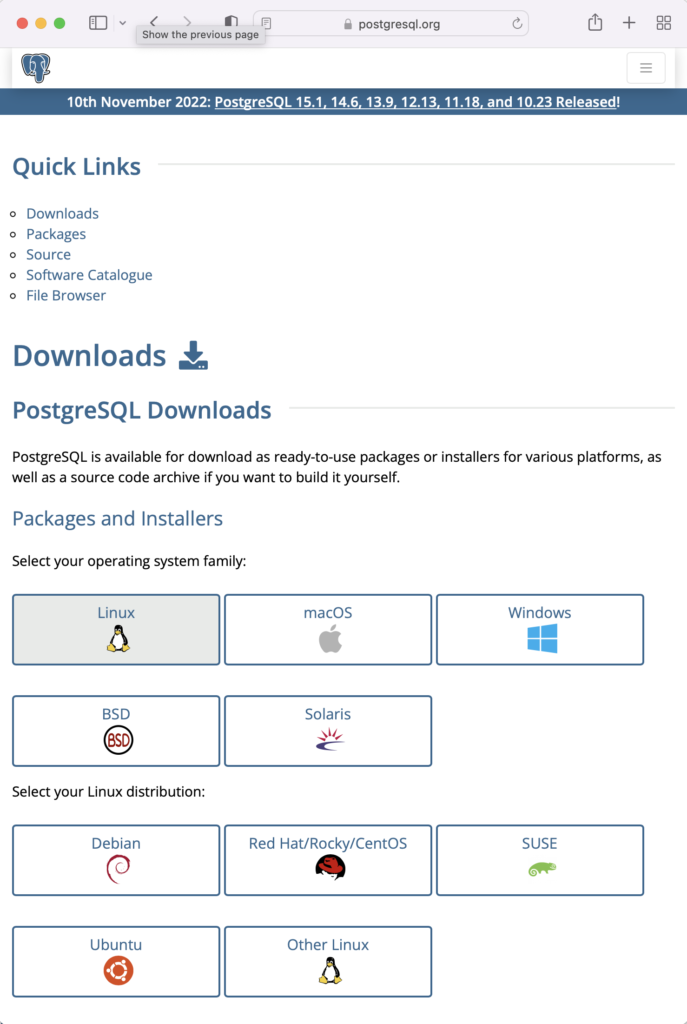
This web page lets you choose a platform, which should be Red Hat Enterprise, Rocky, or Oracle version 9.
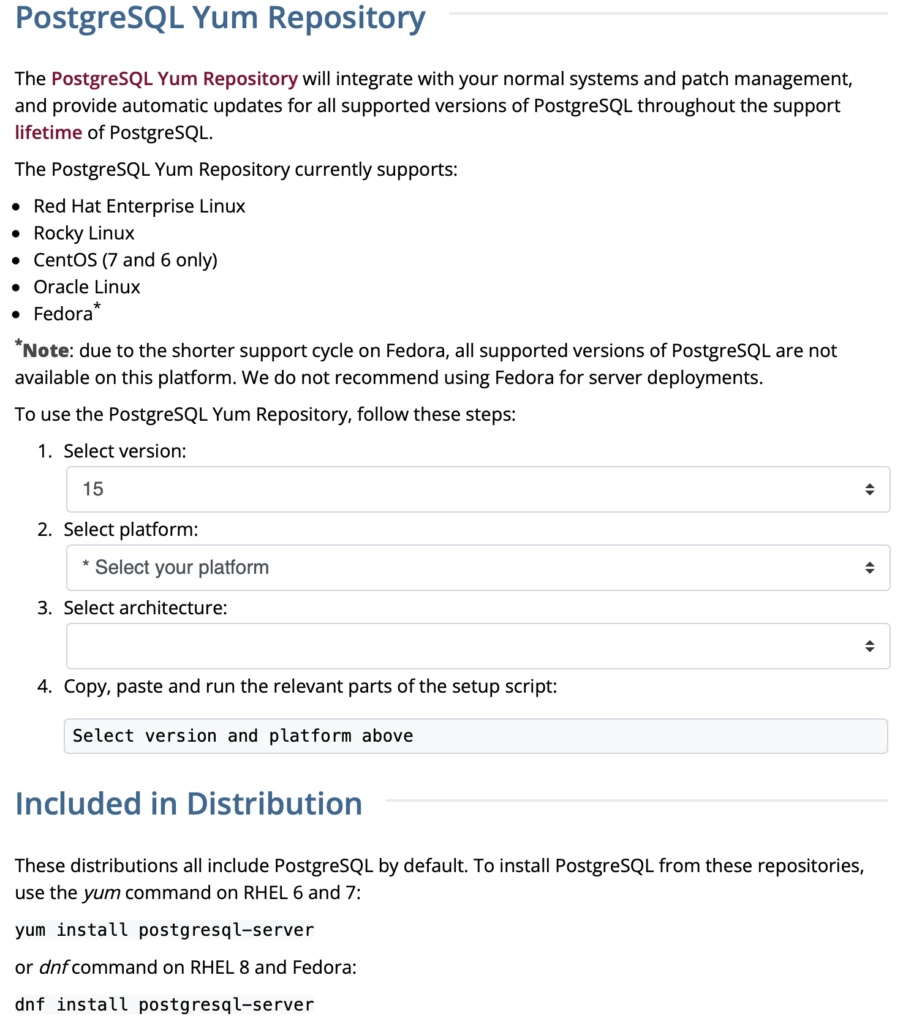
The selection fills out the web page and provides a setup script. The script installs the PostgreSQL packages, disables the built-in PostgreSQL module, installs PostgreSQL 15 Server, initialize, enable, and start PostgreSQL Server.
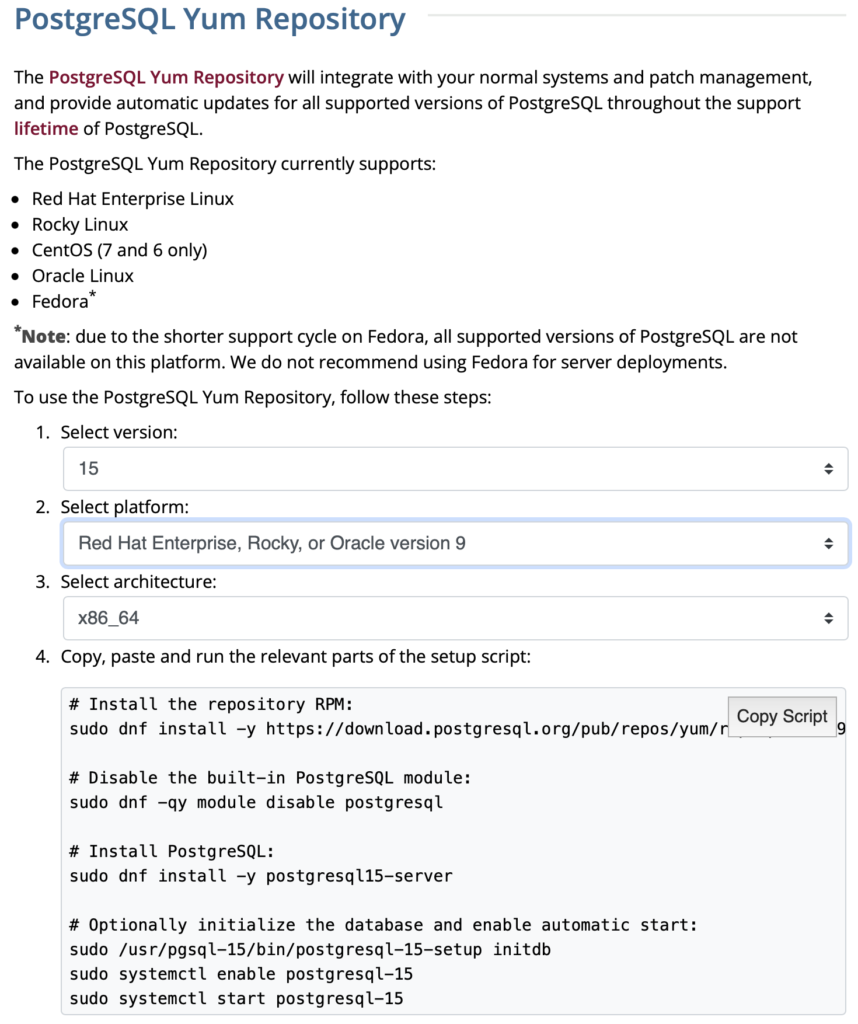
Here are the detailed steps:
- Install the PostgreSQL by updating dependent packages before installing it with the script provided by the PostgreSQL download web site:
# Install the repository RPM:
sudo dnf install -y https://download.postgresql.org/pub/repos/yum/reporpms/EL-9-x86_64/pgdg-redhat-repo-latest.noarch.rpm

# Disable the built-in PostgreSQL module:
sudo dnf -qy module disable postgresql

# Install PostgreSQL:
sudo dnf install -y postgresql15-server

# Optionally initialize the database and enable automatic start:
sudo /usr/pgsql-15/bin/postgresql-15-setup initdb
sudo systemctl enable postgresql-15
sudo systemctl start postgresql-15
Display detailed console log →
Last metadata expiration check: 20:38:10 ago on Mon 21 Nov 2022 02:07:25 AM EST.
pgdg-redhat-repo-latest.noarch.rpm              3.6 kB/s |  12 kB     00:03
Dependencies resolved.
================================================================================
 Package                 Architecture  Version        Repository           Size
================================================================================
Installing:
 pgdg-redhat-repo        noarch        42.0-28        @commandline         12 k

Transaction Summary
================================================================================
Install  1 Package

Total size: 12 k
Installed size: 14 k
Downloading Packages:
Running transaction check
Transaction check succeeded.
Running transaction test
Transaction test succeeded.
Running transaction
Regex version mismatch, expected: 10.40 2022-04-14 actual: 10.37 2021-05-26
Regex version mismatch, expected: 10.40 2022-04-14 actual: 10.37 2021-05-26
  Preparing        :                                                        1/1
  Installing       : pgdg-redhat-repo-42.0-28.noarch                        1/1
  Verifying        : pgdg-redhat-repo-42.0-28.noarch                        1/1

Installed:
  pgdg-redhat-repo-42.0-28.noarch

Complete!
Importing GPG key 0x442DF0F8:
 Userid     : "PostgreSQL RPM Building Project <pgsql-pkg-yum@postgresql.org>"
 Fingerprint: 68C9 E2B9 1A37 D136 FE74 D176 1F16 D2E1 442D F0F8
 From       : /etc/pki/rpm-gpg/RPM-GPG-KEY-PGDG
Importing GPG key 0x442DF0F8:
 Userid     : "PostgreSQL RPM Building Project <pgsql-pkg-yum@postgresql.org>"
 Fingerprint: 68C9 E2B9 1A37 D136 FE74 D176 1F16 D2E1 442D F0F8
 From       : /etc/pki/rpm-gpg/RPM-GPG-KEY-PGDG
Importing GPG key 0x442DF0F8:
 Userid     : "PostgreSQL RPM Building Project <pgsql-pkg-yum@postgresql.org>"
 Fingerprint: 68C9 E2B9 1A37 D136 FE74 D176 1F16 D2E1 442D F0F8
 From       : /etc/pki/rpm-gpg/RPM-GPG-KEY-PGDG
Importing GPG key 0x442DF0F8:
 Userid     : "PostgreSQL RPM Building Project <pgsql-pkg-yum@postgresql.org>"
 Fingerprint: 68C9 E2B9 1A37 D136 FE74 D176 1F16 D2E1 442D F0F8
 From       : /etc/pki/rpm-gpg/RPM-GPG-KEY-PGDG
Importing GPG key 0x442DF0F8:
 Userid     : "PostgreSQL RPM Building Project <pgsql-pkg-yum@postgresql.org>"
 Fingerprint: 68C9 E2B9 1A37 D136 FE74 D176 1F16 D2E1 442D F0F8
 From       : /etc/pki/rpm-gpg/RPM-GPG-KEY-PGDG
Importing GPG key 0x442DF0F8:
 Userid     : "PostgreSQL RPM Building Project <pgsql-pkg-yum@postgresql.org>"
 Fingerprint: 68C9 E2B9 1A37 D136 FE74 D176 1F16 D2E1 442D F0F8
 From       : /etc/pki/rpm-gpg/RPM-GPG-KEY-PGDG
Importing GPG key 0x442DF0F8:
 Userid     : "PostgreSQL RPM Building Project <pgsql-pkg-yum@postgresql.org>"
 Fingerprint: 68C9 E2B9 1A37 D136 FE74 D176 1F16 D2E1 442D F0F8
 From       : /etc/pki/rpm-gpg/RPM-GPG-KEY-PGDG
Unable to resolve argument postgresql
Error: Problems in request:
missing groups or modules: postgresql
Last metadata expiration check: 0:00:02 ago on Mon 21 Nov 2022 10:46:16 PM EST.
Dependencies resolved.
================================================================================
 Package                  Arch        Version                 Repository   Size
================================================================================
Installing:
 postgresql15-server      x86_64      15.1-1PGDG.rhel9        pgdg15      6.0 M
Installing dependencies:
 lz4                      x86_64      1.9.3-5.el9             baseos       58 k
 postgresql15             x86_64      15.1-1PGDG.rhel9        pgdg15      1.5 M
 postgresql15-libs        x86_64      15.1-1PGDG.rhel9        pgdg15      296 k

Transaction Summary
================================================================================
Install  4 Packages

Total download size: 7.8 M
Installed size: 33 M
Downloading Packages:
(1/4): lz4-1.9.3-5.el9.x86_64.rpm                91 kB/s |  58 kB     00:00
(2/4): postgresql15-libs-15.1-1PGDG.rhel9.x86_6  97 kB/s | 296 kB     00:03
(3/4): postgresql15-15.1-1PGDG.rhel9.x86_64.rpm 214 kB/s | 1.5 MB     00:07
(4/4): postgresql15-server-15.1-1PGDG.rhel9.x86 371 kB/s | 6.0 MB     00:16
--------------------------------------------------------------------------------
Total                                           446 kB/s | 7.8 MB     00:17
PostgreSQL 15 for RHEL / Rocky 9 - x86_64       1.4 MB/s | 1.7 kB     00:00
Importing GPG key 0x442DF0F8:
 Userid     : "PostgreSQL RPM Building Project <pgsql-pkg-yum@postgresql.org>"
 Fingerprint: 68C9 E2B9 1A37 D136 FE74 D176 1F16 D2E1 442D F0F8
 From       : /etc/pki/rpm-gpg/RPM-GPG-KEY-PGDG
Key imported successfully
Running transaction check
Transaction check succeeded.
Running transaction test
Transaction test succeeded.
Running transaction
Regex version mismatch, expected: 10.40 2022-04-14 actual: 10.37 2021-05-26
Regex version mismatch, expected: 10.40 2022-04-14 actual: 10.37 2021-05-26
  Preparing        :                                                        1/1
  Installing       : postgresql15-libs-15.1-1PGDG.rhel9.x86_64              1/4
  Running scriptlet: postgresql15-libs-15.1-1PGDG.rhel9.x86_64              1/4
  Installing       : lz4-1.9.3-5.el9.x86_64                                 2/4
  Installing       : postgresql15-15.1-1PGDG.rhel9.x86_64                   3/4
  Running scriptlet: postgresql15-15.1-1PGDG.rhel9.x86_64                   3/4
  Running scriptlet: postgresql15-server-15.1-1PGDG.rhel9.x86_64            4/4
  Installing       : postgresql15-server-15.1-1PGDG.rhel9.x86_64            4/4
  Running scriptlet: postgresql15-server-15.1-1PGDG.rhel9.x86_64            4/4
Regex version mismatch, expected: 10.40 2022-04-14 actual: 10.37 2021-05-26
Regex version mismatch, expected: 10.40 2022-04-14 actual: 10.37 2021-05-26

  Verifying        : lz4-1.9.3-5.el9.x86_64                                 1/4
  Verifying        : postgresql15-15.1-1PGDG.rhel9.x86_64                   2/4
  Verifying        : postgresql15-libs-15.1-1PGDG.rhel9.x86_64              3/4
  Verifying        : postgresql15-server-15.1-1PGDG.rhel9.x86_64            4/4

Installed:
  lz4-1.9.3-5.el9.x86_64
  postgresql15-15.1-1PGDG.rhel9.x86_64
  postgresql15-libs-15.1-1PGDG.rhel9.x86_64
  postgresql15-server-15.1-1PGDG.rhel9.x86_64

Complete!
Initializing database ... /sbin/restorecon: Regex version mismatch, expected: 10.40 2022-04-14 actual: 10.37 2021-05-26
/sbin/restorecon: Regex version mismatch, expected: 10.40 2022-04-14 actual: 10.37 2021-05-26
/sbin/restorecon: Regex version mismatch, expected: 10.40 2022-04-14 actual: 10.37 2021-05-26
/sbin/restorecon: Regex version mismatch, expected: 10.40 2022-04-14 actual: 10.37 2021-05-26
/sbin/restorecon: Regex version mismatch, expected: 10.40 2022-04-14 actual: 10.37 2021-05-26
/sbin/restorecon: Regex version mismatch, expected: 10.40 2022-04-14 actual: 10.37 2021-05-26
OK

Created symlink /etc/systemd/system/multi-user.target.wants/postgresql-15.service → /usr/lib/systemd/system/postgresql-15.service.
- The simpmlest way to verify the installation is to check for the psql executable. You can do that with this command:
which psqlIt should return:
/usr/bin/psql
- Attempt to login with the following command-line interface (CLI) syntax:
psql -U postgres -W
It should fail and return the following:
psql: error: connection to server on socket "/var/run/postgresql/.s.PGSQL.5432" failed: FATAL: Peer authentication failed for user "postgres"
This error occurs because you’re not the postgres user, and all other users must designate that they’re connecting to an account with a password. The following steps let you configure the Operating System (OS).
-
You must shell out to the root superuser’s account, and then shell out to the postgres user’s account to test your connection because postgres user’s account disallows direct connection.
su - root
su - postgres
You can verify the current postgres user with this command:
whoamiIt should return the following:
postgres
As the postgres user, you connect to the database without a password. You use the following syntax:
psql -U postgresIt should display the following:
psql (15.1)
Type "help" for help.
-
At this point, you have some operating system (OS) stuff to setup before configuring a PostgreSQL sandboxed videodb database and student user. Exit psql with the following command:
postgres=# \q
Navigate to the PostgreSQL home database directory as the postgres user with this command:
cd /var/lib/pgsql/15/data
Edit the pg_hba.conf file to add lines for the postgres and student users:
# TYPE  DATABASE        USER            ADDRESS                 METHOD

# "local" is for Unix domain socket connections only
local   all             all                                     peer
local   all             postgres                                peer
local   all             student                                 peer

# IPv4 local connections:
host    all             all             127.0.0.1/32            scram-sha-256
# IPv6 local connections:
host    all             all             ::1/128                 scram-sha-256
# Allow replication connections from localhost, by a user with the
# replication privilege.
local   replication     all                                     scram-sha-256
host    replication     all             127.0.0.1/32            scram-sha-256
host    replication     all             ::1/128                 scram-sha-256
Navigate up the directory tree from the /var/lib/pgsql/15/data directory, which is also the data dictionary, to the following /var/lib/pgsql/15 base directory:
cd /var/lib/pgsql/15
Create a new video_db directory. This is where you will deploy the video_db tablespace. You create this directory with the following command:
mkdir video_dbChange the video_db permissions to read, write, and execute for only the owner with this syntax as the postgres user:
chmod 700 video_db
-
Exit the postgres user with the exit command and open PostgreSQL’s 5432 listener port as the root user. You can use the following command, as the root user:
firewall-cmd --zone=public --add-port 5432/tcp --permanent
-
You must shell out from the root user to the postgres user with the following command:
su - postgres
-
You must shell out to the root superuser’s account, and then shell out to the postgres user’s account to test your connection because postgres user’s account disallows direct connection.
- Connect to the postgres account and perform the following commands:
- After connecting as the postgres superuser, you can create a video_db tablespace with the following syntax:
CREATE TABLESPACE video_db
  OWNER postgres
  LOCATION 'C:\Users\username\video_db';
This will return the following:
CREATE TABLESPACE
You can query whether you successfully create the video_db tablespace with the following:
SELECT * FROM pg_tablespace;
It should return the following:
  oid  |  spcname   | spcowner | spcacl | spcoptions
-------+------------+----------+--------+------------
  1663 | pg_default |       10 |        |
  1664 | pg_global  |       10 |        |
 16389 | video_db   |       10 |        |
(3 rows)
-
You need to know the PostgreSQL default collation before you create a new database. You can write the following query to determine the default correlation:
postgres=# SELECT datname, datcollate FROM pg_database WHERE datname = 'postgres';
It should return something like this:
 datname  | datcollate
----------+-------------
 postgres | en_US.UTF-8
(1 row)
The datcollate value of the postgres database needs to the same value for the LC_COLLATE and LC_CTYPE parameters when you create a database. You can create a videodb database with the following syntax provided you’ve made appropriate substitutions for the LC_COLLATE and LC_CTYPE values below:
CREATE DATABASE videodb
  WITH OWNER = postgres
  ENCODING = 'UTF8'
  TABLESPACE = video_db
  LC_COLLATE = 'en_US.UTF-8'
  LC_CTYPE = 'en_US.UTF-8'
  CONNECTION LIMIT = -1;
You can verify the creation of the videodb with the following command:
postgres# \l
It should show you a display like the following:
List of databases Name | Owner | Encoding | Collate | Ctype | ICU Locale | Locale Provider | Access privileges -----------+----------+----------+-------------+-------------+------------+-----------------+----------------------- postgres | postgres | UTF8 | en_US.UTF-8 | en_US.UTF-8 | | libc | template0 | postgres | UTF8 | en_US.UTF-8 | en_US.UTF-8 | | libc | =c/postgres + | | | | | | | postgres=CTc/postgres template1 | postgres | UTF8 | en_US.UTF-8 | en_US.UTF-8 | | libc | =c/postgres + | | | | | | | postgres=CTc/postgres videodb | postgres | UTF8 | en_US.UTF-8 | en_US.UTF-8 | | libc | (4 rows)Then, you can assign comment to the database with the following syntax:
COMMENT ON DATABASE videodb IS 'Video Store Database';
- After connecting as the postgres superuser, you can create a video_db tablespace with the following syntax:
- Create a Role, Grant, and User:
In this section you create a dba role, grant privileges on a videodb database to a role, and create a user with the role that you created previously with the following three statements. There are three steps in this sections.
- The first step creates a dba role:
CREATE ROLE dba WITH SUPERUSER;
- The second step grants all privileges on the videodb database to both the postgres superuser and the dba role:
GRANT TEMPORARY, CONNECT ON DATABASE videodb TO PUBLIC;
GRANT ALL PRIVILEGES ON DATABASE videodb TO postgres;
GRANT ALL PRIVILEGES ON DATABASE videodb TO dba;
Any work in pgAdmin4 requires a grant on the videodb database to the postgres superuser. The grant enables visibility of the videodb database in the pgAdmin4 console as shown in the following image.
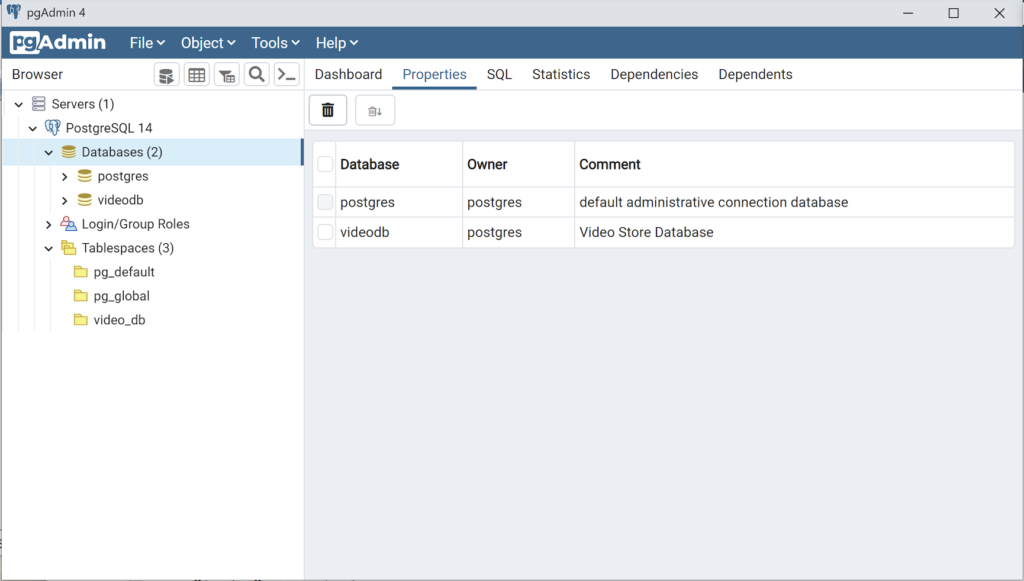
- The third step changes the ownership of the videodb database to the student user:
ALTER DATABASE videodb OWNER TO student;
You can verify the change of ownership for the videodb from the postgres user to student user with the following command:
postgres# \l
It should show you a display like the following:
List of databases Name | Owner | Encoding | Collate | Ctype | ICU Locale | Locale Provider | Access privileges -----------+----------+----------+-------------+-------------+------------+-----------------+----------------------- postgres | postgres | UTF8 | en_US.UTF-8 | en_US.UTF-8 | | libc | template0 | postgres | UTF8 | en_US.UTF-8 | en_US.UTF-8 | | libc | =c/postgres + | | | | | | | postgres=CTc/postgres template1 | postgres | UTF8 | en_US.UTF-8 | en_US.UTF-8 | | libc | =c/postgres + | | | | | | | postgres=CTc/postgres videodb | student | UTF8 | en_US.UTF-8 | en_US.UTF-8 | | libc | =Tc/student + | | | | | | | student=CTc/student + | | | | | | | dba=CTc/student (4 rows) - The fourth step creates a student user with the dba role:
CREATE USER student
  WITH ROLE dba
       ENCRYPTED PASSWORD 'student';
After this step, you need to disconnect as the postgres superuser with the following command:
\q
- The first step creates a dba role:
- Connect to the videodb database as the student user with the PostgreSQL CLI, create a new_hire table and quit the database.
The following syntax lets you connect to a videodb database as the student user. You should note that the Linux OS student user name should match the database user name.
psql -Ustudent -W -dvideodb
You create the new_hire table in the public schema of the videodb database with the following syntax:
CREATE TABLE new_hire
( new_hire_id  SERIAL        CONSTRAINT new_hire_pk PRIMARY KEY
, first_name   VARCHAR(20)   NOT NULL
, middle_name  VARCHAR(20)
, last_name    VARCHAR(20)   NOT NULL
, hire_date    DATE          NOT NULL
, UNIQUE(first_name, middle_name, hire_date));
You can describe the new_hire table with the following command:
\d new_hire
You quit the psql connection with a quit; or \q, like so
quit;
- Installing, configuring, and launching pgadmin4 (don’t forget the pgAdmin 4 Documentation site):
- You need to install three sets of packages. They’re the pgadmin-server, policycoreutils-python-utils, and pgadmin4-desktop.
- Apply the pgadmin-server package:
sudo yum install https://ftp.postgresql.org/pub/pgadmin/pgadmin4/yum/redhat/rhel-9Server-x86_64/pgadmin4-server-6.16-1.el9.x86_64.rpm
Display detailed console log →
Last metadata expiration check: 0:36:13 ago on Mon 28 Nov 2022 12:59:07 AM EST.
pgadmin4-server-6.16-1.el9.x86_64.rpm                                                           1.9 MB/s |  73 MB     00:38
Dependencies resolved.
================================================================================================================================
 Package                           Architecture             Version                        Repository                      Size
================================================================================================================================
Installing:
 pgadmin4-server                   x86_64                   6.16-1.el9                     @commandline                    73 M

Transaction Summary
================================================================================================================================
Install  1 Package

Total size: 73 M
Installed size: 265 M
Is this ok [y/N]: y
Downloading Packages:
Running transaction check
Transaction check succeeded.
Running transaction test
Transaction test succeeded.
Running transaction
Regex version mismatch, expected: 10.40 2022-04-14 actual: 10.37 2021-05-26
Regex version mismatch, expected: 10.40 2022-04-14 actual: 10.37 2021-05-26
  Preparing        :                                                                                                        1/1
  Installing       : pgadmin4-server-6.16-1.el9.x86_64                                                                      1/1
  Verifying        : pgadmin4-server-6.16-1.el9.x86_64                                                                      1/1

Installed:
  pgadmin4-server-6.16-1.el9.x86_64

Complete!
- Apply or upgrade (which is the default at this point) the policycoreutils-python-utils package:
sudo dnf install policycoreutils-python-utils
Display detailed console log →
Last metadata expiration check: 0:50:44 ago on Mon 28 Nov 2022 12:59:07 AM EST.
Package policycoreutils-python-utils-3.3-6.el9_0.noarch is already installed.
Dependencies resolved.
================================================================================================================================
 Package                                      Architecture           Version                    Repository                 Size
================================================================================================================================
Upgrading:
 libsemanage                                  x86_64                 3.4-2.el9                  baseos                    118 k
 policycoreutils                              x86_64                 3.4-4.el9                  baseos                    202 k
 policycoreutils-devel                        x86_64                 3.4-4.el9                  appstream                 139 k
 policycoreutils-python-utils                 noarch                 3.4-4.el9                  appstream                  69 k
 python3-libsemanage                          x86_64                 3.4-2.el9                  appstream                  80 k
 python3-policycoreutils                      noarch                 3.4-4.el9                  appstream                 2.0 M

Transaction Summary
================================================================================================================================
Upgrade  6 Packages

Total download size: 2.6 M
Is this ok [y/N]: y
Downloading Packages:
(1/6): policycoreutils-python-utils-3.4-4.el9.noarch.rpm                                         28 kB/s |  69 kB     00:02
(2/6): python3-libsemanage-3.4-2.el9.x86_64.rpm                                                  32 kB/s |  80 kB     00:02
(3/6): policycoreutils-devel-3.4-4.el9.x86_64.rpm                                                55 kB/s | 139 kB     00:02
(4/6): libsemanage-3.4-2.el9.x86_64.rpm                                                         189 kB/s | 118 kB     00:00
(5/6): python3-policycoreutils-3.4-4.el9.noarch.rpm                                             2.8 MB/s | 2.0 MB     00:00
(6/6): policycoreutils-3.4-4.el9.x86_64.rpm                                                     302 kB/s | 202 kB     00:00
--------------------------------------------------------------------------------------------------------------------------------
Total                                                                                           521 kB/s | 2.6 MB     00:05
Running transaction check
Transaction check succeeded.
Running transaction test
Transaction test succeeded.
Running transaction
Regex version mismatch, expected: 10.40 2022-04-14 actual: 10.37 2021-05-26
Regex version mismatch, expected: 10.40 2022-04-14 actual: 10.37 2021-05-26
  Preparing        :                                                                                                        1/1
  Upgrading        : libsemanage-3.4-2.el9.x86_64                                                                          1/12
  Upgrading        : python3-libsemanage-3.4-2.el9.x86_64                                                                  2/12
  Upgrading        : policycoreutils-3.4-4.el9.x86_64                                                                      3/12
  Running scriptlet: policycoreutils-3.4-4.el9.x86_64                                                                      3/12
  Upgrading        : python3-policycoreutils-3.4-4.el9.noarch                                                              4/12
  Upgrading        : policycoreutils-python-utils-3.4-4.el9.noarch                                                         5/12
  Upgrading        : policycoreutils-devel-3.4-4.el9.x86_64                                                                6/12
  Cleanup          : policycoreutils-devel-3.3-6.el9_0.x86_64                                                              7/12
  Cleanup          : policycoreutils-python-utils-3.3-6.el9_0.noarch                                                       8/12
  Cleanup          : python3-policycoreutils-3.3-6.el9_0.noarch                                                            9/12
  Cleanup          : python3-libsemanage-3.3-2.el9.x86_64                                                                 10/12
  Running scriptlet: policycoreutils-3.3-6.el9_0.x86_64                                                                   11/12
  Cleanup          : policycoreutils-3.3-6.el9_0.x86_64                                                                   11/12
  Cleanup          : libsemanage-3.3-2.el9.x86_64                                                                         12/12
  Running scriptlet: libsemanage-3.3-2.el9.x86_64                                                                         12/12
  Verifying        : policycoreutils-devel-3.4-4.el9.x86_64                                                                1/12
  Verifying        : policycoreutils-devel-3.3-6.el9_0.x86_64                                                              2/12
  Verifying        : policycoreutils-python-utils-3.4-4.el9.noarch                                                         3/12
  Verifying        : policycoreutils-python-utils-3.3-6.el9_0.noarch                                                       4/12
  Verifying        : python3-libsemanage-3.4-2.el9.x86_64                                                                  5/12
  Verifying        : python3-libsemanage-3.3-2.el9.x86_64                                                                  6/12
  Verifying        : python3-policycoreutils-3.4-4.el9.noarch                                                              7/12
  Verifying        : python3-policycoreutils-3.3-6.el9_0.noarch                                                            8/12
  Verifying        : libsemanage-3.4-2.el9.x86_64                                                                          9/12
  Verifying        : libsemanage-3.3-2.el9.x86_64                                                                         10/12
  Verifying        : policycoreutils-3.4-4.el9.x86_64                                                                     11/12
  Verifying        : policycoreutils-3.3-6.el9_0.x86_64                                                                   12/12

Upgraded:
  libsemanage-3.4-2.el9.x86_64                   policycoreutils-3.4-4.el9.x86_64      policycoreutils-devel-3.4-4.el9.x86_64
  policycoreutils-python-utils-3.4-4.el9.noarch  python3-libsemanage-3.4-2.el9.x86_64  python3-policycoreutils-3.4-4.el9.noarch

Complete!
- Apply the pgadmin4-desktop package:
sudo dnf install -y https://ftp.postgresql.org/pub/pgadmin/pgadmin4/yum/redhat/rhel-9Server-x86_64/pgadmin4-desktop-6.16-1.el9.x86_64.rpm
Display detailed console log →
Last metadata expiration check: 1:14:02 ago on Mon 28 Nov 2022 12:59:07 AM EST.
pgadmin4-desktop-6.16-1.el9.x86_64.rpm                                                          3.1 MB/s |  88 MB     00:28
Dependencies resolved.
================================================================================================================================
 Package                          Architecture           Version                             Repository                    Size
================================================================================================================================
Installing:
 pgadmin4-desktop                 x86_64                 6.16-1.el9                          @commandline                  88 M
Installing dependencies:
 libatomic                        x86_64                 11.3.1-2.1.el9.alma                 baseos                        56 k

Transaction Summary
================================================================================================================================
Install  2 Packages

Total size: 88 M
Total download size: 56 k
Installed size: 341 M
Downloading Packages:
libatomic-11.3.1-2.1.el9.alma.x86_64.rpm                                                         83 kB/s |  56 kB     00:00
--------------------------------------------------------------------------------------------------------------------------------
Total                                                                                            39 kB/s |  56 kB     00:01
Running transaction check
Transaction check succeeded.
Running transaction test
Transaction test succeeded.
Running transaction
Regex version mismatch, expected: 10.40 2022-04-14 actual: 10.37 2021-05-26
Regex version mismatch, expected: 10.40 2022-04-14 actual: 10.37 2021-05-26
  Preparing        :                                                                                                        1/1
  Installing       : libatomic-11.3.1-2.1.el9.alma.x86_64                                                                   1/2
  Installing       : pgadmin4-desktop-6.16-1.el9.x86_64                                                                     2/2
  Running scriptlet: pgadmin4-desktop-6.16-1.el9.x86_64                                                                     2/2
  Verifying        : libatomic-11.3.1-2.1.el9.alma.x86_64                                                                   1/2
  Verifying        : pgadmin4-desktop-6.16-1.el9.x86_64                                                                     2/2

Installed:
  libatomic-11.3.1-2.1.el9.alma.x86_64                            pgadmin4-desktop-6.16-1.el9.x86_64

Complete!
- Apply the pgadmin-server package:
- You configure your .bashrc file to add the pgadmin4 directory to your $PATH environment variable.
# Add the pgadmin4 executable to the $PATH.
export set PATH=$PATH:/usr/pgadmin4/bin
You also configure your .bashrc file to add a pgadmin4 function, which simplifies how you call the pgadmin4 executable.
# Function to ensure pgadmin4 call is simplified and without warnings.
pgadmin4 ()
{
  # Call the pgadmin4 executable.
  if [[ `type -t pgadmin4` = 'function' ]]; then
    if [ -f "/usr/pgadmin4/bin/pgadmin4" ]; then
      /usr/pgadmin4/bin/pgadmin4 2>/dev/null &
    else
      echo "[/usr/pgadmin4/bin/pgadmin4] is not found."
    fi
  else
    echo "[pgadmin4] is not a function"
  fi
}
You can launch your pgadmin4 program file now with the following syntax as the student user:
pgadmin4
It takes a couple moments to launch the pgadmin4 desktop. The initial screen will look like:

After pgadmin4 launches, you’re prompted for a master password. Enter the password and click the OK button to proceed.
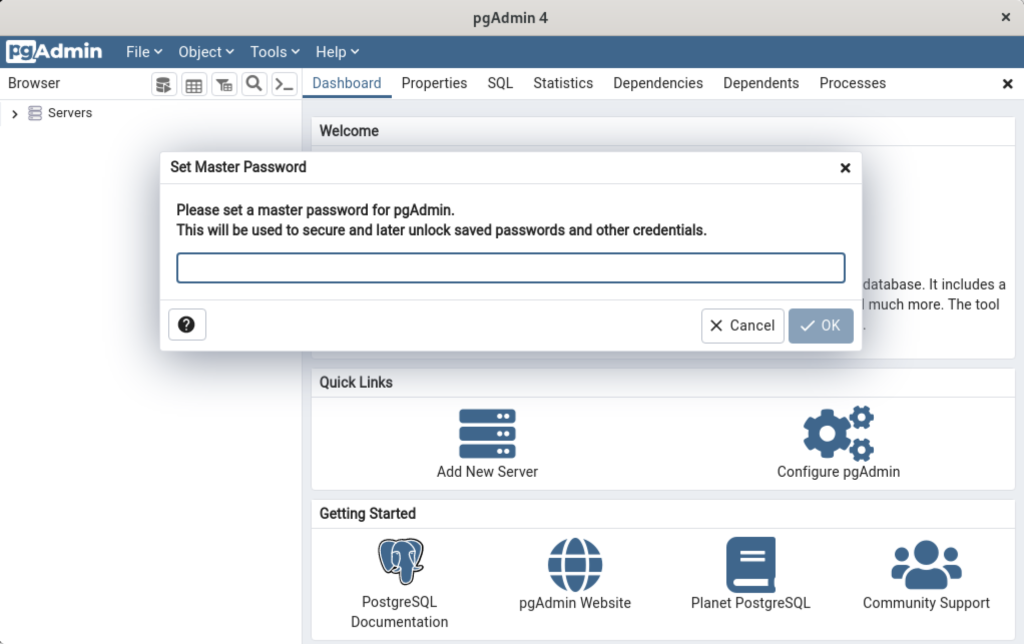
After entering the password, you arrive at the base dialog, as shown.
Click the Add New Server link, which prompts you to register your database. Enter videodb in the Name field and click the Connection tab to the right of the General tab.
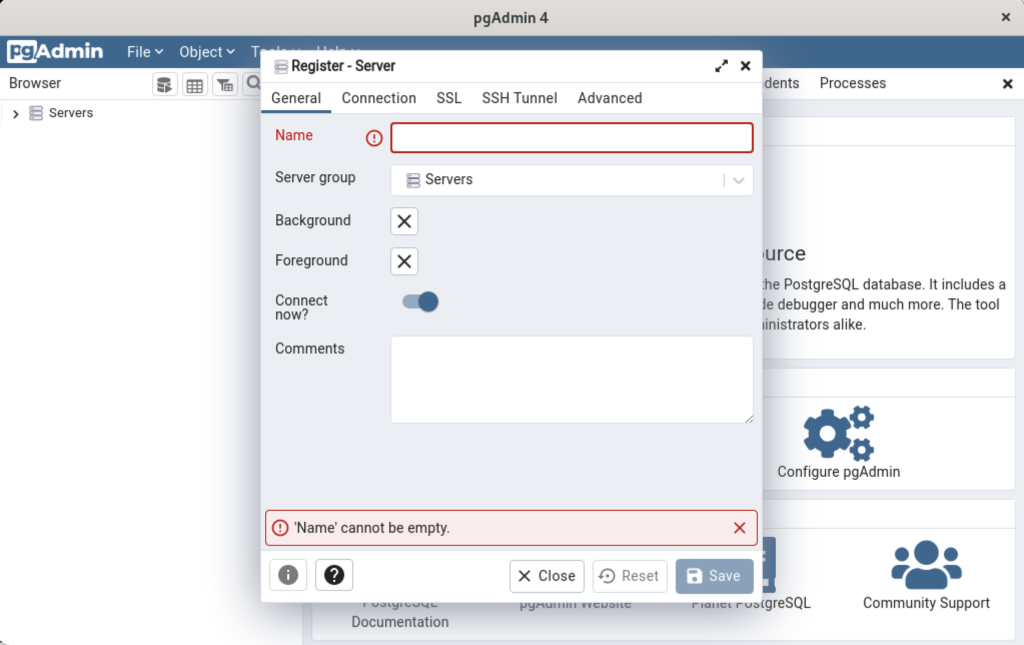
In the Connection dialog, enter the following values:
- Host name/address: localhost
- Port: 5432
- Maintenance database: postgres
- Username: student
- Password: student

Enter a name for your database. In this example, videodb is the Server Name. Click the Save button to proceed.

- You need to install three sets of packages. They’re the pgadmin-server, policycoreutils-python-utils, and pgadmin4-desktop.
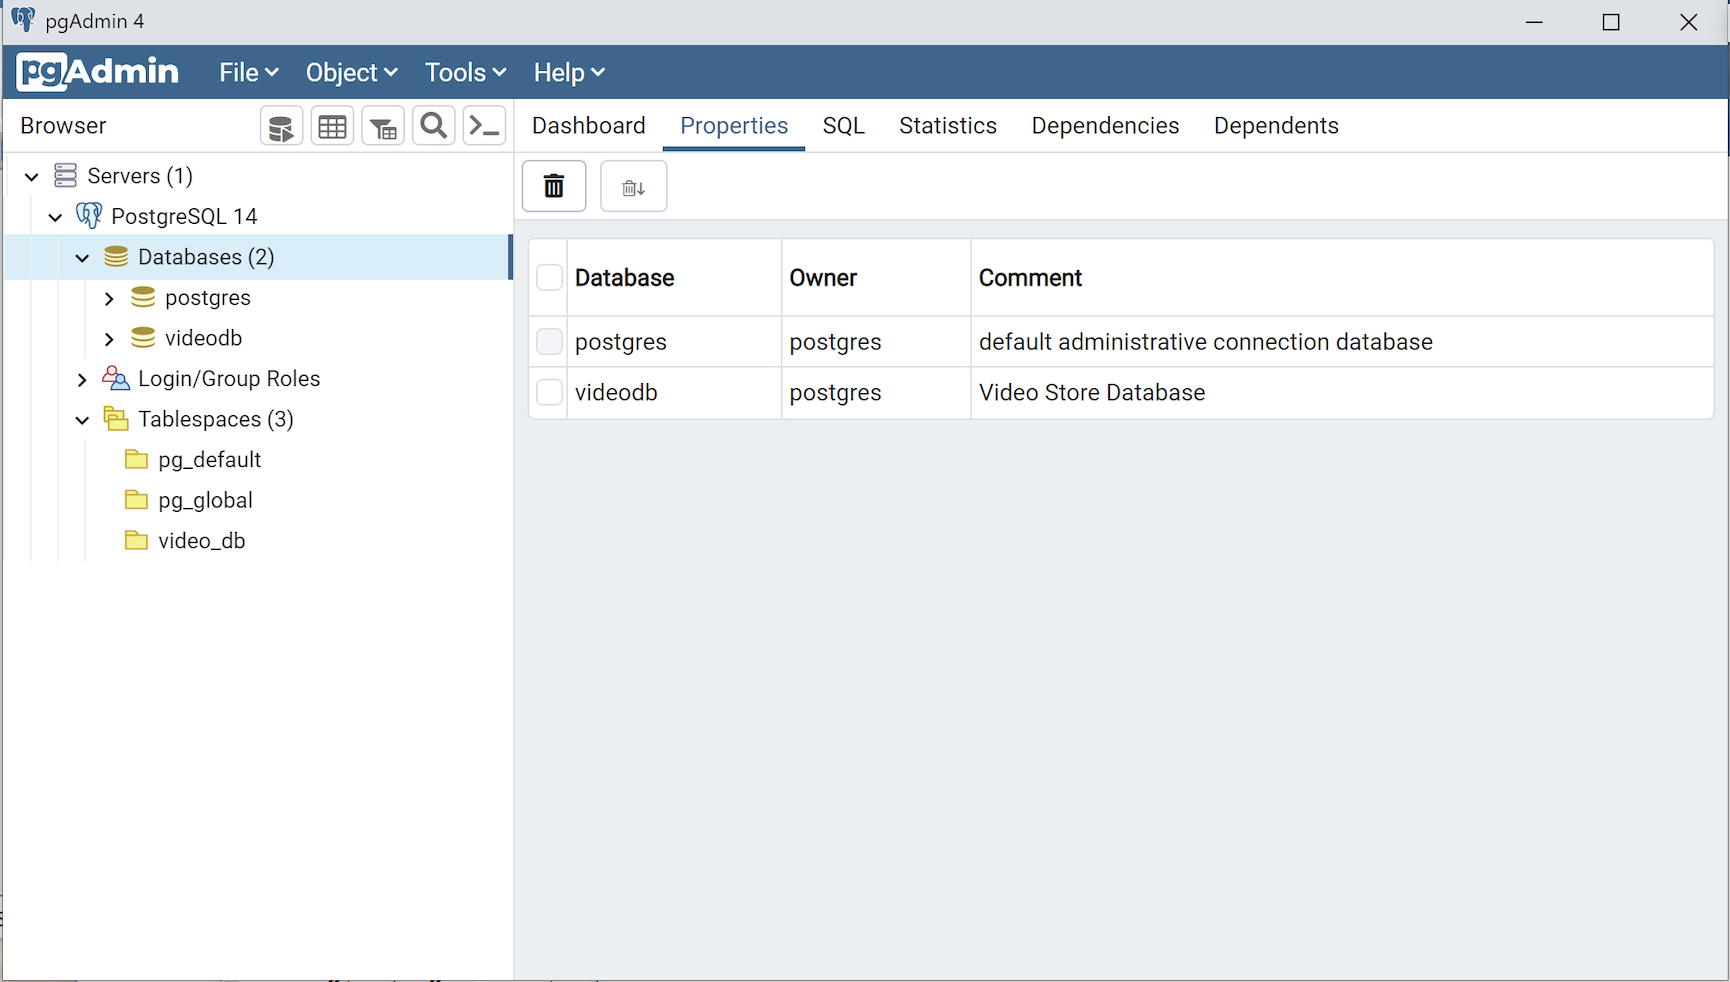
This completes the instructions for installing, configuring, and using PostgreSQL on AlmaLinux. As always, I hope it helps those looking for instructions.
